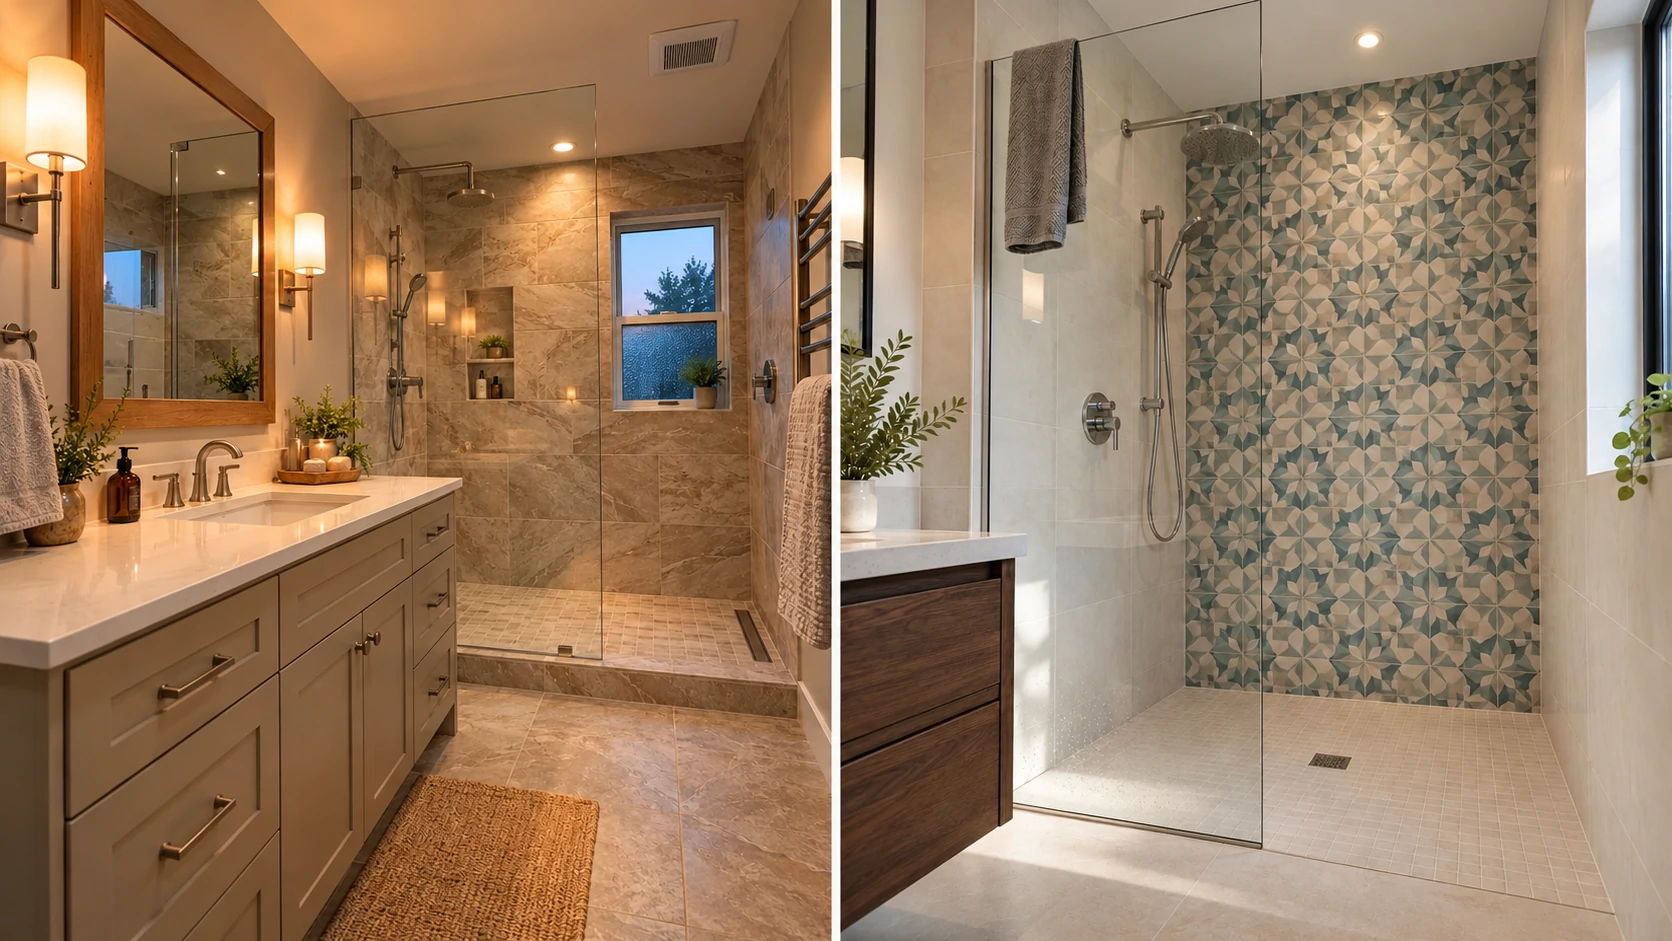
Scroll through any bathroom inspiration feed and you’ll notice something. Nobody’s shampoo bottles are in the shot. The glass is dry, the niche holds one perfectly rolled towel, and the floor tile looks like it has never met a wet foot.
Real showers don’t work that way. This guide covers the honest version: whether a walk-in shower beats a bathtub, which modern walk-in shower ideas hold up after a few years of hard water and daily use, and what it all costs.
Is a Walk-In Shower Better Than a Bathtub?
.webp)
Quick answer: For most households, yes. A walk-in shower is quicker, easier to make step-free, and fits where a bathtub sits. A bathtub still wins for bathing children and soaking, so keep one tub in the home if resale matters.
The catch is that “better” depends less on design and more on who lives in the house. A walk-in shower is usually the smarter use of space in a primary bathroom or a second bathroom. If you have one bathroom and small children, the bath is doing a job a shower can’t.
Quick takeaways
- A walk-in shower is usually the better daily-use choice, especially in a primary or second bathroom.
- Keep at least one bathtub in the home if you have young kids or expect to sell to families.
- The best-looking walk-in showers use fewer materials, one feature surface and matching floor tile. They don’t put pattern on every wall.
- Slope, waterproofing and drain choice matter more than tile choice, and they’re the costliest things to get wrong.
- Doorless designs need enough depth, a sensible showerhead position and a plan for warmth and ventilation.
- Dark matte finishes photograph beautifully but show water spots and soap film faster in hard-water areas.
Walk-In Shower vs Bathtub at a Glance
| Factor | Walk-In Shower | Bathtub |
|---|---|---|
| Daily use | Fast and simple | Slower, and the step over the side is awkward for some users |
| Accessibility | Can be made step-free, with a bench and grab bars | Harder to make accessible without conversion |
| Water use | Typically lower than filling a bath, unless showers run long | Higher per use, but fewer uses |
| Bathing children and pets | Harder without a handheld and a seat | Easier |
| Relaxation and soaking | Limited (a bench and a steam-ready design help) | The clear winner |
| Design flexibility | Very high (tile, glass, layout, niches) | Moderate (a freestanding tub is a statement piece but takes space) |
| Upfront cost | Can be lower or higher depending on waterproofing, glass and tile | Often lower for a standard tub, higher for freestanding or stone |
| Cleaning | Glass, grout and drain need regular care | Fewer surfaces, but tub-shower combos need caulk care |
| Resale | Strong in primary and second bathrooms | Expected in at least one bathroom for many buyers |
| Comfort in cold rooms | Doorless layouts can feel cold without heating | Warm water and an enclosed space feel cosier |
Two rows in that table cause most of the regret. One is cold-room comfort. The other is resale, which matters if you ever plan to remove your only bath. Both come up again below.
What Actually Makes a Walk-In Shower “Modern”?
“Modern” gets slapped on everything, so here’s what it means in practice. A modern walk-in shower usually has these traits:
- A low or flush entry. No tall tub wall to step over.
- Glass doing the enclosing. A fixed panel, often frameless, instead of a curtain or sliding door.
- Continuous surfaces. Matching tile from bathroom floor into the shower, with as few visible joints as possible.
- Hardware that recedes. A slim wall-mounted head, concealed valve trim and a linear or tile-insert drain.
- Drainage designed in from the start. The floor is sloped to the drain rather than fitted around it later.
A few terms get muddled, so it helps to separate them:
- Walk-in shower: an open entry with no swinging door, or a very simple one. It may still have a low curb.
- Curbless (or level-access) shower: the shower floor sits flush with the bathroom floor. This is a build method as much as a look.
- Wet room: the whole room is waterproofed and sloped, so water can go anywhere and still find the drain. Common in the UK and Australia.
Most people searching for walk-in shower design ideas want the look of the first, sometimes the second, and occasionally the third. Knowing which you’re after changes the price and the trade-offs.
Walk-In Shower Styles Compared
| Style | Defining Features | Cost Tier | Maintenance | Best Room Size | Resale Appeal | Trend Longevity |
|---|---|---|---|---|---|---|
| Modern minimalist (curbless) | Large-format tile, continuous floor, frameless fixed glass, hidden or linear drain, minimal hardware | $$$ | Low to moderate (few grout lines, but glass shows spots) | Medium to large; works in small rooms if glass is clear | High if executed cleanly | Long, as it relies on restraint |
| Japandi / warm spa | Honed or stone-look tile in warm neutrals, wood-look accents, bench, soft lighting | $$–$$$ | Moderate (natural stone needs sealing, porcelain does not) | Medium to large | High, because neutrals appeal broadly | Long |
| Modern farmhouse | Wood-look floor, white or soft-colour wall tile, matte black or brass hardware, framed glass | $$ | Moderate (matte black shows spotting in hard-water areas) | Small to medium | Good in family markets | Medium; some elements already feel familiar |
| Transitional / classic subway | Subway tile in stacked or vertical layouts, brushed nickel or chrome, small niche | $–$$ | Moderate (grout lines need care) | Small to medium | Very high, as it’s easy to like | Very long |
| Moody / dark industrial | Charcoal or black tile, dark grout, black fixtures, strong lighting | $$–$$$ | High (water spots and soap film show quickly) | Medium to large with good lighting | Mixed; love-it-or-leave-it | Medium |
The pattern is worth noticing. The styles that score highest on longevity and resale are the quiet ones. The styles that photograph best tend to be the ones asking the most of you on cleaning day.
10 Modern Walk-In Shower Design Ideas (and How They Live in Real Life)
Each look below comes with what it demands, not just what it looks like.
1. The Curbless Minimalist
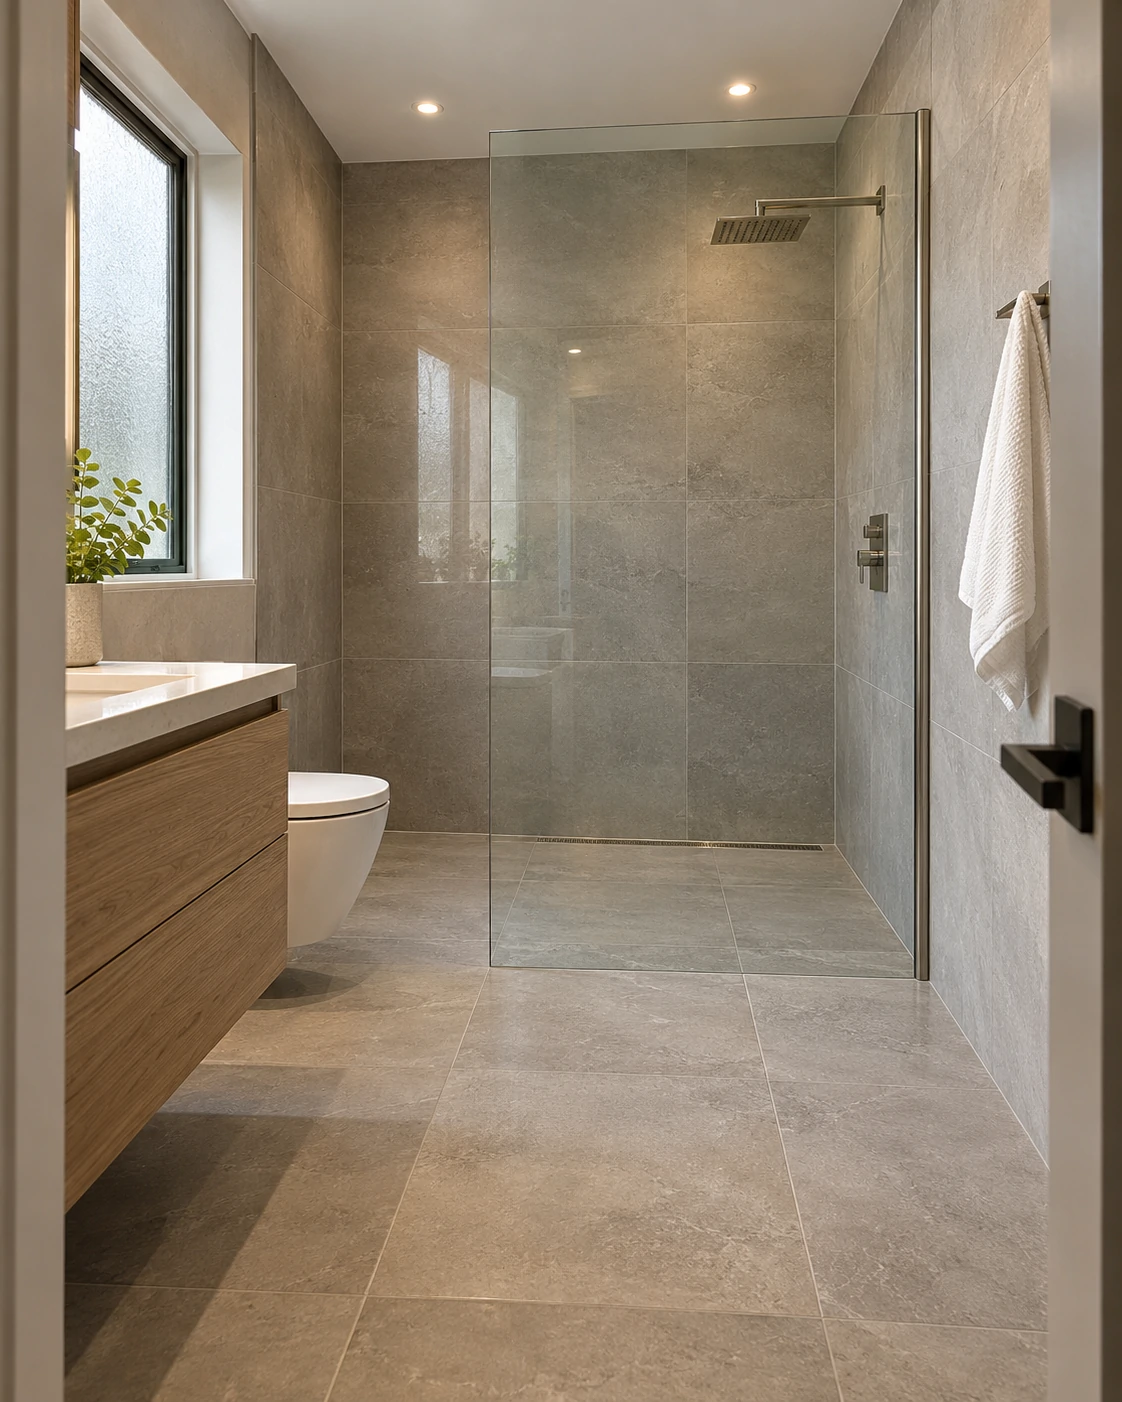
Large-format porcelain on the walls, the same tile running from the bathroom floor straight into the shower, a linear drain and one fixed glass panel. A slim wall-mounted head finishes it. It looks calm and makes a room feel bigger.
It’s also demanding to build. The floor has to be sloped correctly, and the waterproofing has to be right.
Best for: anyone planning to age in place. Watch for: the labour cost of the floor build.
2. The Warm Japandi Spa
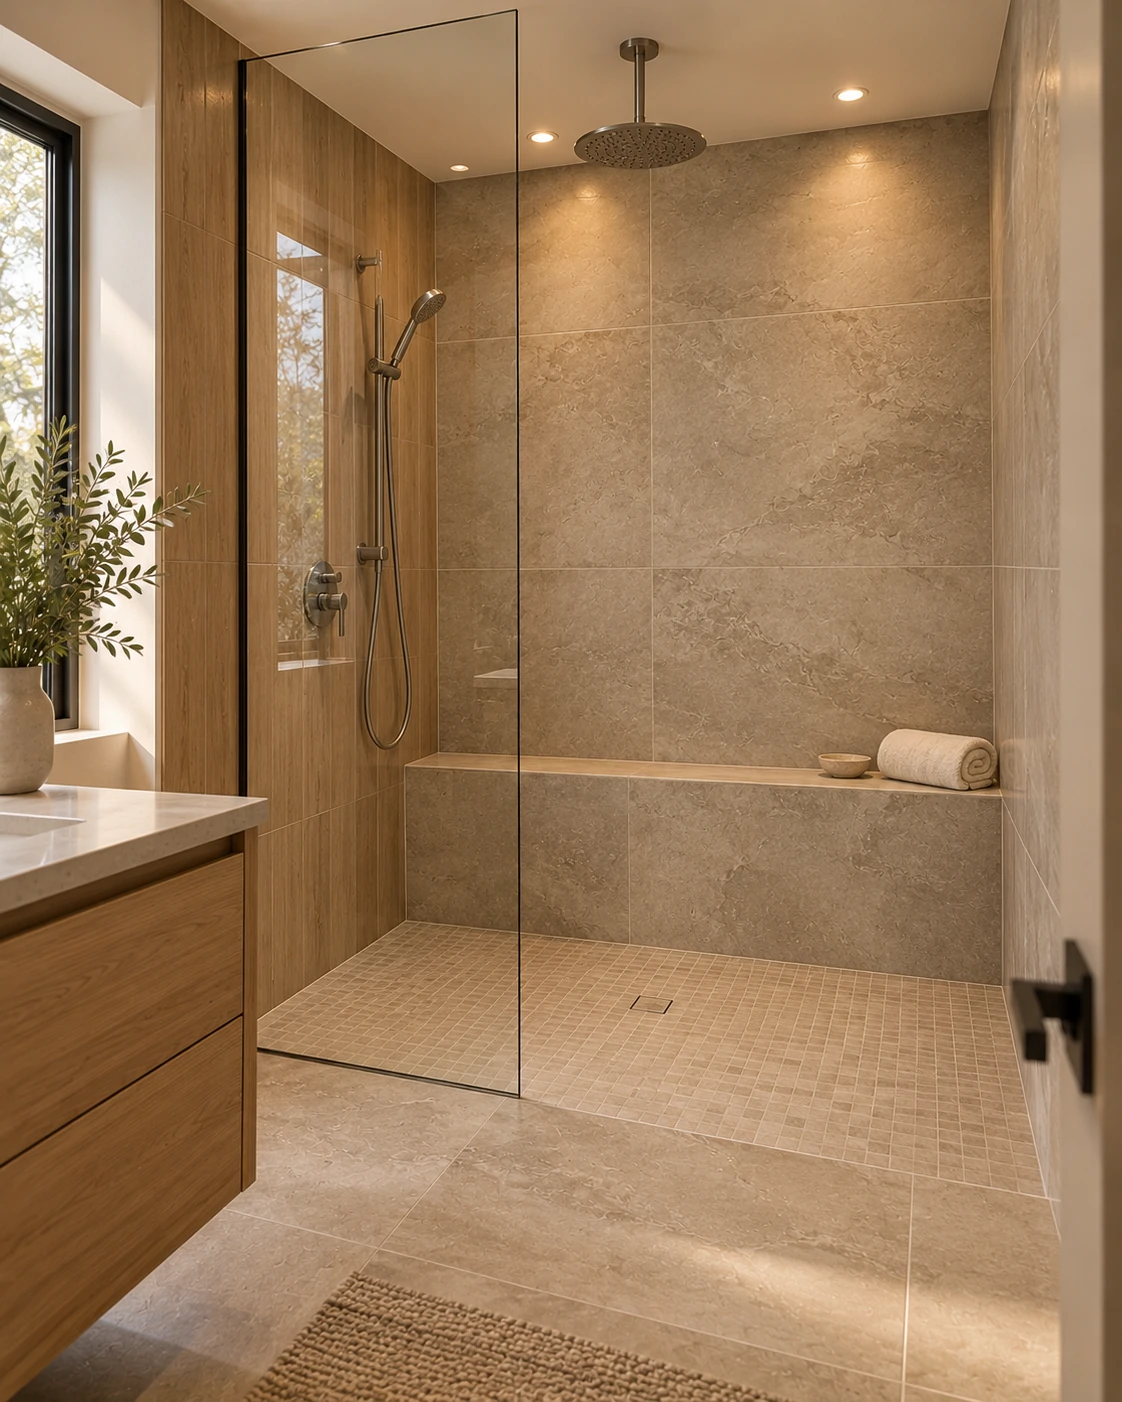
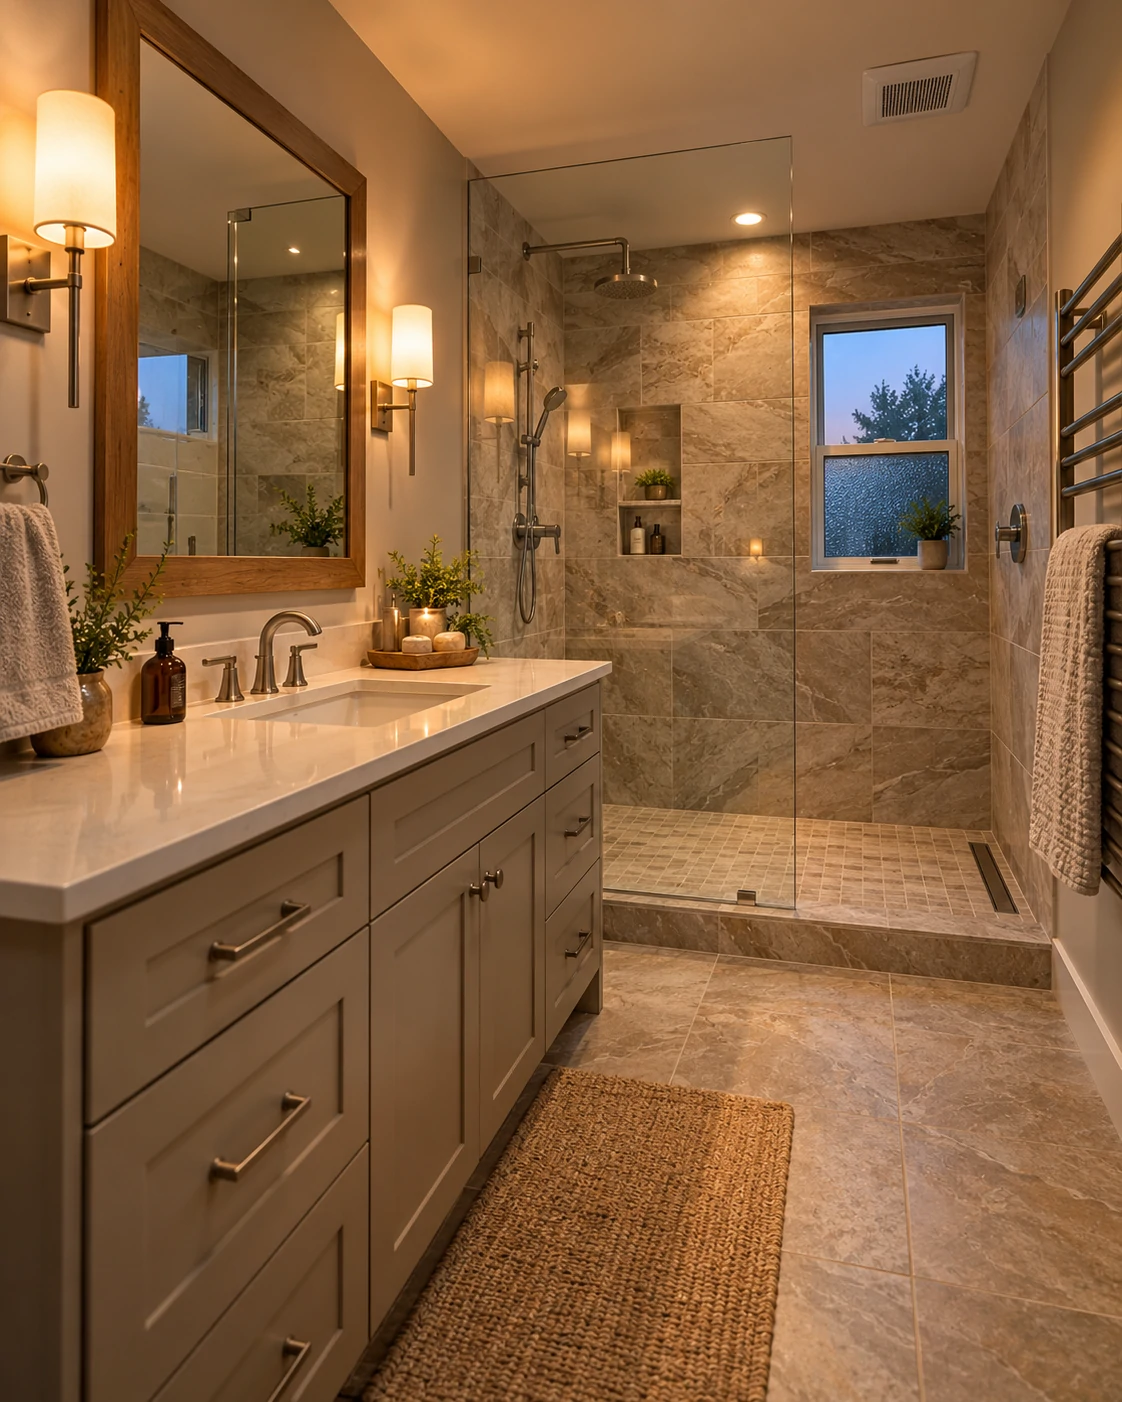
Honed, stone-look tile in warm greige, light wood-look accents, a bench, and a rainfall head paired with a handheld. Lighting sits around 2700K. Nothing shouts.
This is one of the more forgiving looks in a hard-water home, because matte, mid-tone surfaces hide spotting far better than dark or glossy ones.
Best for: primary bathrooms, calm-minded households. Watch for: natural stone needing regular sealing (porcelain doesn’t).
3. Classic Subway With a Modern Twist
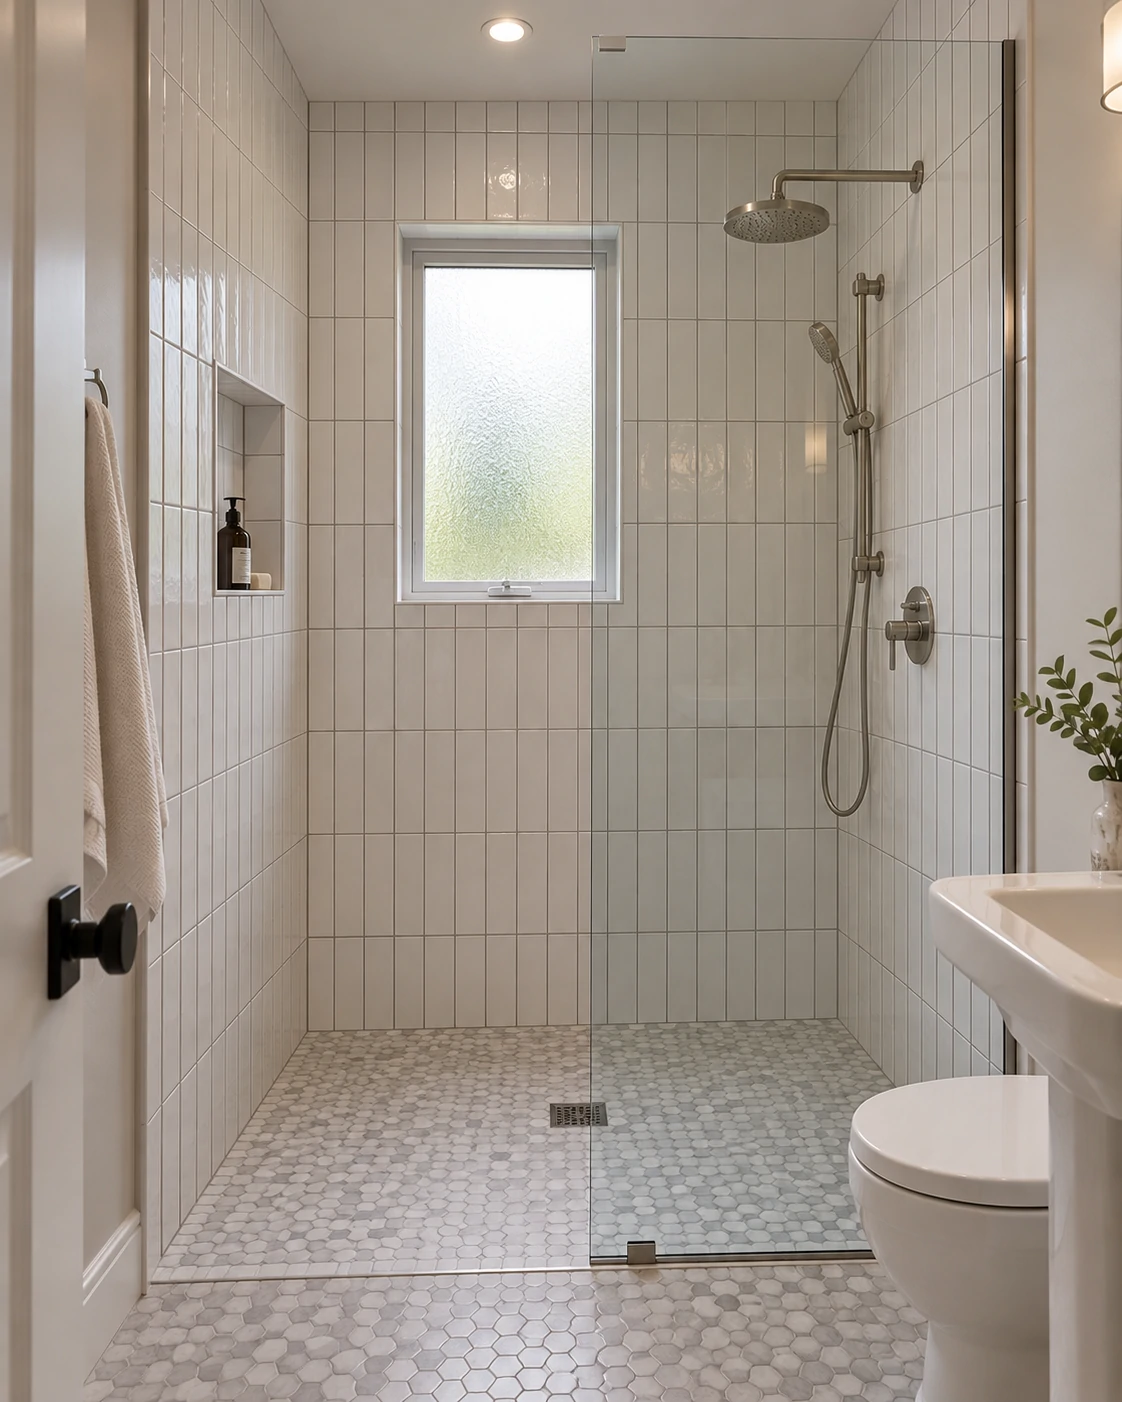
Stacked or vertical white subway tile, a mid-grey grout, brushed nickel fixtures and a small niche. It’s the least dramatic option on this list, and possibly the one you’ll still like in ten years.
Budget-friendly, hard to date and easy for buyers to like. The grout lines are the maintenance, so choosing a mid-grey grout instead of bright white saves a lot of scrubbing.
Best for: tight budgets and resale-minded owners. Watch for: grout staining if you skip sealing on cement grout.
4. One Feature Wall, Calm Everywhere Else
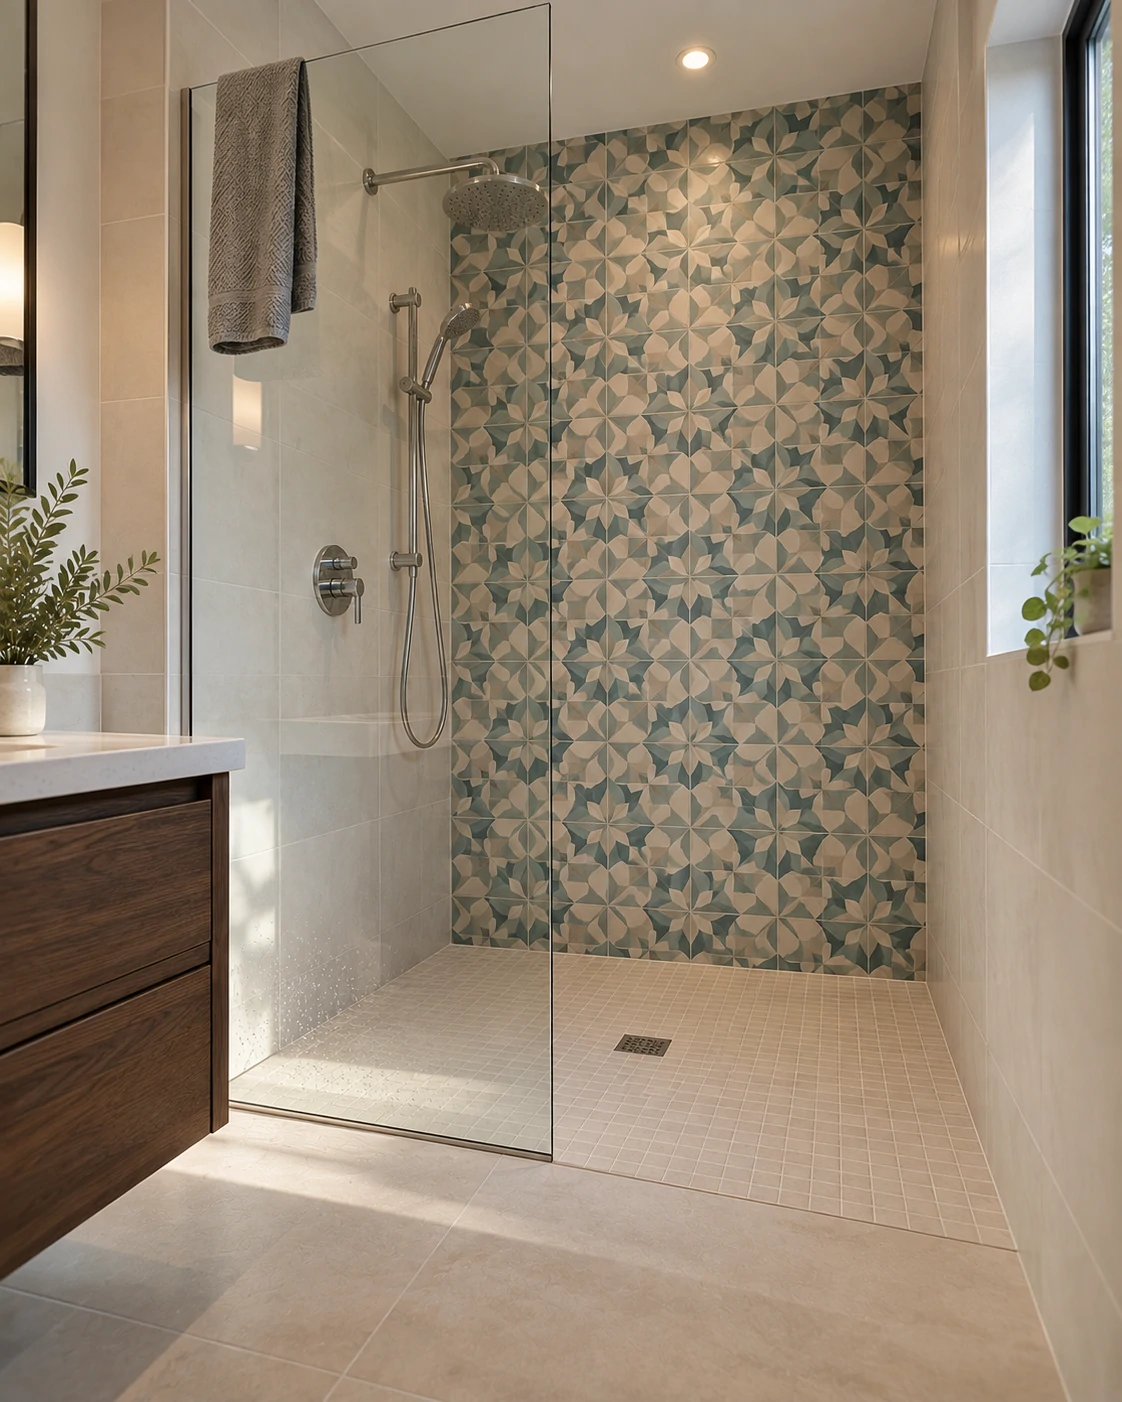
A patterned or textured tile on the back wall only, with plain tile on the sides and floor. You get the impact of a statement without the fatigue of a busy room.
This is the safest way to use trend tile. If the pattern feels tired in five years, you’re re-tiling one wall, not the whole shower.
Best for: people who want personality without commitment. Watch for: texture holding soap scum.
5. The Moody Dark Shower
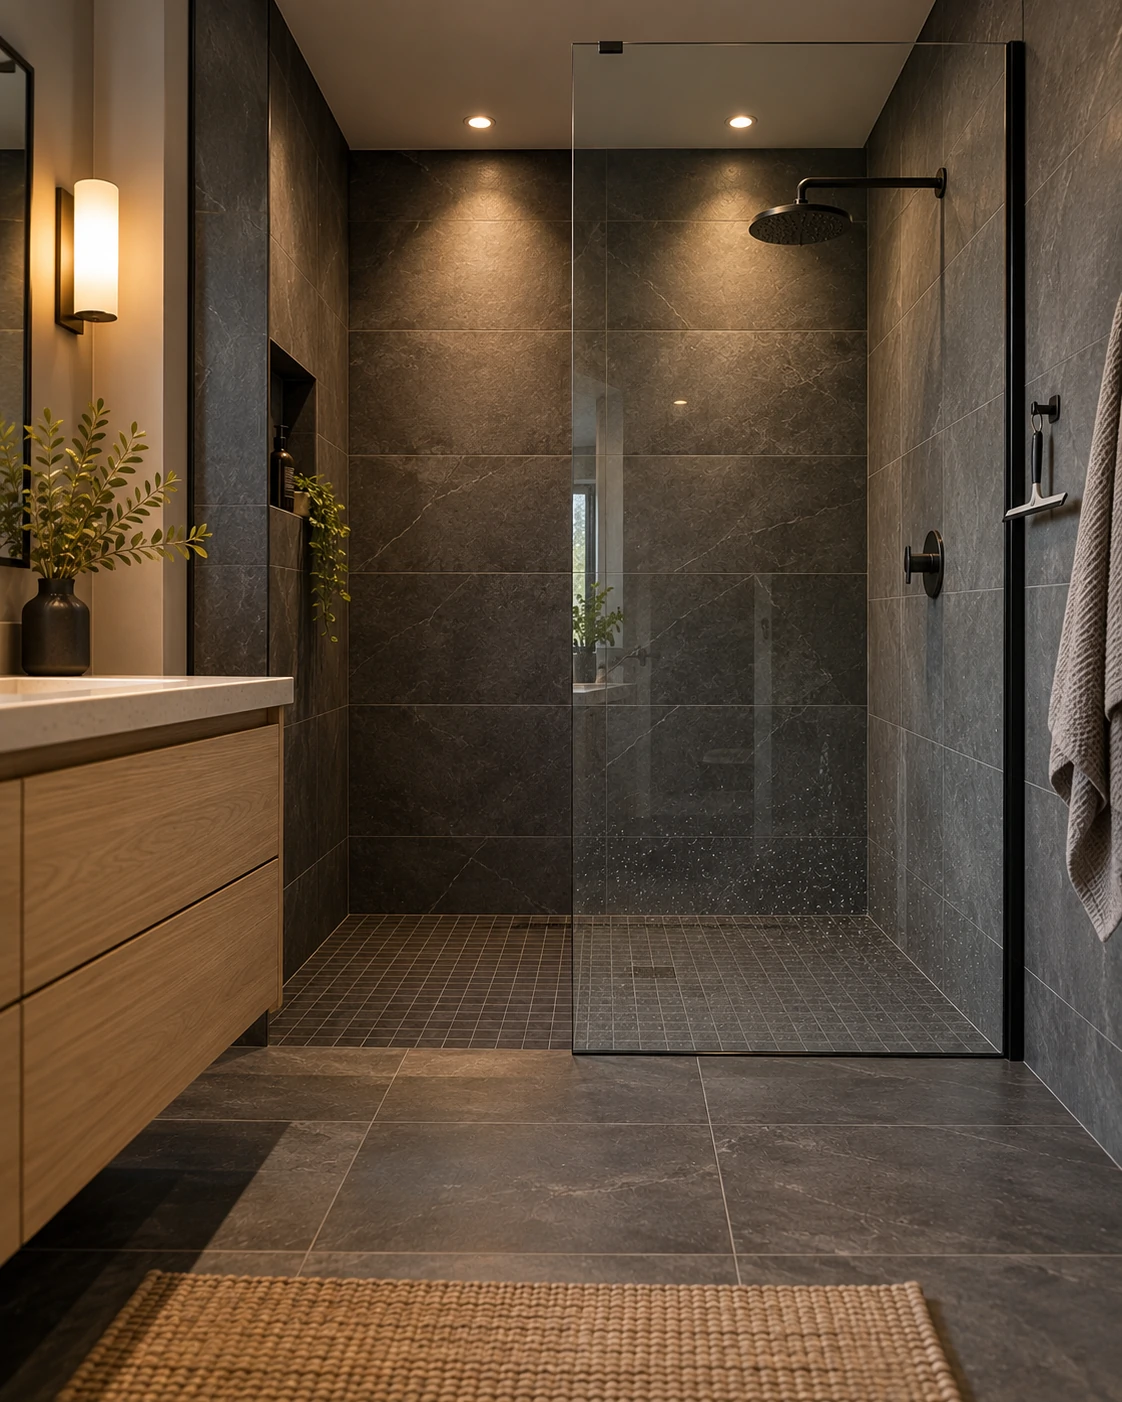
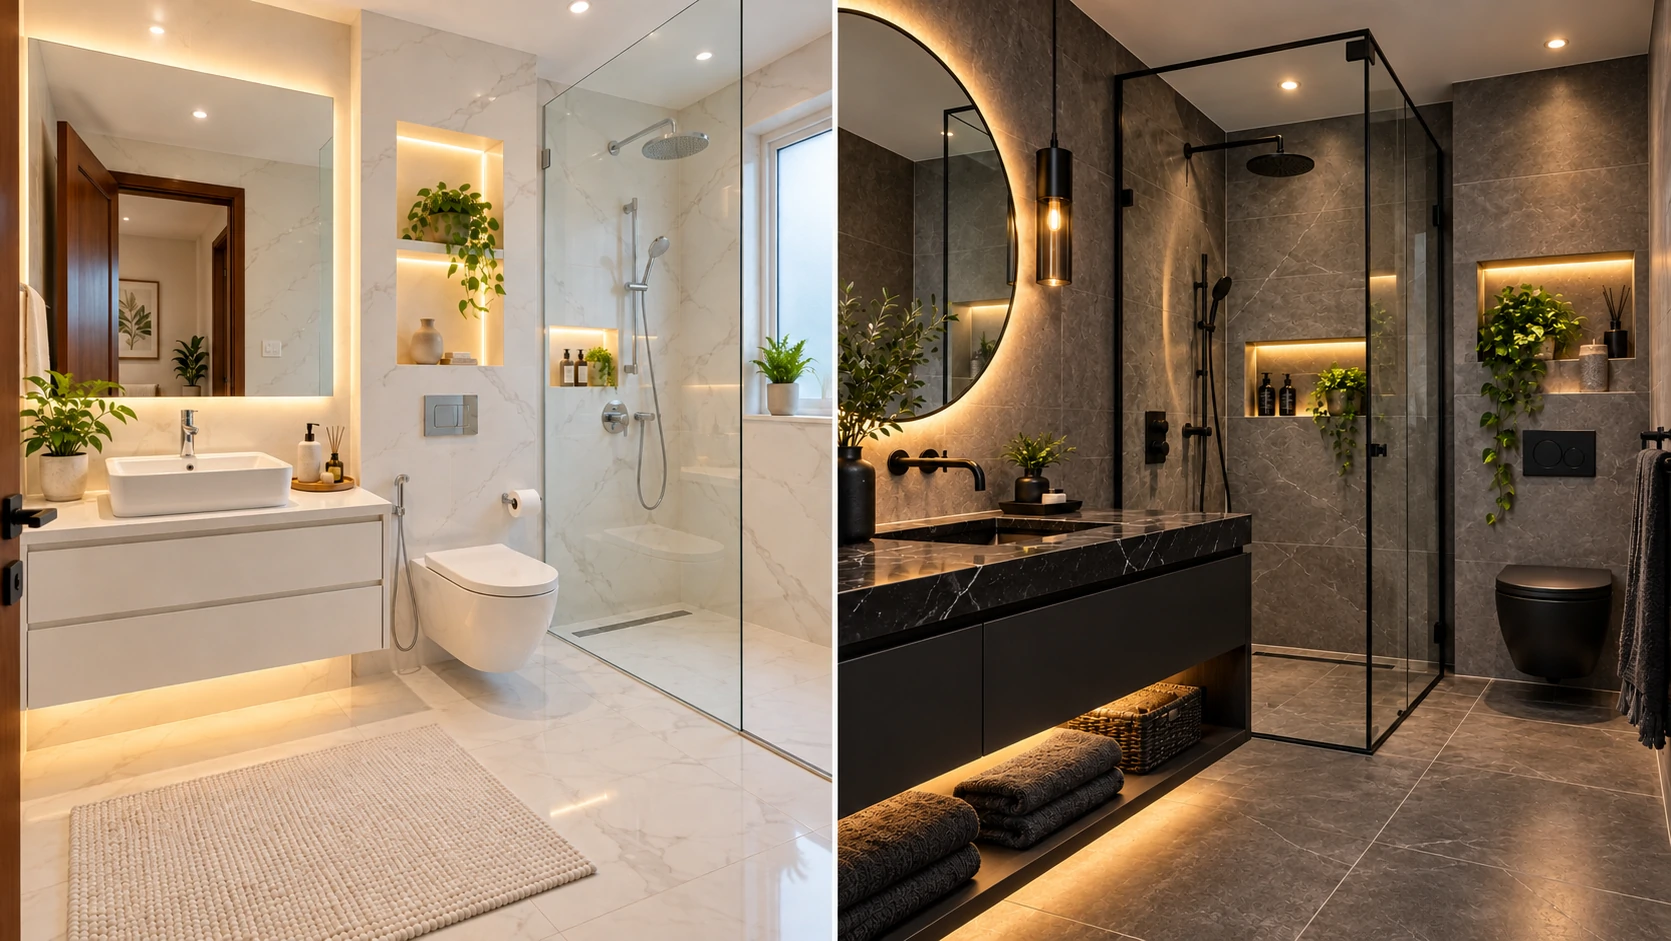
Charcoal matte tile, black fixtures and a careful lighting plan. It’s dramatic and it photographs beautifully.
Most homeowners don’t realise how much dark surfaces show. Mineral spots and soap film stand out against charcoal in a way they never do on white or mid-tone tile. If you have hard water, you’ll want a squeegee by the glass and a descaling habit.
Best for: larger bathrooms with good lighting and soft water. Watch for: daily upkeep.
6. Marble-Look Porcelain Luxury
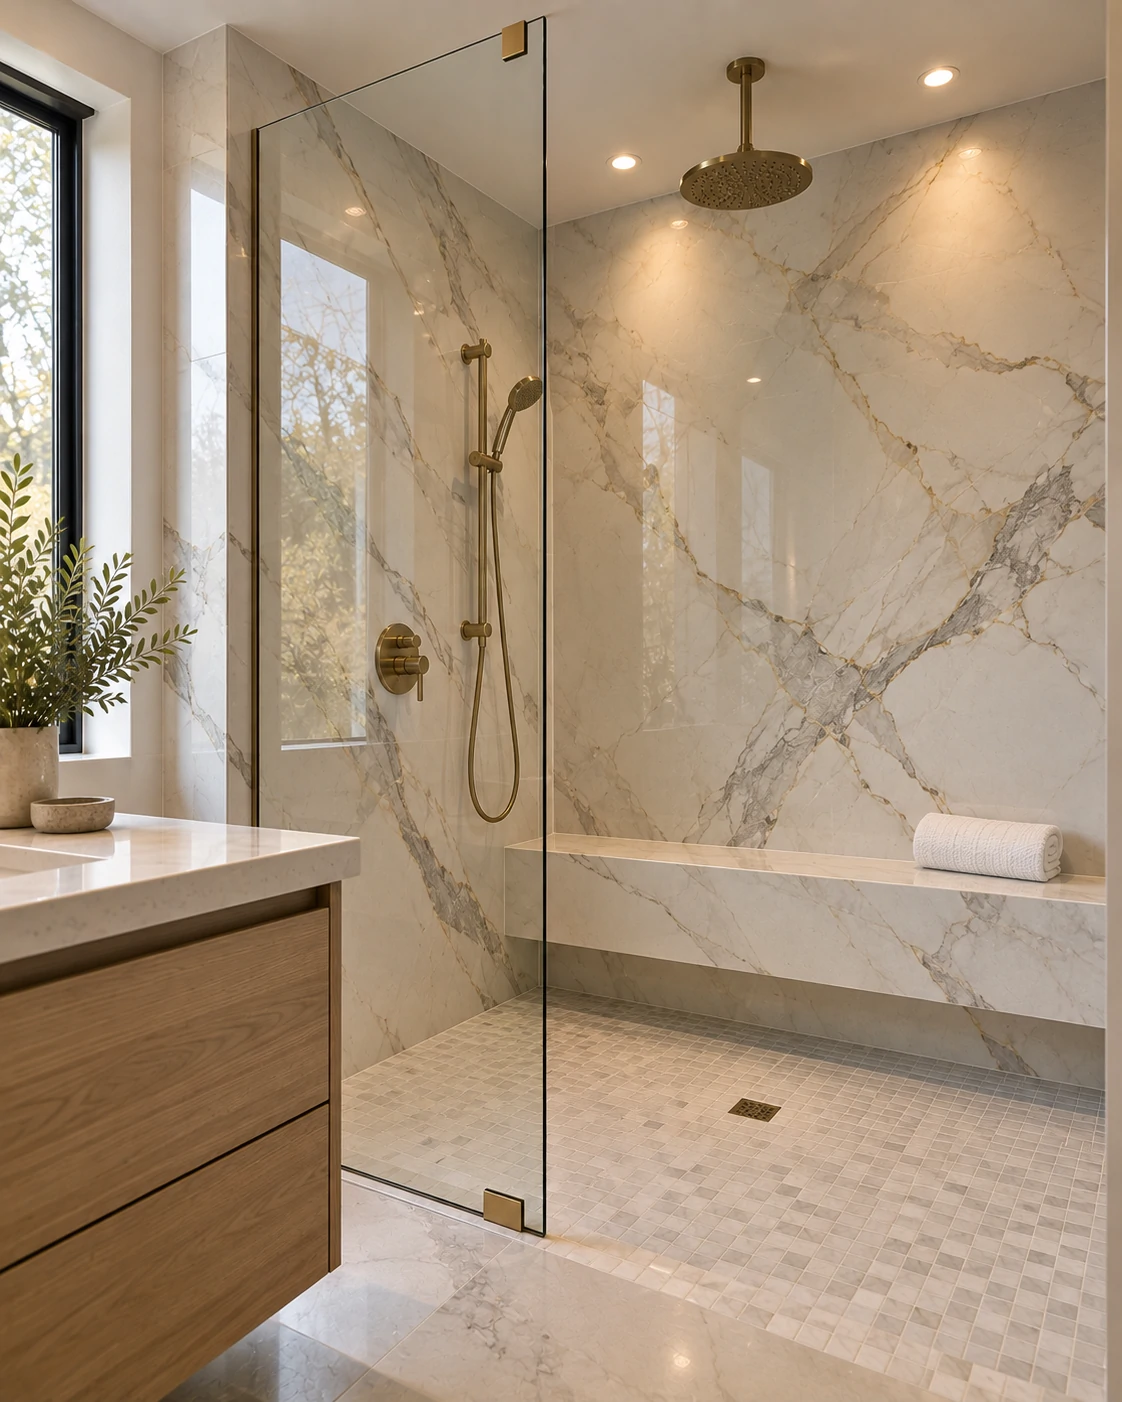
Slab-look, large-format porcelain with veining, brushed brass or nickel, a bench and recessed lighting. It reads as premium.
It usually costs less than real marble and doesn’t need sealing. Installation is specialist work, though, because big slabs are heavy, fragile in transit and unforgiving to cut.
Best for: getting a stone look without stone maintenance. Watch for: installer skill.
7. Modern Farmhouse Walk-In
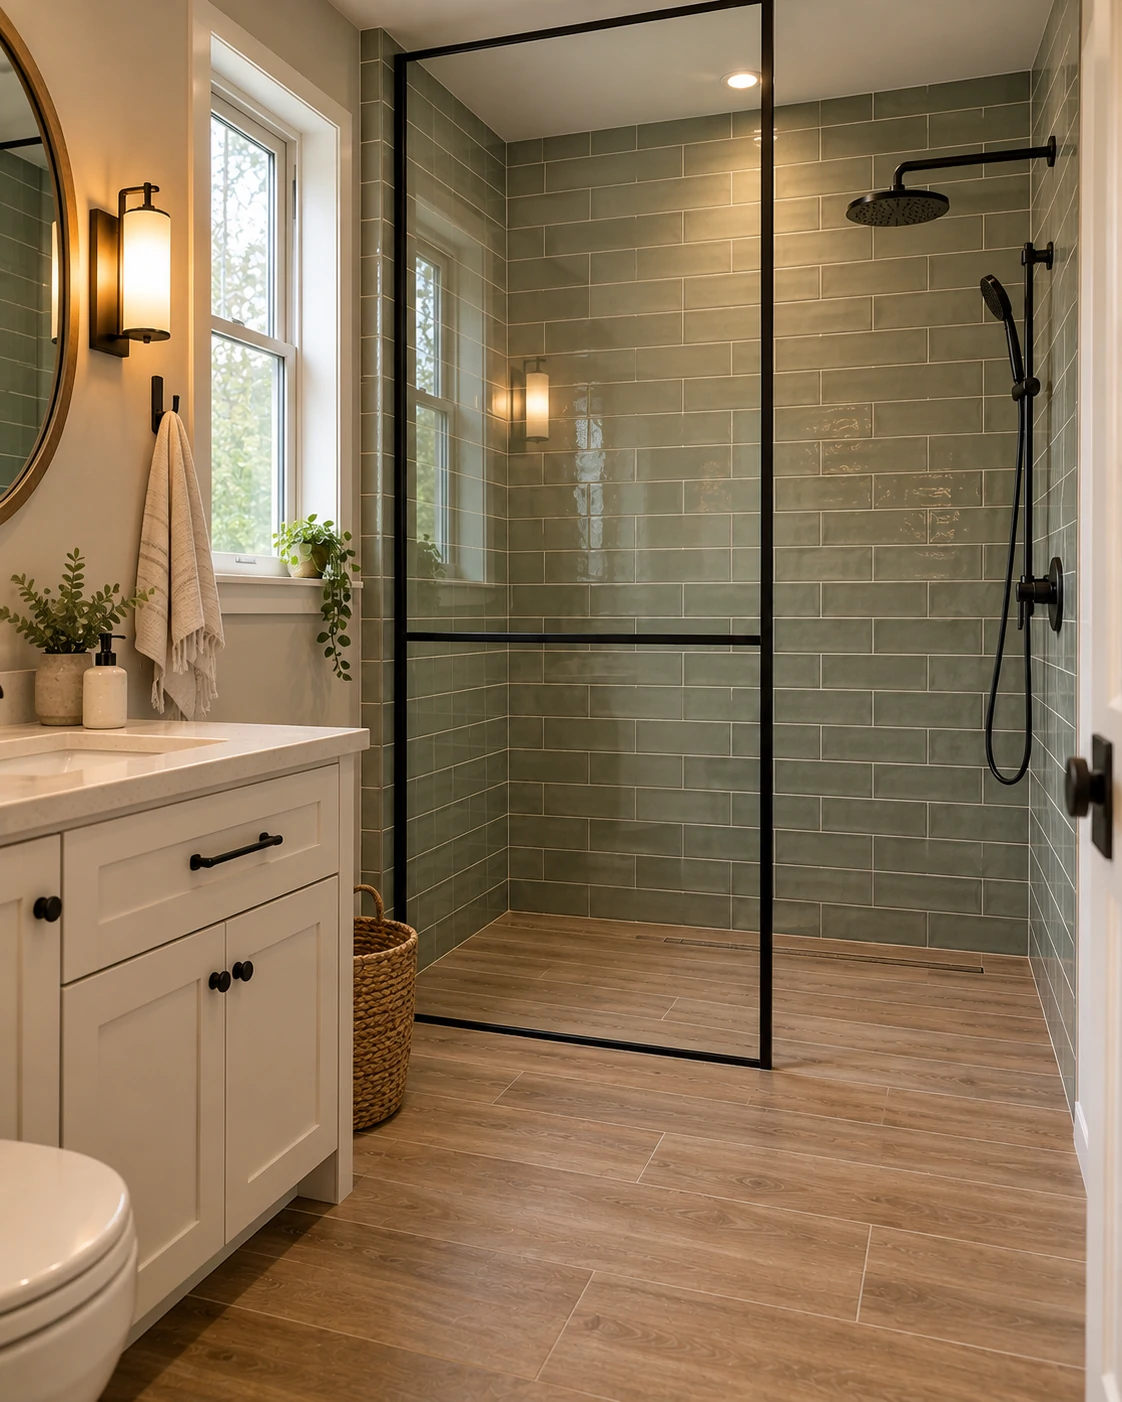
Wood-look floor tile, white or sage wall tile, matte black or brushed brass hardware and a glass panel with a slim frame. It’s friendly, warm and familiar.
The look is already common, which is both a plus (buyers understand it) and a risk (it can feel of-its-moment). Keep the permanent surfaces neutral and let the hardware carry the style.
Best for: family homes. Watch for: cheap matte black wearing through or spotting.
8. The Corner Walk-In for Small Bathrooms
.webp)
Two glass panels, or one panel plus a return, a small mosaic floor, light-toned tile and a narrow niche. It claws back floor space where a tub used to be.
Small footprints splash more, so glass placement matters more than tile.
Best for: compact bathrooms. Watch for: spray reaching the floor if the entry is wide.
9. The Wet Room
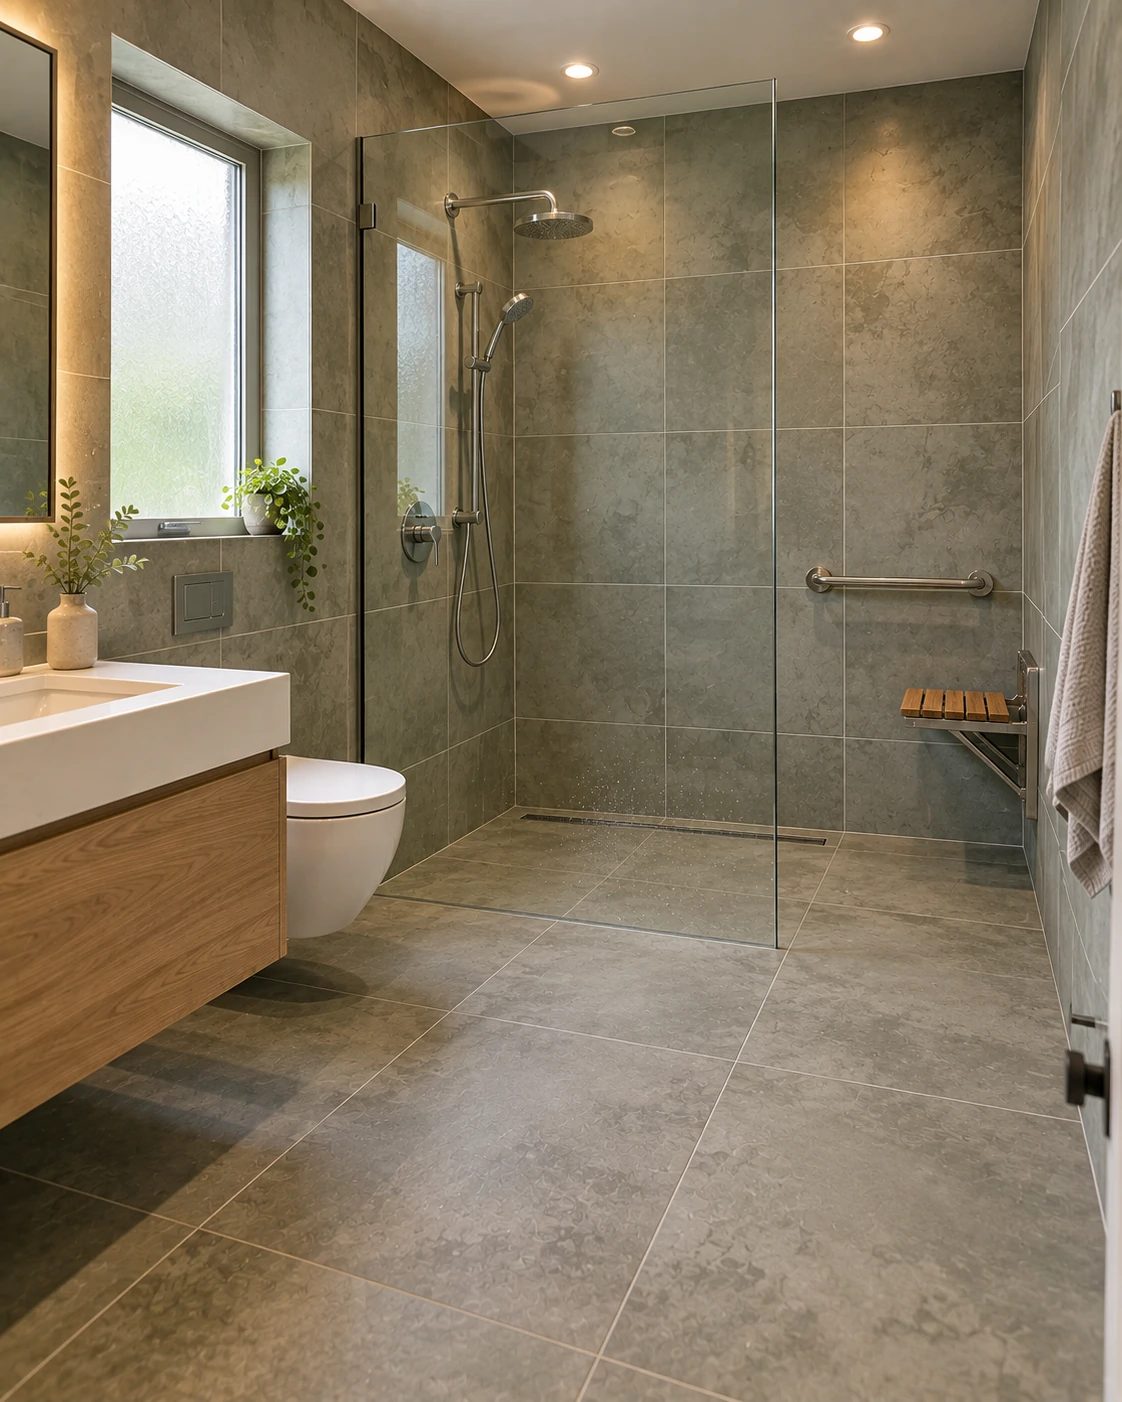
A fully waterproofed room with a sloped floor, one glass panel and no visible curb. It’s the most open look on the list.
It’s also the least forgiving of poor waterproofing, because the whole room is now the shower. This is a job for a qualified tiler working to the local standard.
Best for: accessible design and open-plan bathrooms. Watch for: hidden failures behind tile.
10. The Tub-to-Walk-In Conversion
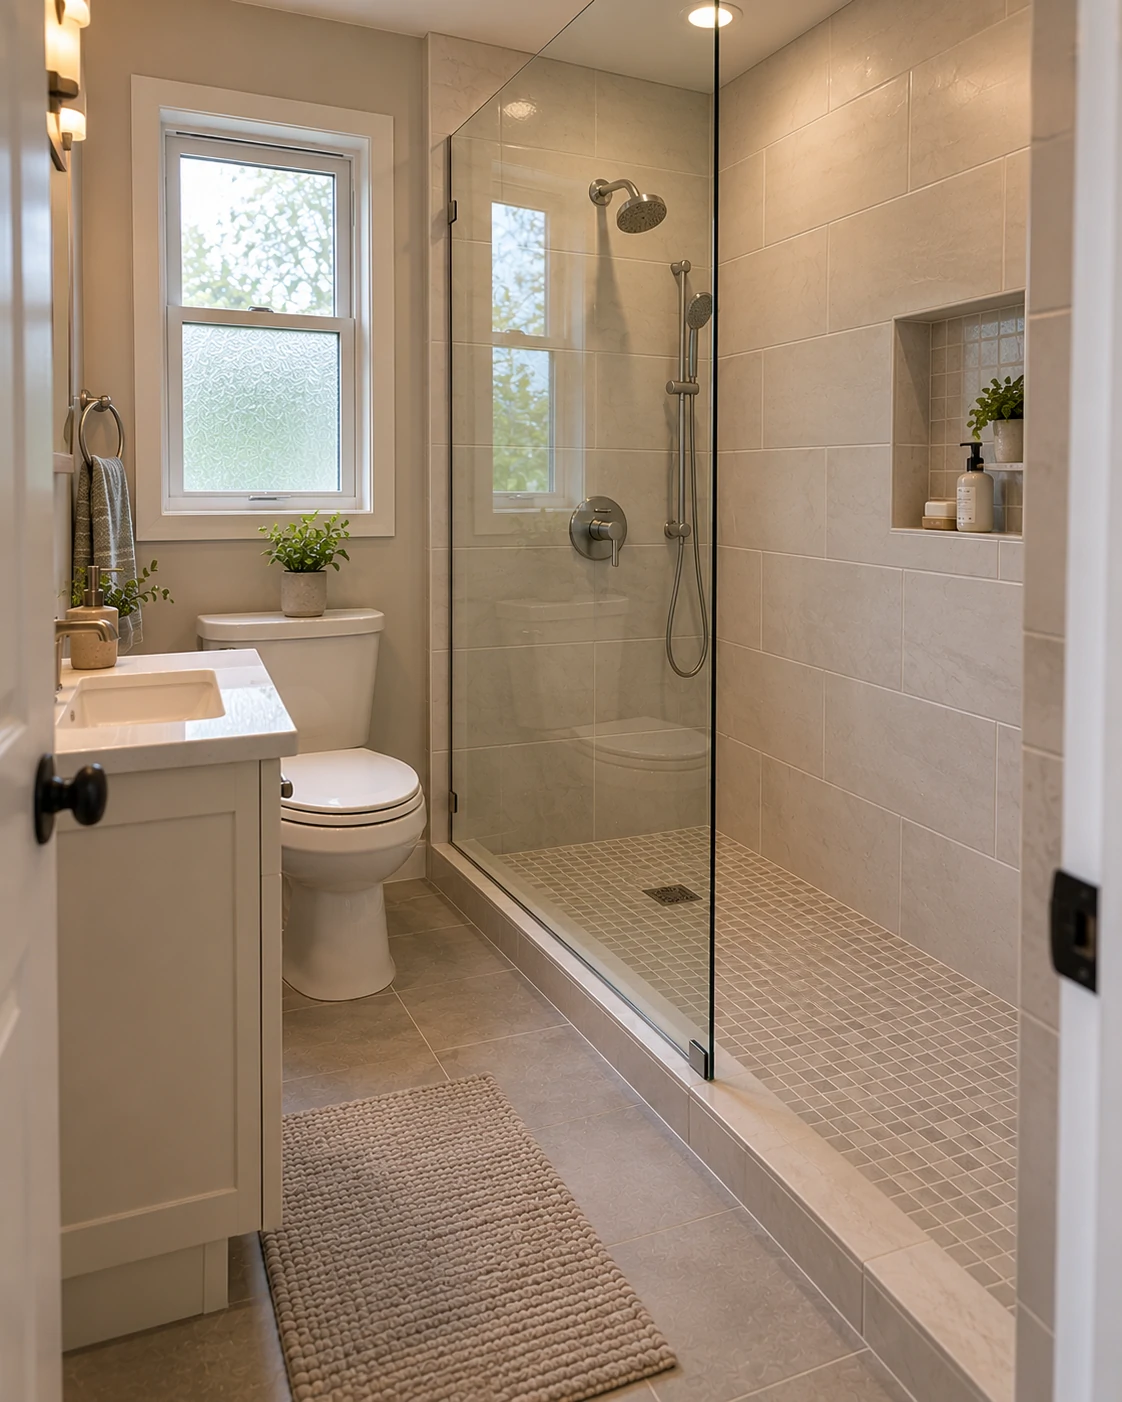
Replace a standard bath alcove with a walk-in shower using the same plumbing wall. It’s often the best value on the list because the layout stays put and the plumbing doesn’t move.
Best for: budget-conscious upgrades. Watch for: losing your only bath (more on that below).
The Design Decisions That Matter Most
Inspiration is easy. Turning it into a spec sheet is where most projects go wrong. This table covers the choices that decide whether a modern walk-in shower looks good on day one and day 1,000.
| Design Element | Best Choice | Why | Common Mistake | Maintenance Reality |
|---|---|---|---|---|
| Flooring tile | Small-format porcelain mosaic (about 2 in / 50 mm) in the shower, matching larger tile outside, with a slip rating suited to wet floors | Small tiles follow the slope to the drain and extra grout lines add grip | Polished large tile on the shower floor, or a mosaic with a rating never checked | More grout to keep clean; epoxy grout reduces staining |
| Wall tile | Large-format porcelain (rectified) with narrow joints, or classic subway in a mid tone | Fewer joints means less grout to clean and a calmer look | Pattern on every wall, or fluted tile in a hard-water area with no cleaning plan | Flat tile wipes faster; textured or fluted tile holds soap scum |
| Grout colour | A tone close to the tile for calm; a mid-grey for subway tile that needs some definition | Grout colour sets the visual grid and hides staining | Bright white grout on the floor, or a stark contrast that turns tile into a grid | Cement grout needs sealing; epoxy grout is more stain-resistant and costs more to install |
| Vanity finish | Matte or satin painted, wood veneer or laminate with a moisture-resistant core | Hides fingerprints and water marks better than high gloss | Dark gloss that shows every splash | Wipe daily; avoid abrasive cleaners |
| Faucet / fixture finish | Brushed nickel, chrome or a PVD-coated brass or black | Chrome and brushed nickel hide spots; PVD finishes resist wear | Cheap matte black that wears through or spots in hard water | Wipe after use; check the manufacturer’s cleaning advice before using acid cleaners |
| Mirror type | Anti-fog LED mirror, or a framed mirror with side sconces | Good light at face level and it copes with steam | A mirror with no anti-fog in a bathroom with a doorless shower | LED mirrors need a rated supply; clean glass only, no drips near edges |
| Lighting | Layered: wet-rated recessed light in the shower, vanity light at face height, a soft ambient source. 2700K–3000K, CRI 90 or higher | Flatters stone and skin tones and avoids a clinical feel | A single ceiling light, or non-rated fixtures inside the wet zone | LED life is long; clean lenses occasionally |
| Countertop material | Quartz or solid surface, or a sintered or porcelain top | Non-porous and resistant to toothpaste, cosmetics and water marks | Unsealed natural stone, or dark polished surfaces that show every splash | Quartz needs only mild cleaner; natural stone needs regular sealing |
Grout does more work than the tile
It’s easy to spend weeks choosing tile and thirty seconds choosing grout. That’s backwards. Grout sets the visual grid.
A contrasting grout turns a plain subway tile into a pattern. A grout close to the tile colour makes the wall read as one calm surface, and it hides staining better. If you want a quiet, modern look, match the grout. If you want the tile to have definition, go a shade or two darker than the tile, not stark white or black.
Lighting changes how tile looks
The same stone-look tile can look warm and inviting under 2700K–3000K light and oddly clinical under cool white. A CRI of 90 or higher keeps colours honest, which matters for skin tone and for natural stone.
A windowless bathroom also changes the colour game. Without daylight, everything sits under artificial light all day, so pick tile samples under the same lighting you’ll be using, not in a shop or by a window.
Fixtures inside or over the shower need the correct wet rating (an IP rating in the UK and Australia, a wet-location listing in the US and Canada). That’s a safety requirement, not a style detail.
What photographs well and what lives well
A staged shower has bare shelves. A lived-in one needs somewhere for shampoo, a hook for the squeegee and a place to stand that isn’t a wet mat. Plan a niche or shelf where the bottles will actually go, and make sure it’s outside the direct spray.
Layout, Size and Splash: Will a Doorless Walk-In Work in Your Bathroom?
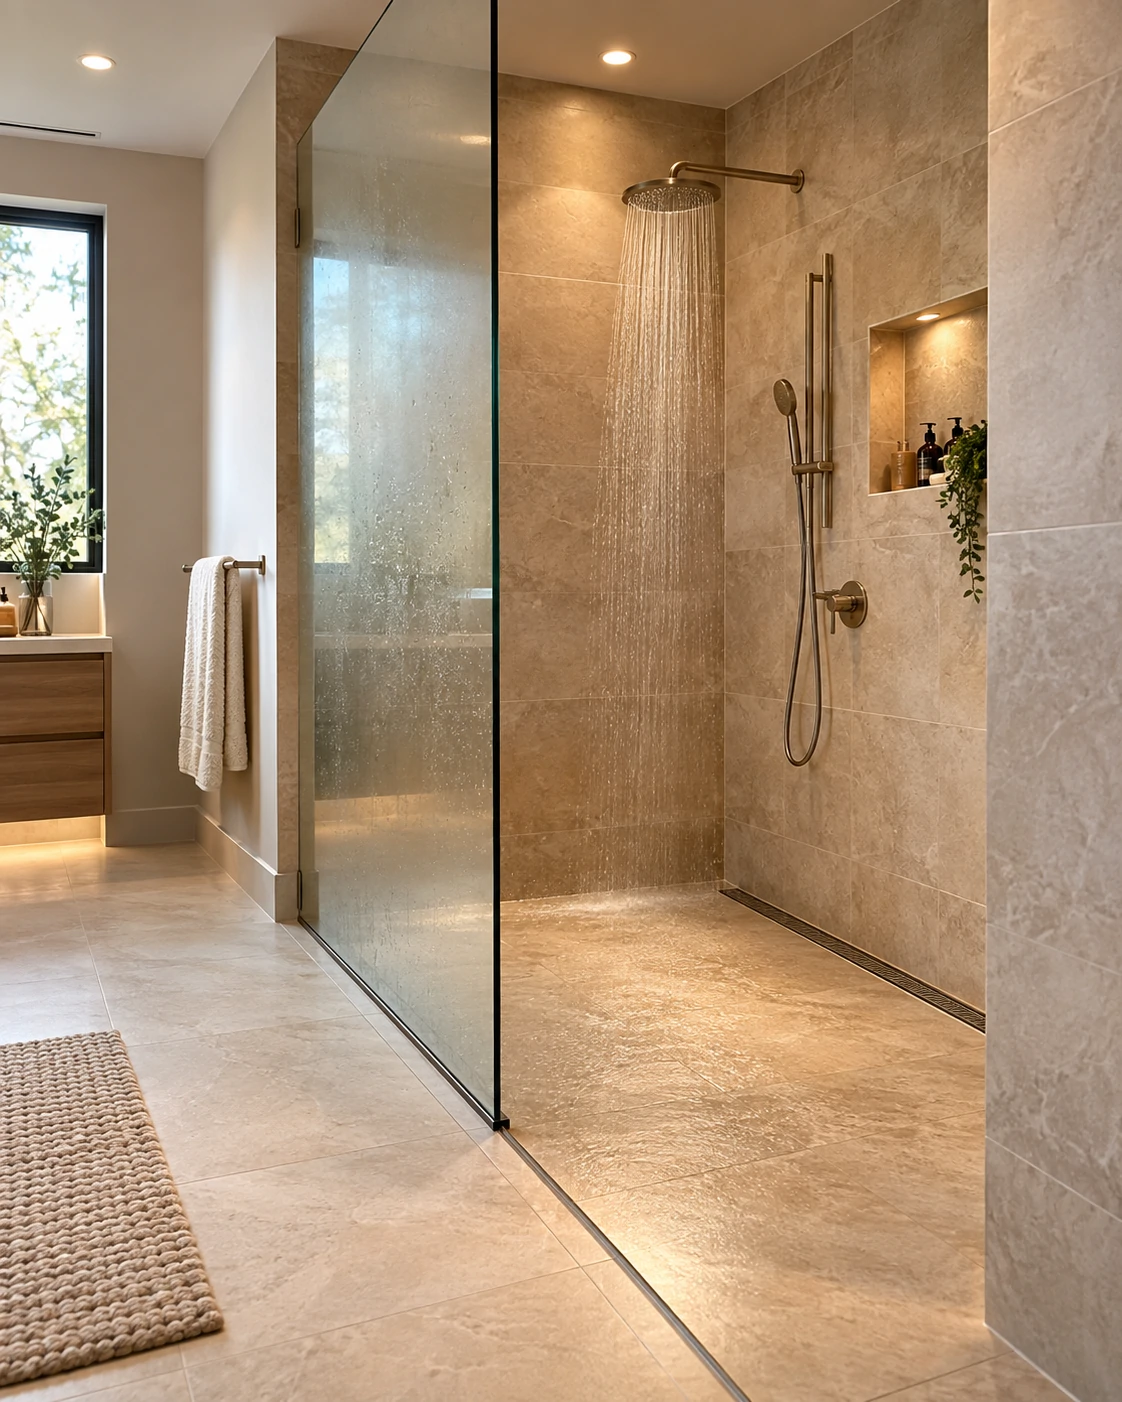
Doorless is a depth question more than a style question. Splash control comes down to three things: how deep the shower is, where the showerhead points, and how wide the glass is.
Some rules of thumb, which you should confirm with your installer:
- Depth: around 60 inches (1.5 m) or more is a commonly suggested starting point for a truly open, doorless layout.
- Head position: put the showerhead on the wall opposite or beside the opening, not aimed at it.
- Glass: a fixed panel wide enough to shield the entry and the head end.
- Tight spaces: add a return panel, a slim hinged door or a lower-flow head.
- Minimum size: local codes often set minimum shower interiors around 30 inches (760 mm) each way, so check yours.
In a small bathroom, clear glass and continuous tile make the room feel bigger, but a shallow doorless shower will splash. A corner layout, a return panel or a narrow door often solves it without giving up the open look.
In a large bathroom, you can go properly open. The trade-off is heat. Big open showers lose warmth and steam faster, so plan underfloor heating, a quick-response thermostatic valve and a fan that can cope.
Real-World Walk-In Shower Design Mistakes
Most walk-in shower regrets come down to a short list. If you skim nothing else, skim this.
- Rainfall head only. It feels lovely but is awkward for rinsing the walls, cleaning or bathing kids and pets. Add a handheld on a slide bar.
- Showerhead aimed at the opening in a doorless design. Water reaches the floor and the cold air rushes in. Put the head on the wall opposite or beside the entry and use a fixed glass panel wide enough to shield the head end.
- Skipping the slope. A shower floor needs proper fall toward the drain, typically about ¼ in per foot (around 2%). Flat spots hold water and cause mould. Confirm the pan or mortar bed slope before tiling.
- Large tile on the shower floor. Big tile can’t follow the slope without heavy cutting. Use small mosaics, or a linear drain with a single-plane slope and a tile size suited to it.
- Polished tile on the floor. It looks stunning dry and is slippery wet. Check the slip rating: in the US a wet DCOF of 0.42 or higher, in the UK a wet pendulum value of 36+, in Australia a wet barefoot rating suited to showers.
- Dark matte everywhere in a hard-water area. Water spots and soap film show quickly. Use a mid tone, or commit to a squeegee habit and expect to descale.
- Pattern on every wall. The look gets busy, costs more and dates faster. Confine pattern to one wall or the niche.
- A niche in the spray path, or sized against the tile grid. Bottles get blasted and the tile cuts look messy. Place the niche away from direct spray and size it to fit whole tiles.
- Non-rated lighting in or over the shower. Standard ceiling lights aren’t designed for wet zones. Use fixtures with the correct wet rating and have an electrician install them.
- Ignoring ventilation. A warm, open shower and a weak fan means condensation and mould at the ceiling and corners. Upgrade the extractor fan and size it for the room.
The slope and slip-rating mistakes are the sneakiest. Both look fine on the day the tiler leaves. Both show up months later, one as standing water and one as a near-fall.
What a Walk-In Shower Costs at Three Budget Levels
Cost is where most inspiration articles go quiet. Here are numbers, with the assumptions stated.
Assumptions: a mid-sized bathroom with roughly 40 sq ft of floor tile and about 100 sq ft of shower wall tile. The layout stays largely in place, with no plumbing relocation, no structural changes and no permit costs. Demolition and disposal are excluded. These are planning ranges in USD for 2026, not quotes, and they vary by region. Convert for the UK, Canada and Australia using local labour rates.
| Cost Category | Budget Tier ($) | Mid Tier ($$) | Premium Tier ($$$) |
|---|---|---|---|
| Floor tile | $120–$300 | $300–$700 | $800–$2,000 |
| Wall tile | $300–$700 | $700–$1,800 | $2,000–$6,000+ |
| Vanity | $300–$700 | $800–$2,000 | $2,500–$6,000+ |
| Fixtures (shower valve and head, faucet, hardware) | $200–$500 | $600–$1,500 | $1,800–$5,000+ |
| Lighting | $80–$250 | $300–$800 | $900–$2,500 |
| Mirror | $50–$200 | $250–$700 | $800–$2,500 |
| Shower glass (fixed panel or door) | $400–$900 | $900–$2,000 | $2,000–$4,500 |
| Waterproofing materials and shower base prep | $150–$400 | $400–$1,000 | $1,000–$2,500 |
| Labor (tile, plumbing, install) | $2,500–$5,000 | $5,000–$10,000 | $10,000–$20,000+ |
| Estimated Total | $4,100–$9,000 | $9,250–$20,500 | $21,800–$51,000 |
Where the money surprises people
- Costs climb quickly with a curbless floor, a linear drain, natural stone, custom glass or relocated plumbing.
- A tub-to-shower conversion that keeps the plumbing wall is usually the most cost-effective route.
- Large-format porcelain slab can deliver a stone look for less than real marble, but installation is specialist work.
- Some looks cost less than they appear. Classic subway with a good grout choice looks expensive and isn’t.
- Some cost more than they appear. A “simple” curbless shower can quietly become a premium job once the floor needs re-sloping.
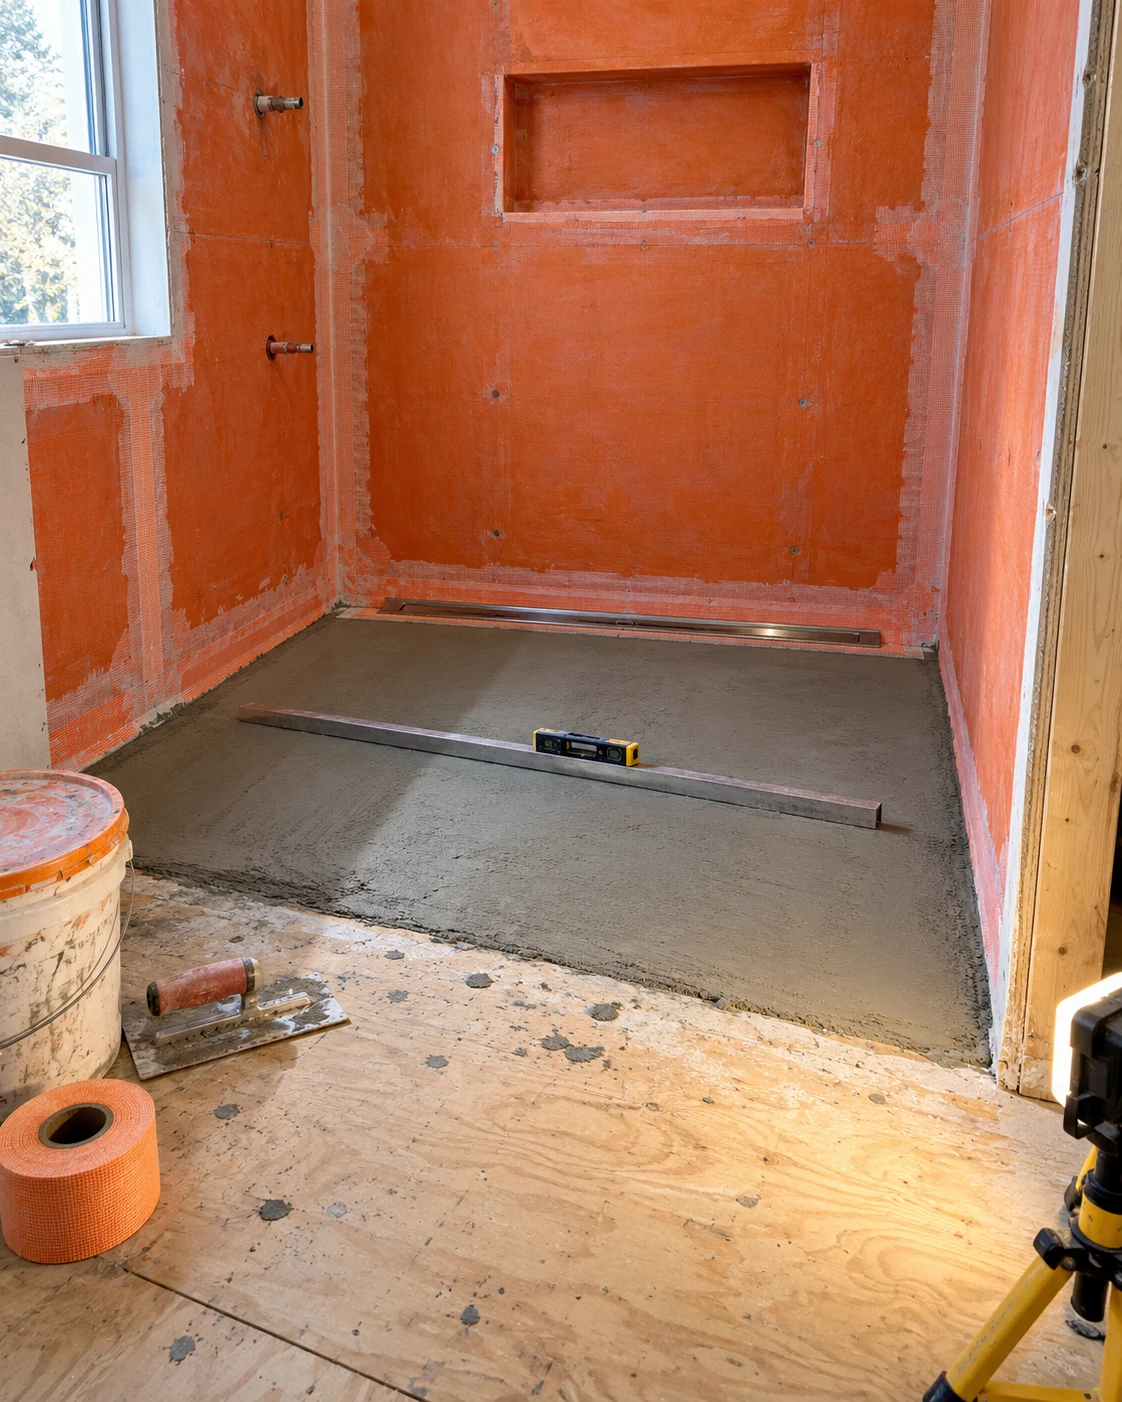
If the budget is tight, put the money into waterproofing and glass first, and let the tile be ordinary. Ordinary tile with excellent waterproofing lasts. Beautiful tile over poor waterproofing doesn’t.
DIY or Hire a Pro? Where to Draw the Line
Some of this is very doable for a competent DIYer. Some of it is the kind of work where a mistake stays hidden behind tile for years.
| You can reasonably DIY | Hire a qualified professional |
|---|---|
| Swapping a showerhead or adding a handheld and slide bar | Waterproofing a shower or wet room |
| Fitting shelves, hooks and accessories (into solid backing, not just tile) | Building the shower base and slope, especially curbless |
| Regrouting and replacing silicone | Measuring and installing glass panels |
| Painting the walls outside the wet zone | Any electrical work, including lights, heated mirrors and warm floors |
| Replacing a non-electric mirror or vanity hardware | Relocating a drain, valve or plumbing |
| Cleaning, descaling and sealing | Installing large-format slabs or natural stone |
⚠️ Waterproofing failures hide. Water damage behind tile can go unnoticed for years and only shows as loose tiles, staining outside the shower or a soft floor. A walk-in or curbless shower depends on a correctly installed membrane and slope. Follow the manufacturer’s system exactly, or hire a qualified tiler. This is the one place to spend money before you spend it on tile.⚠️ Removing your only bathtub can narrow your buyer pool. A well-built walk-in shower is often a selling point in a primary or second bathroom, but many families with young children look for at least one bath. If it’s the only bath in the house, talk to a local agent before removing it.⚠️ Electrics near a shower are not a DIY style choice. Lights, heated mirrors and heated floors need the correct wet-zone rating and a qualified electrician, and local rules apply (for example IP zones in the UK and Australia, or wet-location listings and GFCI protection in the US and Canada). A beautiful fixture that isn’t rated for the location is a hazard.
The Maintenance Reality
.webp)
“Low maintenance” is the most overused phrase in shower marketing. A walk-in shower has fewer surfaces than a tub-shower combo with a curtain, but it isn’t maintenance-free. It just moves the work.
- Glass needs a squeegee habit.
- Grout needs cleaning, and sometimes sealing.
- The drain needs hair removed.
- Silicone joints wear out.
- The fan needs to actually move air.
| Task | Frequency | Difficulty | Notes |
|---|---|---|---|
| Squeegee glass and wipe fixtures | After each shower or daily | Easy | The single biggest thing that stops limescale building up |
| Clean the drain and hair trap | Weekly | Easy | Slow drainage often means hair, not a plumbing fault |
| Wipe tile and niche with a pH-neutral cleaner | Weekly | Easy | Avoid acidic or abrasive cleaners on natural stone and some finishes |
| Deep-clean grout lines | Monthly | Moderate | Mosaic floors and subway tile need more attention because of the extra grout |
| Descale showerhead and fixtures | Every 1–3 months in hard water | Easy to moderate | Check the manufacturer’s advice first, since some finishes and stone don’t tolerate vinegar or acids |
| Reseal cement grout and natural stone | About once a year, or as the product advises | Moderate | Epoxy grout and porcelain tile usually don’t need sealing |
| Inspect silicone or caulk joints | Every 6 months | Easy | Replace cracked, discoloured or mouldy silicone; typical life is a few years |
| Clean extractor fan grille and check airflow | Every 6 months | Easy | A weak fan is a common cause of mould |
| Check for warning signs of waterproofing failure | Yearly | Moderate | Look for loose tiles, staining outside the shower, damp smells or soft floor edges; call a professional if found |
| Reapply glass protective coating (if used) | Per product instructions | Easy | Follow the product guidance and don’t mix products |
A five-minute weekly reset
- Run the fan and wipe the glass and fixtures with a squeegee or microfibre cloth.
- Lift the drain cover and clear the hair.
- Wipe the niche and floor edge with a pH-neutral cleaner.
- Glance at the silicone joints for cracks or dark spots.
- Leave the fan running for another 15–20 minutes.
Most mould problems start at a failed silicone joint or a poorly ventilated corner, not on the tile face. If you catch those two, you avoid most of the ugly surprises.
Resale, Longevity and Trend Fatigue
Some looks age gracefully. Others have a shelf life. The difference is usually whether a surface is a backdrop or a statement.
What tends to age well
- Neutral, mid-tone large-format tile
- Classic subway in a stacked or vertical layout
- Warm, matte finishes in chrome, nickel or good-quality PVD
- Matching floor tile that carries through the room
- Layered, warm lighting
- One bold element (a feature wall or niche) instead of five
What tends to date faster
- Pattern on every wall
- Trend tile used as the main surface rather than an accent
- Very high-contrast schemes that depend on staying spotless
- Finishes that wear through or spot quickly
The safest approach is a neutral base with swappable accents. Hardware, lighting, mirrors and accessories are cheap to change. Tile isn’t.
On resale, a well-built walk-in shower is generally seen as a plus, especially in a primary or second bathroom, and especially for older buyers. The bath question is the one to think through before demolition. If your home has only one, ask a local agent how buyers in your market and price range feel about it.
Does a Walk-In Shower Work for You? A Quick Self-Check
- You have only one bathroom and young children → Keep the bathtub, or choose a tub-shower combination.
- You have a second bathroom or a primary suite and want a spa look → A walk-in shower is usually the better choice.
- Your bathroom is small and you want it to feel bigger → Fixed glass panel, light tile and a continuous floor. Avoid dark pattern on every wall.
- You live in a cold climate and hate a chilly bathroom → Add underfloor heating and a glass panel at the head end. Consider a door.
- You have hard water and dislike wiping surfaces down → Choose mid-tone finishes, chrome or nickel fixtures, large-format tile and a squeegee routine.
- You’re planning to sell within five years → Choose a neutral base, keep a bath elsewhere in the home, and keep bold choices to swappable items.
- You want a step-free or ageing-in-place shower → Curbless entry, bench, grab bars, slip-rated floor and a handheld head. Hire professionals for the floor build.
- You have a tight budget and want the best value → Convert tub to walk-in in the same footprint, use standard-format tile and put the money into waterproofing and glass.
Materials and Products Worth Considering
Categories and specs matter more than brand names here. This is what to look for.
- Porcelain tile: rectified edges for narrow joints, a stated slip rating for the floor, and a through-body or good-quality print. Large-format slabs need a specialist installer.
- Grout: epoxy grout resists staining and doesn’t need sealing but is harder to install. Cement grout is easier to work with and needs sealing.
- Waterproofing: a membrane or tile-ready shower base from an established system, installed exactly to the manufacturer’s instructions.
- Drain: a linear drain suits large tile and single-plane slopes. A centre drain or tile-insert drain suits mosaics.
- Shower valve: a thermostatic valve holds a steady temperature and reaches it quickly, which matters in an open shower. Digital shower controls add presets and are worth considering if you like precise temperatures.
- Glass: toughened safety glass with a fixed panel sized to protect the entry. A factory-applied protective coating can ease cleaning.
- Underfloor heating: an electric warm-floor mat under the tile with a programmable thermostat takes the edge off an open shower and helps floors dry. It needs a qualified electrician.
- Extractor fan: sized for the room, quiet enough that you’ll actually use it, and ideally with a humidity sensor or timer so it keeps running after you leave.
- Mirror and lighting: an anti-fog LED mirror and wet-rated shower lighting, both on the correct supply.
None of these needs to be top-of-the-range. A mid-priced fan that runs and a properly installed membrane beat an expensive mirror over a badly waterproofed floor.
Frequently Asked Questions
Is a walk-in shower better than a bathtub?
For most households, yes. A walk-in shower is quicker to use, easier to make step-free, and usually uses less water than filling a bath unless your showers run long. A bathtub still wins for bathing small children, soaking and washing pets, and many buyers expect at least one tub in a home. If you have one bathroom and a family, keep the bath. If you have a second bathroom or a primary suite, a walk-in shower is usually the better use of the space.
Do walk-in showers make a small bathroom look bigger?
Often, yes, because clear glass and continuous tile let your eye travel across the room instead of stopping at a tub wall. The effect comes from the details: a frameless fixed panel, matching floor and shower tile, light tones and minimal hardware. But visual size isn’t usable size. If the shower is shallow, a doorless layout will splash the floor, so a small bathroom may need a return panel or a narrow door to keep spray contained.
How big does a doorless walk-in shower need to be?
There’s no universal number, but a depth of around 60 inches (1.5 m) or more is a commonly suggested starting point for a truly open, doorless layout, with the showerhead on the wall opposite or beside the opening and a fixed glass panel wide enough to shield the entry. Smaller footprints splash more. In tight spaces, add a return panel, a slim hinged door or a lower-flow head. Also check local minimum shower sizes, which are often around 30 inches (760 mm) each way.
What is the best non-slip tile for a walk-in shower floor?
Small-format tile, such as mosaics from about 2 inches (50 mm), is the safest choice. The extra grout lines add grip and small tiles follow the slope to the drain. Whatever you choose, check the slip rating: in the US look for a wet DCOF of 0.42 or higher, in the UK a wet pendulum value of 36 or more, and in Australia a wet barefoot rating suited to shower floors. Avoid polished finishes on the shower floor, and remember textured tile grips better but holds more soap scum.
Will removing a bathtub for a walk-in shower hurt resale value?
It depends on how many bathrooms you have. In a primary suite or second bathroom, a well-built walk-in shower is generally seen as a plus, especially by older buyers. Removing the only bathtub in the home can narrow your buyer pool, since families with young children often look for one. A common compromise is keeping one tub somewhere in the house. Ask a local agent before you commit, because expectations vary by market and price point.
How much does a modern walk-in shower cost?
As a rough 2026 planning range in USD, the shower zone alone (tile, waterproofing, glass, valve and head, and labor) runs about $3,000–$7,000 for a budget build, $6,000–$13,000 for mid-range, and $13,500 or more for premium finishes such as large-format slabs, natural stone and custom glass. Moving plumbing, building a curbless floor that needs structural changes, and hidden damage found during demolition can add thousands. These are planning ranges, not quotes, so get several local written quotes. Prices in the UK, Canada and Australia differ.
How do you stop a walk-in shower feeling cold and getting mouldy?
Doorless showers lose heat faster, so plan for it: an electric warm-floor mat under the tile, a thermostatic valve that reaches temperature quickly, and glass that encloses the head end. For moisture, fit an extractor fan sized for the room, run it for 15–20 minutes after showering, squeegee the glass and keep silicone joints in good repair. Mould usually starts at failed silicone and poorly ventilated corners rather than on the tile face.
Final Verdict: Which Should You Choose?
If you have a second bathroom or a primary suite, choose the walk-in shower. It’s easier to use, easier to make accessible, and gives you far more room to design. If you have one bathroom and young children, keep the bath, or choose a tub-shower combination and put your design energy into tile, lighting and fixtures.
Whichever you pick, spend first on what you can’t see: slope, waterproofing and ventilation. Then keep the permanent surfaces calm and let hardware, lighting and accessories carry the personality. That’s the combination that still looks good when the styled photo is long forgotten.
.webp)
.webp)
.webp)
.webp)
 (1).webp)