 (1).webp)
Quick Answer: Do You Need a Permit? (At a Glance)
Short answer: probably, but not for everything. Most bathroom renovations need at least one permit somewhere in the process. Purely cosmetic work — new tiles, a fresh coat of paint, swapping a vanity in the exact same spot — usually doesn’t. The moment you move plumbing, add or alter electrical circuits, change ventilation, or touch structure, you’re almost certainly into permit territory, and the specific permit (building, plumbing, or electrical) depends on which system you’re disturbing.
Here’s the fast version before we get into the detail:
- Cosmetic-only updates (new tiles over existing waterproofing, paint, a like-for-like fixture swap) typically don’t need a permit.
- Moving or adding plumbing — relocating a toilet, adding a second basin, running new drainage — almost always does.
- Any new or altered electrical circuit near a wet area triggers an electrical permit or, in the UK, notifiable work under Part P.
- Removing or altering a wall, load-bearing or not in some jurisdictions, requires a building permit everywhere we checked.
- Licensed-trade requirements exist independently of permits. In some places you can legally do the work without a permit but still can’t legally do it yourself — plumbing and electrical are the two areas where this trips people up.
- Apartments, condos, and strata properties usually need a second approval on top of whatever the council, city, or building department requires.
Rules are set locally, not nationally, so treat everything below as a framework for asking the right question — not a substitute for a five-minute call to your building department before you pick up a hammer.
%20(5).webp)
%20(3).webp)
%20(2).webp)
%20(7).webp)
Why Bathroom Permits Exist (It’s Not Just Paperwork)
It’s tempting to write off permits as bureaucratic box-ticking, especially for a room the size of a large closet. That reaction is understandable, but it misses what the process is actually protecting.
A bathroom is the one room in a house where water, electricity, and structure sit within arm’s reach of each other. Waterproofing failures don’t announce themselves — they show up two or three years later as a soft spot in the floor, a mould smell in the room below, or a subfloor that’s quietly rotted out. Electrical work done near a shower or bath has a genuinely higher consequence for getting it wrong than the same mistake in a bedroom. And structural changes — even something as small as widening a doorway — can shift loads in ways that aren’t obvious until a ceiling starts to crack somewhere else in the house.
Permits and inspections exist to put a second set of trained eyes on exactly those risk points before they’re sealed behind tile and plasterboard, where nobody will see a mistake until it’s expensive.
There’s also a practical, less romantic reason to care: resale. An inspected, permitted renovation shows up cleanly on property records. An unpermitted one can surface during a buyer’s building inspection, a conveyancer’s search, or an insurance assessment — often at the worst possible moment in a sale.
What Actually Triggers a Permit (A Universal Checklist)
Country-specific rules matter, but the underlying logic is close to identical everywhere. Permit requirements are triggered by which system your renovation touches, not by how the room looks when you’re done. Here’s the trigger logic, grouped by system.
Plumbing
- Usually triggers a permit: relocating a toilet, shower, or basin; adding a new fixture; extending or altering drainage/waste lines; changing pipe materials in a way that affects the water supply system; installing a new hot water unit.
- Usually doesn’t: replacing a tap, showerhead, or toilet in the exact same location with the same connections.
Electrical
- Usually triggers a permit (or notifiable work): adding a new circuit, installing a new exhaust fan with its own wiring run, adding heated flooring, installing new lighting circuits, moving a switch or power point.
- Usually doesn’t: replacing a light fixture on existing wiring on a like-for-like basis (though even this is regulated more tightly in bathrooms than in any other room — check local rules before assuming).
Structural
- Almost always triggers a permit: removing or altering any wall, whether or not it’s load-bearing; changing the door or window opening size; converting a closet or hallway space into part of the bathroom footprint.
Ventilation
- Usually triggers a permit: installing new mechanical ventilation, cutting a new exhaust duct route through a ceiling or roof, upsizing an extractor fan’s ducting.
- Usually doesn’t: replacing an existing extractor fan of the same type on the same ducting run.
Waterproofing
- Usually triggers a permit or inspection sign-off: any new wet-area waterproofing membrane (shower base, shower walls, tub surround) — this is one of the most commonly missed triggers, because homeowners assume “we didn’t move anything” covers them, when in fact re-tiling a shower recess almost always means re-waterproofing it first, and that’s regulated even if the layout is identical.
The gap most people fall into: assuming that because the layout isn’t changing, nothing is regulated. Waterproofing and drainage are regulated as systems, independent of whether the room’s footprint moves an inch.
Permit Requirements by Country
Because permit rules are written locally — by city, county, council, or province — there’s no single global answer. What is consistent is the category structure: a building permit, a plumbing permit, and an electrical permit are treated as separate approvals almost everywhere, even when one office issues all three.
| Country | Who issues approval | What’s typically regulated | Common exemptions | Where to check |
|---|---|---|---|---|
| United States | City or county building department, following a locally adopted version of the International Residential Code (IRC) | Structural changes, new plumbing runs, new electrical circuits, mechanical ventilation | Like-for-like fixture swaps, cosmetic finishes, minor repairs under a local cost threshold in some cities | Your city or county building department’s permit portal |
| United Kingdom | Local authority Building Control (England, Wales, Northern Ireland) or Scottish Building Standards (Scotland) | Electrical work (Part P, England & Wales), drainage and sanitation (Part G/H), structural alterations | Like-for-like electrical repairs by a competent-person-scheme electrician who self-certifies; non-structural cosmetic work | Local authority Building Control department, or a Competent Person Scheme register for electrical work |
| Canada | Municipal building department, under a provincial building code based on the National Building Code (e.g., the Ontario Building Code) | New plumbing fixtures or drainage, new electrical circuits, structural alterations | Cosmetic finishes, like-for-like fixture replacement in many municipalities | Your municipality’s building permits office |
| Australia | Local council or a licensed/accredited private building surveyor or certifier, under the National Construction Code (NCC) | Structural work, new wet-area waterproofing, plumbing and electrical (via licensed trades, separately from the building permit) | Cosmetic finishes, like-for-like fixture swaps in most states | Your local council, or your state’s building/plumbing regulator |
United States
Permitting in the US runs through the city or county, which adopts (and often modifies) the International Residential Code. That local adoption is the reason two towns twenty minutes apart can have genuinely different thresholds for what needs a permit. Structural changes, new plumbing, and new electrical circuits are permit triggers almost everywhere. A number of cities also apply a dollar-value threshold — renovations under a certain cost may be exempt from a full permit even if they touch plumbing, though this varies enormously and shouldn’t be assumed. The one universal piece of advice: check your specific city or county’s permit portal before starting, not a national rule of thumb.
United Kingdom
The UK splits regulation between Building Control (structural, drainage, sanitation — Parts G and H of the Building Regulations) and Part P for electrical safety in England and Wales specifically (Scotland runs its own Building Standards system with different notification rules). The detail that trips up a lot of DIYers: electrical work in a bathroom is treated as “special location” work because of the water risk, and much of it is notifiable even when the equivalent job in a kitchen wouldn’t be. Using an electrician registered under a Competent Person Scheme lets them self-certify the work instead of you applying to Building Control separately — worth knowing, because it changes who’s filing the paperwork, not whether the work needs to meet the standard.
Canada
Canada’s National Building Code sets the baseline, but each province adapts it — the Ontario Building Code is one well-known example — and the municipality is where you actually apply. Plumbing and electrical permits are frequently issued as separate approvals from the general building permit, sometimes by different departments entirely. Structural changes, new fixtures, and new circuits are consistent triggers across provinces; the exemption thresholds for minor cosmetic work vary municipality to municipality.
Australia
Australia layers three things: the National Construction Code sets the technical standard, your local council or a licensed private building surveyor issues the actual building permit, and plumbing and electrical work run through separately licensed trades who lodge their own compliance paperwork (a plumber typically lodges a compliance certificate with the local water authority; an electrician issues a Certificate of Electrical Safety). This is a genuinely common point of confusion: a lot of homeowners assume “permit” means one document from one office, when in practice a mid-sized bathroom renovation can generate a building permit, a plumbing compliance certificate, and an electrical safety certificate as three separate pieces of paper from three different parties.
Real Renovation Case Study: What Our 6-Week Bathroom Rebuild Actually Required
Most articles on this topic are written from the outside — a content team summarizing rules they’ve never personally had to apply for. This section isn’t that. This is a real bathroom, project-managed by the homeowner, start to finish, with the actual numbers.
The bathroom: 2515mm long x 1830mm wide x 2620mm high — about 4.6m² total, which is on the small side. This matters, because most permit guidance online is written with a large family bathroom in mind, and small-bathroom renovators get left to figure out for themselves whether the same rules apply. (They do. Permit triggers are about systems, not square metres.)
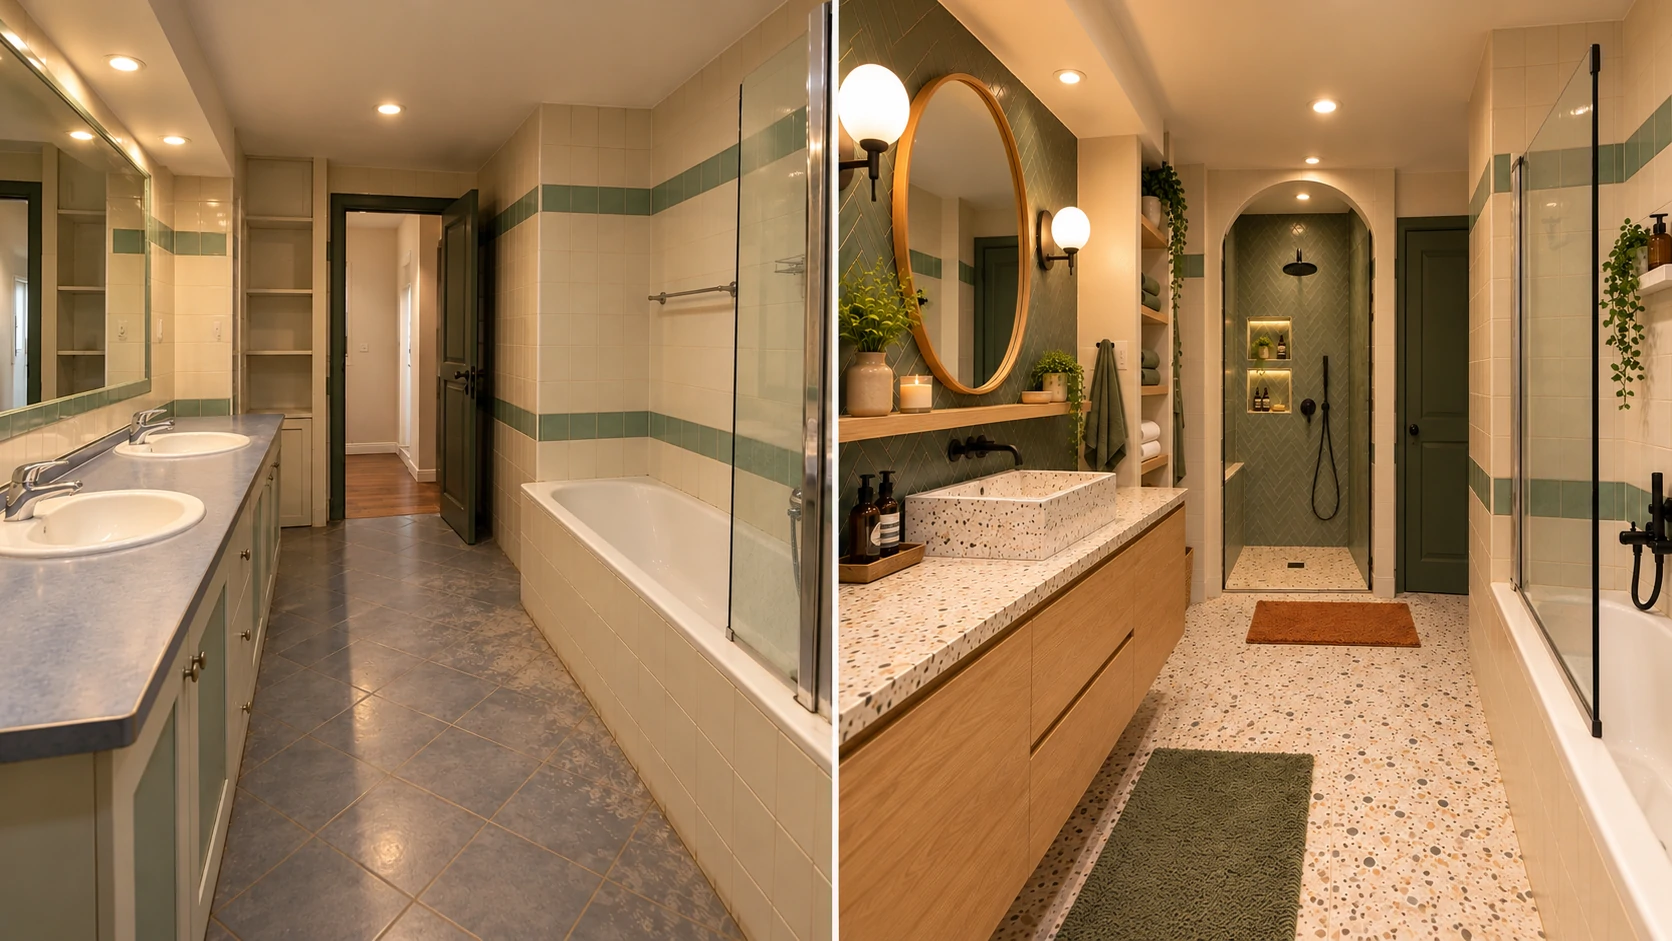
Where it started: the original bathroom was dated but functional — pink and grey mosaic tile floor, a pink tub built into a grey-and-pink tiled surround, a dated vanity, a shower stall with a sliding glass door and a fabric curtain doing extra duty as a second barrier, and a shallow shelf under the window that had become the default catch-all for every bottle and tube in the house.
Where it ended: a full-height glass shower screen replacing the enclosed stall, a freestanding tub positioned under the window with a skylight above it, a floating timber-look vanity with a vessel basin, brushed brass tapware, an arched mirror, a backlit tiled niche where the old shelf used to be, and a sliding barn door replacing the old swing door at the entry.
Timeline: six weeks, start to finish.
Total cost: approximately $17,000–$18,000 AUD, including materials, licensed-trade labor, and everything the homeowner sourced independently.
The task breakdown: who did what
| Task | Who handled it | Notes |
|---|---|---|
| Demolition | Owner | Full strip-out — old tiles, old tub, old vanity |
| Re-concreting the floor | Owner | Levelled the base before new waterproofing and tiling |
| Re-rendering the walls | Owner | Prepped substrate for new tile |
| Ledge-wall build (the tiled niche) | Owner | Framed the recessed shelf now used for shower storage |
| Tile sourcing | Owner | Selected and ordered all tile and stone-look finishes |
| Plumbing rough-in and fixture installation | Licensed plumber | Repositioned supply and drainage for the new tub and shower layout |
| Electrical (lighting, exhaust fan, power points) | Licensed electrician | New circuit work for the backlit niche and wall sconces |
The most common question about this kind of split: “if I’m doing the labour, why pay a trade at all?” Two reasons showed up clearly on this project. First, legally — plumbing and electrical work in a wet area needs to be done, or at minimum signed off, by a licensed practitioner in every one of the four countries this guide covers, regardless of whether a permit is separately required. Second, practically — waterproofing and drainage are the two things that are almost impossible to fix cheaply once tile is on top of them. Getting the fall-to-waste and membrane detail wrong is the single most expensive mistake a DIY renovation can make, because fixing it means ripping out finished work.
What surprised the project owner most: how much of the six weeks was actually waiting — waiting on trade availability, waiting on tile delivery, waiting on inspection sign-off between stages — rather than active work. The demolition and re-rendering moved fast. The gaps between trade visits were where the calendar actually filled up.
One honest maintenance note, a year on: the backlit niche and brass tapware look exactly as good as installation day, but the brushed brass finish shows water spots more visibly than the old chrome ever did, and it gets a wipe-down after every shower now — a small, ongoing cost of the upgrade that doesn’t show up in any renovation budget spreadsheet.
Suggested gallery placement (before / after):
- Before: wide shot down the original hallway into the bathroom, showing the pink tub, mosaic floor, and dated vanity — alt text: “Original small bathroom before renovation, pink bathtub and mosaic tile floor.”
- Before: close-up of the window shelf storage nook, cluttered with toiletries — alt text: “Cluttered window ledge storage in a small bathroom before remodel.”
- After: freestanding tub beneath the skylight, glass shower screen in the foreground — alt text: “Renovated small bathroom with freestanding tub, skylight, and frameless glass shower screen.”
- After: floating timber vanity with vessel basin and brass tapware — alt text: “Modern floating vanity with vessel sink and brushed brass tapware after bathroom renovation.”
- After: sliding barn door installed at the bathroom entrance — alt text: “Black sliding barn door hardware at renovated ensuite entrance.”
DIY vs. Licensed Trade: What You Can Legally Do Yourself
This is the distinction most guides blur, and it’s the one that matters most if you’re project-managing your own renovation: a permit not being required doesn’t automatically mean you’re allowed to do the work yourself. Licensing rules and permit rules are two separate systems that happen to overlap a lot.
| Generally DIY-legal (check locally first) | Requires a licensed trade regardless of permit status |
|---|---|
| Demolition and strip-out | Any new plumbing connection to the water supply or drainage system |
| Tiling and grouting | Any new or altered electrical circuit |
| Painting and cosmetic finishes | Gas fitting (for tankless/instant water heaters) |
| Installing a vanity where plumbing already exists in the same spot | Waterproofing/tanking sign-off in most Australian states, and increasingly elsewhere |
| Assembling and mounting fixtures that don’t involve new wiring or plumbing | Final connection of any fixture to an active electrical circuit |
| Re-rendering and re-concreting (structural engineering sign-off may still apply for anything load-bearing) | Structural alterations involving load-bearing elements |
A useful way to think about it: if a mistake could cause a shock, a flood, or a collapse, it’s licensed-trade territory — permit or no permit. Everything else is a judgment call between your own skill level and your risk tolerance.
Cost of Permits and Compliance
Permit fees are one of the most under-explained parts of this whole process. Most articles say “varies” and leave it there, which isn’t much use when you’re trying to build a budget. Here are realistic ranges — not quotes, and not a substitute for your local fee schedule, which is usually published online and takes about two minutes to find.
| Country | Building permit | Plumbing permit/compliance | Electrical permit/compliance |
|---|---|---|---|
| United States | Roughly $50–$300, often scaled to project value in larger cities | Roughly $50–$200 | Roughly $50–$200 |
| United Kingdom | Building Control fees often £150–£350 depending on notice type | Included in Building Control fee in most cases | Self-certified by a Competent Person Scheme electrician, or a similar Building Control fee if not |
| Canada | Often $75–$500 CAD, sometimes calculated as a percentage of project value | Frequently a separate $50–$200 CAD fee | Frequently a separate $50–$200 CAD fee |
| Australia | Roughly $300–$1,200 AUD through council or a private certifier | Plumbing compliance certificate typically $150–$400 AUD | Certificate of Electrical Safety typically $100–$300 AUD |
Two costs people consistently forget to budget for: re-inspection fees if a stage fails its first inspection, and the time cost of a permit application sitting in a queue while trades are booked and waiting.
How to Apply for a Permit — Step-by-Step
- Confirm which permits your specific scope needs. Use the universal checklist above against your actual plan — not the finished look, the systems you’re touching.
- Check whether your building type adds a layer. Apartment, condo, or strata property? You’ll likely need a second approval before you can even apply for the government permit — see the next section.
- Gather your documentation. Typically a site plan, a description of the work, and — for structural or major plumbing changes — drawings from a licensed designer or engineer.
- Submit the application to your local building department, council, or Building Control office, along with the fee.
- Wait for approval before demolition begins on anything permit-triggering. Starting early is the single most common way homeowners end up with a stop-work order.
- Schedule inspections at each required stage — typically rough-in (before walls close up) and final. This is where waterproofing and drainage get checked before they’re hidden behind tile.
- Receive your final sign-off or compliance certificate, and keep it. You’ll want it for insurance and for disclosure at resale.
If you’re hiring a full-service contractor, they’ll often handle steps 3–6 as part of their fee — which is exactly what “we pull the permits for you” means in a quote, and it’s worth asking explicitly whether that’s included or billed separately.
What Happens If You Skip a Required Permit
This is the section that tends to get either glossed over or turned into scare-copy. Neither helps. Here’s what actually happens, in roughly the order homeowners encounter it.
- A stop-work order. If unpermitted work is discovered mid-project — often because a neighbour reports it or an inspector notices during an unrelated visit — the building department can halt work until it’s regularized.
- Forced rectification. In the worst cases, this means opening up finished walls or floors to prove the work meets code, which costs far more than the original permit ever would have.
- Insurance claim denial. This is the consequence people underestimate most. If a water leak or electrical fault traces back to unpermitted work, insurers frequently deny the claim outright — meaning you’ve paid for the renovation and the damage.
- Resale complications. Unpermitted work is a common flag in a buyer’s inspection, and in many places it has to be disclosed. Buyers’ solicitors, conveyancers, or agents raising it can delay a sale or force a price renegotiation at the worst possible time.
If work is already done without a permit, most jurisdictions have some form of retroactive or “as-built” permit process — sometimes called regularization. It typically involves an inspector opening up enough of the finished work to verify it meets code, which is more invasive (and more expensive) than getting the permit before you started. It’s not a dead end, but it’s the expensive path, not the easy one.
Apartments, Strata, Condos & HOAs — The Extra Approval Layer
If you own an apartment, unit, condo, or a property inside a homeowners association, there’s a layer of approval that has nothing to do with the government and everything to do with your building’s own rules. A government permit confirms your renovation meets safety and construction code. Building, strata, or HOA consent confirms your renovation meets the rules your specific building has set — which can be stricter, and cover things a permit never touches: approved working hours, which trades are allowed on site, noise restrictions, and whether any work can affect shared plumbing risers or waterproofing membranes that other units rely on.
These two approvals are genuinely separate processes, run by different people, and you typically need both — not one or the other. A council permit doesn’t authorize you to start jackhammering a shared wall at 7am on a Saturday if your strata bylaws say otherwise, and strata sign-off doesn’t exempt you from a plumbing permit if you’re relocating a drain.
The practical implication: apartment renovators should budget extra time, not extra risk — the strata or HOA approval step is usually the slower one, since it depends on a committee or manager’s schedule rather than a fixed permit-processing timeline.
%20(12).webp)
%20(11).webp)
%20(6).webp)
%20(8).webp)
%20(9).webp)
Common Homeowner Mistakes During the Permit Process
- Assuming “we didn’t change the layout” means no permit is needed. Waterproofing and drainage are regulated as systems, independent of layout.
- Treating a handy friend or relative as equivalent to a licensed trade. It’s not just a permit issue — it’s a licensing issue, and it’s usually the thing an insurer checks first after a claim.
- Starting demolition before approval comes through, because trades are booked and the calendar feels tight. This is the single fastest route to a stop-work order.
- Not checking for a second approval layer if you’re in an apartment, condo, or strata property, and finding out mid-project.
- Underestimating inspection queue times when scheduling trades, leading to expensive gaps where a paid tradesperson is standing around waiting on a sign-off.
- Assuming permit rules from your last house apply to your new one, especially after a move to a different city, county, or even a different state or province.
- Skipping documentation — not keeping copies of permits, inspection sign-offs, and compliance certificates, which you’ll need again at resale.
- Confusing “permit not required” with “I can legally do this myself.” They’re different questions with different answers.
Permit Timeline — How Long Approval Really Takes
Realistically, expect permit approval to take anywhere from a few days for a straightforward, single-trade permit to several weeks for anything touching structure. On the six-week case study project above, the permitting and inspection stages weren’t the slowest part — trade availability and material delivery were — but the inspection gaps still shaped the schedule more than the hands-on labour did.
A rough shape to expect:
- Application and initial review: days to two weeks, depending on your local department’s backlog.
- Approval and pre-work inspection (if required): typically scheduled within a week or two of approval.
- Rough-in inspection: scheduled once plumbing and electrical rough-in is complete, before walls close up — this is often the stage that determines your real project pace, since work has to pause until it’s signed off.
- Final inspection and sign-off: at project completion.
Build inspection wait time into your schedule the same way you’d budget for tile lead times — it’s a real constraint, not a formality to skip past.
Frequently Asked Questions
Do I need a permit to retile my bathroom if I’m not changing the layout? Usually not for the tile itself, but if retiling a shower recess means removing and replacing the waterproofing membrane underneath — which it almost always does — that step is regulated even though the layout stays the same.
Can I replace a bathtub with a walk-in shower without a permit? Almost never. This typically changes drainage, waterproofing, and often the wall structure around the wet area, all of which are permit triggers in every country covered here.
Do I need a permit to move my toilet just a few inches? Yes, in most jurisdictions. Any change to drainage or supply line position, however small, is treated as new plumbing work requiring a permit and licensed installation.
Is a permit required to simply replace a bathroom vanity? Not if it’s going in the exact same spot with the same plumbing connections. If you’re relocating it, even slightly, that’s a plumbing change and likely needs a permit.
Do I need council or strata approval to renovate an ensuite in an apartment? Typically both. A government building/plumbing/electrical permit and separate building or strata consent are usually required side by side, not as alternatives.
What happens if I sell my house with unpermitted bathroom work? It’s commonly flagged during a buyer’s inspection or conveyancing search, which can delay the sale, trigger a price renegotiation, or in some places require disclosure upfront.
Can I legally do my own bathroom electrical work? In most places, no — not the connection to an active circuit. Even where a permit technically isn’t required for minor like-for-like work, licensing rules for wet-area electrical are stricter than for other rooms.
How much does a bathroom renovation permit typically cost? Ranges vary widely by country and municipality, but as a rough guide: US and Canadian building permits often run $50–$500; UK Building Control fees are commonly £150–£350; Australian building permits often run $300–$1,200 AUD, with separate plumbing and electrical compliance certificates on top.
How long does it take for a bathroom renovation permit to be approved? Anywhere from a few days for a simple, single-trade permit to several weeks for anything structural. Rough-in inspection scheduling, not the initial application, is usually the bigger scheduling constraint.
Permit rules change and are enforced locally. This guide is a starting framework for the right questions to ask — always confirm current requirements and fees with your local building department, council, or Building Control office before demolition begins.
Bathroom Remodeling Planning & Budgeting
- How to Plan a Bathroom Layout on Paper Before You Renovate
- Bathroom Renovation Mistakes to Avoid: A Homeowner’s Real-World Guide
- Do You Need a Permit to Renovate a Bathroom? (US, UK, Canada & Australia Rules Explained)
- Full Gut Renovation vs. Partial Remodel: How to Choose the Right Bathroom Renovation Plan
- Bathroom Renovation Timeline by Phase: What Happens Each Week
- How Long Does a Bathroom Renovation Take? A Real DIY Timeline, Week by Week
- Bathroom Renovation Checklist: The Correct Order of Steps From Demo to Finish
 (1).webp)
.webp)
.webp)
.webp)