Showing Posts From
Bathroom renovation
PEOPLE ALSO READ...
.webp)
Converting a Tub to a Shower: Does It Hurt Resale Value?
Will taking out the tub actually cost you at resale?Converting a tub to a shower can hurt resale when it removes the only bathtub in the home, because many family buyers want one. If another bathroom keeps a tub, the risk is generally low. Local buyer expectations decide the rest. That's the short version. The rest of this article covers what most "tub vs shower" posts skip: how to tell which side of that line you're on, and what the swap costs once the old tub is out and the floor is open. Most homeowners don't realize the real question isn't tub versus shower. It's whether you're about to remove the last tub in the house, and whether the pipes under that tub will allow what you've drawn on paper. The first question tends to come up when an agent mentions it. The second usually comes up mid-demolition, when changing course is expensive. Quick takeawaysCount your tubs first. One tub elsewhere in the house is the biggest resale safeguard. A same-footprint swap is often straightforward, but drain position and size decide the real cost. Slab floors, upper-floor joists and hidden rot are the usual budget-breakers. Full bath versus three-quarter bath labels vary by region, so confirm with a local agent. Waterproofing is the one part of a shower build where shortcuts show up years later. If you may sell soon, get an agent's view before demolition. This decision is hard to reverse.The last-tub test: who should convert and who should think twice Walk through the house and count the bathtubs. That number does most of the work. If the swap leaves you with none, you're taking on resale risk. Buyers with babies and toddlers often treat a tub as a requirement, and some will filter their searches for one. If at least one tub remains, a converted bathroom is usually a safe bet. In a primary bathroom it's often a real upgrade, since a shower is easier to step into and easier to keep clean. There's no reliable universal percentage for what a missing tub costs you, and anyone quoting one is guessing. Local sold listings are better evidence. Ask an agent which comparable homes with and without tubs sold nearby, and how quickly.Convert Think twiceAnother tub remains in the house This is the only tub in the houseYou're staying for years You may sell within a few yearsSomeone in the household struggles with the step-over Your likely buyers are families with young childrenThe tub hasn't been used in ages The property is a rental aimed at familiesUS and Canada: A bathroom with a toilet, sink and shower but no tub is typically called a three-quarter bath. Whether that changes the official bathroom count varies by market and appraiser, so confirm locally.UK: Terraces and smaller homes often have just one bathroom, so losing the only bath matters more than losing one of several. Listings may call the result a "shower room".Australia: Shower-only bathrooms are common in apartments, so buyers there are used to them. A family house with a single bath is a different conversation, so ask a local agent.What changes under the floor and inside the walls On paper, a 60-inch tub and a 60-inch shower base look like a clean swap. They aren't, because the tub drains at one end while many shower bases expect the drain somewhere else. Shower drains are also commonly specified larger than tub drains. So the plumber's first job is working out what happens at the trap. Four things decide how hard that is:Floor type. On a timber floor with access from below (a basement ceiling or crawlspace), moving a drain mostly comes down to joist direction and pipe run length. Joists can't be notched freely, and limits vary by code, so verify locally. On a concrete slab, moving a drain means cutting concrete, which is a different class of job. Wet wall contents. Valve height, supply lines, vents and sometimes wiring all sit in that wall. Nobody should open it without knowing what's inside. Hidden damage. Tubs hide slow leaks well. Subfloor rot often shows up only once the tub is out. Hot water (especially in the UK). A tub tolerates weak flow because you wait for it to fill. A shower doesn't. Whether you have a combi, tank-fed or unvented system changes how the new shower will actually feel, so check pressure and flow before you commit.Change type Rating What decides it Who does it Cost directionSame alcove, drain at same end, prefab base Easy to moderate Drain alignment and size, subfloor condition Plumber or qualified contractor LowestSame footprint, custom tiled base Moderate Waterproofing skill, curb detailing Tiler plus plumber (licensed waterproofer where required) MidDrain moved to centre of larger base, timber floor with access Moderate to hard Joist direction, notching limits, pipe run length Plumber, possibly a builder Mid to highDrain moved through a concrete slab Hard Slab cutting, repiping, reinstatement Plumber plus concrete cutter HighShower enlarged into a closet or neighbouring wall Hard Wall contents, framing, wet wall Builder plus plumber HighLoad-bearing wall altered or soil stack relocated Structural Structure and stack position Structural engineer plus licensed trades HighestRatings are general guidance. Verify with your local building authority and a qualified professional.What happens to the budget once the old tub is out Most quotes look reasonable until demolition day. That's when the line items nobody could see (rotted subfloor, a drain in the wrong spot) get added. The table below breaks the job into lines so you can see where the swing comes from. These are estimated ranges in USD for planning, not quotes.Line item Low Typical High Main variance driverDemolition, tub removal, disposal $300 $600 $1,200 Cast iron vs acrylic tub, stairs, disposal feesShower base $250 $700 $2,500 Prefab vs custom mortar bedDrain and plumbing adjustment $300 $1,000 $4,500+ Slab vs timber, pipe run length, accessShower valve and trim $200 $500 $1,500 Valve type, wall accessWalls and waterproofing $800 $2,500 $6,000 Prefab surround vs tile, membrane system, labour ratesSubfloor or framing repair $0 $400 $2,500 Hidden rot found at demolitionDoor or curtain $50 $400 $2,000 Curtain vs frameless glassPermit and inspection $0 $150 $600 Jurisdiction, and whether plumbing changesEstimated total ~$1,900 ~$6,250 ~$20,800+ All the highs rarely coincideThe cheapest version of this job keeps the drain roughly where it is and uses a prefab surround. The most expensive is a tiled shower with a drain relocated through concrete. Same room, same "tub to shower" label, wildly different invoice. A quote near the top of that range usually means a slab drain move, rot, or both. If a quote comes in far below the typical column, ask what it leaves out. UK, Canada and Australia: Once converted to local currency, costs broadly land in a similar range. Labour rates, city and access move the number more than the exchange rate does. Check whether quotes include VAT (UK), GST/HST (Canada) or GST (Australia). Budget a 10-20% contingency for hidden conditions. If a contractor's quote has none, that's worth a question.Before you book anyone: check these in your own house A handy DIYer can usually handle demolition and fitting a prefab surround. The drain, trap and waterproofing are where mistakes hide for years, and many regions require licensed trades for them. Do the homework below first, so any quote you get is based on what's actually in your walls and floor. Is there another bathtub in the house? If not, have you asked a local agent about resale impact? Floor type confirmed: concrete slab, or timber floor with crawlspace or ceiling access below? Tub drain position noted, and where the shower drain would need to go. Joist direction checked if the drain has to move on a timber floor. Wet wall contents identified (supply pipes, vents, wiring) before anyone opens it. Shut-off valves located and confirmed working, at the bathroom and at the main. Hot water flow checked, especially for UK tank-fed or combi systems. Permit and inspection requirements confirmed with your local building authority. Contingency set aside for subfloor repair. Waterproofing plan agreed: who does it, and what warranty applies.Two cheap tools earn their keep here. A pin-style moisture meter and a flashlight will tell you more about the ceiling or crawlspace under the tub than guessing will. After the job, a battery-powered leak sensor near the shower is a low-cost safeguard. If you're adding a new fan, light or heated mirror in the shower area, that's an electrician's job. Zone and GFCI/RCD requirements differ by country, so verify locally.⚠️ Warning: A 60-inch tub and a 60-inch shower base look like a perfect swap, but the drain is rarely in the right place. Confirm drain position and size with a plumber before ordering the base.⚠️ Warning: Don't remove the last tub in your house on the strength of a general article, including this one. Ask a local agent for recent sold listings first, because demolition is the point of no return.⚠️ Warning: A tub's rim doubles as a waterproof barrier. A shower needs a continuous, correctly detailed membrane, and shortcuts here tend to fail slowly and invisibly. Use a licensed or qualified installer where your region requires it.Middle paths if you're not ready to lose the tub The choice isn't always tub or shower. Three options sit in between.Keep a tub somewhere else. If a second bathroom or a hall bath still has one, convert the primary bathroom and leave the tub where family buyers will look for it. Install a tub-shower combo with a lower step-in. You keep the tub for resale and kids, and the shower gets used daily. The step-over remains, so this won't suit anyone with mobility concerns. Convert the secondary bathroom only. It's often the lower-risk place to experiment, and you can see how the shower works in daily life before touching your main bathroom.If you're leaning towards a larger walk-in design, plan for the plumbing and waterproofing work in the cost table above, since enlarging a shower is where budgets usually stretch. A standard prefab base in the old tub's footprint also tends to be easier to reverse later than a custom tiled one, though nothing about demolition is truly cheap to undo.Keep, convert, or split the difference: a quick decision guide Find the line that sounds like your house.If this is the only tub in the house and you may sell within a few years, keep the tub or talk to a local agent before converting. If another bathroom has a tub, converting the primary bathroom is generally low-risk. If you're ageing in place or have mobility concerns, a low-threshold shower is usually worth more to you than to hypothetical buyers. If you have a concrete slab and want the drain moved, get a plumber's quote before committing to the layout. If the drain can stay roughly where it is, a same-footprint swap is usually the cost-efficient route. If you're a landlord or investor, check local tenant and buyer expectations before removing a tub. If you have young kids, a tub-shower combo or a tub kept elsewhere is the safer choice. If your quote includes no contingency, ask for one. Subfloor surprises are common.Questions homeowners ask before swapping a tub for a shower Does converting a tub to a shower lower my home's value? It depends on what you remove and who buys in your area. Taking out the only tub is the situation agents most often warn about, because buyers with young children usually want one. If another bathroom keeps a tub, a well-built shower is generally a low-risk change, especially in a primary bathroom. There's no universal percentage, so ask a local agent to show recent sold listings before you commit. Does it turn a full bath into a three-quarter bath? In US and Canadian listing language, usually yes. A bathroom with a toilet, sink and shower but no tub is typically called a three-quarter bath. Whether that changes the official bathroom count or an appraisal varies by market and appraiser, so confirm locally. UK and Australian listings are less formal, but "bathroom" versus "shower room" can signal whether a bath exists. Can I convert without moving the plumbing? Sometimes. In a US or Canadian alcove, tubs are commonly 60 inches long and prefab shower bases come in that length, but the tub drain sits at one end while many bases expect it elsewhere. Shower drains are also commonly specified larger than tub drains. Expect a plumber to adjust the drain and trap at minimum. Slab floors make relocation much costlier. Verify requirements with your local building authority. Do I need a permit? Often yes if you alter drain or supply lines, and sometimes even for like-for-like work, depending on where you live. Rules differ across US jurisdictions, UK Building Regulations, Canadian provincial codes and Australian state rules. Licensed trades are commonly required for plumbing and waterproofing. Unpermitted work can surface during a sale or an insurance claim, so check with your local building authority first. Is it worth converting if I'm staying for years or ageing in place? Often yes. If you're living in the house, daily comfort and safety matter more than hypothetical buyers. Stepping over a tub wall is a real hazard for some people, and a low-threshold shower is easier to use. If you may sell later, choose a design that suits future buyers and keep a tub elsewhere if you can.
How Much Does It Cost to Move Plumbing in a Bathroom Remodel? (Estimated Ranges by Type of Move)
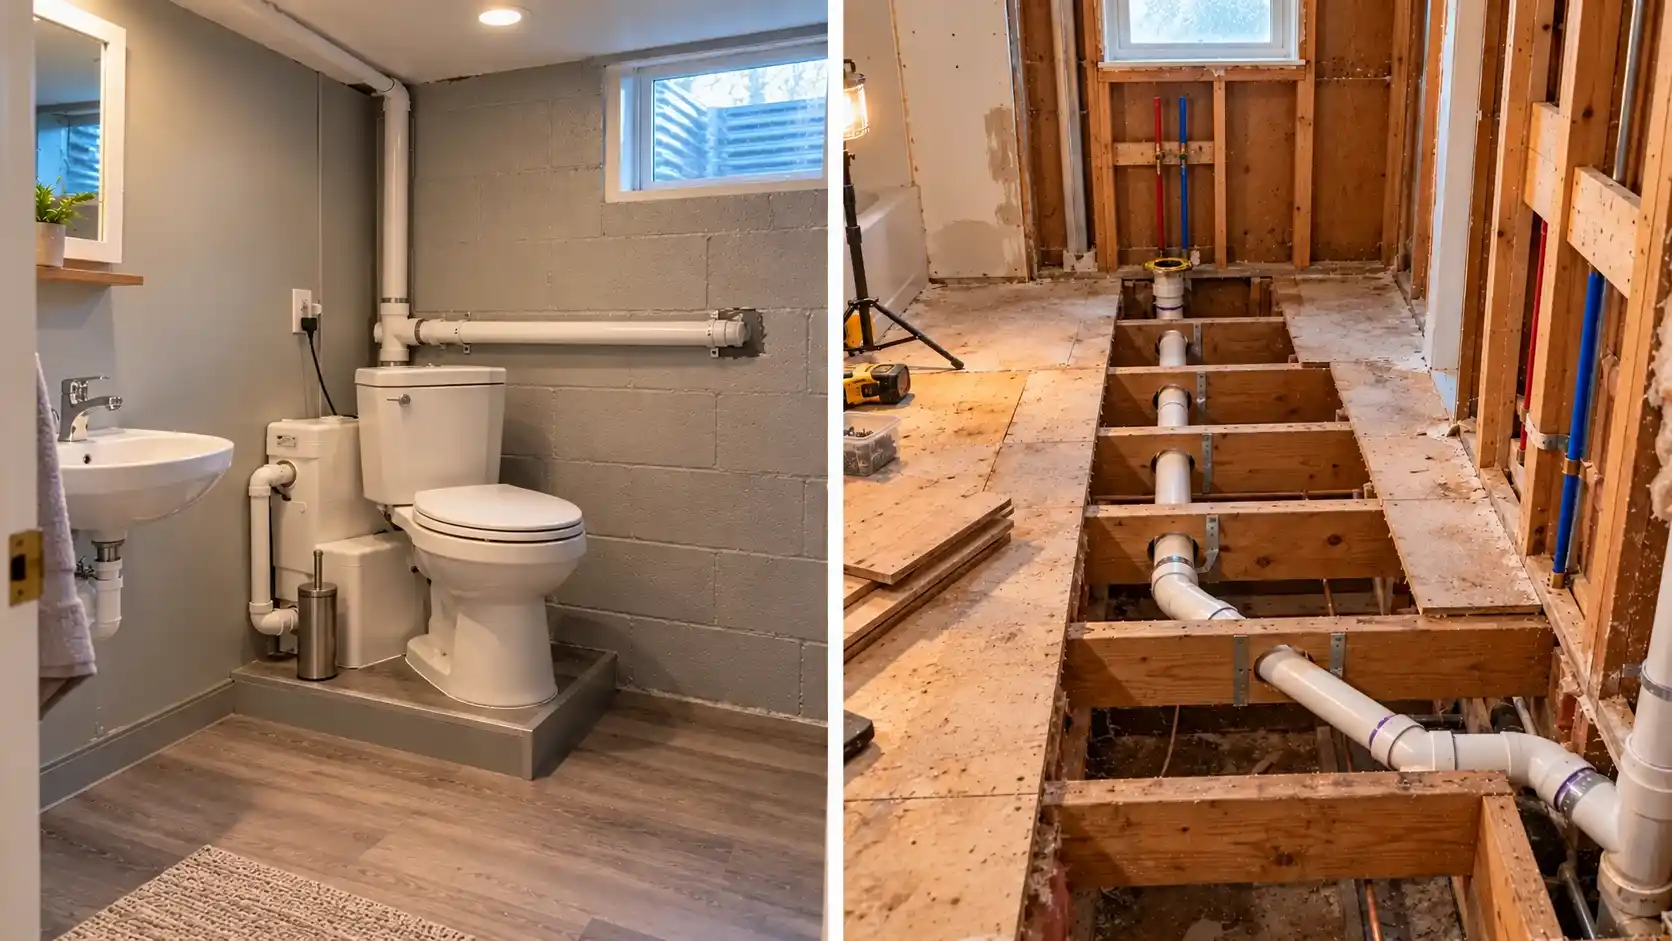
Short answer: Estimated cost to move bathroom plumbing: roughly $500–$1,500 for a short move over a timber floor, and $2,500–$8,000+ when a toilet drain must be relocated through a concrete slab. Drain distance, floor construction, and access drive the price. Almost any fixture can be moved. The better question is whether your house makes it cheap, painful, or not worth doing, and a floor plan can't answer that. It shows where you'd like the toilet. It doesn't show the stack, the joists, or the slab. This guide is built around what a plumber checks on site rather than what looks tidy on paper. Quick takeawaysDrain and stack position set the price more than the fixture does. A timber floor with access from below is the cheapest case. A concrete slab is the dearest. A few inches is cheap. Crossing joists or changing walls can add thousands. Changing your mind on paper costs almost nothing. After tiling, the same change can cost several times more. Ask for an itemised quote, because "plumbing only" figures usually leave out the repair work.Why the drain, not the fixture, sets the price Toilets are the fussy ones. They need the biggest drain in the room, a vent, and a pipe that falls steadily toward the stack. That fall is the catch: the farther you move, the lower the pipe sits in the floor, and a joist bay only has so much depth to give. Most homeowners don't realize that distance is a poor guide. Moving a toilet two feet across the joists can cost more than moving it six feet along a clear bay, because crossing joists means rerouting or notching. Sinks are far more forgiving. Shower drains sit in between: the pipe is smaller, but the slope has to hide inside the floor build-up, and the waterproofing and tile get disturbed. Moving a fixture also changes its vent path. Air admittance valves help in some jurisdictions and are restricted in others, so ask early.Change Rating What decides it Who Relative costSink along the same wall Easy Reach within the same stud bay Plumber LowSink to another wall Moderate New drain and vent path Licensed plumber Low to midToilet, short move near the stack Moderate Joist direction, vent access Licensed plumber Low to midToilet across the room or to another wall Hard Slope, joist crossings, venting Plumber, carpenter Mid to highToilet on a concrete slab Hard Cutting, trench, slab type Plumber, concrete crew HighShower drain, timber floor Moderate Joist depth, waterproofing Plumber, tiler Low to midShower drain, slab Hard Recess depth, trench, re-pour Plumber, concrete crew, tiler Mid to highStack or whole-bathroom relocation Structural Joists, framing, vent route Plumber, builder, maybe an engineer HighestRules differ by region. US codes (IRC/IPC) generally call for at least a 3-inch toilet drain and a steady fall, commonly 1/4 inch per foot on smaller drains. The UK (Approved Document H), Canada (National Building Code plus provincial codes), and Australia (NCC and AS/NZS 3500) cover the same ground in their own terms. Verify with your local building authority.What will each type of move actually cost? These are estimated ranges in USD, not quotes. Get at least two itemised local quotes before you trust any number, including these.Item Low Typical High What moves the numberSink along the same wall $300 $600 $1,200 Reach, wall accessSink to a different wall $600 $1,200 $2,500 New drain and vent pathToilet, short move (timber floor, access below) $500 $1,200 $2,500 Joist direction, flange positionToilet across the room (timber floor) $1,500 $2,800 $5,000 Run length, joist crossingsToilet on a concrete slab $2,000 $4,000 $8,000+ Cutting, trench, slab typeShower drain (timber floor) $500 $1,200 $2,500 Floor depth, waterproofing reworkShower drain (slab) $1,500 $3,000 $6,000 Recess, trench, re-pourSupply lines only (hot and cold) $300 $800 $1,800 Pipe material, wall accessStack or bathroom to another area $3,000 $6,000 $12,000+ Structure, vent route, floors affectedMake-good and permits $300 $1,000 $3,000+ Finished surfaces, local feesThe last row is the one people skip. Floor patching, the ceiling below, and inspection fees rarely appear in a plumber's number. The spread comes from access, slab versus timber, your city, and the length of the pipe run. Directionally, UK jobs are quoted in pounds and often land close to the dollar figure for small work. Canada varies by province. Australia tends toward the upper end because of licensed labour and the number of slab-on-ground homes. Treat all of that as a starting point, not a forecast.What happens when you change your mind after the tile is down? This is where budgets break. Say you decide to move the toilet to the opposite wall. The plumbing is identical at every stage. What changes is how much finished work sits on top of it.Stage What it involves Estimated cost WhyOn paper Redraw the plan, get a plumber's site visit $0–$200 Time and perhaps a call-out feeAt rough-in, before surfaces close Plumber runs new drain, vent, and supply $1,500–$4,000 Pipework is exposedAfter tile and waterproofing Open the floor, move pipes, re-tile, redo the membrane, re-inspect $4,000–$10,000+ You pay for the move plus the destructionEstimates for a timber floor. Drivers: access, tile and membrane cost, re-inspection fees. A pattern that comes up constantly in homeowner threads: the toilet "feels wrong" once the room is framed, and the fix is requested after the waterproofing is done. Walk the framed room with the plumber before anything gets closed. It's the cheapest hour of the project.What demolition reveals that a floor plan can't Old houses are full of surprises: cast-iron stacks that crumble when touched, galvanised supply lines clogged from the inside, open-web trusses nobody can cut, slabs with reinforcing you didn't know about. Two inexpensive checks often pay for themselves: a camera inspection of the main drain line, and a concrete scan before anyone cuts a slab. Some slabs contain post-tension cables, and cutting one is dangerous. Before you commit, confirm: Floor type, and what sits below it. Stack and main line location, plus pipe material and age. Joist direction, spacing, and type (solid timber, I-joist, truss). Access from below, or whether the ceiling underneath must be opened. Wet wall contents: stack, vents, supply, wiring, any flue. Vent route for the new position. Shut-off valves tested before demolition, since old ones can fail when turned. Slab details: as-built drawings if you have them, plus a scan. Permit and inspection hold points, so nothing is closed up too early. An itemised quote separating plumbing, carpentry, tile, waterproofing, and make-good.Where DIY ends and a licensed plumber starts DIY is realistic for the prep: choosing fixtures, clearing the room, and sometimes swapping a vanity onto existing connections. Drains, vents, and anything cut into a slab belong to a licensed plumber, and in most places they also need a permit. Check what applies to you:US: permit and licensing rules vary by state and city. UK: drainage changes may involve Building Control, and water-supply work should be done by a competent person. Canada: permits are generally required for drainage alterations, and licensing is set by province. Australia: sanitary plumbing must be done by a licensed plumber, and a compliance certificate is typically required. Wet-area waterproofing has its own standard (AS 3740).Verify all of this with your local authority.⚠️ Warning: Don't notch or drill joists to squeeze in a bigger drain without checking local rules and getting professional advice. It's a common shortcut, and it can weaken the floor. I-joists and trusses usually can't be cut at all.⚠️ Warning: A plumbing quote is not a renovation budget. If it doesn't mention floor repair, ceiling repair, tile, waterproofing, and permits, expect those costs to show up later.⚠️ Warning: Don't close the floor or wall until new pipework has been pressure-tested, flow-tested, and inspected where required. A slow drain found after tiling means tearing it out again.Move it or leave it? A quick decision guideTimber floor, access from below, new spot near the stack → usually reasonable. Get quotes. Slab, and you only want a few extra inches → don't move the toilet. Adjust the vanity size or door swing instead. Slab, and you want the toilet on the opposite wall → price the slab work, then compare it with moving the vanity or shower. Shower drain must move, shallow floor build-up → ask about a raised platform or a linear drain along the same wall. Stack on the wrong side, room below finished → budget for opening the ceiling, or keep the toilet and relocate other fixtures. Below the sewer line, as in a basement → consider an upflush system. Selling or investing → move plumbing only when it adds real function or a buyer-counted bathroom. Quote far above these ranges → ask which of slab, stack, structure, or make-good is driving it.Moving bathroom plumbing: questions homeowners ask Is it cheaper to move a toilet or a shower drain? Neither is always cheaper, because it depends on the floor and the distance. A toilet is driven by pipe size, venting, and stack distance. A shower drain needs slope inside the floor build-up and often triggers waterproofing and tile rework. On a timber floor with access from below, short moves for either can cost about the same. On a slab, both usually involve cutting concrete. Can I move a toilet to the other side of the room on a concrete slab? Usually yes, but it's one of the pricier moves. The plumber locates existing lines, cuts the slab, runs a new sloped drain and vent, backfills, and the concrete is re-poured. Scan first, because some slabs hide reinforcing or post-tension cables. Compare the price against keeping the toilet put and moving the vanity or shower. How far can you move a toilet from the stack? There's no single safe number. The limit depends on drain size, the slope you can achieve in the available floor depth, and local venting rules, such as trap-to-vent distances under the IRC/IPC or their UK, Canadian, and Australian (AS/NZS 3500) equivalents. A plumber or inspector should confirm the maximum for your house. Verify with your local building authority. Do I need a permit or a licensed plumber to move bathroom plumbing? In most places, altering drains and vents needs a permit and a licensed plumber, though rules vary. US requirements differ by state and city. In the UK, drainage alterations may involve Building Control. Canada generally requires permits, with licensing set by province. Australia requires a licensed plumber for sanitary plumbing. Verify locally. Is an upflush or macerating toilet a cheaper alternative to moving the drain? Sometimes. These units pump waste through a small-bore pipe to an existing drain, which helps where a gravity drain is impractical, such as a basement. The trade-offs are noise, maintenance, pump failure risk, and local code limits. They suit an extra toilet better than a main bathroom, so check your local rules.
.webp)
How to Make a Small Bathroom Feel Bigger: Layout Fixes Ranked by Impact and Cost
The tape measure says the room passes. The plan looked fine. Yet you still turn sideways to get past the door, bump your knee on the vanity, and wonder why a room this size feels like a phone booth. Usually the problem isn't square footage. It's door swing, blocked sightlines, and clearances that technically pass but don't work for a real person with a towel in hand.Quick answer: Fix the layout before the decor. Swap the swinging door for a pocket or outswing door, choose a compact or wall-hung toilet, replace the shower curtain with clear glass, and keep sightlines open. Then add mirrors, lighting, and color.Quick takeawaysDoor swing is usually the cheapest big win. Start there. A clear glass panel opens the room more than any paint color. Compact and wall-hung fixtures help, but check wall depth and the existing drain position first. Moving a toilet or shower drain is possible but often poor value, especially on a concrete slab. Check pocket-door and niche walls for pipes and wires before you commit. Code minimum is not comfortable. Plan to the comfortable figure where you can.Why Does a Bathroom That Fits on Paper Still Feel Cramped? Three things drive the feeling far more than floor area: door arc, sightline, and elbow room. A door that swings in sweeps a quarter circle roughly as wide as the door itself, often 24 to 32 inches. That arc is dead floor, and it often lands right where you need to stand. Most homeowners don't see it until the door is hung and the vanity is installed. Sightline is the second factor. If you walk in and hit a solid wall, a shower curtain, and a bulky vanity, the room reads as a box. Open the view and the same room reads as larger. Elbow room is the third. A layout can pass every minimum and still make two people shuffle past each other every morning. When you plan the layout on paper first, draw the door arc as a shaded quarter circle. It shows the problem in seconds.Layout Fixes Ranked by Impact, Cost, and How Hard They Are to Undo This ranking weighs perceived space gained against cost and how hard the change is to reverse. Start at the top and stop when the room works.# Tactic Impact Est. cost (USD) Difficulty / who What decides it1 Reverse the hinge side or make the door outswing High $100–$600 Easy / DIYer or carpenter Hallway traffic, door frame2 Surface-mounted sliding door Moderate–high $200–$900 Easy–moderate / carpenter Clear wall beside the opening; privacy gaps3 Clear fixed glass panel instead of curtain or hinged door High $400–$2,000 Moderate / glazier Shower width, splash control, floor slope4 Compact or short-projection toilet Moderate $250–$900 Easy / plumber or capable DIYer Existing rough-in distance (wall to drain center)5 Wall-hung or shallower vanity Moderate $300–$1,500 Easy–moderate / carpenter, plumber Wall strength, plumbing position6 Recessed niche or mirror cabinet Moderate $300–$1,200 Moderate / carpenter, plumber Pipes or wires in the cavity; insulation; waterproofing in wet walls7 Pocket door retrofit High $1,200–$4,000 Hard / carpenter plus trades Wall contents, structure above8 Wall-hung toilet with in-wall carrier Moderate (visual) $1,200–$4,500 Hard / plumber and carpenter Wall depth, fixings, stack position9 Relocate toilet or shower drain Variable $1,500–$7,000+ Hard–structural / plumber; engineer if joists are cut Joist direction, slab, stack distance10 Borrow space from a closet or hall High $3,000–$12,000+ Moderate–structural / builder Wall type, permitEstimated ranges in USD, not quotes. UK, Canadian, and Australian pricing differs with local labor rates and materials, and London and major Australian cities often run higher on trade labor. Variance comes from access, slab vs. timber floor, city, and pipe run length. Get local quotes. Terminology shifts by region. What Americans call a vanity is a basin unit in the UK, and "rough-in" is "first fix" there. A shower door is a shower screen in the UK and Australia.⚠️ Warning: Don't commit to a pocket door until the wall has been opened or professionally scanned. A pocket needs a clear cavity, and bathroom walls often hold supply pipes, drain or vent lines, wiring, or structure. Any of these can turn a modest job into a rebuild. A pipe and cable detector or a borescope through a small inspection hole is cheap insurance.The Clearances Every Trick Has to Respect Every tactic above can backfire if it breaks these numbers.Fixture / zone Widely published US minimum (IRC/IPC) Comfortable target NotesToilet center to side wall or vanity 15 in (about 380 mm) 18 in or more Two-person homes feel the difference dailyClear space in front of toilet 21 in (about 530 mm) 24–30 in Don't let the door arc cut through this zoneClear space in front of vanity 21 in 30 in Shared use needs the larger figureShower interior About 30×30 in, able to contain a 30 in circle 36×36 in or larger Narrow showers may need a door instead of an open panelDoor arc vs. fixture zones No universal figure; local interpretation varies Arc clears toilet and shower approach, or use a pocket/outswing door The most common "fits on paper" failureCode systems differ: IRC/IPC in the US; UK Building Regulations (Approved Documents G, M, and P) plus manufacturer guidance; the National Building Code of Canada plus provincial plumbing codes; and the NCC with AS/NZS 3500 and AS 3740 in Australia. The UK and Australia often defer fixture spacing to manufacturer and accessibility guidance rather than one prescriptive figure. Verify with your local building authority. Code minimum means "legal to install," not "pleasant to use." Where you have the room, plan to the comfortable column.What Happens When You Move the Toilet to Win Space On a drawing, sliding the toilet 18 inches sideways looks trivial. In the house, it means rerouting a drain and vent, and the cost depends on what's under your floor.Stage What happens Est. cost (USD) DriversOn paper Measure, sketch, confirm stack location and floor type, get a plumber's opinion $0–$300 Plumber visit feeFloor open, no new tile Reroute drain and vent, adjust flange, patch floor $1,500–$4,500 on timber with a short run parallel to joists; $3,000–$7,000+ on a slab Slab saw-cutting, joists across the run, pipe run length, cityAfter tile and waterproofing Tear out finished surfaces, redo plumbing, re-waterproof, re-tile, possibly re-inspect Add $1,500–$5,000+ to the above Waterproofing redo, matching tile, delaysEstimated ranges only. The principle holds everywhere: the same move costs far more once tile and waterproofing are down. Stack position, joist direction, and floor type decide the price more than the toilet itself. A shower drain move is a different problem. The pipe is smaller, but it is tied to the waterproofed floor and pan. Stop and call a professional if:The route needs cutting through a concrete slab Joists run across the planned drain path The wall you want to open may be load-bearing Existing pipework is unknown, corroded, or very oldMoving plumbing generally triggers permits and inspections, so check with your local building authority, hire licensed trades, and keep a contingency for surprises once the floor is open.⚠️ Warning: A wall-hung toilet is only as good as its carrier and fixings. Hanging one on an ordinary stud wall without an engineered carrier, or burying the cistern with no access panel, invites failure and costly repairs. Confirm the carrier's weight rating, the wall depth required, and local inspection rules.Tricks That Look Great in Photos and Frustrate in Daily UseTrick On paper In daily use Better approachBarn-style surface slider Saves the swing arc Privacy gaps, noise, blocked wall beside the opening Add proper latches and edge seals, or use a pocket door if the wall allowsVery shallow vanity Gains floor space Splash zone shrinks, storage vanishes Keep usable basin width; add a niche or mirror cabinetClear glass panel Open, airy feel Shows water spots and clutter Keep shelves tidy; consider a protective coatingLarge mirror wall Doubles the light Doubles the mess; steam clouds it Pair with good ventilation and a correctly sized exhaust fanCorner or tiny basin Frees a corner No elbow room for shared use Reserve for powder roomsWall-hung toilet Visible floor, easy cleaning Cistern repair needs access Plan flush-plate access at design stageLighting makes the room feel larger, but it's also where the rules bite. Bright, even light at the vanity and a fixture over the shower both help. Pick fixtures with the right water-protection rating and avoid shadowy single-source lighting.⚠️ Warning: Lighting, mirrors with built-in sockets, and glass near water fall under electrical zone rules: IP zones in the UK and Australia, GFCI/RCD protection in the US and Canada. Use correctly rated fixtures and a licensed electrician. Shower glass should be safety glass (tempered or toughened). Verify local rules.Stacking Tactics: What to Combine at Three Room Sizes Roughly 5×8 ft (1.5×2.4 m): Fix the door first, then the glass panel. Add a compact toilet or slimmer vanity next. A pocket door is the best structural upgrade if the wall is clear. Skip plumbing moves and mirror walls. Roughly 5×10 ft: Door and glass are usually enough. Consider a wall-hung vanity for visible floor. Relocating a fixture only makes sense if the stack is close and the floor is timber. Larger rooms: Cramped feelings here usually come from poor circulation or two people sharing. Prioritize comfortable clearances over tricks, and borrow space only if nothing else works.Which Fix First? A Quick Decision GuideDoor opens into the toilet or vanity space and the hallway has room → reverse or outswing it first. Hallway can't take an outswing and the wall holds no services → pocket door. If unsure, use a surface slider as a stopgap. Toilet rough-in is fixed and clearance is tight → try a compact toilet before moving plumbing. House sits on a concrete slab → treat plumbing moves as a last resort and use above-floor tactics first. Timber floor and a short drain move parallel to joists → may be feasible. If it runs across joists, ask an engineer. Renting or unable to alter walls → focus on lighting and mirrors, and change glass only with landlord consent. Might need accessibility later → plan a pocket door, level-access shower, and wall blocking while walls are open. A change would remove your only bathtub → check local resale norms first.Small Bathroom Layout Questions Homeowners Actually Ask What is the cheapest way to make a small bathroom feel bigger? Start with whatever blocks movement. Reversing the door swing or fitting an outward-opening door often costs a few hundred dollars and frees more usable floor than any decor change. Then replace a shower curtain with a clear glass panel, swap a bulky vanity for a wall-hung or slimmer unit, and add layered lighting. Color and mirrors help, but they work best after clearances are fixed. Is a pocket door worth it in a small bathroom? Often, but only if the wall can take it. A pocket door removes the swing arc entirely, which matters most when the door hits the toilet or vanity. The catch is the wall: pipes, wiring, switches, or load-bearing framing can push an estimated $1,200–$4,000 job much higher. Check the wall contents first, and consider a surface-mounted slider if the wall is unsuitable. Does a wall-hung toilet make a bathroom feel bigger? It changes how the room looks more than how it measures. Wall-hung toilets show more floor and are easier to clean around, and they often project a little less than standard bowls. But the in-wall carrier needs a deeper or built-out wall, which can eat back that gain. Compare finished wall depth, not just the bowl, and confirm the carrier's weight rating and fixing method. Can I move the toilet in a small bathroom without a huge bill? Sometimes, but it is one of the least predictable changes. On a timber floor, a short move parallel to the joists is usually manageable. Crossing joists or working through a concrete slab raises cost sharply. Stack position, vent routing, and drain slope set the limits. Try compact fixtures or door changes first, and get a plumber to confirm the stack location before designing around a move. Do I need a permit to change the door, glass, or layout? Often not for cosmetic swaps like a door or vanity, but moving plumbing, altering walls, or changing structure usually triggers permits and inspections. Rules differ: US and Canadian requirements are local, UK work falls under Building Regulations (Part P covers electrics in England), and Australia applies the NCC plus state and council rules. Check with your local building authority first, because unpermitted work can complicate resale.
_1_11zon.webp)
Minimum Size for a Full Bathroom: The Real Numbers (and Why Code Minimum Isn't the Whole Story)
Short answer: Roughly 40 square feet (5 × 8 ft) is the smallest practical full bathroom, fitting a 60 × 30 inch tub-shower, toilet and vanity. Codes set fixture clearances, not room area, so smaller layouts exist but are tight; verify locally. That's the number most people want. The rest of this guide shows where it comes from, so you can test your own room instead of trusting a rule of thumb. It's part of our bathroom layouts and space planning series.Quick numbers Imperial MetricPractical full bath (tub-shower) 5 × 8 ft, 40 sq ft about 1.5 × 2.4 mShower-only (¾) bath roughly 30–36 sq ft about 2.8–3.3 m²Standard alcove tub 60 × 30 in about 1,524 × 762 mmToilet clearance (US code) 21 in front, 15 in centerline to side about 533 mm and 381 mmQuick takeaways40 sq ft is a design convention, not a legal floor-area minimum. Code minimum often feels cramped. Aim for about 30 in in front of the toilet and 18 in each side where you can. Door swing and vanity depth are the usual reasons a plan that "fits on paper" fails. Your stack position, floor type and ceiling height can veto a layout that the tape measure approves.5 × 8 feet is the number. Here's why it works out that wayNobody legislated 40 square feet. It falls out of the fixtures. A standard tub-shower is 60 inches long, so one wall of the room has to be at least 60 in. Call that your width. Now the length: the tub takes 30 in of depth. Beside it you need a toilet zone about 30 in wide (15 in each side of the centerline, per the US IRC), then a vanity around 24 in wide. 30 in tub + 30 in toilet zone + 24 in vanity = 84 in. Give the toilet a more comfortable 18 in on each side and you're at about 90 in. Add a little for the door and framing tolerance and you land on 96 in, or 8 ft. Hence 5 × 8. There's a trap hiding in this sum. A typical toilet projects 28–30 in from the wall, and code wants 21 in in front of it. That's roughly 49–51 in, so a room only 48 in wide usually can't take a standard toilet on its long wall. And "5 feet" is measured between finished wall faces. Tile, backer board and out-of-square framing can quietly take an inch or more per wall, which is how a 60 in tub ends up not fitting a room that was framed at five feet. If you haven't already, plan your layout on paper before you buy anything. Code minimum vs. comfortable: what each fixture really needsMost homeowners don't realize that building codes mostly regulate the space around fixtures, not the size of the room. That's why you can find a legal bathroom at 30 sq ft and a miserable one at 45.Fixture / zone US minimum (IRC/IPC) Comfortable target NotesToilet, side clearance 15 in from centerline to wall or fixture (30 in zone), IRC R307.1 18–20 in each side A tub edge counts as an obstructionToilet, front clearance 21 in, IRC R307.1 About 30 in Add the 28–30 in projection when testing room widthVanity, front clearance 21 in 30–36 in Vanity depth of 16–24 in changes your walkwayWalkway No general requirement 36 in; 60 in turning circle if wheelchair use is possible Future-proofing, not required in most existing homesShower compartment Typically 30 in minimum dimension and about 900 sq in (some editions use 32 × 32 in) 36 × 36 in (about 900 × 900 mm) or larger Measure the interior, excluding valves and seatsTub-shower alcove No minimum tub size; standard is 60 × 30 in 60 × 32 in with about 30 in clear at the entry side Measure between finished wall facesBathroom door No universal minimum for a typical dwelling 28–32 in clear; pocket or out-swing door in tight rooms 32 in clear is the widely used accessible targetCeiling height About 6 ft 8 in at fixtures, IRC R305.1 7 ft+, with headroom over the showerhead Sloped ceilings over a tub are a common surpriseCode figures are widely published minimums, and each jurisdiction adopts editions differently. "Comfortable" figures are design practice, not code. NKBA planning guidelines are a common reference; confirm against the current edition.Regional notes. UK (England): The Building Regulations don't set a minimum bathroom size. Fixture sizing is practical (tubs commonly run 1,500–1,700 mm long, 700–750 mm wide; 800 × 800 mm is a common minimum shower tray), and the relevant Approved Documents cover ventilation (F), sanitation (G), accessibility (M) and electrical safety (P). Scotland, Wales and Northern Ireland have their own rules. Canada: Provincial and territorial codes build on the National Building Code of Canada, so rules vary by province. Australia: The NCC and AS/NZS 3500 (plumbing) apply, wet-area waterproofing follows AS 3740, and licensing is set by each state. Verify with your local building authority.Does a shower-only room count as a "full" bathroom?Not always, and this catches people out at resale. "Full bath" is a market label, not a code category.US: Agents and appraisers usually separate a full bath (toilet, sink, tub or shower) from a ¾ bath (shower, no tub). UK: Listings tend to say "bathroom" or "shower room." Half baths are cloakrooms. Canada: Listings often count pieces: 2-piece, 3-piece. Australia: "Bathroom," "ensuite" or "shower room," with a separate toilet often listed on its own.Here's the honest trade-off. A well-planned ¾ bath often serves a household better than a cramped full bath with a tub nobody can comfortably use. But if resale counts matter in your market, ask a local agent how it will be recorded before you give up the tub. For more on tub-free layouts, see our walk-in shower layouts and the half bath minimum size guide. Three real layouts, measured outThese cards use the fixture sizes above. Diagrams are not to scale. Card 1: Practical minimum full bath, 5 × 8 ft (60 × 96 in, 40 sq ft) +-----------------------+ far wall (60") | TUB-SHOWER 60x30 | +---+-------------------+ |WC | | left wall: WC, then vanity | | open floor | +---+ | |VAN| | +---+-------[DOOR]------+ near wall (pocket or out-swing)Layout: Tub across the far end. Toilet centerline about 18 in from the tub edge. A 24 in wide vanity (about 21 in deep) beside it, near the door. What works: About 32 in in front of the toilet (60 in minus about 28 in projection) and about 39 in in front of the vanity. Side clearance beats the 15 in minimum. What to avoid: An in-swing door landing on the vanity or toilet, a vanity wider than about 30 in unless the door is a pocket or out-swing, the wrong tub drain hand, and any finished width under 60 in.Card 2: Shower-only (¾) bath, 6 × 6 ft (36 sq ft), legal but tight +-------------+----------+ | WC | SHOWER | far wall (72") | | 36 x 36 | +-------------+----------+ | | | open floor ~23" | | [DOOR]| right wall +--[ VANITY 21" deep ]---+ near wallLayout: 36 × 36 in shower in the far corner, toilet on the far wall about 18 in from the side wall and from the shower, vanity on the near wall. What works: Side clearances beat 15 in. About 23 in between toilet front and vanity front is code-legal under the IRC but cramped day to day. What to avoid: An in-swing door (nowhere to go), a shower door swinging toward the toilet, and a deep vanity. A slim 16–18 in vanity buys back 3–5 in of walkway. And don't list it as a "full bath."Card 3: Comfortable full bath, 6 × 10 ft (72 × 120 in, 60 sq ft) +----------------------+--+ | TUB 60" x 30" |12| far wall (72"); 12" shelf/niche +---+------------------+--+ |WC | | left wall run: WC, then vanity +---+ | |VANITY 36"| walkway 44" | +---+----------[DOOR]-----+Layout: Tub across the far end with a 12 in shelf. Toilet and a 36 in vanity share the left wall. What works: About 44 in in front of the toilet and about 51 in in front of the vanity. The door can swing in if hinged against the open side. What to avoid: A second vanity or linen cabinet inside the toilet's clearance zone, and setting a heavy cast iron tub without checking the floor framing.If these still feel too cramped, small bathroom design ideas covers the tricks that make a tight room feel larger. What happens when the room is the right size but the house says no?This is where "fits on paper" plans die. The room can be big enough and the house can still refuse. The stack (the vertical soil pipe) and the drain slope decide how far a toilet can move. A concrete slab means saw-cutting and trenching to relocate a drain. A timber floor means notching and boring rules apply, and joist direction matters, sometimes enough to need an engineer. Moving a toilet and moving a shower are also different problems: the toilet is a slope-and-venting problem, while the shower is mostly waterproofing and a small drain. Headroom is the other quiet veto in attics and under stairs, over both the toilet zone and the showerhead. What a wrong plan costs, by stage (example: moving a toilet drain about 4 ft so a 60 in tub and clearances fit)Stage What happens Estimated cost (USD)1. On paper Redraw the plan, tape a full-size outline on the floor $0–$3002. Walls and floor open, before waterproofing and tile Plumber re-runs drain, vent and flange About $800–$2,500 over timber; $2,000–$5,000 through a slab3. After tile and waterproofing Same move plus demolition, new waterproofing and tile, re-inspection About $3,500–$9,000+Planning ranges, not quotes. Get itemized local quotes. UK figures in GBP often land in a similar numeric range (higher in London and the South East), Canadian quotes in CAD are broadly comparable after conversion, and Australian labor is typically at or above US levels. Everywhere, the biggest swing factor is whether the drain has to go through a concrete slab. See the cost of moving plumbing and hidden renovation costs. Before anyone swings a hammer☐ Locate the soil stack and vent. How far is the toilet from it? ☐ Confirm the floor type (slab, timber joists, or concrete over timber) and joist direction. ☐ Confirm access from below or the ceiling underneath for new pipe runs. ☐ Measure between finished wall faces, not stud faces. ☐ Check what's inside any wall you plan to move: pipes, wiring, ducts, load-bearing function. ☐ Make sure the main and local shut-offs actually work. ☐ Check ceiling height over the showerhead and clearance zones. ☐ Plan the exhaust duct route outdoors (see choosing a bathroom exhaust fan). ☐ Confirm the tub, base or vanity can physically pass through doorways and stairs. ☐ In pre-1980s houses, test suspect floor tile, pipe wrap and paint for asbestos and lead. ☐ Check whether you need a permit with your local building authority.DIY vs. professionalDIY: Measuring, drawing, cardboard or tape floor templates, and choosing fixtures. A laser measure and a cheap stud finder earn their keep here. Professional: Drain and vent changes, structural questions, electrical in wet zones (jurisdiction-dependent), waterproofing (licensed in parts of Australia), and permits. Not sure which side you're on? That's the point to hire a contractor or at least a plumber for a site visit.Whatever you decide, waterproofing before tile is the stage you don't want to redo. For the bigger picture, our complete bathroom renovation guide walks through the whole project. Eight layout mistakes that only show up after the tile is downMeasuring stud-to-stud, then ordering a 60 in tub. Finished walls take inches. Measure finished faces or confirm tub rough-in dimensions first. Putting a toilet on a 48 in-wide wall. Projection plus clearance is over 48 in. Use the end wall, or a compact or wall-hung toilet. A door swinging into the toilet or vanity. The arc eats your clearance. Go pocket or out-swing. Squeezing the toilet under 15 in each side. Shift it or narrow the neighbouring fixtures. Wrong tub drain hand. Stand facing the tub and confirm left or right before ordering. A shower door swinging toward the toilet. Use a sliding door or fixed panel. Judging a shower by square inches alone. 30 × 30 meets the area but you can't turn around. Go 36 × 36 in. A light or outlet in the wet zone. Follow GFCI (US) or RCD and IP zone (UK/AU) rules, and have a licensed electrician place and wire it.One more that never makes the plan: a small, damp room is where mould thrives, so ventilation is part of the layout. See preventing mould in small bathrooms, and review common layout mistakes before you commit.⚠️ Warning: Don't remove, notch or relocate a wall or joist to "find" extra inches until you know whether it's load-bearing and what's inside it. Stacks, ducts and wiring often hide in walls that look removable. Call a structural engineer or builder first.⚠️ Warning: In houses built before about 1980, test suspected flooring, pipe wrap and paint for asbestos and lead before demolition. In parts of Australia, wet-area waterproofing must be done by a licensed waterproofer, and elsewhere inspectors may require documented waterproofing. Verify locally.FAQ What is the smallest size a full bathroom can be? About 40 square feet (5 × 8 ft) is the practical minimum for a toilet, sink and 60-inch tub-shower. Replace the tub with a shower and you can drop to roughly 30–36 square feet, though that is usually called a three-quarter bath. Codes such as the IRC regulate clearances around fixtures, not room area, so smaller layouts work only if every clearance does. Verify with your local building authority. Is there a legal minimum size for a bathroom? Usually not as a single floor-area figure. Building rules focus on fixture clearances, ventilation, ceiling height, waterproofing and electrical safety. Examples include the IRC/IPC in the US, the Approved Documents in England, provincial codes based on the National Building Code of Canada, and the NCC with AS/NZS 3500 in Australia. Rental, new-build and accessibility rules can add requirements, so confirm locally. How much clear space do I need in front of a toilet? The US IRC requires at least 21 inches (about 533 mm) in front and 15 inches (about 381 mm) from the toilet centerline to a side wall or fixture. Daily use is easier with roughly 30 inches in front and 18 inches each side. Many toilets project 28–30 inches, so a 48-inch-wide room is usually too narrow for one on its long wall. Verify locally. Does a three-quarter bath count as a full bathroom when selling? It depends on who is counting. US appraisers and agents commonly separate a full bath from a three-quarter bath (shower, no tub), but conventions vary by market. Canadian listings often use piece counts, and UK or Australian listings may just say "bathroom" or "shower room." Ask a local agent or appraiser how it will be counted before assuming a shower-only room adds a full bath. Can I fit a full bathroom in a closet or under the stairs? Rarely. A tub-shower needs about 60 inches of wall length, and headroom, drain slope and vent routing all have to work. Under stairs, headroom over the toilet and showerhead is usually the limit; the IRC uses about 6 ft 8 in at fixtures, so verify locally. A half or three-quarter bath is more realistic. Have a plumber check the stack location before you design anything. If you're looking at a lower level, read up on basement bathroom plumbing first.
.webp)
What Bathroom Trends Are Outdated in 2026? (And What to Do Instead)
In 2026, the most outdated bathroom trends are cold all-white or all-gray schemes, matte black fixtures everywhere, vessel sinks, tile countertops, faux wood-look tile, single accent walls, and overly matched sets. Designers now favor warm, textured, layered spaces that hold up to daily use. That's the short version. The longer version matters more, because "outdated" is one of those words that can talk you into spending $15,000 you didn't need to spend. A bathroom is not a living room. You can't swap the tile the way you swap a throw pillow, and a wrong call on a countertop will annoy you every single morning for years. So this guide does two things. It tells you which looks have actually aged badly, and it tells you which of those are worth fixing, which are fine to live with, and which cheap changes get you 80% of the way to a current-feeling bathroom. Quick takeawaysCold palettes are the biggest "dated" signal. All-white, all-gray, and icy blue rooms feel clinical. Warm neutrals, clay, cocoa, and soft greens are taking over. Matte black and vessel sinks look great in photos and cause the most complaints once you live with them. Water spots, splash, and cleaning around awkward bases are the usual culprits. A single feature wall and a perfectly matching fixture set now read as staged, not designed. Overhead-only lighting is out. Layered, dimmable, warm light is in, and it's the cheapest big upgrade you can make. Paint, bulbs, a mirror, hardware, and a vanity top can modernize a bathroom for a few hundred dollars. Tile and layout are the expensive, hard-to-reverse decisions. "Outdated" does not mean "rip it out." A clean, functional white bathroom is still a safe bathroom to own and to sell.Why bathroom trends date faster (and hurt more) than any other room Most homeowners don't realize how unusual the bathroom is as a design problem. In a bedroom, almost everything is swappable. Bedding, art, lamps, even the paint, all change over a weekend. In a bathroom, the most visible surfaces (tile, tub, vanity, countertop, floor) are glued, grouted, and plumbed in place. Changing them means demolition, waterproofing, and a week or more without a working shower. That's why a useful way to think about bathroom trends is by how hard each decision is to undo:Layout and plumbing (hardest) Tile and waterproofing Vanity and countertop Faucets and fixtures Lighting and mirror Paint, hardware, textiles, and accessories (easiest)Be cautious at the top of that list and experiment at the bottom. If you take only one idea from this article, take that one. A bold paint color that dates in two years costs you a Saturday. A bold tile that dates in two years costs you a renovation.The 12 outdated bathroom trends in 2026 Design publications have been remarkably consistent about what's fading. One 2026 trends report from Fixr.com, which surveyed roughly 100 designers and home stagers, ranked all-white and all-gray bathrooms as the most-cited look losing momentum, well ahead of vessel sinks, tile countertops, wood-look tile, and matte black hardware. It's a small sample, so treat it as one signal rather than gospel, but it lines up with what most design coverage is saying. Here's the list, with what actually happens when you live with each one. 1. All-white and all-gray color schemesThis is the big one. White tile, gray grout, chrome fixtures, a white vanity, and cool-white bulbs add up to a room that feels like a showroom or a clinic. The thing most articles miss: white and gray aren't the problem. The cold combination is. Cool-white light, gray grout, and zero texture make even good tile feel flat. What to do instead: If the tile and tub are in good shape, warm the room before you replace anything. Repaint the walls in a warm neutral, switch to 2700K–3000K bulbs, add wood or stone, and swap chrome for brushed brass or nickel. For new projects, look at warm stone-look porcelain, sand and clay tones, and soft greens. 2. Matte black everythingMatte black fixtures had a long run because they photograph beautifully. In a real bathroom, they ask a lot of you. In hard-water areas, matte black shows water spots and soap residue quickly. High-touch spots like handles can show wear over time, depending on the finish quality. And when the faucet, showerhead, towel bar, mirror frame, and cabinet pulls are all black, the room starts to look like a catalog. What to do instead: You don't have to give up black. Use it once or twice (a mirror frame, a pair of sconces) and choose a brushed nickel or brass for the faucet and shower, where water hits most. Brushed finishes hide spots far better than either polished chrome or matte black. 3. Vessel sinksA bowl sitting on the counter looked like design in 2015. Living with one is a different story.Water splashes onto the counter and the wall behind it. The rim sits high, which is awkward for kids and shorter adults. The base creates a crevice that collects grime. The faucet has to be tall or wall-mounted, which adds cost.What to do instead: An undermount or integrated sink is easier to wipe down and keeps the counter clear. If you already own a vessel sink and like it, a few things help: a faucet with enough reach, a countertop edge that's sealed well, and a regular wipe-down around the base. 4. Tile countertopsGrout is porous, and a vanity top is the busiest horizontal surface in the bathroom. Toothpaste, hair dye, and splashes all end up in those lines. What to do instead: Quartz, solid surface, or sealed natural stone. All of them give you fewer seams and an easier wipe-down. A new vanity top is often one of the most worthwhile upgrades you can make without touching the walls. 5. Wood-look tile in showersFaux wood tile had its moment, and a few designers still like it. But in shower walls it can read as an imitation, and the repeating pattern of printed planks is easy to spot. What to do instead: If you want warmth, use real wood where it can live, like a vanity, a shelf, or a stool, and let the shower be stone-look or glazed tile with gentle variation. 6. The single feature wallOne wall of expensive "hero" tile in an otherwise plain room used to be the standard way to add interest. It now looks like an afterthought. What to do instead: Carry the material across the room, or limit the pattern to a niche or the inside of the shower. A considered tile plan feels intentional. A lonely accent wall feels like a budget decision. 7. Overly matched setsEvery faucet, handle, hook, and light in exactly the same finish, from the same collection. It's tidy, but designers say it feels staged. What to do instead: Mix finishes on purpose, with one dominant metal and one supporting accent. The trick is repeating each finish at least twice so it looks chosen rather than accidental. 8. Icy blue and pastel palettesSoft pastels and pale spa blues looked fresh for a while, especially online. In person, in north-facing rooms or under cool bulbs, they can turn cold and gray. What to do instead: Warm greens, clay, blush, cocoa, and earthy neutrals. Test paint in your actual lighting at morning and evening before you commit. 9. Heavily textured 3D tileSculpted, wavy, and ribbed wall tile looks wonderful in a photo. In a shower, the grooves collect soap scum and take real scrubbing to clean. What to do instead: Choose a glazed tile with gentle surface variation, like a handmade-look finish, which gives you character without the crevices. 10. Overhead-only recessed lightingA grid of downlights is flat and unflattering. It throws shadows under your eyes and makes the room feel like a hallway. What to do instead: Layer the light. Use dimmable ceiling lights for general light, sconces at face height beside the mirror for tasks, and a soft accent source if you want ambiance. Choose warm bulbs with a high CRI so skin tones and finishes look natural. LED fixtures also keep running costs low, which is a nice side benefit. 11. Plain flat-front vanities and showroom stylingDesigners are leaning toward vanities with more visual interest, like fluted or reeded fronts and warmer wood tones. There's a catch we'll come back to: fluted fronts are the new overused look, and they're likely to date sooner than a simple shaker or slab door. What to do instead: Pick a vanity you'd still like in ten years, such as a simple door profile in a warm wood tone or muted paint color, and let the hardware and lighting carry the trend. 12. Tech that replaces usabilityBacklit mirrors, gadget-heavy showers, and anything that needs an app to wash your hands. Designers are noting a shift toward analog, low-tech spaces. In practice, tech that adds a point of failure is a cost you pay later. What to do instead: Keep the tech that earns its place: heated floors, a humidity-sensing extractor fan, an anti-fog mirror pad, a dimmer. Skip the features you'll stop using in a month.Not every "outdated" trend is a problem This is the part most trend articles skip. Design media and the real world don't always agree.Look What designers say What buyers and daily life say VerdictWhite tile Cold, builder-standard Clean, neutral, widely accepted Keep if in good shape; warm it up with light, paint, and hardwareMatte black accents Overused Fine in small doses Fine as an accent, risky as an everything finish in hard-water areasTub-shower combo Being replaced by walk-in showers Practical, space-efficient, expected in many family homes Keep it, especially if it's the home's only tubCement or patterned tile Needs a fresh take Still beloved when used with restraint Update the color or scale rather than abandoning pattern entirelyMixed metals Now the standard Many buyers like it if it looks deliberate Fine; use one dominant metal and repeat each finish twiceIf your bathroom is dated-looking but functional, you probably don't have a tile problem. You probably have a lighting, color, and hardware problem, and those are cheap to fix.What 2026 bathrooms look like instead (and what could date next) The common thread across the "new" looks is warmth, texture, and durability. Think honed or tumbled stone, handmade-look tile, wood tones, soft curves, and light that makes everything look better. Here's how the main styles compare:Style Defining features Cost tier Maintenance Best room size Resale appeal Trend longevityCold all-white / all-gray modern (fading) White or gray porcelain, chrome, cool light Low to mid Easy to clean; shows soap scum on dark grout Any; feels coldest in large rooms Safe, neutral ShortHigh-contrast black & white (fading) Black fixtures, graphic tile Mid High: water spots and grout stains Medium to large Polarizing Short to mediumWarm organic modern Warm neutrals, stone-look tile, wood vanity, soft curves Mid to high Moderate: stone sealing, grout upkeep Small to large Strong Medium to longTransitional / classic revival Shaker vanity, mixed metals, simple pattern, framed mirror Mid Moderate Small to large Very strong LongJapandi / spa minimal Pale wood, tonal walls, clean lines Mid to high Moderate: timber near water needs care Medium to large Good Medium to longWhat to choose, element by elementElement Best choice Common mistake Maintenance realityFloor tile Matte or lightly textured porcelain with a wet-area slip rating Polished tile that's slippery, or deep texture that holds dirt Low; seal grout, scrub textured surfacesWall tile Larger format with gentle variation, carried across more than one wall One feature wall, or strong 3D relief Glazed is easy; heavy texture traps soap scumGrout Mid-tone warm color close to the tile; epoxy in wet areas if budget allows Bright white on floors; stark contrast that makes pattern busy White discolors; epoxy resists stains but is harder to installVanity Real wood or quality veneer, or muted paint, simple door profile Chasing fluting or a glossy white box Wood needs sealed edges; painted doors show chipsFixtures Brushed nickel, brushed or champagne brass, or deliberate mixing All matte black; unlacquered brass without accepting patina Brushed hides spots; unlacquered brass changes color by designMirror Framed or arched; add an anti-fog pad if needed Large backlit mirror that depends on a powered part Frameless: wipe edges; backlit: electronics can failLighting Layered, dimmable, 2700K–3000K, high CRI Overhead-only; cool-white bulbs Low; check the IP rating near waterCountertop Quartz, solid surface, or sealed stone with undermount sink Tile top; vessel sink on a thin counter Quartz: low; stone: reseal periodicallyA small-room note: in a bathroom under about 40 square feet, scale matters more than color. Larger tile with fewer grout lines, a floating or slim vanity, and a framed mirror that reflects light will do more than any palette change. Skip bulky statement pieces. The warning nobody puts in a trend article The replacements will date too. Fluted vanities, microcement, terracotta, and zellige-style tile are everywhere on social media right now, which usually means they're near the top of their popularity curve. The safe approach is the same hierarchy we started with: keep the permanent surfaces (tile, layout, tub) simple and neutral, and put the trendy look into things you can change cheaply, like paint, mirrors, lighting, hardware, and accessories.Real-world design mistakes to avoid in a 2026 update Save this checklist before you shop. Putting matte black on every fixture because it looks sharp online. In hard-water areas it shows spots. Use black once or twice and choose a brushed finish for the faucet and shower. Installing a vessel sink on a standard-height counter. The rim ends up too high and water splashes out. Choose an undermount or integrated sink. Tiling the countertop. Grout lines stain. Use quartz, solid surface, or sealed stone. Doing one feature wall of expensive tile in a plain room. Carry the material through or confine it to a niche. Choosing heavily textured 3D tile for the shower. It traps soap scum. Pick glazed tile with gentle variation. Relying on overhead recessed lights only. Add sconces at face height and a dimmer. Using cool-white bulbs with white tile and gray grout. Switch to 2700K–3000K with high CRI. Matching every finish exactly. Mix deliberately, with one dominant metal. Choosing floor tile for looks without checking the slip rating. Smooth or polished tile is dangerous when wet. Check the standard used in your country. Replacing one trend with the next. Swapping gray for fluted wood and terracotta everywhere risks the same dated feeling in a few years.How much does it cost to update a dated bathroom? Here are typical planning ranges in USD for a roughly 5 ft × 8 ft bathroom. They're estimates, not quotes, and labor swings widely by region and by whether plumbing or electrics move. For the UK, Canada, and Australia, convert and check local labor rates.Cost category Budget ($) Mid ($$) Premium ($$$)Floor tile $150–$400 $400–$1,000 $1,000–$2,500Wall tile $400–$900 $900–$2,200 $2,500–$6,000Vanity $250–$600 $700–$1,800 $2,000–$5,000+Fixtures $200–$500 $600–$1,400 $1,500–$4,000Lighting $100–$250 $300–$700 $800–$2,000Mirror $60–$200 $200–$500 $500–$1,500Labor (tile + install) $3,000–$6,000 $6,000–$11,000 $12,000–$25,000Estimated total ~$4,200–$8,900 ~$9,100–$18,600 ~$20,300–$46,000+A few things worth knowing about these numbers:Labor is usually the biggest line. That's why swapping finishes without moving the layout is so much cheaper than a full gut. Surprises tend to show up behind the tile. Rotted subfloor, old waterproofing, or outdated plumbing can add cost once the walls are open. Keep a contingency. Premium isn't always better looking. Some of the best-feeling bathrooms use mid-priced materials with excellent lighting and careful layout.The refresh-first route (roughly $500–$1,500) Before you commit to demolition, try this. It addresses cold white, matte black overload, and a bare lighting plan without touching tile:Repaint in a warm neutral or soft green. Replace bulbs with 2700K–3000K, high-CRI LEDs and add a dimmer. Swap the mirror for a framed or arched one. Replace hardware and add towel hooks. Replace the vanity top or refinish the door fronts. Re-caulk the tub, shower, and sink joints.For many dated bathrooms, this is the whole job.DIY or designer? What you can safely do yourselfTask DIY-friendly? NotesPainting walls and ceiling Yes Use moisture-resistant paint and ventilate wellSwapping bulbs, adding a plug-in or switch-in dimmer Usually Turn the power off at the breaker; use a dimmer rated for your bulbsReplacing mirror, towel hooks, cabinet pulls Yes Use proper anchorsReplacing a faucet Often Shutoff valves and compatibility can complicate itRe-caulking Yes Remove old caulk fully and let surfaces dryReplacing a vanity top Sometimes Plumbing connections and weight make it harder than it looksRetiling a floor or shower Not recommended for beginners Waterproofing and flatness errors are expensive to fixMoving plumbing, adding circuits, heated floors No Licensed trades onlySafety callout: waterproofing, electrical work, and plumbing near water are compliance issues, not style choices. In the US and Canada, bathroom outlets and heated-floor systems need GFCI protection. In the UK and Australia, bathroom zones and IP ratings apply to lights and fittings. Hire a licensed electrician for anything beyond a like-for-like swap. When a designer is worth it: if you're changing layout, mixing several materials, or you keep second-guessing your palette. A few hours of design help costs far less than redoing tile.Maintenance reality of the 2026 look The warm, textured look is lovely, but it asks for different habits than gloss white tile.Task Frequency Difficulty NotesWipe fixtures and glass after showers Daily to weekly Easy A squeegee cuts water spots on black and brassClean shower tile and grout Weekly Easy to moderate Soft brush on textured tile; avoid harsh acids on stoneSeal natural stone and cementitious grout Every 1–2 years (follow the manufacturer) Moderate Skip it and stone stains and etches fasterCheck and re-caulk joints Every 1–3 years Moderate Failed caulk is a common leak starting pointClean extractor fan and check airflow Every 6–12 months Easy Poor ventilation hurts paint, wood, and grout in any styleCare for wood or veneer vanity Monthly wipe; check edges yearly Easy Seal edges and wipe up standing waterPolish or accept patina on brass As you like Easy Unlacquered brass changes color by designTest heated-floor thermostat and GFCI/RCD Yearly Moderate Call an electrician if the test button failsExpert warnings⚠️ Don't replace one trend with the next. Many 2026 alternatives are already everywhere online. Put permanent decisions in calm, simple materials and add the trend through swappable items.⚠️ Waterproofing and slip resistance aren't style choices. Textured or matte tile can be slippery or hard to clean depending on the product, and every tile project depends on properly installed waterproofing. Check the slip-rating standard in your country (DCOF in the US, pendulum test value in the UK, R or wet barefoot ratings in Australia) and use licensed trades for wet-area waterproofing and electrical work near water.⚠️ "Outdated" is not the same as "worth replacing." Spending thousands to remove a perfectly functional white-tile bathroom because a magazine called it dated is rarely good value. Warm it up first, then decide.Resale and longevity: does following (or ignoring) trends matter? It depends on how long you'll stay.Selling in 1–2 years: keep tile and layout neutral, fix obvious wear, and refresh lighting, hardware, and paint. Skip bold trend swaps. Buyers respond to clean, bright, and well-maintained far more than to a particular tile. Staying 8+ years: choose finishes you enjoy using, but keep permanent surfaces simple and let trends live in swappable items. Investing or renting out: durable, easy-clean materials beat fashionable ones. A tile countertop or vessel sink is a maintenance call waiting to happen.Be careful with advice that tells you to remove a tub. In many family markets, buyers expect at least one bathtub in the house. If yours is the only one, a walk-in shower conversion can narrow your buyer pool.Regional notes: US, UK, Canada, and AustraliaUnited States: tub-shower combos are still common and often expected. Wet-tile slip guidance usually references DCOF. GFCI protection applies to bathroom outlets and heated floors. United Kingdom: bathroom zones and IP ratings decide which lights and fittings you can use. Heated towel rails are common, and wet rooms are increasingly popular but depend on correct tanking. Canada: cold winters make heated floors a practical comfort feature, not just a luxury. Ventilation matters because of humidity in closed-up houses. Australia: waterproofing standards are strict and licensed work is typically required in wet areas. Slip ratings use R and wet barefoot classifications. Climate varies, so mold control and ventilation are the bigger design drivers in humid regions.In every market, check local building rules before you plan electrical or wet-area changes.Does this update make sense for you? Use this quick check:White and gray but in good condition? Warm it up with paint, bulbs, mirror, and hardware. Replace tile only if it's damaged. Selling within 1–2 years? Keep tile and layout neutral and refresh the visible, cheap items. Staying 8+ years? Choose what you'll enjoy, keep the permanent layer simple. Hard-water area? Avoid matte black on high-touch fixtures. Choose brushed nickel, PVD brass, or chrome. Under 40 sq ft? Use larger tile, a floating or slim vanity, reflective surfaces, and layered lighting. Young kids or shared use? Skip vessel sinks and slippery floor tile. Have a vessel sink or tile countertop now? Replace the countertop and sink before touching wall tile. Changing plumbing, electrics, waterproofing, or heated floors? Hire licensed professionals.Frequently asked questions What bathroom trends are outdated in 2026? The looks designers are moving away from include all-white and all-gray schemes, icy blue palettes, matte black fixtures used everywhere, vessel sinks, tile countertops, wood-look tile in showers, single feature walls, heavily textured 3D tile, and overly matched fixture sets. The common thread is cold, staged, or hard-to-maintain design. Warmer colors, natural textures, mixed finishes, and better lighting are replacing them. Not every item needs replacing, especially if it's in good condition. Is matte black still okay in a bathroom in 2026? Matte black isn't banned, but many designers see it as overused, and it can be harder to live with than expected. It tends to show water spots and soap residue, especially in hard-water areas, and some finishes show wear on frequently touched parts. If you like it, use it sparingly, such as a mirror frame or one accessory, or choose a high-quality brushed finish. For the main faucet and shower, brushed nickel or brass is more forgiving. Are white bathrooms outdated? White itself isn't the issue. Cold, all-white and all-gray rooms with cool lighting and no texture are what read as dated. A white bathroom in good condition can often be warmed up with paint, warmer bulbs, a wood or stone element, and brushed brass or nickel hardware. White tile remains a safe, neutral choice for resale. Replacing it purely because of trends is rarely good value. Why are vessel sinks going out of style? Vessel sinks sit on top of the counter, so water splashes onto the surface, the rim can be too high for children and shorter users, and the base is awkward to clean. The tall faucet they require also tends to feel less comfortable in daily use. Designers now prefer undermount or integrated sinks for easier cleaning and a simpler look. If you already have one and like it, that's fine; just keep the counter and faucet height practical. Will the new 2026 bathroom trends look dated in a few years too? Some might. Fluted vanities, microcement, terracotta, and zellige-style tile are everywhere right now, which usually means they're near the top of their popularity. The safest approach is to keep permanent surfaces, like tile, layout, and tub, simple and neutral, and add trend-driven elements through items you can change cheaply, like paint, mirrors, lighting, hardware, and accessories.The practical takeaway If your bathroom works, is clean, and just feels a little cold, you probably don't need a renovation. You need warmer light, a better mirror, finishes that suit how you live, and one or two swaps that take the room out of 2019. If you are renovating, put your effort where it's hardest to reverse: layout, waterproofing, and tile. Keep those calm and durable, and let the trends play out in paint, lighting, and hardware. For more on choosing styles that last, see our guide to bathroom design ideas, and when you're ready to plan budgets and timelines, our bathroom renovation guide walks through the whole process.
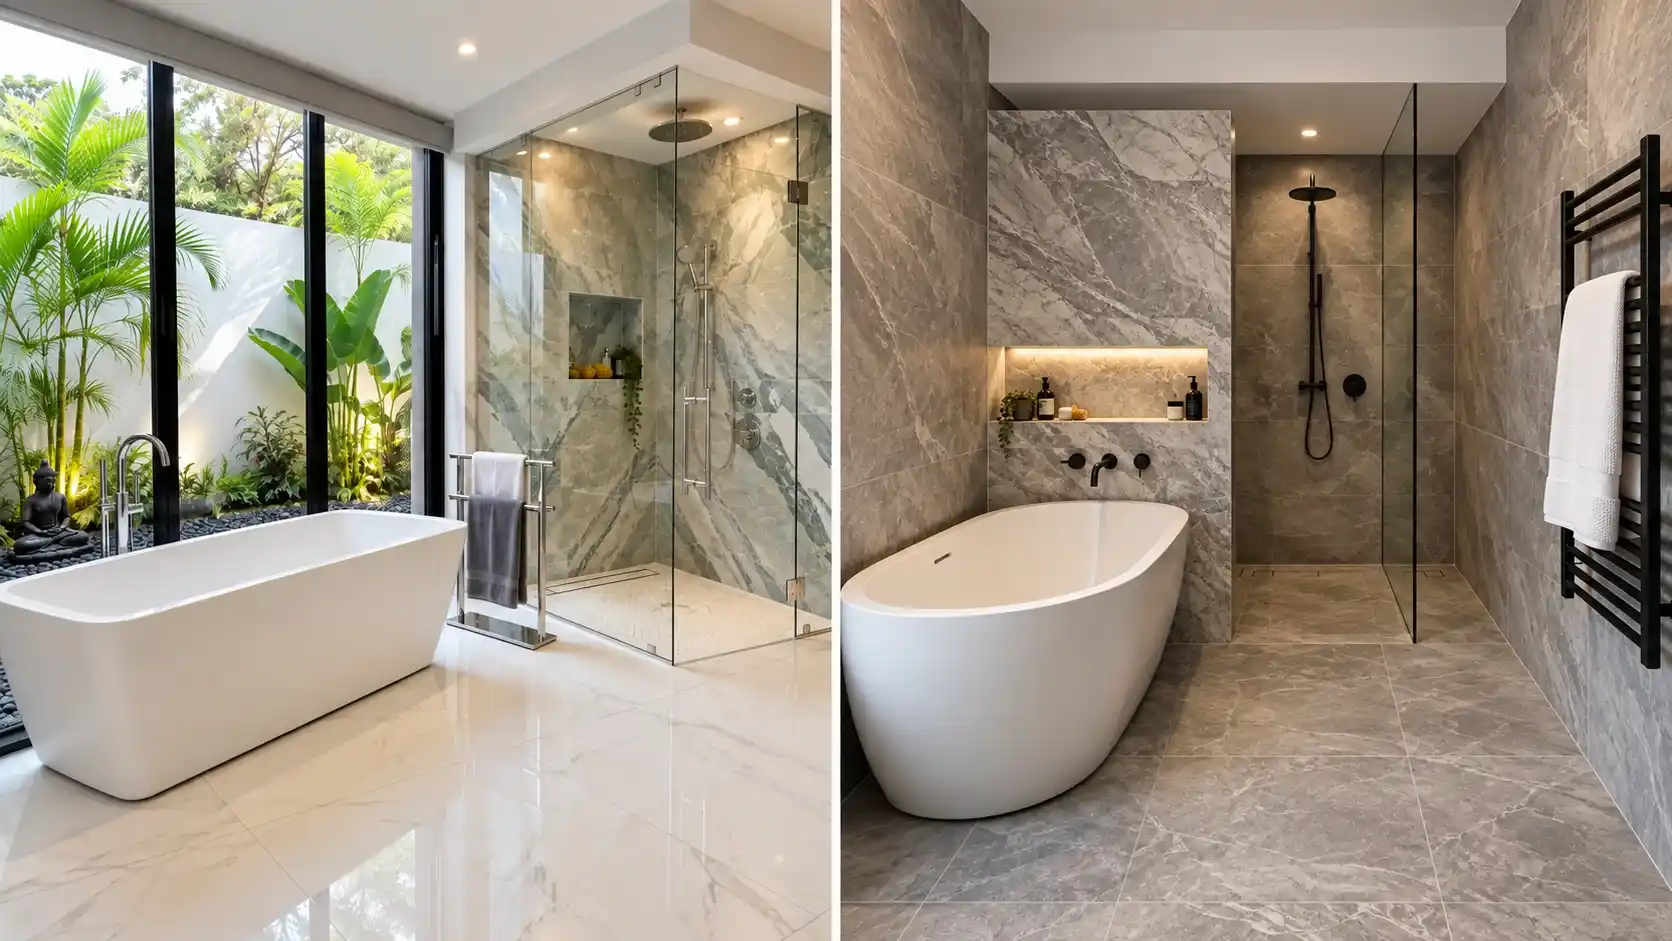
How to Achieve a Minimalist Bathroom Look (Without Making It Feel Empty)
Quick answer: A minimalist bathroom uses a restrained palette, clean-lined fixtures, concealed storage, and very few visible objects. The look depends on hiding clutter and choosing quality materials with simple shapes, so the room reads calm rather than unfinished. Quick TakeawaysLimit the palette to two or three related tones, and let texture carry the interest. Hide storage behind flat-front doors or in recessed niches so the counters stay clear. Choose large-format tile with narrow grout lines to reduce visible joints. Use wall-mounted or floating fixtures where possible, and budget for the blocking and plumbing they need. Layer your lighting. Ceiling downlights alone make most minimalist bathrooms feel flat. Plan for upkeep. A bare room shows every splash, smudge, and water mark.What Minimalism Actually Requires Most people picture a minimalist bathroom as a room with less stuff in it. That's true, but it leaves out the part that makes the look work. A minimalist bathroom takes more planning than a busy one, not less. When a bathroom looks effortless, it usually means three things happened behind the scenes. The storage was designed to disappear. The tile joins were laid out so they don't break up the surfaces. The fixtures were installed so their edges sit flush with the walls and tile. None of that happens by accident, and none of it is cheap. The discipline also has to continue after the renovation is finished. A toothbrush cup on the edge of the vanity, a rack of shampoo bottles in the shower, or a stack of folded towels on an open shelf can undo the whole effect in seconds. Many homeowners find that the first month looks exactly as planned, and then the everyday objects slowly return. Planning for those objects before construction is what separates a calm room from a cluttered one that happens to be white.⚠️ Warning: Plan the storage before you choose the finishes. The most common reason a minimalist bathroom fails is that the homeowner didn't allow enough hidden storage. Count the daily items each person uses, then design a recessed niche, a drawer, or a closed cabinet for each one. If you add storage after the tile is set, the options are limited and usually more expensive.Design Elements Breakdown The look comes from a handful of decisions that interact with each other. Tile affects grout, grout affects how big the tile field looks, and lighting changes how every color reads. It helps to think through the elements in the order they affect the room. Floor and Wall Tile Large-format porcelain is the workhorse of minimalist bathrooms. Fewer joints mean fewer visual breaks, and the surface reads as one continuous plane. Rectified tile, which has been ground so its edges are square, lets installers set very narrow joints. That is what gives a clean, seamless look. The trade-off is installation. Large tile needs a flat subfloor and a skilled setter. Small variations in the floor show up quickly on a large tile, and any lippage (one tile sitting higher than its neighbor) is much more visible than it would be with smaller tile. Expect the installer to spend more time on preparation, and expect the labor line to grow. Finish matters as much as size. Polished tile looks sharp when it's new, but it shows water spots, soap film, and footprints clearly, and it can be slippery when wet. A matte or lightly textured surface hides water marks better and gives better grip. Textured tile does collect grit, so it needs a quick vacuum before mopping. Slip ratings are not optional for a bathroom floor. In the United States, look for a dynamic coefficient of friction (DCOF) rating that meets the ANSI A326.3 standard for wet areas. In Australia and New Zealand, check the R-rating under AS/NZS 4586. In the UK, look for a pendulum test value from the BS 7976 method. Ask your installer to confirm the tile is suitable for barefoot use in wet areas before it's ordered.Grout Grout is the element most people underestimate. It is also the one that changes the room's visual size the most. When the grout contrasts sharply with the tile, the joints create a visible grid, and the room starts to look broken into pieces. When the grout matches the tile, or sits close to it in tone, the joints recede and the surface reads as larger and quieter. Stark white grout on dark tile is the classic mistake. It looks crisp in the showroom and then shows every line in daily use. Light grout also shows dirt faster than mid-tone grout, so it asks for more regular cleaning. Epoxy grout resists staining and doesn't need sealing, but it costs more and is harder to work with. Cementitious grout is cheaper and more forgiving to install, but it needs sealing and periodic care. For a minimalist look in a wet area, many installers recommend epoxy in high-use zones like showers, though the cost difference should be weighed against the rest of the budget.Vanity and Storage A floating vanity is the most recognizable piece of a minimalist bathroom. Mounted off the floor, it shows more of the wall and floor beneath, which makes the room feel bigger. It also makes cleaning easier, since you can wipe under the cabinet without moving anything. The vanity's finish should blend into the wall rather than draw the eye. Warm white, greige, soft oak veneer, and muted matte tones all work. Glossy lacquer, especially in dark colors, shows water rings, fingerprints, and the smudges that come from every morning routine. Plan to wipe the front after each use if you choose glossy finishes. Storage is where the look is won or lost. Flat-front drawers and doors with push-to-open or recessed pulls keep the front clean. Inside, dividers keep the everyday items organized so the drawer doesn't become a jumble. Recessed wall niches work well in showers and beside the mirror, but they must be framed and waterproofed correctly before tiling. A niche cut into a wall without proper membrane is a leak waiting to happen. Many homeowners underestimate how much storage a bathroom needs. Count the items for every person in the household, including the ones kept in the shower and the towels and cleaning supplies. If there isn't room for them behind closed doors, the minimalist look will not survive.Faucets, Valves, and Fixtures Minimalist fixtures tend to be simple in shape, with few decorative details and no visible hardware where possible. Wall-mounted faucets and concealed thermostatic valves let the wall or tile remain uninterrupted. They are more expensive and require the plumbing to be planned before the wall is closed. Finish type matters more than the color name. Painted matte black fixtures can look striking when new, but the paint can chip around handles and spouts over time. PVD (physical vapor deposition) finishes bond the metal color to the surface at a microscopic level and resist wear much better. Brushed nickel and brushed brass in a PVD finish are often more forgiving over the long run than painted black. Hard water changes the picture. Both matte and polished metals show mineral spotting, but in different ways. Matte surfaces can show spotting in a different pattern than chrome, which means a sample should be checked in your own bathroom's light before buying. Descaling every month or so keeps the spots under control in most hard-water homes.Toilets A wall-hung toilet is the most dramatic minimalist upgrade, and also the one that causes the most surprises. The bowl and cistern sit behind the wall, supported by a steel or reinforced carrier frame. That frame must be installed and blocked correctly before the wall is finished. The gains are real. Floor space opens up, the profile is clean, and cleaning under and behind the bowl is much easier. Repairs, though, require access through the wall or a service panel, and retrofitting into an existing wall is often difficult or impossible. Confirm the frame's load rating, the access plan, and the plumbing route with a licensed plumber before you commit. A close-coupled floor-mounted toilet with a simple, flush profile offers much of the look at lower cost and lower risk. For many households, that's the more practical choice.Lighting Lighting makes or breaks a minimalist room more than most people expect. Ceiling downlights are common in minimalist bathrooms because they keep the ceiling clean. The problem is that overhead light alone flattens faces, hides texture, and makes the room feel clinical. Layer the light instead. Wall sconces beside the mirror, or a backlit mirror, provide even light at face height. A dimmable setup lets you lower the output at night, which feels more relaxing and uses less energy. Color temperature is the other big factor. Warm white LEDs in the 2700K to 3000K range flatter pale tile, natural wood, and soft neutrals. Cool white around 4000K and above can make the same palette look sterile and harsh. Check the color temperature on the box before buying, because the same wattage can produce very different results.Mirror A frameless mirror suits a minimalist room, and a backlit version adds useful light without visible fixtures. Look for an LED mirror with a demister pad if you have a shower close to the mirror, since condensation otherwise clouds the glass. A plain large mirror with no lighting can make the room feel flat, so pair it with sconces or a backlight.Countertop Solid surface, honed stone, or a flush-mounted sealed top gives a continuous surface that is easy to wipe. Avoid thick edge profiles and bulky backsplashes, which create visual breaks. Natural stone needs regular sealing, and seams should be kept clear of standing water.Real-World Mistakes That Undermine a Minimalist Bathroom Most of the problems people run into with minimalist bathrooms don't show up in photos. They show up after six months of use. These are the ones that come up most often. A pale palette with no texture. A single-tone room can look unfinished rather than calm. Add one textured element, such as a lightly ribbed tile, a wood-look vanity, or a linen-look wall finish. Visible everyday objects. One toothbrush cup or bottle on the vanity breaks the look. Plan a recessed niche or drawer for these items before the wall is tiled. A wall-hung toilet with no carrier frame. A wall-hung toilet needs a frame and solid blocking inside the wall. Retrofitting later is expensive and sometimes impossible, so confirm the frame is in the plan before the wall closes. Polished tile on a wet floor. Glossy surfaces become slippery when wet. Check the slip rating for your region before ordering. Stark grout on dark tile. White grout around dark tile draws a grid across the floor and walls. Matching or near-matching the grout to the tile keeps the surface continuous. Ceiling downlights only. Overhead light alone flattens faces and hides texture. Add wall sconces or a backlit mirror at face height. Painted matte black fixtures in hard water. Paint chips over time, and mineral spotting shows clearly on dark finishes. A PVD finish and a monthly descaling routine will serve you better. Assuming minimalism is cheaper. The look depends on clean joins, precise tile layout, flush fittings, and concealed plumbing. Those take skilled labor, and the budget needs to reflect that.Many homeowners also say the same thing after a few months: the room looks wonderful, but it takes more daily attention than the old one. That's not a reason to avoid the style. It's a reason to plan for the maintenance before the renovation starts.Budget Tiers for a Minimalist Look Minimalism is often presented as the cheaper route, because it seems to involve fewer things. In practice, the look depends on more precise tile work, higher-quality finishes, and concealed plumbing and framing. Labor is usually the largest single cost in the project, often 50 to 65 percent of the total in a mid-range remodel. The figures below are approximate U.S. ranges for 2026. Published guides vary widely, and prices differ by region, so get at least three local quotes before budgeting.Cost Category Budget ($) Mid ($$) Premium ($$$)Floor tile (about 40–60 sq ft) $150–$400 $400–$900 $900–$2,000Wall tile $200–$500 $500–$1,200 $1,200–$3,000Vanity (floating, flat-front) $400–$800 $800–$1,800 $1,800–$4,000Fixtures (faucet, valve trim, toilet, accessories) $300–$700 $700–$1,500 $1,500–$4,000Lighting $100–$300 $300–$700 $700–$1,500Mirror $100–$250 $250–$600 $600–$1,500Labor (tile and install, plus fixture work) $2,500–$4,500 $4,500–$8,000 $8,000–$15,000Estimated total $3,750–$7,450 $7,450–$14,700 $14,700–$31,000These totals exclude demolition, permits, plumbing or electrical relocation, structural or waterproofing repairs, and a contingency of 10 to 15 percent. Wall-hung toilets, carrier frames, and linear shower drains add cost beyond the fixture line. Where the money goes in a minimalist build: Most of the difference between a good minimalist room and a poor one is in the installation, not the materials. A budget that puts all its money into fixtures and leaves little for a skilled tile setter often ends up with the look that was supposed to be the goal.DIY vs. Professional Work Some parts of a minimalist bathroom are well within reach of a careful homeowner. Others carry real risk, and a mistake can be expensive or dangerous. Good candidates for DIY:Painting walls and ceilings in warm, low-contrast tones Replacing cabinet hardware and adding flush-fit pulls Installing a simple floating shelf into proper wall anchors Adding a small, pre-fabricated recessed niche in a dry wall, where the framing is simple Regrouting an existing floor in good condition Adding accessories such as a mirror, a towel bar, or a bath mat in a warm toneBest left to licensed professionals:Wall-hung toilet frames, plumbing relocations, and concealed valves Large-format tile installation, which needs a flat subfloor and careful layout Electrical work for sconces, dimmers, and new circuits Waterproofing membranes behind tile and in shower niches Floating vanity installation in masonry, plaster over brick, or any wall with unknown construction Structural changes, including wall removal or new drain runsA useful rule: if a mistake could cause water damage, electrical hazard, or a structural problem, hire it out. Many people try to save money on tile and waterproofing, then pay more to repair damage behind the finished wall.Maintenance Reality A minimalist bathroom asks for more daily attention than a busy one. The surfaces are open, the edges are sharp, and every mark is visible. The schedule below is a realistic starting point.Task Frequency Difficulty NotesWipe vanity front and mirror Daily Easy Water spots and fingerprints are the main upkeepSqueegee or towel-dry shower walls After each use Easy Prevents soap film and limescale on glass and tileClear surfaces of clutter Weekly Easy Keeps the look intact and speeds up cleaningClean grout lines Monthly Moderate Use a pH-neutral cleaner; light grout shows dirt fasterDescale faucet and shower head Monthly in hard water Easy Both matte and polished finishes show mineral depositsCheck silicone at tub and shower edges Every 6 months Easy Cracked or grey silicone lets water behind the tileClean and test the exhaust fan Every 3 to 6 months Easy Humidity can cause mold on sealed surfaces and paintReseal natural stone Every 1 to 2 years Moderate Test with a drop of water; if it soaks in, resealInspect wall-mounted vanity and toilet fixings Yearly Moderate Check for looseness; a plumber should handle repairsCheck LED mirror and sconce connections Yearly Moderate Electrical work should be done by a licensed electricianVentilation, Energy, and Smart Controls Hard, sealed surfaces are a feature of minimalist design, and they are also a moisture problem. A bathroom with lots of tile and glass holds humidity, and that moisture has nowhere to go unless the room is ventilated properly. Condensation on the mirror and walls is the first sign. Left alone, it leads to mold on grout, paint, and sealant, and it can make a clean, minimal room look neglected in a year or two. Size the exhaust fan for the room, not for the fixture's marketing. Many U.S. guides point to at least 50 CFM for a small bathroom as a starting point, with sizing based on the room's volume. A fan that is too small runs constantly and still doesn't clear the air. Many homeowners find that a fan with a humidity sensor is worth the small extra cost. It runs when the air is damp and shuts off when it's dry, which saves energy and keeps the room drier without manual switching. Pair it with a timer or a run-on setting so the fan keeps working for 15 to 20 minutes after a shower. Lighting is another place where efficiency and design overlap. LED fixtures use far less electricity than older halogen or incandescent bulbs, and a dimmer lets you lower the light for evening use. Smart dimmers and scheduled lighting can help, but they should be compatible with the LED drivers in the fixtures. Mismatched dimmers cause flicker and buzzing, which is one of the more common complaints after a lighting upgrade. Heated floors are a popular addition to minimalist bathrooms because they add comfort without visible radiators. They do use electricity, and their running cost depends on how often they're on and how well the room is insulated. A thermostat with a schedule or an occupancy sensor limits the hours they run. They also need a licensed electrician for the connection in most places. Smart mirrors with demister pads and LED backlights are useful in a minimalist room, but check that the controls are simple and the touch panels don't clutter the surface. A basic wall switch is often the cleaner option.Resale and Longevity A well-made minimalist bathroom can age gracefully, but the way it ages depends on the choices behind it. Warm minimalism tends to hold its appeal. Neutral tones, a touch of natural texture, and layered lighting feel current without depending on a single trend. Stark black-and-white contrast, cool lighting, and very sharp edges can feel dated faster, especially when the trend that inspired them peaks. Materials make the difference over time. Porcelain tile, PVD fixtures, and well-installed sealed surfaces keep their appearance for years with routine care. Painted finishes, thin coatings, and poorly sealed stone show wear sooner and can make a room look tired. For resale, the safest approach is to keep the palette neutral and the layout practical. Buyers respond well to clean, bright bathrooms, and they can be put off by a space that looks too stark or hard to live with. A minimalist room that still has a shower curtain rail, enough storage, and good lighting usually reads as desirable, not severe. If you plan to sell within a few years, avoid bold accent colors tied to a single season, and make sure the storage is generous enough for a buyer to live with.Does Minimalism Work for Your Bathroom? Use these questions to test the idea before you commit.You have little storage and lots of daily items. Build in recessed or concealed storage before you choose finishes. Without it, the look will not last. The bathroom is shared by several people. Choose easy-clean surfaces, and give each person a closed storage space. You live in a hard-water area. Choose PVD fixtures over painted matte black, and plan regular descaling. The room is small and has no window. Use warm, layered lighting and a light, low-contrast palette so the room doesn't feel cold. You plan to sell within three to five years. Keep the palette neutral and add one warm texture. You're considering a wall-hung toilet or floating vanity in an older home. Check the wall construction and confirm the blocking and load capacity before buying. Your budget is limited. Spend on tile installation and fixtures rather than decorative accessories, which can be added later. You prefer warmth and natural materials. A Japandi or warm modern direction may suit you better than a stark minimal one.Frequently Asked Questions Q1: What makes a bathroom look minimalist rather than just empty? A: A minimalist bathroom is planned, not bare. It uses a limited palette, simple shapes, and hidden storage, and it keeps visible objects to a few intentional pieces. An empty room often looks unfinished because it lacks texture, layered light, and well-chosen materials. The difference comes from the quality of the surfaces and the precision of the installation. Good tile joins, flush fittings, and a warm light source make the room feel considered. If yours feels cold and empty, the fix is usually better lighting and one textured element, not more decoration. Q2: Will a minimalist bathroom look dated in a few years? A: It depends on how stark the design is. Warm minimalism, with neutral tones, natural texture, and soft lighting, tends to age well because it doesn't rely on one trend. Black-and-white schemes with cool light and very sharp contrast can feel dated faster. Choose finishes you'll still like in five years, avoid accent colors tied to a single season, and keep the layout simple. Materials matter too. Well-installed porcelain and PVD fixtures hold their appearance far longer than painted or thin-coated finishes. Q3: Can I achieve a minimalist bathroom on a DIY budget? A: Some parts, yes. Painting, replacing hardware, adding a simple recessed niche in a dry wall, installing a basic floating shelf, and regrouting can all be done by a careful homeowner. Large-format tile is harder than it looks, since it needs a flat subfloor and careful layout to avoid lippage. Plumbing relocation, wall-hung toilet frames, and electrical lighting changes should be done by licensed trades. A realistic approach is to hire out the tile and any fixed plumbing work, then handle storage, accessories, and paint yourself. Expect the professional share to be the largest line in the budget. Q4: Are matte black fixtures a good choice for a minimalist bathroom? A: They suit the look, but the finish type matters more than the color. Painted matte black can chip and wear through, especially around handles and spouts. PVD-coated finishes resist wear much better. In hard-water areas, both matte and polished metals show mineral spotting, so plan to descale regularly. Matte finishes also show fingerprints and water marks differently from polished chrome, so check a sample in your bathroom's actual light before you buy. If you're unsure, brushed nickel or brushed brass in a PVD finish is a more forgiving choice. Q5: Do floating vanities work in older homes or rentals? A: They can, but the wall construction decides whether they're safe and practical. Floating vanities need solid support, such as a stud wall with blocking, a masonry wall, or a reinforced frame. Plaster over brick or old lath can be fragile, and anchors may not hold the weight of a full vanity with a stone top. Before buying, check what the wall is made of, and have a plumber or carpenter confirm the load capacity. In a rental, a floating vanity usually needs landlord approval and may be hard to remove without damage. A freestanding or legged vanity can give a similar look with less risk.Figures in this article are approximate U.S. ranges for 2026 and will vary by region, labor market, and scope. Slip ratings and electrical or plumbing requirements differ by country and local code. Check with a licensed professional and your local building authority before starting work.
.webp)
20 Luxury Bathroom Design Ideas: What Actually Defines a High-End Bathroom (and What Just Photographs Well)
Walk into a hotel bathroom you remember fondly. Chances are it wasn't the size or the gold taps that stuck with you. It was the warm light, the shower that held its temperature, the lack of visual clutter, and the fact that nothing looked like it was about to fail. That's the real brief behind most luxury bathroom design ideas. People search for them wanting pictures. What they usually need is a way to decide what's worth paying for. What Makes a Bathroom Feel Luxurious? (Quick Answer)Short answer: A luxury bathroom is defined by quality materials, layered lighting, calm uncluttered space, and precise detailing, like large-format stone-look tile, frameless glass, a thermostatic shower, heated floors, and a generous vanity, not by price or size alone.A slightly fuller version: a luxury bathroom combines durable materials (stone or stone-look porcelain, quartz or solid-surface tops, quality brassware) with layered lighting, real storage, and comfort features like underfloor heating and a thermostatic shower. What separates it from merely expensive is execution: tight grout lines, flush tile edges, proper ventilation, and a restrained palette that stays cohesive. Quick takeawaysLuxury is execution plus restraint: fewer materials, better installed. Layered lighting (ambient, task, accent) does more for a high-end feel than any single fixture. Large-format tile with narrow, tone-matched grout reads as premium and is easier to keep clean. The comfort features owners keep appreciating are quiet ones: heated floor, thermostatic valve, silent extractor fan. Budget the labor and waterproofing, not just the tile. They often cost more than the materials. Choose a neutral core with personal accents to protect resale and avoid trend regret.Regional terms at a glance (US / UK / CA / AU)Vanity (US/CA) = vanity unit (UK) = vanity (AU) Countertop (US/CA) = worktop (UK) Exhaust fan (US/CA) = extractor fan (UK/AU) Waterproofing membrane (US/CA) = tanking (UK/AU) Towel warmer (US) = heated towel rail (UK/CA/AU) GFCI (US/CA) = RCD (UK/AU)Electrical and plumbing rules differ by country, state and municipality. Verify local code before you buy or build anything.Luxury Is a Set of Decisions, Not a Price Tag Here's something that surprises people: a $9,000 bathroom can feel more luxurious than a $45,000 one. It happens often. The expensive room has six tile types, three metal finishes, a statement pendant, and a vanity that fights the layout. The cheaper one has one calm material, good light, and a clean install. Luxury comes from five decisions, each of which you can make at nearly any budget.Materials. Few, durable, and consistent. Stone or convincing stone-look porcelain, quartz, solid surface, real wood veneer with proper moisture protection. Light. Layered, warm, dimmable. This changes how everything else looks. Space and calm. Clear surfaces, fewer visual breaks, concealed storage, generous clearances. Quiet technology. A thermostatic shower valve, heated floor, silent fan, humidity-sensing controls. Features that work without asking for attention. Detailing. Even grout, aligned tile joints, flush edges, consistent hardware. This is the one most people underinvest in.If you only remember one thing, remember this: restraint is what reads as expensive. Every extra material or finish needs a reason to be there.Luxury Bathroom Styles Compared Before choosing finishes, choose a direction. Styles differ less in how they look than in how they age, how much work they demand, and how widely they appeal when you sell. Each of these can look high-end. The real question is which set of trade-offs suits your home and the way you live.Style Defining Features Cost Tier Maintenance Best Room Size Resale Appeal Trend LongevityContemporary Spa Large-format stone-look porcelain, floating vanity, frameless glass, layered warm lighting, minimal grout, restrained neutral palette Mid–High Low–Medium Any; excellent in small rooms High (broad appeal) High (proportion-led, not fad-led)Classic / Transitional Luxury Honed or marble-look tile, furniture-style vanity, polished nickel or chrome, framed mirrors, brass accents, wainscot or panelling Mid–High Medium (higher with real marble) Medium to large High HighJapandi Light oak or ash, warm off-whites, textured plaster or microcement, low-profile tub, concealed storage, deliberate negative space Mid–High Medium (wood needs sealing and ventilation) Small to medium Medium–High HighArt Deco / Glam Geometric or fan tile, brass or gold finishes, dark stone, fluted glass, statement lighting High Medium–High (finishes show marks) Medium to large Medium (polarising) MediumOrganic Modern Honed stone, plaster-look walls, wood vanity, matte or brushed metals, plants, earth tones, soft-edged shapes Mid–High Medium Medium to large High Medium–HighA note on Japandi, since it's frequently misread: it isn't "wood plus beige." It depends on negative space, concealed storage, and a short palette. Open shelving packed with product bottles breaks it instantly.The Design Elements That Do the Heavy Lifting Each subsection below ends with a year-5 reality note: what the choice tends to look like after daily use, hard water, and a few hundred rounds of cleaning products. Tile, Grout and Layout Tile gets all the attention, but grout changes the look more than tile colour does. High-contrast grout turns a surface into a grid and highlights every small misalignment. Tone-matched, narrow grout (roughly 1.5–3 mm on rectified tile) creates the continuous surface that reads as premium. Scale matters too. In smaller rooms, fewer and larger tiles (600×1200 mm / 24×48 in is a common format) mean fewer lines and a calmer space. Running tile floor-to-ceiling in the wet zones looks deliberate. Stopping at an arbitrary mid-height rarely does. One thing most homeowners don't realize until the tile arrives: large-format tile is less forgiving. It exposes uneven substrates, and lippage (where adjacent tile edges sit at slightly different heights) shows up fast under side lighting. This is where installer skill matters more than tile price. Year-5 reality: Porcelain barely changes. Cement grout can stain and needs sealing and periodic checks. Epoxy grout costs more up front, but resists staining better, especially in showers.Lighting: The Layer Most People Get Wrong Lighting is where average bathrooms and high-end bathrooms separate most clearly. A single bright ceiling light is flat and shadowy. A well-planned scheme has three layers:Ambient: recessed or ceiling fittings, dimmable. Task: eye-level light beside or around the mirror, for shaving, makeup, and skin checks. Accent: a niche strip, toe-kick glow, or cove light that adds depth and works as a night light.Specs matter more than shape. Aim for 2700–3000K colour temperature and CRI 90+ so stone, wood, and skin tones look natural. Cool 4000–5000K "daylight" LEDs tend to make stone look grey and skin look tired. And one common trap: a backlit mirror is not task lighting. Halo lighting looks beautiful in photos, but it often leaves the face under-lit from the front. Add side or eye-level sconces if you groom at the mirror. Fittings must also be rated for their zone: damp or wet-location listed in the US and Canada, IP-rated in the UK and Australia. A small automation upgrade worth considering: motion-sensor night lighting at a low, warm level. It saves you from blasting your eyes at 3 a.m., and it quietly adds to the hotel-bathroom feel. Year-5 reality: LEDs are low-maintenance, but cheap drivers and mirror seals are the usual failure points. Moisture getting behind a mirror's edge shortens its life.Fixtures and Finishes (Including the Hard-Water Problem) Finishes are a durability decision disguised as a style decision.Finish Looks Hard-water behaviour WearPolished chrome Bright, classic Hides spotting reasonably well; wipes clean Very durableBrushed nickel Soft, warm-grey Forgiving; hides spotting and fingerprints DurablePVD brushed brass Warm, premium Fairly forgiving PVD generally outlasts platingMatte black Dramatic, graphic Limescale and spots show clearly Quality varies widely; cheap coatings can wear or flakeIf you love matte black, it can work. Choose a quality PVD or powder-coated finish and treat hard water with a softener or filtration. Pick one metal family for the room and stay disciplined. Mixing three finishes looks like indecision, not richness. Year-5 reality: In hard-water areas, aerators and showerheads clog with scale. A quick descale every one to three months keeps flow and appearance consistent.Vanity, Storage and Countertops Floating vanities look lighter and make floors easier to clean. They also have a classic failure mode: owners lose storage, clutter takes over the counter, and the clean look disappears within a month. Before committing, check drawer depth and plan concealed storage for the things you actually use daily. For tops, quartz, sintered stone, and solid surface handle toothpaste, makeup, and cleaners without drama. Honed marble is beautiful but etches and stains if you let spills sit. If you love it, accept the patina. If you don't, stone-look porcelain or sintered stone gets you most of the way there. Year-5 reality: Wood veneer needs moisture control, so ventilation matters here too. High-gloss dark lacquer shows every fingerprint and toothpaste speck.Mirrors A large frameless or slim-framed mirror reflects light and enlarges the room. Arched or curved shapes are popular right now, and they photograph well, but shape is the easiest element to swap later, so it's a safe place to experiment. Anti-fog mirrors are one of the more practical smart-bathroom upgrades, particularly in bathrooms shared by several people. Some include dimming or colour-temperature controls. Keep the sconce guidance above in mind regardless. Year-5 reality: Check the edge seal and the LED driver annually. Moisture ingress is the main enemy.The Shower and Tub Experience A thermostatic shower valve is the single most appreciated "quiet" upgrade. It holds a steady temperature when someone flushes a toilet or runs a tap elsewhere in the house. It's a comfort and a safety feature. Now the part that rarely makes it into inspiration galleries: rain showers and body jets are limited by your supply. Low-pressure or gravity-fed systems (common in some UK homes), regional flow-rate rules (US WaterSense labelling, Australian WELS ratings), and hot water capacity all decide whether a spa shower delivers or merely drizzles. Don't buy a large rainfall head and hope for the best. If pressure is low, plan a pump or choose a head designed for it. Digital shower controllers (programmable temperature and presets) are a nice touch, but they add electronics to a wet environment, so they need correct installation and rating. Freestanding tubs look dramatic and demand homework:Floor load: A typical tub holds roughly 50–80 gallons (190–300 litres). Water weighs about 8.3 lb per gallon, so add the tub and a bather and the load is substantial. Check joist capacity. Hot water: A big tub can exceed a small cylinder or tank. Usage: Be honest about whether you'll actually take baths. Cleaning: The space around a freestanding tub is awkward to wipe.Year-5 reality: Glass shows limescale quickly. A squeegee habit or a hydrophobic coating changes your cleaning life. Freestanding tubs that don't get used become expensive towel racks.Comfort Technology (Heated Floors, Smart Features, Ventilation) Heated floors are the feature owners most often say they'd choose again. Electric mat systems are common in retrofits; hydronic systems suit larger projects or new builds. Pair them with a programmable or smart thermostat with a floor sensor and a schedule. Heating the floor on a timer rather than all day keeps running costs reasonable, and insulation underneath makes the heat go up rather than down. Ventilation is the most underrated luxury feature. A quiet, correctly sized fan (rated in CFM or l/s) protects stone, grout, paint, and cabinetry. Condensation destroys high-end finishes faster than daily use does. A humidity-sensing fan with a run-on timer is a small upgrade with a big payoff, because it keeps working after you've left the room and forgotten about it. Other smart-home-adjacent upgrades, such as heated toilet seats, bidet or washlet seats, and smart mirrors, are comfort items. They're worth it if you'll use them, and they need GFCI/RCD-protected outlets planned during rough-in, not after. Year-5 reality: Fan grilles clog and fans lose airflow. Most owners never check. Heated floor controllers need an annual glance, and inconsistent temperatures are a call-a-pro situation.Design Element Decision Table (Contemporary Spa Style)Design Element Best Choice Why Common Mistake Maintenance RealityFlooring tile Large-format porcelain (600×1200 mm / 24×48 in) in honed or textured stone-look finish, with a wet-area slip rating Fewer grout lines, calm continuity, hard-wearing Polished porcelain on a bathroom floor Textured finishes hold soap film; clean regularly with a pH-neutral cleanerWall tile Floor-to-ceiling large-format in wet zones; one restrained accent wall or niche Premium look, fewer joints to clean Stopping tile at mid-height; mixing 3+ tile types Easy wipe-down; failure usually comes from poor waterproofing, not the tileGrout color Tone-matched, 1.5–3 mm on rectified tile; epoxy in the shower if budget allows Continuous surface, less visible staining White grout on a floor; high-contrast grout on dark tile Epoxy resists staining; cement grout needs sealing and re-checkingVanity finish Floating or furniture-style vanity in wood veneer or matte lacquer, soft-close, deep drawers Visual lightness, easy to clean under, warm texture High-gloss dark lacquer; losing all storage to a floating design Wood veneer needs moisture control; gloss shows fingerprints and toothpasteFaucet / fixture finish Brushed nickel, polished chrome, or PVD brushed brass; matte black only in soft-water areas Hides spotting and wear better Matte black in hard water; mixing 3+ metal finishes Descale regularly in hard-water areas; PVD usually outlasts platingMirror type Large frameless or slim-framed mirror with separate eye-level lighting; optional anti-fog Reflects light and enlarges space A backlit mirror as the only lighting Wipe monthly; check LED driver and edge sealLighting Layered: dimmable ambient, side or eye-level task, accent (niche, toe-kick); 2700–3000K, CRI 90+, IP / wet-location rated Flattering light, accurate tone and skin colour Cool daylight LEDs; a single central ceiling light LED fittings are low-maintenance; keep them dimmable and zone-ratedCountertop material Quartz, sintered stone, or solid-surface; honed marble only if you accept etching Stain and scratch resistance Unsealed natural stone beside toothpaste, makeup, and cleaners Quartz and sintered stone are low-maintenance; marble needs sealing and quick spill wipe-upsWhat Photographs Well vs What Lives Well Inspiration images are shot with styled products, perfect lighting, and an empty counter. Real bathrooms have a toothbrush holder, a bath mat, and a bottle of something blue.Photographs well Lives wellBacklit mirror as the hero light Eye-level sconces plus a dimmable ceiling layerPolished marble or glossy porcelain floors Honed or textured tile with a wet-area slip ratingMatte black fixtures everywhere Brushed nickel, chrome, or PVD finishesOpen shelving with a few styled items Concealed storage with deep drawersFreestanding tub as centrepiece A great shower, with a tub only if you'll use itHigh-contrast patterned tile Tone-on-tone large-format with one restrained accentCool, bright "clean" white light Warm 2700–3000K, CRI 90+, dimmableNeither column is "wrong." But many regrets come from choosing the left column for a bathroom that has to survive the right. One practical rule: test samples in the actual room, in the morning, in the evening, and under your artificial lighting. Showroom light and screens shift colour badly. Stone-look tile that looks warm in the shop can read cold and grey under your own lighting.Making Luxury Work in Small and Large Bathrooms Luxury isn't reserved for big rooms. Small bathrooms often benefit most from restraint, because there isn't space to hide mistakes.Room size What works What to avoidSmall (under ~40 sq ft / 3.7 m²) Large-format tile with minimal grout, frameless glass or a fixed panel, wall-hung toilet and vanity to show more floor, a single palette, one tactile upgrade (heated floor or a quality shower system) Busy patterns, bulky vanities, mixing multiple tile types, deep-framed shower screens that chop the room upMedium (~40–80 sq ft) A defined feature zone (vanity wall or niche), layered lighting, furniture-style vanity, a walk-in shower or a tub-and-shower combo done well Tub and oversized shower competing for the same space; too many accent featuresLarge (80+ sq ft / 7.4 m²+) Double vanity, separate zones for bathing and showering, freestanding tub (with floor checks), more warm accent lighting Treating the extra space as a place to add more materials; vast bare surfaces without lighting layersIn a small room, you're really spending your budget on continuity. In a large one, the risk is the opposite: filling space with features and losing coherence.Luxury Bathroom Mistakes People Regret If you save one checklist from this article, make it this one. Polished tile on the floor. Slippery when wet. Choose a wet-area-rated honed or textured finish. Backlit mirror as the only light source. Shadows on the face and poor grooming light. Add eye-level side lighting. Cool-white LEDs (4000–5000K). They make stone and skin look harsh. Use 2700–3000K, CRI 90+, dimmable. Matte black fixtures in hard-water areas. Spotting shows constantly. Choose brushed nickel, chrome, or a PVD finish. Too many materials. Stone, wood, glass, three tiles, and two metals read as busy, not rich. Limit to 3–4 materials and one metal family. Unsealed marble or travertine near toothpaste, makeup, and cleaners. Etching and staining follow. Seal it, or use stone-look porcelain. High-contrast grout lines. They turn large tile into a grid and highlight every misalignment. Match grout to tile. Floating vanity with no storage plan. Looks great, then clutter takes over. Check drawer depth and plan concealed storage. Skipping ventilation upgrades. Condensation damages finishes. Install a properly sized, quiet fan, ideally humidity-sensing. Choosing finishes from a screen or showroom only. Colour shifts under real light. Test samples at home at different times of day.What a Luxury Look Really Costs Cost is the question underneath most searches, and the honest answer is: it depends on scope, and labor is usually the largest line. Assumptions: roughly 60 sq ft (5.5 m²) bathroom, about 150 sq ft of wall tile, standard layout with no plumbing relocation, USD, 2026 planning estimates. Local quotes will vary. UK, Canadian, and Australian labor and material costs differ, so treat this as a guide to proportions, not a quote.Cost Category Budget Tier ($) Mid Tier ($$) Premium Tier ($$$)Floor tile (materials) $200–$450 $500–$1,000 $1,500–$4,000Wall tile (materials) $450–$900 $1,200–$2,500 $3,000–$7,500Vanity (with top) $400–$900 $1,200–$2,800 $3,500–$9,000Fixtures (taps, shower system, toilet, hardware) $600–$1,200 $1,800–$3,800 $5,000–$13,000Lighting (layered) $150–$400 $500–$1,400 $1,500–$4,500Mirror $80–$250 $300–$900 $1,000–$3,000Frameless shower glass $500–$900 $1,000–$2,000 $2,500–$5,000Labor (tile, plumbing hookup, electrical, install) $3,000–$5,000 $5,000–$9,000 $10,000–$20,000Estimated Total $5,400–$10,000 $11,500–$23,400 $28,000–$66,000Not included: demolition, extensive waterproofing and substrate prep, plumbing relocation, structural work, permits, freestanding tub, underfloor heating, and design fees. That exclusions list is where budgets quietly double. Most homeowners don't realize how often a "simple" remodel uncovers rotted subfloor, outdated wiring, or a fan duct that vents into the attic. Build in a contingency of 10–20%. Where to spendWaterproofing and substrate prep Tile installation quality Ventilation Lighting layers Thermostatic valveWhere to saveAccessories and trend-led decor Oversized statement fixtures Premium-brand taps (mid-range with a good warranty is often fine)Looks expensive, costs lessStone-look porcelain Tone-matched grout Wall-hung vanity in a standard size Layered dimmable lightingLooks cheap, costs moreCustom glass Built-in niches with intricate tiling Plumbing moves Slab or natural-stone feature walls Bespoke joineryDIY, Designer or Contractor: Who Should Do What Luxury gets lost in three places when DIY goes wrong: waterproofing, tile setting, and lighting layout. All three are invisible when done right and glaring when done wrong.Task DIY-friendly? Designer helps Licensed trade neededDemolition (non-structural) Yes, with carePossibly for asbestos/lead testing in older homesPainting, trim, accessories YesInstalling mirrors, towel bars, shelves Yes (locate studs and wiring first)Layout, lighting plan, material selection Possible Strongly recommendedWaterproofing / tanking RiskyQualified installer; follow local codeLarge-format tile setting Risky; unforgiving of uneven substratesExperienced tilerPlumbing changes, valve installation NoLicensed plumberElectrical (lighting, heated floor, fan, outlets) NoLicensed electricianFrameless glass measuring and install NoGlazier / specialistA reasonable middle path: hire a designer for a paid consultation or plan only, hire licensed trades for waterproofing, electrical, and plumbing, and handle painting, demolition, and accessory installation yourself. That can save real money without risking the parts that fail expensively.The Maintenance Reality of a Luxury Bathroom "Low maintenance" is relative. Porcelain and quartz are easy, but glass, brassware, and ventilation still need regular attention. The good news is that most tasks take minutes. The bad news is that skipping the boring ones (fan, silicone, grout checks) is how expensive damage starts.Task Frequency Difficulty NotesSqueegee shower glass after use Daily Easy Prevents limescale film and cuts cleaning timeClean tile and glass with pH-neutral cleaner Weekly Easy Avoid acids on natural stone and some metal finishesWipe taps and wet-zone fixtures Weekly Easy Dry-wipe hard-water spotting quicklyDescale showerhead and tap aerators Every 1–3 months (hard water) Easy–Medium White vinegar works on many finishes, but check manufacturer guidanceClean extractor fan grille / filter Every 3–6 months Easy Poor airflow means condensation damageInspect silicone / caulk and grout Every 6 months Easy Catch cracks early; water behind tile is costlyReseal natural stone and cement grout Per manufacturer; typically annually to every few years Medium Not needed for porcelain and epoxy groutReplace silicone sealant Typically every few years Medium Mould-stained or peeling silicone should be replacedCheck LED mirror seals and driver Annually Easy Moisture ingress shortens lifespanCheck thermostatic cartridge and heated floor controls Annually Medium Call a professional if temperature is inconsistentResale and Longevity: What Buyers Notice Buyers rarely pay back every dollar of a luxury remodel, but they do notice a bathroom that feels clean, bright, cohesive, and well built. They also notice the opposite: stained grout, a cheap-looking fan, a bold colour they'd have to rip out. A simple rule works well: neutral core, personal accents. Keep tile, tops, and fixtures timeless. Put personality into things that are cheap to change: towels, art, a mirror shape, paint on a non-wet wall. Designs that depend on one colour or finish applied everywhere (all-grey, all-matte-black, high-contrast patterned tile in every zone) tend to date fastest. Proportion and material quality last longer than any trend. What counts as "expected" also depends on your market and price bracket, so check local comparables before spending heavily. If you might sell within a few years, put your money into waterproofing, ventilation, lighting, and installation quality. Those are the things inspectors and observant buyers actually check.Does This Style Work for You? Use this as a quick filter before you commit.Your bathroom is under 40 sq ft → Go contemporary spa or Japandi: large-format tile, wall-hung fixtures, frameless glass, one material family. You rent or may move within 5 years → Neutral core, personal accents. Skip bespoke or polarising features. You live in a hard-water area → Choose brushed nickel, chrome, or PVD finishes and install a quality shower filter or softener. Avoid matte black. You can't tolerate regular wiping or squeegeeing → Choose porcelain, epoxy grout, quartz tops, and framed or fixed-panel glass. You love natural stone → Accept etching, sealing, and patina, or choose stone-look porcelain for similar looks with less upkeep. Your water pressure is low or gravity-fed → Fit a pump or a pressure-appropriate head. Don't buy a large rainfall head and hope. You want a freestanding tub → Check floor loading, hot water capacity, and whether you'll actually use it. You plan to DIY everything → Hire pros for waterproofing, electrical, and any plumbing changes. Consider DIY demolition, painting, and accessory installation.Materials and Products Worth Considering Rather than naming brands, here are the criteria worth checking in each category.Large-format porcelain: Look for rectified edges (tighter joints), a wet-area slip rating suitable for floors, consistent shading across boxes, and enough extra stock for cuts and future repairs. Quartz or sintered stone tops: Check thickness, edge profile, heat and stain resistance, and the fabricator's seam quality. Seams are where cheap installs show. Thermostatic valves: Look for a replaceable cartridge, accessible service access, stable temperature under pressure changes, and a decent warranty. PVD finishes: Ask for the manufacturer's finish warranty and cleaning guidance. Real PVD is durable; vague "gold-look" coatings are not the same. LED mirrors: Check CRI 90+, adjustable colour temperature if possible, dimming, an ingress-protection or wet-location rating suited to the zone, and driver access for replacement. Extractor fans: Check airflow (CFM or l/s) against room volume, noise rating (sones or dB), humidity sensing, and a run-on timer. Quiet fans get used. Loud ones get switched off. Heated floor systems: Look for a floor-temperature sensor, a programmable or smart thermostat, and a certified installer for electrical connection.Expert Warnings Competitors Skip⚠️ Waterproofing decides whether luxury lasts. The most expensive tile can fail within a few years if the membrane, slope, or junctions are done badly. Water damage behind tile is common in remodels where the money went into finishes rather than preparation. Spend on a documented waterproofing system and a qualified installer, and follow local building code.⚠️ Electrical safety isn't optional. Mirrors, heated floors, LED strips, and heated towel rails all involve electricity near water. Use correctly rated fittings (damp or wet-location listed in the US and Canada, IP-rated in the UK and Australia), RCD or GFCI protection, and a licensed electrician. DIY wiring here is a safety and insurance risk.⚠️ Slip risk grows with luxury finishes. Polished porcelain, glossy marble, and some glass mosaics look high-end and become dangerous when wet, particularly for children and older adults. Check the slip-resistance rating suitable for wet floors in your region (DCOF in the US and Canada, pendulum test value in the UK, P/R and wet-barefoot classes in Australia) and keep polished finishes for walls.Frequently Asked Questions How much does a luxury bathroom cost? It depends on size, location, and how much you change. For a mid-size bathroom with no plumbing relocation, a luxury look can start around $5,000–$10,000 with careful material choices and some DIY, and run to $28,000–$66,000 or more for high-end stone, custom joinery, and premium fixtures. Labor is often the largest cost, so get at least three local quotes. Costs vary significantly across the US, UK, Canada, and Australia, so treat any single figure as a planning range, not a quote. What features make a bathroom look luxurious on a budget? Focus on cohesion and execution. Use large-format stone-look porcelain with narrow tone-matched grout, a floating or furniture-style vanity, layered dimmable lighting at 2700–3000K, a frameless or minimal glass screen, and one consistent metal finish. These deliver a high-end look at a lower price than natural stone or custom work. Skip excessive decor and trend-led accents, which add cost without lasting value. Are matte black fixtures a good choice for a luxury bathroom? They can look striking, but they aren't ideal everywhere. In hard-water areas, limescale and water spots show clearly on matte black and need frequent wiping. Lower-quality coatings can also wear or flake. If you love the look, choose a quality PVD or powder-coated finish and consider water softening or filtration. Brushed nickel and polished chrome are more forgiving and age more gracefully in busy family bathrooms. Will a luxury bathroom increase my home's value? Often partly, rarely in full. Buyers tend to respond to clean, well-executed, neutral bathrooms with quality materials and good lighting, while highly personal or trend-driven designs can narrow appeal. The expected standard also depends on your local market and home price range. If you may sell within a few years, favour durable, neutral choices and spend on waterproofing, ventilation, and installation quality rather than statement features. Can I make a small bathroom feel luxurious? Yes, and restraint helps most. Use large-format tile with minimal grout lines, frameless glass, wall-hung fixtures to show more floor, a single palette, and layered lighting. Add one tactile feature, such as a good shower system, heated floor, or warm wood vanity. Avoid busy patterns, bulky vanities, and too many materials, which make small rooms feel crowded rather than refined. Your Next-Steps ChecklistPick your style direction from the comparison table and write down three words that describe the feel (for example: warm, quiet, uncluttered). Order tile and countertop samples and test them in the room at morning, evening, and night. Sketch a three-layer lighting plan before choosing any fixtures. Confirm water pressure, hot water capacity, and floor-loading if you want a rain shower or freestanding tub. Get at least three itemised quotes, with waterproofing, electrical, and ventilation listed separately. Set a contingency of 10–20% for what's behind the walls.Costs are planning estimates, not quotes. Always verify local building, electrical, and plumbing codes, and use licensed professionals for waterproofing, electrical, and plumbing work. Bathroom Design & Style :How to Choose a Tile Pattern That Makes a Small Bathroom Look Bigger How Many Lights Should a Bathroom Have? Layouts, Lumens & Lighting Design Ideas That Work Walk-In Shower vs Bathtub: Which Is Better? Plus Modern Walk-In Shower Design Ideas That Last Small Bathroom Design Ideas: How to Make a Compact Bathroom Look (and Feel) Bigger Farmhouse Bathroom Ideas: What the Style Actually Requires (and What Nobody Tells You About Living With It) What Colors Make a Bathroom Look Bigger and Brighter? What Makes a Bathroom Look Modern? (Everything That Actually Matters)
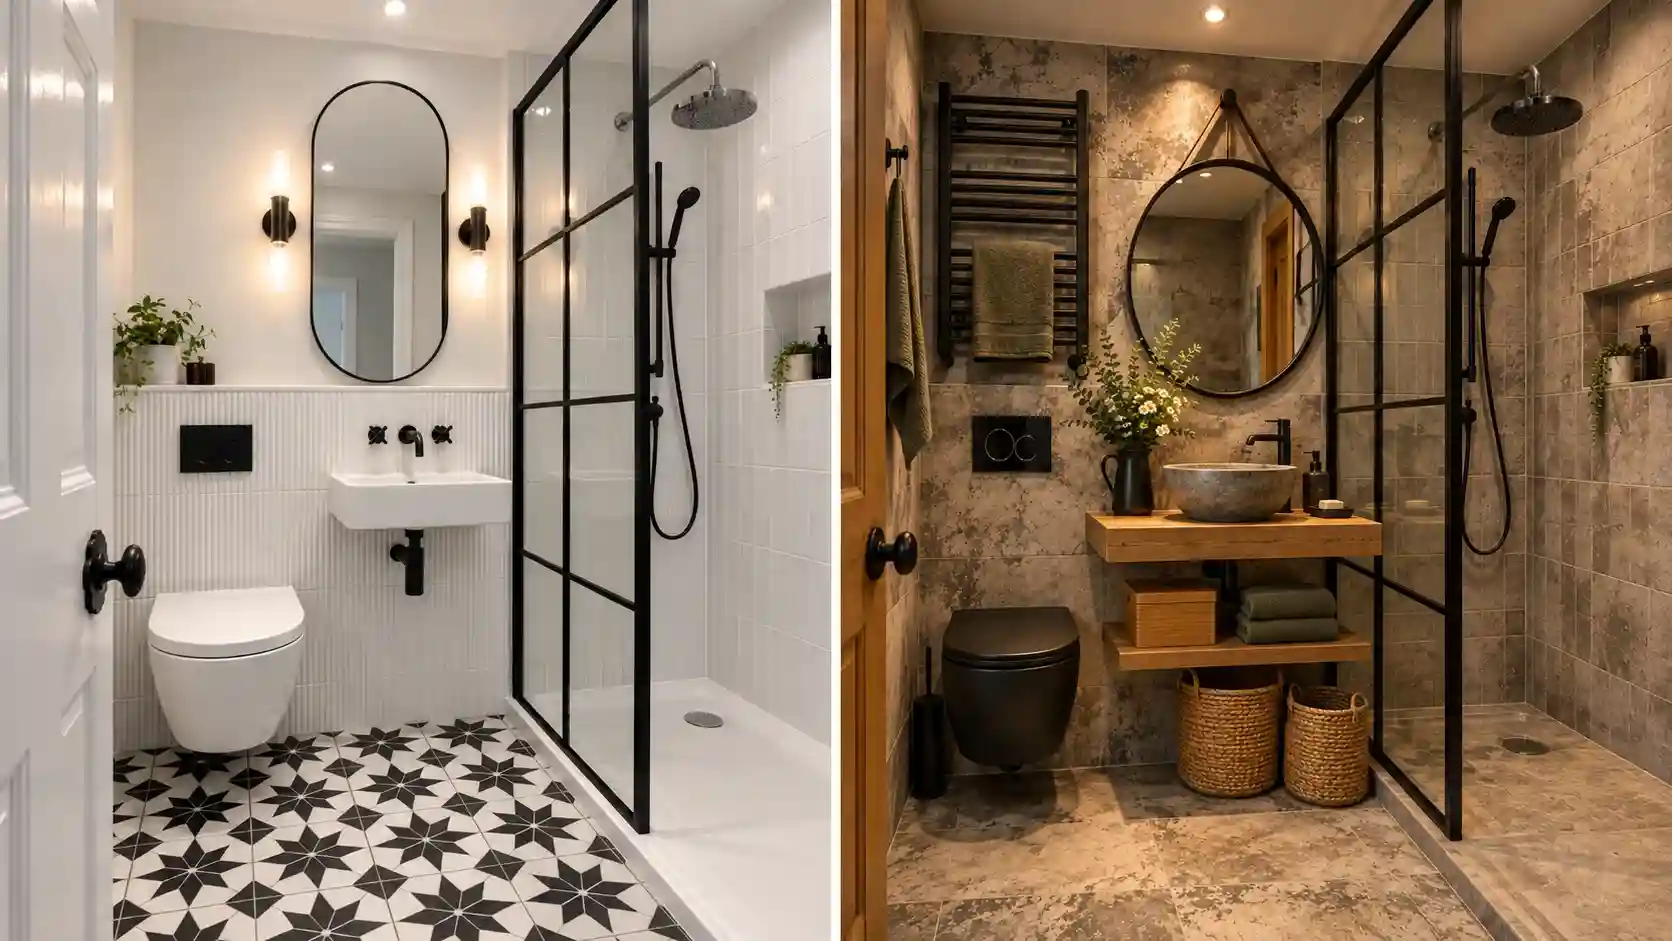
How to Choose a Tile Pattern That Makes a Small Bathroom Look Bigger
If you've spent any time scrolling renovation inspiration, you've probably noticed the same three words repeated endlessly: "go light, go large, go diagonal." It's not wrong advice, exactly — it's just incomplete. The truth is that tile pattern is one of the few design decisions in a small bathroom that does real, measurable optical work, and most of the advice out there skips the part that actually matters: why it works, and where it falls apart. Quick answer: Large-format tile (12"x24" or bigger) laid with minimal grout lines, a diagonal layout on the floor, or a single-tone herringbone pattern are the three approaches that genuinely make a small bathroom read as larger. The common thread isn't the pattern itself — it's the number of visual interruptions your eye has to process. Fewer grout lines and fewer color breaks mean your brain reads the surface as one continuous space instead of a patchwork of small ones. That's the one-sentence version. Here's everything underneath it — including the trade-offs nobody mentions until you're halfway through a renovation.Why Tile Pattern Actually Affects How Big a Room Feels This isn't decorating folklore — it's about how your eye processes visual boundaries. Every grout line is a tiny stop sign. Your brain uses those lines to measure the room, almost unconsciously, the same way you'd count floor tiles to estimate a room's size without a tape measure. The more stop signs there are, the more "measuring" your eye does, and the smaller the space registers. Large-format tile removes most of those stop signs. Diagonal layouts don't reduce grout lines, but they do something different — they stretch the visible line of the room from corner to corner instead of wall to wall, which is a longer line than the room's actual width. Herringbone works through a third mechanism: movement. It creates a rhythm that pulls the eye along the floor rather than letting it land and stop, which reads as flow rather than boundary. None of these patterns changes a single wall measurement. They all work by managing what your eye does, not what's physically there — which is exactly why pattern choice outperforms color choice in small bathrooms, even though color gets most of the attention in design content.The Best Patterns for Small Bathrooms, Compared Not every pattern that looks good in a 12x12 bathroom translates to a 5x7 one. Here's how the main options stack up specifically for small spaces.Pattern Defining Features Cost Tier Maintenance Best Room Size Resale Appeal Trend LongevityLarge-format straight lay Minimal grout lines, clean uninterrupted surface $$ Low — fewer grout lines to clean Any small bathroom, especially under 40 sq ft High — broadly neutral Very high, consistently safeDiagonal (45°) Square tile rotated, lengthens sightline corner to corner $$–$$$ Low–Medium 5×7 ft to 8×10 ft Medium–High High, long-standing techniqueHerringbone Zigzag interlocking rectangles, adds movement $$$ Medium — more grout lines Medium-small, not micro bathrooms Medium Medium — trend-sensitive if bold color usedVertical stack Tile stacked vertically on walls, raises sightline $$ Low Any, especially low-ceiling rooms Medium–High HighBasketweave Small tile woven pattern, textured look $$$ Medium–High Accent use only in small spaces Medium Medium — classic but can read busyIf you only take one thing from that table: large-format straight lay is the safest, lowest-risk, lowest-cost option, and it's the one most professionals quietly recommend when a homeowner asks "what won't I regret?"Large-Format Tile: The Safest Bet, and Why It Works So Well "Large-format" generally means anything 12"x24" or bigger, though many homeowners now go up to 24"x24" or even 24"x48" slabs in small bathrooms. The appeal isn't really the size of the tile — it's what the size does to the grout. A 12"x24" tile on a 5x7 floor needs roughly a third of the grout lines that a 12"x12" tile would, and less than a tenth of what a small mosaic tile requires. The trade-off most people don't expect: larger tile needs a flatter substrate to sit properly, and it's less forgiving of minor subfloor imperfections than smaller tile, which can flex into small dips. In an older home, that sometimes means a self-leveling compound gets added to the quote that wasn't in the original budget. It's a small cost relative to the visual payoff, but it's worth asking your tiler about upfront rather than finding out mid-project.Diagonal Layout: What It Really Costs You Diagonal tile is one of the oldest tricks for making a boxy room feel longer, and it still works because it's based on geometry, not trend. Rotating a square tile 45 degrees means the longest visible line across the floor runs corner to corner — which, in a small rectangular bathroom, is mathematically longer than either wall. What rarely gets mentioned: diagonal layouts waste more tile. Every edge tile along the perimeter needs an angled cut, and those offcuts usually can't be reused elsewhere in the room. Expect 10–15% more material than a straight lay from the same floor area, plus a modest labor upcharge for the extra cutting time. It's not a dealbreaker — it's just a cost that should be in the budget conversation from day one, not discovered when the tiler asks for more material halfway through.Herringbone and Chevron: When They Work (and When They Don't) Herringbone has a very specific job: it adds movement and texture without adding visual weight, but only when it's kept in a single, muted tone. The moment you introduce a bold color or a strong grout contrast into a herringbone layout, the pattern stops reading as "flowing" and starts reading as "busy" — and busy is the opposite of what a small bathroom needs. There's also a structural requirement competitors rarely bring up: herringbone and chevron are unforgiving of an uneven subfloor. Each tile sits at an angle against its neighbor, so any dip or hump in the floor shows up as lippage — a slightly raised or uneven edge — right at the points of the pattern, which is exactly where your eye naturally looks. In homes over 20–30 years old, it's common for a tiler to recommend floor leveling before a herringbone install, which adds cost but prevents a pattern that looks slightly "off" the moment the grout goes in.⚠️ Herringbone and chevron patterns are unforgiving of an uneven subfloor. Budget for floor leveling in older homes before committing to these layouts — skipping it is one of the most common sources of post-install regret tilers report.Used well — single tone, floor only, walls kept plain — herringbone is one of the more distinctive choices that still works in a small space. Used carelessly, it's the pattern most likely to backfire.Grout Color: The Variable Everyone Skips Here's the one most design articles leave out entirely, and it might matter more than the pattern itself: grout color can cancel out everything you just paid for. A large-format tile chosen specifically to reduce visual breaks will still look choppy and small if it's grouted in a sharply contrasting color. High-contrast grout essentially outlines every tile, turning a "seamless" tile choice back into a grid. The fix is simple — keep grout within one or two shades of the tile itself — but it's rarely stated outright, probably because it doesn't photograph as dramatically as a before-and-after tile swap.⚠️ Grout color is a structural part of the "bigger" effect, not a finishing touch. Match it within one to two shades of the tile, especially with large-format or diagonal layouts.The trade-off: lighter grout shows staining and discoloration faster than darker grout, particularly around high-moisture areas like the shower floor. It's a maintenance cost worth knowing about before you commit, not a reason to avoid light grout altogether.Tile Pattern Mistakes to Avoid in a Small Bathroom Using a bold or oversized pattern in a true micro-bathroom (under 30 sq ft) — the pattern dominates the room instead of expanding it. Choosing high-contrast grout for a "crisp" look — it emphasizes every tile edge and visually shrinks the floor. Mixing pattern direction between floor and walls without a plan — competing sightlines cancel out the elongating effect. Picking small mosaic tile for the entire floor — more grout lines overall, even when individual tiles are inexpensive. Skipping subfloor leveling before a herringbone or chevron install — uneven lippage breaks the clean lines the pattern depends on. Switching tile types at the shower threshold — creates a visual "stop" that undercuts the continuity effect. Choosing high-gloss tile under a single small window — glare and reflections add clutter rather than brightness. Underestimating diagonal or herringbone material waste and running short mid-install. Pairing a trend-driven dark color (deep green, navy) with a high-movement pattern like herringbone — it doubles down on visual weight in a space that needs the opposite. Hiring a general contractor for herringbone or chevron work instead of a tiler experienced specifically in pattern layouts — uneven points are difficult to fix after grouting sets.DIY vs. Professional: Where the Line Actually Is A straight lay or vertical wall stack is genuinely DIY-achievable for a patient homeowner with basic tiling experience — the layout math is simple and small errors are forgiving. Diagonal and herringbone are a different story. A few degrees of drift in a diagonal layout becomes visible across a small floor in a way it never would in a large open room, and herringbone has almost no tolerance for layout error once you're a few rows in.Pattern DIY Feasibility WhyLarge-format straight lay High Simple grid layout, forgiving of minor measurement errorVertical stack High Straightforward layout, minimal cuttingDiagonal Low–Medium Requires precise 45° layout; drift is highly visible in small roomsHerringbone/chevron Low Minimal tolerance for error; floor prep sensitivity adds riskIf you're DIY-renovating the rest of the bathroom, it's common practice to hire out just the tile work for these two patterns and handle the vanity, paint, and fixtures yourself.What It Actually Costs by Pattern Based on a roughly 35 sq ft small bathroom, here's where the budget typically lands in 2026.Cost Category Budget Tier ($) Mid Tier ($$) Premium Tier ($$$)Floor tile (material) $150–$350 $350–$700 $700–$1,500Wall tile (material) $200–$450 $450–$900 $900–$2,000Grout & setting materials $40–$80 $80–$150 $150–$250Labor — straight lay $600–$1,000 $1,000–$1,600 $1,600–$2,500Labor — diagonal/herringbone upcharge +$150–$300 +$300–$600 +$600–$1,200Waste factor (material overage) ~7–10% ~10–12% ~12–15%Estimated Total $1,100–$2,000 $2,200–$3,900 $4,000–$7,400The gap between a straight lay and a patterned layout is rarely about the tile itself — it's the combination of labor upcharge and waste factor that adds up.Maintenance Reality, By PatternTask Frequency Difficulty NotesReseal grout lines Every 12–18 months Easy More frequent with herringbone/basketweave due to grout volumeDeep-clean grout Monthly Easy–Moderate Light grout shows grime faster than dark groutCheck for lippage/wear at pattern edges Annually Easy Diagonal and herringbone edges see more foot traffic wearInspect shower threshold transition tile Every 6 months Easy Critical where continuous tile meets the shower panRe-caulk tile-to-tub/shower seams Annually Easy–Moderate More seams in patterned layouts near fixturesNone of this is a reason to avoid a pattern you love — it's just the honest version of what "low-maintenance" actually means in practice.Does This Pattern Work for My Bathroom?Bathroom under 30 sq ft → large-format straight lay, light grout; skip bold patterns entirely. 30–50 sq ft with good natural light → diagonal layout or vertical wall stacking. 30–50 sq ft with little natural light → large-format tile, matte finish; avoid dark or high-gloss patterns. Tight budget → large-format straight lay (lowest waste, lowest labor upcharge). Want visual interest without losing size perception → herringbone in a single muted tone, floor only. Older home with an uneven subfloor → budget for leveling before committing to herringbone/chevron. Selling within 3–5 years → prioritize large-format or diagonal in neutral tones. DIY renovation → straight lay or vertical stack; leave diagonal and herringbone to a professional.Frequently Asked Questions Does tile color matter more than tile pattern for making a small bathroom look bigger? Pattern and color work together, but pattern has the bigger structural effect. A light-colored tile in a busy mosaic layout can still look smaller than a mid-tone large-format tile with minimal grout lines. If you can only prioritize one, choose large-format tile with low-contrast grout over chasing the "right" color alone. Is diagonal tile still considered a current design choice, or is it outdated? Diagonal tile remains widely used because it's based on optical geometry rather than a passing trend. It pairs well with both modern and transitional bathrooms. It only reads as dated when combined with dated-era tile choices, like small beige ceramic squares from early-2000s builds. Can I install a diagonal or herringbone pattern myself, or do I need a professional? A straight or vertical layout is DIY-friendly for a confident homeowner. Diagonal and especially herringbone require precise cutting and layout planning — a few degrees of drift becomes visible across a small floor. Most tilers recommend hiring a professional for these two patterns specifically. Does a patterned tile layout cost more than a plain straight lay? Yes, in two ways: material waste (typically 10–15% more for diagonal or herringbone) and labor, which carries a $150–$1,200 upcharge depending on tile size and room complexity. A straight, large-format lay remains the most budget-efficient option. What's the single biggest tile pattern mistake in small bathrooms? Using a small, highly patterned tile — a busy mosaic or bold basketweave — across the entire floor. Even in a flattering color, the sheer number of grout lines creates visual noise that reads as "more surface," which shrinks the room rather than expanding it. Should the tile pattern be the same on the floor and the walls? Not necessarily the same pattern, but they should feel continuous. A common approach pairs a straight or diagonal floor with vertical-stack wall tile in a coordinating color. Abrupt pattern or color changes between floor and wall reintroduce the visual "stop" the pattern is meant to remove. Will a bold tile pattern hurt resale value? It can, depending on how bold and how small the bathroom is. Large-format or diagonal layouts in neutral tones carry low resale risk because they appeal broadly. Herringbone or basketweave in a strong color can be a selling point in some markets and a turn-off in others — neutral tones reduce that risk. Bathroom Design & StyleHow to Choose a Tile Pattern That Makes a Small Bathroom Look Bigger How Many Lights Should a Bathroom Have? Layouts, Lumens & Lighting Design Ideas That Work Walk-In Shower vs Bathtub: Which Is Better? Plus Modern Walk-In Shower Design Ideas That Last Small Bathroom Design Ideas: How to Make a Compact Bathroom Look (and Feel) Bigger Farmhouse Bathroom Ideas: What the Style Actually Requires (and What Nobody Tells You About Living With It) What Colors Make a Bathroom Look Bigger and Brighter? What Makes a Bathroom Look Modern? (Everything That Actually Matters)
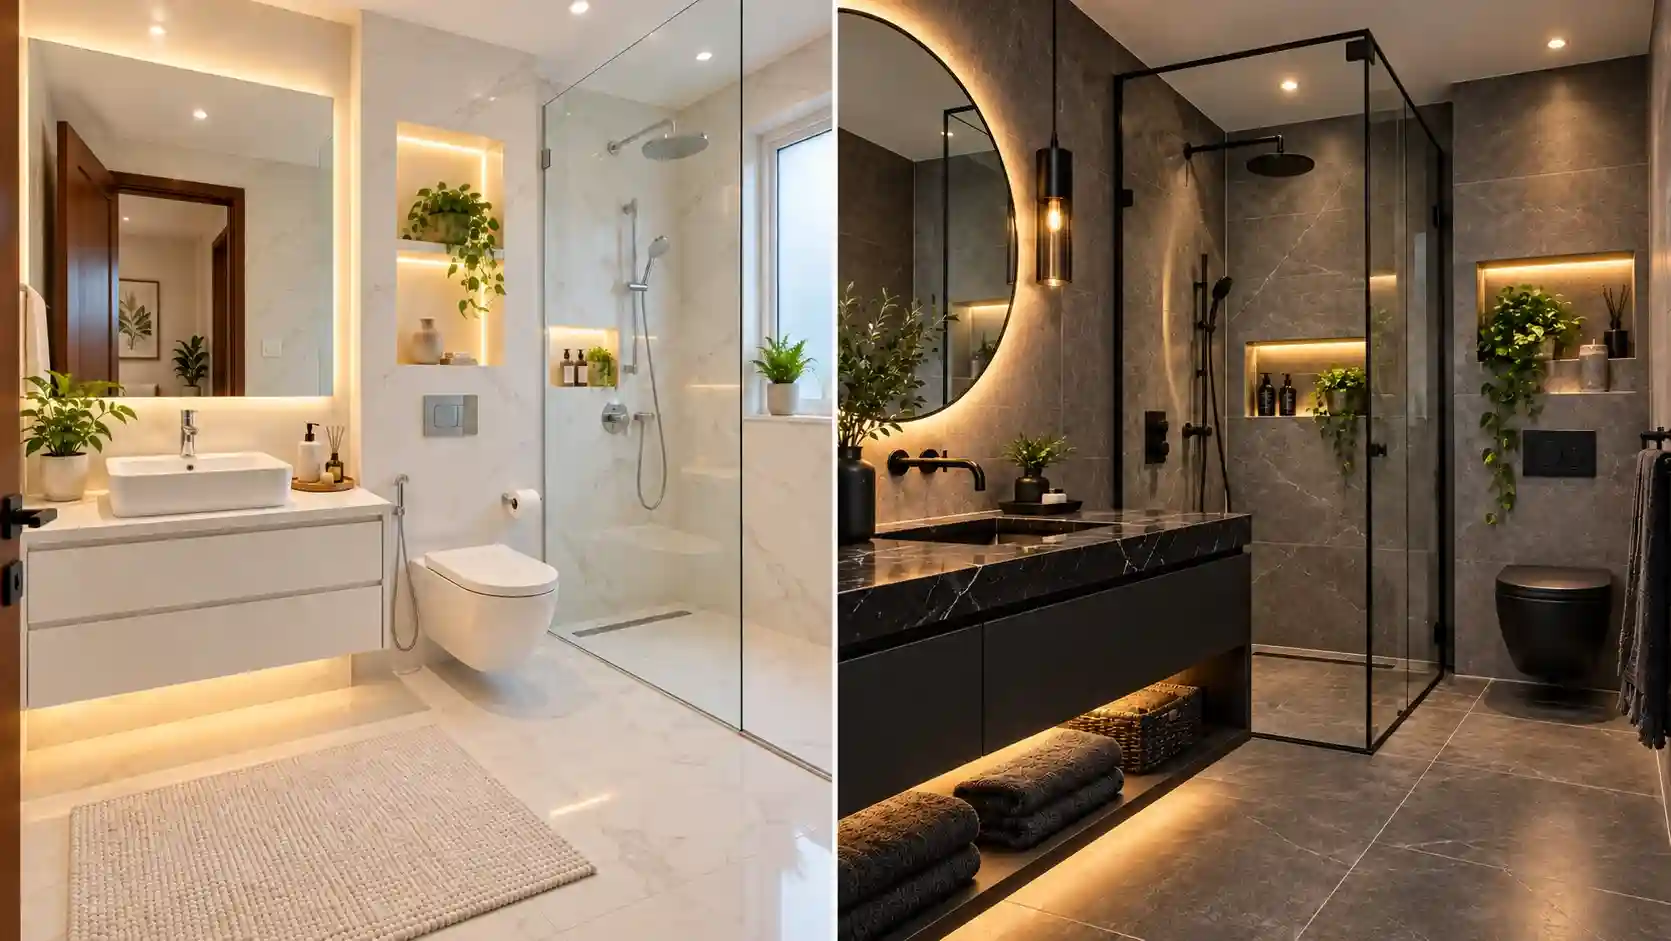
How Many Lights Should a Bathroom Have? Layouts, Lumens & Lighting Design Ideas That Work
Most bathrooms are lit by one ceiling fixture and a four-bulb bar over the mirror. It looks fine in the listing photos. Then you try to shave at 6:30am in January, or your partner needs to find the toilet at 2am, and the room turns out to be both dim and harsh. So how many lights does a bathroom actually need? The honest answer is that the count matters less than what each light is doing and where it sits. Here's the short version, then the detail.Quick answer: Most bathrooms need three to six light points arranged in layers: vanity task lighting on both sides of the mirror, one or two ceiling lights for general illumination, and a damp- or wet-rated light over the shower.Quick TakeawaysCount light points and lumens, not bulbs. A four-bulb bar is one fixture that lights your face from one direction only: above. Put vanity lights at face height, on both sides of the mirror. Overhead-only light casts shadows under the eyes and chin. Plan roughly 70–80 lumens per square foot (about 750–850 per m²) across the room. Dark tile, dark paint and windowless rooms sit at the top of that range. Use one color temperature (2700K–3000K suits most homes) and CRI 90+ in every fixture. Separate your switches or dimmers for vanity, ceiling, shower and night lighting. Check the rating for your country. Fixtures near tubs and showers have rules, and pendants or chandeliers over a tub are usually not allowed.For a typical 40–60 sq ft (3.7–5.6 m²) bathroom, that adds up to two vanity lights, two or three ceiling lights, and a shower light if the enclosure is dark. That's about four to six fittings. Stop Counting Bulbs: Light Points, Lumens and Layers "How many lights" sounds simple until you're standing in a lighting showroom holding a three-lamp bar, a pair of sconces and a lighted mirror, wondering which counts as what. Three terms clear it up:Light point: one fixture position. A three-lamp vanity bar is one light point with three bulbs. Lumens: how much light is actually produced. This is the number that decides whether a room feels bright, not the number of fixtures. Layers: the different jobs the light does.Most well-lit bathrooms use four layers:Layer Job Typical sourceTask Grooming, shaving, makeup Sconces beside the mirror, front-lit mirrorAmbient (general) Overall visibility, safe movement Ceiling downlights, flush mountAccent Mood, highlighting a niche or texture Niche lights, cove or toe-kick stripsNight Getting to the toilet without waking up Low, warm motion-sensor lightMost homeowners don't realize that two 800-lumen sconces at face height can beat six weak downlights at the mirror. Where the light lands on your face matters more than how many fittings are on the ceiling.Bathroom Light Count by Size and Layout This table is a starting point, not a rule. Ceiling height, windows and finishes will move the numbers.Bathroom type Typical size Minimum that works Recommended light pointsPowder room / half bath ≤25 sq ft (≤2.3 m²) 2 2–3: two sconces or one bar, plus an optional small ceiling lightSmall full bath 25–40 sq ft (2.3–3.7 m²) 2 3–5: two sconces or a bar, 1–2 ceiling lights, shower light if enclosed, night lightStandard full bath 40–60 sq ft (3.7–5.6 m²) 3 4–6: two sconces, 2–3 ceiling lights, shower light, night lightPrimary / ensuite 70–120 sq ft (6.5–11 m²) 5 7–12: light per basin, ceiling grid, separate shower and tub lights, toilet compartment light, accent, toe-kickDouble vanity any 3 sconces or 2 bars 3–4 sconces (or a bar per mirror) plus a ceiling layerWet room 40–70 sq ft 4 wet-rated 5–8 wet-rated in the spray zone, damp-rated elsewherePowder rooms and half baths A powder room can look better with less. Two sconces on a dimmer often beat a ceiling light, because you're mostly washing hands and glancing in a mirror. Skip recessed cans unless the room is windowless and gloomy. Small full bathrooms In a small bathroom, adding ceiling lights is the instinct. Improving the mirror-side lighting usually does more. If you have to choose, put your budget at the vanity first, then add a wet-rated light in an enclosed shower. Windowless bathrooms Without daylight, the room depends entirely on your fixtures. Aim for the upper end of the lumen range, choose high-CRI lamps, and think about tunable white so the room doesn't feel like a cellar on winter mornings. Double vanities For two basins with two mirrors, three sconces is a common layout: one between the mirrors and one at each end. If you'd rather use bars, one above each mirror works. Add a ceiling layer either way, or the space between the basins will look dim. Primary bathrooms Larger rooms fail differently. They don't lack light points, they lack control. A 100 sq ft ensuite with six lights on one switch is either glaring or dark. Break it into zones: vanity, ceiling, shower, tub, toilet compartment, and night.How Bright Should a Bathroom Be? A Five-Minute Lumen Calculation A commonly used planning benchmark is 70–80 lumens per square foot across the whole room. Treat it as a starting point and adjust. Worked example: a 5×8 ft bathroom (40 sq ft)40 sq ft × 70–80 = 2,800–3,200 lumens in total. Rough split:Zone Approx. lumensVanity (two sconces or bar) 1,200–1,600Ceiling (2 downlights at ~450–650 each) 900–1,300Shower light 300–500Night light A few dozen, kept lowMove toward the higher end if you have dark tile, dark paint, no window, or a mirror that faces away from any light. On energy use: a typical 800-lumen LED lamp draws roughly 8–10 watts. Even a well-lit bathroom uses little electricity, so lighting it properly isn't the energy problem most people fear. The bigger drains are usually heated floors, towel warmers and long exhaust fan runs. If you want to trim running costs, a vacancy sensor or a fan-timer switch helps more than under-lighting the room.Vanity Lighting: The Layer That Decides Whether the Room Works If you only get one thing right, get this right. Vanity lighting is where people judge the room, and where they notice mistakes daily. Why side lighting wins Light from above the face pushes shadows under your eyes and chin. Light from both sides at face height fills them in. That's the reason designers keep recommending sconces beside the mirror, and it's not just a style preference. Sconces vs vanity bar vs lighted mirrorOption Best for Trade-offsTwo sconces beside the mirror Most bathrooms; best face lighting Needs wall space and wiring on both sidesBar above the mirror Tight walls, replacing an old fixture Overhead-only light unless the mirror is wide and the bar is diffusedFront-lit LED mirror Modern, minimalist rooms Integrated LEDs are often not user-replaceable; check CRI and warrantyBacklit (halo) mirror Ambient glow, mood Doesn't replace task lightingMany buyers assume an "LED mirror" solves the vanity. A halo mirror mainly adds glow around the frame. For grooming you still want light on your face. Height and spacing These are common starting points, not universal rules:Height: center of the fixture at roughly face height, often 60–66 in (152–168 cm) from the floor. Spacing: about 30–40 in (75–100 cm) apart, adjusted to the mirror width and who's tallest in the house. Bars above a mirror: keep the bar no wider than the mirror, and diffused rather than bare-bulb.Pros and cons of the sconce approach ProsThe most flattering, even light on the face Works with almost any style Easy to swap decorative fixtures laterConsNeeds wiring on both sides of the mirror Retrofitting into a finished wall can mean patching drywall or tileCeiling, Shower and Night Lighting Recessed lights: where they go For general lighting, a common starting point is spacing recessed lights roughly half the ceiling height apart. On an 8 ft ceiling that's about 4 ft. The bigger mistake is location. Downlights directly above the vanity user's head cast shadows on the face. Place them in front of the vanity zone and let the sconces do the face lighting. If your ceiling is under about 8 ft (2.4 m), use slim wafer downlights or a low-profile flush mount. Avoid anything that hangs. The recessed-light problem nobody mentions Recessed housings that aren't sealed can leak warm, humid air into the ceiling cavity or attic. Over time, that can mean condensation and mold. Look for airtight housings, and where insulation touches the fixture, check the IC (insulation contact) rating. Then make sure your exhaust fan really vents outdoors. Shower lighting If your shower is enclosed with glass or a curtain and the general lights don't reach it, add a dedicated light. Anything inside or directly above the spray zone needs the correct wet-location or IP rating for your country. More on that in the safety section below. Night lighting Most people don't plan for this until after the renovation, and then regret it. A low, warm, motion-activated light on the toilet route (a toe-kick strip, or a light under a floating vanity) keeps you from turning on full-brightness light at 2am. It's also a genuine safety feature for children and older adults on hard, wet floors. If you already use smart switches or Matter-compatible devices at home, a motion-triggered night scene can be automated without a separate gadget. Fan-and-light combos Older bathrooms often rely on an exhaust fan with a built-in light as the "general" light. It's usually dim and low-CRI. If you're upgrading the fan, consider separating the fan and the lighting so you can choose each properly.Color Temperature, CRI and Why Your Tile Looks Different at Night Kelvin2700K–3000K: warm, flattering, spa-like. Suits most homes. 3500K–4000K: crisper, more neutral. 5000K and up: often reads clinical in a home bathroom, even if it's marketed as "daylight."The most important rule: use the same color temperature in every fixture. A 2700K downlight next to a 4000K mirror makes the room look patchy. CRI CRI (color rendering index) describes how accurately colors appear under a light. For a bathroom, aim for CRI 90 or higher. It changes how skin tones, makeup and tile look. Many budget lighted mirrors don't publish a CRI, and that's worth noticing. How light changes your finishesGloss reflects the light source. Polished dark floor tile, glossy vanities and polished counters can mirror your downlights as hot spots. Honed, matte or satin finishes diffuse them. Dark surfaces absorb light. The same fixtures feel dimmer over dark paint and tile. Paint with a high LRV (light reflectance value, around 70 or higher) bounces more light back. Sidelight exposes flaws. Sconces and wall-washing rake across surfaces, revealing uneven plaster, tile lippage and wavy handmade tile that flat overhead light hides. Kelvin shifts undertones. A greige or gray tile with white grout can look yellow at 2700K and blue-gray at 4000K. Test samples under the actual bulbs, at the times of day you use the room.Natural light matters too. A tile that looks perfect at noon can look flat at 6pm, and both are worth checking before you order.Design element decision table For a layered, warm-neutral, transitional-modern bathroom.Element Best choice Common mistake Upkeep realityFloor tile Mid-tone, honed or matte porcelain with a suitable wet slip rating (in the US, look for DCOF 0.42+) Polished dark tile that mirrors downlights Matte texture can hold soap film; use a soft brush and pH-neutral cleanerWall tile Light, satin or soft-gloss, large format Uneven glossy handmade tile under sconces Fewer grout lines means easier cleaningGrout Within one or two shades of the tile Bright white grout that yellows under warm light Light grout shows mildew; epoxy or stain-resistant grout helpsVanity finish Mid-tone wood veneer or matte lacquer High-gloss dark vanity that reflects sconces Gloss shows fingerprints and water spotsFixture finish Brushed nickel or PVD-coated brass Mixing four finishes; matte black in hard water Matte black spots as readily as chrome; descale as neededMirror Framed mirror with side sconces, or front-lit LED with published CRI Relying on a halo mirror alone Check anti-fog and warrantyLighting Three layers, separate control, 2700K–3000K, CRI 90+ One overhead fixture or single bar Drivers and dimmers usually fail before LEDs doCountertop Honed quartz or quartzite Polished dark granite; marble that etches Marble etches and stains; quartz is easierPaint Warm white, matte or eggshell, mold-resistant Dark paint with no extra lumens Repaint every few years in steamy roomsBathroom Lighting Design Ideas by Style Lighting choices often define a bathroom's style more than the tile does. Here's how five popular directions compare.Style Lighting approach Cost tier Upkeep LongevityModern minimalist Slim or trimless recessed, linear LED, front-lit mirror $$–$$$ Low–medium; integrated LEDs rarely user-replaceable High if well madeTransitional / classic Paired shaded or opal-glass sconces, framed mirror $$ Low–medium HighJapandi / spa Warm 2700K, soft diffusers, dimmers, toe-kick glow $$–$$$ Medium; diffusers and wood near moisture need care Medium–highFarmhouse / industrial Gooseneck or cage sconces, exposed-bulb bars $–$$ Medium; matte black spots, bulbs collect dust Lower; looks date fasterMoody powder room Dark paint, low-output sconces, dimmers $–$$ Medium; dark surfaces show splashes MediumFive scenes worth picturing A small windowless bath, done well. Two slim sconces flank a plain mirror. A single flush ceiling light sits in front of the vanity, and a wet-rated downlight covers the shower. Everything is 3000K, CRI 90+, on two dimmers. It's not dramatic, but it works at any hour. A transitional double vanity. Three opal-glass sconces sit between and beside two framed mirrors, with recessed lights in front of the vanity. The finishes match the faucets. It reads as timeless because nothing is trying too hard. A Japandi spa bath. Warm indirect light washes a textured wall, and a low glow runs under a floating vanity. A soft-diffused ceiling fixture sits on a dimmer. The success here depends on glare control, and one bare bulb ruins it. A farmhouse bath. Black gooseneck sconces above a shiplap-style wall. It photographs beautifully. Living with it means dusting exposed bulbs, wiping hard-water spots off matte black, and making sure open sockets aren't near the spray. A moody powder room. Black walls and two low-output sconces. Guests love it. But dark paint absorbs light, so it needs enough lumens and dimmer control to stay usable. Photos flatter. Real bathrooms get judged at dawn, at dusk and at midnight. Choose the lighting for the version of the room you'll live in, not the one you saved on Pinterest.Lighting Design Ideas 09 Plan Your Layout in Six StepsNote the conditions. Room size, ceiling height, windows, surface colors, who uses the room and when. Set a lumen target. Multiply square footage by 70–80, then adjust for dark finishes or no window. Design the vanity first. Side lighting at face height, or a front-lit mirror, sized to the mirror and number of basins. Add ceiling and shower layers. Place recessed lights in front of the face zone. Add a wet-rated shower light if needed. Zone the circuits. Separate switches or dimmers for vanity, ceiling, shower and night. Check ratings and code, then get quotes. Confirm zones and ratings for your country, and have an electrician review the plan.Safety and Code: Zones, Ratings and Regional Differences Bathrooms combine water and electricity, so rules exist for good reason. They also vary by country, and that's where online advice tends to go wrong.⚠️ A chandelier over the tub is a code problem, not just a style choice. In the US, NEC 410.10(D) restricts hanging fixtures within about 3 ft horizontally and 8 ft vertically of the tub rim or shower threshold, and other countries apply comparable zone rules. Moody chandelier photos are often taken in large bathrooms where the tub sits away from the fixture. Confirm clearances with your local code and an electrician before ordering.⚠️ "Damp-rated" does not mean "wet-rated." A damp-rated sconce is fine on a dry wall away from spray, but not inside a shower enclosure. Anything in or above the spray zone needs the correct wet-location or IP rating. If you're unsure, don't guess.What to check by countryCountry Terms to know What to checkUnited States Damp vs wet location, UL/ETL, GFCI, NEC Correct location rating; tub/shower clearances; GFCI protectionCanada CSA/cUL-certified, Canadian Electrical Code, GFCI Certified fixtures; permit rules vary by provinceUnited Kingdom Zones 0–2, IP ratings, BS 7671, RCD At least IP44 in zones 1 and 2; zone 0 needs a much higher rating on a low-voltage supply; UKCA/CE markingAustralia Zones, IP ratings, AS/NZS 3000, RCM, safety switch Correct zone ratings; RCM-marked fittings; licensed electricianOne more trap: if you're buying from a US retailer while living in the UK or Australia, remember those fixtures are usually made for 120V. UK and Australian supplies are 230V, so many US fixtures won't work and shouldn't be installed. Always switch off the breaker before touching any fixture, and confirm it's dead with a tester. Rules change, so verify with your local authority.Lighting Design Ideas 10 Bathroom Lighting Mistakes People Regret Relying on one overhead light or one bar. It shadows your eyes and chin. Add side lighting at face height, or choose a front-lit mirror. Sconces too high, too low or too far apart. Aim for roughly face height and about 30–40 in apart, adjusted to the mirror. Buying for looks before checking lumens. Many decorative sconces are dim. Check output per lamp and per fixture. Mixing color temperatures. Pick one Kelvin for the whole room. Putting a chandelier or pendant over the tub. It looked great online. Most codes restrict it. No dimmers, no separate switching. One switch means a full-brightness blast at 3am. Unsealed or wrongly rated recessed lights. They can leak humid air into the ceiling or create a fire-safety issue. Ignoring gloss reflections. Polished floors, gloss vanities and polished counters throw hot spots. Integrated-LED fixtures with no CRI or serviceability info. If the driver fails after the warranty, the whole unit goes. Downlights directly over the vanity user's head. They shadow the face. Place them in front instead.What Bathroom Lighting Costs: Three Budget Tiers These are planning ranges in USD for a typical 40–60 sq ft bathroom, based on US pricing. Convert at current rates, and expect electrician costs to vary by region. The budget tier assumes existing wiring and boxes.Cost category Budget ($) Mid ($$) Premium ($$$)Vanity lighting $60–$150 $150–$450 $450–$1,300+Ceiling lights (2–4) $40–$120 $120–$300 $300–$800Shower light (wet-rated) $15–$40 $40–$120 $120–$300Mirror $100–$250 $250–$700 $700–$2,000+Dimmers / controls $15–$40 $40–$150 $150–$500Night light / toe-kick strip $15–$40 $40–$120 $120–$350Electrician labor $300–$700 $700–$1,800 $1,800–$4,000+Patching and painting $0–$150 $150–$500 $500–$1,200Estimated total (rounded) $550–$1,500 $1,500–$4,100 $4,100–$10,500Lighting Design Ideas 11 Where the money is worth spendingWorth it: vanity lighting, CRI 90+ lamps, and separate dimmers. You use these every day. Often not worth it: an expensive decorative ceiling fixture nobody looks at, or a designer bar with weak output. Easy to swap later: decorative fixtures. Bad wiring layout is the expensive thing to fix afterward.The costs people don't expectPatching and repainting. Adding recessed lights or moving sconces can mean opening drywall or, worse, cutting into tile. Wiring for controls. Many smart dimmers need a neutral wire at the switch box. Older homes, and many UK lighting circuits, don't have one. Multi-gang boxes. Adding several dimmers may require a larger switch box.DIY or Electrician? What You Can (and Can't) DoTask Typical verdictSwap bulbs for high-CRI LEDs DIY-friendlyLike-for-like fixture swap Often DIY, but check local rulesAdd a new recessed light ElectricianNew circuit or wall opening ElectricianAny fixture in or above the wet zone ElectricianDimmer or smart switch Often DIY in the US and Canada; rules vary elsewhereRules differ by country, so check locally. In Australia, fixed wiring work generally needs a licensed electrician, and in most states that includes replacing a fitting. In the UK, some like-for-like work is allowed, but bathroom zones, BS 7671 and notification rules still apply, and new circuits should go to a registered electrician. In Canada, permit rules vary by province. In the US, local codes apply and some jurisdictions require permits for new circuits.Lighting Design Ideas 12 When to call an electricianYou're adding new light points or moving wiring Anything sits in or above the shower or tub zone Recessed lights are going into an insulated ceiling A breaker trips, a GFCI or RCD won't reset, or wires look damaged You're not sure about zonesWhen a designer earns their fee A designer or lighting specialist helps with large primary bathrooms, custom coves or niches, or when you're combining lots of decorative fixtures and want them to work together. For a standard bathroom, this guide plus an electrician is usually enough.Lighting Design Ideas 13 Maintenance and Long-Term Ownership Bathroom lighting lasts longer than most people expect and fails in less obvious ways. Usually it's the driver or the dimmer, not the LED chip.Task Frequency Difficulty NotesWipe fixtures, shades, lighted mirror Monthly Easy Microfiber; check the maker's guidance for coatingsClean diffusers and glass shades Quarterly Easy Dust and steam residue dim outputTest GFCI (US/CA) or RCD (UK/AU) Monthly to quarterly Easy Call an electrician if it won't trip or resetInspect caulk and trims around recessed and shower lights Twice a year Easy–medium Stops moisture creeping behind trimsDescale fixtures in hard water As needed Easy Non-abrasive; avoid harsh acids on lacquered or PVD finishesCheck the exhaust fan and vent Every 6 months Easy–medium Poor ventilation shortens the life of finishes and electronicsCheck dimmers for flicker, buzz or heat Annually Medium Match the dimmer to the LED driver and minimum loadReplace lamps or modules Per rated life Easy–medium Heat and humidity can shorten driver lifeLighting Design Ideas 14 TroubleshootingSymptom Likely cause What to try Call an electrician ifFlicker when dimmed Dimmer and driver mismatch Use an LED-rated dimmer matched to the load Flicker persists or fixtures feel hotBuzzing Incompatible dimmer or failing driver Swap the dimmer type Buzzing comes from the switch boxLight slowly dimming Dust, steam residue, aging driver Clean the diffuser; replace the lamp Several fixtures dim at onceYellowing or uneven color Mixed Kelvin or aging lamps Replace with matching lamps —Fogged mirror light Failed anti-fog pad or seal Check the warranty Water reaches wiringGFCI or RCD keeps tripping Moisture in a fixture or wiring Turn off the affected circuit AlwaysDoes This Plan Work for Your Bathroom?Under about 25 sq ft? Two sconces on a dimmer is plenty. No window? Plan for the upper end of the lumen range, with CRI 90+ and possibly tunable white. Dark tile, paint or vanity? Add lumens, and avoid polished surfaces that glare. Double vanity? Give each basin its own light, and add a ceiling layer. Ceiling under about 8 ft? Use slim or low-profile fixtures. Avoid hanging lights. Kids, older adults or frequent night use? Add a low, warm, motion-activated light on its own circuit. Renting or not touching wiring? Swap in high-CRI LED lamps, add a battery-powered motion night light rated for damp areas, and skip extension cords. Selling within two years? Symmetrical paired sconces, 3000K, clean finishes and working dimmers are a safe bet.Resale, Trends and What Ages Well No reliable data ties a specific bathroom fixture to a higher sale price. What buyers do notice is dim, yellowed, builder-grade lighting, and anything that looks dated or badly maintained. A few patterns tend to age well:Symmetrical, well-placed sconces Warm, consistent color temperature Working dimmers Simple finishes that match the hardwareSome trends carry more risk: cage lights, exposed-bulb bars, oversized statement fixtures, and very cool "daylight" bulbs. The layout is worth getting right, because it's expensive to change. The decorative fixtures are the part you can swap in an afternoon.Fixtures and Specs to Look For Before you fall for a fixture, check the spec sheet:Lumens per lamp and per fixture Color temperature (Kelvin) CRI, ideally 90+ Location rating: damp or wet in the US and Canada, IP rating in the UK and Australia Dimming compatibility with your dimmer type Replaceable lamps or driver, and a real warranty Certification marks for your country (UL/ETL, cUL/CSA, UKCA/CE, RCM) For recessed lights: IC and airtight ratings, and beam angle Finish: PVD or brushed finishes tend to be more forgiving in humidity and hard waterUpgrade categoriesBudget: LED wafer downlights, simple sconces or bars, basic dimmers. Mid-range: better diffusers, high-CRI lamps, smart dimmers, motion night lights. Premium: front-lit or anti-fog LED mirrors with published specs, multi-zone controls, tunable white.Tools that earn their placeA non-contact voltage tester, for safety A phone lux-meter app, useful for comparing rooms even though it's not lab-accurate Sample bulbs, to test color before committingFrequently Asked Questions How many lights should a small bathroom have? In a bathroom under about 40 sq ft (3.7 m²), plan for three to five light points: two vanity sconces or one bar over the mirror, one or two ceiling lights, and a damp- or wet-rated shower light if the enclosure is dark. A powder room can work with just two sconces on a dimmer. Count lumens rather than fixtures, and aim for roughly 70–80 lumens per square foot as a starting point. How many recessed lights does a bathroom need? A standard 5×8 ft bathroom typically needs two or three recessed lights for general lighting, plus a wet-rated one over the shower if it's enclosed. A common starting point is spacing them roughly half the ceiling height apart, placed in front of the vanity rather than directly above it. Choose airtight, correctly rated housings and check lumen output rather than counting fixtures alone. How many lumens does a bathroom need? A commonly used planning benchmark is about 70–80 lumens per square foot (roughly 750–850 per m²) across the whole room. A 40 sq ft bathroom therefore needs about 2,800–3,200 lumens in total, with a large share at the vanity. Dark tile, dark paint or no window push you to the upper end. Treat it as a starting point, then adjust to how the room actually feels. What color temperature and CRI are best for bathroom lighting? For most homes, 2700K–3000K feels warm and flattering, while 3500K–4000K is crisper if you prefer a brighter look. Use the same Kelvin across every fixture so the room doesn't look patchy. Choose CRI 90 or higher so skin tones and tile colors look accurate. Very cool light (5000K and up) often reads clinical in a home bathroom. Can I put a chandelier or pendant light in a bathroom? Sometimes, but not over the tub or shower. In the US, NEC 410.10(D) restricts hanging fixtures within about 3 ft horizontally and 8 ft vertically of the tub rim or shower threshold, and other countries apply similar zone rules. Pendants are generally fine away from the wet zone in a larger bathroom with adequate ceiling height. Check your local code and use a fixture with the right damp or wet rating. Do I need a separate light in the shower? If the shower is enclosed with glass or a curtain and your general lighting doesn't reach it, yes. Any fixture in or directly above the spray zone must be rated for wet locations (US), or carry the required IP rating for the relevant zone (UK and Australia). Fixtures outside the spray zone can be damp-rated. Have an electrician confirm ratings and installation. Are dimmers and separate switches worth it in a bathroom? Yes. Separate control for vanity, ceiling, shower and night lighting lets you use bright light for grooming and soft light at night. Dimmers typically cost about $15–$150 each, plus installation. Use a dimmer rated for LED and compatible with your fixtures' drivers, and check the minimum load, because mismatched dimmers cause flicker or buzzing. Your Bathroom Lighting Checklist Light points planned by layer: task, ambient, accent, night Roughly 70–80 lumens per sq ft, adjusted for dark finishes and windows Vanity lighting at face height on both sides of the mirror One color temperature, CRI 90+ throughout Separate dimmers or switches for each zone Correct wet or damp rating for every fixture near water Recessed lights sealed and correctly rated A night route light for the toilet Electrician consulted for anything new, moved or in the wet zoneLighting is one piece of a bigger picture. Tile, layout and overall style all change how your lighting plan works, so treat this as one step in your wider bathroom design and renovation planning. Bathroom Design & Style :How to Choose a Tile Pattern That Makes a Small Bathroom Look Bigger How Many Lights Should a Bathroom Have? Layouts, Lumens & Lighting Design Ideas That Work Walk-In Shower vs Bathtub: Which Is Better? Plus Modern Walk-In Shower Design Ideas That Last Small Bathroom Design Ideas: How to Make a Compact Bathroom Look (and Feel) Bigger Farmhouse Bathroom Ideas: What the Style Actually Requires (and What Nobody Tells You About Living With It) What Colors Make a Bathroom Look Bigger and Brighter? What Makes a Bathroom Look Modern? (Everything That Actually Matters)
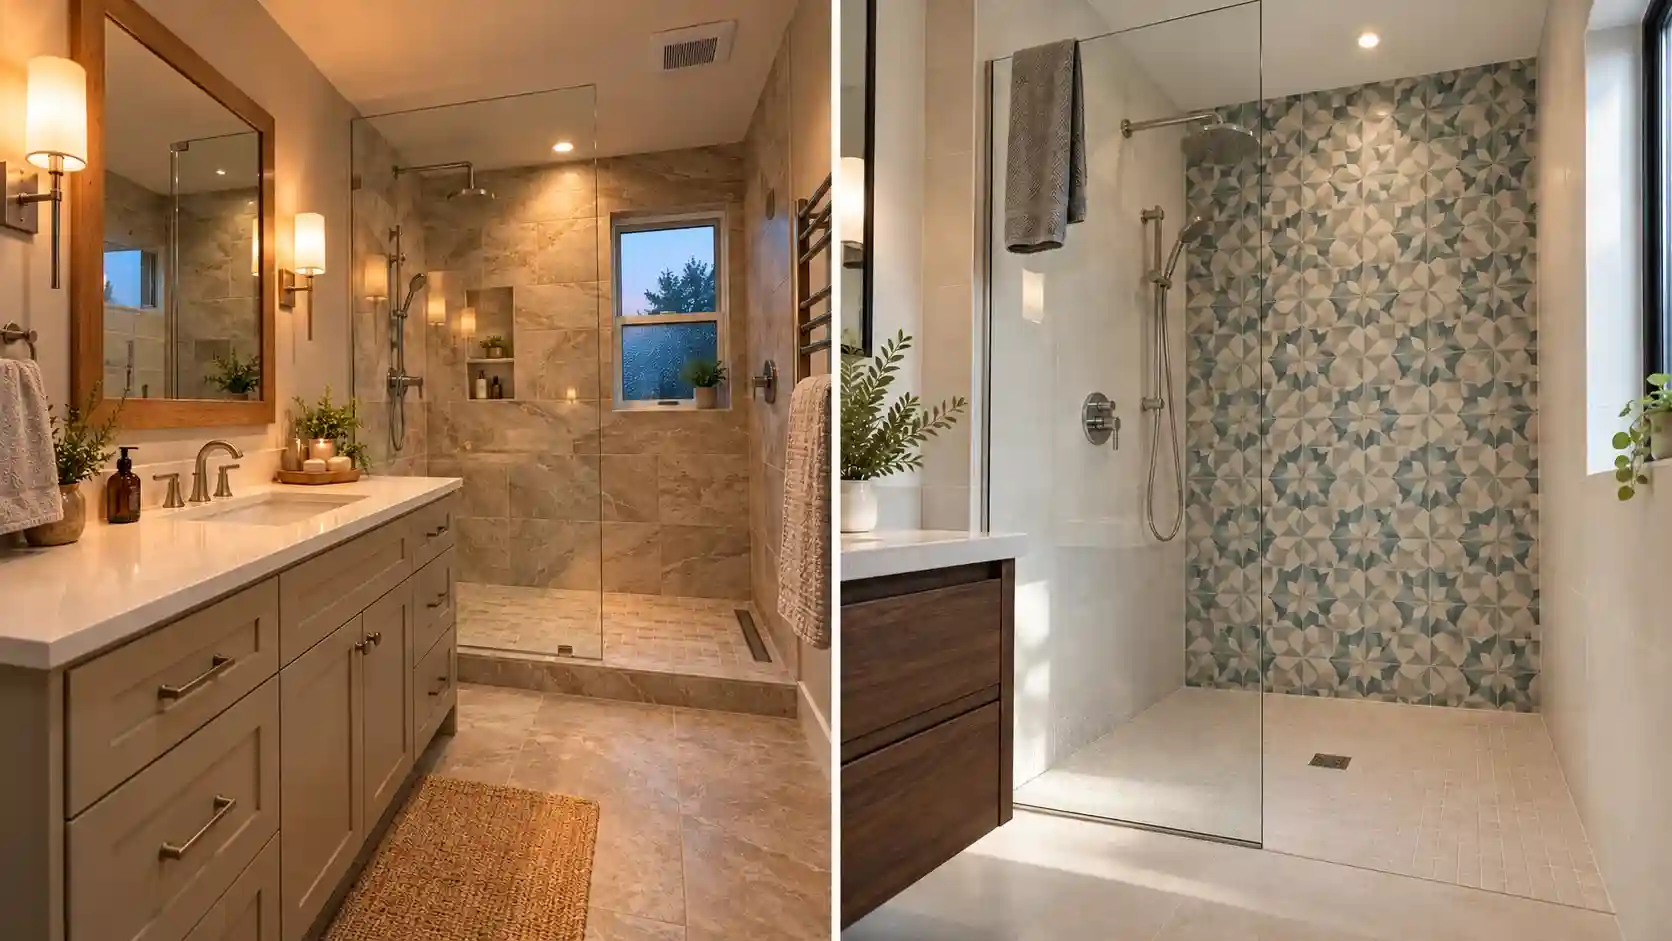
Walk-In Shower vs Bathtub: Which Is Better? Plus Modern Walk-In Shower Design Ideas That Last
Scroll through any bathroom inspiration feed and you'll notice something. Nobody's shampoo bottles are in the shot. The glass is dry, the niche holds one perfectly rolled towel, and the floor tile looks like it has never met a wet foot. Real showers don't work that way. This guide covers the honest version: whether a walk-in shower beats a bathtub, which modern walk-in shower ideas hold up after a few years of hard water and daily use, and what it all costs.Is a Walk-In Shower Better Than a Bathtub?Quick answer: For most households, yes. A walk-in shower is quicker, easier to make step-free, and fits where a bathtub sits. A bathtub still wins for bathing children and soaking, so keep one tub in the home if resale matters. The catch is that "better" depends less on design and more on who lives in the house. A walk-in shower is usually the smarter use of space in a primary bathroom or a second bathroom. If you have one bathroom and small children, the bath is doing a job a shower can't. Quick takeawaysA walk-in shower is usually the better daily-use choice, especially in a primary or second bathroom. Keep at least one bathtub in the home if you have young kids or expect to sell to families. The best-looking walk-in showers use fewer materials, one feature surface and matching floor tile. They don't put pattern on every wall. Slope, waterproofing and drain choice matter more than tile choice, and they're the costliest things to get wrong. Doorless designs need enough depth, a sensible showerhead position and a plan for warmth and ventilation. Dark matte finishes photograph beautifully but show water spots and soap film faster in hard-water areas.Walk-In Shower vs Bathtub at a GlanceFactor Walk-In Shower BathtubDaily use Fast and simple Slower, and the step over the side is awkward for some usersAccessibility Can be made step-free, with a bench and grab bars Harder to make accessible without conversionWater use Typically lower than filling a bath, unless showers run long Higher per use, but fewer usesBathing children and pets Harder without a handheld and a seat EasierRelaxation and soaking Limited (a bench and a steam-ready design help) The clear winnerDesign flexibility Very high (tile, glass, layout, niches) Moderate (a freestanding tub is a statement piece but takes space)Upfront cost Can be lower or higher depending on waterproofing, glass and tile Often lower for a standard tub, higher for freestanding or stoneCleaning Glass, grout and drain need regular care Fewer surfaces, but tub-shower combos need caulk careResale Strong in primary and second bathrooms Expected in at least one bathroom for many buyersComfort in cold rooms Doorless layouts can feel cold without heating Warm water and an enclosed space feel cosierTwo rows in that table cause most of the regret. One is cold-room comfort. The other is resale, which matters if you ever plan to remove your only bath. Both come up again below.What Actually Makes a Walk-In Shower "Modern"? "Modern" gets slapped on everything, so here's what it means in practice. A modern walk-in shower usually has these traits:A low or flush entry. No tall tub wall to step over. Glass doing the enclosing. A fixed panel, often frameless, instead of a curtain or sliding door. Continuous surfaces. Matching tile from bathroom floor into the shower, with as few visible joints as possible. Hardware that recedes. A slim wall-mounted head, concealed valve trim and a linear or tile-insert drain. Drainage designed in from the start. The floor is sloped to the drain rather than fitted around it later.A few terms get muddled, so it helps to separate them:Walk-in shower: an open entry with no swinging door, or a very simple one. It may still have a low curb. Curbless (or level-access) shower: the shower floor sits flush with the bathroom floor. This is a build method as much as a look. Wet room: the whole room is waterproofed and sloped, so water can go anywhere and still find the drain. Common in the UK and Australia.Most people searching for walk-in shower design ideas want the look of the first, sometimes the second, and occasionally the third. Knowing which you're after changes the price and the trade-offs.Walk-In Shower Styles ComparedStyle Defining Features Cost Tier Maintenance Best Room Size Resale Appeal Trend LongevityModern minimalist (curbless) Large-format tile, continuous floor, frameless fixed glass, hidden or linear drain, minimal hardware $$$ Low to moderate (few grout lines, but glass shows spots) Medium to large; works in small rooms if glass is clear High if executed cleanly Long, as it relies on restraintJapandi / warm spa Honed or stone-look tile in warm neutrals, wood-look accents, bench, soft lighting $$–$$$ Moderate (natural stone needs sealing, porcelain does not) Medium to large High, because neutrals appeal broadly LongModern farmhouse Wood-look floor, white or soft-colour wall tile, matte black or brass hardware, framed glass $$ Moderate (matte black shows spotting in hard-water areas) Small to medium Good in family markets Medium; some elements already feel familiarTransitional / classic subway Subway tile in stacked or vertical layouts, brushed nickel or chrome, small niche $–$$ Moderate (grout lines need care) Small to medium Very high, as it's easy to like Very longMoody / dark industrial Charcoal or black tile, dark grout, black fixtures, strong lighting $$–$$$ High (water spots and soap film show quickly) Medium to large with good lighting Mixed; love-it-or-leave-it MediumThe pattern is worth noticing. The styles that score highest on longevity and resale are the quiet ones. The styles that photograph best tend to be the ones asking the most of you on cleaning day.10 Modern Walk-In Shower Design Ideas (and How They Live in Real Life) Each look below comes with what it demands, not just what it looks like. 1. The Curbless MinimalistLarge-format porcelain on the walls, the same tile running from the bathroom floor straight into the shower, a linear drain and one fixed glass panel. A slim wall-mounted head finishes it. It looks calm and makes a room feel bigger. It's also demanding to build. The floor has to be sloped correctly, and the waterproofing has to be right. Best for: anyone planning to age in place. Watch for: the labour cost of the floor build. 2. The Warm Japandi SpaHoned, stone-look tile in warm greige, light wood-look accents, a bench, and a rainfall head paired with a handheld. Lighting sits around 2700K. Nothing shouts. This is one of the more forgiving looks in a hard-water home, because matte, mid-tone surfaces hide spotting far better than dark or glossy ones. Best for: primary bathrooms, calm-minded households. Watch for: natural stone needing regular sealing (porcelain doesn't). 3. Classic Subway With a Modern TwistStacked or vertical white subway tile, a mid-grey grout, brushed nickel fixtures and a small niche. It's the least dramatic option on this list, and possibly the one you'll still like in ten years. Budget-friendly, hard to date and easy for buyers to like. The grout lines are the maintenance, so choosing a mid-grey grout instead of bright white saves a lot of scrubbing. Best for: tight budgets and resale-minded owners. Watch for: grout staining if you skip sealing on cement grout. 4. One Feature Wall, Calm Everywhere ElseA patterned or textured tile on the back wall only, with plain tile on the sides and floor. You get the impact of a statement without the fatigue of a busy room. This is the safest way to use trend tile. If the pattern feels tired in five years, you're re-tiling one wall, not the whole shower. Best for: people who want personality without commitment. Watch for: texture holding soap scum. 5. The Moody Dark ShowerCharcoal matte tile, black fixtures and a careful lighting plan. It's dramatic and it photographs beautifully. Most homeowners don't realise how much dark surfaces show. Mineral spots and soap film stand out against charcoal in a way they never do on white or mid-tone tile. If you have hard water, you'll want a squeegee by the glass and a descaling habit. Best for: larger bathrooms with good lighting and soft water. Watch for: daily upkeep. 6. Marble-Look Porcelain LuxurySlab-look, large-format porcelain with veining, brushed brass or nickel, a bench and recessed lighting. It reads as premium. It usually costs less than real marble and doesn't need sealing. Installation is specialist work, though, because big slabs are heavy, fragile in transit and unforgiving to cut. Best for: getting a stone look without stone maintenance. Watch for: installer skill. 7. Modern Farmhouse Walk-InWood-look floor tile, white or sage wall tile, matte black or brushed brass hardware and a glass panel with a slim frame. It's friendly, warm and familiar. The look is already common, which is both a plus (buyers understand it) and a risk (it can feel of-its-moment). Keep the permanent surfaces neutral and let the hardware carry the style. Best for: family homes. Watch for: cheap matte black wearing through or spotting. 8. The Corner Walk-In for Small BathroomsTwo glass panels, or one panel plus a return, a small mosaic floor, light-toned tile and a narrow niche. It claws back floor space where a tub used to be. Small footprints splash more, so glass placement matters more than tile. Best for: compact bathrooms. Watch for: spray reaching the floor if the entry is wide. 9. The Wet RoomA fully waterproofed room with a sloped floor, one glass panel and no visible curb. It's the most open look on the list. It's also the least forgiving of poor waterproofing, because the whole room is now the shower. This is a job for a qualified tiler working to the local standard. Best for: accessible design and open-plan bathrooms. Watch for: hidden failures behind tile. 10. The Tub-to-Walk-In ConversionReplace a standard bath alcove with a walk-in shower using the same plumbing wall. It's often the best value on the list because the layout stays put and the plumbing doesn't move. Best for: budget-conscious upgrades. Watch for: losing your only bath (more on that below).The Design Decisions That Matter Most Inspiration is easy. Turning it into a spec sheet is where most projects go wrong. This table covers the choices that decide whether a modern walk-in shower looks good on day one and day 1,000.Design Element Best Choice Why Common Mistake Maintenance RealityFlooring tile Small-format porcelain mosaic (about 2 in / 50 mm) in the shower, matching larger tile outside, with a slip rating suited to wet floors Small tiles follow the slope to the drain and extra grout lines add grip Polished large tile on the shower floor, or a mosaic with a rating never checked More grout to keep clean; epoxy grout reduces stainingWall tile Large-format porcelain (rectified) with narrow joints, or classic subway in a mid tone Fewer joints means less grout to clean and a calmer look Pattern on every wall, or fluted tile in a hard-water area with no cleaning plan Flat tile wipes faster; textured or fluted tile holds soap scumGrout colour A tone close to the tile for calm; a mid-grey for subway tile that needs some definition Grout colour sets the visual grid and hides staining Bright white grout on the floor, or a stark contrast that turns tile into a grid Cement grout needs sealing; epoxy grout is more stain-resistant and costs more to installVanity finish Matte or satin painted, wood veneer or laminate with a moisture-resistant core Hides fingerprints and water marks better than high gloss Dark gloss that shows every splash Wipe daily; avoid abrasive cleanersFaucet / fixture finish Brushed nickel, chrome or a PVD-coated brass or black Chrome and brushed nickel hide spots; PVD finishes resist wear Cheap matte black that wears through or spots in hard water Wipe after use; check the manufacturer's cleaning advice before using acid cleanersMirror type Anti-fog LED mirror, or a framed mirror with side sconces Good light at face level and it copes with steam A mirror with no anti-fog in a bathroom with a doorless shower LED mirrors need a rated supply; clean glass only, no drips near edgesLighting Layered: wet-rated recessed light in the shower, vanity light at face height, a soft ambient source. 2700K–3000K, CRI 90 or higher Flatters stone and skin tones and avoids a clinical feel A single ceiling light, or non-rated fixtures inside the wet zone LED life is long; clean lenses occasionallyCountertop material Quartz or solid surface, or a sintered or porcelain top Non-porous and resistant to toothpaste, cosmetics and water marks Unsealed natural stone, or dark polished surfaces that show every splash Quartz needs only mild cleaner; natural stone needs regular sealingGrout does more work than the tile It's easy to spend weeks choosing tile and thirty seconds choosing grout. That's backwards. Grout sets the visual grid. A contrasting grout turns a plain subway tile into a pattern. A grout close to the tile colour makes the wall read as one calm surface, and it hides staining better. If you want a quiet, modern look, match the grout. If you want the tile to have definition, go a shade or two darker than the tile, not stark white or black. Lighting changes how tile looks The same stone-look tile can look warm and inviting under 2700K–3000K light and oddly clinical under cool white. A CRI of 90 or higher keeps colours honest, which matters for skin tone and for natural stone. A windowless bathroom also changes the colour game. Without daylight, everything sits under artificial light all day, so pick tile samples under the same lighting you'll be using, not in a shop or by a window. Fixtures inside or over the shower need the correct wet rating (an IP rating in the UK and Australia, a wet-location listing in the US and Canada). That's a safety requirement, not a style detail. What photographs well and what lives well A staged shower has bare shelves. A lived-in one needs somewhere for shampoo, a hook for the squeegee and a place to stand that isn't a wet mat. Plan a niche or shelf where the bottles will actually go, and make sure it's outside the direct spray.Layout, Size and Splash: Will a Doorless Walk-In Work in Your Bathroom?Doorless is a depth question more than a style question. Splash control comes down to three things: how deep the shower is, where the showerhead points, and how wide the glass is. Some rules of thumb, which you should confirm with your installer:Depth: around 60 inches (1.5 m) or more is a commonly suggested starting point for a truly open, doorless layout. Head position: put the showerhead on the wall opposite or beside the opening, not aimed at it. Glass: a fixed panel wide enough to shield the entry and the head end. Tight spaces: add a return panel, a slim hinged door or a lower-flow head. Minimum size: local codes often set minimum shower interiors around 30 inches (760 mm) each way, so check yours.In a small bathroom, clear glass and continuous tile make the room feel bigger, but a shallow doorless shower will splash. A corner layout, a return panel or a narrow door often solves it without giving up the open look. In a large bathroom, you can go properly open. The trade-off is heat. Big open showers lose warmth and steam faster, so plan underfloor heating, a quick-response thermostatic valve and a fan that can cope.Real-World Walk-In Shower Design Mistakes Most walk-in shower regrets come down to a short list. If you skim nothing else, skim this. Rainfall head only. It feels lovely but is awkward for rinsing the walls, cleaning or bathing kids and pets. Add a handheld on a slide bar. Showerhead aimed at the opening in a doorless design. Water reaches the floor and the cold air rushes in. Put the head on the wall opposite or beside the entry and use a fixed glass panel wide enough to shield the head end. Skipping the slope. A shower floor needs proper fall toward the drain, typically about ¼ in per foot (around 2%). Flat spots hold water and cause mould. Confirm the pan or mortar bed slope before tiling. Large tile on the shower floor. Big tile can't follow the slope without heavy cutting. Use small mosaics, or a linear drain with a single-plane slope and a tile size suited to it. Polished tile on the floor. It looks stunning dry and is slippery wet. Check the slip rating: in the US a wet DCOF of 0.42 or higher, in the UK a wet pendulum value of 36+, in Australia a wet barefoot rating suited to showers. Dark matte everywhere in a hard-water area. Water spots and soap film show quickly. Use a mid tone, or commit to a squeegee habit and expect to descale. Pattern on every wall. The look gets busy, costs more and dates faster. Confine pattern to one wall or the niche. A niche in the spray path, or sized against the tile grid. Bottles get blasted and the tile cuts look messy. Place the niche away from direct spray and size it to fit whole tiles. Non-rated lighting in or over the shower. Standard ceiling lights aren't designed for wet zones. Use fixtures with the correct wet rating and have an electrician install them. Ignoring ventilation. A warm, open shower and a weak fan means condensation and mould at the ceiling and corners. Upgrade the extractor fan and size it for the room.The slope and slip-rating mistakes are the sneakiest. Both look fine on the day the tiler leaves. Both show up months later, one as standing water and one as a near-fall.What a Walk-In Shower Costs at Three Budget Levels Cost is where most inspiration articles go quiet. Here are numbers, with the assumptions stated. Assumptions: a mid-sized bathroom with roughly 40 sq ft of floor tile and about 100 sq ft of shower wall tile. The layout stays largely in place, with no plumbing relocation, no structural changes and no permit costs. Demolition and disposal are excluded. These are planning ranges in USD for 2026, not quotes, and they vary by region. Convert for the UK, Canada and Australia using local labour rates.Cost Category Budget Tier ($) Mid Tier ($$) Premium Tier ($$$)Floor tile $120–$300 $300–$700 $800–$2,000Wall tile $300–$700 $700–$1,800 $2,000–$6,000+Vanity $300–$700 $800–$2,000 $2,500–$6,000+Fixtures (shower valve and head, faucet, hardware) $200–$500 $600–$1,500 $1,800–$5,000+Lighting $80–$250 $300–$800 $900–$2,500Mirror $50–$200 $250–$700 $800–$2,500Shower glass (fixed panel or door) $400–$900 $900–$2,000 $2,000–$4,500Waterproofing materials and shower base prep $150–$400 $400–$1,000 $1,000–$2,500Labor (tile, plumbing, install) $2,500–$5,000 $5,000–$10,000 $10,000–$20,000+Estimated Total $4,100–$9,000 $9,250–$20,500 $21,800–$51,000Where the money surprises peopleCosts climb quickly with a curbless floor, a linear drain, natural stone, custom glass or relocated plumbing. A tub-to-shower conversion that keeps the plumbing wall is usually the most cost-effective route. Large-format porcelain slab can deliver a stone look for less than real marble, but installation is specialist work. Some looks cost less than they appear. Classic subway with a good grout choice looks expensive and isn't. Some cost more than they appear. A "simple" curbless shower can quietly become a premium job once the floor needs re-sloping.If the budget is tight, put the money into waterproofing and glass first, and let the tile be ordinary. Ordinary tile with excellent waterproofing lasts. Beautiful tile over poor waterproofing doesn't.DIY or Hire a Pro? Where to Draw the Line Some of this is very doable for a competent DIYer. Some of it is the kind of work where a mistake stays hidden behind tile for years.You can reasonably DIY Hire a qualified professionalSwapping a showerhead or adding a handheld and slide bar Waterproofing a shower or wet roomFitting shelves, hooks and accessories (into solid backing, not just tile) Building the shower base and slope, especially curblessRegrouting and replacing silicone Measuring and installing glass panelsPainting the walls outside the wet zone Any electrical work, including lights, heated mirrors and warm floorsReplacing a non-electric mirror or vanity hardware Relocating a drain, valve or plumbingCleaning, descaling and sealing Installing large-format slabs or natural stone⚠️ Waterproofing failures hide. Water damage behind tile can go unnoticed for years and only shows as loose tiles, staining outside the shower or a soft floor. A walk-in or curbless shower depends on a correctly installed membrane and slope. Follow the manufacturer's system exactly, or hire a qualified tiler. This is the one place to spend money before you spend it on tile.⚠️ Removing your only bathtub can narrow your buyer pool. A well-built walk-in shower is often a selling point in a primary or second bathroom, but many families with young children look for at least one bath. If it's the only bath in the house, talk to a local agent before removing it.⚠️ Electrics near a shower are not a DIY style choice. Lights, heated mirrors and heated floors need the correct wet-zone rating and a qualified electrician, and local rules apply (for example IP zones in the UK and Australia, or wet-location listings and GFCI protection in the US and Canada). A beautiful fixture that isn't rated for the location is a hazard.The Maintenance Reality"Low maintenance" is the most overused phrase in shower marketing. A walk-in shower has fewer surfaces than a tub-shower combo with a curtain, but it isn't maintenance-free. It just moves the work.Glass needs a squeegee habit. Grout needs cleaning, and sometimes sealing. The drain needs hair removed. Silicone joints wear out. The fan needs to actually move air.Task Frequency Difficulty NotesSqueegee glass and wipe fixtures After each shower or daily Easy The single biggest thing that stops limescale building upClean the drain and hair trap Weekly Easy Slow drainage often means hair, not a plumbing faultWipe tile and niche with a pH-neutral cleaner Weekly Easy Avoid acidic or abrasive cleaners on natural stone and some finishesDeep-clean grout lines Monthly Moderate Mosaic floors and subway tile need more attention because of the extra groutDescale showerhead and fixtures Every 1–3 months in hard water Easy to moderate Check the manufacturer's advice first, since some finishes and stone don't tolerate vinegar or acidsReseal cement grout and natural stone About once a year, or as the product advises Moderate Epoxy grout and porcelain tile usually don't need sealingInspect silicone or caulk joints Every 6 months Easy Replace cracked, discoloured or mouldy silicone; typical life is a few yearsClean extractor fan grille and check airflow Every 6 months Easy A weak fan is a common cause of mouldCheck for warning signs of waterproofing failure Yearly Moderate Look for loose tiles, staining outside the shower, damp smells or soft floor edges; call a professional if foundReapply glass protective coating (if used) Per product instructions Easy Follow the product guidance and don't mix productsA five-minute weekly resetRun the fan and wipe the glass and fixtures with a squeegee or microfibre cloth. Lift the drain cover and clear the hair. Wipe the niche and floor edge with a pH-neutral cleaner. Glance at the silicone joints for cracks or dark spots. Leave the fan running for another 15–20 minutes.Most mould problems start at a failed silicone joint or a poorly ventilated corner, not on the tile face. If you catch those two, you avoid most of the ugly surprises.Resale, Longevity and Trend Fatigue Some looks age gracefully. Others have a shelf life. The difference is usually whether a surface is a backdrop or a statement. What tends to age wellNeutral, mid-tone large-format tile Classic subway in a stacked or vertical layout Warm, matte finishes in chrome, nickel or good-quality PVD Matching floor tile that carries through the room Layered, warm lighting One bold element (a feature wall or niche) instead of fiveWhat tends to date fasterPattern on every wall Trend tile used as the main surface rather than an accent Very high-contrast schemes that depend on staying spotless Finishes that wear through or spot quicklyThe safest approach is a neutral base with swappable accents. Hardware, lighting, mirrors and accessories are cheap to change. Tile isn't. On resale, a well-built walk-in shower is generally seen as a plus, especially in a primary or second bathroom, and especially for older buyers. The bath question is the one to think through before demolition. If your home has only one, ask a local agent how buyers in your market and price range feel about it.Does a Walk-In Shower Work for You? A Quick Self-CheckYou have only one bathroom and young children → Keep the bathtub, or choose a tub-shower combination. You have a second bathroom or a primary suite and want a spa look → A walk-in shower is usually the better choice. Your bathroom is small and you want it to feel bigger → Fixed glass panel, light tile and a continuous floor. Avoid dark pattern on every wall. You live in a cold climate and hate a chilly bathroom → Add underfloor heating and a glass panel at the head end. Consider a door. You have hard water and dislike wiping surfaces down → Choose mid-tone finishes, chrome or nickel fixtures, large-format tile and a squeegee routine. You're planning to sell within five years → Choose a neutral base, keep a bath elsewhere in the home, and keep bold choices to swappable items. You want a step-free or ageing-in-place shower → Curbless entry, bench, grab bars, slip-rated floor and a handheld head. Hire professionals for the floor build. You have a tight budget and want the best value → Convert tub to walk-in in the same footprint, use standard-format tile and put the money into waterproofing and glass.Materials and Products Worth Considering Categories and specs matter more than brand names here. This is what to look for.Porcelain tile: rectified edges for narrow joints, a stated slip rating for the floor, and a through-body or good-quality print. Large-format slabs need a specialist installer. Grout: epoxy grout resists staining and doesn't need sealing but is harder to install. Cement grout is easier to work with and needs sealing. Waterproofing: a membrane or tile-ready shower base from an established system, installed exactly to the manufacturer's instructions. Drain: a linear drain suits large tile and single-plane slopes. A centre drain or tile-insert drain suits mosaics. Shower valve: a thermostatic valve holds a steady temperature and reaches it quickly, which matters in an open shower. Digital shower controls add presets and are worth considering if you like precise temperatures. Glass: toughened safety glass with a fixed panel sized to protect the entry. A factory-applied protective coating can ease cleaning. Underfloor heating: an electric warm-floor mat under the tile with a programmable thermostat takes the edge off an open shower and helps floors dry. It needs a qualified electrician. Extractor fan: sized for the room, quiet enough that you'll actually use it, and ideally with a humidity sensor or timer so it keeps running after you leave. Mirror and lighting: an anti-fog LED mirror and wet-rated shower lighting, both on the correct supply.None of these needs to be top-of-the-range. A mid-priced fan that runs and a properly installed membrane beat an expensive mirror over a badly waterproofed floor.Frequently Asked Questions Is a walk-in shower better than a bathtub? For most households, yes. A walk-in shower is quicker to use, easier to make step-free, and usually uses less water than filling a bath unless your showers run long. A bathtub still wins for bathing small children, soaking and washing pets, and many buyers expect at least one tub in a home. If you have one bathroom and a family, keep the bath. If you have a second bathroom or a primary suite, a walk-in shower is usually the better use of the space. Do walk-in showers make a small bathroom look bigger? Often, yes, because clear glass and continuous tile let your eye travel across the room instead of stopping at a tub wall. The effect comes from the details: a frameless fixed panel, matching floor and shower tile, light tones and minimal hardware. But visual size isn't usable size. If the shower is shallow, a doorless layout will splash the floor, so a small bathroom may need a return panel or a narrow door to keep spray contained. How big does a doorless walk-in shower need to be? There's no universal number, but a depth of around 60 inches (1.5 m) or more is a commonly suggested starting point for a truly open, doorless layout, with the showerhead on the wall opposite or beside the opening and a fixed glass panel wide enough to shield the entry. Smaller footprints splash more. In tight spaces, add a return panel, a slim hinged door or a lower-flow head. Also check local minimum shower sizes, which are often around 30 inches (760 mm) each way. What is the best non-slip tile for a walk-in shower floor? Small-format tile, such as mosaics from about 2 inches (50 mm), is the safest choice. The extra grout lines add grip and small tiles follow the slope to the drain. Whatever you choose, check the slip rating: in the US look for a wet DCOF of 0.42 or higher, in the UK a wet pendulum value of 36 or more, and in Australia a wet barefoot rating suited to shower floors. Avoid polished finishes on the shower floor, and remember textured tile grips better but holds more soap scum. Will removing a bathtub for a walk-in shower hurt resale value? It depends on how many bathrooms you have. In a primary suite or second bathroom, a well-built walk-in shower is generally seen as a plus, especially by older buyers. Removing the only bathtub in the home can narrow your buyer pool, since families with young children often look for one. A common compromise is keeping one tub somewhere in the house. Ask a local agent before you commit, because expectations vary by market and price point. How much does a modern walk-in shower cost? As a rough 2026 planning range in USD, the shower zone alone (tile, waterproofing, glass, valve and head, and labor) runs about $3,000–$7,000 for a budget build, $6,000–$13,000 for mid-range, and $13,500 or more for premium finishes such as large-format slabs, natural stone and custom glass. Moving plumbing, building a curbless floor that needs structural changes, and hidden damage found during demolition can add thousands. These are planning ranges, not quotes, so get several local written quotes. Prices in the UK, Canada and Australia differ. How do you stop a walk-in shower feeling cold and getting mouldy? Doorless showers lose heat faster, so plan for it: an electric warm-floor mat under the tile, a thermostatic valve that reaches temperature quickly, and glass that encloses the head end. For moisture, fit an extractor fan sized for the room, run it for 15–20 minutes after showering, squeegee the glass and keep silicone joints in good repair. Mould usually starts at failed silicone and poorly ventilated corners rather than on the tile face.Final Verdict: Which Should You Choose? If you have a second bathroom or a primary suite, choose the walk-in shower. It's easier to use, easier to make accessible, and gives you far more room to design. If you have one bathroom and young children, keep the bath, or choose a tub-shower combination and put your design energy into tile, lighting and fixtures. Whichever you pick, spend first on what you can't see: slope, waterproofing and ventilation. Then keep the permanent surfaces calm and let hardware, lighting and accessories carry the personality. That's the combination that still looks good when the styled photo is long forgotten. Bathroom Design & Style :How to Choose a Tile Pattern That Makes a Small Bathroom Look Bigger How Many Lights Should a Bathroom Have? Layouts, Lumens & Lighting Design Ideas That Work Walk-In Shower vs Bathtub: Which Is Better? Plus Modern Walk-In Shower Design Ideas That Last Small Bathroom Design Ideas: How to Make a Compact Bathroom Look (and Feel) Bigger Farmhouse Bathroom Ideas: What the Style Actually Requires (and What Nobody Tells You About Living With It) What Colors Make a Bathroom Look Bigger and Brighter? What Makes a Bathroom Look Modern? (Everything That Actually Matters)
_12_11zon.webp)
Small Bathroom Design Ideas: How to Make a Compact Bathroom Look (and Feel) Bigger
Short answer: Use one continuous floor tile, expose floor with pedestal or wall-hung fixtures, swap curtains for clear glass, recess storage into walls, and layer warm lighting. Light colours help, but controlled contrast can too. Here's the thing most small bathroom advice gets wrong. It treats size as a square-footage problem, so it hands you a list of tricks: paint it white, hang a big mirror, buy a smaller vanity. Sometimes that works. Often it gives you a small, bland bathroom. A room feels big or small based on what your eye can do when you walk in. Can it travel along the floor? Can it see through things? Is there clutter competing for attention? Fix those, and a bathroom of about 5 × 8 ft (1.5 × 2.4 m) can feel calm and roomy, even with a bath in it and even with deep green tile on the walls. Quick takeawaysShow the floor. Pedestal basins, wall-hung fixtures and an open base under a drawer unit read larger than a bulky cabinet. Recess before you add. Wall niches hold daily clutter without eating floor or visual space. Clear glass beats curtains and frames. One panel, not a boxed-in cubicle. Dark colour can work if you commit. Wrap one zone in deep tile. Splitting dark and light evenly reads as chopped up. Light in layers. Ceiling, mirror and niche lighting beat one central fitting. Keep the reversible layers cheap. Paint, mirror, towels and hardware are easy to change if your taste shifts.Why some small bathrooms feel spacious and others feel like a cupboard Four things do most of the work. None of them depends on how many square feet you have. 1. Sightlines. Think about what you see standing in the doorway. A long, uninterrupted floor pulls your eye through the room. A shower door frame, a vanity that juts out and a curtain rail all interrupt it. 2. Visible floor. This matters more than floor colour. A pedestal basin leaves the floor visible behind and beside it. A full vanity hides a large rectangle of it. Even when the footprint is similar, the room with more visible floor feels bigger. 3. Visual weight. Dark, busy or high-contrast surfaces feel heavy. Pale, plain or matte surfaces feel light. You can balance weight, so a single heavy zone can sit comfortably next to calm surroundings. 4. Light. Where it comes from, how warm it is, and what it bounces off. A bathroom with one bright ceiling light and dark corners feels smaller than one with three softer sources. Most homeowners don't realize how much clutter changes perceived size. Six bottles on a windowsill can shrink a room more than a slightly smaller bath would. That's why storage sits at the centre of everything below.Real example: a 1940s bathroom with a fixed toilet and no room to spare Take a real project. A two-bedroom 1948 home in New Zealand has a small original bathroom. Before the renovation, it had beige tiles laid diagonally with dark grout, an acrylic shower cubicle with a framed door, a corner vanity, a small window and a cream wall colour that made everything look a bit tired. The homeowner described it as feeling like a prison bathroom. The photos back that up. The brief was specific. The homeowner wanted a bath back in the room, did not want to move the toilet, and wanted something with personality for their partner. Moving a toilet means moving drainage, and in a small older house that can blow up both budget and schedule. So the toilet stayed put, and everything else was designed around it. The renovation was a DIY project spread over a year. The period pedestal basin, a 1952 piece, was picked up at an auction for very little, in near-perfect condition. The tile was chosen first because the couple fell for it. The rest of the design grew from there, keeping loosely in tune with the house. Here's what changed and why it worked:Before After Why it helps a small roomDiagonal beige floor tile with dark grout One warm wood-look porcelain plank, one material throughout Long planks and a continuous surface pull the eye through the roomFramed acrylic shower cubicle Flat-sided bath with a single fixed glass panel Sightlines stay open, and the bath gives a soak and a shower in the same footprintCorner vanity with laminate top Pedestal basin plus a small recessed drawer unit with an open base More visible floor, less bulk, and storage out of the roomBeige walls White upper walls, pale half-height tile, deep green in the wet zone Depth where you look, calm everywhere elseWall-mounted cabinet and surface clutter Storage sunk into the walls Daily items disappear without shrinking the roomOne ceiling light Downlight, warm LED strip in the recess, natural light from a frosted window Layers of light add depthCold tile underfoot Underfloor heating You don't see it, but it changes how you use the room. The cats approved.The homeowner also came into this with a bias against shower-over-bath setups and changed their mind. The straight-sided bath is roomy, easy to step into, and the glass panel keeps water where it belongs. That's worth remembering when a layout you dislike in theory turns out well in practice. Now let's break down the decisions so you can adapt them to your own room.Tile, fixtures, lighting, colour and layout: what to choose in a small room Floor: one material, laid long The floor in this project is a matte, warm grey-brown wood-look porcelain plank running the length of the room. There are no threshold changes and no border tile. That's deliberate. Planks laid along the longest wall stretch the room visually. Porcelain handles water, heat and the movement of underfloor heating well. Whichever tile you choose, check its slip rating for wet areas. The rating system differs by country (R-ratings in Australia and New Zealand, DCOF in the US, pendulum test values in the UK), and glossy polished tile with a low rating on a bathroom floor is an easy mistake to make. Walls: put the drama where you look The deep green tile wraps the bath zone. Everything else is white paint above pale half-height tile. The result is depth in one place and calm everywhere else. You can see this in the wide photo. Your eye lands on the green, then rests on the white. Handmade-look glazed ceramic in small squares has real character. It also has real quirks:Shade varies from tile to tile. That's the look. Edges aren't razor-straight, so joints are wider than with rectified tile. Small squares mean a lot of grout lines, which means more cleaning.Order 10–15% extra, mix boxes as you lay, and view a sample board in your own lighting before you commit.Grout: quieter than you'd expect Most people obsess over tile colour and forget that grout changes how the whole wall reads. High-contrast grout draws a net over small walls and makes them look busier. Tone-on-tone grout, or one step lighter than the tile, calms the grid. On floors, a mid-tone hides dirt better than pale grout. Basin and storage: pedestal plus a recess A pedestal basin shows floor and looks light. The trade-off is real: it has no cupboard, only a narrow ledge, and the plumbing is exposed. The fix in this project was a small drawer unit set into the wall, with an open base below holding a basket. It stores what you need without dominating the room. There's more on how that works in the storage section below. One honest note on separate hot and cold taps. They look great on a period basin. But you can't blend water at the spout, so you get scalding or freezing water in your hands until you fill the bowl. Some homeowners love that. Others switch to a mixer within a year. Check your local plumbing rules, and think about who uses the bathroom (children, older relatives) before you commit. Metal finishes: pick a family Brushed brass runs through the fixtures, drawer pulls, towel rails, mirror frame and hinges. A polished brass accent on the taps and a tiny brass snail on the basin add personality without breaking the rule. The point is that there's one dominant metal, not three. Brushed or PVD-coated finishes generally hide water spots better than polished ones. Ask the manufacturer for care instructions, because harsh or acidic cleaners can damage some finishes.Mirror: sized to the basin A rounded-rectangle framed mirror softens all the square lines from the tile. Keep it in proportion to the basin. An oversized mirror can reflect clutter and doubles whatever is behind you, including the toilet. Decision table for a heritage-style small bathroomDesign element Best choice Why Common mistake Maintenance realityFlooring tile Matte porcelain planks, one tile through the room, laid along the longest wall, slip-rated for wet areas Continuous surface and long lines pull the eye through Mixing floor materials at thresholds, or polished tile with a low slip rating Mid-tone grout hides dirt. Sweep and damp-mop weekly.Wall tile Small handmade-look glazed ceramic: deep colour in the bath zone, pale half-height tile elsewhere Depth where you look, calm where you don't Full-height dark tile on every wall More grout lines means more cleaning. Seal cement-based grout if the maker advises.Grout colour Tone-on-tone or one step lighter Softens the grid High-contrast grout that draws a net over small walls Very pale floor grout stains. Mid-tone hides it.Vanity finish Pedestal basin plus painted recessed drawers with an open base Shows floor, keeps storage out of the room A deep vanity that blocks the door swing Exposed plumbing needs wiping. Painted fronts need moisture-rated paint.Faucet/fixture finish One metal family, e.g. brushed brass, with one matching accent Reads as intentional Mixing polished brass, chrome and black without a plan Brushed or PVD usually hides spots better. Avoid abrasives.Mirror type Rounded-rectangle framed mirror sized to the basin Softens hard lines, adds depth Oversized mirror reflecting clutter Wipe splashes off the frame.Lighting Recessed downlight, LED strip in niches, warm 2700–3000K Layers create depth, and warm light flatters green and brass One central light only, or cool white that turns green tile grey IP-rated fittings. Have an electrician confirm zones.Countertop material Engineered stone or solid surface on the small drawer unit Non-porous, thin edge, easy to wipe Unsealed porous stone in a wet room Wipe daily. Let a fabricator cut it, since engineered stone dust is a health hazard.Recessed storage: the small-bathroom trick that actually works If you take one idea from this article, take this one. The storage in this bathroom lives inside the walls. There's a lit niche above the drawer unit with shelves for daily items. There's a mirror set into the recess. Toilet roll and tissues sit in small wall pockets by the door. There's a tiled shelf inside the bath alcove for shampoo. Why it works: a recess uses space that already exists, the cavity between wall studs. Nothing sticks out, so nothing shrinks the room. And because the items sit in a defined frame, everyday clutter looks styled rather than messy. The homeowner noted that this is what keeps the room feeling open even with daily clutter. A few things to know before you start.Depth is limited by the wall. A standard stud cavity is about 3.5 in (89 mm) in the US and roughly 90 mm in AU/NZ framing. That fits bottles and toothbrushes, not bulky items. Check what's inside the wall. Pipes, wires, ducts and structural members can all be in the cavity. Look first, and stop if you're unsure. Load-bearing walls are not a DIY guess. If a wall might be structural, get a builder or engineer to confirm. Wet zones need waterproofing. A niche inside a shower or bath area needs proper waterproofing and sealing before tile goes in. Moisture behind a niche is one of the most common hidden failures. Think about the base. An open shelf under the drawers, as here, shows more floor and holds a basket for towels or spares.⚠️ Recessing into walls isn't just carpentry. Before cutting a niche, confirm the wall isn't load-bearing and that the cavity holds no pipes, wires, ducts or fire-rated lining. Waterproof any niche inside a wet zone. If in doubt, stop and call a builder, plumber or electrician.Can you use dark green (or any bold colour) in a small bathroom? Everyone says no. The conventional wisdom is that dark colour shrinks a room. Here's the more accurate version: dark colour shrinks a room when it's everywhere. Used deliberately in one zone, it can add depth. In this bathroom, the deep green sits on the bath wall and wraps the alcove. The floor is mid-toned, the upper walls are white, the half-height tile is pale, and the window lets in light. The green becomes a focal point, and your eye gets rest everywhere else. When it worksColour is concentrated in one zone, such as the bath or basin wall Floor, ceiling and upper walls stay lighter Glossy or reflective glaze bounces light around Lighting is warm and layered You've seen samples in the room, day and nightWhen it failsDark tile covers every wall and the ceiling too Lighting is one cool-white fitting The tile is matte and light-absorbing with no other bright surfaces You picked it from a screen and never saw it in your roomMost homeowners don't realize how much the light changes green. The same tile looks different in morning daylight, under a warm 2700K strip and at night against a dark window. Put your sample on the wall, and look at it at breakfast and bedtime. The trade-off is maintenance. Glossy dark tile shows water spots, soap film and limescale more than pale matte tile. It wipes clean easily, but you'll be wiping. If you live in a hard-water area, that matters.Small bathroom lighting: three layers that change how big it feels Lighting is the cheapest way to make a room feel bigger, and the one most people skip. Ambient light is the general glow. In this room, that's a recessed downlight plus daylight through a frosted window. Frosted glass gives privacy without blocking light. Task light is where you need to see clearly, at the mirror and around the basin. Place it so it lights your face, not the top of your head. A single downlight directly above you casts shadows under your eyes. Accent light is the layer that makes people say "oh, nice." In this bathroom, a warm LED strip runs inside the recessed niche. It lights the shelves, glows on the mirror and adds depth to the wall. A few practical points:Warm white (2700–3000K) flatters green tile and brass. Cool white turns green grey and makes brass look flat. Use bathroom-rated fittings. Fittings near water carry an IP rating, and zone rules differ by country. Have a licensed electrician confirm what goes where. Think about switching. Put ambient and accent light on separate switches, or add a dimmer, so a midnight bathroom trip doesn't feel like an interrogation. Don't forget underfloor heating. It isn't lighting, but it belongs to the same "how the room feels" category. Electric underfloor heating in a small bathroom is easy to appreciate, and it should be installed by a licensed electrician.⚠️ Electrical work in a bathroom must be done to local rules. Underfloor heating, LED strips, downlights and switches near water all carry zone and rating requirements that differ by country. Use bathroom-rated fittings and a licensed electrician, and keep test readings and paperwork for warranty and insurance.10 mistakes that make small bathrooms feel smaller (or regrettable) Use this as a save-and-check list before you buy anything. Choosing a full vanity because everyone has one. It hides the floor and blocks movement. Consider a pedestal basin plus recessed drawers. Using cool-white bulbs with green or warm tile. The colour goes flat and grey. Test 2700–3000K in the actual room. Letting dark tile run onto every wall. The room closes in. Concentrate it in one zone. Buying tiny tile with high-contrast grout. The wall looks like a net. Use tone-on-tone joints. Ordering exactly enough handmade-look tile. Shade variation and breakage leave you short. Add 10–15% and mix boxes. Cutting a wall niche without checking what's inside. Pipes, wires and structure hide in cavities. Check first and hire a pro if unsure. Leaving a niche unwaterproofed in a wet zone. Moisture gets behind it. Waterproof and seal properly. Using a shower curtain or boxed frame in a small alcove. It chops the space visually. A single clear glass panel keeps sightlines open. Mixing three metal finishes with no rule. It looks accidental. Pick one main metal and one accent at most. Copying Pinterest lighting. A photographed room is lit by a photographer. Plan layers, switching and dimming for real life.Which style suits a small bathroom? Five options compared The bathroom above is heritage or period revival, but it isn't the only route. Here's how five styles compare when space is tight.Style Defining features Cost tier Maintenance Best room size Resale appeal Trend longevityHeritage / period revival Pedestal basin, cross-head or lever taps, handmade-look glazed tile, warm metal, timber accents Mid–High (salvage can lower it) Medium–High (gloss tile, brass, grout lines) Small to medium Strong in character homes, mixed elsewhere High if proportions stay classic, colour may dateModern minimalist Large-format tile, wall-hung vanity, frameless glass, few grout lines Mid–High Low–Medium Small to large Broad Medium–HighJapandi Warm timber, matte neutral tile, simple forms, hidden storage Mid–High Medium (timber needs sealing and ventilation) Small to medium Broad HighTransitional classic white White tile, chrome or brushed nickel, simple shaker or pedestal Low–Mid Low–Medium Any Very broad HighMoody / jewel-tone Deep colour tile or paint, brass or black metal, layered lighting Mid–High Medium–High (shows water marks) Small rooms when committed, to medium Divisive Medium (palette-dependent)If you want the lowest-maintenance, broadest-appeal choice, transitional white or modern minimalist is safer. If you want a room with character and you're fine with a bit more upkeep, heritage or moody can be brilliant.What this look costs: budget, mid and premium Let's be upfront: costs vary a lot by country, city and supplier. The figures below are indicative 2026 USD ranges for a bathroom of about 5 × 8 ft, with roughly 30 sq ft of floor tile and 100 sq ft of wall tile. They don't include demolition, plumbing, electrical, waterproofing, the bath, the glass panel, underfloor heating or permits. Those often add up to more than the finishes, so get local quotes.Cost category Budget tier ($) Mid tier ($$) Premium tier ($$$)Floor tile $60–$120 $150–$300 $360–$750Wall tile $200–$500 $800–$1,500 $2,500–$5,500Vanity (pedestal or drawer unit) $150–$350 $400–$900 $900–$2,000Fixtures $250–$600 $700–$1,500 $1,800–$4,000Lighting $60–$200 $200–$600 $600–$1,500Mirror $40–$120 $150–$400 $400–$1,200Labor (tile + install) $0 (DIY) to $1,800 $1,500–$3,000 $3,500–$7,000Estimated total ≈ $800–$3,700 ≈ $3,900–$8,200 ≈ $10,000–$22,000Where money makes the biggest difference: the tile in the wet zone and the lighting. Where to save: the mirror frame, accessories and paint. Two cost surprises worth knowing about. First, a salvaged period basin can cost far less than a new reproduction, but it needs a plumber to check tap holes, overflow and fitting compatibility. Second, handmade-look tile is often the single most expensive line in the whole room, and it's also the one that needs the most careful laying, so the labour bill rises with it.What you can DIY and what to hand to a licensed trade A capable DIYer can do a lot in a small bathroom. But some jobs carry safety, legal and warranty consequences.Reasonable to DIY (with skill and patience) Hand to a licensed professionalDemolition of non-structural finishes Anything structural or load-bearingPainting walls and ceiling with moisture-rated paint Plumbing changes, moving drainage or fixing supply linesBuilding shelves, painting and fitting drawer units Electrical work, including underfloor heating, lights and switchesTiling, if you're patient and prepared for irregular tile Waterproofing of wet areas (often required to be done or certified by a licensed trade)Installing towel rails and accessories Glass panel supply and fixingCutting and framing recessed niches (after checking the cavity) Engineered stone cutting, which should be done by a fabricatorThe homeowner in this project did the bulk of the build themselves and put a lot of effort into tile and drywall detail, but still, the safety-critical trades are the ones to protect. A poorly waterproofed wet area can fail years later, behind finished tile, and cost far more than the original job. If you're not sure whether something needs a licensed trade, ask your local building authority. Rules differ by country and region.What this bathroom is like to live with after a year Design photos never show maintenance. Here's a realistic routine for a bathroom with glossy handmade-look tile, brass fixtures and painted storage.Task Frequency Difficulty NotesWipe glossy wall tile and glass panel After showers (squeegee) or weekly Easy Prevents water spots and limescale build-upClean brass or metal fixtures Weekly Easy Soft cloth, mild soap. Avoid abrasives and acidic cleaners.Clean grout lines Fortnightly, deeper monthly Medium Small tile has more joints, so it takes longerCheck silicone and sealant at bath edge and glass Every 3–6 months Easy Reseal at the first sign of gaps or mouldDamp-mop floor Weekly Easy Slip-rated tiles need residue-free cleanersWipe painted drawer fronts and timber shelves Weekly Easy Wipe splashes promptly. Reseal timber if water stops beading.Descale taps and shower head Monthly in hard-water areas Easy Vinegar-based products can damage some finishes, so check the maker's guidanceCheck extractor fan or window ventilation Every 3 months Easy Ventilation protects paint, timber and groutInspect tile joints and niche edges Yearly Medium Catch hairline cracks before water tracks behind themVentilation deserves its own sentence. Timber shelves, painted drawers and grout all suffer in a damp room. An open window or a properly sized extractor fan does more for the long-term look of the bathroom than any cleaning product.⚠️ Handmade-look and glossy tile will not look like a catalogue swatch. Uneven glaze, shade variation and irregular edges are part of the look, but they also mean wider joints, more careful setting and more cleaning. Order a sample board and view it in your own lighting before committing.Will it date? Resale, reversibility and "Does this style work for me?" Nobody can promise a bathroom will never look dated. What you can do is decide which parts you're willing to risk. Think of the room in two layers:Permanent shell: tile, layout, waterproofing, plumbing positions, built-in storage. Expensive to change. Reversible layer: paint, mirror, towels, hardware, plants, accessories. Cheap to change.If you might sell within a few years, keep the shell calmer and put personality in the reversible layer. In a character or period home, a well-executed heritage bathroom often suits the house and helps buyers picture themselves in it. Preferences vary by market, so ask a local agent rather than guessing. Bold choices can divide buyers. That's not automatically bad if you plan to stay, but be honest with yourself about your timeline. Does this style work for me?Your toilet can't move and floor space is tight → Use wall-hung or pedestal fixtures and recess storage to keep the floor open. You want a bath but only have an alcove → A flat-sided bath with a single fixed glass panel can work. Check bath length, depth and access first. You love deep colour but fear a cave → Wrap one wet zone, keep the floor and upper walls pale, and add layered warm light. You dislike cleaning grout → Choose larger tile, or accept small tile with tone-on-tone grout and a regular routine. You're a renter, or might sell within 3 years → Keep the shell neutral and put personality in paint, mirror, towels and hardware. Your home is a character or period house → A period-revival approach with salvaged fixtures suits it. Match proportions, not necessarily every detail. You live in a hard-water area → Prefer brushed or PVD metal, plan for squeegeeing, and avoid glossy black surfaces everywhere. You're doing wet-area work yourself → Hire a licensed trade for waterproofing, plumbing and electrical, even if you tile and paint.Small bathroom design: your questions answered Q1: Can I use dark green tile in a small bathroom without making it feel smaller? A: Yes, if you use it deliberately. Concentrate deep colour in one zone, such as the bath wall, and keep the floor, ceiling and upper walls pale so the eye still has light to travel across. Add warm layered lighting so the tile glows rather than absorbs. Gloss glaze reflects light, but it also shows water spots, so plan on regular wiping. Order samples and check them in daytime and evening light before committing. Q2: What is the single best way to make a small bathroom look bigger? A: Show more floor and keep sightlines open. In practice that means a pedestal or wall-hung basin instead of a bulky vanity, one continuous floor tile, a clear glass shower panel instead of a curtain or frame, and storage recessed into the wall. These changes work regardless of style or colour. Layered lighting and a well-sized mirror then add depth. Colour matters, but layout and visibility usually do more. Q3: Is a shower-over-bath worth it in a small bathroom? A: It can be, especially if you want a bath but can't add floor area. A straight-sided bath gives more usable width than a tapered one, and a single fixed glass panel keeps water in without visually closing the space. Check the bath length, wall strength and access before buying. If you never bathe, a walk-in shower may make better use of the room. Consider who lives in the house and how you'll use it. Q4: Will bold tile and brass fixtures hurt resale? A: They can divide buyers. A bold shell (tile, fixtures) is permanent and costly to change, while paint, mirrors, towels and accessories are cheap to swap. If you might sell within a few years, keep permanent surfaces calmer and put personality in the reversible layers. In a character or period home, a well-executed heritage look often suits the house. Speak to a local agent about your market, since preferences vary. Q5: How do recessed wall niches work, and are they worth it? A: A recess uses the cavity between studs to hold shelves, so daily items stay off the floor and counters. The depth is limited by the framing, typically about 3.5 in (89–90 mm). Before cutting, check for pipes, wires, structure and fire-rated lining, and waterproof any niche inside a wet zone. They keep small bathrooms visually clear, but they need planning. Use a professional if you're unsure what's in the wall. Q6: Pedestal basin or vanity for a small bathroom? A: A pedestal basin shows more floor and feels lighter, but it has no built-in storage and a small ledge. A vanity adds storage but can dominate a small room. A middle path is a pedestal basin plus a shallow recessed drawer unit or wall niche. Check basin depth, tap positions and door swing, and confirm any salvaged basin can take modern fittings before you buy. Q7: How much does it cost to give a small bathroom a designer look? A: Costs vary widely. A budget refresh with DIY tiling can land under a few thousand dollars, while handmade-look tile, brass fixtures and professional labour can push a small bathroom well into five figures, before plumbing, electrical and waterproofing. The best value usually comes from spending on wet-zone tile and lighting and saving on mirrors and accessories. Get local quotes, since labour and materials differ by country and region. Bathroom Design & Style :How to Choose a Tile Pattern That Makes a Small Bathroom Look Bigger How Many Lights Should a Bathroom Have? Layouts, Lumens & Lighting Design Ideas That Work Walk-In Shower vs Bathtub: Which Is Better? Plus Modern Walk-In Shower Design Ideas That Last Small Bathroom Design Ideas: How to Make a Compact Bathroom Look (and Feel) Bigger Farmhouse Bathroom Ideas: What the Style Actually Requires (and What Nobody Tells You About Living With It) What Colors Make a Bathroom Look Bigger and Brighter? What Makes a Bathroom Look Modern? (Everything That Actually Matters)
_16_11zon.webp)
Farmhouse Bathroom Ideas: What the Style Actually Requires (and What Nobody Tells You About Living With It)
Most farmhouse bathroom guides show you a photo and call it a day. What they don't tell you is why a $400 vanity update looks convincing while a $4,000 one sometimes doesn't — or why the exact fixture finish everyone's obsessed with right now might be a maintenance headache in your specific house. Quick answer: Farmhouse bathroom style is built on a handful of repeatable elements — shiplap or board-and-batten walls, an apron-front sink, matte black or oil-rubbed bronze fixtures, and a wood-tone vanity — set against a neutral palette. It's rustic material, applied with restraint. The moment it stops being restrained, it starts looking like a theme park bathroom instead of someone's actual home. That distinction matters more than any single product choice, and it's the thing most inspiration content skips entirely. Quick TakeawaysThe core formula: shiplap/board-and-batten + apron sink + matte black hardware + wood vanity + neutral palette Texture and warmth do more work than shine — this is not a high-gloss style "Modern farmhouse" is the toned-down version that still tests well in 2026; full traditional farmhouse is starting to read as dated You can get 60–70% of the look for under $1,000 with paint, hardware, and lighting alone Matte black fixtures and hard water are not friends — check your local water before you commit Small bathrooms can absolutely do this style, but only if you scale the details down with the roomWhat Actually Defines Farmhouse Bathroom Style Here's the thing people get wrong first: farmhouse isn't a mood board, it's a material logic. It grew out of actual working farmhouses — practical spaces built with what was on hand, not styled for a camera. That origin is why the "good" version of this style always looks a little imperfect. A slightly uneven grout line, a vanity with visible wood grain instead of a mirror finish, a faucet with some age character instead of a chrome shine — those aren't flaws in the aesthetic, they're the aesthetic. Where it goes wrong is when every surface tries to say "farmhouse" at once. Shiplap on all four walls, a barn door on the linen closet, a wagon-wheel light fixture, distressed everything — that's not farmhouse, that's a costume. The homes that actually pull this off well tend to use one or two strong material choices (usually the wall treatment and the fixtures) and let everything else stay quiet. There's also a real split worth naming up front: traditional/rustic farmhouse (heavier wood, more distressing, more visual weight) versus modern farmhouse (board-and-batten instead of full shiplap, cleaner lines, lighter overall palette). If you've been scrolling inspiration photos and can't figure out why some look current and some look like they're from 2019, this is usually why. The style comparison table further down breaks out the differences in cost, upkeep, and how well each one is likely to age.The Design Elements That Actually Read as Farmhouse This is the part most articles gloss over — not just what to pick, but why one choice reads as farmhouse and a nearly identical one doesn't. Flooring. Wood-look porcelain plank tile is doing most of the heavy lifting in modern farmhouse bathrooms right now, and for good reason — actual hardwood in a room that gets standing water and humidity is asking for trouble. Porcelain gets you the warmth without the risk. Wall treatment. Subway tile in a vertical stack pattern is currently reading as more "current" than a full wall of shiplap. If you do use shiplap or board-and-batten, keep it to one wall. Full coverage is exactly the kind of over-committing that ages a room fast. Grout color. Nobody talks about this one, and it matters more than it should. Bright white grout against textured farmhouse-style tile shows every bit of daily grime within weeks. A grout shade slightly darker than the tile hides normal wear and actually looks more intentional. Vanity. Painted wood — white, sage, or navy are the current front-runners — with some visible wood grain coming through does the job. A heavily distressed or whitewashed finish on top of that reads as themed rather than lived-in. Fixtures. Matte black or unlacquered brass is the signature farmhouse move. Polished chrome pulls the whole room toward transitional instead. The trade-off — and this is the part almost nobody mentions — is that matte black shows hard water spots faster than chrome does. More on that below. Mirror. Simple wood frame or a black metal round mirror. An oversized ornate French-style mirror in a small bathroom just fights the room for attention. Lighting. Black metal sconces or one schoolhouse-style pendant. Skip the wagon-wheel chandelier unless you have a genuinely large bathroom — in anything smaller it just looks oversized. Countertop. Quartz with subtle veining, or sealed butcher block if you want the real wood texture and don't mind resealing it periodically.Farmhouse Style Variations at a GlanceStyle Defining Features Cost Tier Maintenance Best Room Size Resale Appeal Trend LongevityTraditional/Rustic Farmhouse Full shiplap, exposed beams, apron sink, distressed finishes $$–$$$ Moderate–high Medium–large Moderate, regionally strong Aging faster — reads as dated in some marketsModern Farmhouse Board-and-batten, matte black fixtures, white/greige palette $$–$$$ Moderate Small–large High, broadest appeal Cooling from its peak but still mainstreamFarmhouse-Industrial Black metal, exposed pipe accents, concrete-look tile $$$ Moderate Medium–large Moderate Stable, nicheCoastal Farmhouse Whitewashed wood, soft blues, woven textures $$–$$$ Moderate Small–medium High in coastal markets StableFrench Country Farmhouse Ornate mirrors, curved lines, warm metals, vintage accents $$$–$$$$ Higher Medium–large Lower outside its target audience Niche, stableIf you're not sure which lane you're in, modern farmhouse is the safest bet for most homes — it's the version that still photographs well and doesn't box you into a single narrow audience if you ever sell.Mistakes People Actually Make With This Style Some of these come up constantly in renovation forums, and almost none of them show up in glossy inspiration articles:Shiplap inside the shower zone. Even sealed, moisture finds its way behind the panels over time. Keep wood paneling out of direct wet zones and use tile there instead. Bright white grout with textured tile. Shows dirt and water spots within weeks — go a shade darker than the tile. Oversized barn door hardware on a standard door. Looks like a prop rather than architecture. Distressing every single surface at once. One or two aged elements read as character. All of them read as a theme. Choosing matte black without checking your water hardness. This is the single most common regret we hear about, and it's entirely avoidable with a five-minute check beforehand. Unsealed reclaimed wood vanity near a sink. Warps and stains within a year without proper sealing. Open shelving in a poorly ventilated, humid bathroom. Towels and decor stay damp; mildew follows. Wagon-wheel or oversized cage lighting in a small room. Overwhelms the scale instead of complementing it. Skipping ventilation upgrades when adding wood paneling. Wood needs airflow, full stop — this is where a lot of moisture problems start. Matching every metal finish exactly. A little variation between black fixtures and brass accents reads more authentic than a uniform hardware kit.What This Actually Costs in 2026 Cost is where most farmhouse content gets vague on purpose — "it depends" is technically true but not helpful. Here's a real range, broken out by tier, for a full bathroom:Cost Category Budget Tier ($) Mid Tier ($$) Premium Tier ($$$)Floor tile $2–4/sq ft (vinyl/laminate wood-look) $5–9/sq ft (porcelain plank) $12–20+/sq ft (real wood, sealed)Wall tile $1–3/sq ft (basic subway) $4–8/sq ft (patterned subway) $10–18/sq ft (handmade/zellige-style)Vanity $300–600 (stock painted) $800–1,800 (semi-custom) $2,500–5,000+ (custom reclaimed wood)Fixtures & hardware $150–300 $400–700 $900–1,800+Lighting $80–200 $250–500 $600–1,200Mirror $60–150 $200–400 $500–900Labor (tile + install) $1,500–3,000 $3,500–6,000 $7,000–12,000+Estimated Total $2,000–4,500 $5,500–10,000 $12,000–22,000+If your budget is closer to the low end, don't panic — paint, a new faucet, cabinet hardware, and a wood-framed mirror get you most of the visual impact without touching tile or plumbing at all.DIY vs. Calling a Professional Not everything here requires a contractor, and it's worth being honest about where the real line sits: You can reasonably do yourself:Painting the vanity Swapping cabinet hardware and faucet (if it's a like-for-like fit) Installing board-and-batten on a dry wall (not a wet zone) Adding open shelving Replacing a mirror or light fixture (basic wiring knowledge helps)Call a professional for:Apron-front sink installation — this almost always requires cabinet modification, not just a drop-in swap, and that's where a lot of the labor cost actually sits Any wall changes involving plumbing or electrical Tile work in wet zones, where waterproofing matters Ventilation upgrades if you're adding wood panelingThe Maintenance Nobody Mentions in the Photos This is the section that separates a bathroom that still looks good in five years from one that doesn't.Task Frequency Difficulty NotesWipe matte black fixtures Weekly (hard water areas) Easy Prevents visible mineral spottingReseal butcher-block countertop Every 6–12 months Moderate Skipping this causes staining and warpingInspect shiplap/board-and-batten caulking Every 6 months Easy Catches moisture intrusion earlyDust open shelving Weekly Easy Open storage collects dust faster than closed cabinetsRe-seal grout Every 12–18 months Moderate Extends tile life, prevents stainingCheck ventilation fan function Every 3 months Easy Critical wherever there's wood panelingTouch up painted vanity chips As needed Easy–Moderate Painted wood shows wear faster than laminate⚠️ Moisture Warning: Raw or lightly sealed wood paneling in a shower zone is one of the most common regrets we see. Even "sealed" shiplap needs a proper enamel or marine-grade finish in high-splash areas — a decorative wood sealer isn't built for that job.⚠️ Hard Water Warning: Matte black is the most photogenic farmhouse fixture finish and the highest-maintenance one in hard water regions. Check your local water hardness before committing an entire fixture package to it.⚠️ Trend Warning: Full shiplap walls are starting to read as a 2018–2020 signal rather than a timeless one. Board-and-batten or a single accent wall gets you the same warmth with less renovation-regret risk down the line.Will It Hold Its Value? This is the question people don't type into Google but are absolutely thinking about. Modern farmhouse generally tests well across a broad range of buyers, especially in suburban and rural U.S. markets, where the aesthetic is well established. Heavier traditional farmhouse — or anything that leans hard into distressing and theme — narrows your audience, particularly in urban markets or outside the U.S., where the style hasn't taken hold the same way. If resale is even a background consideration, staying in the modern farmhouse lane with neutral tones is the lower-risk move.Does This Style Actually Work for Your Bathroom?Small bathroom (under 40 sq ft) → Simplify: board-and-batten instead of full shiplap, one accent wall only Hard water in your area → Favor brushed nickel or chrome over matte black, or accept more frequent cleaning Humid climate, weak ventilation → Skip open shelving and raw wood; use sealed, painted surfaces instead Selling within 3–5 years → Lean modern farmhouse over heavily rustic/traditional Tight budget → Paint, hardware, and lighting swaps get you most of the way there Coastal or humid region → Coastal farmhouse variant fits the materials better than traditional rustic Want lower maintenance → Porcelain wood-look tile over real wood, quartz over butcher block Family bathroom with kids → Skip all-white grout and delicate open shelving; go for forgiving, durable finishesFrequently Asked Questions What makes a bathroom "farmhouse style" instead of just rustic or country style? Farmhouse style is defined by a specific combination — shiplap or board-and-batten walls, apron-front sinks, matte black or oil-rubbed bronze fixtures, and wood-tone vanities — set against neutral palettes. Country or rustic styles can lean more ornate or cluttered; farmhouse stays functional and pared back. The distinction is restraint: farmhouse borrows rural materials but applies them with intentional simplicity rather than heavy decoration. Is modern farmhouse bathroom style already outdated in 2026? Full traditional farmhouse — heavy shiplap, distressed wood, wagon-wheel fixtures — is increasingly read as dated. Modern farmhouse, with board-and-batten instead of full shiplap and a lighter palette, has cooled from its 2018–2022 peak but still tests well for broad buyer appeal. Simplified, lower-saturation choices extend the style's shelf life. Can I do a farmhouse bathroom look on a small budget? Yes. Paint, cabinet hardware, a matte black faucet, and a wood-framed mirror can get you roughly 60–70% of the visual impact for under $1,000, with no tile or plumbing work involved. Full material changes — tile, vanity, apron sink — are what push costs into the thousands. Does farmhouse bathroom style work in a small bathroom? Yes, with simplified detailing. Full shiplap, oversized barn door hardware, and large chandeliers overwhelm small spaces. A single accent wall, one statement light fixture, and a compact vanity get you the look without shrinking the room visually. Are matte black fixtures hard to maintain? In hard water areas, matte black shows mineral spots more visibly than chrome or brushed nickel and typically needs weekly wiping to stay spot-free. In soft water areas, maintenance is closer to any other finish. Worth checking your local water hardness before committing to an all-matte-black package. Is shiplap safe to use in a bathroom? Yes, outside direct wet zones — shower and tub splash areas — as long as it's properly primed and sealed with a moisture-resistant enamel finish. Raw or decoratively finished shiplap inside a shower is a common source of hidden moisture damage and should be avoided there in favor of tile. Will a farmhouse bathroom hurt my home's resale value? Modern farmhouse generally tests well with a broad range of buyers, especially in suburban and rural U.S. markets. Heavier traditional or highly themed versions can narrow appeal, particularly in urban markets or outside the U.S., where the style is less established. Sticking to simplified, neutral-toned modern farmhouse keeps resale risk lower. Bathroom Design & Style :How to Choose a Tile Pattern That Makes a Small Bathroom Look Bigger How Many Lights Should a Bathroom Have? Layouts, Lumens & Lighting Design Ideas That Work Walk-In Shower vs Bathtub: Which Is Better? Plus Modern Walk-In Shower Design Ideas That Last Small Bathroom Design Ideas: How to Make a Compact Bathroom Look (and Feel) Bigger Farmhouse Bathroom Ideas: What the Style Actually Requires (and What Nobody Tells You About Living With It) What Colors Make a Bathroom Look Bigger and Brighter? What Makes a Bathroom Look Modern? (Everything That Actually Matters)
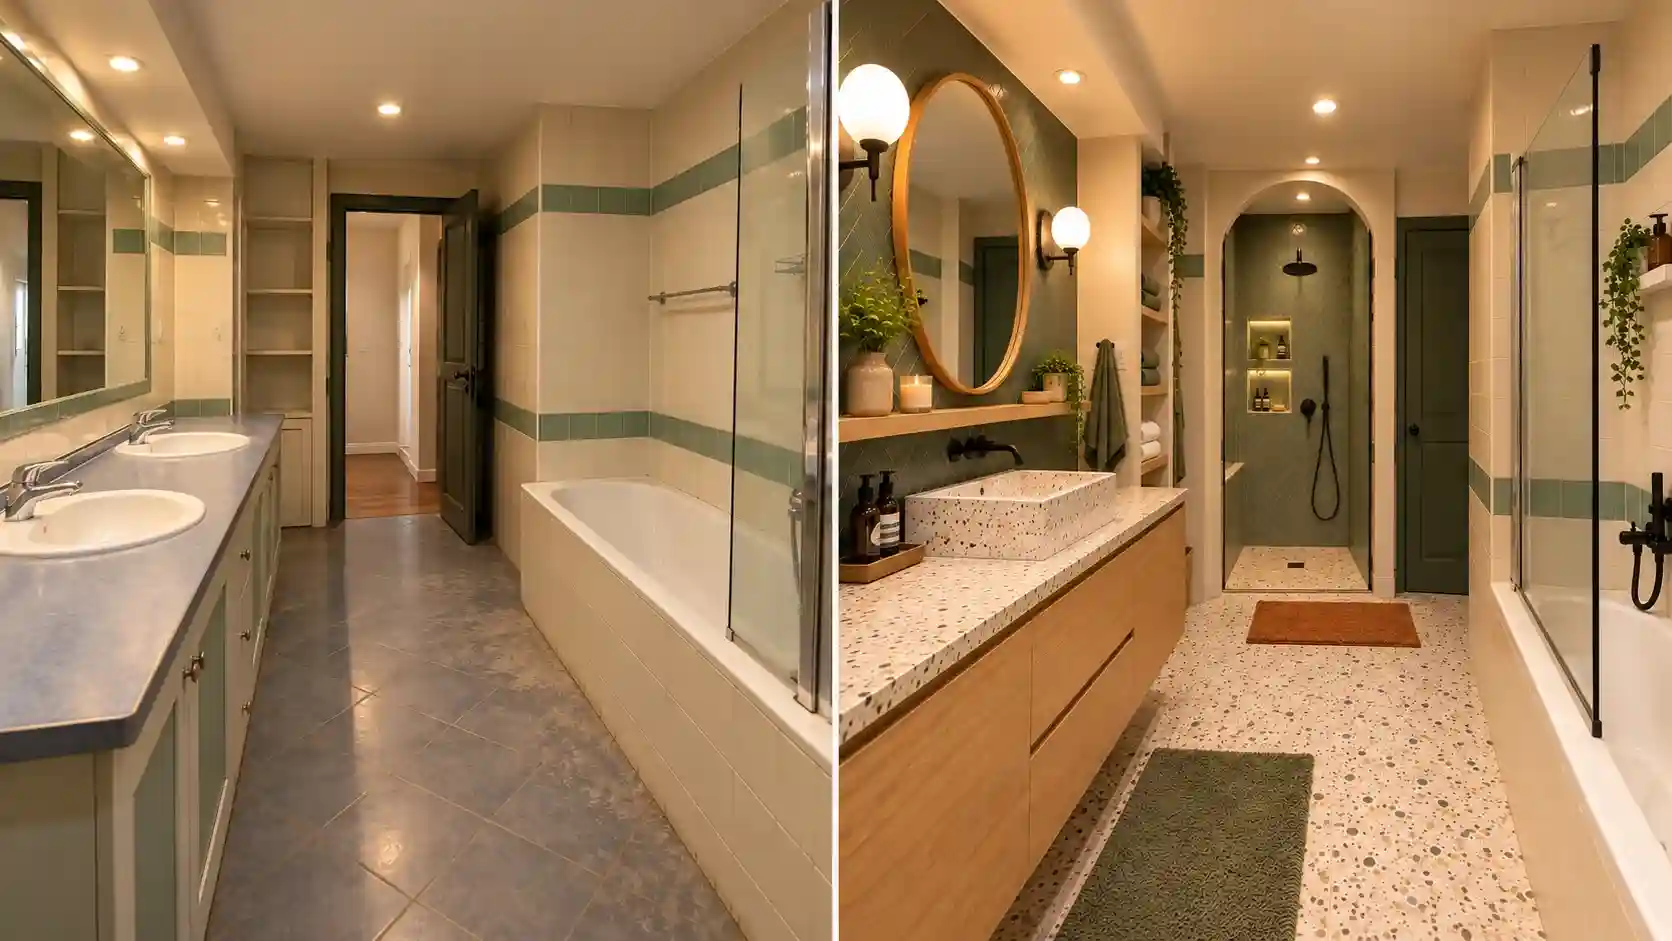
What Colors Make a Bathroom Look Bigger and Brighter?
Quick answer: Soft whites, warm greiges, pale blue-grey, and light sage make a bathroom look bigger and brighter — especially in a near-monochromatic scheme carried from walls to floor. But color is only half the story. Grout tone, tile format, and lighting temperature do as much visual work as the paint chip you agonized over, and most articles skip that part entirely. If you've ever repainted a small bathroom "the right color" and still felt like you were standing in a box, you're not imagining it. The color wasn't wrong. Something around it was.The Real Mechanism — Why Some "Light" Colors Still Look Small Here's what most bathroom color guides leave out: a color's actual brightness isn't just about how light it looks on the chip. Paint and tile manufacturers print a Light Reflectance Value (LRV) — a number from 0 (absolute black) to 100 (pure white) that tells you how much light a color actually bounces back into the room. Two colors can both look "light neutral" sitting next to each other on a fan deck, but one might sit at 72 LRV and the other at 54. In a small windowless bathroom under a single 60-watt bulb, that gap is the difference between a room that photographs bright and one that just looks flat and slightly grey by 7 p.m. Undertone matters just as much. A "warm white" that reads perfect in the paint aisle can turn cold and faintly grey the moment it's next to your existing oak vanity or beige floor tile that isn't getting replaced. This is the single most common reason people repaint a bathroom, hate it within a year, and assume the color itself was the problem. It usually wasn't — it clashed with something already in the room. Most homeowners don't realize the bulb already installed in their bathroom is doing more to determine how "bright" their color choice looks than the color itself. A cool 5000K bulb on a warm greige wall will fight the paint. A warm 3000K bulb on the exact same wall will make it glow.The Best Colors, Ranked by Room Type Not every bathroom needs the same fix. The right palette depends on what kind of small or dim room you're actually dealing with. Windowless powder rooms or interior bathrooms Skip stark, cool white — without daylight to balance it, it can look flat and clinical under artificial light. Warm white or soft greige (something in the 65–75 LRV range with a warm undertone) performs better here because it holds its brightness under artificial bulbs instead of relying on daylight it doesn't get. Small bathrooms with a single window This is where a near-monochromatic scheme — walls, floor, and vanity kept within the same tonal family — does the most work. Removing the visual "stop points" where one color ends and another begins makes the actual footprint read larger than it is. North-facing bathrooms (cooler, flatter daylight) North light tends to be cooler and bluer. A wall color with a warm undertone (soft ivory, warm greige, pale blush-beige) counteracts that flatness. A cool grey or icy white in a north-facing room can look almost bluish-dim by mid-afternoon. South-facing or skylit bathrooms You have more room to experiment. Pale sage, dusty blue, or a soft warm grey all work well here because there's enough natural daylight to keep the color from reading dark, even with slightly lower LRV values than you'd want in a windowless room. Bathrooms with dark or warm existing flooring you're not replacing Don't fight it with a cool white — it will look grey and slightly off. Lean into a warm neutral or soft greige wall color that pulls the same undertone as the floor, so the whole room feels intentional instead of mismatched.Style Comparison — Which Light Palette Fits Your BathroomStyle Defining Features Cost Tier Maintenance Best Room Size Resale Appeal Trend LongevityAll-White Modern Crisp white walls, white or pale grey tile, chrome or nickel fixtures $ Medium — shows water spots and scuffs quickly Small to mid High — broadly appealing High, but can feel sterile under weak lightingWarm Neutral (Greige/Taupe) Warm-undertone walls, soft taupe or oak-toned accents $–$$ Low-medium — hides everyday marks better than stark white Small to large High Very high — softer than trend-driven whiteSoft Pastel (Sage/Pale Blue) Muted sage or dusty blue walls, white trim $–$$ Medium Small to mid Medium-high Medium-high — currently trending, likely to age gracefully if kept mutedMonochromatic Light Scheme Same or near-same tone across wall, floor, vanity $$ Medium — light grout needs upkeep Small (most effective here) High — reads intentional HighBold/Dark Accent One dark tiled wall or niche, light floor, warm lighting $$–$$$ Medium-high Small to mid, if lit well Medium — polarizing but photogenic Medium — muted tones (forest green, charcoal) outlast trend colorsA monochromatic light scheme is usually the safest bet for a genuinely small room. But don't let the "safe" column talk you out of contrast entirely — more on that below.Grout, Tile Size, and Finish — The Part Everyone Skips You can pick the technically correct paint color and still end up with a bathroom that looks smaller than it should, because the tile and grout decisions undo the color work.Design Element Best Choice Why Common Mistake Maintenance RealityFlooring tile Large-format (12"×24"+) light porcelain, matte-to-satin Fewer grout lines, wider reflective surface Small light mosaic — grout grid cancels the effect Satin resists slips better than gloss; mop weeklyWall tile Glossy or satin, warm white or pale grey Gloss reflects light directly Busy pattern "because it's light-colored" Gloss shows water spots faster; squeegee after showersGrout color Within 1–2 shades of the tile Matching grout removes the visible grid Dark grout on light tile — creates a shrinking grid effect Light grout stains faster; seal every 12–18 monthsVanity finish Light wood or painted warm white Keeps the largest furniture piece from anchoring the eye Dark espresso vanity in a light room Painted edges chip near the basin; wood needs occasional resealingMirror Oversized, ideally wall-to-wall Doubles the perceived light source Undersized mirror centered over the sink Anti-fog backlit types reduce streakingLighting Layered, 3000–3500K warm-white Reads brighter and more flattering than cool white Single overhead fixture — creates shadows Replace bulbs as a matched setGrout deserves its own callout here because it's the variable almost nobody budgets time for. Dark grout on light tile creates a visible grid across the floor or wall — and that grid, not the tile color, is often what makes a "light" bathroom still read small in photos.Design Mistakes That Undo a Bright Palette Painting walls fresh but leaving yellowed trim untouched — the mismatch reads dingy even with new wall color. Choosing a paint swatch under store lighting and skipping a test patch under your own bathroom's bulbs. Using dark or contrasting grout with light tile "for definition" — it visually chops up the surface. Installing a small, centered mirror instead of an oversized one — the cheapest brightening upgrade, consistently under-sized. Relying on a single harsh overhead light — creates shadows that make even a well-chosen color look uneven. Choosing high-gloss white floor tile in a household with kids or pets — it shows every hair and water spot, and the maintenance frustration often leads to a regretted re-tile. Matching the shower curtain, bath mat, and towels exactly to the wall color — a fully matched room can look flat rather than bright. Leaving a dark vanity untouched while repainting everything else light — it becomes the heaviest object in the room. Skipping the exhaust fan upgrade when repainting — poor ventilation causes light paint to yellow or shadow with faint mildew along the ceiling within 1–2 years. Assuming any light color fixes a genuinely dark, windowless bathroom — in true low-light rooms, the lighting fixture does more work than the wall color ever will.What This Actually Costs You don't need a full renovation to get most of this effect. Here's a realistic 2026 breakdown by budget tier for a small bathroom.Cost Category Budget Tier ($) Mid Tier ($$) Premium Tier ($$$)Floor tile $2–$4/sq ft $5–$9/sq ft $10–$20+/sq ftWall tile $1.50–$3/sq ft $4–$8/sq ft $9–$18/sq ftVanity $150–$350 $400–$900 $1,000–$2,500+Fixtures $80–$150 $200–$450 $500–$1,200Lighting $60–$150 $180–$400 $450–$900+Mirror $50–$120 $150–$350 $400–$900+Labor DIY paint refresh: $0–$300 in supplies $1,500–$3,500 partial retile $4,000–$9,000+ full retileEstimated Total $300–$900 $3,000–$6,500 $7,000–$16,000+If your budget lands in the first column, spend it on paint, a grout refresh, an oversized mirror, and better bulbs before you touch the tile. That combination delivers most of the visible difference for a fraction of the cost of a full retile.Can a Dark Accent Still Work in a Small Bathroom? This is where most articles get too simplistic. "Light = big, dark = small" isn't really a rule — it's a shortcut that only holds up when everything else in the room stays weak. I recently walked through a bathroom that made this obvious. The before was a fairly typical dated setup: grey floor tile, beige-and-white wall tile with a sage accent stripe running around the room, and a single overhead downlight doing all the work. On paper, it was a light-ish, neutral bathroom. In person, it felt closed-in and a little cave-like — the lighting was too weak and too uneven to make any of that "light" color actually read as bright. The after wasn't all-white. It went the other direction on one wall — a saturated dark green herringbone tile running floor to ceiling in the shower. But the rest of the room stayed deliberately light: a pale speckled terrazzo-look floor, soft off-white walls, and layered warm-toned wall sconces flanking an oversized mirror. The result reads more spacious than the "safer" before version did, not less. The dark tile became a focal point instead of a wall closing in on you, because the floor stayed light and the lighting more than doubled. The takeaway isn't "go dark." It's that a bold color and a spacious-feeling room aren't mutually exclusive — the floor tone and the lighting are doing the heavy lifting either way.⚠️ Warning: Undertone clash is the #1 reason people repaint within a year. A "warm white" that looks perfect on a paint chip can read cold and slightly grey next to warm oak flooring or a beige tile you're keeping. Always test a sample against what's staying in the room — not just against the wall.⚠️ Warning: Paint sheen matters as much as color. Flat or matte absorbs both humidity and light. Satin or semi-gloss is the realistic minimum for bathroom walls — it survives the humidity and reflects more light.DIY vs. Calling a Pro Most of what actually moves the needle here — paint, grout refresh, a new mirror, updated lighting fixtures, bulb swaps — is well within reach for a confident DIYer over a weekend. None of it requires moving plumbing or touching structural elements. Where it's worth calling a professional: full tile replacement (especially anything involving waterproofing behind the tile), any electrical work beyond a straightforward fixture swap, and moving a vanity or plumbing fixture to a new location. Botched waterproofing behind new tile is one of the most expensive mistakes to fix after the fact — it's not the place to save money on labor.Maintenance Reality of a Light Palette A brighter bathroom takes slightly more upkeep than a dark, forgiving one. That's a fair trade for most people, but it's worth knowing going in.Task Frequency Difficulty NotesSqueegee glossy tile/walls After each shower Easy Biggest factor in keeping a light glossy scheme looking bright long-termRe-seal light grout Every 12–18 months Easy–Medium Light grout stains faster than darkDeep clean grout lines Monthly Medium Use pH-neutral cleaner to protect matte finishesRepaint high-touch trim Every 3–5 years Medium Trim scuffs and dulls before wall paint doesClean/replace exhaust fan filter Every 6 months Easy Prevents ceiling-line yellowingCheck caulk for yellowing Every 6–12 months Easy Yellowed caulk is one of the fastest ways a bright bathroom starts looking datedPolish mirror and fixtures Weekly / monthly Easy Dust and water spots quietly dull the reflective effect you paid for"Which Palette Fits My Bathroom?" Quick Self-CheckNo window or a very small one → Prioritize lighting temperature and mirror size over the exact wall color. Kids or pets in the house → Avoid high-gloss white flooring; choose a warm greige or satin-finish light tile. Renting or planning to move soon → Stick to paint-only changes — most of the effect comes from these lower-cost levers anyway. Selling within 2–3 years → Favor warm neutral or monochromatic light schemes over trend colors for broader buyer appeal. Existing dark or warm flooring you're keeping → Choose a warm-undertone wall color, not a cool stark white. Want a design statement, not just "safe" → A single dark accent wall can work, as long as the floor stays light and the lighting is strong. Working with a tiny powder room → Monochromatic light schemes perform best; multiple colors or materials tend to shrink a very small footprint further. Budget under $500 → Spend it on paint, grout refresh, an oversized mirror, and bulb temperature before touching the tile.FAQ What is the single best color to make a small bathroom look bigger? There's no one universal answer, but warm white and soft greige consistently perform best because they carry a high light reflectance value while hiding everyday marks better than stark white. The bigger factor than the exact shade is consistency — carrying the same tone across walls, floor, and vanity avoids the visual breaks that make a small room feel chopped up. Will a dark accent wall make my small bathroom feel cramped? Not necessarily. A single dark wall or tiled niche can work if the floor stays light and the lighting is strong and warm-toned. The problem isn't dark color itself — it's dark color combined with weak lighting and a dark floor, which together remove the visual "escape points" that keep a room feeling open. Should bathroom wall color match the floor tile? Matching or near-matching tones generally makes a small bathroom feel larger, since it removes the visual line where one surface stops and another begins. A stark contrast between a very light wall and a very dark floor tends to visually shrink the room. Is white still the best bathroom color in 2026, or is it dated? All-white remains broadly appealing and safe for resale, but warm neutrals and soft muted tones have gained ground because they photograph just as bright while feeling less clinical. All-white isn't dated — pairing it with warm wood tones and layered lighting simply reads more current than stark white with cool chrome alone. Can paint alone brighten a bathroom with no window? Paint helps, but in a windowless bathroom, lighting temperature and fixture placement do more of the actual work than color. A light wall color under a single weak overhead bulb will still look dim; the same color under layered, warm-white lighting and a large mirror reads noticeably brighter. Does light grout require more maintenance than dark grout? Yes. Light grout stains and discolors faster than dark grout without regular sealing. It's a real trade-off: light grout supports the "bigger and brighter" effect better than dark grout on light tile, but it needs resealing roughly every 12–18 months to stay looking fresh. What's the cheapest way to make a bathroom look bigger without retiling? Repainting walls and trim in a consistent light, warm-toned color, refreshing the grout, upgrading to a larger mirror, and switching to warm-white layered lighting typically costs a few hundred dollars and delivers most of the visual impact of a full retile. Bathroom Design & Style :How to Choose a Tile Pattern That Makes a Small Bathroom Look Bigger How Many Lights Should a Bathroom Have? Layouts, Lumens & Lighting Design Ideas That Work Walk-In Shower vs Bathtub: Which Is Better? Plus Modern Walk-In Shower Design Ideas That Last Small Bathroom Design Ideas: How to Make a Compact Bathroom Look (and Feel) Bigger Farmhouse Bathroom Ideas: What the Style Actually Requires (and What Nobody Tells You About Living With It) What Colors Make a Bathroom Look Bigger and Brighter? What Makes a Bathroom Look Modern? (Everything That Actually Matters)
_20_11zon.webp)
What Makes a Bathroom Look Modern? (Everything That Actually Matters)
Most bathroom renovation guides will tell you to "use neutral colors," "update your fixtures," and maybe "add a plant." That advice isn't wrong. It's just incomplete in a way that costs homeowners time, money, and sometimes the entire look they were trying to achieve. A bathroom that genuinely looks modern isn't the result of one or two swapped-out fixtures. It's the result of a set of interlocking design decisions — material choices, fixture proportions, lighting strategy, finish consistency — that work together to create a space that feels calm, intentional, and built to last. This article breaks all of it down. Not as a listicle, and not with stock photos. What follows is grounded in real renovation experience — including a full documented project from demolition to finished space — covering every element that actually drives the modern look, what makes a bathroom read as dated in the first place, what realistic renovation costs look like, and the mistakes that are most expensive to fix after the fact.Quick Answer A bathroom looks modern through six core principles: eliminating visual clutter, choosing large-format surfaces, floating storage over floor-standing cabinets, frameless glass enclosures, layered lighting instead of a single overhead fixture, and a consistent two-finish hardware palette. Each principle removes the specific dated signals that age a bathroom fastest and replaces them with calm, cohesive choices built around longevity rather than trend. At a glance:Large-format tile (24×48" or larger) eliminates the visual noise of small-tile grout grids Floating vanities signal contemporary design and open up the floor visually Frameless glass enclosures remove the visual barrier framed doors create Wall sconces flanking the mirror replace dated bulkhead lighting Two metal finishes maximum — never three Integrated sinks simplify the counter plane LED strip lighting under the vanity adds hotel-quality warmth at low costThe Six Principles Behind Every Modern Bathroom Before you start shopping for tile or calling contractors, it helps to understand what modern bathroom design actually is — not as a trend, but as a set of principles. Trends shift. The principles below are why certain bathrooms still look sharp twenty years after they were built, while others look dated within five. 1. Visual Simplicity — Removing What Ages a Space Modern design doesn't mean sterile. It means deliberate. Every element should be there because it serves a function or creates a specific visual effect — not because it came with the set. The bathrooms that age the fastest are usually the busiest ones. Diagonal tile patterns. Decorative borders. Contrasting grout. Towel bar sets that match the toilet paper holder, which matches the robe hook, which matches the light fixture finials. That level of coordination reads as 2002 now, and it will always read as whatever year it was trendy. Modern bathrooms strip all of that back to a handful of intentional choices and let the materials do the work. 2. Material Continuity — Running the Same Surface Across Planes This is one of the details that separates a genuinely modern bathroom from a renovation that has modern fixtures inside a dated shell. Running the same tile from the floor up the shower walls — without a contrasting border, without a tile-height change, without a bullnose cap — creates a visual continuity that makes the space feel larger and more intentional than it actually is. In practice, this means selecting your primary tile before you select anything else. Everything flows from that choice. 3. Floating Elements — Why Off-the-Floor Signals Contemporary Design Floor-to-ceiling cabinetry is practical. It's also visually heavy in a way that makes a bathroom feel smaller and older. Floating vanities — wall-hung with visible floor space beneath — do the opposite. They reduce the visual weight of the largest piece of furniture in the room, make cleaning easier, and create an immediate association with high-end hotel design. The same principle applies to wall-hung toilets. The slab-sided silhouette of a skirted one-piece toilet reads as contemporary. A two-piece toilet with exposed trapway bolts and a separate tank reads as every bathroom built between 1985 and 2010. 4. Layered Lighting — The One Change With the Highest Spatial Impact Most older bathrooms have one overhead light — often a fan/light combo with a plastic grille. That single source creates flat, harsh light and casts shadows downward across the face, which is exactly where you don't want them when you're trying to see yourself clearly. Modern bathroom lighting uses three layers: ambient (recessed ceiling), task (flanking sconces at eye level, not overhead), and accent (LED strips under vanities, at shower benches, inside niches). The combination changes how the room feels at every hour of the day, particularly in the evening when a dimmer brings the ambient light down and the warm LED strips become the dominant source. That shift alone — from single overhead to layered and dimmable — is the highest-impact lighting change you can make without moving any walls. 5. Cohesive Finish Palette — The Rule Most Renovations Break Here's where a lot of renovations fall apart, not because of bad taste but because of fragmented purchasing. The shower valve gets ordered from a plumbing supplier in brushed nickel. The vanity faucet comes from a big-box store in chrome because it was in stock. The towel bar ends up in matte black because that's what was left. Each piece is fine on its own. Together, they look like the bathroom was assembled from three different uncompleted renovation projects. The rule is simple: choose two metal finishes maximum, and apply them consistently across every fixture, fitting, and hardware piece in the room. Brushed nickel and warm brass work together. Matte black and natural walnut work. Chrome and oil-rubbed bronze do not. 6. Enclosure Clarity — Frameless, Open, or Fully Integrated The shower enclosure is often the largest single visual element in a bathroom. A framed glass door — with metal tracks and corner hardware — creates a defined boundary that emphasizes the shower as a separate contained unit. Frameless glass does the opposite. It lets the shower tile be seen from across the room, keeps the floor plane visually continuous, and makes the space read as larger than it is. Walk-in showers without any enclosure do the same thing even more effectively, which is why they appear in every high-end hotel renovation. The trade-off is a slightly higher maintenance threshold around keeping the bathroom floor dry. For most homeowners in a master suite context, it's worth it.What Specifically Dates a Bathroom — And Why These Signals Are So Powerful You can usually tell within three seconds whether a bathroom is dated. What you're reading, without consciously analyzing it, is a cluster of visual signals that were all popular at roughly the same time. Here's what those signals are — specifically — and what replaces each one.Dated Element Why It Ages the Space Modern ReplacementDiagonal tile layout Creates busyness; associated strongly with 1995–2008 design Large-format tile in straight stack or offset patternHollywood-strip bulkhead lighting Harsh overhead cast; associated with dated salons and hotel chains Flanking wall sconces at eye level (approximately 60")Burl or flat-panel oak cabinetry The grain finish and orange-honey tones read immediately as 1990s–2000s Walnut, white oak, or flat-front painted cabinetry with integrated hardwareRound drop-in sinks Decorative and spatially awkward; high cleaning maintenance around the rim Integrated stone trough, clean undermount, or rectangular vesselTwo-piece toilet with exposed trapway Bulky silhouette; impossible to clean around the base Skirted one-piece or wall-hungFramed glass shower door Metal frame emphasizes the enclosure as a boundary Frameless panel or open walk-inChrome mixed with gold or brass Multi-finish chaos that signals budget constraints, not stylistic intent Single finish or one deliberate two-finish paletteMatched towel bar/ring/hook sets Coordinated sets feel like a hotel supply catalog circa 2003 Individual pieces in one finish family, mixed proportionsFan/light combination fixture Plastic grille signals utility installation, not design consideration Separate high-CFM exhaust fan + independent lighting circuitSmall-format floor tile with wide grout joints The grout grid creates visual noise and a cleaning burden Large-format tile with 1/16" to 1/8" minimal grout jointOne thing worth noting: these elements don't date independently. A bathroom with diagonal tile and birdseye maple cabinetry and a Hollywood-strip mirror light accumulates visual signals that compound each other. The cumulative effect is stronger than any single element. Which is why replacing just one or two of these without addressing the others leaves a bathroom that still reads as dated — just slightly less so.Modern Bathroom Design by Element — The Practical Breakdown Large-Format Tile — The Single Biggest Visual Upgrade If there's one material choice that transforms a bathroom more than any other, it's the shift from small-format to large-format tile. "Large-format" is a general term for tile 15 inches or larger on at least one dimension. In current practice, most modern bathroom renovations use 24×24, 24×48, or even 32×48 porcelain. The effect is significant: fewer grout joints mean less visual interruption across the floor and wall surfaces. The space reads as calmer, more expansive, and more considered. The practical side of large-format tile is where most design guides stop talking, which is where the real information begins. What your subfloor actually has to do: Large-format tile is unforgiving of flex. The standard requirement is L/360 deflection — meaning a floor spanning 10 feet must not flex more than 1/3 of an inch under load. Most standard floor joists in older homes don't meet this without sistering or an additional layer of 1/4" fiber cement. If your installer doesn't mention subfloor deflection before quoting the job, ask specifically. Tiles installed on a floor that flexes will crack at the grout joints within one to three years. Rectified tile is not optional for minimal joints. Rectified tile is precision-cut to exact dimensions, allowing grout joints as narrow as 1/16" without lippage issues. Standard pressed tile has dimensional variation that makes tight joints impossible without visible tile edges at different heights. If you want the continuous-plane look, specify rectified. Slip resistance matters more on large-format floor tile. Larger tiles typically have a smoother face — visually cleaner, but with a lower DCOF (Dynamic Coefficient of Friction) rating when wet. DCOF 0.42 is the minimum for wet floor applications. Polished porcelain often falls below this. Specify a honed or lightly textured finish for shower floors and wet bathroom floors, and verify the DCOF rating before purchasing. This is the conversation almost no tile salesperson initiates. Cost range: Porcelain large-format tile typically runs $3–$12 per square foot for material. Large-format natural stone (travertine, marble) runs $8–$25+. Installation labor for large-format tile is 20–40% higher than standard tile due to the back-buttering technique, larger-notch trowels, and more complex lippage control. Budget accordingly.Floating Vanities — What to Know Before You Commit The floating vanity is probably the most universally recognized marker of a contemporary bathroom. It also has a piece of installation context that almost no design article mentions — and that context matters a great deal if you're planning a phased renovation. Wall blocking has to be installed before drywall. A floating vanity is mounted to the wall framing, not the drywall surface. The mount points need to hit solid blocking — typically a horizontal run of 2×6 or 2×8 lumber installed between studs — that distributes the weight across the framing rather than relying on the drywall alone. That blocking has to go in during the framing phase, before any cement board or drywall is hung. If you're renovating in phases and you didn't plan for a floating vanity during your last bathroom remodel, installing one later means opening the wall to add blocking, patching, and refinishing. Add $500 to $1,500 to a vanity project that could have been planned once. It's not a deal-breaker — it just needs to be known going in. Humidity affects drawer hardware faster than you'd expect. The soft-close mechanisms in floating vanity drawers are typically rated for residential use in normal interior conditions. Bathroom humidity — especially in a bathroom without a properly sized exhaust fan — accelerates wear on the slides and soft-close dampeners. Cabinet ventilation cutouts in the back panel, and a correctly sized exhaust fan (80–110 CFM for most master baths), extend the life of the hardware meaningfully. Material choices: Solid walnut and white oak are the most popular contemporary finishes. Both are warm, durable, and age well if the finish is maintained. Painted MDF is a lower-cost option that works well in low-humidity environments but is more susceptible to swelling at joints in consistently damp spaces. Thermofoil and lacquer finishes are low-maintenance but can peel at edges in high-humidity conditions over time.Frameless Glass Enclosures — Beautiful, With Obligations The frameless shower enclosure photographs beautifully. Every hotel renovation and design magazine uses them for a reason: the uninterrupted glass plane lets the tile work be seen without a metal frame interrupting it. The real-world experience has a few additional chapters. Daily squeegee. Without it, hard water minerals deposit on the glass surface with every shower and gradually etch the glass, creating a haze that no cleaner fully removes. This isn't a scare story — it's just the maintenance reality. A ten-second squeegee after every shower keeps frameless glass looking the way it does in photos. If that's not a routine the household will maintain, a textured or low-iron treated glass (Diamon-Fusion, EnduroShield) applied at installation reduces but does not eliminate the obligation. Glass thickness and door swing. Standard residential frameless glass is 3/8" thick. Heavier installations use 1/2" glass, which is more rigid and less prone to door flex over time. More importantly: frameless glass doors swing outward. Measure the clearance to your toilet, any other cabinet, and the door in your bathroom before ordering. In compact bathrooms, a frameless door can clear the toilet by literally two or three inches at full swing. Some homeowners discover this after installation. Semi-frameless vs. frameless: Semi-frameless uses a metal channel at the top and one side wall, with the door panel frameless. It costs 15–25% less than full frameless and is mechanically simpler. Visually, it's a slight compromise — the top rail is visible — but for most configurations it's barely noticeable and significantly more forgiving in terms of installation tolerance on out-of-plumb walls. Older homes almost always have walls that are slightly out of plumb.The Shower System — Beyond Choosing a Rain Head A ceiling-mounted rain head has become the defining fixture of the modern shower. It's also the element most homeowners get half-right. Thermostatic vs. pressure-balance valve. Most homes are built with pressure-balance valves — the single handle that controls both temperature and flow. These are code-minimum. Thermostatic valves maintain exact temperature regardless of pressure changes elsewhere in the home (someone flushing a toilet, running the dishwasher). They also allow you to run the shower to temperature before stepping in, and to pause flow without losing the temperature setting. In a high-end master bath renovation, the thermostatic valve is the correct choice, and the cost difference ($800–$2,500 for the valve system) is modest relative to the overall project. Rain head positioning matters. A ceiling-mounted rain head positioned 8 to 10 inches from the shower wall (toward the center of the shower) provides full overhead coverage without water running down the adjacent tile wall. Rain heads mounted directly above the entry point are less comfortable to use than those positioned centrally. This seems obvious in retrospect but is frequently overlooked in the design phase. The handheld isn't optional. Practically speaking, most households use a handheld for daily rinsing, cleaning the shower, and bathing children. It's not a luxury add-on. It's a functional necessity that should be included in every shower system regardless of how minimalist the design. Wall-mounted handhelds in a matching finish integrate cleanly without visual clutter. Linear drain vs. center drain. A linear drain positioned at the entry threshold of a walk-in shower creates a cleaner visual — no center drain interrupting the tile field, and the ability to run floor tile in a single direction without the four-way slope required for a center drain. The trade-off is cost ($400–$900 for a linear drain vs. $80–$200 for a standard drain) and a slightly more complex installation requiring consistent 1/4" per foot slope across the entire shower floor toward the linear channel.Modern Toilet Options — The Most Overlooked Design Element Nobody writes about the toilet's contribution to bathroom aesthetics. It's probably the most overlooked design decision in a renovation. The silhouette is what you're working with. A traditional two-piece toilet — separate tank and bowl, exposed trapway at the base — has a utilitarian silhouette that no amount of stylish tile will fully override. A skirted one-piece toilet (where the trapway is covered by a continuous ceramic shell) has a much cleaner profile that reads as intentional rather than functional. A wall-hung toilet takes this further — the tank is concealed in the wall, and only the bowl projects, which makes the floor completely clear and allows floor tile to run uninterrupted beneath it. Smart toilet considerations. Toto, Kohler, and several other manufacturers produce integrated smart toilet seats and bidet-integrated units with heated seats, auto-flush, deodorizer, and warm water wash functions. These are particularly effective in the water closet / WC configuration (a separate enclosed toilet room adjacent to the main bath), where the contained space allows for a more focused, considered installation. In that context, a smart toilet adds meaningful daily function alongside a design statement. Rough-in dimension. Before selecting any toilet, measure the rough-in: the distance from the finished wall to the center of the drain. Standard US rough-in is 12 inches. Some older homes have 10" or 14" rough-ins. A toilet specified for a 12" rough-in installed in a 10" rough-in will not fit flush against the wall. This is a simple measurement that can save a significant return and reselection cost.Lighting Design — Ambient, Task, and Accent in Practice This is where most bathroom design falls short — not for lack of interest, but because the guidance available is almost always too vague. "Add sconces" is not a lighting design. Here's what actually works. The three layers:Ambient lighting provides the base illumination. Recessed downlights (4" or 6", shower-rated where applicable) positioned to cover the general room without creating harsh shadows. In a bathroom, these typically run on a dimmer circuit. Task lighting is the layer that matters most for daily use. Sconces positioned on either side of the mirror — not overhead, on the sides — illuminate the face evenly without casting the downward shadows that vanity lighting from above creates. The target height is approximately 60" from the floor to the center of the sconce, which aligns with most adults' eye level. This is non-negotiable if you want functional task lighting that also looks intentional. Accent lighting adds warmth and visual depth without adding direct function. LED strip lighting under the floating vanity toe-kick, at the base of a shower bench, or inside a niche creates a warm glow that shifts the room from functional to spa-like, particularly in the evening with the ambient lights dimmed.IP ratings for wet zones. Any light fixture inside the shower — recessed or otherwise — must be rated for wet locations (IP65 minimum, IP67 for direct water exposure). Standard recessed lights are not. LED strips near or in the shower require IP67 rating for long-term reliability in humid environments. Standard LED strips fail and yellow within two to three years in bathroom conditions. This is the detail most homeowners discover too late and most contractors don't mention at installation. Dimmer compatibility. Not all LED bulbs and strips are dimmer-compatible. Specify "dimmable LED" at purchase and verify that the dimmer switch itself is rated for the LED load on that circuit. Mismatched dimmers cause flicker, buzzing, and shortened bulb life — all of which defeat the point of the layered lighting investment.Accent Walls — How to Add Visual Depth Without Clutter The accent wall is one of the most effective tools in a bathroom renovation and one of the most commonly misused ones. Done well, it creates focal depth and architectural interest. Done wrong, it makes the space feel busy in a different way than it was before. Material choices that work in 2026:3D wave textured tile in charcoal or dark stone tones Large-format dark natural stone or porcelain-look slate Fluted vertical wood panels (white oak or walnut, sealed for humidity) Limewash plaster (applied by a skilled plasterer, not roller paint) Venetian plaster (similar application, higher sheen)Placement matters more than material. The strongest accent wall placement is behind the vanity mirror zone — where the eye naturally falls on entry to the room. Placing the accent wall in the shower and keeping the vanity wall neutral works too, but the visual impact is reduced because the shower wall is partially obscured by the glass. Placing accent walls in both zones simultaneously creates competition rather than contrast, and the room loses its visual hierarchy. In the project documented in this article, the dark 3D wave textured tile was placed at full height behind the vanity and mirror zone, flanked by warm sconce lighting. The shower used the same large-format tile as the floor, maintaining visual continuity and letting the accent wall remain the focal point from the door. The decision was intentional — and it shows in how the room reads.What a Real Full Gut Renovation Involves — A Documented Project Breakdown The renovation documented in this article started with a bathroom that hit almost every dated-design signal in the table above. Before: A master bathroom built in the early 2000s. Brown diagonal travertine tile covering the floor, shower walls, and jetted tub surround. Birdseye maple flat-front cabinetry in a warm honey tone. Two round drop-in sinks set into a travertine counter. A Hollywood-strip bulkhead mirror spanning the full vanity width. A framed glass corner shower enclosure. A whirlpool jetted tub. Chrome fixtures throughout. The room was large and functional. It looked like it was designed in 2002, because it was. The homeowners had not used the jetted tub in three years. Between the tub and the corner shower, the center of the room was occupied by fixtures that weren't being used — while the shower itself felt cramped relative to the room's total square footage. Phase 1 — Demolition: Full gut down to wood stud framing. When the tile came off, the original waterproofing condition became visible: liquid-applied membrane only at the shower pan, not extended up the shower walls to the code-required 6" minimum above the pan. Moisture had tracked into the lower portion of the framing behind the shower walls — not catastrophic, but the kind of slow damage that becomes expensive after another decade. The jetted tub surround had similar issues at the tub-to-tile transition, where the caulk joint had failed and allowed periodic moisture intrusion into the framing. Phase 2 — Framing and Rough-In: With the tub removed, the shower footprint was redesigned to use the full width of the window wall. New framing established the shower configuration. Blocking was pre-installed at the vanity locations — a critical step, given that the floating vanities were part of the finished design. Plumbing rough-in was relocated to center the linear drain position in the new shower layout. Electrical rough-in established sconce locations at precise 60" height and shower-rated recessed positions. Phase 3 — Waterproofing: Henry JumboTex two-ply sheet membrane was installed across the shower walls, extending a minimum of 6" beyond the wet zone boundary on all sides. The shower bench assembly — a built-in tiled bench along the window wall — was waterproofed at all seams and corner transitions with membrane tape and liquid-applied sealant before the mortar bed was established. The shower floor was pre-sloped to the linear drain at the required 1/4" per foot gradient. This is the invisible work that most homeowners never see and never think about until something goes wrong. It determines whether a bathroom performs for five years or thirty. Phase 4 — Finished Result:Large-format travertine-look porcelain tile running continuously from the floor through the shower walls, with minimal grout joints Floating walnut vanity with open lower shelving and integrated Calacatta marble trough sink Full-height 3D dark wave textured accent tile behind the vanity zone Wood-framed rectangular mirror centered between warm-tone sconces Frameless glass shower enclosure with ceiling-mounted brushed nickel rain head and wall-mounted handheld Built-in tiled shower bench with warm LED accent strip at the base Skirted smart toilet in the adjacent private water closet, paired with a second walnut floating vanity and marble-top sink IP67-rated warm-tone LED strip under the vanity toe-kickThe transformation is significant. But the photos only show the after. The work that made the after possible — the framing, the blocking, the membrane — is invisible in every finished image. That's intentional. That's what a correct renovation looks like.The Budget Reality — What Different Renovation Scopes Actually Cost This is the question most homeowners have before they call anyone. And it's the question most online content avoids answering honestly.Renovation Scope What Is Included Estimated Cost (US) Typical TimelineCosmetic Refresh Hardware, lighting, mirror, paint, caulk refresh, accessories $1,500–$5,000 1–4 daysPartial Fixture Swap New vanity, toilet, shower fixtures — no tile work $5,000–$15,000 1–2 weeksTile and Fixture Remodel New tile (layout unchanged), vanity, fixtures, lighting $15,000–$35,000 3–6 weeksFull Gut Renovation Complete demo, new waterproofing, potential layout change, all finishes $35,000–$85,000+ 6–14 weeksA few honest additions: Add 10–20% contingency in every case. Hidden water damage, mold remediation, permit requirements, and material lead times are the most common cost escalators. They occur in a substantial percentage of bathroom gut renovations — particularly in homes built before 2005, where original waterproofing methods were less rigorous. UK, Canada, and Australia: Adjust upward by 15–35% depending on regional labor markets and material import costs. Tile pricing in the UK and Australia is typically higher for equivalent large-format porcelain due to import costs. Canadian labor rates vary significantly by province. What drives cost above the baseline: Natural stone vs. porcelain-look, wall relocation, plumbing stack moves, electrical panel upgrades, radiant floor heating added during tile phase, frameless vs. semi-frameless glass, smart fixtures, and any remediation of water damage discovered mid-demo. The project shown in this article fell in the full gut range. The footprint was the same room. But demo, new waterproofing, full re-framing of the shower zone, plumbing relocation for the linear drain, floating vanity blocking, new electrical, all new finishes, and premium materials put it firmly in that bracket. It was worth it. That's a separate decision every homeowner makes based on their own timeline, budget, and plans for the property.The Waterproofing Layer — The Invisible Decision That Determines How Long "Modern" Lasts Two bathrooms can be tiled with identical materials by equally skilled tile setters and look identical at completion. In five years, one looks the same. The other has grout cracking at the shower corners, a slight efflorescence stain at the base of the wall tile, and a smell that wasn't there before. The difference is almost always the waterproofing layer — not the tile, not the grout, not the installer's technique. The tile is not the moisture barrier. The membrane behind the tile is the moisture barrier. Tile and grout are water-resistant, not waterproof. Every grout joint, every corner, every change of plane is a potential pathway for moisture to reach the substrate. Without a continuous membrane behind the tile in wet zones, moisture accumulates in the framing over time. Membrane options:Sheet membrane (Schluter KERDI, Henry JumboTex): Bonded directly to the cement board substrate, covered with mortar, then tile. Highly reliable, well-tested, and what the project documented here used. JumboTex two-ply sheet membrane provides an additional redundancy layer that single-ply options don't. Liquid-applied membrane (RedGard, Hydro Ban): Brushed or rolled onto the substrate in two coats, allowed to cure, then tiled over. Less material cost than sheet membrane, but application quality is more variable — brush technique, coat thickness, and corner build-up matter significantly. Widely used and effective when properly applied. Foam board systems (Wedi, Schluter Kerdi-Board): Rigid foam panels that are inherently waterproof, eliminating the need for a separate membrane. More expensive material cost, faster installation, and dimensionally stable. Used frequently for custom shower niches and benches.⚠ Important: Waterproofing cannot be inspected after tile is installed. It cannot be corrected without full demolition. The cost of inadequate waterproofing is not the $200–$600 that the membrane would have cost. It is the cost of remediation, reconstruction, and in some cases mold testing and treatment of surrounding wall cavities and subfloor — typically $8,000–$25,000 or more. Treat waterproofing as a non-negotiable fixed cost, not a place to reduce the budget.Shower pan slope is part of this. Code requires a minimum 1/4" per foot slope from the edges toward the drain across the entire shower floor. Pre-slope is established before the membrane goes down, using a mortar bed or pre-sloped foam substrate. A shower floor that does not slope correctly holds standing water — which stresses the membrane, the grout, and eventually the structure beneath it. Ask your contractor specifically how the pre-slope will be established before demo begins.DIY vs. Professional — An Honest Assessment Not every part of a bathroom renovation requires a licensed contractor. But some parts genuinely do — both for safety and for long-term results. Here's a practical breakdown.DIY-Appropriate Hire a Licensed ProfessionalPainting walls and ceiling Tile installation (especially large-format on wet walls)Hardware replacement (towel bars, hooks, toilet paper holder) Plumbing rough-in or any drain/supply relocationMirror swap Electrical work in wet zones (GFCI circuits, permits required)Lighting fixture replacement (existing GFCI wiring in place) Waterproofing membrane installationVanity top replacement with unchanged plumbing connections Floating vanity installation requiring wall blockingCaulk refresh and grout touch-up Frameless glass enclosure installationAccessory and decor layer Shower niche and bench framing and waterproofingVanity cabinet painting or staining Heated floor rough-in during tile phaseA note on regional requirements: plumbing and electrical permits are required in most US states, Canadian provinces, UK local authorities, and Australian states for any rough-in work or new circuit installation. Unpermitted work in these categories can create complications at resale — many lenders and buyers require permits to be pulled retroactively, which involves inspecting work that may now be behind finished walls. The upfront cost of permits ($150–$500 typically) is significantly less than the potential complication.Modern Bathroom Mistakes That Are Expensive to Fix 1. Skipping Wall Blocking Before Drywall The floating vanity you've been planning requires horizontal blocking between wall studs, installed before any drywall or cement board goes up. If you finish the walls first and add the vanity as a phase two project, you're opening a finished wall to add blocking, patching the cement board or drywall, retaping and finishing, and potentially retiling. What would have cost nothing during rough-in adds $500–$1,500 to the project after the fact. 2. Choosing Polished Large-Format Floor Tile The look is immaculate. In a dry space — a lobby, a hallway — polished porcelain is a legitimate choice. In a bathroom floor that gets wet every day, polished tile below a DCOF of 0.42 is a fall hazard. Specify honed or lightly textured finish for bathroom floor applications, and verify the DCOF rating before ordering. The tile supplier will have this data. 3. Mixing Three Metal Finishes Buy the shower valve in brushed nickel. Order the faucet in chrome because it was two weeks faster. Pick up towel bars in matte black because they were on clearance. The result looks like a renovation that ran out of money at three different points. Before purchasing any hardware, list every metal finish point in the bathroom — valve trim, faucet, drain cover, towel bars, toilet paper holder, robe hook, mirror frame, sconce hardware, shower door hardware — and assign finishes deliberately. Two finishes maximum. Apply them consistently. 4. Light Grout Color in a High-Use Wet Space White or very light grout in a shower or on a bathroom floor is beautiful for approximately six months. Then the routine of daily use, imperfect sealing schedules, and the reality of soap scum and mineral deposits makes it a maintenance obligation that most households won't sustain. Grout color that matches the tile closely — charcoal grout with gray tile, tan grout with travertine-look porcelain — is significantly more forgiving and ages more evenly. 5. Shower Niche Without Proper Liner Waterproofing A built-in shower niche is one of the most requested features in a modern bathroom remodel and one of the most common sources of slow water intrusion behind shower walls. The niche cuts through the waterproofing plane. Every corner of the niche — back panel to side walls, side walls to top and bottom — needs to be waterproofed with membrane tape and liquid-applied sealant before tile goes on. A tile-over-backer-board niche without additional waterproofing at the corners is one of the most common callbacks in bathroom renovation warranty work. 6. Non-IP-Rated LED Strips in the Bathroom Standard LED strips — the kind available at every hardware store — are not rated for wet or humid environments. In a bathroom, humidity is constant. Near a shower, moisture exposure is direct. Standard LED strips in these conditions fail within one to three years: the silicone coating separates, the board corrodes, sections stop illuminating, or the color temperature shifts toward yellow. Specify IP67-rated LED strips for any installation within or near the shower wet zone, and IP44 minimum for under-vanity and other bathroom applications. 7. Buying Frameless Glass Before Measuring the Door Swing Frameless glass doors swing outward. In a spacious master bath, this is not an issue. In a smaller bathroom — or in a configuration where the shower is adjacent to the toilet — a full-swing frameless door may have very limited clearance. Measure the full door swing arc before ordering. Some configurations work better with a bi-panel frameless door that folds rather than swings, or with a fixed panel and no door at all (open walk-in). Discover this during planning, not delivery. 8. Removing the Only Bathtub in a Family Home This is the renovation decision with the most consistent resale impact. Modern design strongly favors large walk-in showers over jetted tubs in master bathrooms — the tub is often unused, and the shower footprint is genuinely more useful. But if the bathroom being renovated is the only bathroom in the home with a bathtub, removing it affects your buyer pool at resale. Many families with young children specifically require at least one tub. Check whether another bathroom in the home has a tub before committing to tub removal in the master. 9. Selecting Trendy Grout Colors The grout color palettes that trend in a given year have a shelf life of three to five years. "Greige" grout, charcoal grout on white tile, and warm beige grout on gray tile all have a dated association now — not because those colors are bad, but because they were so specifically fashionable at one moment. Grout that matches the tile tone closely — rather than contrasting it — is the most timeless choice and the one least likely to signal a specific renovation era in ten years. 10. Missing the Radiant Floor Heating Window Radiant floor heating — electric mat systems in particular — must be installed beneath the tile before the tile goes down. That's the only opportunity. If you want heated floors and your bathroom is being tiled, the cost to add a floor heating mat during the tile phase is typically $400–$900 for materials (for a standard master bath) plus a few additional hours of electrician time for the thermostat wiring. Adding heated floors after tile installation means demolishing the floor. The incremental cost during renovation is a fraction of the reconstruction cost afterward.Frequently Asked Questions What is the single most impactful change to make a bathroom look modern? Lighting. Specifically, replacing a bulkhead vanity light or fan/light combo with flanking wall sconces at eye level (60" from the floor) changes how the face is lit, how the room feels, and how the entire vanity zone reads. It requires a licensed electrician if new wiring is needed, or can often be done with existing wiring if the outlet box location is compatible. After lighting, the next highest-impact single change is the vanity — either replacing a floor-standing unit with a floating design or replacing the hardware and mirror to bring the existing cabinet forward visually. How do I make a small bathroom look modern on a limited budget? Focus on what the eye goes to first: the mirror and lighting above the vanity. Swap a basic rectangle mirror for a frameless or thin-framed rectangular design. Replace overhead vanity lighting with a single wall sconce (in a very small bath, one centered sconce is acceptable). Repaint in a single neutral tone that reads as intentional rather than default. Update all hardware to a single consistent finish. These four changes — mirror, lighting, paint, hardware — can be done for $800–$2,500 depending on fixture quality and require no plumbing or tile work. What tile size makes a bathroom look most modern? 24×48 inch is the current benchmark in high-end renovation work. At this size, the minimal grout joint creates a nearly continuous surface that reads as architectural rather than tiled. 12×24 is a practical middle ground for older homes where subfloor stiffness is a concern — it's still large-format relative to standard tile but has less lippage risk on floors that aren't perfectly level. Anything smaller than 12×12 is generally not considered large-format and will read as more traditional in the context of a contemporary design. Is a floating vanity worth the extra installation cost? Yes — with a qualification. A floating vanity properly installed (with wall blocking, correct weight-bearing hardware, and appropriate cabinetry material for a humid environment) will perform well and maintain the look that makes it worth choosing. A floating vanity retrofitted into a wall that wasn't blocked, mounted with inadequate hardware, or built from non-humidity-rated cabinetry will feel unstable and show wear within a few years. The design is right. The installation details have to match. Should I remove my bathtub to expand the shower? In a master bathroom where another tub exists elsewhere in the home, yes — if the space permits a shower that genuinely benefits from the tub's footprint. The trade is almost always worth it in terms of daily usability. In a home where the master bath is the only bathroom with a tub, this decision affects resale buyer pool. National Association of Realtors data consistently shows that removing the last tub in a home reduces appeal for families with young children. It's not a dealbreaker for every buyer, but it's a conversation worth having before committing. What hardware finish is most modern in 2026, and how long will it stay that way? Brushed nickel has proven the most durable in terms of design longevity — it doesn't spike, doesn't read as aggressively trendy, and doesn't show fingerprints the way polished finishes do. Matte black remains strong but is past its peak trend moment, which means it's now a legitimate design choice rather than a trend signal. Unlacquered brass (which patinas naturally over time) and satin brass are currently in a growth phase and likely to hold for another five to eight years based on cycle patterns. Polished chrome is genuinely timeless in a minimalist context. Whatever you choose, apply it consistently — finish longevity is about coherence as much as the finish itself. How do I choose between frameless and semi-frameless glass shower enclosures? If your shower walls are plumb and your budget supports it, full frameless is the cleaner choice visually. If your walls have any significant out-of-plumb condition (common in homes more than 20 years old), semi-frameless is more forgiving — the top rail and side channel accommodate variance that a completely frameless installation struggles with. Cost difference is typically 15–25%. For most master bath configurations, the visual difference between the two is minimal once the shower is finished and tiled. What type of lighting makes a bathroom feel modern and spa-like? Three-layer lighting on dimmers: ambient recessed downlights, task sconces at eye level flanking the mirror, and accent LED strips under the vanity (and optionally at shower bench level). The key element is the dimmer. In a bathroom with all three layers and a dimmer, you can run full brightness in the morning for task use and bring everything down in the evening so the LED strip becomes the dominant light source — warm, low, indirect. That shift in ambience is what people mean when they describe a bathroom that "feels like a spa." How long does a full bathroom gut renovation realistically take? Six to fourteen weeks from permit approval to substantial completion is the honest range for a master bath full gut renovation. Permit approval alone takes one to four weeks depending on jurisdiction. Demo is typically one to two days. Rough-in (plumbing, electrical, framing) takes one to two weeks. Waterproofing, tile, and drywall take two to four weeks. Fixtures, glass, and finishes take one to two weeks. The schedule compresses when subcontractors are available and materials are pre-ordered. It expands when concealed damage is discovered, when permit inspections are delayed, or when custom materials have lead times. Order tile, vanities, and glass enclosures before demo begins. Custom items can take four to twelve weeks to arrive. Which modern bathroom features actually add measurable resale value? Large-format tile, floating vanities, and frameless glass enclosures are broadly recognized by buyers in the current market and improve perceived quality. Smart toilets and thermostatic shower systems are appreciated but not typically reflected in appraisal value. Radiant floor heating adds perceived luxury but is not universally valued in warm climates. The strongest ROI driver in a bathroom renovation remains the overall quality and coherence of finishes — buyers in the $500,000+ home market have seen enough renovations to recognize shortcuts — rather than any single feature. Consistent quality across every element outperforms one premium element surrounded by budget choices. How do I prevent large-format floor tile from being slippery when wet? Specify a honed or lightly textured surface finish rather than polished. Verify the DCOF (Dynamic Coefficient of Friction) rating — the minimum for wet bathroom floors is 0.42. For shower floors specifically, a slip-resistance rating of 0.60 or higher is appropriate given the consistently wet conditions. Many large-format porcelain lines offer the same visual in both polished (for walls) and honed/textured (for floors) finishes. Buy both from the same product line for the same visual continuity. Apply a penetrating sealer to natural stone and unglazed porcelain on a schedule — typically annually — to maintain both slip resistance and stain resistance. What is the real maintenance routine for a frameless glass shower enclosure? Daily: squeegee all glass panels after each shower. Takes about ten seconds. Without this, hard water minerals etch into the glass surface gradually and create a haze that cleaning products cannot fully remove. Weekly: wipe down with a bathroom glass cleaner (white vinegar solution works) to dissolve any mineral deposit that accumulated despite daily squeegeeing. Monthly: inspect and clean the door hinge hardware and pivot points — debris and soap residue accumulate at hinge points and can affect smooth operation over time. Annually: consider a professional treatment with a hydrophobic glass coating (Diamon-Fusion, EnduroShield) if not applied at installation. This is not optional maintenance in hard water areas. It is what frameless glass requires. Can I mix metal finishes in a modern bathroom? Yes — with discipline. Two finishes maximum. One dominant, one accent. The dominant finish (brushed nickel, matte black, etc.) applies to all primary fixtures: shower valve trim, faucets, towel hardware. The accent finish appears in secondary or decorative elements: mirror frame, sconce detail, cabinet pull. The critical rule is that both finishes appear in more than one location — a "mixing" that really means one finish everywhere and one piece in a contrasting finish looks like a mistake, not a decision. When both finishes recur throughout the space, the combination reads as intentional. What is the most expensive mistake homeowners make during a bathroom renovation? Inadequate waterproofing is the most consequential — it creates damage that is invisible for years and catastrophically expensive when it surfaces. The second most expensive is skipping permits for plumbing and electrical work, which creates resale complications. The third is failing to plan floating vanity wall blocking before walls are finished, which turns a simple vanity installation into a wall-opening project. All three share the same pattern: they save money in the moment and cost significantly more to correct after the fact. The decisions that feel like savings during renovation frequently become the largest costs in the five years that follow. How do I modernize a bathroom on a budget under $5,000 without touching tile or plumbing? In priority order: lighting first ($400–$1,200 for quality sconces plus electrician if wiring changes are needed), then mirror ($200–$800 for a frameless or framed rectangular design), then hardware in a single consistent finish ($300–$600 for a complete set), then paint ($100–$300 for professional-quality product plus labor if not DIY), then vanity accessories — soap dispenser, tray, towel display — in a cohesive palette ($200–$400). Total: $1,200–$3,300 for the range, leaving room for an unexpected cost or a higher-quality sconce selection. This scope modernizes the visual layer of a bathroom without any structural, plumbing, or tile work.This article is based on real renovation experience, documented project evidence, and trade-level knowledge of bathroom construction, waterproofing systems, and finish selection. For project-specific advice, consult a licensed contractor in your area. Bathroom Design & Style :How to Choose a Tile Pattern That Makes a Small Bathroom Look Bigger How Many Lights Should a Bathroom Have? Layouts, Lumens & Lighting Design Ideas That Work Walk-In Shower vs Bathtub: Which Is Better? Plus Modern Walk-In Shower Design Ideas That Last Small Bathroom Design Ideas: How to Make a Compact Bathroom Look (and Feel) Bigger Farmhouse Bathroom Ideas: What the Style Actually Requires (and What Nobody Tells You About Living With It) What Colors Make a Bathroom Look Bigger and Brighter? What Makes a Bathroom Look Modern? (Everything That Actually Matters)
.webp)
How Do You Shower When Your Bathroom Is Being Renovated
If you've ever stood in a half-demolished bathroom at 7 a.m. wondering where exactly you're supposed to wash your hair, you already know this isn't really a plumbing question. It's a logistics question. And most articles on this topic answer it like it's a single, tidy problem with one tidy solution — when in practice, the "no bathroom" period of a renovation is really three or four different problems stacked on top of each other, each with its own timeline and its own headaches. We went through a full gut renovation ourselves — plumbing relocated, tile ripped down to the studs, the whole thing — and we're going to walk through exactly what that looked like, alongside the options that actually work for most households. Quick Answer: Your Options at a Glance During a bathroom renovation, most people cover their shower needs with some combination of: a gym or community center day pass, a portable camp shower rigged to an outdoor spigot or garage hose bib, a plumber-installed temporary shower or sink line before demo starts, staying with family or in a hotel for the roughest stretch, or renting a portable bathroom trailer for longer projects. Which one makes sense depends heavily on how long the project runs and how much of the house still has working water. Quick takeaways:A full gut typically leaves you without a shower for 2–6 weeks — but you're rarely without all water access for that entire stretch. Access usually comes and goes in phases. Demolition day and the waterproofing cure period are the two windows where you have genuinely zero access to that room. Everything in between is more negotiable than people assume. Toilet access is usually the more urgent problem to solve, not showering — plan that one first. The cheapest options (gym pass, camp shower) and the most comfortable ones (plumber-installed temporary line, portable bathroom rental) sit at opposite ends of a fairly wide cost range, and most households end up mixing two or three approaches rather than picking just one.How Long Are You Actually Without Water? (It's Not the Whole Project) This is the part almost nobody explains well, and it's the single biggest source of unnecessary stress during a renovation. Homeowners tend to hear "6-week bathroom remodel" and mentally block off six weeks of showering at the gym. That's rarely accurate. Water access usually comes and goes by phase, and knowing which phase you're in changes what you need to plan for.Phase What's happening Shower/water access Typical durationPre-demo prep Permits, material selection, contractor scheduling Full access — bathroom still works 1–4 weeks (doesn't affect you daily)Demolition Old tile, tub, vanity, and fixtures removed Zero access — this is the hard stop 1–3 daysRough plumbing & electrical Pipes and wiring relocated or replaced behind the walls Zero access, sometimes intermittent water shutoff to the rest of the house 3–10 days (longer if the layout is changing, like ours did)Inspection hold Rough-in inspection before walls close up Zero access — this can stall unexpectedly if the inspector is backed up A few days to two weeks (this is where timelines usually slip)Waterproofing & tile setting Membrane, thinset, tile, grout Zero access — new tile and grout also need to cure before contact with water 1–2 weeksFixture install & finishing Tub, toilet, vanity, glass, hardware go in Partial access returns — toilet is often usable before the shower is 3–7 daysTwo things worth flagging here, because they're the parts that trip people up most: The inspection hold is where projects quietly stall. Contractors can't close up walls until a plumbing/electrical inspector signs off on the rough-in, and municipal inspection scheduling is completely outside your contractor's control. If your city is backed up, a "10-day rough-in" can become three weeks with zero warning. Build slack into whatever temporary plan you set up — don't assume the calendar your contractor gave you is the calendar you'll get. New tile needs to cure before it can get wet — even though it looks finished. This is the one that catches people off guard the most. Thinset and grout both need real cure time (commonly 24–72 hours minimum, longer for certain waterproofing membranes) before the shower can be used at all, and full cure can take weeks even though the tile is technically "done." A contractor telling you the shower is tiled is not the same as telling you it's usable. What This Actually Looked Like For Us Numbers on a page are one thing. Here's what a real full-gut renovation looks like from the inside — because the phase-by-phase timeline above only tells half the story.Before: the original vanity — 1960s/70s tile that had never been touched, with a fixed sink cut into the tiled countertop. This bathroom hadn't been touched since it was built. Colored fixtures — the tub, the toilet, even the sink basin — were all molded in the same pastel green, which was a very normal thing for a mid-century build but meant literally every fixture in the room was original and past its functional life. The tub had worn through its glaze at the bottom, the grout had gone porous enough to stain, and there was no ventilation fan — just a window over the toilet.Before: the tub/shower combo. Note the worn glaze and mineral staining — decades of hard water take a visible toll on a fixture like this. Because the layout was changing — the new design separates the wet zone (tub and shower) from a two-sink vanity area — this wasn't a like-for-like swap. That distinction matters more than most renovation guides let on: a straight fixture replacement (same tub, same spot, new finishes) can sometimes keep partial water access going for longer, while any project that relocates plumbing lines guarantees a longer full shutoff, because the rough plumbing work simply takes more time and more inspection cycles.Before: the original built-in linen storage — solid, dated, and part of what came out during the gut. For us, that meant a genuine multi-week stretch with no functioning shower or tub in the house at all. During demo and rough-in, we relied on a gym membership for weekday showers and a portable camp shower kept in the garage for evenings and weekends — more on both of those below. The toilet situation, honestly, was solved faster and more simply than the shower: a plumber left one working line active on a temporary basis until the old fixtures came out, which is a request worth asking your own plumber about before demo starts.After: the same footprint, reconfigured. The wet zone is now fully tiled floor-to-ceiling with a frameless glass enclosure.After: brass rainhead and slide-bar handheld, with a tiled niche replacing the old shower-caddy situation entirely.After: the vanity moved to its own separated zone with sink — part of why the plumbing relocation took longer than a simple swap would have. The honest takeaway from living through it: the shower being gone wasn't actually the hardest part. It was the unpredictability — not knowing on any given Tuesday whether the plumber would show up as scheduled, or whether the inspection would clear that week. If we'd known to build in extra slack from the start instead of trusting the initial schedule, the whole stretch would have felt a lot less chaotic.Comparing Your Shower Options Every option below solves the same core problem differently, and most households end up combining two of them rather than relying on just one.Option Typical cost Comfort level Setup effort Best forGym or community center day pass / membership Low ($10–$30/day or $30–$60/month) Moderate — real shower, but you're commuting there daily None (just sign up) Anyone within a short drive, especially during weekday demo/rough-inPortable camp shower (pressurized tank or solar bag) Low ($40–$150 one-time) Basic — short warm shower, weather-dependent if used outdoors Low — fill, wait for heat if solar, use in garage or yard Short projects, backup option, or supplementing a gym routine on weekendsPlumber-installed temporary shower/sink line Moderate–High ($300–$1,200+ depending on access and local labor rates) High — a real, code-compliant shower or hose bib inside the house Moderate — needs to be scheduled before demo begins Full gut renovations, cold climates, households that can't easily leave the house dailyStaying with friends or family Free–Low High comfort, but limited by their patience and space None Short, intense phases like demo weekHotel or short-term rental High ($100–$300+/night) Highest comfort None beyond booking The most disruptive 3–7 days of a project, not the whole timelinePortable bathroom trailer rental High ($300–$1,000+/week) High — full shower, sink, sometimes toilet Moderate — needs a delivery slot and a spot to park it Whole-house renovations, additions, or projects running 6+ weeksA pattern worth noticing: the cheapest options (gym, camp shower) ask the most of your daily routine, while the most comfortable options (temporary plumbed line, hotel, trailer) ask the most of your budget. There's no free lunch here, but there is a genuinely good middle path for most households — which is what the framework below is for. Which Option Actually Fits Your Renovation? Rather than picking blind, match your plan to two variables: how long the project runs, and how much flexibility your household actually has.Under 1 week, single adult or flexible schedule → A gym pass or a friend's spare bathroom covers this easily. Don't overspend on anything more elaborate. 1–3 weeks, working household → Combine a gym membership for weekdays with a camp shower or family/friend visits for weekends. This is the sweet spot where a temporary plumbed line usually isn't worth the cost. 3–6+ weeks, or a full gut with relocated plumbing → Talk to your plumber before demo about leaving one temporary line active, even a simple hose bib with a shower attachment in a garage or basement. The upfront cost pays for itself in daily convenience once you're a month in. Households with kids under 5, elderly residents, or anyone with mobility needs → Prioritize a plumbed temporary solution or a portable bathroom trailer over anything requiring daily transport. The "just go to the gym" advice quietly assumes a level of mobility and free time not every household has. Renovation involves your only bathroom in the house → Treat toilet access as the priority to solve first, before you even think about showering. See the next section.Building a Safe Temporary Shower Yourself If you're setting something up at home rather than relying on a gym or hotel, safety is the part that gets skipped most often in DIY write-ups — and it's the part that actually matters. What you'll typically need:A pressurized camp shower (battery-pump or foot-pump models both work) or a solar shower bag for warm-weather use A garden hose adapter if you're connecting to an outdoor spigot A backflow preventer on any connection that ties into your home's potable water line — this stops contaminated water from being siphoned back into your drinking water supply, and it's non-negotiable, not optional A GFCI-protected outlet if you're using anything electric (an on-demand water heater, a fan, string lighting) anywhere near the setup A simple drainage plan — a kiddie pool, a floor drain, or a slotted shower base that routes water away from your foundation and away from any interior flooringWhere people get hurt or cause damage:⚠️ Safety note: Never run an extension cord to an electrical device near an open-air or garage shower setup unless it's plugged into a GFCI-protected outlet. Standing water and household extension cords are a genuinely dangerous combination — this is the single most common way DIY renovation showers cause an injury, not the plumbing itself.⚠️ Property note: Improvised indoor drainage (a bucket, a makeshift floor drain, a garden hose draining into a basement sink) is the most common way homeowners accidentally create water damage or mold during a renovation that was never in the original scope of work. If you're setting up indoors, confirm exactly where the water goes before you use it, not after.A garage or basement setup is almost always safer and more private than an outdoor one, provided there's a floor drain or you can direct water toward one. If neither exists, a simple slatted pallet or shower base over a drainage bucket, emptied after each use, is a low-cost workaround — just don't let water sit and soak into subfloor material. Don't Forget the Toilet — It's a Separate Problem Most renovation content treats "no bathroom" as one blanket issue, but toilet access and shower access are genuinely different problems with different urgency levels. You can go a day without a shower. You can't really go a day without a toilet, especially overnight or with kids in the house. Toilet checklist before demo day:Ask your plumber directly whether one fixture (toilet or a hose bib) can stay active until the old bathroom is fully demoed If there's a second bathroom in the house, confirm it can handle full household use — check water pressure and hot water capacity if multiple people will now share it For single-bathroom homes, price out a temporary toilet rental (a small, enclosed portable unit, not a construction-site port-a-potty) for the demo-to-rough-in window Keep a battery-powered or plug-in air freshener/fan nearby if a portable unit will be indoors — ventilation matters more than people expect Confirm with your contractor exactly which day the last working fixture will be disconnected, in writing, so you're not caught off guardWhat It Actually Costs Prices vary by region and by how competitive local trades are, but here's a realistic range across the countries this guide covers.Solution United States United Kingdom Canada AustraliaGym day pass / month $10–$30/day, $30–$60/mo £8–£20/day, £25–£50/mo CA$12–$35/day, CA$40–$70/mo AU$15–$35/day, AU$45–$80/moCamp shower unit $40–$150 £35–£120 CA$55–$190 AU$60–$200Plumber temporary line $300–$1,200+ £250–£900+ CA$400–$1,500+ AU$450–$1,600+Hotel (per night) $100–$300+ £80–£220+ CA$130–$350+ AU$140–$380+Portable bathroom trailer (weekly) $300–$1,000+ £250–£800+ CA$400–$1,300+ AU$450–$1,400+The number that actually derails budgets isn't usually the temporary shower solution itself — it's the compounding cost of a hotel or extended stay when a project runs longer than planned. If your renovation has any risk of an inspection delay (and most do), price out your temporary plan assuming an extra one to two weeks, not the best-case timeline your contractor quoted. Special Considerations: Kids, Elderly Parents, and Multi-Person Households A lot of shower-during-renovation advice quietly assumes one flexible adult with a car and free evenings. That's not most households.Young kids don't do well with a rigid gym-shower schedule, especially around bedtime. A garage or basement setup with warm water on demand tends to work better than a daily commute, even if it costs more upfront. Elderly or mobility-limited residents often can't safely use a portable camp shower or an unfamiliar gym facility. This is one of the clearest cases where a plumber-installed temporary line, even a basic one, is worth the cost over the cheaper DIY route. Multiple adults on different schedules benefit most from a hybrid approach — a gym membership covers the person leaving early for work, while a simple home setup covers everyone else in the evening, rather than everyone competing for the same solution at the same time. Pets are the detail nobody plans for. If your dog usually gets bathed in the tub that's now gone, sort that out separately — a laundry sink, a portable pet tub, or a local groomer for the duration works better than discovering the gap the week it happens.Mistakes We See Constantly (and Made Ourselves)Waiting until demo week to think about it. The best temporary plans — especially a plumber-installed line — need to be arranged before demolition starts, not after. Assuming the whole project timeline equals zero shower access. As the phase table above shows, access usually returns in stages. Plan around the actual dead zones, not the whole calendar. Skipping the backflow preventer on a DIY hose setup. It's a five-dollar part that prevents a genuinely serious contamination risk, and it's routinely left out of DIY renovation-shower tutorials. Not confirming who handles overnight toilet access. This is the one that causes actual arguments at 11 p.m., not the shower. Underestimating cure time on new tile. "The tile's in" and "the shower is usable" are two different milestones, sometimes separated by a week or more. Not budgeting slack for inspection delays. Municipal inspection scheduling is the single most common reason a "3-week rough-in" becomes a 5-week one, and it has nothing to do with your contractor's competence.FAQ How long are you typically without a shower during a bathroom renovation? For a full gut with relocated plumbing, 2–6 weeks is typical. A cosmetic refresh (new tile and fixtures in the same layout) can sometimes preserve partial access for longer. Can a plumber keep one fixture working during a full bathroom gut? Often yes, if it's arranged before demolition — commonly a temporary hose bib or a single sink line — but it depends on your home's existing plumbing layout and needs to be discussed with your contractor ahead of time, not assumed. Is it safe to run a garden-hose shower off an outdoor spigot? It can be, provided you use a backflow preventer to protect your potable water supply and keep any electrical equipment on a GFCI-protected circuit away from the wet area. What's the cheapest way to shower during a renovation? A gym or community center day pass combined with a low-cost portable camp shower for evenings and weekends covers most short-to-medium renovations without a large upfront cost. How do you handle toilet access if there's no working bathroom at all? Ask your plumber about keeping one fixture active until final demo, confirm a second bathroom can handle increased household use, or price out a small enclosed portable toilet rental for the gap period. Do gyms allow non-member day passes just for showering? Many do, though policies vary widely by gym and by country — it's worth calling ahead rather than assuming, since some require a guest pass or a trial membership instead. Is a hotel or a portable bathroom rental cheaper for a multi-week renovation? For anything beyond about two weeks, a portable bathroom trailer or a temporary plumbed line is usually cheaper per week than sustained hotel stays, even though the upfront cost looks higher. What should you check with your contractor before demo day? Confirm the exact day water/shutoff happens, whether any temporary fixture can stay active, and get a written estimate of how long the rough-in and inspection phase is expected to take — with the understanding that inspections can add unplanned time. How do families with young kids or elderly residents manage without a bathroom? Prioritizing an at-home temporary solution (a plumbed line or a garage/basement setup) over a daily commute-based option like a gym tends to work better for both groups. Bathroom Remodeling Planning & BudgetingHow to Plan a Bathroom Layout on Paper Before You Renovate Bathroom Renovation Mistakes to Avoid: A Homeowner's Real-World Guide Do You Need a Permit to Renovate a Bathroom? (US, UK, Canada & Australia Rules Explained) Full Gut Renovation vs. Partial Remodel: How to Choose the Right Bathroom Renovation Plan Bathroom Renovation Timeline by Phase: What Happens Each Week How Long Does a Bathroom Renovation Take? A Real DIY Timeline, Week by Week Bathroom Renovation Checklist: The Correct Order of Steps From Demo to Finish The Best Free Tools to Design a Bathroom Remodel (And What "Free" Actually Costs You) Questions to Ask a Contractor Before Starting a Bathroom Remodel How Do You Shower When Your Bathroom Is Being Renovated
_15_11zon.webp)
Questions to Ask a Contractor Before Starting a Bathroom Remodel
Most people don't get burned on a bathroom remodel because they hired a bad contractor. They get burned because they never asked the questions that would have told them, three weeks before demo, that this particular contractor wasn't the right one. That distinction matters, because it means the fix isn't "find a magically trustworthy contractor." It's asking a specific, ordered set of questions — before you sign anything — that force clarity on the things that actually go wrong: money, scope, hidden damage, and who's accountable when the schedule slips. Quick Answer Before hiring a bathroom remodel contractor, ask about their license and insurance (and actually verify it, don't just take their word for it), get an itemized written estimate that separates fixed costs from allowances, confirm the payment schedule (a deposit over 25% or a request for full payment upfront is a red flag), ask who pulls permits, find out whether they use subcontractors or an in-house crew, and — this is the one almost everyone skips — ask what happens, cost-wise and schedule-wise, if they find water damage, mold, or outdated wiring once the walls are opened. Quick takeaways:A normal deposit is 10–25% of the total project cost. Full payment upfront is not normal, regardless of the reason given. Ask to physically see a license and a certificate of insurance — don't accept a verbal "yes, I'm covered." Get the scope, materials, allowances, and payment milestones in a signed written contract before any demo starts. Confirm who is responsible for pulling permits — most bathroom remodels involving plumbing or electrical work require them, even in a home that's been remodeled before. Ask what the process is if they discover hidden water damage or mold behind the tile. The answer tells you more about the contractor than almost any other question on this list.Why the Right Questions Matter More Than the Lowest Bid Here's the uncomfortable part: three contractors can walk through the same bathroom, look at the same shower and the same 1990s vanity, and come back with bids that are $8,000 apart. That gap usually isn't one contractor padding the price. It's usually that they're quoting three different projects — one assumes the existing plumbing stays put, one assumes a plumbing allowance that will change once the wall opens, and one has quietly priced in a full subfloor replacement because they noticed soft flooring near the toilet flange during the walkthrough. If you compare those three bids on price alone, you'll pick the "best deal" and then spend the next two months finding out what wasn't included. Homeowner satisfaction surveys on bathroom remodels consistently show something close to 95% of people are happy with the finished result — the dissatisfaction, when it happens, tends to trace back to the estimate stage, not the workmanship stage. The questions below exist to close that gap before you sign, not after.Licensing, Insurance & Legal Protections This is the section most competitor guides get wrong, because they write for one country and assume the reader is in it. Licensing and insurance verification look different depending on where you live, and "just ask if they're licensed" isn't specific enough to actually protect you.Country What to Verify How to Verify ItUnited States A current state (and sometimes municipal) contractor license; general liability insurance; workers' compensation coverage Look the license number up directly on your state's contractor licensing board website — don't rely on a number printed on a business card. Ask for a certificate of insurance naming you as certificate holder, and if you want extra certainty, call the insurer to confirm the policy is active.United Kingdom There's no single blanket "contractor license" — instead, verify trade-specific registration: Gas Safe Register for any gas work, Part P registration (or NICEIC/NAPIT membership) for electrical work Check the tradesperson's registration number directly on the Gas Safe or NICEIC/NAPIT public lookup tools. Federation of Master Builders (FMB) membership and TrustMark accreditation are additional (not mandatory) trust signals worth asking about.Canada Provincial trade certification (Red Seal where applicable), a valid business license, and a workers' compensation clearance certificate (e.g., WSIB in Ontario) Verify certification through your provincial regulator, and ask for a current clearance certificate — this protects you from liability if a worker is injured on your property.Australia State-based licensed builder registration and, for larger projects, home warranty insurance Search the contractor's license number on your state's Fair Trading / Building Commission online register. HIA or Master Builders Association membership is a useful secondary signal, though not a substitute for the license check itself.The question to actually ask: "Can you send me your license number and a current certificate of insurance before our next conversation?" A legitimate contractor answers this without hesitation, usually within the day. Deflection — "don't worry, I've got you covered" — is the answer to pay attention to, not the one to accept.Experience, Portfolio & Reference Checks Every list of contractor questions tells you to "ask for references." Fewer of them tell you what to actually do with the answer."Can you show me a bathroom project similar in scope to mine?" — A contractor who mostly does kitchen work can still do a fine bathroom remodel, but you want to see they've handled wet-area waterproofing specifically, not just tile and cabinetry in general. "How many bathroom remodels have you completed in the last 12 months?" — This tells you whether bathrooms are a core part of their business or an occasional side job. "Can I have two or three references I can actually call?" — Then call them, and ask questions that reveal process, not just satisfaction: Did the project finish on time? Did the final price match the original quote? What happened when something unexpected came up? Read the negative reviews before the positive ones. A contractor with zero negative reviews across years of work is unusual. What matters more is how they responded — a defensive or dismissive response to a legitimate complaint is a more useful signal than the complaint itself.Scope of Work, Design & Materials Questions This is where "my quote didn't include that" complaints usually start, and it comes down to one distinction almost nobody explains clearly: the difference between a fixed price and an allowance. A fixed price means the exact tile, faucet, or vanity is specified in the contract at a locked cost. An allowance is a placeholder budget ("$1,200 allowance for vanity") that assumes you'll pick something within that range later. Allowances aren't dishonest — they're often necessary because you haven't chosen finishes yet — but they're also the single most common source of final-bill shock, because homeowners fall in love with a $2,400 vanity without realizing they blew past the allowance by double.Ask This Why It Matters"Is this line item a fixed price or an allowance?" Tells you which numbers are locked and which are placeholders"What happens if I choose something above the allowance?" Clarifies whether you pay the difference directly or it triggers a change order"Are labor costs affected if I supply my own materials?" Some contractors reduce their markup, others charge the same labor rate regardless — this should be spelled out"What's included in 'demo' — do you haul away debris, or is that separate?" Disposal fees are a common line-item surprisePermits, Inspections & Code Compliance Bathroom remodels that touch plumbing, electrical, or structural elements typically require permits — even in an older home that's "been redone before." Skipping this isn't just a legal risk; unpermitted work can complicate a home sale later, since some buyers' inspectors and title companies specifically flag it.Ask who pulls the permit — you or the contractor. A licensed contractor pulling their own permits is generally a better sign than being asked to pull permits yourself for work they're performing. Ask which inspections are required and at what stage (rough-in plumbing/electrical is the most common inspection point before walls are closed up). Ask how permit delays are handled in the schedule — inspectors don't work on a contractor's timeline, and a realistic contractor builds a buffer for this rather than promising a date they can't control.What's Behind the Walls: Plumbing, Waterproofing & Hidden Damage Questions This is the section homeowners search for after the fact, when they wish they'd asked beforehand. Bathrooms fail differently than other rooms — moisture doesn't announce itself until it's already caused a problem. "What waterproofing method will you use behind the shower tile?" A proper shower buildup uses either a waterproof membrane (sheet or liquid-applied) over cement backer board, or a fully waterproof backer board system. If a contractor's answer is vague — "we just tile over the greenboard" — that's worth pushing on. Greenboard alone is moisture-resistant, not waterproof, and it's a known failure point behind showers. "What CFM is the exhaust fan, and is it vented outside, not just into the attic?" Ventilation gets skipped in almost every "what to ask a contractor" list, yet a fan that's too small or vents into an attic space instead of outdoors is one of the more common causes of mold recurring after a remodel that otherwise looked great. "If you find water damage, rot, or old wiring once the wall is open, what's the process?" This is the single most revealing question on this entire list. A straight answer sounds like: "We'll stop, show you photos of what we found, and give you a written change order with the cost and time impact before doing anything further." A vague or annoyed answer — or one that implies they'll "just handle it and add it to the bill" — tells you how disputes will be handled later.If They Find... What Should HappenSoft or rotted subfloor Photos shown to you, written change order with cost/timeline before proceedingMold behind old tile Contractor pauses, discusses remediation scope (sometimes requiring a specialist), documents before covering it back upOutdated or unsafe wiring Licensed electrician (in-house or sub) brought in, code-compliant fix quoted separatelyCast iron or galvanized supply lines in poor condition Plumbing replacement quoted as a change order rather than silently patchedTimeline, Daily Schedule & Living Through the Remodel A mid-size, full bathroom remodel typically takes somewhere between two and four weeks of active work, though the number that matters more is: how long is your only bathroom, or your primary shower, actually unusable?Ask for a day-by-day breakdown, not just a start and end date. Demo, rough-in, inspection, tile, fixtures, and final touches each have their own timeline, and delays compound — a permit inspection that slips two days pushes everything behind it. Ask what hours workers will be in your home, and whether that changes if you work from home or have small children napping on a schedule. Ask how they contain dust — plastic sheeting and a dedicated exit path matter more than people expect once demo actually starts. Confirm your plan for water access. If this is your only bathroom, ask directly how many days you'll be without a working toilet or shower, and plan around it rather than assuming it will "probably be fine."Cost, Payment Schedule & Change Orders Search "average bathroom remodel cost" and you'll get numbers ranging from $6,500 to $80,000, which is technically all true and practically useless. The range is wide because these figures blend cosmetic refreshes, mid-range full remodels, and primary suite renovations without separating them. Square footage matters less than most people assume — the real cost drivers are whether plumbing gets relocated, whether the shower or tub is being converted or rebuilt, and the tier of materials chosen.Scope Typical Cost Range What's Usually IncludedCosmetic refresh $3,000 – $15,000 New vanity, paint, fixtures, lighting; existing layout and plumbing unchangedMid-range full remodel $15,000 – $30,000 New tile, new shower/tub, new vanity, updated lighting; plumbing stays roughly in placeHigh-end renovation $30,000 – $60,000 Layout changes, plumbing relocation, custom tile work, upgraded fixturesLuxury / primary suite $60,000 – $120,000+ Structural changes, heated flooring, custom cabinetry, premium finishes throughoutAs a rough national rule of thumb, labor accounts for roughly 40–65% of the total budget and materials for 35–60%, which is why a contractor who's dramatically cheaper than everyone else is either cutting one of those two things or hasn't accounted for something you'll discover later. A fair payment structure looks something like this:10–25% deposit at signing (never more, and never the full amount) Progress payment after demo is complete and rough-in plumbing/electrical passes inspection Progress payment after tile, fixtures, and vanity are installed Final payment (10–20%) held until after the final walkthrough and a completed punch listTying the final payment to the walkthrough — not to a calendar date — is what gives you leverage to get small, lingering issues (uneven caulking, a sticky drawer, a scuffed wall) actually fixed instead of promised. On change orders: ask upfront how they're priced — hourly, at a fixed markup, or negotiated case by case — and insist that every change order is written and signed before the additional work happens, not invoiced after the fact.Communication, Project Management & Subcontractors"Will you personally be on site, or will I be dealing with a project manager and a rotating crew?" Neither answer is automatically wrong, but you want to know which one you're getting. "Do you use subcontractors for plumbing and electrical, or is that in-house?" If subcontractors are involved, ask whether they're separately licensed and insured — a general contractor's coverage doesn't automatically extend to every sub on the job in every state or province. "What's the best way to reach you during the project, and how quickly should I expect a response?" Get this in writing if possible. Early communication patterns — a contractor who's slow to respond before they have your deposit — tend to predict the pattern for the rest of the job.Warranty, Punch List & Post-Project Support"What's your warranty on labor, separate from the manufacturer's warranty on materials?" These are two different things, and a contractor should be able to explain both without confusing them. "How do we handle the final punch list?" Ask for this in writing — a simple shared list of small unfinished items, with an agreed date for completion, prevents the "it's basically done" limbo that drags on for months. "If something fails within the warranty period — a leak, a loose fixture — what's the process for getting it addressed?" A specific answer (a phone number, a response-time commitment) is worth more than a general assurance.Red Flags That Mean You Should Walk Away⚠️ Warning: any one of these on its own is a reason to slow down. More than one should end the conversation.A deposit over 25%, or a request for full payment upfront. Legitimate contractors don't need your entire budget before work starts. Pressure tactics — "this price is only good today," or "I have another client who wants this slot." A confident, reputable contractor lets you compare bids without a countdown clock. No written contract, or a contract so vague it doesn't specify materials, timeline, or payment terms. Refusal or deflection when asked for proof of license and insurance — "don't worry about it" is not an answer. Cash-only payment insistence. This isn't automatically fraudulent, but it removes a paper trail that protects you if a dispute arises. A bid dramatically lower than every other quote, with no clear explanation for the gap. Vague answers about hidden-damage protocol — if they can't describe what happens when they find a problem behind the wall, you won't like finding out mid-project.Printable Contractor Interview ChecklistConfirmed license number via official state/provincial/national lookup tool Received and verified certificate of insurance (liability + workers' comp) Reviewed 2–3 completed bathroom projects of similar scope Called at least two references directly Received a written, itemized estimate distinguishing fixed prices from allowances Confirmed deposit amount (10–25%) and full payment milestone schedule Confirmed who pulls permits and which inspections are required Asked about waterproofing method and exhaust fan ventilation Asked what happens if hidden damage is found, and got a specific answer Confirmed daily work hours and dust-containment approach Clarified subcontractor use and their separate licensing/insurance Confirmed labor warranty terms and punch-list process in writing Compared at least 3 quotes before decidingReal Renovation Example: What a Before-and-After Actually Looks Like Photos are a better gut-check than any checklist, because they show you what "full remodel" and "cosmetic refresh" actually mean in practice — this is a real project, not a stock rendering.Before — the original shower. Fully tiled, functional, with a glass panel and a recessed niche. The tile is a warm tan stone-look pattern that was on-trend years ago; the finish on the shower head and controls has visibly aged.After — same footprint, completely different feel. The tile shifted to a light, large-format neutral stone-look, the back wall was finished in a vertical wood-look tile as a focal point, and the fixture package moved to a brushed brass slide-bar shower system. Notice the recessed niche was rebuilt deeper, with a stone shelf — a detail worth specifically asking your own contractor about if storage is a priority, since niche depth and shelf placement are easy to get wrong the first time.Before — a single-sink vanity with a tiled countertop, a wall-mounted mirror, and a nearby closet doorway. Workable, but dated, and short on counter space for two people getting ready at once.After — a furniture-style double vanity in a warmed oak tone, a stone-look composite countertop, and two backlit LED mirrors flanked by vertical sconces. A project like this typically involves adding at least one new electrical circuit for the backlit mirrors and sconces — exactly the kind of scope item that should be spelled out as a fixed line item in the estimate, not assumed. The lesson from a project like this isn't "spend more" — it's that a full remodel changes the room's entire moisture-management and electrical footprint, not just its appearance. That's precisely why the licensing, waterproofing, and hidden-damage questions earlier in this guide matter more here than they would for, say, a simple vanity swap.How to Compare Multiple Quotes Fairly Comparing three bids side by side only works if you're comparing the same scope. Build a simple table like this one before you decide:Criteria Contractor A Contractor B Contractor CTotal priceFixed-price items vs. allowancesTimeline (start to finish)Deposit % and payment milestonesLicense/insurance verified? (Y/N)References checked? (Y/N)Waterproofing method specified?Subcontractors used?Communication style during estimateIf one bid is significantly lower, the gap is almost always sitting in one of these rows — usually the allowance amounts or the waterproofing/plumbing scope — not in the contractor's profit margin. Filling this out forces you to find it before you sign, not after.FAQ How many quotes should I get before choosing a bathroom remodel contractor? Three is generally enough to spot outliers in price and scope without dragging the decision out for weeks. Fewer than that, and you can't tell whether a bid is reasonable or not. Should I automatically go with the lowest bid? No. Compare scope first — a lower bid with a smaller allowance or a vaguer waterproofing plan often ends up costing more once change orders start. What's a normal deposit amount, and when is a deposit too large? 10–25% of the total project cost is standard. A deposit above that, or a request for full payment before work begins, is a warning sign worth addressing directly. Do I need a permit for a bathroom remodel that doesn't move any plumbing? Often yes, if you're touching electrical circuits, ventilation, or structural elements — cosmetic-only work (paint, hardware swaps) usually doesn't require one. Confirm with your contractor and, if you want a second opinion, your local building department directly. How do I actually verify a contractor's license and insurance are current? Look the license up on your state, provincial, or national licensing board's public database — don't rely on a printed number. Ask for a current certificate of insurance and consider calling the insurer to confirm it's active. What happens if the contractor finds water damage or mold once demo starts? A reputable contractor pauses, documents the damage with photos, and presents a written change order with the added cost and time before proceeding. If the answer you get is vague, that's worth pressing on before you sign anything. Should I hire a general contractor or a bathroom-specialist remodeling company? Either can work well. A specialist tends to have deeper experience with wet-area waterproofing specifically; a general contractor may be a better fit if your project also touches adjoining rooms or structural work. How long should a mid-size bathroom remodel realistically take, start to finish? Two to four weeks of active work is typical for a full remodel, though permit inspections and material lead times can extend that. Ask for a day-by-day schedule rather than just a start and end date. Bathroom Remodeling Planning & BudgetingHow to Plan a Bathroom Layout on Paper Before You Renovate Bathroom Renovation Mistakes to Avoid: A Homeowner's Real-World Guide Do You Need a Permit to Renovate a Bathroom? (US, UK, Canada & Australia Rules Explained) Full Gut Renovation vs. Partial Remodel: How to Choose the Right Bathroom Renovation Plan Bathroom Renovation Timeline by Phase: What Happens Each Week How Long Does a Bathroom Renovation Take? A Real DIY Timeline, Week by Week Bathroom Renovation Checklist: The Correct Order of Steps From Demo to Finish The Best Free Tools to Design a Bathroom Remodel (And What "Free" Actually Costs You) Questions to Ask a Contractor Before Starting a Bathroom Remodel How Do You Shower When Your Bathroom Is Being Renovated
_13_11zon.webp)
The Best Free Tools to Design a Bathroom Remodel (And What "Free" Actually Costs You)
If you've typed "best free bathroom design app" into Google, you've probably already hit the problem this article exists to solve: every list you find ranks the same five apps by how nice their interface looks, and none of them tell you which one will actually get you from "I hate this bathroom" to a plan you can hand a contractor. Here's the short version, then we'll get into the parts that actually matter.Quick answer: There's no single best free bathroom design tool, because "design" means three different things. For an accurate floor plan you can build from, use a 2D/3D planner like Planner 5D, Roomstyler, or SketchUp Free. For a cost ballpark tied to real materials, use a retailer's free project planner. For a fast "what would this tile look like" preview, an AI photo-redesign app is quicker — but it isn't measuring anything, and it won't tell you if your layout is buildable.Quick takeaways:Floor-plan accuracy and style previews are two different jobs — most people only need one of them, not both, at least at first Nearly every "free" tool paywalls something: HD export, watermark removal, or a cap on how many projects you can save A free app can show you a layout. It cannot tell you whether your drain, vent stack, or load-bearing wall will let you build it Measuring the room properly before you open any app saves more redesign time than picking the "best" app ever willWhat "Free" Actually Means in These Apps This is the part most roundups skip, and it's the part that actually causes frustration. "Free" bathroom design software almost always means free up to a point, and that point is usually the exact moment you need the output most. Watch for these four traps: ⚠️ Common free-tier catches:Watermarks on export — the render looks perfect until you try to save or print it, and there's a logo across your tile pattern Resolution caps — you can view the plan on screen at full quality, but the exported PDF or image is too low-res to actually read measurements from Project limits — one free project, and starting over means losing your first layout Feature gating — 2D plans are free, but the 3D walkthrough or the "true to scale" measurement tool sits behind a subscriptionNone of this makes free tools useless — it just means you should decide before you invest three evenings in a layout whether you're going to need the paid tier to actually use what you build. Check the export terms first. It takes two minutes and saves a genuinely annoying surprise later.Layout Tools vs. Style-Preview Tools: Pick the Right Category First This is the distinction that would save people the most time, and almost nobody explains it clearly. There are two fundamentally different kinds of "free bathroom design tool," and they solve different problems.Layout / floor-plan tools AI style-preview toolsWhat they do Build a to-scale 2D or 3D floor plan using your actual measurements Generate a redesigned image of your existing bathroom photo in a new styleGood for Testing whether a walk-in shower fits, planning fixture placement, producing something a contractor can quote from Deciding between tile colors, vanity styles, or an overall look before you commitAccuracy Measurement-based — as accurate as the numbers you enter Visual only — doesn't know your plumbing, wall types, or real dimensionsTypical free limits Export resolution, number of saved projects Number of free generations (often 1–3), then a subscriptionExamples Planner 5D, Roomstyler 3D Home Planner, SketchUp Free, Sweet Home 3D General-purpose AI photo-redesign appsCommon mistake Using a generic room template instead of your real dimensions Assuming the AI render is a buildable planIf you only remember one thing from this article, make it this: measure and lay out first, style-preview second. Falling in love with a gorgeous AI render of a floating vanity and rainfall shower, only to find out the drain can't move there without breaking into the slab, is one of the more common — and avoidable — frustrations in this whole process.The Best Free Bathroom Floor-Plan Tools, Reviewed Planner 5D A drag-and-drop 2D/3D planner with a genuinely usable free tier. You can build a to-scale floor plan, drop in fixtures, and switch to a 3D view to check sightlines. The free version caps you on high-resolution export and some premium furniture items, but for laying out a real bathroom footprint, it's one of the more capable free options. Best for: homeowners who want a 3D sense of the space without a steep learning curve. Roomstyler 3D Home Planner Browser-based, no download, and reasonably intuitive once you get past the initial interface. Handles bathroom-specific fixtures decently and lets you toggle between a top-down floor plan and a 3D render. Best for: a quick, no-install layout session. SketchUp Free (web) This is closer to true CAD than the drag-and-drop tools, which means more precision and a longer learning curve. If you want exact measurements down to the eighth of an inch, or you're planning to hand a file to a contractor who already works in SketchUp, it's worth the extra hour it takes to get comfortable. Best for: people planning a more involved renovation who want plan accuracy over ease of use. Sweet Home 3D A free, open-source desktop program rather than a web app. It's dated-looking compared to newer tools, but it has no watermark, no subscription upsell, and no project cap because there's nothing to sell you — which, for a strictly free tool, is worth something. Best for: anyone who wants a permanent, offline planning tool with no strings attached. Retailer project planners (Lowe's, Home Depot) These aren't full design tools, but they're genuinely useful for a different reason: they tie your layout to real SKUs and generate a material list with current pricing. Less flexible on layout, more useful for budgeting. Best for: turning a finished layout into an actual shopping list.Best Free Tools for Ballparking Cost and MaterialsRenovation scope Typical cost range (materials + labor) What drives the rangeCosmetic refresh (paint, fixtures, vanity swap) $1,500–$5,000 Fixture quality, whether plumbing stays putMid-range full remodel $10,000–$18,000 Tile choice, new vanity, updated shower/tubWalk-in shower conversion $6,000–$12,000 Whether the drain has to move, glass enclosure costFull gut renovation, layout changed $20,000–$35,000+ Moving plumbing/electrical, structural changes, permit requirementsThese are ranges, not quotes — regional labor costs and material choices swing them significantly. The point of running this before you finalize a design isn't precision, it's preventing the fairly common experience of designing a bathroom you love and then discovering it's double the budget you had in mind.Step-by-Step: Planning Your Bathroom Remodel in a Free AppMeasure the actual room first. Length, width, ceiling height, door swing direction, window and vent locations. A photo-scanning measurement app helps here, but a tape measure and graph paper work fine too — the point is real numbers, not a template. Note what's fixed. Where the drain, supply lines, and main vent stack currently are. Moving these is possible but adds real cost, so knowing the starting point shapes what layouts are actually realistic. Build the floor plan to scale. Enter your real dimensions into the tool rather than starting from a preset room size. This single step prevents most of the "it looked fine on screen" disappointments. Place fixtures and check clearances. Toilet, vanity, shower/tub. Most codes want roughly 21 inches of clear floor space in front of a toilet and similar clearance for a vanity — check your local code, since minimums vary. Switch to 3D and walk through it. This is where door swing conflicts and "wait, that shower door hits the vanity" problems usually surface — much cheaper to catch here than after demo. Only now, move to style. Once the layout is locked, use a style-preview tool or the app's material library to test tile, paint, and fixture finishes. Export what you can, screenshot the rest. If the free tier limits your export, screenshot the plan views you need before you lose access, and note the exact dimensions separately in case you need to recreate anything.Common Mistakes People Make With Free Design AppsMistake Why it causes problemsUsing a generic room template instead of real measurements The layout looks finished but doesn't match your actual walls, so it's unusable the moment you try to build from itIgnoring existing plumbing location A gorgeous new layout can turn into a five-figure plumbing relocation if the drain has to moveSkipping clearance codes A vanity or door that looks fine in a render can violate minimum clearance and cause real problems at inspectionTreating an AI style render as a final plan It's a mood board, not a measured drawing — there's no clearance or plumbing logic behind the imageNot checking tile scale A tile that looks proportional in a 3D render can visually shrink a small bathroom once it's actually installedLosing the free project before exporting Many free tiers auto-delete inactive projects — save your measurements outside the app as a backupFrom Digital Plan to Real Renovation: A Real Example Every one of the tool comparisons above is more useful once you've seen what an actual before-and-after looks like — because the honest answer to "will my plan really turn into this?" is that it depends on decisions made well before any tile goes up. Here's the starting point: a dated, fully tiled bathroom with a built-in tub, wall-mounted taps, and a layout that hadn't been touched in decades.Before: the original layout — built-in tub, dated tile from floor to ceiling, minimal storage.Before: twin pedestal sinks and a green suite that was standard decades ago but left the room feeling closed in and clinical. The finished result reworked the same footprint into a walk-in shower with a built-in bench, a separate soaking tub, a dedicated toilet nook, and a furniture-style vanity that reads more like a piece of furniture than a fixture.After: the sink area now anchors around a repurposed antique dresser, which does double duty as storage and as the visual focal point of the room.After: the toilet was tucked into its own nook, separated visually from the rest of the room — a layout choice that's easy to plan for on paper but easy to miss if you're only thinking in terms of "fit the fixtures in."After: the tub and shower were split into distinct zones with a glass divider, rather than combined into a single tub/shower unit — a common upgrade that changes the whole feel of a room without changing its footprint.After: the walk-in shower includes a built-in bench and a rainfall shower head — a layout that only works because the drain and clearances were planned before any tile was chosen.The point of walking through this isn't that any specific app produced it — it's that the sequence matters more than the software. Layout and clearances get decided first. Plumbing constraints get respected, not discovered halfway through. Style and materials come last, once the bones of the room are settled. A free planning tool can absolutely get you through that sequence — it just can't skip it for you.When a Free Tool Isn't Enough Free tools are genuinely good for exploring options and building a first-pass layout. They stop being enough at a fairly predictable point:You're moving plumbing or load-bearing structure — this needs a plumber or structural assessment regardless of how good your digital plan looks You need permit-ready drawings — most free tools produce a helpful visual, not a stamped or code-compliant drawing You want photorealistic renders for a contractor bid — paid tiers or a designer's software will get you further, faster You've redone the layout three times and it still doesn't work — at that point, an hour with a designer or contractor often resolves what another round of drag-and-drop can'tA simple way to decide: if the output needs to convince you, a free tool is usually enough. If the output needs to convince a contractor, an inspector, or a permit office, budget for either a paid tier or a professional at that stage — not before.FAQ Is any bathroom design app actually free, with no watermark or paywall? Some are — Sweet Home 3D is fully free with no subscription tier. Most web-based tools (Planner 5D, Roomstyler) are free to use but limit export quality or watermark high-resolution downloads. What's the difference between a floor-plan app and an AI bathroom redesign app? A floor-plan app builds a to-scale layout from your real measurements. An AI redesign app generates a styled image from a photo of your existing bathroom — it's useful for style direction, not for measurements or plumbing logic. Can I use a free design app to get an accurate contractor quote? A well-built floor plan with real measurements gets you close. Most contractors will still want to verify measurements and plumbing locations in person before quoting. Do free bathroom planning apps account for plumbing and drain locations? No — they'll let you place a toilet or shower anywhere on the floor plan, but they don't know where your actual drain or vent stack is. That's on you to note and respect. Which free app is easiest for a first-time user? Roomstyler and Planner 5D both have a gentler learning curve than SketchUp Free, which is closer to true CAD software. How accurate are AI photo-redesign apps compared to what I'll actually get built? They're accurate for style and color direction, not for layout or feasibility. Treat the output as a mood board. What measurements do I need before I start designing? Room length, width, and ceiling height; door swing direction; window and vent locations; and the current position of your drain and supply lines. Will a free bathroom design tool tell me if my layout is up to code? No. Clearance codes (space in front of a toilet or vanity, for example) vary by location, and free tools generally don't check for them automatically. How long does it actually take to design a bathroom in one of these apps? Plan for a few focused sessions rather than one sitting — most people revise the layout at least twice once they see it in 3D. Are retailer tools like Lowe's or Home Depot's project planner better than standalone design apps? They serve a different purpose — less flexible for layout, but useful for turning a finished plan into a real material list and cost estimate. Bathroom Remodeling Planning & BudgetingHow to Plan a Bathroom Layout on Paper Before You Renovate Bathroom Renovation Mistakes to Avoid: A Homeowner's Real-World Guide Do You Need a Permit to Renovate a Bathroom? (US, UK, Canada & Australia Rules Explained) Full Gut Renovation vs. Partial Remodel: How to Choose the Right Bathroom Renovation Plan Bathroom Renovation Timeline by Phase: What Happens Each Week How Long Does a Bathroom Renovation Take? A Real DIY Timeline, Week by Week Bathroom Renovation Checklist: The Correct Order of Steps From Demo to Finish The Best Free Tools to Design a Bathroom Remodel (And What "Free" Actually Costs You) Questions to Ask a Contractor Before Starting a Bathroom Remodel How Do You Shower When Your Bathroom Is Being Renovated
_17_11zon.webp)
How to Plan a Bathroom Layout on Paper Before You Renovate
If you've ever stood in your bathroom with a tape measure in one hand and a half-finished sketch in the other, wondering whether the bath you actually want will fit — you're not alone. It's one of the most common places renovation plans stall out, usually right after someone (a designer, a plumber, a well-meaning neighbour) tells you "there's no way that's going to fit." Sometimes they're right. Often, they're guessing. Quick answer: To plan a bathroom layout on paper, measure the room's exact dimensions along with door swings, window positions, and existing plumbing points. Draw the space to scale on graph paper — a common ratio is 1 square equals 4 inches (or 10cm). Then cut out scaled paper or cardboard templates of each fixture and physically test different arrangements before locking anything in. Cross-check against basic clearance guidelines, then verify the winning layout with painter's tape on the actual floor before you commit to demolition. That last step matters more than people think. A drawing on paper can lie to you in small, expensive ways. A full-scale mockup on the floor rarely does. Quick TakeawaysMeasure the room, doors, windows, and existing plumbing before you think about fixtures Draw everything to scale — don't eyeball proportions on blank paper Cut paper or cardboard templates for each fixture and physically move them around Mark your existing plumbing stack and drain location; moving them is where budgets get expensive Tape out the final layout on the real floor at full size before ordering anything Treat "it won't fit" as a hypothesis to test, not a verdict to acceptWhat to Measure Before You Draw Anything This is the step most people rush, and it's the one that causes the most rework later. A bathroom layout drawn from memory or a rough guess will look fine on paper and then fall apart the moment a tradesperson tries to install something. Before you draw a single line, go into the room with a tape measure (a laser measure is faster and slightly more accurate, but a decent tape works fine) and record: Room measurementsOverall length and width, measured at floor level and at a higher point like waist height — older homes are often not the same width top to bottom Ceiling height, and any sloped sections if it's under a roofline Diagonal measurements corner to corner (more on why below)Fixed pointsEvery door opening: width, swing direction, and how far the door swings into the room Every window: width, height, and sill height from the floor Existing plumbing: where the toilet drain, shower drain, and vanity plumbing currently sit Position of the main stack or waste pipe, if you can identify it (a plumber can confirm this if you're unsure) Any structural elements you can't move — load-bearing walls, ducting, exhaust fan locationElectrical and servicesExisting power point locations Light switch and exhaust fan wiring Heating (in-slab, panel heater, or heat lamp wiring) if applicableMost homeowners who redo this step later say the same thing: I wish I'd measured the windowsill height and the door swing properly the first time. Doors that swing into a shower's future footprint, or a window sill that sits lower than a bath's rim, are the kind of thing that only shows up once you've already drawn a "finished" plan.How to Draw Your Room to Scale Once you have real numbers, translate them onto graph paper. This sounds basic, but skipping "to scale" and drawing free-hand is the single biggest reason paper plans mislead people.Pick a scale and stick to it. A common, easy scale is 1 square on graph paper = 4 inches in real life (or 1 square = 10cm if you're working in metric). Write the scale on the page so you don't lose track of it later. Draw the outer walls first, using your actual measured dimensions — not the "should be" dimensions from a floor plan or listing, which are often rounded or wrong in older homes. Mark fixed elements: doors (with a swing arc), windows, plumbing stack location, and anything structural you can't move. Mark your existing drain points clearly — this is the reference everything else gets measured against. Leave the fixtures out for now. At this stage you're just locking in the "shell" of the room accurately. Fixtures come next.A phone camera photo of your finished scale drawing is worth keeping — it's genuinely useful to send to a plumber or tiler later so they're working from the same numbers you are, instead of a verbal description.Testing Fixture Placement With Paper Templates This is the step that actually resolves the "will it fit" argument — and it's the one almost nobody does properly. Instead of drawing a bath, toilet, and vanity directly onto your scale plan and hoping the proportions look right, cut out separate templates to the same scale as your room drawing. Cardboard is more durable than paper if you're going to be sliding pieces around a lot. How to do it:Look up the external footprint dimensions of the fixtures you're considering (most manufacturer or retailer product pages list overall length, width, and height — not just the visible "usable" measurements). Cut a template for each fixture at the same scale as your room plan. Lay the templates on your scale drawing and physically slide them into different arrangements. Photograph each version so you can compare them side by side later.This is exactly the kind of exercise that turns a flat "no" into a useful conversation. It's common to hear a fixture "won't fit" based on a quick visual estimate in the room — and it's just as common for that estimate to be wrong once someone actually lays out the real footprint. A first opinion isn't always the final word; it's a starting point worth testing yourself before you accept it or pay for a second opinion. Once you have a layout on paper that looks like it works, take it one step further: mark it out with painter's tape directly on the bathroom floor at full size. Standing inside a taped-out shower footprint, or opening a taped-out door swing, tells you things a drawing simply can't — like whether a door will actually clear a vanity corner, or whether "technically fits" also means "comfortable to use."Clearance and Code Basics You Can Self-Check Building codes vary by country and even by state or council, so treat the ranges below as general planning guidance to sanity-check your layout — not a substitute for checking your local code or your builder's confirmation.Fixture Typical Minimum Clearance in Front Typical Minimum Side ClearanceToilet ~21–24 in (530–600mm) ~15 in (380mm) from centre to nearest wall/fixtureVanity/sink ~21 in (530mm) Varies by width of unitShower entry ~24 in (600mm) clear floor space at entry Door/screen swing must clear other fixturesBath No strict clearance in most codes, but ~24 in (600mm) walking space alongside is a practical minimum —Why this matters beyond compliance: a layout that technically meets minimum clearances can still feel cramped in daily use, especially in a shared or family bathroom. If you have the floor space, treating these numbers as a floor rather than a target usually pays off in day-to-day comfort. If your final plan is close to these minimums anywhere, that's exactly where a full-scale tape mockup on the floor earns its keep — numbers on paper don't always convey what a tight corner feels like in real life.Planning Around Fixed Elements: Doors, Windows, and Two-Door (Ensuite) Layouts Not every bathroom is a clean rectangle with one door. A layout with two entry doors — common in Jack-and-Jill or dual-access ensuite configurations — adds real constraints that most generic planning guides skip entirely. With two doors, you're not just planning around one swing arc; you're planning around two, and often around sightlines from two different rooms. A few practical points:Map both door swings on your scale drawing before placing anything else. The overlap zone between two door swings is often the most constrained part of the room, and it's easy to miss until you've drawn both arcs. Consider what's visible from each doorway. A layout that works structurally can still feel awkward if the toilet is the first thing visible from one of the entries. Fixed windows aren't always a problem to work around — sometimes they're worth designing around instead. An original window in an older home, in particular, can be worth keeping rather than automatically replacing, both for character and for cost. If a window's sill height, position, or fixed frame is a constraint, that's a cue to plan the bath, vanity, or shower position relative to it — not necessarily a reason to remove it. A "won't fit" verdict from an initial walkthrough is often based on the room as it currently exists, not as the layout could be reconfigured. Two fixed doors don't automatically rule out a bath, a walk-in shower, or a double vanity — they just narrow down which corner each of those needs to sit in. This is precisely where the paper-template exercise above is worth doing thoroughly, rather than trusting a first impression.Older Home Considerations: Square Walls, Subfloors, and Hidden Costs Here's something most bathroom planning guides don't tell you clearly enough: your paper plan is only as good as the assumption that your walls are actually square, your floor is level, and your subfloor is sound. In homes built more than 40–50 years ago, that assumption doesn't always hold. Before finalizing a layout, check whether your room is actually square:Measure both diagonals of the room, corner to corner. If the two diagonal measurements match, the room is square. If they differ by more than roughly half an inch to an inch (1–2cm) over a typical bathroom-sized room, the walls are out of square — sometimes by more.This isn't just a curiosity. A layout drawn assuming perfectly square walls can leave you with visible gaps, awkward cuts, or tile lines that don't run true once installation actually starts. It's a common discovery in older homes: walls that look straight to the eye turn out to be several centimetres out over the length of the room. Warning — hidden cost triggers in older homes:Out-of-square walls or ceilings may require reframing sections of the room, not just re-tiling Subfloor rot or water damage, often invisible until old flooring or a shower base is removed, can mean replacing part or all of the subfloor Old wiring or plumbing behind walls may need updating to meet current code once walls are opened Materials common in pre-1990s construction (in some regions, this includes asbestos-containing sheeting or tile adhesive) should be assessed by a professional before demolition — this is not a DIY testing situationThis is also the honest, uncomfortable truth about budgeting a renovation on a modest finishes budget: choosing lower-cost tile, keeping the original vanity top, or reusing a towel rail can genuinely bring the finishes cost down — but it does nothing to protect you from a structural surprise once demolition starts. It's entirely possible to plan carefully, choose economical materials throughout, and still see the total project cost climb well past the original budget because the floor, ceiling, or three of the four walls needed to be replaced to get a square, sound room to build the new layout into. That's not a planning failure — it's just what older housing stock sometimes requires, and it's worth budgeting a contingency for before you start, not after.Paper Plan vs. Planning App vs. Professional CAD Each method has a real place in the process — the question is which stage you're at.Method Cost Accuracy Speed Best Use CaseHand-drawn scale plan (graph paper) Free Good, if measurements are accurate Fast for one layout, slower for many variations Early-stage exploration, testing multiple ideas quicklyFree retailer/planning app Free Good for standard fixtures with known dimensions Fast, easy to adjust Cross-checking a paper plan, visualizing finishes, generating a shareable version for tradespeopleProfessional CAD / designer drawing Paid (varies by scope) Highest — accounts for structural and plumbing detail Slower, involves a consultation Final working drawings, council/permit submissions, complex or structural layout changesA practical approach many homeowners land on: sketch and test on paper first, since it's free and fast for exploring options. Once you have a layout that survives the paper-template test, run it through a free planning app (several plumbing and bathroom retailers offer these) to visualize finishes and double-check dimensions against real product listings. Save professional CAD or a paid designer consultation for the final stage — confirming structural feasibility, getting permit-ready drawings, or resolving a layout that genuinely needs an expert opinion after your own testing.Realistic Cost Ranges and Where Budgets Blow Out Cost guidance for bathroom renovations tends to focus only on fixtures and finishes. That's only part of the picture — and often not the part that determines your final number.Renovation Tier Typical Range (fixtures & finishes only) NotesBudget Lower end of market range Keeping the existing layout and plumbing locations significantly reduces costMid-range Moderate Some layout changes, mid-tier fixtures and tilingHigh-end Higher end of market range Custom fixtures, layout changes, premium finishesCommon hidden cost additions not included in a standard fixtures-and-finishes quote:Moving plumbing (toilet, shower, or vanity drain) to a new location Replacing subfloor due to water damage or rot Reframing walls that are out of square Replacing ceiling if damaged or if new exhaust/lighting placement requires it Waterproofing repairs or full waterproofing membrane replacement (often required by code when a wet area is substantially altered) Electrical upgrades to meet current codeIt's genuinely possible — and common — for a homeowner to keep every finish decision on the economical side (affordable tile, a reused towel rail, budget-conscious fittings) and still see the total project cost land well above the original estimate, simply because the room needed structural work to get to a stable, square starting point. That's not a sign the budgeting was done poorly. It's a sign the finishes budget and the structural contingency are two separate line items, and only one of them is usually where you'd expect to be spending. A reasonable rule of thumb for older homes (roughly 50+ years old): budget a contingency of at least 20–30% above your fixtures-and-finishes estimate for potential structural findings, and treat that number as a real possibility rather than a worst-case scenario.Common Layout Planning Mistakes to AvoidSkipping the diagonal-measurement square check — and finding out mid-renovation that the walls aren't square Drawing fixtures without checking their true external footprint — a bath's overall dimensions are often larger than its "usable" interior dimensions Ignoring door swing arcs when placing a vanity or shower screen too close to a doorway Assuming plumbing can move for free — relocating a drain is one of the more expensive layout changes, not a minor adjustment Not accounting for ventilation — a reshuffled layout can put an exhaust fan further from the shower than is effective, which matters for long-term mould and moisture control Trusting a verbal "it won't fit" without testing it yourself with scaled templates or a full-size floor mockup Underbudgeting for older homes by only pricing fixtures and finishes, with no contingency for structural findingsDIY Paper Plan vs. Hiring a Designer: A Decision FrameworkYour Situation Recommended ApproachSimple, square room; keeping the existing layout and plumbing locations DIY paper plan is usually sufficientAwkward shape, two doors, or fixed elements you need to work around DIY paper plan first, then cross-check with a free planning app before finalizingMoving plumbing, structural walls, or a heritage/older home with unknown wall condition DIY paper plan to explore ideas, but bring in a designer or draftsperson before committing to a final layoutCouncil/permit approval required for structural changes Professional CAD drawings are typically required regardless of how the layout was originally plannedA paper plan isn't a replacement for professional input when structural work is involved — it's a way to walk into that conversation already knowing what you want to test, instead of starting from a blank page and a verbal description.Frequently Asked Questions What's the easiest way to draw a bathroom layout to scale by hand? Use graph paper and pick a simple scale, such as 1 square equals 4 inches (or 10cm). Draw the room's actual measured dimensions first, then add fixed elements like doors, windows, and plumbing points before considering fixtures. What should I measure first before sketching a bathroom layout? Start with the room's overall dimensions (measured at more than one height), then record every door swing, window position and sill height, and the location of existing plumbing and drains. How do I know if a bathtub will actually fit in my space? Cut a paper or cardboard template to the bath's actual external footprint dimensions, at the same scale as your room drawing, and physically test it against your scaled plan and door swings — rather than relying on a visual estimate. Can I test a layout without hiring a designer? Yes. A scale drawing combined with fixture templates and a full-size floor mockup using painter's tape will reveal most fit and clearance issues before you need to pay for a professional opinion. What's the minimum clearance needed in front of a toilet and vanity? General guidance suggests roughly 21–24 inches (530–600mm) of clear floor space in front of a toilet, and a similar clearance in front of a vanity, though exact requirements vary by local code. How do I plan a bathroom layout with two entry doors (Jack-and-Jill/ensuite)? Map both door swing arcs on your scale drawing before placing any fixtures, since the overlap zone between them is often the most constrained part of the room. Then test fixture placement around both swings using scaled templates. Do I need to keep my plumbing in the same location to save money? Generally, yes. Keeping the toilet, shower, and vanity drains in their existing locations is typically one of the biggest cost-saving decisions available, since relocating plumbing adds both labour and potential structural work. How can I tell if my bathroom walls are out of square before renovating? Measure both diagonals of the room from corner to corner. If they differ by more than roughly half an inch to an inch over a standard bathroom, the walls are out of square, which is common in older homes. Are free bathroom planning apps accurate enough to rely on? They're generally accurate for cross-checking standard fixture dimensions and visualizing a layout, but they typically can't account for structural issues like out-of-square walls, which is why a physical tape measurement check is still worthwhile. Why did my bathroom renovation cost more than my tile and fixture budget? This usually happens when structural issues — an out-of-square wall, a damaged subfloor, or an aging ceiling — are discovered after demolition begins. Economical finish choices don't offset structural repair costs, which is why a contingency budget matters, particularly in older homes. Bathroom Remodeling Planning & BudgetingHow to Plan a Bathroom Layout on Paper Before You Renovate Bathroom Renovation Mistakes to Avoid: A Homeowner's Real-World Guide Do You Need a Permit to Renovate a Bathroom? (US, UK, Canada & Australia Rules Explained) Full Gut Renovation vs. Partial Remodel: How to Choose the Right Bathroom Renovation Plan Bathroom Renovation Timeline by Phase: What Happens Each Week How Long Does a Bathroom Renovation Take? A Real DIY Timeline, Week by Week Bathroom Renovation Checklist: The Correct Order of Steps From Demo to Finish The Best Free Tools to Design a Bathroom Remodel (And What "Free" Actually Costs You) Questions to Ask a Contractor Before Starting a Bathroom Remodel How Do You Shower When Your Bathroom Is Being Renovated
_22_11zon.webp)
Bathroom Renovation Mistakes to Avoid: A Homeowner's Real-World Guide
I've gutted three bathrooms in my own house at this point, and every single one taught me something the design blogs never mentioned. The photos always show the pretty "after." Nobody shows you the moment you cut into a wall and realize the layout you fell in love with on Pinterest is about to cost you an extra $2,000 — or just isn't happening at all. That's really what this guide is about. Not the fun stuff (tile patterns, faucet finishes, paint colors), but the mistakes that quietly wreck a renovation's budget, timeline, or final result. Most of them aren't dramatic. They're small decisions made in the wrong order, or assumptions nobody bothered to check before the sledgehammer came out.Quick Answer: The Most Common Bathroom Renovation Mistakes The short version, if you're mid-scroll and need the takeaway fast:Moving a sink or toilet before confirming what's actually inside the wall (often the single most expensive assumption in a remodel) Skipping ventilation upgrades, which shows up later as mold, peeling paint, or a permanently foggy mirror Lighting the mirror from directly above instead of from the sides, which casts shadows across your face Waterproofing tile with caulk and hope instead of an actual membrane system Budgeting for the renovation you want, not the renovation you'll likely get once demo starts Ordering vanities, tile, and fixtures before opening the walls to confirm the layout is even possible Skipping permits on plumbing or electrical work, which can bite you at resaleEach of these gets its own section below, with the "why" behind it — because knowing that something is a mistake doesn't help nearly as much as understanding why it happens.Mistake #1: Assuming You Can Freely Relocate Plumbing This is the big one. If you take away one thing from this article, make it this. Here's what actually happened in my first-floor half bath. I wanted to move the sink to the center of the vanity — a simple, clean, symmetrical look. In my head, that meant the drain would just move a foot or two over. Easy. Then I opened the drywall. The wall behind that sink wasn't just housing one drain line. It was a genuine tangle — supply lines, the drain, and vent piping all clustered together in a space that gave me almost no room to reroute anything. Moving the drain to the true center wasn't a matter of "pay a bit more." It would have meant tearing into framing and potentially disturbing venting that served other fixtures in the house. That's a different category of project entirely. So I compromised. Instead of moving the drain, I shortened the upper right drawer on the vanity to work around where the plumbing actually lived, and kept the sink close to its original position. The end result still looks intentional — most people would never guess there was a fight behind that wall — but it's not the exact layout I originally sketched out. Why this matters more than most articles let on: walls that contain a sink, toilet, or shower drain are often called "wet walls," and they tend to be dense. You're not just looking at one pipe. You're looking at supply lines (hot and cold), a drain line, and often a vent stack that needs to maintain a specific slope and connection point to work correctly. Moving any one of those isn't purely cosmetic — it's a plumbing project with real structural and code implications.⚠️ Before You Finalize Your Layout Don't order a vanity, sink, or tile based on a "dream layout" sketch until someone has physically opened the wall (or at minimum, run a camera scope or consulted the original plumbing plans) to confirm what's actually back there. A layout that looks simple on paper can be a five-figure plumbing project in practice — or, like mine, simply not worth doing.What to do instead:Ask your contractor to open the wall (or at least inspect it) before you finalize cabinetry or tile orders If a full drain relocation isn't feasible, ask about "offset" solutions — slight repositioning that works within the existing rough-in Budget separately for "plumbing relocation" vs. "plumbing repair" — they are very different price categories Accept that sometimes the compromise (like my shortened drawer) is genuinely fine. Nobody using my bathroom has ever noticed.Mistake #2: Skipping the "Open the Wall First" Step in Design This follows directly from Mistake #1, but it deserves its own callout because it's a sequencing problem, not just a plumbing problem. Most homeowners — understandably — design a bathroom the way you'd design anything else: pick the look first, then figure out how to build it. Tile samples, vanity finishes, faucet style, mirror shape. It's the fun part, so it happens early. The trouble is that bathroom layouts are constrained by things you can't see: framing, plumbing rough-ins, electrical runs, and sometimes structural elements like joists or load-bearing walls. Designing fully before opening anything up means you're designing against unknowns. A more realistic sequence:Rough out your wish list layout (this can absolutely start with inspiration photos) Have demo done on the wet wall(s) specifically — even if the rest of demo happens later Confirm what's actually behind the wall: pipe locations, electrical runs, structural framing Adjust the layout based on reality, then finalize vanity size, sink placement, and tile Order materials only after the layout is lockedSkipping straight to step 5 is how people end up with a vanity that doesn't fit, a sink that's off-center from the mirror, or — like me — a drawer that has to be an inch shorter than planned.Mistake #3: Poor Lighting Placement Most homeowners don't realize how much bathroom lighting placement affects how a mirror actually functions day to day, not just how the room photographs. In my case, the original setup had a single vanity light fixture mounted directly above the mirror. It looked fine in isolation, but it cast shadows down across the face — exactly where you don't want them if you're doing makeup, shaving, or just trying to see what you look like before leaving the house. I moved the lighting to two sconces mounted on either side of the mirror, roughly at face height, and it made a bigger difference than almost any other single change in the whole renovation.Lighting Style Where It's Mounted Shadow Quality Best ForSingle overhead/above-mirror fixture Directly above mirror Casts shadows downward across the face Budget renovations, powder rooms with minimal grooming useSide-mounted sconces Either side of mirror, at eye/face level Even, cross-lit illumination with minimal shadowing Primary bathrooms, makeup application, shavingCombination (overhead + sconces) Above and beside Most balanced, layered light Larger bathrooms, shared/family bathroomsBacklit or edge-lit mirrors Integrated into the mirror itself Soft, diffused, low-shadow Modern builds, smaller spaces where sconces won't fitThe practical trade-off: side sconces usually require running new electrical to a different wall location, which means opening drywall (again, tying back to Mistake #2). If you're already opening the wall for plumbing reasons, this is the moment to also reroute lighting — doing it as a separate project later means paying for drywall repair twice.Mistake #4: Underestimating Ventilation Needs Ventilation is the mistake that doesn't show up on renovation day. It shows up eight months later, as a musty smell, a permanently foggy mirror, or dark spots creeping along the ceiling near the shower. A lot of renovations reuse the old exhaust fan because it's "already there and it still turns on." But an old fan may be undersized for the room, venting into an attic space instead of outside (a real mold risk), or just worn out enough that it's moving far less air than it used to.Symptom After Renovation Likely Cause FixMirror stays fogged long after a shower Fan undersized for room volume or airflow blocked Recalculate required CFM (roughly 1 CFM per square foot as a baseline, more for larger or high-ceiling rooms) and confirm ductwork isn't kinkedMusty smell that won't go away Fan venting into attic/soffit instead of outdoors Reroute venting to a proper roof or wall exterior vent capPeeling paint near ceiling or top of walls Chronic excess humidity Increase fan run-time (timer or humidity-sensing switch), check for adequate makeup airFan runs but doesn't seem to pull air Duct too long, too many bends, or crushed flex duct Replace with rigid duct where possible, shorten runMold on grout or caulk lines within months Combination of poor exhaust and inadequate waterproofing Address both ventilation and waterproofing — see Mistake #5Realistic expectation: even a properly sized fan won't fix a bathroom with zero makeup air (a bathroom with a tightly sealed door and no gap for air to enter as the fan exhausts it). If your renovation includes a new solid-core door, consider a door undercut or a small transfer grille so the fan can actually do its job.Mistake #5: Inadequate Waterproofing Under Tile Tile is not waterproof. That surprises people, but grout and even sealed tile are still somewhat porous, and water will eventually find its way through hairline cracks in grout lines over years of use. What actually keeps water out of your walls and subfloor is the waterproofing membrane underneath the tile — not the tile itself. A properly waterproofed wet area typically includes:Cement board or a purpose-built waterproof backer board (not standard drywall, even "green board," in direct wet zones) A liquid-applied or sheet waterproofing membrane over seams and the entire wet zone Properly sloped mortar bed at shower floors, directing water to the drain Sealed penetrations anywhere a pipe, niche, or fixture passes through the membraneCommon shortcuts that cause problems years later:Using standard drywall in a shower surround because "it's cheaper and no one will know" Skipping membrane at the transition between shower floor and walls (a frequent leak point) Relying on caulk alone at corners and edges instead of proper membrane detailing Not waterproofing behind a freestanding tub surround, assuming splashing won't reach itNone of this is visible once tile goes up, which is exactly why it's the step people cut corners on. It's also the step that's brutally expensive to fix later, since correcting it usually means removing the tile you just paid for.Mistake #6: Underbudgeting for Hidden Issues Every renovation blog says "add a contingency." Almost none of them explain what that contingency is actually for, which makes it easy to treat as an arbitrary padding number instead of a real risk category.Hidden Issue Category How Common It Is Typical Cost Range if Found Why It HappensOld or deteriorated supply/drain lines behind walls Fairly common in homes 25+ years old $500–$3,000+ Galvanized or old copper piping corrodes internally over decadesSubfloor rot near toilet or tub Common if there was any prior slow leak $800–$4,000+ Water intrusion around wax rings or tub seals goes unnoticed for yearsOutdated or undersized electrical circuit Common in older homes $300–$1,500 Bathrooms built before modern code often lack dedicated GFCI-protected circuitsMold behind existing tile or drywall Occasional, but serious when found $1,000–$5,000+ Prior inadequate waterproofing (see Mistake #5)Structural framing issues (rot, prior modifications) Less common, but high-impact $1,000–$6,000+ Long-term moisture exposure or poor prior renovation workA more realistic budgeting approach:Set aside 15–20% of your total budget specifically for "opened-wall surprises," not general miscellaneous spending Ask your contractor, before demo, which of the above categories they'd flag as "likely" given your home's age and any known history Resist the urge to spend the contingency on upgrades if demo goes smoothly — let it roll over as a buffer for the next phaseMistake #7: Neglecting Storage Planning Storage tends to get decided last and regretted first. It's easy to pick a vanity based on how it looks in a showroom and only realize afterward that it holds half of what your old, ugly one did. A quick pre-purchase storage checklist:Count your actual daily-use items (not aspirational ones) — toothbrushes, skincare, medications, hair tools Measure your tallest bottles and confirm they fit under the sink with the P-trap in place (plumbing eats more cabinet space than people expect) Decide if you need a linen/towel storage solution outside the vanity, since vanities rarely hold both daily items and linens comfortably Check drawer depth, not just cabinet width — shallow drawers look nice but hold very little If plumbing constraints (see Mistake #1) force an asymmetric layout, plan which side gets the smaller drawer before ordering, so you can allocate storage intentionally instead of losing it randomlyMistake #8: Leaving Unfinished Cosmetic Details This is the mistake that doesn't cost money so much as it costs polish — the difference between a renovation that looks "done" and one that looks like it's still mid-project three years later. When I changed my bathroom's layout, the old ceiling had leftover HVAC vent openings and an old air conditioning outlet that no longer matched where anything needed to be. It would have been easy to just leave them, covered with a grille, looking orphaned in the middle of an otherwise clean ceiling. Instead, I had those openings closed up and drywalled flush, then finished smooth along with the rest of the room. Finishing details that are easy to skip but make a real visual difference:Capping and flushing old vent or fixture openings left behind by a layout change Skim-coating textured walls to a smooth finish if you're going for a modern look (a genuinely underrated upgrade in older homes) Patching and repainting all affected wall sections, not just the section directly touched by plumbing/tile work Replacing outlet covers and switch plates to match new hardware finishes, instead of leaving mismatched leftoversNone of these are structurally necessary. All of them are the difference between "renovated" and "finished."Mistake #9: Skipping Permits for Plumbing/Electrical Work It's tempting to skip permits, especially for a "small" change. But depending on scope and location, moving plumbing or adding new electrical circuits often does require permitting — and skipping it creates risk beyond just the small chance of a fine.Region General Tendency Why It MattersUnited States Permit requirements vary by city/county; plumbing and electrical work usually require permits, cosmetic-only work often doesn't Unpermitted work can complicate home sales and insurance claimsUnited Kingdom Notifiable work under Part P (electrical) in bathrooms often requires building control sign-off Non-compliant electrical work near water sources is a genuine safety issue, not just paperworkCanada Provincial/municipal permits typically required for plumbing and electrical alterations Unpermitted work can void insurance coverage in the event of water or fire damageAustralia Plumbing work generally requires a licensed plumber and compliance certificate Unlicensed plumbing work can affect resale and insurance validityRealistic take: permit rules and enforcement vary a lot by specific municipality, so this table is directional, not a substitute for checking with your local building department. What's consistent across all four countries is the underlying risk: unpermitted plumbing or electrical work tends to surface during a home inspection at resale, and it can complicate insurance claims if something goes wrong later.Mistake #10: Choosing the Wrong Flooring for a Wet Room Not all attractive flooring is appropriate flooring for a room that regularly gets wet.Flooring Type Slip Resistance (Wet) Moisture Tolerance NotesPorcelain tile (matte/textured finish) Good Excellent A common, reliable choice; avoid high-gloss finishes near tubs/showersNatural stone (marble, travertine) Moderate to good, depending on finish Good, but requires sealing Beautiful, like the herringbone marble used in this renovation, but needs periodic resealing to stay moisture-resistantLuxury vinyl tile/plank (LVT/LVP) Good Excellent Budget-friendly and genuinely waterproof at the surface, though seams need attentionGlossy ceramic tile Poor Good Attractive but can be genuinely dangerous when wet — often a bad choice directly around tubs and showersEngineered hardwood Poor Poor Not recommended for full bathrooms, even "water-resistant" versions, due to long-term moisture exposureDIY vs. Professional: What to Tackle YourselfTask DIY-Friendly? WhyPainting, caulking, hardware swaps Yes Low risk, easily corrected if imperfectTile installation (floor, non-wet areas) Yes, with research Time-consuming but forgiving of minor imperfectionsWaterproofing membrane installation Caution Mistakes here are invisible until they fail — many DIYers hire this specific step out even if tiling themselvesPlumbing relocation (drain/vent lines) No Code compliance and venting requirements make this a licensed-plumber task in most areasNew electrical circuits near water sources No GFCI/RCD requirements and shock risk make this a licensed-electrician taskRemoving/relocating a load-bearing element No Structural risk; requires professional assessmentRealistic Renovation Timeline A single full-bathroom renovation (not a full gut of multiple bathrooms at once) commonly runs longer than people expect, mostly due to sequencing and material lead times rather than labor hours themselves.Week 1: Demo, wall opening, plumbing/electrical inspection and adjustment Week 2: Rough-in changes (plumbing/electrical), inspection sign-off if permitted Week 3: Waterproofing, tile installation (floor and walls) Week 4: Vanity, countertop, and fixture installation Week 5: Paint, lighting, hardware, final punch list and touch-upsRealistic expectation: material lead times (custom vanities, specific tile, certain fixtures) can extend this well beyond five weeks. A vanity built to fit an adjusted layout, for example, often takes longer to arrive than the demo and rough-in work combined.Post-Renovation Maintenance to Protect Your InvestmentTask Frequency Why It MattersInspect and re-caulk shower/tub seams Every 12–18 months Caulk degrades before the membrane underneath does; catching it early prevents water intrusionReseal natural stone tile/countertops Every 12–24 months (varies by stone type) Unsealed stone absorbs moisture and stains more easilyClean exhaust fan grille and check airflow Every 6 months Dust buildup reduces CFM significantly over timeCheck for grout cracking or discoloration Every 6 months Early sign of movement or moisture issues worth addressing before they spreadTest GFCI outlets Every 1–3 months Ensures the safety device is actually functioning, not just presentFrequently Asked Questions What is the most common bathroom renovation mistake homeowners make? Finalizing a new layout — especially moving a sink or toilet — before opening the wall to confirm what plumbing is actually there. It's the single most common source of budget and timeline blowouts. Can you always move a sink or toilet to a new location during a remodel? Not always, and not for free. It depends on how much room exists in the wet wall for rerouting supply, drain, and vent lines. Sometimes a full relocation isn't structurally practical, and a compromise layout is the more realistic path. Why do plumbing relocations sometimes cost more than expected? Because moving a drain line often affects venting requirements and may require opening more wall or floor than initially planned, especially in older homes with dense pipe clusters. How much extra should I budget for hidden problems during a bathroom remodel? A common guideline is 15–20% of the total project budget set aside specifically for issues discovered after walls are opened, separate from planned design upgrades. What size exhaust fan do I need for a bathroom? A common baseline is roughly 1 CFM per square foot of bathroom, with adjustments upward for higher ceilings, separate water closets, or rooms with a soaking tub in addition to a shower. Why does my bathroom mirror light cast shadows on my face? A single light mounted directly above the mirror lights the top of your face and casts shadows downward. Side-mounted sconces at roughly face height provide more even, shadow-free lighting. Do I need a permit to move plumbing or electrical outlets in a bathroom? In most of the US, UK, Canada, and Australia, yes — though exact requirements vary by local jurisdiction. It's worth checking with your local building department before work begins rather than after. What's the difference between waterproofing with a membrane vs. just using grout and caulk? Grout and caulk are surface-level and will eventually develop hairline gaps. A waterproofing membrane sits underneath the tile and is the actual barrier preventing water from reaching the wall structure or subfloor. Should I finalize my tile and vanity order before or after demolition begins? After the wet wall has been opened and inspected, ideally. Ordering beforehand risks purchasing materials sized for a layout that turns out not to be feasible. Bathroom Remodeling Planning & BudgetingHow to Plan a Bathroom Layout on Paper Before You Renovate Bathroom Renovation Mistakes to Avoid: A Homeowner's Real-World Guide Do You Need a Permit to Renovate a Bathroom? (US, UK, Canada & Australia Rules Explained) Full Gut Renovation vs. Partial Remodel: How to Choose the Right Bathroom Renovation Plan Bathroom Renovation Timeline by Phase: What Happens Each Week How Long Does a Bathroom Renovation Take? A Real DIY Timeline, Week by Week Bathroom Renovation Checklist: The Correct Order of Steps From Demo to Finish
 (1).webp)
Do You Need a Permit to Renovate a Bathroom? (US, UK, Canada & Australia Rules Explained)
Quick Answer: Do You Need a Permit? (At a Glance) Short answer: probably, but not for everything. Most bathroom renovations need at least one permit somewhere in the process. Purely cosmetic work — new tiles, a fresh coat of paint, swapping a vanity in the exact same spot — usually doesn't. The moment you move plumbing, add or alter electrical circuits, change ventilation, or touch structure, you're almost certainly into permit territory, and the specific permit (building, plumbing, or electrical) depends on which system you're disturbing. Here's the fast version before we get into the detail:Cosmetic-only updates (new tiles over existing waterproofing, paint, a like-for-like fixture swap) typically don't need a permit. Moving or adding plumbing — relocating a toilet, adding a second basin, running new drainage — almost always does. Any new or altered electrical circuit near a wet area triggers an electrical permit or, in the UK, notifiable work under Part P. Removing or altering a wall, load-bearing or not in some jurisdictions, requires a building permit everywhere we checked. Licensed-trade requirements exist independently of permits. In some places you can legally do the work without a permit but still can't legally do it yourself — plumbing and electrical are the two areas where this trips people up. Apartments, condos, and strata properties usually need a second approval on top of whatever the council, city, or building department requires.Rules are set locally, not nationally, so treat everything below as a framework for asking the right question — not a substitute for a five-minute call to your building department before you pick up a hammer.Why Bathroom Permits Exist (It's Not Just Paperwork) It's tempting to write off permits as bureaucratic box-ticking, especially for a room the size of a large closet. That reaction is understandable, but it misses what the process is actually protecting. A bathroom is the one room in a house where water, electricity, and structure sit within arm's reach of each other. Waterproofing failures don't announce themselves — they show up two or three years later as a soft spot in the floor, a mould smell in the room below, or a subfloor that's quietly rotted out. Electrical work done near a shower or bath has a genuinely higher consequence for getting it wrong than the same mistake in a bedroom. And structural changes — even something as small as widening a doorway — can shift loads in ways that aren't obvious until a ceiling starts to crack somewhere else in the house. Permits and inspections exist to put a second set of trained eyes on exactly those risk points before they're sealed behind tile and plasterboard, where nobody will see a mistake until it's expensive. There's also a practical, less romantic reason to care: resale. An inspected, permitted renovation shows up cleanly on property records. An unpermitted one can surface during a buyer's building inspection, a conveyancer's search, or an insurance assessment — often at the worst possible moment in a sale.What Actually Triggers a Permit (A Universal Checklist) Country-specific rules matter, but the underlying logic is close to identical everywhere. Permit requirements are triggered by which system your renovation touches, not by how the room looks when you're done. Here's the trigger logic, grouped by system. PlumbingUsually triggers a permit: relocating a toilet, shower, or basin; adding a new fixture; extending or altering drainage/waste lines; changing pipe materials in a way that affects the water supply system; installing a new hot water unit. Usually doesn't: replacing a tap, showerhead, or toilet in the exact same location with the same connections.ElectricalUsually triggers a permit (or notifiable work): adding a new circuit, installing a new exhaust fan with its own wiring run, adding heated flooring, installing new lighting circuits, moving a switch or power point. Usually doesn't: replacing a light fixture on existing wiring on a like-for-like basis (though even this is regulated more tightly in bathrooms than in any other room — check local rules before assuming).StructuralAlmost always triggers a permit: removing or altering any wall, whether or not it's load-bearing; changing the door or window opening size; converting a closet or hallway space into part of the bathroom footprint.VentilationUsually triggers a permit: installing new mechanical ventilation, cutting a new exhaust duct route through a ceiling or roof, upsizing an extractor fan's ducting. Usually doesn't: replacing an existing extractor fan of the same type on the same ducting run.WaterproofingUsually triggers a permit or inspection sign-off: any new wet-area waterproofing membrane (shower base, shower walls, tub surround) — this is one of the most commonly missed triggers, because homeowners assume "we didn't move anything" covers them, when in fact re-tiling a shower recess almost always means re-waterproofing it first, and that's regulated even if the layout is identical.The gap most people fall into: assuming that because the layout isn't changing, nothing is regulated. Waterproofing and drainage are regulated as systems, independent of whether the room's footprint moves an inch.Permit Requirements by Country Because permit rules are written locally — by city, county, council, or province — there's no single global answer. What is consistent is the category structure: a building permit, a plumbing permit, and an electrical permit are treated as separate approvals almost everywhere, even when one office issues all three.Country Who issues approval What's typically regulated Common exemptions Where to checkUnited States City or county building department, following a locally adopted version of the International Residential Code (IRC) Structural changes, new plumbing runs, new electrical circuits, mechanical ventilation Like-for-like fixture swaps, cosmetic finishes, minor repairs under a local cost threshold in some cities Your city or county building department's permit portalUnited Kingdom Local authority Building Control (England, Wales, Northern Ireland) or Scottish Building Standards (Scotland) Electrical work (Part P, England & Wales), drainage and sanitation (Part G/H), structural alterations Like-for-like electrical repairs by a competent-person-scheme electrician who self-certifies; non-structural cosmetic work Local authority Building Control department, or a Competent Person Scheme register for electrical workCanada Municipal building department, under a provincial building code based on the National Building Code (e.g., the Ontario Building Code) New plumbing fixtures or drainage, new electrical circuits, structural alterations Cosmetic finishes, like-for-like fixture replacement in many municipalities Your municipality's building permits officeAustralia Local council or a licensed/accredited private building surveyor or certifier, under the National Construction Code (NCC) Structural work, new wet-area waterproofing, plumbing and electrical (via licensed trades, separately from the building permit) Cosmetic finishes, like-for-like fixture swaps in most states Your local council, or your state's building/plumbing regulatorUnited States Permitting in the US runs through the city or county, which adopts (and often modifies) the International Residential Code. That local adoption is the reason two towns twenty minutes apart can have genuinely different thresholds for what needs a permit. Structural changes, new plumbing, and new electrical circuits are permit triggers almost everywhere. A number of cities also apply a dollar-value threshold — renovations under a certain cost may be exempt from a full permit even if they touch plumbing, though this varies enormously and shouldn't be assumed. The one universal piece of advice: check your specific city or county's permit portal before starting, not a national rule of thumb. United Kingdom The UK splits regulation between Building Control (structural, drainage, sanitation — Parts G and H of the Building Regulations) and Part P for electrical safety in England and Wales specifically (Scotland runs its own Building Standards system with different notification rules). The detail that trips up a lot of DIYers: electrical work in a bathroom is treated as "special location" work because of the water risk, and much of it is notifiable even when the equivalent job in a kitchen wouldn't be. Using an electrician registered under a Competent Person Scheme lets them self-certify the work instead of you applying to Building Control separately — worth knowing, because it changes who's filing the paperwork, not whether the work needs to meet the standard. Canada Canada's National Building Code sets the baseline, but each province adapts it — the Ontario Building Code is one well-known example — and the municipality is where you actually apply. Plumbing and electrical permits are frequently issued as separate approvals from the general building permit, sometimes by different departments entirely. Structural changes, new fixtures, and new circuits are consistent triggers across provinces; the exemption thresholds for minor cosmetic work vary municipality to municipality. Australia Australia layers three things: the National Construction Code sets the technical standard, your local council or a licensed private building surveyor issues the actual building permit, and plumbing and electrical work run through separately licensed trades who lodge their own compliance paperwork (a plumber typically lodges a compliance certificate with the local water authority; an electrician issues a Certificate of Electrical Safety). This is a genuinely common point of confusion: a lot of homeowners assume "permit" means one document from one office, when in practice a mid-sized bathroom renovation can generate a building permit, a plumbing compliance certificate, and an electrical safety certificate as three separate pieces of paper from three different parties.Real Renovation Case Study: What Our 6-Week Bathroom Rebuild Actually Required Most articles on this topic are written from the outside — a content team summarizing rules they've never personally had to apply for. This section isn't that. This is a real bathroom, project-managed by the homeowner, start to finish, with the actual numbers. The bathroom: 2515mm long x 1830mm wide x 2620mm high — about 4.6m² total, which is on the small side. This matters, because most permit guidance online is written with a large family bathroom in mind, and small-bathroom renovators get left to figure out for themselves whether the same rules apply. (They do. Permit triggers are about systems, not square metres.) Where it started: the original bathroom was dated but functional — pink and grey mosaic tile floor, a pink tub built into a grey-and-pink tiled surround, a dated vanity, a shower stall with a sliding glass door and a fabric curtain doing extra duty as a second barrier, and a shallow shelf under the window that had become the default catch-all for every bottle and tube in the house. Where it ended: a full-height glass shower screen replacing the enclosed stall, a freestanding tub positioned under the window with a skylight above it, a floating timber-look vanity with a vessel basin, brushed brass tapware, an arched mirror, a backlit tiled niche where the old shelf used to be, and a sliding barn door replacing the old swing door at the entry. Timeline: six weeks, start to finish. Total cost: approximately $17,000–$18,000 AUD, including materials, licensed-trade labor, and everything the homeowner sourced independently. The task breakdown: who did whatTask Who handled it NotesDemolition Owner Full strip-out — old tiles, old tub, old vanityRe-concreting the floor Owner Levelled the base before new waterproofing and tilingRe-rendering the walls Owner Prepped substrate for new tileLedge-wall build (the tiled niche) Owner Framed the recessed shelf now used for shower storageTile sourcing Owner Selected and ordered all tile and stone-look finishesPlumbing rough-in and fixture installation Licensed plumber Repositioned supply and drainage for the new tub and shower layoutElectrical (lighting, exhaust fan, power points) Licensed electrician New circuit work for the backlit niche and wall sconcesThe most common question about this kind of split: "if I'm doing the labour, why pay a trade at all?" Two reasons showed up clearly on this project. First, legally — plumbing and electrical work in a wet area needs to be done, or at minimum signed off, by a licensed practitioner in every one of the four countries this guide covers, regardless of whether a permit is separately required. Second, practically — waterproofing and drainage are the two things that are almost impossible to fix cheaply once tile is on top of them. Getting the fall-to-waste and membrane detail wrong is the single most expensive mistake a DIY renovation can make, because fixing it means ripping out finished work. What surprised the project owner most: how much of the six weeks was actually waiting — waiting on trade availability, waiting on tile delivery, waiting on inspection sign-off between stages — rather than active work. The demolition and re-rendering moved fast. The gaps between trade visits were where the calendar actually filled up. One honest maintenance note, a year on: the backlit niche and brass tapware look exactly as good as installation day, but the brushed brass finish shows water spots more visibly than the old chrome ever did, and it gets a wipe-down after every shower now — a small, ongoing cost of the upgrade that doesn't show up in any renovation budget spreadsheet. Suggested gallery placement (before / after):Before: wide shot down the original hallway into the bathroom, showing the pink tub, mosaic floor, and dated vanity — alt text: "Original small bathroom before renovation, pink bathtub and mosaic tile floor." Before: close-up of the window shelf storage nook, cluttered with toiletries — alt text: "Cluttered window ledge storage in a small bathroom before remodel." After: freestanding tub beneath the skylight, glass shower screen in the foreground — alt text: "Renovated small bathroom with freestanding tub, skylight, and frameless glass shower screen." After: floating timber vanity with vessel basin and brass tapware — alt text: "Modern floating vanity with vessel sink and brushed brass tapware after bathroom renovation." After: sliding barn door installed at the bathroom entrance — alt text: "Black sliding barn door hardware at renovated ensuite entrance."DIY vs. Licensed Trade: What You Can Legally Do Yourself This is the distinction most guides blur, and it's the one that matters most if you're project-managing your own renovation: a permit not being required doesn't automatically mean you're allowed to do the work yourself. Licensing rules and permit rules are two separate systems that happen to overlap a lot.Generally DIY-legal (check locally first) Requires a licensed trade regardless of permit statusDemolition and strip-out Any new plumbing connection to the water supply or drainage systemTiling and grouting Any new or altered electrical circuitPainting and cosmetic finishes Gas fitting (for tankless/instant water heaters)Installing a vanity where plumbing already exists in the same spot Waterproofing/tanking sign-off in most Australian states, and increasingly elsewhereAssembling and mounting fixtures that don't involve new wiring or plumbing Final connection of any fixture to an active electrical circuitRe-rendering and re-concreting (structural engineering sign-off may still apply for anything load-bearing) Structural alterations involving load-bearing elementsA useful way to think about it: if a mistake could cause a shock, a flood, or a collapse, it's licensed-trade territory — permit or no permit. Everything else is a judgment call between your own skill level and your risk tolerance.Cost of Permits and Compliance Permit fees are one of the most under-explained parts of this whole process. Most articles say "varies" and leave it there, which isn't much use when you're trying to build a budget. Here are realistic ranges — not quotes, and not a substitute for your local fee schedule, which is usually published online and takes about two minutes to find.Country Building permit Plumbing permit/compliance Electrical permit/complianceUnited States Roughly $50–$300, often scaled to project value in larger cities Roughly $50–$200 Roughly $50–$200United Kingdom Building Control fees often £150–£350 depending on notice type Included in Building Control fee in most cases Self-certified by a Competent Person Scheme electrician, or a similar Building Control fee if notCanada Often $75–$500 CAD, sometimes calculated as a percentage of project value Frequently a separate $50–$200 CAD fee Frequently a separate $50–$200 CAD feeAustralia Roughly $300–$1,200 AUD through council or a private certifier Plumbing compliance certificate typically $150–$400 AUD Certificate of Electrical Safety typically $100–$300 AUDTwo costs people consistently forget to budget for: re-inspection fees if a stage fails its first inspection, and the time cost of a permit application sitting in a queue while trades are booked and waiting.How to Apply for a Permit — Step-by-StepConfirm which permits your specific scope needs. Use the universal checklist above against your actual plan — not the finished look, the systems you're touching. Check whether your building type adds a layer. Apartment, condo, or strata property? You'll likely need a second approval before you can even apply for the government permit — see the next section. Gather your documentation. Typically a site plan, a description of the work, and — for structural or major plumbing changes — drawings from a licensed designer or engineer. Submit the application to your local building department, council, or Building Control office, along with the fee. Wait for approval before demolition begins on anything permit-triggering. Starting early is the single most common way homeowners end up with a stop-work order. Schedule inspections at each required stage — typically rough-in (before walls close up) and final. This is where waterproofing and drainage get checked before they're hidden behind tile. Receive your final sign-off or compliance certificate, and keep it. You'll want it for insurance and for disclosure at resale.If you're hiring a full-service contractor, they'll often handle steps 3–6 as part of their fee — which is exactly what "we pull the permits for you" means in a quote, and it's worth asking explicitly whether that's included or billed separately.What Happens If You Skip a Required Permit This is the section that tends to get either glossed over or turned into scare-copy. Neither helps. Here's what actually happens, in roughly the order homeowners encounter it.A stop-work order. If unpermitted work is discovered mid-project — often because a neighbour reports it or an inspector notices during an unrelated visit — the building department can halt work until it's regularized. Forced rectification. In the worst cases, this means opening up finished walls or floors to prove the work meets code, which costs far more than the original permit ever would have. Insurance claim denial. This is the consequence people underestimate most. If a water leak or electrical fault traces back to unpermitted work, insurers frequently deny the claim outright — meaning you've paid for the renovation and the damage. Resale complications. Unpermitted work is a common flag in a buyer's inspection, and in many places it has to be disclosed. Buyers' solicitors, conveyancers, or agents raising it can delay a sale or force a price renegotiation at the worst possible time.If work is already done without a permit, most jurisdictions have some form of retroactive or "as-built" permit process — sometimes called regularization. It typically involves an inspector opening up enough of the finished work to verify it meets code, which is more invasive (and more expensive) than getting the permit before you started. It's not a dead end, but it's the expensive path, not the easy one.Apartments, Strata, Condos & HOAs — The Extra Approval Layer If you own an apartment, unit, condo, or a property inside a homeowners association, there's a layer of approval that has nothing to do with the government and everything to do with your building's own rules. A government permit confirms your renovation meets safety and construction code. Building, strata, or HOA consent confirms your renovation meets the rules your specific building has set — which can be stricter, and cover things a permit never touches: approved working hours, which trades are allowed on site, noise restrictions, and whether any work can affect shared plumbing risers or waterproofing membranes that other units rely on. These two approvals are genuinely separate processes, run by different people, and you typically need both — not one or the other. A council permit doesn't authorize you to start jackhammering a shared wall at 7am on a Saturday if your strata bylaws say otherwise, and strata sign-off doesn't exempt you from a plumbing permit if you're relocating a drain. The practical implication: apartment renovators should budget extra time, not extra risk — the strata or HOA approval step is usually the slower one, since it depends on a committee or manager's schedule rather than a fixed permit-processing timeline.Common Homeowner Mistakes During the Permit ProcessAssuming "we didn't change the layout" means no permit is needed. Waterproofing and drainage are regulated as systems, independent of layout. Treating a handy friend or relative as equivalent to a licensed trade. It's not just a permit issue — it's a licensing issue, and it's usually the thing an insurer checks first after a claim. Starting demolition before approval comes through, because trades are booked and the calendar feels tight. This is the single fastest route to a stop-work order. Not checking for a second approval layer if you're in an apartment, condo, or strata property, and finding out mid-project. Underestimating inspection queue times when scheduling trades, leading to expensive gaps where a paid tradesperson is standing around waiting on a sign-off. Assuming permit rules from your last house apply to your new one, especially after a move to a different city, county, or even a different state or province. Skipping documentation — not keeping copies of permits, inspection sign-offs, and compliance certificates, which you'll need again at resale. Confusing "permit not required" with "I can legally do this myself." They're different questions with different answers.Permit Timeline — How Long Approval Really Takes Realistically, expect permit approval to take anywhere from a few days for a straightforward, single-trade permit to several weeks for anything touching structure. On the six-week case study project above, the permitting and inspection stages weren't the slowest part — trade availability and material delivery were — but the inspection gaps still shaped the schedule more than the hands-on labour did. A rough shape to expect:Application and initial review: days to two weeks, depending on your local department's backlog. Approval and pre-work inspection (if required): typically scheduled within a week or two of approval. Rough-in inspection: scheduled once plumbing and electrical rough-in is complete, before walls close up — this is often the stage that determines your real project pace, since work has to pause until it's signed off. Final inspection and sign-off: at project completion.Build inspection wait time into your schedule the same way you'd budget for tile lead times — it's a real constraint, not a formality to skip past.Frequently Asked Questions Do I need a permit to retile my bathroom if I'm not changing the layout? Usually not for the tile itself, but if retiling a shower recess means removing and replacing the waterproofing membrane underneath — which it almost always does — that step is regulated even though the layout stays the same. Can I replace a bathtub with a walk-in shower without a permit? Almost never. This typically changes drainage, waterproofing, and often the wall structure around the wet area, all of which are permit triggers in every country covered here. Do I need a permit to move my toilet just a few inches? Yes, in most jurisdictions. Any change to drainage or supply line position, however small, is treated as new plumbing work requiring a permit and licensed installation. Is a permit required to simply replace a bathroom vanity? Not if it's going in the exact same spot with the same plumbing connections. If you're relocating it, even slightly, that's a plumbing change and likely needs a permit. Do I need council or strata approval to renovate an ensuite in an apartment? Typically both. A government building/plumbing/electrical permit and separate building or strata consent are usually required side by side, not as alternatives. What happens if I sell my house with unpermitted bathroom work? It's commonly flagged during a buyer's inspection or conveyancing search, which can delay the sale, trigger a price renegotiation, or in some places require disclosure upfront. Can I legally do my own bathroom electrical work? In most places, no — not the connection to an active circuit. Even where a permit technically isn't required for minor like-for-like work, licensing rules for wet-area electrical are stricter than for other rooms. How much does a bathroom renovation permit typically cost? Ranges vary widely by country and municipality, but as a rough guide: US and Canadian building permits often run $50–$500; UK Building Control fees are commonly £150–£350; Australian building permits often run $300–$1,200 AUD, with separate plumbing and electrical compliance certificates on top. How long does it take for a bathroom renovation permit to be approved? Anywhere from a few days for a simple, single-trade permit to several weeks for anything structural. Rough-in inspection scheduling, not the initial application, is usually the bigger scheduling constraint.Permit rules change and are enforced locally. This guide is a starting framework for the right questions to ask — always confirm current requirements and fees with your local building department, council, or Building Control office before demolition begins. Bathroom Remodeling Planning & BudgetingHow to Plan a Bathroom Layout on Paper Before You Renovate Bathroom Renovation Mistakes to Avoid: A Homeowner's Real-World Guide Do You Need a Permit to Renovate a Bathroom? (US, UK, Canada & Australia Rules Explained) Full Gut Renovation vs. Partial Remodel: How to Choose the Right Bathroom Renovation Plan Bathroom Renovation Timeline by Phase: What Happens Each Week How Long Does a Bathroom Renovation Take? A Real DIY Timeline, Week by Week Bathroom Renovation Checklist: The Correct Order of Steps From Demo to Finish
.webp)
Full Gut Renovation vs. Partial Remodel: How to Choose the Right Bathroom Renovation Plan
If you've ever stood in a tired, cramped bathroom trying to figure out whether you can get away with a fresh coat of paint and a new vanity, or whether you're actually looking at a full gut job, you're not alone. It's one of the most common — and most expensive — decisions a homeowner makes, and most of the advice online treats it like a simple budget calculation. It isn't. It's a structural decision disguised as a budget decision, and getting it wrong either wastes money on a remodel that fails in a few years or means gutting a bathroom that never needed it. Quick answer: A full gut renovation strips a bathroom back to the brick or studs — new waterproofing, new plumbing and electrical runs, and (where possible) a new layout. A partial remodel keeps the existing plumbing and layout and updates only the surfaces: tile, fixtures, paint, and hardware. The deciding factor usually isn't your budget — it's the condition of what's behind the tile, and whether your existing layout is fixable without moving the toilet.Quick TakeawaysFull gut renovation: new waterproofing membrane, new plumbing/electrical rough-in, layout can change, typically 4–8 weeks, higher cost. Partial remodel: cosmetic only, existing plumbing and layout stay, typically 1–2 weeks, lower cost — but higher risk of masking a problem instead of fixing it. In older buildings (especially brick apartments from the 1960s–80s), the toilet's waste stack is usually the single biggest constraint on layout, and no amount of budget changes that. Small bathrooms (roughly under 5m²) tend to get more real value from a full renovation, simply because there's so little room to compromise on layout. The line items most likely to blow out a "small" budget are tile format and pattern, window replacement, and moving a fixture — not the fixtures themselves.Full Gut Renovation Partial RemodelWhat's replaced Waterproofing, plumbing, electrical, tiling, fixtures, layout Surface finishes only — tile face, vanity, tapware, paintLayout changes possible Yes, within stack/drain constraints Rarely — existing pipe and drain positions stay putTypical timeline 4–8 weeks 1–2 weeksWaterproofing certified? Yes, new certified membrane Only if a wet area is disturbedBest suited to Bathrooms with old/failing waterproofing, poor layout, or damage behind tile Bathrooms that are cosmetically dated but structurally soundRisk if skipped when needed N/A Existing damage gets tiled or painted over, not fixedWhat "Full Gut Renovation" and "Partial Remodel" Actually Mean These two terms get thrown around loosely, so it's worth being precise, because the difference changes almost every decision that follows. A full gut renovation means the bathroom is stripped back to its bones — old tile off, old waterproofing membrane removed, and in older properties, back to the brick or block substrate underneath. From there, everything is rebuilt: new plumbing rough-in (sometimes relocated within the constraints of the existing waste stack), new electrical circuits for lighting, heating and exhaust, a fresh waterproofing membrane that gets certified before anything is tiled over it, then tiling, fixtures, and fit-off. A partial remodel leaves the plumbing and layout exactly where they are. The toilet, shower, and vanity stay in their existing footprint. What changes is the surface: new tiles laid over (or replacing) the old ones, a new vanity and tapware, repainting, maybe a new mirror cabinet or exhaust fan. It's faster and cheaper, but it depends entirely on what's underneath already being sound. The trap most people fall into is assuming a partial remodel is automatically the safe, cheaper option. It's only cheaper if the existing waterproofing and substrate are actually fine. If they're not, a partial remodel just delays the real cost — and hides the evidence in the process.The Real Decision Factors (Beyond Budget) Most guides frame this as "how much do you want to spend." In practice, three things decide it long before budget does. 1. The age and condition of the waterproofing membrane Waterproofing has a design life — commonly cited as 15–20 years, though this varies by product and installation quality. If your bathroom is older than that and hasn't been redone, there's a real chance the membrane behind the tile has already started to fail, even if you can't see it yet. A partial remodel that just re-tiles over a failing membrane doesn't fix anything; it just puts a new face on the same problem, and the next sign of trouble is usually a damp patch on a ceiling below or a neighboring wall. 2. What's actually behind the tile In a pre-1980s brick or masonry building specifically, opening up a wall is genuinely unpredictable. It's common to find old wiring run directly through mortar joints, inconsistent wall thickness from patch repairs over the decades, or evidence of a previous leak that was never properly addressed. None of this shows up on a surface inspection. It's one of the most common reasons a "partial" plan turns into a full gut mid-project — the tiler or plumber opens something up and finds a problem that has to be dealt with before anything else can proceed.Expert warning: If your building is more than about 40–50 years old and has never had the bathroom fully waterproofed and re-plumbed, budget contingency for this. It's not a matter of if something unexpected turns up behind that wall — it's a matter of how much.3. Whether your toilet's waste stack is fixed This is the factor almost nobody explains clearly, and it's arguably the biggest real-world constraint on layout in older apartment buildings. Many older buildings — particularly brick apartments built before the 1980s — have a single shared waste stack serving the toilet on each floor, and relocating it means cutting into structural slab or navigating plumbing that serves units above and below you. That's a different order of job entirely from moving a vanity or a shower. In practice, this means the toilet's position is often the one fixed point in the room, and every other layout decision gets built around it — not the other way around. If you've been dreaming of a completely different bathroom layout, this is usually the first thing to check with a plumber before falling in love with a floor plan.Layout Planning in a Small Footprint A small bathroom — anything under roughly 5m² — punishes bad layout decisions much more than a larger one, because there's no spare space to absorb an awkward choice. Take a fairly typical scenario: a bathroom roughly 1.8m × 2.6m in a ground-floor apartment, brick construction, built in the early 1970s. The toilet's waste stack is fixed (moving it isn't realistic), and there's no appetite to keep the existing bathtub — it's shallow, dated, and rarely used for actual bathing. That leaves one real decision: where does the shower go? In a layout like this, moving the shower to the far wall opposite the door — rather than trying to preserve the old tub's footprint — is often the only way to get a workable, code-compliant shower into a tight space. The result can be narrower than a "dream" walk-in shower — something in the 70–75cm range isn't unusual — but a well-planned narrow shower with a properly sloped floor waste and a decent showerhead is genuinely comfortable day-to-day, even if it wouldn't win a design award for spaciousness. Keeping vs. removing a bathtub — the honest trade-offsKeep the Tub Remove the TubPros Useful for small children, some buyers expect at least one tub in the home Frees significant floor space; allows a wider, more comfortable showerCons Often the least-used fixture in a small bathroom; limits shower size Loses bathing option for young kids; occasionally flagged by buyers in family-oriented marketsBest fit Only bathroom in a family home with young children Small footprint, adult household, or a second/ensuite bathroom elsewhere in the homeThere's no universally "correct" answer here — it depends on the household and, to a lesser extent, resale expectations in your specific market. But in a genuinely small bathroom, the tub is very often the single biggest thing standing between a cramped layout and a comfortable one.Cost Breakdown: What Drives the Budget Up or Down Cost guides that give a single number ("small bathroom renovations cost $X") aren't very useful, because the spread between a straightforward full renovation and one that runs 30–50% over is almost always driven by the same handful of decisions.Line Item Typical Share of Budget NotesDemolition & disposal 5–8% Higher in older buildings with limited access (e.g., apartment lifts, narrow corridors)Plumbing rough-in & relocation 10–15% Rises sharply if the waste stack needs workElectrical rough-in 5–8% Covers new circuits for lighting, exhaust, heated elementsWaterproofing & rendering 8–12% Non-negotiable in a full gut; must be certifiedTiling (labor + materials) 20–30% The single biggest lever on cost — large-format, patterned, or narrow-format tiles all increase labor time significantlyFixtures (toilet, vanity, tapware, shower screen) 15–20% Wide range depending on brand/finish tierWindow replacement (if applicable) 5–10% Jumps significantly if the opening needs to be resized or the wall is solid masonryProject management / contingency 10–15% Should never be zero on an older propertyWhere budgets actually blow out:Tile choice. A narrow vertical fluted tile or a terrazzo-look large format tile looks fantastic, but both take considerably longer to lay than a standard rectified tile, and labor — not material cost — is what moves the number. Window replacement. Swapping a window in a solid brick or masonry wall isn't a like-for-like job. It can involve cutting back render, reinforcing the opening, and re-flashing — all before the new (often double-glazed) unit goes in. Fixture relocation. Moving a basin or shower a meter across the room sounds minor. Moving the associated waste and supply lines under a slab is not.A project that starts as a $30–35k plan and lands closer to $45–48k almost always got there through some combination of upgraded tile, a window replacement that turned out to be more involved than expected, and a contingency that got used in full rather than held in reserve.Realistic Timeline: What Happens Week by Week A full gut renovation of a small bathroom typically runs five to eight weeks, not the two-week timeline sometimes implied by glossy before/after content. Here's a realistic trade sequence:Week What HappensWeek 1 Demolition — strip tile, old fixtures, and (in older buildings) back to brick/masonry. Disposal of debris.Week 1–2 Rough-in — plumber relocates waste/supply lines within stack constraints; electrician runs new circuits; window removed and opening prepared if being replaced.Week 2–3 Structural/substrate work — rendering brick back to a flat surface, framing for niches or new stud walls, new window installed and sealed.Week 3–4 Waterproofing — membrane applied to floor and walls in the wet area, then certified before any tile goes down. This step cannot be rushed; skipping cure time is one of the most common causes of early failure.Week 4–6 Tiling — floor first (falls to the drain), then walls. Time here scales directly with tile format and pattern complexity.Week 6–7 Fixture fit-off — toilet, vanity, tapware, shower screen, mirror cabinet, exhaust fan, lighting.Week 7–8 Final details, silicone sealing, snagging list, and clean-up.Delays most commonly happen at two points: waiting on a specialist trade (electricians and waterproofers are frequently the bottleneck, not tilers) and discovering an issue once demolition reveals what's actually inside the wall.DIY vs. Professional: What You Can and Can't Safely Take OnTask DIY-Suitable? NotesDemolition (tile removal) Often yes Requires care around existing plumbing/electrical; dust and debris management matters, especially in apartmentsPainting (non-wet areas) Yes Only outside the certified wet-area zoneHardware/accessory swaps Yes Towel rails, mirrors, toilet roll holdersWaterproofing No Needs to be installed and certified by a licensed applicator to meet building code and remain valid for insurance/resalePlumbing relocation No Licensed plumber required by law in most jurisdictionsElectrical work in wet zones No Licensed electrician required; wet-zone electrical has specific safety clearancesWindow replacement in masonry No (usually) Structural opening work is a job for a licensed builder, particularly on load-bearing brick wallsTiling Possible but risky Falls (floor slope to drain) need to be precise for correct drainage — a poorly executed DIY fall is a common cause of pooling waterSafety note: Waterproofing and electrical work in a bathroom aren't areas to cut corners on, even under budget pressure. A failed membrane or non-compliant wiring in a wet zone isn't just a maintenance headache later — it's a genuine safety and moisture-damage risk, and in most places it also affects what you're legally allowed to have done without a licensed tradesperson.Common Mistakes and Regrets in Small Bathroom Renovations Most homeowners don't realize how many small decisions get quietly cut during a renovation under time or budget pressure — and how much they end up regretting exactly one of them, months later.Skipping a heat lamp or heated element to save on the electrical scope. It's a small line item during construction and a genuinely difficult retrofit afterward, since it usually means reopening a finished ceiling. This is one of the most commonly regretted omissions in small bathroom renovations — cheap to include during the build, expensive and disruptive to add later. Undersizing the exhaust fan. A fan sized for the room on paper but not for the actual moisture load (a daily shower in a small enclosed space) leads to lingering condensation and, eventually, mould at grout lines. Choosing a tile pattern before checking the labor cost implication. A herringbone or narrow-format tile can add real cost and time versus a standard format — worth deciding early, not after quotes are already secured. Assuming a partial remodel avoids permit or waterproofing requirements. In most places, if you disturb a wet area at all — even to swap a vanity — some form of compliance requirement can be triggered. Assuming otherwise is a common and costly misunderstanding. Letting a project manager talk you out of a "nice to have" for scheduling reasons. Trade sequencing pressure is real, and it's easy to get talked into dropping something small under the argument that it'll delay the project. If it's cheap relative to the whole job and hard to retrofit, it's usually worth holding firm on.Apartment/Strata-Specific Considerations If you're renovating in a multi-unit building, a few things apply that rarely show up in generic renovation content:Notify neighbors and the body corporate/strata manager before demolition starts. Noise, dust, and access through shared corridors or lifts are common sources of friction if they're a surprise. Confirm what waterproofing standard is required and who certifies it. In strata buildings, a bathroom leak that affects a unit below can become a liability question, not just a repair one. Check insurance coverage during the works period. Standard building insurance doesn't always cover renovation-related incidents; confirm this before demolition, not after. Confirm waste disposal and access arrangements. Ground-floor units typically have easier access for skips and material delivery; upper-floor units may need to budget extra for this logistics cost. Understand shared plumbing stack constraints early. As covered above, this is usually the single biggest layout constraint in an older multi-unit building, and it's worth a plumber's opinion before finalizing any layout sketch.Decision Framework: Which Path Fits Your Bathroom Work through these questions in order:Is your waterproofing membrane older than 15–20 years, or has it never been redone? → If yes, lean toward a full renovation. Re-tiling over questionable waterproofing is a false economy. Is the current layout genuinely unusable (a shower too small to use comfortably, a bathtub nobody uses, fixtures crammed together)? → If yes, a partial remodel won't fix this — it only changes the finish, not the footprint. Is your toilet's waste stack fixed, and does your desired layout depend on moving it? → If moving it isn't realistic, plan your layout around its current position rather than designing around a change that may not be feasible. Is the bathroom cosmetically dated but structurally and functionally sound (waterproofing recent, layout works, no visible damage)? → A partial remodel is a reasonable, lower-cost option here. Have you budgeted contingency (10–15%) for what demolition might reveal, especially in a building over 40 years old? → If not, build this in before committing to a fixed budget — it's the single most common source of stress mid-project.If you answer "full renovation" to two or more of the first three questions, that's usually the more honest long-term choice, even though it costs more upfront.Frequently Asked Questions How do I know if my bathroom needs a full gut renovation instead of a partial remodel? The clearest signal is the age and condition of the waterproofing membrane, combined with whether the current layout actually works. If the membrane is past its design life or the layout is genuinely unworkable, a partial remodel won't resolve the underlying issue. Can I do a partial remodel if the waterproofing membrane is old but hasn't visibly failed yet? It's possible, but it's a risk-based decision rather than a safe default. Waterproofing failures aren't always visible until water has already tracked somewhere unwanted, such as into a wall cavity or the ceiling below. Why can't I just move the toilet to improve my bathroom layout? In many older buildings, the toilet connects to a shared waste stack that also serves units above or below. Relocating it can mean cutting into structural slab and coordinating with plumbing that isn't solely yours to alter, which is a significantly bigger job than moving a vanity or shower. What's the minimum shower width that's actually comfortable in a small bathroom? There's no single number that suits everyone, but showers in the low-to-mid 70cm range are commonly used in tight layouts and are workable day-to-day, provided the floor waste and screen are well planned. Is it worth keeping a bathtub in a small bathroom, or should I switch to a shower-only layout? This depends on the household. Families with young children often value keeping at least one tub in the home; in an adult household or where another bathroom has a tub, removing it frequently makes a small bathroom noticeably more functional. What typically causes a small bathroom renovation to go over budget? Tile format and pattern choice, window replacement scope, and fixture relocation are the three most common cost drivers — far more so than the fixtures themselves. How long does a full gut renovation of a small bathroom actually take, start to finish? Five to eight weeks is a realistic range for a small bathroom, accounting for trade sequencing and waterproofing cure times. Shorter timelines are possible but usually indicate a smaller scope of work, not just faster execution. Bathroom Remodeling Planning & BudgetingHow to Plan a Bathroom Layout on Paper Before You Renovate Bathroom Renovation Mistakes to Avoid: A Homeowner's Real-World Guide Do You Need a Permit to Renovate a Bathroom? (US, UK, Canada & Australia Rules Explained) Full Gut Renovation vs. Partial Remodel: How to Choose the Right Bathroom Renovation Plan Bathroom Renovation Timeline by Phase: What Happens Each Week How Long Does a Bathroom Renovation Take? A Real DIY Timeline, Week by Week Bathroom Renovation Checklist: The Correct Order of Steps From Demo to Finish
.webp)
Bathroom Renovation Timeline by Phase: What Happens Each Week
If you've never gone through a bathroom renovation before, the process can feel like a black box. One week your bathroom exists. The next, it's a plywood subfloor and some exposed pipe stubs, and nobody seems to be able to tell you exactly when you'll have a working shower again. Here's the thing: a bathroom renovation isn't really measured in "weeks" the way most articles present it. It's measured in phases, and each phase has its own bottleneck — sometimes it's labor, sometimes it's a cure time you can't rush no matter how much you want to, and sometimes it's an inspector's calendar that has nothing to do with how fast your tradespeople are working. Once you understand which is which, the whole timeline stops feeling random. This guide walks through what actually happens at each stage, in the order it happens, and why.Quick Answer: How Long Does a Bathroom Renovation Take? A full bathroom renovation typically takes 3 to 6 weeks from demolition to final sign-off. The work itself — demo, rough-in, tiling, fixture install — usually only adds up to about 10 to 15 working days. The rest of the calendar time goes to waterproofing cure periods, grout curing, material delivery windows, and inspection scheduling. Quick takeaways:Demolition: 1–3 days Plumbing and electrical rough-in: 3–5 days, plus inspection wait time Waterproofing: 1–2 days to apply, then a mandatory cure period before tiling Tiling and grouting: 3–7 days, plus a grout/silicone cure period before use Fixtures and fittings: 2–4 days Finishing and final inspection: 2–3 days A cosmetic refresh with no layout changes can be done in 1–2 weeks A full gut renovation with a moved layout can stretch past 6 weeksPhase-by-Phase Timeline Table This is the table worth screenshotting. It separates what determines the length of each phase — because "labor time" and "you're just waiting" are two very different kinds of delay.Phase Typical Duration What Actually Determines the Length DIY-Friendly?Planning & permitting 1–4 weeks (before work starts) Council/local authority processing time, contractor availability Partial — permit applications, yes; permit approval, noDemolition 1–3 days Labor + disposal logistics Often yes, with carePlumbing & electrical rough-in 3–5 days Labor, then mandatory inspection wait No — licensed trade requiredWaterproofing / tanking 1–2 days to apply Cure time, not labor (often 48–72+ hours) Not recommended for wet areasTiling & grouting 3–7 days Pattern complexity, tile size, then grout/silicone cure Possible for simple layoutsFixtures & fittings 2–4 days Delivery lead times more than labor Partial — accessories yes, plumbed fixtures usually noPainting & finishing 2–3 days Labor + paint dry time YesFinal inspection & sign-off 1–5 days Inspector scheduling, not your project NoNotice how many rows are gated by something other than the trades working hard. That's the piece most timelines leave out, and it's the single biggest reason a "3-week job" quietly becomes a 5-week job.Before Week One: Planning, Permits, and Prep Most homeowners think of "week one" as demo day. In reality, the clock starts earlier — and this stage is where a lot of future delays get baked in without anyone noticing. Before-you-start checklist:Finalize the layout — moving a toilet or shower drain changes plumbing scope significantly Select tile, fixtures, and vanity before rough-in starts, not after (custom or imported tile can have 2–6 week lead times) Confirm whether your project needs a permit (most full renovations touching plumbing or electrical do, in the US, UK, Canada, and Australia — requirements vary by municipality) Book your contractor and key trades in the right order (plumber and electrician need lead time; tilers usually book further out than you'd expect) Set a contingency budget of 10–20% on top of your quote Arrange an alternate bathroom plan if this is your only one Ask your contractor directly: "What's the realistic worst case if you find something we didn't plan for?"Most homeowners don't realize that the permit and inspection process — not the physical labor — is what determines your real start-to-finish timeline in a lot of jurisdictions. If your local building authority takes two weeks to approve a permit, that's two weeks before a single tile gets cut, regardless of how good your contractor is.Week 1: Demolition and Site Protection Demo feels like progress — and it is — but it's also the phase most likely to surface a problem nobody budgeted for. A typical demo day involves stripping out the old vanity, tile, shower base, and sometimes flooring down to the subfloor. In older homes (roughly pre-1980s in the US and Canada, and similar eras in the UK and Australia), this is also the point where asbestos-containing materials in old tile adhesive, vinyl, or texture coatings can turn up. A licensed contractor should test for this before demo begins in any home of that age — it's not a step to skip to save time. What demo commonly reveals that isn't in the original quote:Water damage or soft subfloor from a long-term slow leak behind the old shower Mold or mildew growth inside the wall cavity Outdated or unsafe wiring behind the old vanity Cracked or corroded drain pipes that weren't visible until the wall came offExpert warning: If your contractor finds water damage during demo and says "it's fine, we'll just tile over it," that's a red flag, not reassurance. Wet, soft, or rotted subfloor and framing need to be dried out, treated, or replaced before waterproofing goes on top of it — otherwise you're sealing a problem behind new tile.This is also when dust control matters more than most people expect. Plastic sheeting over doorways and a dedicated debris path (rather than carrying demo waste through your living room) genuinely reduces how much dust ends up in your HVAC system and the rest of the house.Week 1–2: Plumbing and Electrical Rough-In This is where the bathroom starts to take its real shape — supply lines, drain-waste-vent piping, and electrical circuits get run to where the new fixtures will sit. This phase is legally off-limits for DIY in most of the US, UK, Canada, and Australia when it comes to gas, electrical, and often plumbing rough-in — not because it's impossible to learn, but because a mistake here is hidden behind a wall for years before it fails. What happens during rough-in:Water supply lines are run to the new sink, shower, and toilet locations Drain and vent piping is installed to code, including correct fall/slope toward the main drain Electrical circuits are run for lighting, the exhaust fan, GFCI/RCD-protected outlets (required near wet areas in most jurisdictions), and any heated towel rail or underfloor heating If the layout is changing, this is where that shift physically happensThen: the inspection pause. In most areas, rough-in plumbing and electrical must be inspected and approved before the walls can be closed up with waterproofing and tile. This is one of the most common places a schedule quietly slips, because you're not waiting on your trades — you're waiting on the inspector's availability. A contractor who books the inspection the same day rough-in finishes, rather than "whenever," is worth their fee.Week 2: Waterproofing and Cure Time If there's one phase competitors consistently under-explain, it's this one — and it's arguably the most important step in the entire renovation for long-term durability. Waterproofing (sometimes called tanking, particularly in the UK and Australia) is the membrane system applied to the shower floor, walls, and any other wet-area surfaces before tile goes on. Its job is to stop water that gets past the grout and tile from reaching the framing and subfloor underneath. Here's what most homeowners don't realize: the membrane itself only takes a day or two to apply, but it needs to cure before tiling can start — and cure time is not the same as dry-to-the-touch time. Depending on the product and climate, that's commonly 48 to 72+ hours, sometimes longer in cold or humid conditions. Some jurisdictions also require a flood test (filling the shower base with water for a set period to check for leaks) before it's signed off.Step Typical Time Can It Be Rushed?Membrane application 1–2 days No — needs even, full coverageCure time before tiling 48–72+ hours No — this is the single most common corner cut on tight timelinesFlood test (where required) 24 hours NoExpert warning: Tiling over a waterproofing membrane before it's fully cured is one of the leading causes of tile failure, grout cracking, and slow leaks years down the line — and it's invisible until it fails. If a contractor offers to "save you two days" by tiling early, that's a trade-off you don't want to make.This phase is also where smart-home-style upgrades are easiest to plan for, since the walls are already open: humidity-sensing exhaust fans, in-floor heating mats, and digital shower valve pre-plumbing are all far cheaper to install now than to retrofit later.Week 3: Tiling and Grouting Once waterproofing has cured, tiling begins — and this is the phase where timeline estimates vary the most, because "tiling" isn't one job. It's several, depending on what you've chosen.Tile Type / Pattern Typical Install Time (avg. bathroom) NotesStandard subway tile, running bond 2–4 days Fastest, most forgiving layoutLarge-format tile (600mm+/24in+) 3–5 days Requires flatter substrate, more prepHerringbone or chevron pattern 4–6 days Significantly more cutting and layout timeMosaic or small-format tile 3–5 days Slower per square foot, more grout linesNatural stone 4–7 days Often needs sealing before and after groutingAfter tiling, grout goes in — and like waterproofing, grout and silicone sealant need cure time before the shower can be used. Cementitious grout typically needs about 24–72 hours before light water exposure and up to a couple of weeks before it reaches full cure and can handle daily heavy use; epoxy grout cures faster but costs more and is less forgiving to install. Silicone sealant along the shower edges usually needs 24 hours minimum before contact with water. This is also a good moment to flag a mistake that's easy to make and expensive to fix: choosing tile after the layout is finalized often means discovering your favorite tile doesn't fit the space without awkward cuts. Locking in tile selection during the planning phase — not during demo week — avoids this entirely.Week 3–4: Fixtures, Fittings, and Cabinetry Installation With tile in and cured, the bathroom starts looking like a bathroom again. This phase covers the vanity, toilet, shower screen or door, mixer taps, showerhead, mirror, and any heated towel rail. DIY vs. professional installation:Task DIY-Realistic? WhyMounting a mirror or towel rail Yes Low risk, no plumbing/electrical connectionInstalling accessories (soap dish, hooks) Yes Cosmetic onlyConnecting a vanity sink to existing supply/drain Sometimes Depends on local code; many areas still require a licensed plumber for final connectionsInstalling a toilet Sometimes Straightforward mechanically, but a poor wax ring seal is a common cause of hidden leaksConnecting a shower mixer valve or digital shower control No Requires correct pressure balancing and, often, licensingWiring a heated towel rail or exhaust fan No Electrical work near a wet areaDelivery timing matters more than people expect here. A vanity or shower screen on backorder can stall this entire phase even if your installer is available and ready to go — which is exactly why locking in fixture selections during the planning stage (not during week 3) is one of the highest-leverage decisions in the whole project.Week 4–5: Finishing, Painting, and Final Details This is the "almost there" stretch — painting, trim, caulking, hardware, and the accumulation of small tasks contractors often call a punch list (US/Canada) or snagging list (UK/Australia). Typical finishing checklist:Paint touch-ups and ceiling finish Trim, baseboard, and door casing reinstalled or replaced Final caulking around vanity, tub, and trim Cabinet hardware installed Light fixtures and mirror finalized Exhaust fan tested for proper extraction Deep clean of grout haze, dust, and construction residue Walkthrough with contractor to flag anything that needs correctionIt's normal — not a sign of a bad contractor — to find two or three small items on a walkthrough. What matters is whether they're addressed before final sign-off, not whether they existed at all.Final Inspection, Sign-Off, and First Use Depending on your country, this final step looks a little different:United States / Canada: A final building inspection is typically required for any project that involved plumbing or electrical permits, confirming the work matches approved plans before it's closed out. United Kingdom: Work involving electrics in a bathroom (a "special location" under UK wiring regulations) typically needs to be certified by a qualified electrician, with Building Regulations sign-off where applicable. Australia: A licensed plumber's compliance certificate is generally required for wet-area work, alongside any council inspection tied to the permit.Once sign-off happens, you can use the space — but pay attention to any cure-time notes your contractor gives you (for example, avoiding heavy daily shower use for the first 24–48 hours if grout or silicone was recently finished).What Actually Causes Bathroom Renovation Delays If your renovation is running behind, it's worth checking whether the cause is a real problem or just... a normal part of the process that nobody explained upfront.Delay Cause Typical Schedule Impact How to Reduce the RiskSpecial-order tile or fixtures 1–4 weeks Confirm stock/lead times before demo starts, not afterFailed or delayed inspection 2–10 days Ask your contractor to schedule inspections proactively, not reactivelyHidden water damage or mold found in demo 3–7 days Budget a 10–20% contingency in both time and costRushed waterproofing cure time Not immediate — shows up as leaks or cracked grout months/years later Ask directly what cure time your contractor is planning forSubcontractor scheduling gaps Variable, often 3–5 days Ask upfront how rough-in, waterproofing, and tiling trades are sequencedLayout changes mid-project 1–3 weeks Finalize layout during planning, before rough-in beginsFull Renovation vs. Cosmetic Refresh vs. Wet-Area-Only: Timeline Differences Not every "bathroom renovation" is the same project, and a lot of timeline confusion comes from comparing apples to oranges.Project Type What's Included Typical TimelineCosmetic refresh New paint, fixtures, vanity swap, no layout or plumbing changes 1–2 weeksWet-area-only renovation Shower/tub area rebuilt with new waterproofing and tile, rest of the room untouched 2–3 weeksFull gut renovation, same layout Everything replaced, plumbing and electrical stay in the same locations 3–5 weeksFull gut renovation, layout changed Toilet, shower, or vanity relocated, requiring new rough-in runs 5–8 weeksIf a quote for a full layout change comes in at "2 weeks," that's worth asking direct questions about — either the scope is smaller than you think, or the timeline is optimistic in a way that will show up as delays later.Living Without a Bathroom: Planning the Disruption If this is your only bathroom, this is the part of the project that affects daily life the most — and it's the part general contractors mention least. Planning checklist:Confirm the exact days water will be shut off (usually during rough-in and fixture connection, not the whole project) Arrange alternate shower access — a gym membership, a nearby family member, or a portable camping shower for a short stretch Keep a portable toilet option in mind if the project runs past the estimated timeline Set expectations with household members early — this is often more disruptive emotionally than physically Ask your contractor for a "worst case" number of days without water access, not just the best caseFrequently Asked Questions How long does a bathroom renovation actually take from start to finish? Most full bathroom renovations take 3 to 6 weeks from demolition to final sign-off, though a cosmetic refresh with no layout changes can be done in 1–2 weeks, and a full renovation with a moved layout can run past 6 weeks. What is the very first thing that happens in a bathroom renovation? After planning and permitting, the first physical step is demolition — removing the old tile, fixtures, and sometimes flooring down to the subfloor. Why does waterproofing take so long to cure before tiling can start? The waterproofing membrane needs to fully bond and harden to reliably block water from reaching the subfloor and framing. Tiling over it too early is one of the leading causes of leaks and grout failure later on. Can I use my shower or toilet at all during the renovation? Not once demolition starts in that room. If it's your only bathroom, plan alternate access — most disruption to water access happens during rough-in and fixture connection. What causes most bathroom renovation delays? Material lead times, inspection scheduling, and hidden issues found during demolition (like water damage) cause more delays than the actual labor does. Do I need a permit and inspection for a bathroom renovation? In most cases, yes, if the project involves plumbing or electrical work — requirements vary by country and local authority, so it's worth confirming with your contractor or local building department before work starts. Which parts of a bathroom renovation can I legally do myself? Demolition, painting, and accessory installation are commonly DIY-friendly. Plumbing, electrical, and waterproofing typically require a licensed trade in most jurisdictions. How much faster is a cosmetic refresh compared to a full renovation? A cosmetic refresh (new paint, fixtures, vanity, no layout changes) usually takes 1–2 weeks, compared to 3–6+ weeks for a full renovation. Bathroom Remodeling Planning & BudgetingHow to Plan a Bathroom Layout on Paper Before You Renovate Bathroom Renovation Mistakes to Avoid: A Homeowner's Real-World Guide Do You Need a Permit to Renovate a Bathroom? (US, UK, Canada & Australia Rules Explained) Full Gut Renovation vs. Partial Remodel: How to Choose the Right Bathroom Renovation Plan Bathroom Renovation Timeline by Phase: What Happens Each Week How Long Does a Bathroom Renovation Take? A Real DIY Timeline, Week by Week Bathroom Renovation Checklist: The Correct Order of Steps From Demo to Finish
.webp)
How Long Does a Bathroom Renovation Take? A Real DIY Timeline, Week by Week
Quick answer: A full bathroom remodel typically takes 3 to 6 weeks when a licensed contractor is running the job full-time with subcontractors lined up. If you're doing the work yourself around a regular job — nights and weekends only — plan on 8 to 14 weeks or more. The gap isn't really about skill. It's about fixed waiting periods that no amount of hustle can shrink: tile cure times, countertop fabrication, and permit inspections all run on their own clock.Contractor-Led DIY (Evenings/Weekends)Typical timeline 3–6 weeks 8–14+ weeksBiggest time driver Subcontractor scheduling Available hours per weekFixed bottleneck Same for both Countertop fabrication, tile cure timeWe gutted our own bathroom down to the studs and subfloor, and it took just under ten weeks from demo day to the last coat of grout sealer, working around two full-time jobs. I'm walking through exactly where that time went, because most articles on this topic give you a number without explaining why it's that number — and that's the part that actually helps you plan.Quick TakeawaysContractor-led full gut remodel: 3–6 weeks, assuming no permit delays or material backorders DIY, part-time evenings and weekends: 8–14+ weeks is normal, not a sign you're doing something wrong The single biggest fixed delay: countertop templating-to-fabrication lead time — often 1 to 3 weeks where your only job is to wait Tile isn't a one-day task: thin-set cure, grout cure, and sealing add unavoidable dead days even if you tile the whole room in an afternoon Custom cabinetry (built instead of bought) can add 2 to 4 weeks on top of a standard remodel timeline The most common source of delay isn't laziness — it's opening a wall and finding a rotted subfloor, old plumbing, or a window that needs replacingAverage Bathroom Remodel Timeline: Contractor vs. DIY Most articles on this topic treat "a bathroom remodel" as one single timeline. It isn't. A contractor and a homeowner doing their own work aren't running the same race — they're not even on the same track. A contractor has crews who show up daily, subcontractors who are pre-scheduled, and materials that get ordered the moment the contract is signed. Their bottleneck is almost entirely coordination — getting the plumber, electrician, and tile setter in the right order without gaps. A DIYer's bottleneck is hours in the day. You might get four hours on a Tuesday night and a full Saturday, then nothing until the following weekend because life happens. That stop-start rhythm is normal, and it's the single biggest reason DIY timelines run two to three times longer than a contractor's — not because the work itself takes longer, but because it's spread across far more calendar days than labor days.Phase Contractor Timeline DIY Timeline (Part-Time)Demo 1–2 days 3–7 daysRough-in (plumbing/electrical) 2–4 days 1–2 weeksInspection 1–3 days (scheduled in advance) 3–7 days (often waiting on availability)Waterproofing & backerboard 2–3 days 1–2 weeksTile + cure time 1–2 weeks 2–3 weeksCountertop template → install 1–2 weeks (concurrent with other work) 1–3 weeks (often on the critical path)Cabinetry install (prefab) 1–2 days 3–5 daysCabinetry (custom-built) 1–2 weeks (subcontracted) 2–4 weeksFixtures, trim, final punch list 2–4 days 1–2 weeksA few of those rows deserve real explanation, because "why does tile take two weeks when I can set it in a day" is one of the most common frustrations homeowners run into mid-project.Full Timeline Breakdown: Why Each Phase Takes as Long as It Does Demo: Fast Labor, Slow Discovery Demo itself moves quickly — pry bar, reciprocating saw, oscillating multi-tool, and a few hours will strip a small bathroom to studs. What actually slows demo down is what you find once the tile and drywall come off. Behind old tub surrounds, it's common to find water staining on the subfloor, outdated galvanized supply lines, or wiring with no GFCI protection at all. None of that is visible until the walls are open, which is exactly why "demo" and "surprises" tend to happen in the same week. If you're renting a dumpster or ordering a haul-away bin, size it generously — old tile, backerboard, and plaster are heavier than people expect, and running out of bin space mid-demo means a delay while you arrange a second pickup. Rough-In: Plumbing and Electrical This is where DIY timelines really start to diverge from contractor timelines. A licensed plumber can rough in supply lines, drain, and vent in a day because they've done it hundreds of times and know the local code cold. A first-time DIYer doing the same work correctly — with proper slope on the drain line, correctly sized vent, and code-compliant shutoff placement — is realistically looking at several evenings, plus research time. This is also the phase where most jurisdictions require a rough-in inspection before you're allowed to close the walls, which introduces the first scheduling dependency of the project. Waterproofing: The Step That's Invisible But Non-Negotiable Cement backerboard, a waterproofing membrane (sheet or liquid-applied), and proper transitions at the tub and niche are what keep water out of your wall cavity for the next twenty years. This step is slow because it has to be done in order — backerboard, seams taped and sealed, membrane applied and cured, then checked before tile goes over it. Skipping ahead here is one of the most common (and expensive) DIY mistakes. Tile: Where "Fast" and "Cured" Are Two Different Things You can physically set tile for an entire shower surround in a weekend. What you can't do is speed up chemistry. Thin-set mortar typically needs 24 to 48 hours before you can grout, and grout itself needs to cure before it's sealed — usually another 48 to 72 hours, longer in humid climates. A porcelain hex mosaic floor and a full tiled shower surround, including a niche, realistically means:1–2 days to set tile 1–2 days thin-set cure before grouting 1 day to grout 2–3 days grout cure before sealing 1 day to sealThat's 6 to 9 days minimum, most of which is waiting, not working. If you're building a shower niche with a mitered or bullnose edge, add time for precise cuts on a wet tile saw — rushing niche corners is one of the most common places DIYers end up redoing work. Countertops: The Bottleneck You Can't Control This is the phase almost nobody warns you about, and it's the one that most often blows up a DIY schedule. Once cabinetry is set, a fabricator comes to template the countertop — meaning they measure the exact installed cabinet, not a drawing. From that template day, engineered quartz or natural stone fabrication typically takes 1 to 3 weeks, depending on the shop's backlog. You cannot rush this by working harder; it's entirely dependent on someone else's production schedule. This is worth building into your timeline from day one, because it often becomes the true critical path of the entire project — everything else can be finished and you're still waiting on a countertop. Custom Cabinetry vs. Prefab: A Real Time Difference A prefab vanity can be installed, leveled, and plumbed in a single day. A custom-built vanity — like a floating walnut cabinet built from raw lumber — involves milling, joinery, finishing, and a fitted install that accounts for out-of-square walls. Realistically, that's 2 to 4 additional weeks compared to a box-store vanity, spread across evenings and weekends. It's also one of the highest-EEAT, highest-satisfaction parts of a DIY remodel, because it's the one component that can't be bought anywhere else.A Real DIY Bathroom Renovation: Our Timeline, Photo by Photo We didn't hire anyone. My husband and I gutted a small, dated hall bathroom — pink laminate vanity, patterned vinyl floor, a shower surround with tile that hadn't been updated since the house was built — and rebuilt it ourselves over about ten weeks. Week 1 — Demo to the studs. Everything came out: tile, drywall, subfloor tile, the old vanity. Once the tub surround was off, we found exactly what a lot of homeowners find behind decades-old tile: staining on the original subfloor boards and a wall cavity that had never been properly insulated. That discovery alone added a few days, because it meant patching subfloor sections before we could move forward instead of tiling straight over what was there. Week 2 — Framing and the window. The original window was original to the house and drafty, so we swapped it while the wall was already open — which is genuinely the right time to do it. Trying to replace a bathroom window after tile is installed means cutting back into finished work, so if a window swap is even a possibility, decide before backerboard goes up. This phase also meant new insulation and a vapor barrier before anything got closed in. Weeks 3–4 — Plumbing rough-in and inspection. We moved the drain slightly to accommodate the new vanity layout, which meant new supply lines and DWV work under the subfloor. This is the phase where we lost the most calendar time to something other than labor: waiting for the local inspector's schedule to open up for the rough-in inspection before we were allowed to close the wall. Weeks 5–6 — Waterproofing and tile. Backerboard, membrane, cure time, then tile — the full shower surround, including a built-in niche with a shelf, plus black hexagon mosaic flooring through the whole room. The niche took longer than expected; getting clean mitered corners on a wet saw is not a first-try skill, and we redid one corner rather than live with a bad cut for the next fifteen years. Weeks 7–8 — Cabinetry and countertop. My husband built the vanity from raw walnut — face frame, drawer boxes, the works — which is where a chunk of the "extra" DIY time actually went. We had the quartz countertop templated the day the cabinet was installed and level, then waited on the fabricator's schedule while we handled trim, painting, and the overhead linen cabinet in the meantime. Weeks 9–10 — Countertop install, fixtures, and finish work. Countertop went in, plumbing got connected, black matte fixtures went on, grout got sealed, and the punch list — caulk lines, hardware, a final deep clean — closed the project out. Looking back, the labor itself probably added up to three or four full weeks of actual hands-on time. The rest was cure times, inspection scheduling, and waiting on the countertop fabricator — which is exactly the split most articles on this topic never explain.What Adds Time to a Bathroom RemodelDelay Factor Typical Added Time Why It HappensRotted or water-damaged subfloor 3–7 days Requires patching or full sheet replacement before flooring can proceedOutdated plumbing (galvanized pipe, no shutoffs) 1–2 weeks Often needs replacing beyond the original scope once walls are openMissing GFCI or outdated wiring 3–5 days Electrical often needs to be brought to current code before drywall closesWindow replacement mid-project 3–5 days Best done during framing; costly to retrofit after tileCustom cabinetry vs. prefab 2–4 weeks Milling, joinery, and finish work can't be rushedCountertop fabrication lead time 1–3 weeks Entirely dependent on fabricator's production schedule, not your labor speedWaiting on inspection scheduling 3–10 days Municipal inspector availability, not project readinessTile order shortfall 1–2 weeks Reordering and waiting on a dye-lot match if you didn't order 10–15% overagePermits & Inspections: How They Affect Your Schedule Most jurisdictions across the US, UK, Canada, and Australia require a permit for any bathroom remodel involving plumbing or electrical changes — moving a drain, adding a circuit, or relocating a fixture. Cosmetic-only work (new tile, paint, a swapped-in prefab vanity with no plumbing moves) often doesn't trigger a permit, but it's genuinely worth confirming with your local building department before demo day, not after. What typically gets inspected:Rough-in plumbing (before walls close) Electrical rough-in, including GFCI protection near water sources Waterproofing, in some jurisdictions, before tile goes over it Final inspection once fixtures are connectedThe scheduling reality: inspectors work on their own calendar, not yours. Booking your rough-in inspection the moment your work is ready — rather than assuming next-day availability — is one of the simplest ways to avoid dead time on a DIY timeline. Skipping permits to save time is a real risk, not just a technicality: it can complicate insurance claims later and create real problems if you ever sell the house and it comes up in a home inspection.DIY vs. Hiring a Contractor: Which Is Actually FasterChoose DIY If Choose a Contractor IfTime available You have consistent evenings/weekends for 2–3+ months You need the bathroom back in weeks, not monthsSkill level You're comfortable learning plumbing/electrical code, or willing to sub those out You have zero experience with rough-in tradesBudget flexibility You'd rather spend time than money Your time is worth more than the labor savingsRisk tolerance You're okay troubleshooting mid-project You want one point of contact and a fixed scheduleA hybrid approach is worth considering and is genuinely common: DIY the demo, tile, and finish work yourself, but hire a licensed plumber and electrician for rough-in. It shortens the highest-risk, most code-sensitive phases while keeping the labor-intensive (and satisfying) parts in your own hands.Cost vs. Time TradeoffsSpeed-Up Option Typical Added Cost Time SavedRush countertop fabrication $100–$400+ 3–7 daysExpedited permit review (where offered) $50–$300 3–10 daysHiring a plumber/electrician for rough-in only $800–$2,500 1–2 weeksTemporary bathroom solution (gym membership, portable shower rental) $30–$150/month N/A — quality-of-life cost, not a timeline shortcutNone of these are necessary. They're worth knowing about specifically because most competing content pretends speed is free — it isn't, and it's better to decide upfront whether a faster timeline is worth paying for than to discover the option mid-project when you're already frustrated.How to Shorten Your Timeline Without Cutting CornersOrder tile with 10–15% overage before demo starts — reordering mid-project to match a dye lot can cost a week or more Book your countertop template appointment the moment cabinetry is set, not after — this is usually the longest lead time in the whole project Call your local building department before demo, not during, to confirm what needs a permit and how inspection scheduling works Decide on window, layout, or plumbing relocation changes before rough-in, since changes after walls close cost far more time than they would have upfront Batch your "waiting" phases with other tasks — use countertop fabrication lead time to paint, install trim, or build a linen cabinet instead of sitting idle Rent or buy the right tools upfront (wet tile saw, notched trowel, level) instead of discovering mid-project that you need to source oneMistakes That Add Weeks to a RemodelCommon mistake: Tiling before the waterproofing membrane has fully cured. Rushing this step doesn't save time — it risks redoing the entire tile job if moisture gets trapped behind it.Skipping the 10–15% tile overage and getting caught mid-project when a dye lot is discontinued Not confirming permit requirements before demo, then having to pause and retroactively pull one Closing walls before a rough-in inspection is scheduled, forcing you to reopen them Underestimating custom cabinetry time and starting the build too late to hit the countertop template date Ignoring a soft or discolored subfloor instead of investigating it — this almost always resurfaces later, at a worse timeLiving Without a Bathroom During the Remodel If this is your only full bathroom, plan for it honestly rather than hoping the timeline stays tight. A few things that actually helped:A temporary shower solution — a gym membership, a friend or family member nearby, or a portable camping shower for the toilet-and-sink-only stretch Keeping the toilet functional as long as possible, even mid-demo, by protecting it with plastic sheeting rather than removing it on day one Setting expectations with anyone else in the house early — the "ugly middle" phase, after demo but before visible progress, is when motivation dips hardestFAQ How many weeks does a full gut bathroom remodel take on average? A contractor-led full gut remodel typically takes 3 to 6 weeks. A DIY renovation done evenings and weekends usually takes 8 to 14 weeks, mostly due to cure times, fabrication lead times, and limited available hours rather than the actual labor involved. Is the timeline different for a DIY renovation versus hiring a contractor? Yes, significantly. Contractors run concurrent trades on a fixed daily schedule, while DIYers work in shorter, spread-out sessions. The work itself may take a similar number of labor hours, but it's spread across far more calendar weeks for a part-time DIY schedule. Does replacing a window during a bathroom renovation add extra time? Yes, typically 3 to 5 days if done during the framing stage, when the wall is already open. Replacing a window after tile is installed takes considerably longer, since it means cutting into finished work. How long should thin-set mortar cure before you can grout bathroom tile? Most thin-set mortars need 24 to 48 hours before grouting, though this varies by product and humidity. Grouting too early can trap moisture and weaken the bond, so it's worth checking your specific product's instructions rather than assuming a standard time. How long does it take to tile, grout, and seal a shower niche? A tiled niche with mitered or bullnose corners typically adds a full extra day or two to a tile job, mostly due to precision cutting. Including cure and seal time, the niche portion alone can add 3 to 5 days to a tiling timeline. Why do quartz or stone countertops take weeks to arrive after templating? Fabrication shops template your exact installed cabinetry, then cut and finish the stone to that measurement. Depending on the shop's production backlog, this typically takes 1 to 3 weeks and is entirely dependent on their schedule, not your labor speed. How much longer does a custom-built vanity take compared to installing a prefab one? A prefab vanity can usually be installed in a single day. A custom-built vanity — milled, joined, finished, and fitted — realistically adds 2 to 4 weeks when built around a part-time schedule. Bathroom Remodeling Planning & BudgetingHow to Plan a Bathroom Layout on Paper Before You Renovate Bathroom Renovation Mistakes to Avoid: A Homeowner's Real-World Guide Do You Need a Permit to Renovate a Bathroom? (US, UK, Canada & Australia Rules Explained) Full Gut Renovation vs. Partial Remodel: How to Choose the Right Bathroom Renovation Plan Bathroom Renovation Timeline by Phase: What Happens Each Week How Long Does a Bathroom Renovation Take? A Real DIY Timeline, Week by Week Bathroom Renovation Checklist: The Correct Order of Steps From Demo to Finish
 (1).webp)
Bathroom Before and After: What to Do When You Regret the Grout Color (Not the Whole Remodel)
Quick Answer Grout color can almost always be adjusted after a bathroom remodel is finished, usually with a penetrating epoxy grout colorant applied directly over the existing lines — no tile removal required. Uneven gaps between tiles are a different problem entirely. That's a spacing and installation issue, not a color issue, and a colorant won't fix it. If the tile joints themselves are inconsistent, the honest fix usually involves resetting the affected tiles, which is a bigger job than most homeowners expect. Quick takeaways:A grout color you regret is one of the more fixable mistakes in a finished bathroom Wide or uneven gaps between tiles point to a spacing problem during installation, not something a stain can hide Grout looks different once it's fully cured and sealed than it does on a wet sample chip A vanity swap is typically the least disruptive correction available, since it doesn't touch tile or waterproofing Feeling unsure about parts of a finished remodel, even one you mostly like, is common — it doesn't mean the whole project failedIs Your Reaction Normal? A remodel rarely lands as one clean verdict. Homeowners tend to expect a single "love it" or "hate it" moment once the crew packs up, but most transformations are more mixed than that. One element clicks immediately — new tile, better layout, more light — while another sits wrong, and it's usually something small: a grout line, a hardware finish, a vanity that looked right in a showroom photo but feels out of place against the actual wall color. That mixed reaction isn't a sign of poor decision-making. It's closer to a normal part of living with a big purchase before the eye adjusts to it. What matters more is figuring out, calmly, which parts of the reaction point to an actual installation problem and which parts are simply taste settling in over the following weeks.A Real-World Transformation: From Dated Pink to Deep Green A useful way to see how these regrets play out is to look at a full gut renovation, start to finish. Starting Point. The bathroom began as a fairly typical mid-century layout: pale pink four-inch tile running halfway up the walls, a matching pink tile countertop on a boxy white vanity, stained-glass windows, and a dated glass-paneled shower stall crowded into the corner. The tub sat along one wall with a small step-up lip, and the floor was a plain grey ceramic tile that had clearly seen decades of use. Nothing was broken exactly — it was simply worn and stylistically stuck in another era. Motivating Trigger. For most homeowners in this position, the trigger isn't damage — it's the sense that a functional room has become a liability for resale value, combined with wanting a bathroom that actually feels current. Vintage pink tile has a devoted fan base among some renovation purists, but plenty of buyers see it as a room they'd need to redo immediately. Renovation Decisions. In this case, the plan called for a full tear-out: replacing the pink four-inch tile with a deep, glossy green field tile carried up the walls and into a curbless-style shower and tub surround, swapping the porcelain floor for a large-format stone-look porcelain slab, and installing a mid-century-inspired dark wood vanity with a white stone top to contrast against the green. The layout stayed largely the same — tub and shower combo in the same footprint, toilet and vanity roughly where they were — which kept plumbing changes to a minimum. Execution Reality. This is where full gut remodels tend to surprise people. Tile-heavy bathrooms with a tub/shower combo commonly run several weeks longer than a simple refresh once demolition reveals the state of the substrate behind old tile. Waterproofing membrane work, cement board replacement, and re-routing for a new shower valve are common hidden costs that don't show up in an initial estimate. In this project, the shower converted from a framed glass stall to a more open, glass-panel design, which required reworking the curb and drainage slope — a detail that's easy to underestimate from a mood board. Result. The finished room reads dramatically different from where it started: dark, saturated green tile against white walls, a furniture-style vanity, and a large-format stone floor that reads more like a spa than a 1960s tract-home bathroom. It's the kind of transformation that photographs well and clearly solves the "outdated" problem. Key Takeaway. Even in a remodel this successful, the two most common sources of regret are the ones that show up here too — grout color reading differently once the tile is grouted and sealed, and questions about how consistent the tile joints are, especially on darker, glossier tile where every line is easy to see. The vanity, meanwhile, is usually the easiest of the bunch to revisit if it doesn't feel right, since it's not structurally tied to the shower or plumbing rough-in.Why Grout Color Looks Different Than You Expected This is the single most common complaint tied to finished tile work, and it has a straightforward explanation. Grout samples are almost always shown as small, dry chips or thin painted swatches. Once grout is mixed, packed into joints, and sealed, several things change:Cured color shift. Cementitious grout often dries several shades lighter or more muted than the wet mix looked during installation. Sealer darkening. Penetrating sealers — especially on darker grout — can deepen the tone slightly, which sometimes surprises homeowners who picked a lighter shade expecting it to stay light. Contrast effect. A grout color that looked neutral next to a small tile sample can look far more prominent once it's framing dozens of tiles across an entire wall. Grout lines add up visually in a way a single sample never demonstrates. Lighting shift. Bathroom lighting — especially warm vanity bulbs versus daylight from a window — changes how both tile and grout read throughout the day.The reassuring part: this is one of the more correctable mistakes in a finished bathroom. Grout Colorant vs. Re-Grout vs. Tile ResetFix What It Actually Solves Tile Removal Needed Typical Disruption Best ForEpoxy grout colorant/stain Changes grout color only No Low — a few hours per section, some dry time Grout color you dislike, but joints are even and grout is soundFull re-grout Replaces grout entirely; can change color and repair damaged/cracked grout No (grout removed, tile stays) Moderate — grout removal, repacking, cure time Cracked, crumbling, or badly stained grout, or a bigger color change than a colorant allowsTile reset Corrects uneven spacing, tile lippage, or poor tile placement Yes, on affected tiles High — may involve waterproofing repair Genuinely inconsistent gaps or tiles that were never set correctlyThe mistake homeowners often make is reaching for the most invasive fix (tile reset) when the real complaint is only about color — or the opposite, applying a colorant over what is actually a structural spacing problem that a color change can never resolve.Uneven Grout Lines and Tile Gaps: Workmanship Issue or Design Choice? This is a separate question from color, and it deserves a more careful look before assuming anything is wrong. Some gap variation is normal — especially on certain tile types. Handmade and zellige-style glazed tile, including many deep, saturated glaze finishes, is intentionally made with slight size and edge variation. A tile setter working with this kind of material has to plan for that variance, and small differences in joint width are part of the material's character rather than a mistake. But there's a difference between intentional character and inconsistent installation. A pattern worth flagging to a contractor looks more like this:Gaps that widen or narrow noticeably across a single wall, rather than a subtle, evenly distributed variation Grout lines that visibly wander instead of running straight Tiles sitting proud of their neighbors (lippage) that catch on a hand or a towel Corners or transitions where tile edges don't align at allQuick Self-Check Before Calling It a DefectStep back and view the wall from several feet away — some unevenness disappears at normal viewing distance Check whether the tile itself is a handmade or artisanal style with natural size variation Run a hand flat across the tile surface to feel for lippage, not just look for gap width Compare gap width in multiple spots — small, even variation is different from one section clearly wider than the rest Photograph problem areas in daylight, not just under bathroom vanity lightingIf the issue holds up after this check, it's reasonable to raise it as a workmanship concern rather than a matter of taste.DIY Grout Colorant: What It Can and Can't Fix For homeowners whose complaint is purely about color, an epoxy grout colorant is often a realistic weekend project — with real limitations worth understanding first. What it does well:Recolors cured, structurally sound grout without removing tile Adds a protective, water-resistant layer over the grout line Comes in a wide range of shades, including options to go lighter or darker than the originalWhere it runs into trouble:It needs a genuinely clean, degreased surface — soap scum or sealant residue left behind causes uneven absorption and patchy results Application in an active, high-humidity shower area needs adequate cure time before the space is used again, which is easy to underestimate It won't hide physical gap inconsistencies — a colorant follows the existing joint shape exactly Over-application can leave a filmy residue on the tile face itself, which then needs to be buffed off before it hardensCaution: Applying grout colorant in a shower that's still in daily use, without allowing full manufacturer-recommended cure time, is one of the more common reasons homeowners end up redoing the job a second time. Ventilation matters here too — these products carry noticeable fumes in an enclosed bathroom.Cost Comparison: Grout Colorant vs. Re-Grout vs. Tile Reset Figures below are general US-based estimates for a standard tub/shower combo surround, and can vary meaningfully in the UK, Canada, and Australia based on labor rates, product availability, and regional contractor pricing.Fix Typical Cost Range (US) Primary Cost DriverEpoxy grout colorant (DIY) $30–$80 in materials Product cost only, if done yourselfEpoxy grout colorant (professional) $150–$400 Labor for prep and applicationFull re-grout (professional) $400–$1,200 Grout removal labor, square footage, grout typePartial tile reset $500–$2,000+ Tile removal, potential waterproofing repair, tile replacement/matchingTile reset costs climb quickly if the original tile is discontinued and needs to be sourced or substituted, or if waterproofing membrane has to be repaired behind the removed tiles — both common surprises once a contractor opens up a small section of wall.When to Involve Your Contractor Before Final Sign-Off Timing matters more than most homeowners realize. Concerns raised before final payment are typically far easier and less expensive to resolve than the same concerns raised weeks later. Before signing off or making final payment:Walk every wall in daylight, not just under bathroom lighting Run a hand across tile surfaces to check for lippage Compare grout color in multiple spots against the sample originally approved Confirm grout joint width matches what was discussed or contracted, if that was specified Note any punch-list items in writing before the final invoice is paid Ask directly whether a workmanship warranty covers grout or tile issues discovered shortly after completionA written punch list, even a short one, is the strongest leverage a homeowner has. Once final payment clears and the crew has moved to the next job, a "please come fix this" request becomes a favor rather than a contractual obligation.Vanity Regret: Why It's the Easiest Fix in the Room Of all the common post-remodel regrets, a vanity that doesn't feel right is usually the least stressful to correct. Unlike grout or tile, a vanity is a standalone component. Swapping it typically involves:Disconnecting and reconnecting supply lines and drain — routine plumbing work, not a structural change No impact on waterproofing or tile work, assuming the new vanity fits the existing footprint or plumbing rough-in The option to keep the same countertop and simply change the cabinet base, or vice versa, depending on what specifically feels offThe bigger cost driver is footprint and plumbing location. A like-for-like swap — same width, same plumbing position — is a modest job. Moving a sink several feet, or changing from a single to a double vanity, brings plumbing relocation into the picture and raises both cost and complexity.How to Avoid This Next Time: Choosing Grout and Tile Layout Before Installation The single biggest information gap in most bathroom planning is treating grout choice as an afterthought to tile choice. A few habits close that gap:Request a full-size mockup panel — several tiles grouted together — rather than judging from a paint chip–style grout sample View the mockup in the actual bathroom, under the actual lighting, at different times of day Ask the tile setter directly what grout joint width they plan to use, and put it in writing For handmade or artisanal tile, ask specifically how the installer plans to handle natural size variation Choose grout one shade lighter or darker than what feels perfect on the sample, accounting for the color shift that happens after curing and sealing Confirm in writing whether epoxy or cementitious grout will be used, since the two behave differently over time and stain resistance differs significantlyNone of this eliminates the possibility of regret entirely — taste evolves, and no sample fully replicates a finished room. But it meaningfully narrows the gap between what's approved on paper and what actually gets lived with.Frequently Asked Questions Can you change grout color after it's already installed and cured? Yes. An epoxy grout colorant applied over fully cured, structurally sound grout is the standard method, and it doesn't require removing any tile. Does grout colorant work in a shower, or only in dry areas? Most epoxy colorants are formulated for wet-use areas, but they need full cure time before the shower is used again — rushing this step is a common cause of early failure. Why do grout lines look uneven even though the tile itself is level? Uneven grout lines usually trace back to spacer use and layout planning during installation, not to the tile itself being out of level. Some handmade tile styles also have natural size variation that affects joint consistency. Is uneven tile spacing a workmanship defect or normal for handmade tile? It can be either. Subtle, evenly distributed variation is expected with handmade tile. Gaps that clearly widen in one section or wander out of line are more consistent with an installation issue. How long does grout colorant last in a high-moisture shower? Manufacturer guidance varies, but most epoxy colorants are marketed as long-lasting when applied to properly prepped, fully cured grout — though heavy daily shower use will test that durability over years, not months. What's the cost difference between grout colorant, re-grouting, and resetting tile? Colorant is the least expensive option by a wide margin, a full re-grout sits in the middle, and resetting tile is the most expensive because it can involve waterproofing repair and tile sourcing. Can a contractor be asked to fix grout color or spacing before final payment? Yes, and this is the ideal time to raise it. A written punch list before final sign-off carries far more leverage than a request made after the invoice is settled.
 (2).webp)
How to Remodel a Small Bathroom on a Budget (Real Costs, Timeline, and a Before-and-After Case Study)
Quick answer: A small bathroom remodel on a budget usually means keeping the existing footprint where possible, doing demolition and cleanup yourself if you're able, choosing a durable but reasonably priced subfloor and tile combination, and reserving licensed trades for plumbing, waterproofing, and electrical work. Costs for a small bathroom typically fall in the low-to-mid thousands for a cosmetic refresh, rising quickly once plumbing is relocated or a full gut renovation is involved. Quick takeaways:Waterproofing and tiling are usually the largest combined line item in a small bathroom, not the fixtures themselves Moving a drain or shower head adds real cost, but it can unlock a layout — like a wall-hung toilet or floating vanity — that a fixed layout can't DIY demolition and rubbish removal are realistic, low-risk ways to save money A mismatch between a toilet pan and an in-wall cistern is one of the most common — and most avoidable — reordering mistakes Small footprint does not mean small timeline; sequencing between trades still takes weeksWhat a Small Bathroom Remodel Actually Costs in 2026 Homeowners searching for a "budget" bathroom remodel often expect a number that turns out to be optimistic once quotes come in. Part of the reason is that a lot of the cost in a small bathroom is fixed — waterproofing, plumbing rough-in, and demolition cost close to the same whether the room is 3 square meters or 8. A bigger room spreads that fixed cost over more floor area; a smaller one doesn't. The table below reflects typical 2026 ranges for a small bathroom (roughly 3–5 square meters, or about 30–50 square feet) that keeps most of the existing layout. These are general averages, not quotes — costs shift by region, contractor demand, and material choice, so treat them as a planning baseline rather than a fixed budget.Country Typical Small Bathroom Remodel Range National/Regional Average NotesUnited States $2,000 – $18,000 ~$6,500 Cosmetic refresh at the low end; full remodel with new plumbing pushes toward the topUnited Kingdom £2,200 – £9,000 ~£4,500–£7,500 London and the South East typically run 15–30% above the national figureCanada CA$5,000 – CA$18,000 ~CA$13,000–CA$14,500 Toronto and Vancouver commonly run 25–35% above national averageAustralia AU$8,000 – AU$18,000+ ~AU$26,000 (mid-range, broader market) Small footprint can raise the cost per square meter even though the total is lowerA few patterns hold across all four markets:Labor is the dominant cost, typically 40–60% of the total, because a bathroom is one of the most hand-installed rooms in a home Relocating plumbing — moving a drain, shower head, or toilet — commonly adds a few hundred to several thousand dollars/pounds, depending on how far pipework has to travel and whether it's a slab floor or a suspended timber floor Waterproofing (sometimes called "tanking") is non-negotiable in a wet area and is one of the few line items where cutting corners creates expensive, hidden damage laterBefore and After: A Real-World Small Bathroom Transformation Case examples are useful because they show where a budget actually goes, not just where a guide suggests it should go. The pattern below reflects a common, well-executed small bathroom transformation — the kind homeowners regularly report when they plan carefully and sequence trades well. Starting point. The bathroom was a compact, dated wet area — roughly 2.4 by 1.5 meters, with a 2.7-meter ceiling. A framed glass shower enclosure with a subway-tiled surround sat opposite a floor-mounted toilet and a pedestal-style vanity. The finishes were functional but visibly tired, and the layout hadn't been touched in decades. Motivating trigger. The push to renovate wasn't cosmetic alone — the existing layout wasted space around the vanity, and the owners wanted a wall-hung toilet and a floating vanity, both of which meant relocating plumbing rather than simply refinishing what was there. Renovation decisions. The room was stripped back to the framing. The floor drain was relocated from its original position to a wall-mounted connection to support the floating vanity, and the shower head was moved to the opposite wall to improve the shower's usable footprint. Rather than tearing out the existing subfloor entirely, the team overlaid it with a 6mm fiber cement sheet — a lower-cost alternative to replacing the subfloor with a dedicated wet-area flooring product. Tile was sourced through a secondhand marketplace rather than bought new. Execution reality. The project ran close to eight weeks from strip-out to completion — long for a room that size, but typical once you account for trade sequencing (see the timeline section below). Demolition and rubbish removal were handled by the homeowners themselves, which meaningfully reduced the total spend. When the trade costs are looked at as a share of the total budget rather than a specific currency figure, the breakdown looked roughly like this:Cost Category Approximate Share of Total BudgetMaterials (tile, fixtures, hardware) ~31%Tiling and waterproofing labor ~27%Plumbing labor ~21%Shower screen ~9%Electrical ~7%Carpentry ~4%Plastering Billed separately — final cost wasn't confirmed until after other trades finishedDemolition and rubbish removal $0 (self-performed)Result. The finished bathroom featured a frameless sliding shower screen, vertically stacked tile in a soft sage tone, a wall-hung toilet paired with a concealed in-wall cistern, and a floating timber vanity with a stone-look benchtop and above-counter basin — a layout only possible because the plumbing had been moved. Key takeaway for readers planning something similar: the project wasn't free of friction. One notable snag was ordering a toilet pan that turned out to be roughly a centimeter too tall to properly seat against the in-wall cistern it was meant to pair with — a mismatch that isn't obvious from a product listing and forced a reorder mid-project. That single detail is common enough, and avoidable enough, that it gets its own section below.Planning Your Layout: When Moving Plumbing Is Worth the Cost Keeping the existing drain, toilet, and shower positions is almost always the cheaper path. But there are a few scenarios where paying to relocate plumbing pays for itself in usability:You want a floating (wall-hung) vanity. These typically need the drain moved from the floor to the wall, which means opening the wall cavity and rerouting waste and supply lines. The current layout blocks the door or wastes corner space. In very small bathrooms, a few centimeters of relocated plumbing can be the difference between a cramped vanity and one that actually fits. You're installing a wall-hung toilet with a concealed cistern. This almost always requires new framing to house the cistern unit, plus careful coordination between the plumber and carpenter before any plasterboard goes up.Decision framework:If your goal is… Consider moving plumbing when… Keep the existing layout when…Lower total cost The current layout already works reasonably well Budget is the primary constraintA floating vanity or wall-hung toilet You're comfortable with a longer timeline and higher plumbing cost You'd rather have a floor-mounted toilet and standard vanity at lower costBetter use of a cramped footprint The layout is the main source of frustration, not just the finishes The finishes are dated but the layout itself is functionalA note on permits: in most jurisdictions across the US, UK, Canada, and Australia, relocating a drain, shower, or toilet waste line requires either a permit, a notification to the local building authority, or sign-off from a licensed plumber — sometimes all three. Requirements vary by state, province, and council, so it's worth confirming locally before demolition starts, not after.Trade-by-Trade: What Each Contractor Actually Does A common source of frustration in small bathroom projects is not knowing why trades have to happen in a specific order — or why a delay in one trade pushes back everyone after it. Typical sequence:Demolition — strip-out of old fixtures, tile, and sometimes subfloor. Often DIY-friendly if there's no asbestos risk (common in homes built before the 1990s — have this checked first in older properties). Plumbing rough-in — drain relocation, supply line changes, and installation of any in-wall cistern frame. This has to happen before the walls are closed up. Electrical rough-in — wiring for lighting, exhaust fans, and any heated mirror or underfloor heating, also completed before plasterboard goes up. Carpentry/framing — building out stud walls for concealed cisterns, niches, or new partitions. Plastering/wall lining — closing up the walls once plumbing and electrical are confirmed complete. Waterproofing ("tanking") — a membrane applied to the shower and often the whole floor, critical to preventing water damage in the structure behind the tile. Tiling — usually the same trade as waterproofing, or closely coordinated with them. Fixture installation and finishing — toilet, vanity, shower screen, tapware, mirror, and final electrical connections.Skipping steps out of order — for example, ordering a shower screen before final tiling dimensions are confirmed — is one of the more common causes of delay and reorder cost.Subfloor and Tile Choices That Make or Break Your Budget Subfloor: cement sheet vs. a dedicated wet-area flooring productOption Moisture Resistance Relative Cost Installation ComplexityFiber cement sheet overlay on existing subfloor Good, when paired with proper waterproofing membrane Lower Lower — can often go over sound existing flooringFull subfloor replacement with a branded wet-area flooring system Very good, purpose-built for wet areas Higher Higher — requires removing existing flooring entirelyStandard plywood or particleboard (not moisture-rated) Poor in a wet area Lowest Not recommended for shower zonesOverlaying a sound existing subfloor with a fiber cement sheet is a legitimate budget strategy, provided the original subfloor is structurally sound and free of rot — something worth confirming with a moisture meter before covering it up. Skipping that check to save time is a common regret reported after the fact, once tiles are already down. Buying tile secondhand or through a marketplace: a checklist Sourcing tile secondhand can meaningfully cut material costs, but it carries risks a full-price purchase doesn't:Confirm the total quantity available covers your square footage plus at least 10% overage for cuts and breakage Ask whether all pieces are from the same production batch — dye-lot variation between batches can be visible once installed Inspect for chips, warping, or hairline cracks before purchase, not after installation Confirm the tile is rated for wet-area/floor use if it's going in a shower or on the floor, not just wall-rated Understand there's typically no manufacturer warranty on secondhand stockDIY vs. Professional: Where You Can Safely Cut CostsTask DIY-Friendly? WhyDemolition (non-structural, no asbestos) Yes Physically demanding but low technical riskRubbish removal Yes Time cost rather than skill costPainting, caulking touch-ups Yes Low risk, easily redone if imperfectTile selection and sourcing Yes Research-heavy, not trade-specificPlumbing (drain relocation, supply lines) No Code compliance, leak risk, insurance implicationsElectrical (wiring, fan/light circuits) No Safety risk, usually requires licensed sign-offWaterproofing/tanking No Errors are invisible until they cause structural water damageTiling Sometimes Skill-dependent; a poor tiling job is highly visible and hard to fix invisiblyA general rule that holds across all four markets: if a mistake would be hidden behind a finished wall or under tile, it belongs to a licensed trade. If a mistake would just mean redoing a visible surface, it's a reasonable DIY candidate for a confident homeowner.Common Small Bathroom Remodel Mistakes to AvoidWarning: fixture compatibility isn't guaranteed by category. A pattern that shows up repeatedly when a floor-mounted toilet is replaced with a wall-hung unit and a concealed (in-wall) cistern: the toilet pan and the cistern are often sold as separate products that look interchangeable but aren't. Pan height, outlet position, and the cistern's specific rough-in dimensions all have to line up. When they don't — as happens more often than product listings suggest — the pan has to be returned and reordered, which stalls the plumber's schedule and adds both cost and time to the project.Other frequent mistakes:Ordering fixtures before final measurements are locked in. Confirm tile thickness and wall build-up before ordering anything that has to fit a specific gap. Skipping a moisture check before covering an old subfloor. A subfloor that looks fine can still be compromised underneath. Underestimating demolition and rubbish removal time, especially in homes without easy waste access — this alone has stretched some projects by weeks. Assuming a small footprint means a short timeline. Trade sequencing takes the same number of steps regardless of room size. Leaving plastering costs unconfirmed until late in the project. Get an itemized quote for every trade before work starts, not just the trades you assume will be expensive.Realistic Timeline for a Small Bathroom Renovation A small bathroom with a layout change (drain relocation, wall-hung toilet, or similar) commonly takes 6–8 weeks from strip-out to completion — longer than most homeowners expect for the square footage involved. A cosmetic refresh that keeps the existing layout can often be completed in 1–3 weeks. The reason a small room doesn't move faster: waterproofing needs to cure before tiling starts, tiling needs to set before grouting, and grout needs to cure before fixtures go back in. None of that compresses just because the room is small.Maintaining Your New Bathroom After the Renovation A finished remodel is not the end of the story — waterproofing and finishes degrade faster without basic upkeep.Task Frequency Why It MattersCheck silicone joints around the shower base and tub for cracking Every 6 months Cracked silicone is often the first sign of a failing waterproofing sealRun the exhaust fan during and after showers Every use Reduces humidity that drives mold growth and can shorten paint and grout lifeRe-seal grout lines (if using porous tile/grout) Every 1–2 years Prevents moisture penetration behind tileClean and inspect the shower drain Every 3 months Slow drainage can indicate a developing blockage or a fall (slope) issueCheck for soft spots in flooring near the shower Annually Early sign of a subfloor moisture problem, often before visible damage appearsA few smaller upgrades pay off long-term without adding much to the budget: a humidity-sensing exhaust fan that runs itself down after a shower, water-efficient tapware and dual-flush toilets (look for WaterSense or WELS ratings depending on your country), and an LED mirror with a built-in demister, which reduces the moisture load on painted walls from wiping condensation by hand.Frequently Asked Questions How much does it cost to remodel a small bathroom on a budget? Costs vary by country and scope, but a cosmetic refresh that keeps the existing layout typically lands at the lower end of national ranges, while relocating plumbing or fully gutting the room pushes costs toward the middle or top of the range shown in the cost table above. Is it cheaper to keep the existing bathroom layout instead of moving plumbing? Yes, in almost every case. Moving a drain, toilet, or shower head adds labor and sometimes structural work that a like-for-like layout avoids entirely. Why would a toilet pan not fit an in-wall cistern? Toilet pans and concealed cisterns are frequently sold as separate products. Pan height and outlet position must match the specific cistern's rough-in dimensions — compatibility isn't guaranteed just because both are marketed for wall-hung installations. Can I install a floating vanity without moving the drain? Sometimes, if the existing drain position happens to align with where you want the vanity. In most cases, though, a floating vanity requires relocating the drain from the floor to the wall. Do I need a permit to relocate a shower head or floor drain? Likely yes, though requirements vary by country, state or province, and local council. Confirm with your local building authority before demolition begins. Is cement sheet a good subfloor for a small bathroom, or should I use a dedicated flooring product? Fiber cement sheet over a sound existing subfloor is a reasonable budget option when combined with proper waterproofing. A full subfloor replacement with a purpose-built wet-area product costs more but may be necessary if the existing subfloor shows moisture damage. Is it safe to buy tile secondhand from a marketplace? It can work well if you confirm quantity, batch consistency, and condition before purchase — see the checklist above. How long should a small bathroom renovation realistically take? A layout change typically takes 6–8 weeks; a cosmetic refresh with no plumbing changes can often be done in 1–3 weeks.
.webp)
Master Bathroom Before and After Renovation Color Ideas
Most master bathroom transformations that look dramatic in photos are actually built from a small number of repeatable decisions: a new base palette, one confident accent color, updated hardware finishes, and better lighting. The wall color rarely does the heavy lifting on its own — it's the combination that changes everything. Quick Answer Popular master bathroom before-and-after color changes replace dated tan or beige tones and honey-oak cabinetry with a white or light-gray base, then add one saturated accent color — commonly deep teal, navy, or forest green tile — finished with brass or matte black hardware and updated lighting. Quick takeaways:A white or light-gray base palette photographs as "updated" and tends to appeal to a broader range of buyers if resale is a consideration One bold accent color, usually applied through tile rather than paint, reads as intentional instead of overwhelming Cabinet tone (honey oak, cherry, or dark walnut) ages a bathroom faster than any wall color choice Grout color changes how dark or light a tile looks by roughly one to two shades Mixed metal finishes work when one metal clearly dominates and the second is used sparingly Lighting color temperature changes how saturated colors like teal or navy read from morning to eveningWhat "Before and After" Color Changes Actually Involve Before comparing palettes, it helps to know what's actually being changed in most of these transformations, because the term "color idea" gets used loosely. Some before-and-after changes are cosmetic only: a fresh coat of paint, swapped hardware, a new mirror, updated light fixtures. These are inexpensive and often reversible. Other changes are renovation-level: new tile on a shower surround or accent wall, a new countertop, a relocated or upgraded sink, new flooring. These involve demolition, waterproofing, and usually a permit depending on scope and location. A homeowner comparing two "before and after" photos side by side often can't tell which category they're looking at. That distinction matters more than the color itself, because it determines the budget, the timeline, and whether a professional needs to be involved at all. Most Common Before Palettes (What's Being Replaced) Certain combinations show up again and again in dated master bathrooms, largely because they were standard builder-grade choices for decades:Tan, beige, or peach-toned walls paired with a similarly warm ceramic tile backsplash Honey-oak or golden-toned cabinetry with arched raised-panel doors Polished brass hardware and fixtures, often mismatched with chrome plumbing A single large builder-grade mirror spanning the full width of the vanity, usually frameless A multi-bulb vanity light bar with warm alabaster glass shades, mounted directly above that mirror Small-format beige or almond tile, typically limited to the countertop backsplash rather than a full wallNone of these choices were poorly made at the time. They were simply the standard palette for a specific era of home construction, and warm tones like these tend to look dated faster than neutral ones because design trends have moved firmly toward cooler, higher-contrast palettes over the past decade. Popular After Palettes and Why They Work There isn't one "correct" after palette. Most successful renovations pick one of a few reliable directions and commit to it fully rather than mixing several. White or Light-Gray Base With One Bold Accent This is the most common direction in current renovations. The vanity, walls, and countertop stay in a tight neutral range — white, off-white, or light gray — while a single high-contrast element carries all the personality. That element is almost always tile: a deep teal, navy, or forest-green glazed tile on the shower surround or a textured tile on a feature wall behind the vanity. The reasoning is straightforward. A neutral base doesn't compete with the accent, so the accent reads as a deliberate design choice rather than one of several competing colors. It also means the accent can be swapped later (new shower curtain, new towels, even a re-tiled surround down the line) without redoing the entire room. Monochromatic Warm Minimalism Some renovations skip the bold accent entirely and instead layer several close shades of the same warm neutral — think white walls, a slightly warmer white vanity, and a beige-toned stone-look floor tile. This direction tends to suit smaller bathrooms where a strong accent color could feel overwhelming in a tight footprint, and it photographs as calm rather than dramatic. Mixed-Metal Neutral Palette Instead of leaning on wall or tile color, this approach uses a neutral backdrop and lets hardware finishes do the contrast work — brass cabinet pulls against chrome plumbing fixtures, for example. This only works well when one finish clearly dominates (say, 70% brass, 30% chrome) rather than an even split, which tends to look unplanned. Dark, Moody Palettes Less common in master bathrooms than in powder rooms, but still seen: charcoal or deep green walls paired with brass or black fixtures. This direction photographs dramatically but has real practical trade-offs worth knowing before committing — dark paint shows water spots and soap residue more visibly, and a windowless bathroom can feel noticeably smaller with this palette unless lighting is planned carefully.Transformation Spotlight: A Common Renovation Path A frequently seen master bathroom transformation follows a fairly consistent pattern, and walking through one example end to end shows how the palette decisions above actually play out in a real space. Starting point. The bathroom in question had all the hallmarks of a builder-grade primary bath from the early 2000s: warm tan walls, a honey-oak vanity with arched cabinet doors, polished brass hardware and door hardware that didn't match the chrome faucet, a wide frameless mirror bolted directly to the wall, and a four-light vanity strip with warm alabaster glass shades. Tile was limited to a small beige backsplash directly behind the sink — the rest of the wall above it was painted drywall. Motivating trigger. In cases like this, the push to renovate rarely comes from anything being broken. The fixtures still worked. The real trigger is usually that the room simply feels disconnected from the rest of an otherwise updated home, and the mismatched metals make the dated feel more obvious than any single element on its own. Renovation decisions. The direction chosen here was the white-base-plus-bold-accent approach described above. The oak vanity was replaced with a white shaker-style cabinet using brass bar pulls — a deliberate choice to keep one warm metal tone rather than switching to a colder finish. The backsplash was expanded into a full-height elongated hexagon tile feature wall running behind the vanity to the ceiling. The old frameless mirror was swapped for a black-framed mirror with rounded corners, flanked by two globe-style wall sconces instead of the single overhead light bar. Flooring throughout the bathroom changed from small beige tile to a larger-format gray wood-look porcelain plank. In the tub and shower area, a deep teal glazed tile was installed floor to ceiling in a stacked pattern, with two small glass corner shelves worked into the tile joints. A separate toilet alcove was finished with coordinating black-and-white and botanical framed art to tie the new palette together without adding more paint color. Execution reality. Projects like this typically run four to eight weeks depending on tile lead times and whether cabinetry is stock or semi-custom, and the timeline is rarely the surprise — the surprises tend to show up in what's hidden behind the old backsplash and inside the shower wall. Replacing a small backsplash with a full-height tile wall means the drywall behind it needs to be checked and often reinforced, since builder-grade backsplashes rarely have backer board behind them. Re-tiling a shower surround always requires new waterproofing membrane behind the tile, not just new tile over the old substrate, which is one of the most commonly underestimated line items in a renovation budget like this. Adding wall sconces in a new location usually means running new electrical, which should go through a licensed electrician regardless of how confident a homeowner feels about DIY wiring. Result. The finished bathroom reads as an entirely different room, even though the footprint, plumbing locations, and window placement didn't change. The consistent white-and-brass base ties the vanity, mirror, and lighting together, while the teal tile in the shower gives the room a single clear focal point instead of several competing details. Key takeaway for the reader. The biggest visual shift didn't come from a paint color at all — it came from replacing the warm-toned cabinetry and mismatched hardware with one consistent neutral base, then letting a single bold material (the tile, not the wall paint) carry the color statement. That's a pattern worth copying even on a smaller budget: fix the base first, then commit to one accent, rather than spreading color decisions evenly across the whole room. Grout, Lighting, and Finish Details That Change How Color Reads This is where most homeowners get surprised after the fact, and it's the section most before-and-after galleries skip entirely. Grout color shifts perceived tile darkness. A teal or navy tile installed with white grout will look noticeably lighter and busier than the same tile installed with a matching or slightly darker grout. Contractors often recommend bringing home an actual tile sample and testing it against two or three grout swatches before ordering, rather than trusting a showroom display. Glossy versus matte finish changes how bold a color feels. A glossy glazed tile in a saturated color reflects more light and can look almost like a different shade depending on the angle it's viewed from. A matte finish in the same color reads as calmer and more consistent throughout the day. LED color temperature changes everything. Warm LED lighting (around 2700K–3000K) will pull out the warmth in a teal or green tile and make brass hardware glow more noticeably. Neutral or cool LED lighting (3500K and above) makes the same colors look more blue and makes chrome or matte black finishes feel crisper. A common mistake is choosing tile and hardware under one lighting setup, then installing fixtures with a different color temperature and being surprised the room doesn't look the way it did in the sample photos. Fixed finishes should anchor the decision. If the countertop, flooring, or a window trim isn't being replaced, the new accent color needs to be chosen against those fixed elements in person, not against a screen or a showroom sample under different lighting. DIY-Friendly vs. Professional-Required ChangesChange DIY-Friendly? NotesRepainting walls Yes Use a mildew-resistant, satin or semi-gloss bathroom paintSwapping cabinet hardware Yes Simple tool list; check hole spacing before orderingReplacing a mirror Usually Heavier mirrors need proper wall anchors or a mounting bracketInstalling new light fixtures Sometimes Only if wiring location doesn't change; otherwise hire an electricianAdding a tile backsplash (small area) Sometimes Manageable for an experienced DIYer; requires correct backer boardRetiling a full shower surround No Waterproofing membrane and slope requirements make this a professional job in most casesRelocating plumbing fixtures No Requires a licensed plumber and often a permitReplacing a countertop No Fabrication and correct sink cutout support require professional measurement and installationAdding new electrical circuits or sconces in new locations No Requires a licensed electrician and typically an inspectionCost Ranges by Change Type Figures below are approximate US averages and can vary significantly by region, contractor availability, and material quality. Homeowners in the UK, Canada, and Australia should expect different ranges based on local labor rates and material import costs.Change Approximate Cost Range (USD)Paint refresh (walls only) $200–$600Hardware and lighting swap $300–$1,200Tile accent wall (partial, cosmetic) $800–$2,500Full shower surround retile $3,000–$8,000Vanity replacement (stock cabinetry) $1,200–$4,000Countertop replacement (quartz or similar) $1,500–$4,500Full flooring replacement $1,500–$5,000Complete color-focused renovation (vanity, tile, lighting, flooring) $12,000–$30,000+Labor typically makes up 40–60% of tile and countertop costs, which is why a full shower retile costs so much more than the tile itself would suggest.Maintenance Realities of Popular Color ChoicesGlossy dark tile shows water spots and soap film more visibly than matte or lighter tile, meaning more frequent wiping to keep the shower looking clean Grout needs resealing roughly every 12–18 months in a wet area like a shower, regardless of tile color; darker grout hides staining longer but doesn't need sealing any less often Unlacquered brass develops a natural patina over time, which some homeowners want and others find frustrating if they expected it to stay shiny; lacquered brass stays brighter longer but can show wear at high-touch points like handles White grout in a shower will show mildew faster than a mid-tone or dark grout, which is worth factoring in for anyone choosing an all-white palette Bold accent colors are easier to update later than a full-room palette, since replacing one tile wall or repainting one accent is far less disruptive than redoing an entire monochromatic schemeChoosing a Direction: A Simple Decision FrameworkIdentify what's staying fixed. Countertop, flooring, or window trim that isn't being replaced should be the starting point for any new color decision, not an afterthought. Decide if the accent will be paint or material. Paint is reversible and inexpensive; a tile or stone accent is a bigger commitment but tends to hold up better in a wet area and photographs with more depth. Pick one dominant metal finish. Choose brass, matte black, or chrome as the primary finish across hardware, faucets, and lighting, and use a second metal sparingly if at all. Test under real lighting before ordering materials. Bring samples into the actual bathroom at different times of day rather than relying on a showroom or online photo. Confirm the base can handle moisture where it matters. Any tile going into a wet area needs waterproofing behind it — this isn't optional regardless of color choice.Frequently Asked Questions What color changes make the biggest visual difference in a master bathroom renovation? Replacing warm-toned cabinetry and mismatched metal hardware with a consistent neutral base tends to make a bigger visual difference than wall paint alone, since cabinetry and hardware are what the eye notices first. Do I need to replace tile to change my bathroom's color scheme, or can paint alone update it? Paint alone can meaningfully update a bathroom if the existing tile, countertop, and cabinetry are already neutral. If those elements are warm-toned or dated, paint alone usually isn't enough to shift the overall feel. What color combinations look dated within a few years versus staying timeless? Trend-driven combinations tied to a specific era — like an all-gray "farmhouse" palette or a single trendy accent shade — tend to date faster than neutral bases paired with a classic accent color like deep teal or navy, which have stayed popular across multiple design cycles. How does grout color affect the final look of tile? Grout color can shift how dark, light, or busy a tile appears by roughly one to two shades, and it's one of the most overlooked decisions in a tile-based renovation. Can I mix brass and chrome fixtures in the same bathroom? Yes, as long as one finish clearly dominates. An even split between two metals tends to look unplanned rather than intentional. Does a bold accent color like teal or navy hurt resale value? Generally not when it's contained to one feature, such as a shower surround, and paired with a neutral base elsewhere in the room. A bold color applied to every surface is more likely to be a resale concern. What ventilation changes are needed if I add darker, glossier tile to a shower? Ventilation requirements are based on the room's moisture load, not the tile color itself, but a working exhaust fan matched to the bathroom's square footage becomes more important with any full-height tile surround, since trapped moisture behind tile increases mold risk over time.
.webp)
Bathroom Before and After: What a Real Renovation Reveals About Hidden Damage, Timelines, and Smart Design Choices
A bathroom "before and after" photo is easy to scroll past. The dated tile disappears, a new tub shows up, and the room looks finished. What most of those photo pairs leave out is everything that happened in between — the part where a contractor opens a wall and finds something nobody expected. That gap between "before" and "after" is where the real decisions get made. This guide walks through what typically shows up once a bathroom is opened to the studs, why certain repairs aren't optional even when they weren't in the original plan, and how the design choices in a finished space actually make a small room feel larger. Along the way, a real-world transformation illustrates how these issues play out in practice. Quick answer: In most bathroom renovations, removing old tile, flooring, and fixtures uncovers problems that weren't visible beforehand — water-damaged subfloor, framing that's out of level, or plumbing and wiring that no longer meet current standards. Addressing these issues before installing new tile or fixtures is what keeps a renovation from failing early. Homes built before the 1980s are especially prone to these surprises. Quick TakeawaysDemo on an older bathroom often reveals more than cosmetic wear — rot, out-of-level framing, and aging plumbing are common, not rare Structural problems get corrected before finish work starts; skipping this step leads to cracked tile, sticking doors, and future leaks A full plumbing and electrical replacement is standard practice in many older-home gut renovations, not an unnecessary upsell A renovation can reasonably expand into an adjoining space (like a hallway) if that space shares the same structural or water damage Larger fixtures — a bigger tub, a double vanity — don't have to make a small bathroom feel more cramped if the layout and finishes are chosen deliberately Trim, hardware, and shelving are frequently the last items completed, even after a bathroom is fully usableWhat "Before and After" Actually Means for Homeowners Search for bathroom transformation photos and the pattern is almost always the same: a dated room on the left, a polished one on the right. It's satisfying to look at, but it can also set unrealistic expectations. A homeowner planning their own project sees the glossy result without seeing the water-stained subfloor, the plumbing rerouted mid-project, or the three extra days spent waiting on an inspector. Understanding what typically happens between those two photos is more useful than the photos themselves. A pattern remodeling contractors flag constantly: the surprises found during demo, not the finish selections, are what actually determine a project's timeline and budget.Transformation Spotlight: A 1950s Bathroom Gut Renovation To ground these ideas in a concrete example, here's how one real-world bathroom transformation played out, using a framework that applies to almost any older-home renovation. Starting Point: The original bathroom in a mid-century home hadn't been touched since it was built. Two-tone painted walls, a yellowed fiberglass tub-and-shower surround, worn patterned vinyl flooring, and a single dark wood vanity made the room feel closed in. Grab bars mounted near the tub and toilet were leftover fixtures from a previous owner's needs — a common sight in homes that have changed hands more than once. Motivating Trigger: The homeowner was preparing for a career change that would leave little time for home projects afterward, which created a hard deadline to complete the renovation beforehand — a scenario familiar to anyone who has tried to squeeze a remodel around a life event rather than the other way around. Renovation Decisions: The plan called for a full gut renovation: a larger soaking tub, a double vanity in place of the single sink, a new window for better natural light, and a full tile surround rather than the original one-piece unit. Execution Reality: Once the walls and flooring came out, the project scope grew considerably. The subfloor showed rot from long-term water intrusion, and the floor framing was out of level by more than an inch across the width of the room — enough to require reframing rather than a patch repair. The ceiling joists had a similar leveling issue and needed additional support. Several walls were out of plumb. Because the exterior wall was being reframed anyway for the new window, that work was folded into the same phase. The plumbing and electrical systems were replaced in full rather than patched around the old layout. The project also expanded into the adjoining hallway, where a set of built-in cabinets tied into the same wall cavity had deteriorated and needed to be addressed at the same time. Result: The finished bathroom uses a textured, dimensional gray tile across the tub surround, a built-in tiled bench, and recessed niches for storage. A tongue-and-groove wood ceiling adds warmth against the cooler tile tone. The single vanity was replaced with a floating double vanity topped in a light solid-surface counter, paired with a linear LED light fixture instead of a row of exposed bulbs. Despite adding a larger tub and a second sink, the room reads as more open than it did before — partly because of the lighter wall color, partly because of the wall-mounted fixtures, and partly because opening the hallway wall removed a visual bottleneck. Key Takeaway: Renovating an older bathroom on a fixed timeline is realistic — but only if the budget and schedule leave room for structural surprises. The visible finishes are the easy part. What happens underneath them determines whether those finishes last.What Demo Often Reveals: Reading the Signs of Hidden Damage Bathrooms fail slowly. A small gap in grout, a caulk line that's been resealed one too many times, or a shower pan that was never properly waterproofed can leak for years before anyone notices a soft spot in the floor. By the time it's visible, the damage is usually already in the subfloor and possibly the framing below it. Common signs that show up once tile and flooring are removed:Discolored or crumbling subfloor near the base of the tub or shower Rotted or soft floor joists, especially where old drain lines pass through Rusted or corroded plumbing fittings on galvanized supply lines Mold or mildew staining on the underside of subfloor sheathing Insulation that has absorbed moisture and lost its effectivenessNone of this is unusual for a home several decades old. It's also one of the main reasons renovation estimates include a contingency line — because nobody knows the true condition of a floor system until it's opened up. Safety note: Homes built before 1980 may have vinyl flooring, tile, or adhesive that contains asbestos. Testing a sample before demo is a standard precaution, not an overreaction, and it's inexpensive relative to the cost of the renovation itself.Why Contractors Reframe Floors Instead of Patching Them Replacing a few rotted boards is straightforward. Correcting a floor that's out of level is a different problem, and it's one that gets missed in a lot of before-and-after content.Situation Typical Fix WhyIsolated rot from a single leak point Sister or replace the affected joists Localized damage doesn't require touching the whole floor systemFloor out of level by less than 1/4" over a run Self-leveling underlayment Minor variance can be corrected at the surfaceFloor out of level by 3/4" or more across the width of the room Full reframing Shimming or building up a topping layer this thick creates an unstable base for tile and fixturesCeiling joists unsupported or sagging Add blocking, sistering, or additional support Prevents movement that cracks ceiling drywall or tile below itTile is rigid. A tub is heavy and needs level support to sit correctly and drain properly. When the substrate underneath isn't level or is structurally compromised, covering it with new finishes just delays the failure — it doesn't prevent it. This is one of the more common mistakes in DIY renovations: rushing past the framing stage to get to the visible part of the project.Plumbing and Electrical: When Full Replacement Is Standard, Not Excessive Homeowners are sometimes surprised when a contractor recommends replacing plumbing and wiring that "still works." A few factors typically drive that recommendation:Galvanized supply lines corrode from the inside out and are past their expected service life in most homes built before the 1960s Cast iron or old PVC drain lines may have degraded joints that aren't visible until the wall is open Two-prong, ungrounded circuits in an older bathroom don't meet current code for a room with water exposure Lack of GFCI protection near sinks, tubs, and showers is a common finding in homes that haven't been updated since original constructionOnce walls and floors are already open for a full renovation, replacing these systems is usually more cost-effective than isolating and patching individual sections — and it removes the risk of a new tile installation being torn out again in five years because of a plumbing failure behind it. Permit note: Plumbing and electrical work in a bathroom renovation typically requires permits and inspection in the US, UK, Canada, and Australia, though specific requirements vary by municipality. Skipping this step can create problems at resale, even if the work itself was done correctly.When a Renovation Grows Into an Adjoining Space It's common for a bathroom project to expand beyond the room's four walls, and it's worth having a way to evaluate whether that expansion is necessary or optional. Decision framework: is the scope creep necessary?Question If yes If noDoes the adjoining space share the same wall cavity or plumbing chase? Likely necessary to address together May be separableIs there visible water damage or rot extending into it? Necessary OptionalWould leaving it alone create a mismatched, half-finished look? Worth considering, but discretionary Can be deferredIs it purely cosmetic (paint, cabinet style) with no shared systems? Discretionary Defer to a future projectIn the case example above, the hallway built-ins shared framing with the bathroom's exterior wall and had deteriorated to the point that leaving them alone wasn't realistic once the wall was open. That's a necessary expansion. A hallway that simply looks dated by comparison, with no shared structural or water issue, is a different — and more optional — decision.Execution Reality: Can a Full Gut Renovation Really Happen in a Few Weeks? A tight, self-imposed timeline is one of the more common (and more stressful) constraints homeowners set for themselves, often tied to a move, a new job, or hosting an event. Whether it's realistic depends less on the calendar and more on how the trades are sequenced. A typical sequence for a full gut bathroom renovation:Demo and disposal Rough plumbing and electrical (inspected before walls close) Framing corrections (leveling, plumbing walls, sistering joists) Insulation and vapor barrier Drywall or backer board Waterproofing membrane in wet areas Tile installation (walls, then floor, or vice versa depending on the layout) Fixture installation (tub, vanity, toilet) Electrical trim (lighting, outlets) Trim carpentry, caulking, and final touch-upsSeveral of these steps can overlap — electrical rough-in and plumbing rough-in often happen in the same window, for instance — which is how experienced crews compress a multi-week project into a shorter timeline. What's hard to compress is anything that requires an inspection before work can continue, since that depends on scheduling outside the contractor's control. A realistic expectation: a small, single-bathroom gut renovation with a dedicated crew and no major delays can be completed in three to five weeks. Faster than that is possible but leaves very little room for the kind of structural surprises discussed above.Design Choices That Make a Small Bathroom Feel Larger Adding a bigger tub and a second sink sounds like it should make a small room feel more crowded, not less. In practice, several design decisions can offset that:Consistent, larger-format tile reduces the number of grout lines the eye tracks, which reads as more open than smaller tile in the same footprint Wall-mounted fixtures (tub fillers, faucets set into the wall rather than the deck) reduce visual clutter on counters and tub edges A floating vanity shows floor space underneath it instead of a solid cabinet base, which makes the floor plane feel larger Light, natural materials on the ceiling — wood paneling, light paint — draw the eye upward and soften a low ceiling height Linear lighting instead of multiple fixtures creates a cleaner sightline along the mirror wall A tiled bench built into the tub surround adds function without adding a separate piece of furniture that competes for floor spaceNone of this requires expanding the room's footprint. It's a matter of choosing finishes that don't visually compete with each other, which is a detail that's easy to miss when comparing fixtures one at a time in a showroom.Budgeting for the Unexpected Separating "planned renovation" costs from "surprise repair" costs helps set a realistic contingency budget before work starts.Category What it typically covers US average range*Structural repair (rot, reframing, leveling) Joist replacement, subfloor repair, wall correction $2,000–$8,000+Plumbing replacement Supply lines, drain-waste-vent piping, fixtures rough-in $2,500–$6,000Electrical replacement Rewiring, GFCI outlets, new circuits $1,500–$4,000Tile and waterproofing Materials, membrane, labor $3,000–$9,000Fixtures (tub, vanity, toilet) Mid-range fixtures, not luxury-tier $2,000–$7,000*Figures are general US averages and vary significantly by region, contractor, and material choice. Homeowners in the UK, Canada, and Australia should expect different baseline costs and should verify current local pricing before budgeting — labor rates and material availability differ enough between these markets that US figures aren't a reliable substitute. A reasonable rule of thumb for homes built before 1980: budget an additional 15–25% beyond the planned renovation cost for structural surprises. Homes with a known history of water damage or DIY repairs should budget toward the higher end of that range.Checklist: Before You Start Your Own Bathroom RenovationGet a plumber or inspector to assess the condition of existing supply and drain lines before finalizing a budget Test flooring and adhesive for asbestos if the home was built before 1980 Confirm whether ceiling joists or floor framing show any visible sag, bounce, or unevenness Check whether adjoining walls or cabinetry share structural framing with the bathroom Set a contingency budget of at least 15–20% above the planned renovation cost Confirm permit requirements with the local building department before demo begins Decide in advance which finish decisions (tile, vanity, fixtures) are flexible if the budget shifts mid-project Build slack into the schedule around any step that requires a third-party inspectionDIY vs. Professional: Where the Line Usually FallsTask Reasonable for an experienced DIYer Typically requires a licensed professionalDemo (removing tile, fixtures, flooring) Yes —Painting, caulking, trim carpentry Yes —Tile installation Sometimes, with research and practice —Framing corrections (leveling, sistering joists) Rarely Yes — structural miscalculations are costly to fix laterPlumbing rough-in and connections No Yes — code and inspection requirements applyElectrical wiring No Yes — safety and code requirements applyWaterproofing membrane installation Sometimes Recommended for anyone unfamiliar with the productThe pattern here isn't about skill level as much as it is about what happens if something goes wrong. A crooked tile line is a cosmetic problem. A miscalculated load path or an improperly grounded circuit is a safety problem — and one that can be invisible until it isn't.Maintenance Realities After the Renovation Is Done A finished bathroom still needs upkeep, and a few items are worth planning for early rather than discovering later:Grout and tile: Re-seal natural stone tile annually; check grout lines for cracking every six months, especially in the shower Caulk joints: Replace caulk around the tub and shower perimeter every 1–2 years before it fails and lets water behind the tile Exhaust fan: Run it during and after every shower for at least 20 minutes to prevent moisture buildup that leads to mold Cabinet hardware and hinges: Check for loosening every few months in a floating vanity, since the wall-mounted weight puts more stress on the anchors than a floor-standing cabinetA pattern that shows up often in inspection reports: bathrooms that were renovated well structurally but neglected on these small maintenance items end up with the same moisture problems the renovation was meant to solve, just years later. What's Still Unfinished After Move-In (and Why That's Normal) It's common for a bathroom to be fully usable — tub installed, vanity plumbed, toilet functional — while trim work, shelving, towel bars, and other small hardware are still pending. These items tend to get pushed to the end of a project because they don't affect whether the room can be used, and because they're easier to complete without a hard deadline hanging over them. A bathroom photographed for a "before and after" post at this stage isn't unfinished in any way that matters functionally; it's just not fully done cosmetically yet, which is worth keeping in mind when comparing a finished project to one still in progress.Frequently Asked Questions How do you know if a bathroom subfloor needs to be replaced? Soft spots, visible staining, or a floor that flexes underfoot near the tub or shower usually indicate subfloor damage. A moisture meter or a contractor's inspection during demo can confirm the extent before deciding between a patch repair and full replacement. Can a full bathroom gut remodel realistically be finished in under a month? Yes, in many cases, if trades are sequenced efficiently and there are no major inspection delays. Homes with significant hidden damage may need more time once that damage is discovered. Why would a contractor reframe an entire floor instead of just replacing the rotted boards? If the floor is out of level by a significant margin across its width, patching individual boards won't correct the underlying slope. Reframing addresses both the rot and the leveling issue at the same time. Is it normal for floor joists in an older home to be out of level? It's common in homes several decades old, particularly if the structure has settled over time or wasn't perfectly level during original construction. It becomes a problem specifically when the variance is large enough to affect tile or fixture installation. What typically causes hidden water damage under a bathtub in a mid-century home? Failed caulk or grout joints, an aging or improperly sloped shower pan, or a tub surround that was never properly waterproofed behind the tile are common sources. Should grab bars found during a bathroom demo be removed or reinstalled? That depends on who will use the space and whether resale value or aging-in-place needs are a priority. Reinstalling them in a way that matches the new design is straightforward and worth discussing with a contractor rather than automatically removing them. Does replacing all the plumbing and electrical significantly increase a bathroom remodel's cost? It adds cost compared to leaving existing systems in place, but it's often less expensive than patching around old systems and dealing with a failure later — especially once walls are already open.Planning a bathroom renovation means budgeting for what's behind the walls, not just what ends up in front of them. The rooms that hold up well over time are the ones where the structural work got the same attention as the tile selection — even when that wasn't part of the original plan.
.webp)
How Long Does It Take to Remodel a Small Bathroom? A Realistic Timeline (With a Before & After)
A small bathroom remodel usually takes 1 to 2 weeks for a cosmetic refresh and 3 to 6 weeks for a full gut renovation, depending on whether the layout changes, plumbing gets relocated, and how long custom materials like glass shower doors take to arrive. Projects that convert a tub into a walk-in shower typically land at the longer end of that range, even in a small footprint. That range surprises a lot of homeowners, mostly because contractor quotes and online estimates rarely separate "paint and swap the vanity" from "gut it to the studs." Those are two different projects with two different calendars, and conflating them is where most timeline frustration starts. Quick TakeawaysCosmetic refresh (paint, fixtures, vanity swap, no plumbing moves): 1–2 weeks Full gut remodel, same layout: 2–4 weeks Full gut remodel with a tub-to-shower conversion or layout change: 4–6+ weeks Add 1–2 weeks if permits, inspections, or custom-fabricated glass and cabinetry are part of the job The single biggest hidden delay in most small bathroom gut jobs isn't labor — it's waiting on materials, especially glassHow Long Does a Small Bathroom Remodel Actually Take? Scope determines the timeline far more than square footage does. A tiny bathroom with a full layout overhaul can easily take longer than a much bigger bathroom that's only getting a cosmetic update, because demo, plumbing, and finish work don't scale down proportionally with the room size — some tasks (running new supply lines, waiting on a custom shower door, curing waterproofing membrane) take the same number of days whether the room is 35 square feet or 90. Here's a realistic breakdown by scope:Project Type Typical Timeline What's InvolvedCosmetic refresh 1–2 weeks New paint, vanity, faucet, toilet, lighting, mirror — no plumbing or wall changesFull gut, same footprint 2–4 weeks Demo to studs, new tile/panels, new fixtures, same tub/shower footprintFull gut + layout change 4–6+ weeks Tub-to-shower conversion, moved plumbing, window removal or relocation, electrical updatesFull gut + custom materials Add 1–2 weeks Frameless glass, custom vanity, backordered fixturesSmall bathrooms often move faster than larger ones for the pure labor of demolition and tiling — less area to cover means fewer days on those specific tasks. But that advantage disappears quickly once a layout change enters the picture, because plumbing relocation, waterproofing, and inspection scheduling take roughly the same amount of time regardless of room size.Before & After: What a Small Bathroom Transformation Actually Looks Like To make the timeline concrete, it helps to look at what a real gut renovation of a small bathroom typically involves — not as a single anecdote, but as a pattern that shows up again and again in small-space remodels. Starting point. A common starting condition looks like this: a cramped bathroom with a dated pedestal-style or undersized vanity, a chrome strip-light fixture over a builder-grade medicine cabinet mirror, half-height tile wainscoting, a tub-and-curtain combo that eats visual space, and a small operable window positioned right at the tub/shower wall. Ventilation is often a basic fan with no light or humidity sensing. Nothing is broken, exactly — it's just tired, cramped, and inefficient for how the space actually gets used. Motivating trigger. In small bathrooms specifically, the trigger is rarely "something failed." It's usually that the layout itself is the problem — a tub nobody uses, a vanity too small for two people to share, a mirror and light setup that makes the room feel dimmer than it is. Homeowners in this position often realize a cosmetic refresh won't fix the actual complaint, which pushes them toward a full gut instead. Renovation decisions. A typical decision set for this kind of project includes: removing the tub entirely in favor of a walk-in shower with a sliding glass door, switching to tile-look composite wall panels instead of individual tile (faster install, fewer grout lines to maintain), replacing the vanity with a floating wood-tone cabinet to visually open up the floor, installing a large backlit oval mirror in place of a boxy medicine cabinet, moving to black matte fixtures and hardware throughout, and upgrading the exhaust fan to a combination unit with integrated lighting. Execution reality. This is where the timeline math from the sections above plays out in practice. Demo and rough-in plumbing typically consume the first week. Waterproofing and wall panel or tile installation take another week, and this stage often can't be rushed — membrane needs to cure before the next layer goes on. The glass shower door is usually the long pole: it can't be fabricated until the shower base is set and measured on-site, and lead times of one to three weeks for custom glass are common. Vanity installation, mirror mounting, and final electrical (including the upgraded fan and any accent lighting) typically wrap in the final week, followed by a punch-list pass for caulking, touch-ups, and hardware alignment. Result. The finished space usually reads as noticeably larger, even though the footprint hasn't changed. Removing the tub, switching to a curbless-style shower entry, and lightening the material palette (wood tones, large-format tile, backlit mirror) all reduce visual clutter, which does more for the sense of space than any structural expansion could. Key takeaway for readers: if a project involves removing a tub, moving plumbing, or ordering custom glass, plan for 4–6 weeks minimum — and build in slack for the glass door lead time specifically, since it's the step most likely to create a gap between "everything else is done" and "the room is actually usable." Week-by-Week Breakdown of a Full Gut Remodel For a small bathroom gut renovation with a layout change (like a tub-to-shower conversion), a realistic week-by-week schedule looks like this: Week 1 — Demo and rough-in. Old fixtures, tile, and tub come out. Plumbers relocate or reroute supply and drain lines if the shower position is changing. Electricians rough in any new circuits needed for the exhaust fan, vanity lighting, or accent lighting. This is also when hidden problems — subfloor rot, old galvanized pipe, undersized ventilation ductwork — tend to surface, which is the most common reason a "2-week job" quietly becomes a 3-week job. Week 2 — Waterproofing and wall/floor installation. Cement backer board or a waterproofing membrane goes up around the wet zone. Shower pan or base gets set and leveled. Tile or tile-look wall panels get installed. If real tile is used, grout curing time adds a day or two that composite panels don't require. This is also typically when the shower is measured for a custom glass door. Week 3 — Fixtures, glass, and finish plumbing. Vanity, toilet, faucet, and shower hardware go in. If glass wasn't ordered until after the shower base was set in Week 2, this is often where the schedule stalls waiting on fabrication — it's worth asking a contractor upfront when the glass measurement will happen relative to the rest of the timeline. Week 4 — Electrical finish, ventilation, and punch list. Exhaust fan and lighting get finished and tested. Mirror gets mounted. Final caulking, paint touch-ups, and hardware installation happen here. A final walkthrough should confirm the fan actually clears steam within a reasonable time and that GFCI outlets near the sink test correctly. Jobs involving a moved window, structural framing changes, or a full electrical panel update can push past four weeks. Permit inspections (rough-in and final) also add scheduling dependencies outside the contractor's direct control — inspectors work on their own calendar, not the job site's. What Slows a Small Bathroom Remodel Down Even well-planned projects hit delays. The most common ones:Hidden water damage. Removing old tile or a tub surround often reveals soft subfloor or mold growth that wasn't visible beforehand. This is discovered, not optional — and it has to be addressed before anything else continues. Permit and inspection scheduling. Any project that moves plumbing or adds electrical circuits typically needs a permit in most US jurisdictions, the UK, Canada, and Australia. Inspectors book on their own timeline, which can add days the contractor can't control. Backordered materials. Custom vanities, specific tile runs, and frameless glass are the most common items to arrive late. A pattern worth watching for: quotes that don't specify material lead times separately from labor time. Change orders. Once demo exposes the real condition of plumbing or framing, scope (and cost) can shift. A contract that doesn't address what happens if hidden damage is found is a common source of both delay and dispute. Living without a bathroom. In a single-bathroom home, this is often the most disruptive part of the whole project rather than the construction itself — worth planning for before work starts, not during it.Tub-to-Shower Conversion: Why It Adds Time (and Value) Converting a tub to a walk-in shower is one of the most common upgrades in small bathroom remodels, and it's also one of the least explained in terms of timeline impact. The extra time comes from three places. First, waterproofing a curb-less or low-curb shower pan generally requires more careful membrane work at the transition point than a standard tub surround does. Second, the new shower base has to be set and leveled before it can be measured for a glass enclosure — that sequencing is fixed, and it's what creates the fabrication lead-time gap mentioned earlier. Third, plumbing often needs adjustment even if the shower stays in roughly the same spot, since drain height and valve placement differ between a tub and a shower pan. The trade-off is usually worth it for small bathrooms specifically: removing a tub frees up several square feet of usable floor and eliminates a fixture many households rarely use, while a well-installed shower can make a cramped room feel considerably larger without changing its footprint. Ventilation and Lighting Upgrades Homeowners Overlook Small bathrooms are more sensitive to humidity buildup than larger ones simply because there's less air volume to dilute steam. That makes exhaust fan sizing a bigger deal than most cosmetic-focused remodel guides suggest. Fan capacity is measured in CFM (cubic feet per minute), and a common rule of thumb is roughly 1 CFM per square foot of floor area, with a minimum of about 50 CFM even in very small rooms. Bathrooms with a separate enclosed shower or a tub-to-shower conversion often benefit from sizing toward the higher end of that range, since a fully enclosed glass shower traps steam more than an open tub did.Watch for this: if a remodel removes or reduces natural ventilation from an operable window, the exhaust fan becomes the only line of defense against trapped moisture. Undersizing it — or reusing an old fan "because it still works" — is a common mistake that shows up later as mold on the ceiling or peeling paint, not as an immediate problem during the renovation.Fan-and-light combination units have become a popular upgrade in small bathrooms because they solve two problems (ventilation and lighting) without adding a second ceiling fixture, which matters more in a small room where every fixture placement competes for limited ceiling space. Some newer combination units also add features like humidity-sensing auto-run or integrated ambient lighting — genuinely useful for moisture control, though the ambient lighting feature is a comfort upgrade rather than a code or safety requirement.DIY vs. Hiring a Pro: What Actually Changes the TimelineTask DIY Feasibility Timeline ImpactDemo (removing old tile, vanity, tub) Reasonable for most homeowners Can save 2–4 days of contractor labor, but extends calendar time if done evenings/weekends onlyPainting and cosmetic touch-ups High Minimal timeline impact either wayPlumbing rough-in and relocation Not recommended without licensing in most jurisdictions Licensed trade required for permit sign-off in the US, UK, Canada, and AustraliaElectrical (new circuits, GFCI, fan wiring) Not recommended without licensing Same as above — inspection typically requiredTile or wall panel installation Moderate — panels are more DIY-friendly than full tile Panels install faster and forgive minor error better than tileGlass shower door installation Low — usually done by the fabricator/installer Rarely a DIY task regardless of skill levelVanity and fixture installation Moderate to high Straightforward if plumbing rough-in is already correctly placedThe realistic pattern: DIY demo plus hired trades for plumbing, electrical, and glass tends to save money without meaningfully slowing the project, as long as the homeowner's demo schedule doesn't create gaps between finishing demo and the trades starting their work. Full DIY on plumbing or electrical, by contrast, is where both safety risk and permit problems tend to show up. Maintaining Your New Small Bathroom A remodel's finish quality holds up a lot longer with a bit of routine upkeep — especially in the materials that show up most in small-bathroom transformations:Squeegee glass shower doors after each use to reduce hard water spotting, especially in areas with harder municipal water Wipe door tracks monthly — small shower footprints mean tracks collect soap residue faster than in larger enclosures Reseal grout lines (if using real tile) roughly every 1–2 years, or inspect composite panel seams annually for caulk wear Recaulk the shower base perimeter at the first sign of cracking — small gaps let water reach the subfloor before they're visually obvious Clean exhaust fan grilles quarterly; dust buildup reduces airflow even when the fan sounds like it's running normally Check LED mirror defogger function seasonally if the mirror includes one — condensation buildup is often the first sign it's stopped workingFrequently Asked Questions How long does a small bathroom remodel take on average? Most small bathroom remodels take 1–2 weeks for a cosmetic-only update and 3–6 weeks for a full gut renovation, with layout changes and custom materials pushing toward the longer end. Does removing a bathtub add time to a bathroom remodel? Yes. Converting a tub to a shower typically adds waterproofing work at the pan transition, plumbing adjustments, and a glass fabrication lead time that a straight tub replacement doesn't require. Can a small bathroom be remodeled in one week? Only for cosmetic-scope work — new paint, vanity, faucet, and lighting without moving plumbing or opening walls. A full gut in one week is not realistic once demo, waterproofing cure time, and inspections are factored in. What causes the most delays in a small bathroom renovation? Hidden water damage discovered during demo, permit inspection scheduling, and backordered materials (especially custom glass) are the most common sources of delay. Do I need a permit to convert a tub to a walk-in shower? In most US jurisdictions, as well as the UK, Canada, and Australia, plumbing relocation and any new electrical circuits typically require a permit and inspection. Requirements vary by local authority, so checking with the local building department before starting is worth the time. How long does it take to install a walk-in shower? The shower installation itself (pan, waterproofing, wall panels or tile, glass) typically takes 1–2 weeks within a larger gut renovation timeline, not counting glass fabrication lead time. Is a windowless bathroom shower safe if ventilation is upgraded? Yes, as long as the exhaust fan is sized appropriately for the room's square footage and runs long enough to clear humidity after each use. A properly sized, code-compliant fan is generally considered adequate ventilation without a window. How much faster is a cosmetic bathroom refresh compared to a full gut remodel? A cosmetic refresh is typically 2–4 times faster than a full gut renovation, since it skips demo, plumbing/electrical rough-in, waterproofing cure time, and inspection scheduling entirely. Can I live in my house during a small bathroom remodel? Yes, though single-bathroom households should plan an alternative bathing arrangement for at least the demo-through-fixture-install phase, typically 2–3 weeks in a full gut project. How long does glass shower door fabrication typically take? Custom glass fabrication commonly takes 1–3 weeks after final on-site measurement, which can only happen once the shower base is set — making it one of the least flexible parts of the schedule. Does a floating vanity take longer to install than a standard vanity? It can add some time if plumbing needs to be adjusted for wall-mounted supply lines, but the vanity installation itself is comparable in speed to a standard freestanding unit. What's the difference in timeline between tile and tile-look shower wall panels? Composite wall panels generally install faster than individual tile, since they involve fewer waterproofing steps and no grout curing time, often saving several days on a small shower. How often should shower glass and grout be resealed after a remodel? Grout in a wet shower area typically benefits from resealing every 1–2 years; caulk at transitions and corners should be inspected annually and redone at the first sign of cracking or gaps. Is DIY demo worth it if I'm hiring a contractor for everything else? Often yes, for cost savings, as long as the demo is scheduled tightly enough that trades can start plumbing and electrical work without a gap. Loosely scheduled DIY demo is a common source of project delay. How small can a bathroom be and still fit a walk-in shower? Many manufactured shower bases are available in footprints as small as roughly 32 x 32 inches, making a walk-in shower feasible in most small bathroom layouts, though local code minimums for clearance should be confirmed before finalizing a design.Cost figures and timeline ranges above reflect general US averages and may vary by region, local labor rates, and material availability. Homeowners in the UK, Canada, and Australia should expect different price points and permit requirements based on local building authorities.