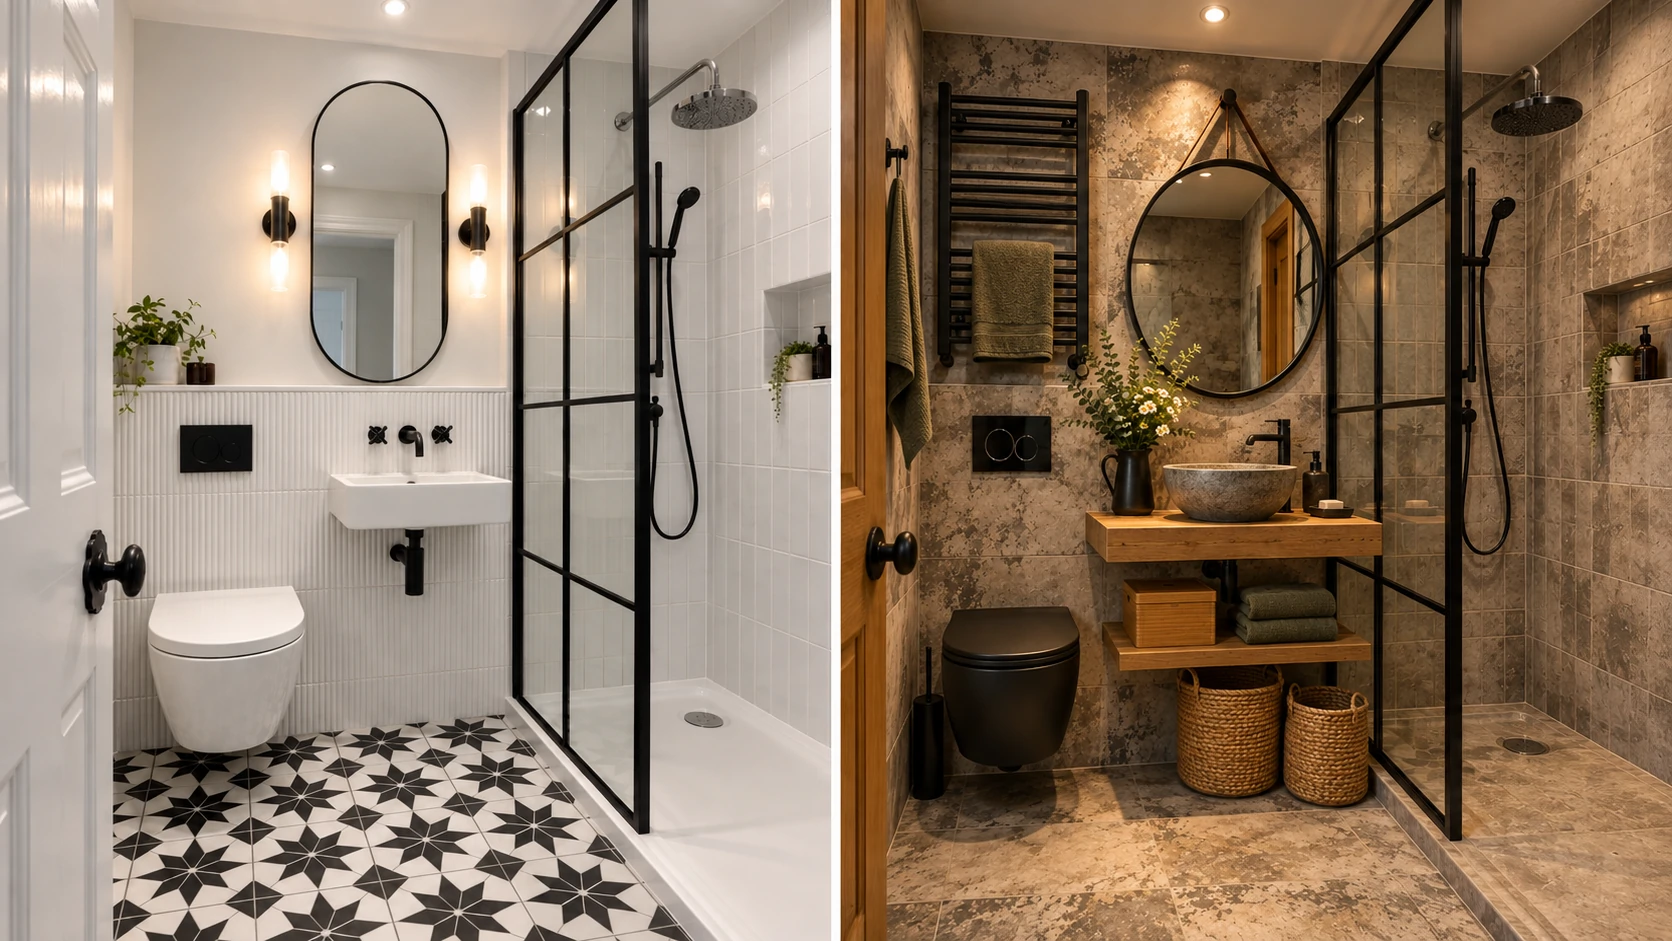
.webp)
Most bathroom renovation guides will tell you to “use neutral colors,” “update your fixtures,” and maybe “add a plant.” That advice isn’t wrong. It’s just incomplete in a way that costs homeowners time, money, and sometimes the entire look they were trying to achieve.
A bathroom that genuinely looks modern isn’t the result of one or two swapped-out fixtures. It’s the result of a set of interlocking design decisions — material choices, fixture proportions, lighting strategy, finish consistency — that work together to create a space that feels calm, intentional, and built to last.
This article breaks all of it down. Not as a listicle, and not with stock photos. What follows is grounded in real renovation experience — including a full documented project from demolition to finished space — covering every element that actually drives the modern look, what makes a bathroom read as dated in the first place, what realistic renovation costs look like, and the mistakes that are most expensive to fix after the fact.
Quick Answer A bathroom looks modern through six core principles: eliminating visual clutter, choosing large-format surfaces, floating storage over floor-standing cabinets, frameless glass enclosures, layered lighting instead of a single overhead fixture, and a consistent two-finish hardware palette. Each principle removes the specific dated signals that age a bathroom fastest and replaces them with calm, cohesive choices built around longevity rather than trend.
At a glance:
- Large-format tile (24×48” or larger) eliminates the visual noise of small-tile grout grids
- Floating vanities signal contemporary design and open up the floor visually
- Frameless glass enclosures remove the visual barrier framed doors create
- Wall sconces flanking the mirror replace dated bulkhead lighting
- Two metal finishes maximum — never three
- Integrated sinks simplify the counter plane
- LED strip lighting under the vanity adds hotel-quality warmth at low cost
.webp)
.webp)
.webp)
The Six Principles Behind Every Modern Bathroom
Before you start shopping for tile or calling contractors, it helps to understand what modern bathroom design actually is — not as a trend, but as a set of principles. Trends shift. The principles below are why certain bathrooms still look sharp twenty years after they were built, while others look dated within five.
1. Visual Simplicity — Removing What Ages a Space
Modern design doesn’t mean sterile. It means deliberate. Every element should be there because it serves a function or creates a specific visual effect — not because it came with the set.
The bathrooms that age the fastest are usually the busiest ones. Diagonal tile patterns. Decorative borders. Contrasting grout. Towel bar sets that match the toilet paper holder, which matches the robe hook, which matches the light fixture finials. That level of coordination reads as 2002 now, and it will always read as whatever year it was trendy. Modern bathrooms strip all of that back to a handful of intentional choices and let the materials do the work.
2. Material Continuity — Running the Same Surface Across Planes
This is one of the details that separates a genuinely modern bathroom from a renovation that has modern fixtures inside a dated shell. Running the same tile from the floor up the shower walls — without a contrasting border, without a tile-height change, without a bullnose cap — creates a visual continuity that makes the space feel larger and more intentional than it actually is.
In practice, this means selecting your primary tile before you select anything else. Everything flows from that choice.
3. Floating Elements — Why Off-the-Floor Signals Contemporary Design
Floor-to-ceiling cabinetry is practical. It’s also visually heavy in a way that makes a bathroom feel smaller and older. Floating vanities — wall-hung with visible floor space beneath — do the opposite. They reduce the visual weight of the largest piece of furniture in the room, make cleaning easier, and create an immediate association with high-end hotel design.
The same principle applies to wall-hung toilets. The slab-sided silhouette of a skirted one-piece toilet reads as contemporary. A two-piece toilet with exposed trapway bolts and a separate tank reads as every bathroom built between 1985 and 2010.
4. Layered Lighting — The One Change With the Highest Spatial Impact
Most older bathrooms have one overhead light — often a fan/light combo with a plastic grille. That single source creates flat, harsh light and casts shadows downward across the face, which is exactly where you don’t want them when you’re trying to see yourself clearly.
Modern bathroom lighting uses three layers: ambient (recessed ceiling), task (flanking sconces at eye level, not overhead), and accent (LED strips under vanities, at shower benches, inside niches). The combination changes how the room feels at every hour of the day, particularly in the evening when a dimmer brings the ambient light down and the warm LED strips become the dominant source.
That shift alone — from single overhead to layered and dimmable — is the highest-impact lighting change you can make without moving any walls.
5. Cohesive Finish Palette — The Rule Most Renovations Break
Here’s where a lot of renovations fall apart, not because of bad taste but because of fragmented purchasing. The shower valve gets ordered from a plumbing supplier in brushed nickel. The vanity faucet comes from a big-box store in chrome because it was in stock. The towel bar ends up in matte black because that’s what was left. Each piece is fine on its own. Together, they look like the bathroom was assembled from three different uncompleted renovation projects.
The rule is simple: choose two metal finishes maximum, and apply them consistently across every fixture, fitting, and hardware piece in the room. Brushed nickel and warm brass work together. Matte black and natural walnut work. Chrome and oil-rubbed bronze do not.
6. Enclosure Clarity — Frameless, Open, or Fully Integrated
The shower enclosure is often the largest single visual element in a bathroom. A framed glass door — with metal tracks and corner hardware — creates a defined boundary that emphasizes the shower as a separate contained unit. Frameless glass does the opposite. It lets the shower tile be seen from across the room, keeps the floor plane visually continuous, and makes the space read as larger than it is.
Walk-in showers without any enclosure do the same thing even more effectively, which is why they appear in every high-end hotel renovation. The trade-off is a slightly higher maintenance threshold around keeping the bathroom floor dry. For most homeowners in a master suite context, it’s worth it.
What Specifically Dates a Bathroom — And Why These Signals Are So Powerful
You can usually tell within three seconds whether a bathroom is dated. What you’re reading, without consciously analyzing it, is a cluster of visual signals that were all popular at roughly the same time. Here’s what those signals are — specifically — and what replaces each one.
| Dated Element | Why It Ages the Space | Modern Replacement |
|---|---|---|
| Diagonal tile layout | Creates busyness; associated strongly with 1995–2008 design | Large-format tile in straight stack or offset pattern |
| Hollywood-strip bulkhead lighting | Harsh overhead cast; associated with dated salons and hotel chains | Flanking wall sconces at eye level (approximately 60”) |
| Burl or flat-panel oak cabinetry | The grain finish and orange-honey tones read immediately as 1990s–2000s | Walnut, white oak, or flat-front painted cabinetry with integrated hardware |
| Round drop-in sinks | Decorative and spatially awkward; high cleaning maintenance around the rim | Integrated stone trough, clean undermount, or rectangular vessel |
| Two-piece toilet with exposed trapway | Bulky silhouette; impossible to clean around the base | Skirted one-piece or wall-hung |
| Framed glass shower door | Metal frame emphasizes the enclosure as a boundary | Frameless panel or open walk-in |
| Chrome mixed with gold or brass | Multi-finish chaos that signals budget constraints, not stylistic intent | Single finish or one deliberate two-finish palette |
| Matched towel bar/ring/hook sets | Coordinated sets feel like a hotel supply catalog circa 2003 | Individual pieces in one finish family, mixed proportions |
| Fan/light combination fixture | Plastic grille signals utility installation, not design consideration | Separate high-CFM exhaust fan + independent lighting circuit |
| Small-format floor tile with wide grout joints | The grout grid creates visual noise and a cleaning burden | Large-format tile with 1/16” to 1/8” minimal grout joint |
One thing worth noting: these elements don’t date independently. A bathroom with diagonal tile and birdseye maple cabinetry and a Hollywood-strip mirror light accumulates visual signals that compound each other. The cumulative effect is stronger than any single element. Which is why replacing just one or two of these without addressing the others leaves a bathroom that still reads as dated — just slightly less so.
.webp)
.webp)
.webp)
.webp)
Modern Bathroom Design by Element — The Practical Breakdown
Large-Format Tile — The Single Biggest Visual Upgrade
If there’s one material choice that transforms a bathroom more than any other, it’s the shift from small-format to large-format tile.
“Large-format” is a general term for tile 15 inches or larger on at least one dimension. In current practice, most modern bathroom renovations use 24×24, 24×48, or even 32×48 porcelain. The effect is significant: fewer grout joints mean less visual interruption across the floor and wall surfaces. The space reads as calmer, more expansive, and more considered.
The practical side of large-format tile is where most design guides stop talking, which is where the real information begins.
What your subfloor actually has to do: Large-format tile is unforgiving of flex. The standard requirement is L/360 deflection — meaning a floor spanning 10 feet must not flex more than 1/3 of an inch under load. Most standard floor joists in older homes don’t meet this without sistering or an additional layer of 1/4” fiber cement. If your installer doesn’t mention subfloor deflection before quoting the job, ask specifically. Tiles installed on a floor that flexes will crack at the grout joints within one to three years.
Rectified tile is not optional for minimal joints. Rectified tile is precision-cut to exact dimensions, allowing grout joints as narrow as 1/16” without lippage issues. Standard pressed tile has dimensional variation that makes tight joints impossible without visible tile edges at different heights. If you want the continuous-plane look, specify rectified.
Slip resistance matters more on large-format floor tile. Larger tiles typically have a smoother face — visually cleaner, but with a lower DCOF (Dynamic Coefficient of Friction) rating when wet. DCOF 0.42 is the minimum for wet floor applications. Polished porcelain often falls below this. Specify a honed or lightly textured finish for shower floors and wet bathroom floors, and verify the DCOF rating before purchasing. This is the conversation almost no tile salesperson initiates.
Cost range: Porcelain large-format tile typically runs $3–$12 per square foot for material. Large-format natural stone (travertine, marble) runs $8–$25+. Installation labor for large-format tile is 20–40% higher than standard tile due to the back-buttering technique, larger-notch trowels, and more complex lippage control. Budget accordingly.
Floating Vanities — What to Know Before You Commit
The floating vanity is probably the most universally recognized marker of a contemporary bathroom. It also has a piece of installation context that almost no design article mentions — and that context matters a great deal if you’re planning a phased renovation.
Wall blocking has to be installed before drywall. A floating vanity is mounted to the wall framing, not the drywall surface. The mount points need to hit solid blocking — typically a horizontal run of 2×6 or 2×8 lumber installed between studs — that distributes the weight across the framing rather than relying on the drywall alone. That blocking has to go in during the framing phase, before any cement board or drywall is hung.
If you’re renovating in phases and you didn’t plan for a floating vanity during your last bathroom remodel, installing one later means opening the wall to add blocking, patching, and refinishing. Add $500 to $1,500 to a vanity project that could have been planned once. It’s not a deal-breaker — it just needs to be known going in.
Humidity affects drawer hardware faster than you’d expect. The soft-close mechanisms in floating vanity drawers are typically rated for residential use in normal interior conditions. Bathroom humidity — especially in a bathroom without a properly sized exhaust fan — accelerates wear on the slides and soft-close dampeners. Cabinet ventilation cutouts in the back panel, and a correctly sized exhaust fan (80–110 CFM for most master baths), extend the life of the hardware meaningfully.
Material choices: Solid walnut and white oak are the most popular contemporary finishes. Both are warm, durable, and age well if the finish is maintained. Painted MDF is a lower-cost option that works well in low-humidity environments but is more susceptible to swelling at joints in consistently damp spaces. Thermofoil and lacquer finishes are low-maintenance but can peel at edges in high-humidity conditions over time.
Frameless Glass Enclosures — Beautiful, With Obligations
The frameless shower enclosure photographs beautifully. Every hotel renovation and design magazine uses them for a reason: the uninterrupted glass plane lets the tile work be seen without a metal frame interrupting it.
The real-world experience has a few additional chapters.
Daily squeegee. Without it, hard water minerals deposit on the glass surface with every shower and gradually etch the glass, creating a haze that no cleaner fully removes. This isn’t a scare story — it’s just the maintenance reality. A ten-second squeegee after every shower keeps frameless glass looking the way it does in photos. If that’s not a routine the household will maintain, a textured or low-iron treated glass (Diamon-Fusion, EnduroShield) applied at installation reduces but does not eliminate the obligation.
Glass thickness and door swing. Standard residential frameless glass is 3/8” thick. Heavier installations use 1/2” glass, which is more rigid and less prone to door flex over time. More importantly: frameless glass doors swing outward. Measure the clearance to your toilet, any other cabinet, and the door in your bathroom before ordering. In compact bathrooms, a frameless door can clear the toilet by literally two or three inches at full swing. Some homeowners discover this after installation.
Semi-frameless vs. frameless: Semi-frameless uses a metal channel at the top and one side wall, with the door panel frameless. It costs 15–25% less than full frameless and is mechanically simpler. Visually, it’s a slight compromise — the top rail is visible — but for most configurations it’s barely noticeable and significantly more forgiving in terms of installation tolerance on out-of-plumb walls. Older homes almost always have walls that are slightly out of plumb.
The Shower System — Beyond Choosing a Rain Head
A ceiling-mounted rain head has become the defining fixture of the modern shower. It’s also the element most homeowners get half-right.
Thermostatic vs. pressure-balance valve. Most homes are built with pressure-balance valves — the single handle that controls both temperature and flow. These are code-minimum. Thermostatic valves maintain exact temperature regardless of pressure changes elsewhere in the home (someone flushing a toilet, running the dishwasher). They also allow you to run the shower to temperature before stepping in, and to pause flow without losing the temperature setting. In a high-end master bath renovation, the thermostatic valve is the correct choice, and the cost difference ($800–$2,500 for the valve system) is modest relative to the overall project.
Rain head positioning matters. A ceiling-mounted rain head positioned 8 to 10 inches from the shower wall (toward the center of the shower) provides full overhead coverage without water running down the adjacent tile wall. Rain heads mounted directly above the entry point are less comfortable to use than those positioned centrally. This seems obvious in retrospect but is frequently overlooked in the design phase.
The handheld isn’t optional. Practically speaking, most households use a handheld for daily rinsing, cleaning the shower, and bathing children. It’s not a luxury add-on. It’s a functional necessity that should be included in every shower system regardless of how minimalist the design. Wall-mounted handhelds in a matching finish integrate cleanly without visual clutter.
Linear drain vs. center drain. A linear drain positioned at the entry threshold of a walk-in shower creates a cleaner visual — no center drain interrupting the tile field, and the ability to run floor tile in a single direction without the four-way slope required for a center drain. The trade-off is cost ($400–$900 for a linear drain vs. $80–$200 for a standard drain) and a slightly more complex installation requiring consistent 1/4” per foot slope across the entire shower floor toward the linear channel.
Modern Toilet Options — The Most Overlooked Design Element
Nobody writes about the toilet’s contribution to bathroom aesthetics. It’s probably the most overlooked design decision in a renovation.
The silhouette is what you’re working with. A traditional two-piece toilet — separate tank and bowl, exposed trapway at the base — has a utilitarian silhouette that no amount of stylish tile will fully override. A skirted one-piece toilet (where the trapway is covered by a continuous ceramic shell) has a much cleaner profile that reads as intentional rather than functional. A wall-hung toilet takes this further — the tank is concealed in the wall, and only the bowl projects, which makes the floor completely clear and allows floor tile to run uninterrupted beneath it.
Smart toilet considerations. Toto, Kohler, and several other manufacturers produce integrated smart toilet seats and bidet-integrated units with heated seats, auto-flush, deodorizer, and warm water wash functions. These are particularly effective in the water closet / WC configuration (a separate enclosed toilet room adjacent to the main bath), where the contained space allows for a more focused, considered installation. In that context, a smart toilet adds meaningful daily function alongside a design statement.
Rough-in dimension. Before selecting any toilet, measure the rough-in: the distance from the finished wall to the center of the drain. Standard US rough-in is 12 inches. Some older homes have 10” or 14” rough-ins. A toilet specified for a 12” rough-in installed in a 10” rough-in will not fit flush against the wall. This is a simple measurement that can save a significant return and reselection cost.
Lighting Design — Ambient, Task, and Accent in Practice
This is where most bathroom design falls short — not for lack of interest, but because the guidance available is almost always too vague. “Add sconces” is not a lighting design. Here’s what actually works.
The three layers:
- Ambient lighting provides the base illumination. Recessed downlights (4” or 6”, shower-rated where applicable) positioned to cover the general room without creating harsh shadows. In a bathroom, these typically run on a dimmer circuit.
- Task lighting is the layer that matters most for daily use. Sconces positioned on either side of the mirror — not overhead, on the sides — illuminate the face evenly without casting the downward shadows that vanity lighting from above creates. The target height is approximately 60” from the floor to the center of the sconce, which aligns with most adults’ eye level. This is non-negotiable if you want functional task lighting that also looks intentional.
- Accent lighting adds warmth and visual depth without adding direct function. LED strip lighting under the floating vanity toe-kick, at the base of a shower bench, or inside a niche creates a warm glow that shifts the room from functional to spa-like, particularly in the evening with the ambient lights dimmed.
IP ratings for wet zones. Any light fixture inside the shower — recessed or otherwise — must be rated for wet locations (IP65 minimum, IP67 for direct water exposure). Standard recessed lights are not. LED strips near or in the shower require IP67 rating for long-term reliability in humid environments. Standard LED strips fail and yellow within two to three years in bathroom conditions. This is the detail most homeowners discover too late and most contractors don’t mention at installation.
Dimmer compatibility. Not all LED bulbs and strips are dimmer-compatible. Specify “dimmable LED” at purchase and verify that the dimmer switch itself is rated for the LED load on that circuit. Mismatched dimmers cause flicker, buzzing, and shortened bulb life — all of which defeat the point of the layered lighting investment.
Accent Walls — How to Add Visual Depth Without Clutter
The accent wall is one of the most effective tools in a bathroom renovation and one of the most commonly misused ones. Done well, it creates focal depth and architectural interest. Done wrong, it makes the space feel busy in a different way than it was before.
Material choices that work in 2026:
- 3D wave textured tile in charcoal or dark stone tones
- Large-format dark natural stone or porcelain-look slate
- Fluted vertical wood panels (white oak or walnut, sealed for humidity)
- Limewash plaster (applied by a skilled plasterer, not roller paint)
- Venetian plaster (similar application, higher sheen)
Placement matters more than material. The strongest accent wall placement is behind the vanity mirror zone — where the eye naturally falls on entry to the room. Placing the accent wall in the shower and keeping the vanity wall neutral works too, but the visual impact is reduced because the shower wall is partially obscured by the glass. Placing accent walls in both zones simultaneously creates competition rather than contrast, and the room loses its visual hierarchy.
In the project documented in this article, the dark 3D wave textured tile was placed at full height behind the vanity and mirror zone, flanked by warm sconce lighting. The shower used the same large-format tile as the floor, maintaining visual continuity and letting the accent wall remain the focal point from the door. The decision was intentional — and it shows in how the room reads.
What a Real Full Gut Renovation Involves — A Documented Project Breakdown
The renovation documented in this article started with a bathroom that hit almost every dated-design signal in the table above.
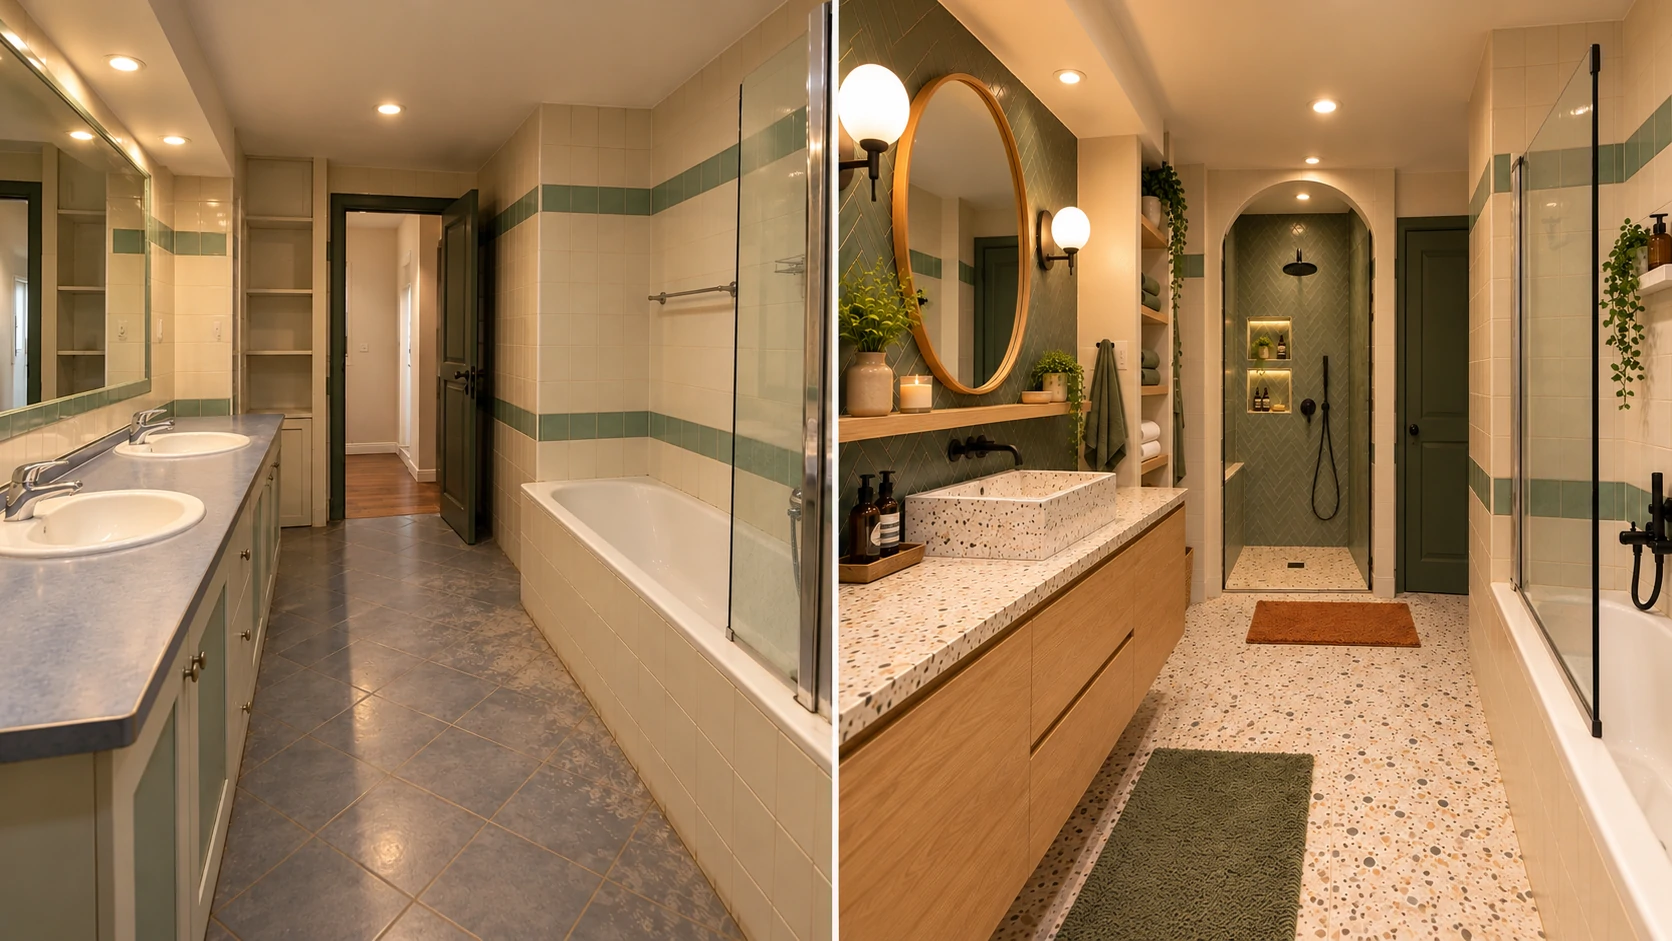
Before: A master bathroom built in the early 2000s. Brown diagonal travertine tile covering the floor, shower walls, and jetted tub surround. Birdseye maple flat-front cabinetry in a warm honey tone. Two round drop-in sinks set into a travertine counter. A Hollywood-strip bulkhead mirror spanning the full vanity width. A framed glass corner shower enclosure. A whirlpool jetted tub. Chrome fixtures throughout. The room was large and functional. It looked like it was designed in 2002, because it was.
The homeowners had not used the jetted tub in three years. Between the tub and the corner shower, the center of the room was occupied by fixtures that weren’t being used — while the shower itself felt cramped relative to the room’s total square footage.
Phase 1 — Demolition: Full gut down to wood stud framing. When the tile came off, the original waterproofing condition became visible: liquid-applied membrane only at the shower pan, not extended up the shower walls to the code-required 6” minimum above the pan. Moisture had tracked into the lower portion of the framing behind the shower walls — not catastrophic, but the kind of slow damage that becomes expensive after another decade. The jetted tub surround had similar issues at the tub-to-tile transition, where the caulk joint had failed and allowed periodic moisture intrusion into the framing.
Phase 2 — Framing and Rough-In: With the tub removed, the shower footprint was redesigned to use the full width of the window wall. New framing established the shower configuration. Blocking was pre-installed at the vanity locations — a critical step, given that the floating vanities were part of the finished design. Plumbing rough-in was relocated to center the linear drain position in the new shower layout. Electrical rough-in established sconce locations at precise 60” height and shower-rated recessed positions.
Phase 3 — Waterproofing: Henry JumboTex two-ply sheet membrane was installed across the shower walls, extending a minimum of 6” beyond the wet zone boundary on all sides. The shower bench assembly — a built-in tiled bench along the window wall — was waterproofed at all seams and corner transitions with membrane tape and liquid-applied sealant before the mortar bed was established. The shower floor was pre-sloped to the linear drain at the required 1/4” per foot gradient. This is the invisible work that most homeowners never see and never think about until something goes wrong. It determines whether a bathroom performs for five years or thirty.
Phase 4 — Finished Result:
- Large-format travertine-look porcelain tile running continuously from the floor through the shower walls, with minimal grout joints
- Floating walnut vanity with open lower shelving and integrated Calacatta marble trough sink
- Full-height 3D dark wave textured accent tile behind the vanity zone
- Wood-framed rectangular mirror centered between warm-tone sconces
- Frameless glass shower enclosure with ceiling-mounted brushed nickel rain head and wall-mounted handheld
- Built-in tiled shower bench with warm LED accent strip at the base
- Skirted smart toilet in the adjacent private water closet, paired with a second walnut floating vanity and marble-top sink
- IP67-rated warm-tone LED strip under the vanity toe-kick
The transformation is significant. But the photos only show the after. The work that made the after possible — the framing, the blocking, the membrane — is invisible in every finished image. That’s intentional. That’s what a correct renovation looks like.
The Budget Reality — What Different Renovation Scopes Actually Cost
This is the question most homeowners have before they call anyone. And it’s the question most online content avoids answering honestly.
| Renovation Scope | What Is Included | Estimated Cost (US) | Typical Timeline |
|---|---|---|---|
| Cosmetic Refresh | Hardware, lighting, mirror, paint, caulk refresh, accessories | $1,500–$5,000 | 1–4 days |
| Partial Fixture Swap | New vanity, toilet, shower fixtures — no tile work | $5,000–$15,000 | 1–2 weeks |
| Tile and Fixture Remodel | New tile (layout unchanged), vanity, fixtures, lighting | $15,000–$35,000 | 3–6 weeks |
| Full Gut Renovation | Complete demo, new waterproofing, potential layout change, all finishes | $35,000–$85,000+ | 6–14 weeks |
A few honest additions:
Add 10–20% contingency in every case. Hidden water damage, mold remediation, permit requirements, and material lead times are the most common cost escalators. They occur in a substantial percentage of bathroom gut renovations — particularly in homes built before 2005, where original waterproofing methods were less rigorous.
UK, Canada, and Australia: Adjust upward by 15–35% depending on regional labor markets and material import costs. Tile pricing in the UK and Australia is typically higher for equivalent large-format porcelain due to import costs. Canadian labor rates vary significantly by province.
What drives cost above the baseline: Natural stone vs. porcelain-look, wall relocation, plumbing stack moves, electrical panel upgrades, radiant floor heating added during tile phase, frameless vs. semi-frameless glass, smart fixtures, and any remediation of water damage discovered mid-demo.
The project shown in this article fell in the full gut range. The footprint was the same room. But demo, new waterproofing, full re-framing of the shower zone, plumbing relocation for the linear drain, floating vanity blocking, new electrical, all new finishes, and premium materials put it firmly in that bracket. It was worth it. That’s a separate decision every homeowner makes based on their own timeline, budget, and plans for the property.
The Waterproofing Layer — The Invisible Decision That Determines How Long “Modern” Lasts
Two bathrooms can be tiled with identical materials by equally skilled tile setters and look identical at completion. In five years, one looks the same. The other has grout cracking at the shower corners, a slight efflorescence stain at the base of the wall tile, and a smell that wasn’t there before. The difference is almost always the waterproofing layer — not the tile, not the grout, not the installer’s technique.
The tile is not the moisture barrier. The membrane behind the tile is the moisture barrier. Tile and grout are water-resistant, not waterproof. Every grout joint, every corner, every change of plane is a potential pathway for moisture to reach the substrate. Without a continuous membrane behind the tile in wet zones, moisture accumulates in the framing over time.
Membrane options:
- Sheet membrane (Schluter KERDI, Henry JumboTex): Bonded directly to the cement board substrate, covered with mortar, then tile. Highly reliable, well-tested, and what the project documented here used. JumboTex two-ply sheet membrane provides an additional redundancy layer that single-ply options don’t.
- Liquid-applied membrane (RedGard, Hydro Ban): Brushed or rolled onto the substrate in two coats, allowed to cure, then tiled over. Less material cost than sheet membrane, but application quality is more variable — brush technique, coat thickness, and corner build-up matter significantly. Widely used and effective when properly applied.
- Foam board systems (Wedi, Schluter Kerdi-Board): Rigid foam panels that are inherently waterproof, eliminating the need for a separate membrane. More expensive material cost, faster installation, and dimensionally stable. Used frequently for custom shower niches and benches.
⚠ Important: Waterproofing cannot be inspected after tile is installed. It cannot be corrected without full demolition. The cost of inadequate waterproofing is not the $200–$600 that the membrane would have cost. It is the cost of remediation, reconstruction, and in some cases mold testing and treatment of surrounding wall cavities and subfloor — typically $8,000–$25,000 or more. Treat waterproofing as a non-negotiable fixed cost, not a place to reduce the budget.
Shower pan slope is part of this. Code requires a minimum 1/4” per foot slope from the edges toward the drain across the entire shower floor. Pre-slope is established before the membrane goes down, using a mortar bed or pre-sloped foam substrate. A shower floor that does not slope correctly holds standing water — which stresses the membrane, the grout, and eventually the structure beneath it. Ask your contractor specifically how the pre-slope will be established before demo begins.
DIY vs. Professional — An Honest Assessment
Not every part of a bathroom renovation requires a licensed contractor. But some parts genuinely do — both for safety and for long-term results. Here’s a practical breakdown.
| DIY-Appropriate | Hire a Licensed Professional |
|---|---|
| Painting walls and ceiling | Tile installation (especially large-format on wet walls) |
| Hardware replacement (towel bars, hooks, toilet paper holder) | Plumbing rough-in or any drain/supply relocation |
| Mirror swap | Electrical work in wet zones (GFCI circuits, permits required) |
| Lighting fixture replacement (existing GFCI wiring in place) | Waterproofing membrane installation |
| Vanity top replacement with unchanged plumbing connections | Floating vanity installation requiring wall blocking |
| Caulk refresh and grout touch-up | Frameless glass enclosure installation |
| Accessory and decor layer | Shower niche and bench framing and waterproofing |
| Vanity cabinet painting or staining | Heated floor rough-in during tile phase |
A note on regional requirements: plumbing and electrical permits are required in most US states, Canadian provinces, UK local authorities, and Australian states for any rough-in work or new circuit installation. Unpermitted work in these categories can create complications at resale — many lenders and buyers require permits to be pulled retroactively, which involves inspecting work that may now be behind finished walls. The upfront cost of permits ($150–$500 typically) is significantly less than the potential complication.
Modern Bathroom Mistakes That Are Expensive to Fix
1. Skipping Wall Blocking Before Drywall
The floating vanity you’ve been planning requires horizontal blocking between wall studs, installed before any drywall or cement board goes up. If you finish the walls first and add the vanity as a phase two project, you’re opening a finished wall to add blocking, patching the cement board or drywall, retaping and finishing, and potentially retiling. What would have cost nothing during rough-in adds $500–$1,500 to the project after the fact.
2. Choosing Polished Large-Format Floor Tile
The look is immaculate. In a dry space — a lobby, a hallway — polished porcelain is a legitimate choice. In a bathroom floor that gets wet every day, polished tile below a DCOF of 0.42 is a fall hazard. Specify honed or lightly textured finish for bathroom floor applications, and verify the DCOF rating before ordering. The tile supplier will have this data.
3. Mixing Three Metal Finishes
Buy the shower valve in brushed nickel. Order the faucet in chrome because it was two weeks faster. Pick up towel bars in matte black because they were on clearance. The result looks like a renovation that ran out of money at three different points. Before purchasing any hardware, list every metal finish point in the bathroom — valve trim, faucet, drain cover, towel bars, toilet paper holder, robe hook, mirror frame, sconce hardware, shower door hardware — and assign finishes deliberately. Two finishes maximum. Apply them consistently.
4. Light Grout Color in a High-Use Wet Space
White or very light grout in a shower or on a bathroom floor is beautiful for approximately six months. Then the routine of daily use, imperfect sealing schedules, and the reality of soap scum and mineral deposits makes it a maintenance obligation that most households won’t sustain. Grout color that matches the tile closely — charcoal grout with gray tile, tan grout with travertine-look porcelain — is significantly more forgiving and ages more evenly.
5. Shower Niche Without Proper Liner Waterproofing
A built-in shower niche is one of the most requested features in a modern bathroom remodel and one of the most common sources of slow water intrusion behind shower walls. The niche cuts through the waterproofing plane. Every corner of the niche — back panel to side walls, side walls to top and bottom — needs to be waterproofed with membrane tape and liquid-applied sealant before tile goes on. A tile-over-backer-board niche without additional waterproofing at the corners is one of the most common callbacks in bathroom renovation warranty work.
6. Non-IP-Rated LED Strips in the Bathroom
Standard LED strips — the kind available at every hardware store — are not rated for wet or humid environments. In a bathroom, humidity is constant. Near a shower, moisture exposure is direct. Standard LED strips in these conditions fail within one to three years: the silicone coating separates, the board corrodes, sections stop illuminating, or the color temperature shifts toward yellow. Specify IP67-rated LED strips for any installation within or near the shower wet zone, and IP44 minimum for under-vanity and other bathroom applications.
7. Buying Frameless Glass Before Measuring the Door Swing
Frameless glass doors swing outward. In a spacious master bath, this is not an issue. In a smaller bathroom — or in a configuration where the shower is adjacent to the toilet — a full-swing frameless door may have very limited clearance. Measure the full door swing arc before ordering. Some configurations work better with a bi-panel frameless door that folds rather than swings, or with a fixed panel and no door at all (open walk-in). Discover this during planning, not delivery.
8. Removing the Only Bathtub in a Family Home
This is the renovation decision with the most consistent resale impact. Modern design strongly favors large walk-in showers over jetted tubs in master bathrooms — the tub is often unused, and the shower footprint is genuinely more useful. But if the bathroom being renovated is the only bathroom in the home with a bathtub, removing it affects your buyer pool at resale. Many families with young children specifically require at least one tub. Check whether another bathroom in the home has a tub before committing to tub removal in the master.
9. Selecting Trendy Grout Colors
The grout color palettes that trend in a given year have a shelf life of three to five years. “Greige” grout, charcoal grout on white tile, and warm beige grout on gray tile all have a dated association now — not because those colors are bad, but because they were so specifically fashionable at one moment. Grout that matches the tile tone closely — rather than contrasting it — is the most timeless choice and the one least likely to signal a specific renovation era in ten years.
10. Missing the Radiant Floor Heating Window
Radiant floor heating — electric mat systems in particular — must be installed beneath the tile before the tile goes down. That’s the only opportunity. If you want heated floors and your bathroom is being tiled, the cost to add a floor heating mat during the tile phase is typically $400–$900 for materials (for a standard master bath) plus a few additional hours of electrician time for the thermostat wiring. Adding heated floors after tile installation means demolishing the floor. The incremental cost during renovation is a fraction of the reconstruction cost afterward.
.webp)
.webp)
.webp)
.webp)
Frequently Asked Questions
What is the single most impactful change to make a bathroom look modern?
Lighting. Specifically, replacing a bulkhead vanity light or fan/light combo with flanking wall sconces at eye level (60” from the floor) changes how the face is lit, how the room feels, and how the entire vanity zone reads. It requires a licensed electrician if new wiring is needed, or can often be done with existing wiring if the outlet box location is compatible. After lighting, the next highest-impact single change is the vanity — either replacing a floor-standing unit with a floating design or replacing the hardware and mirror to bring the existing cabinet forward visually.
How do I make a small bathroom look modern on a limited budget?
Focus on what the eye goes to first: the mirror and lighting above the vanity. Swap a basic rectangle mirror for a frameless or thin-framed rectangular design. Replace overhead vanity lighting with a single wall sconce (in a very small bath, one centered sconce is acceptable). Repaint in a single neutral tone that reads as intentional rather than default. Update all hardware to a single consistent finish. These four changes — mirror, lighting, paint, hardware — can be done for $800–$2,500 depending on fixture quality and require no plumbing or tile work.
What tile size makes a bathroom look most modern?
24×48 inch is the current benchmark in high-end renovation work. At this size, the minimal grout joint creates a nearly continuous surface that reads as architectural rather than tiled. 12×24 is a practical middle ground for older homes where subfloor stiffness is a concern — it’s still large-format relative to standard tile but has less lippage risk on floors that aren’t perfectly level. Anything smaller than 12×12 is generally not considered large-format and will read as more traditional in the context of a contemporary design.
Is a floating vanity worth the extra installation cost?
Yes — with a qualification. A floating vanity properly installed (with wall blocking, correct weight-bearing hardware, and appropriate cabinetry material for a humid environment) will perform well and maintain the look that makes it worth choosing. A floating vanity retrofitted into a wall that wasn’t blocked, mounted with inadequate hardware, or built from non-humidity-rated cabinetry will feel unstable and show wear within a few years. The design is right. The installation details have to match.
Should I remove my bathtub to expand the shower?
In a master bathroom where another tub exists elsewhere in the home, yes — if the space permits a shower that genuinely benefits from the tub’s footprint. The trade is almost always worth it in terms of daily usability. In a home where the master bath is the only bathroom with a tub, this decision affects resale buyer pool. National Association of Realtors data consistently shows that removing the last tub in a home reduces appeal for families with young children. It’s not a dealbreaker for every buyer, but it’s a conversation worth having before committing.
What hardware finish is most modern in 2026, and how long will it stay that way?
Brushed nickel has proven the most durable in terms of design longevity — it doesn’t spike, doesn’t read as aggressively trendy, and doesn’t show fingerprints the way polished finishes do. Matte black remains strong but is past its peak trend moment, which means it’s now a legitimate design choice rather than a trend signal. Unlacquered brass (which patinas naturally over time) and satin brass are currently in a growth phase and likely to hold for another five to eight years based on cycle patterns. Polished chrome is genuinely timeless in a minimalist context. Whatever you choose, apply it consistently — finish longevity is about coherence as much as the finish itself.
How do I choose between frameless and semi-frameless glass shower enclosures?
If your shower walls are plumb and your budget supports it, full frameless is the cleaner choice visually. If your walls have any significant out-of-plumb condition (common in homes more than 20 years old), semi-frameless is more forgiving — the top rail and side channel accommodate variance that a completely frameless installation struggles with. Cost difference is typically 15–25%. For most master bath configurations, the visual difference between the two is minimal once the shower is finished and tiled.
What type of lighting makes a bathroom feel modern and spa-like?
Three-layer lighting on dimmers: ambient recessed downlights, task sconces at eye level flanking the mirror, and accent LED strips under the vanity (and optionally at shower bench level). The key element is the dimmer. In a bathroom with all three layers and a dimmer, you can run full brightness in the morning for task use and bring everything down in the evening so the LED strip becomes the dominant light source — warm, low, indirect. That shift in ambience is what people mean when they describe a bathroom that “feels like a spa.”
How long does a full bathroom gut renovation realistically take?
Six to fourteen weeks from permit approval to substantial completion is the honest range for a master bath full gut renovation. Permit approval alone takes one to four weeks depending on jurisdiction. Demo is typically one to two days. Rough-in (plumbing, electrical, framing) takes one to two weeks. Waterproofing, tile, and drywall take two to four weeks. Fixtures, glass, and finishes take one to two weeks. The schedule compresses when subcontractors are available and materials are pre-ordered. It expands when concealed damage is discovered, when permit inspections are delayed, or when custom materials have lead times. Order tile, vanities, and glass enclosures before demo begins. Custom items can take four to twelve weeks to arrive.
Which modern bathroom features actually add measurable resale value?
Large-format tile, floating vanities, and frameless glass enclosures are broadly recognized by buyers in the current market and improve perceived quality. Smart toilets and thermostatic shower systems are appreciated but not typically reflected in appraisal value. Radiant floor heating adds perceived luxury but is not universally valued in warm climates. The strongest ROI driver in a bathroom renovation remains the overall quality and coherence of finishes — buyers in the $500,000+ home market have seen enough renovations to recognize shortcuts — rather than any single feature. Consistent quality across every element outperforms one premium element surrounded by budget choices.
How do I prevent large-format floor tile from being slippery when wet?
Specify a honed or lightly textured surface finish rather than polished. Verify the DCOF (Dynamic Coefficient of Friction) rating — the minimum for wet bathroom floors is 0.42. For shower floors specifically, a slip-resistance rating of 0.60 or higher is appropriate given the consistently wet conditions. Many large-format porcelain lines offer the same visual in both polished (for walls) and honed/textured (for floors) finishes. Buy both from the same product line for the same visual continuity. Apply a penetrating sealer to natural stone and unglazed porcelain on a schedule — typically annually — to maintain both slip resistance and stain resistance.
What is the real maintenance routine for a frameless glass shower enclosure?
Daily: squeegee all glass panels after each shower. Takes about ten seconds. Without this, hard water minerals etch into the glass surface gradually and create a haze that cleaning products cannot fully remove. Weekly: wipe down with a bathroom glass cleaner (white vinegar solution works) to dissolve any mineral deposit that accumulated despite daily squeegeeing. Monthly: inspect and clean the door hinge hardware and pivot points — debris and soap residue accumulate at hinge points and can affect smooth operation over time. Annually: consider a professional treatment with a hydrophobic glass coating (Diamon-Fusion, EnduroShield) if not applied at installation. This is not optional maintenance in hard water areas. It is what frameless glass requires.
Can I mix metal finishes in a modern bathroom?
Yes — with discipline. Two finishes maximum. One dominant, one accent. The dominant finish (brushed nickel, matte black, etc.) applies to all primary fixtures: shower valve trim, faucets, towel hardware. The accent finish appears in secondary or decorative elements: mirror frame, sconce detail, cabinet pull. The critical rule is that both finishes appear in more than one location — a “mixing” that really means one finish everywhere and one piece in a contrasting finish looks like a mistake, not a decision. When both finishes recur throughout the space, the combination reads as intentional.
What is the most expensive mistake homeowners make during a bathroom renovation?
Inadequate waterproofing is the most consequential — it creates damage that is invisible for years and catastrophically expensive when it surfaces. The second most expensive is skipping permits for plumbing and electrical work, which creates resale complications. The third is failing to plan floating vanity wall blocking before walls are finished, which turns a simple vanity installation into a wall-opening project. All three share the same pattern: they save money in the moment and cost significantly more to correct after the fact. The decisions that feel like savings during renovation frequently become the largest costs in the five years that follow.
How do I modernize a bathroom on a budget under $5,000 without touching tile or plumbing?
In priority order: lighting first ($400–$1,200 for quality sconces plus electrician if wiring changes are needed), then mirror ($200–$800 for a frameless or framed rectangular design), then hardware in a single consistent finish ($300–$600 for a complete set), then paint ($100–$300 for professional-quality product plus labor if not DIY), then vanity accessories — soap dispenser, tray, towel display — in a cohesive palette ($200–$400). Total: $1,200–$3,300 for the range, leaving room for an unexpected cost or a higher-quality sconce selection. This scope modernizes the visual layer of a bathroom without any structural, plumbing, or tile work.
This article is based on real renovation experience, documented project evidence, and trade-level knowledge of bathroom construction, waterproofing systems, and finish selection. For project-specific advice, consult a licensed contractor in your area.
.webp)
.webp)
 (2).webp)
.webp)