PEOPLE ALSO READ...
.webp)
Bathroom Remodel Ideas on a Budget (With a Real 1908 Home Example)
Most "budget bathroom remodel" articles give you the same five ideas: paint, new hardware, a mid-range vanity, updated lighting, maybe a shower kit. None of that advice is wrong. It's just incomplete for anyone dealing with a bathroom older than about sixty years, where the real budget question isn't what you want to change — it's what's already happening behind the wall. This guide covers both sides of that question: where the genuine savings are in a bathroom remodel, what actually drives the cost of a tub-to-shower conversion, and what a real renovation looked like in a 1908 home once the walls came down — plumbing surprises included. In short: a cosmetic-only bathroom refresh typically runs $3,000 to $15,000, and a full remodel that keeps the existing layout lands between $15,000 and $30,000. Costs climb from there when plumbing has to move or when a home's original framing needs repair before new work can go in over it — both far more common in pre-1960s houses than most budget guides let on.Quick takeawaysReusing the existing plumbing layout is the single biggest cost saver in any bathroom remodel. Homes built before 1960 — and especially before 1940 — often carry hidden structural or plumbing costs that a "budget" number doesn't include. A tub-to-shower conversion costs far less when the drain and supply lines stay exactly where they are. Large-format porcelain tile can mimic natural stone at a fraction of the material and maintenance cost. Any joist showing old notches or cuts from earlier plumbing work should be evaluated before new drywall or tile covers it back up.What "Budget" Actually Means for a Bathroom Remodel "Budget" means something different depending on what's actually changing. A vanity swap and a fresh coat of paint is a different project — and a different price — than gutting a bathroom down to the framing. Three things determine where a project lands on that spectrum:Whether the plumbing moves Whether the layout changes What condition the existing structure is in once it's opened upThe first two are choices you make going in. The third one usually isn't — you find out once demolition starts.Scope Typical 2026 cost range What it usually includesCosmetic refresh $3,000 – $15,000 Paint, vanity, fixtures, hardware, lighting, new flooring — plumbing stays putFull remodel, same layout $15,000 – $30,000 New tile, new shower or tub, new vanity, updated ventilation and electricalFull remodel, layout changed $25,000 – $45,000+ Everything above, plus moved drain/supply lines and possible framing workThese figures assume the framing and plumbing underneath are in reasonable shape. If they're not — which is common in older homes — add a structural contingency on top. More on sizing that later in this guide.A Real Budget Remodel: 1908 Home, Tub-to-Shower Conversion Numbers like the ones above are easier to trust with a real project attached. Here's one. This bathroom started the way a lot of older-home bathrooms do: dated but functional. Floral wallpaper, an oak vanity from a previous decade's update, and a layer of vinyl plank flooring that had been installed over the original subfloor at some point — a cosmetic patch that never touched what was actually holding the room up. Worth flagging on its own: a new floor or a fresh coat of paint can make an old bathroom look updated for a few years. It doesn't tell you anything about the plumbing or framing underneath. Eventually something forces the real question — in this case, a full renovation that included converting the tub to a walk-in shower. Once the walls came down, the reason so many older-home remodels blow past their original number became obvious. Behind the wallpaper was original lath-and-plaster construction — thin strips of wood nailed horizontally across the studs, holding a base coat of plaster, standard for houses built in the early 1900s. It's sturdy on its own, but it also means every wire and pipe added since has usually been fished through it, not planned around it. The floor joists told the real story. Decades of plumbing repairs had left them notched, drilled, and patched — repairs made to get the pipe where it needed to go, not necessarily repairs made to any code. It's the kind of thing a homeowner never sees until a floor or ceiling opens up, and it's exactly the hidden structural cost a budget number rarely accounts for. Before any new tile or drywall could go in, the plumbing itself had to be replaced — new PVC drain and waste lines run cleanly through the joist bays instead of notched through them — and sections of subfloor needed patching where old flooring had let water in over the years. Only after that structural work was done could the finish work start: moisture-resistant drywall on the ceiling and walls, a liquid waterproofing membrane over cement board in the shower area, and large-format porcelain tile with a marble-look finish on the walls, paired with black herringbone tile on the shower floor for grip. A tiled niche replaced what would otherwise have been an add-on shower caddy. One detail most bathrooms don't have: a window in the shower's exterior wall was kept rather than framed over, fitted with a new window unit and tiled directly into the surround. That's worth a second look if your own bathroom has a window near or inside a shower — it needs the same waterproofing attention as every other surface in that stall, and skipping it is a common, hard-to-spot source of future leaks. The finished bathroom kept a piece of the home's original character — a fluted door casing with rosette corner blocks, consistent with the house's age — while updating everything else: a marble-look quartz vanity top, brass fixtures at the sink paired with matte black hardware in the shower and on the lighting, a frameless glass shower enclosure, and black tile flooring throughout. A renovation at this scope — full gut, new plumbing, a custom tiled shower, and a quartz-look vanity top — commonly lands in the $18,000–$32,000 range for a bathroom this size, once the structural work is accounted for. Small bathrooms often cost more per square foot than large ones, since fixed costs like plumbing and waterproofing don't shrink along with the room, but the smaller total footprint still keeps the overall number lower than the same finishes would cost in a full-size primary bathroom.Why Old Plumbing Often Means Hidden Structural Costs Most homes built before the 1960s were never designed with modern plumbing in mind. Indoor plumbing in many early-1900s houses was added after the home was built — sometimes years or decades later — by whoever the homeowner at the time could afford. That usually meant routing pipe wherever it fit: through joists, not around them. Modern building codes are specific about how much material can be removed from a joist before it loses structural capacity — how large a hole can be, how close to the edge, how deep a notch is allowed. Those rules didn't widely exist, or weren't enforced, when plumbing was retrofitted into most older homes. Decades later, the result is framing that's been quietly weakened by repairs nobody signed off on.Why this matters: A joist that's been over-notched or over-drilled can look fine for years, until new tile, a heavier vanity, or a soaking tub adds enough weight to make the problem visible as a sagging or bouncy floor. If your bathroom is in a pre-1960s home and you're planning any remodel that opens the floor or walls, budget for a professional to look at the framing before it gets covered back up — not after.The real gap in most budget bathroom remodel content is right here: it treats structural repair as a rare exception, when in older homes it's closer to standard practice. Budget-Friendly Layout Decisions The single biggest lever on cost isn't the material list — it's whether the plumbing stays where it is. Keeping your toilet, sink, and shower or tub in their existing locations means the supply and drain lines already there can usually be reused. Moving any of them means new lines, new venting, and often opening up a wall or floor in an adjacent room to make the connection. A simple way to decide:Keep the layout if: the current arrangement works for how your household actually uses the bathroom, the plumbing is in decent shape, and you'd rather put the budget into finishes. Change the layout if: the plumbing already needs replacing regardless of layout (in which case relocating it while the walls are already open adds relatively little), the current layout doesn't fit how the space actually gets used, or converting the tub to a shower is genuinely the goal rather than a nice-to-have.One thing worth knowing: if you're already committed to opening the walls for a structural repair, that's often the cheapest moment to also fix a plumbing layout that never made sense. A large share of the labor cost of "opening the wall" has already been spent either way. Tub-to-Shower Conversion: What Actually Drives the Cost Most articles list "convert your tub to a shower" as a budget-friendly idea without explaining why the same conversion can cost $2,000 in one bathroom and $15,000 in another. The difference almost never comes down to the shower itself. It comes down to the drain.Conversion type Typical cost WhyPrefab shower kit, drain unchanged $2,000 – $8,000 Fast install, waterproofing built into the unit, no tile laborCustom tiled shower, drain unchanged $6,000 – $12,000 Tile and membrane labor, but plumbing stays in placeCustom tiled shower, drain relocated $10,000 – $18,000+ Adds plumbing labor, possible framing or floor work, and re-venting to codeA shower needs to slope toward its drain from every direction, which is different geometry than a tub, whose drain sits at one end. If the new shower's footprint doesn't line up with where the old tub drain was, that drain has to move — and moving a drain means cutting into the floor, adjusting the waste line's slope, and, in a home with a finished ceiling below, opening that ceiling too. The lesson for budgeting: "just swap the tub for a shower kit" is only accurate pricing when the shower's shape and drain location match the old tub almost exactly. Any real layout change turns it into a plumbing project with a shower attached to it.DIY vs. Professional: Where to Draw the Line Not every part of a bathroom remodel needs a licensed trade. But some parts absolutely do, and guessing wrong on this list is one of the more expensive mistakes a homeowner can make.Task Who should handle itPainting, caulking, re-grouting existing tile HomeownerSwapping hardware, towel bars, cabinet pulls HomeownerInstalling a new vanity (plumbing unchanged) Homeowner, if comfortable with basic supply-line connectionsInstalling floor tile over proper underlayment Homeowner, with some research — forgiving of small mistakesInstalling a prefab shower kit (drain unchanged) Homeowner or handymanWaterproofing membrane for a custom tiled shower Licensed contractor or experienced tile setter — mistakes stay invisible until they leakRelocating a drain or supply line Licensed plumberAny electrical beyond a like-for-like fixture swap Licensed electricianRemoving, notching, or reinforcing joists Licensed contractor or structural professionalAnything requiring a permit or inspection Licensed contractorA useful rule of thumb: if a mistake would be visible right away — crooked tile, a scuffed wall — it's a reasonable DIY risk. If a mistake would stay hidden until it causes water damage, mold, or a structural problem — waterproofing, plumbing, framing — it's worth paying for the license and the inspection that comes with it.Budget Materials That Still Look High-End The materials that save the most money without looking like it share one thing in common: they imitate a premium material's appearance without its maintenance demands.Large-format porcelain tile with a marble-look finish. Same visual weight as natural marble, without the sealing, etching, and staining concerns real stone carries in a wet environment. Quartz or engineered stone vanity tops. Non-porous and consistent in pattern, at a fraction of natural stone's price, with no periodic resealing required. Matte black or brass fixture finishes. These read as intentional design choices rather than budget compromises, and both hold up well against water spotting compared to polished chrome. Herringbone or basket-weave patterns on a shower floor. A layout change, not a material upgrade, that adds visual interest and slip resistance for the same per-tile cost as a straight lay. Prefabricated shower pans under a tiled surround. Combines the look of a fully tiled shower with a factory-sealed base, reducing one of the most common points of shower leaks — the pan-to-drain connection. Humidity-sensing exhaust fans. Automatically run longer after a shower without a separate timer switch — a small upgrade that protects every other budget choice in the room from moisture damage.None of these require premium pricing to look considered. What they require is choosing finishes designed to imitate something more expensive, rather than finishes that look inexpensive because they are. Prefab shower kit vs. custom tiled shower, side by side:Factor Prefab shower kit Custom tiled showerInstalled cost $1,000 – $4,000 (up to ~$8,000 for larger units) $6,000 – $17,000+Install time 1–3 days 7–12 days or moreWaterproofing Built into the factory unit Entirely dependent on installer's membrane workOngoing maintenance Low — no grout to reseal Moderate — grout and sealant need periodic attentionTypical lifespan 10–20 years 20–30 years with proper careDesign flexibility Limited to stock sizes and finishes Fully customNeither option is objectively better. A prefab kit is the more budget-efficient choice for a secondary bathroom; custom tile earns its higher cost in a primary bathroom, where daily use and resale expectations run higher.Structural and Plumbing Red Flags in Older Homes Before starting any remodel in a home built before 1960, it's worth knowing what to look for — ideally before demolition, not after. Watch for:Joists with visible notches, drilled holes larger than roughly a third of the joist's depth, or cuts near the bottom edge (the load-bearing edge) A bouncy or noticeably sloped bathroom floor Discoloration, soft spots, or a spongy feel underfoot near the toilet or shower Galvanized supply pipes, which corrode from the inside and reduce water pressure over decades Cast iron drain lines, which can develop invisible internal corrosion long before they fail visibly Any sign of a previous leak — a water stain on the ceiling below, or a musty odor near the plumbing wallNone of these automatically mean a project is unsafe to complete. They mean the budget should include a professional assessment before the rest of the plan gets finalized. Confirming a joist is fine costs far less than finding out it isn't after new tile is already on the wall. Realistic Budget Breakdown by Project Scope Most budget bathroom remodel content gives one number for the whole project. A more useful way to plan is by line item, so it's clear exactly where a structural surprise would hit.Line item Typical cost, if neededDemolition and disposal $1,000 – $2,300Permits $100 – $1,000Subfloor repair or replacement $100 – $570Joist sistering (per joist) $100 – $300Joist replacement (per joist) $500 – $2,000Plumbing relocation $2,000 – $8,000+Shower tile and waterproofing $3,000 – $8,000Vanity, fixtures, and lighting $1,500 – $5,000A rule that holds up across most remodels: labor makes up roughly 40–65% of total project cost, materials the rest. In an older home, it's worth setting aside 10–20% of the total budget as a structural contingency — money that either goes toward framing and plumbing repairs, or gets folded back into better finishes if the crew opens the wall and finds good news instead. Maintenance After a Budget Remodel The material choices made during a budget remodel affect how much upkeep the bathroom needs afterward, not just how it looks on move-in day.Tiled showers need grout resealed roughly once a year to keep water from working its way behind the tile. Prefab shower kits need almost no sealant maintenance, but the caulk joint where the unit meets the wall or floor should be checked and replaced if it starts to gap. Quartz and engineered stone tops don't need sealing, unlike natural stone, but avoid abrasive cleaners that can dull the finish over time. Exhaust fans should run during and for at least 20 minutes after every shower — the cheapest thing a homeowner can do to protect new drywall and tile from moisture damage.FAQ How much does a budget bathroom remodel cost on average? A cosmetic-only remodel typically runs $3,000 to $15,000. A full remodel that keeps the existing layout runs $15,000 to $30,000, and one that involves moving plumbing or reconfiguring the layout can run $25,000 to $45,000 or more. Is it safe to remodel a bathroom if the joists were previously cut for plumbing? It can be, but it needs to be evaluated first. A joist with a small notch or hole in the right location may be fine; one cut too deep or too close to the edge may need sistering or replacement before new work goes over it. Have a contractor or structural professional look at it before covering it back up. What's the difference between sistering a joist and replacing it? Sistering attaches a new piece of lumber alongside a damaged joist to restore its strength, without removing the original — typically $100–$300 per joist. Full replacement removes the damaged joist entirely and costs more, usually $500–$2,000 per joist, because the floor above needs temporary support during the work. Can I convert a tub to a shower myself? Installing a prefab shower kit where the drain doesn't move is within reach for a confident DIYer. Anything involving relocating the drain, altering framing, or installing a custom tile waterproofing system is a job for a licensed plumber or contractor — the failure mode for a mistake is a hidden leak, not a cosmetic flaw. Do I need a permit to change my bathroom layout? In most jurisdictions, yes. Moving plumbing or electrical typically requires a permit, even in a small bathroom. Requirements vary by city and county, so check with the local building department before work starts. Are prefab shower kits cheaper than tiled showers long-term? Usually. Prefab units need almost no ongoing sealant maintenance, while tiled showers need grout resealed periodically. Tile tends to last longer overall (20–30 years vs. 10–20 for prefab) and carries more resale appeal in a primary bathroom, so the "cheaper" answer depends on how long the material actually needs to last.
.webp)
We Gutted Our 46-Year-Old Kitchen — Kitchen renovation design ideas interior
The walls of a 1979 kitchen don't give up their secrets until you pull the cabinets off. We knew that going in — we just didn't know exactly what we'd find, or how much it would change the decisions we thought we'd already made. What started as a straightforward design project turned into a full systems overhaul the moment demo began. This is the real account: what the original kitchen looked like, what the demo phase revealed, every major design decision we made afterward, and the vision we're building toward. If you're planning something similar in an older home, this is the article you'll want before you start swinging a pry bar.The short answer: A full kitchen gut renovation in a home built before 1985 involves removing all existing cabinetry, inspecting and often updating electrical, plumbing, and drywall, then rebuilding from scratch. In homes from the late 1970s, discovering outdated wiring, aging supply pipes, or asbestos-containing materials is common — budget for it before demo begins, not after. All major design decisions, including cabinet layout, island sizing, countertop material, and outlet placement, must be locked in before walls are closed.Quick Takeaways:Pre-1980 homes commonly contain aluminum branch circuit wiring, galvanized supply pipes, and potentially asbestos — budget $3,000–$15,000 for discoveries before committing to a full gut Two-tone cabinets (white shaker uppers with dark espresso lowers) are the dominant 2026 modern farmhouse kitchen aesthetic — and there's a specific design logic behind where the color split falls A farmhouse apron-front sink changes your plumbing rough-in height requirements — this decision must be made before your base cabinet boxes are ordered Island clearance minimums are 42 inches on working sides and 36 inches on non-working sides per most residential codes — smaller than that and the space will feel wrong Quartz countertops on an island span over 48 inches require a 3/4-inch plywood substrate to prevent flex-cracking at seams over timeThe Original Kitchen: Before Photos and What We Were Working With The kitchen that greeted us was a textbook late-1970s build. Raised-panel honey-oak cabinets ran floor to ceiling, anchored by a soffit that added visual weight to an already low ceiling plane. The hardware was dated black metal, the countertops were laminate, and a row of upper cabinets flanked both sides of a window that made the room feel smaller than it measured. There were things that had already been updated — the flooring was a newer dark luxury vinyl plank, and stainless appliances had replaced whatever came with the house. But the bones of the kitchen itself hadn't been touched since Reagan was in office. The existing DIY island was the most interesting element: a white-painted base with a dark epoxy-butcher block top and black hardware. It pointed toward where the design could go. It also gave us a reference point — the color palette we wanted to work with was already partially established. What we were not working with: enough storage for a modern family, any functional prep zone near the range, adequate lighting, a layout that made sense, or cabinet boxes we trusted to outlast a renovation budget.Why We Chose a Full Gut Over Cabinet Refacing Refacing makes sense under specific conditions. Cabinet boxes in sound structural condition, a layout that functions well, plumbing and electrical that are modern — if those three things are true, refacing can deliver 70% of the visual result for 30% of the cost. That math is real. None of those conditions applied here. The cabinet boxes were face-frame construction from the original build — not structurally failed, but warped at the drawer slides and assembled with the staple-and-glue method common to that era. Relying on them as the foundation for new doors and hardware would have been building on sand. Beyond that, the layout didn't work. The sink was positioned in a corner that made the dishwasher loading awkward, the island was undersized for the room, and the soffit above the upper cabinets was eating 18 inches of ceiling height we didn't need to sacrifice. The plumbing situation — galvanized steel supply lines behind the walls — made the decision final. Once you're opening walls for pipe replacement, you're already in a gut renovation whether you planned for it or not. The 5-question gut vs. reface decision framework:Are the existing cabinet boxes square, plumb, and structurally sound? (If no — gut) Does the current layout serve the way you actually cook and move? (If no — gut) Are your plumbing and electrical systems from the original build or within the last 20 years? (If original — gut) Is your renovation budget above $25,000 for a mid-size kitchen? (If yes — gut is often better value) Are you planning to stay in this home for more than 5 years? (If yes — long-term quality justifies the gut cost)We answered gut on every question. So we gutted.What Demo Revealed: Hidden Problems in a 46-Year-Old Kitchen This is the section that separates real renovation documentation from the aspirational content you'll find everywhere else. Demo is where an older home either cooperates or doesn't. Ours did not cooperate. With the cabinets off the walls and the soffit opened up, what we found was: a 1970s kitchen that had never been touched electrically or structurally since the day it was built. The walls came down to bare drywall, plumbing rough-in was exposed, and the electrical boxes told a story that made us stop and call a licensed electrician before any other trade came back. The Electrical We Found — And Why It Mattered The wire in our outlet boxes was aluminum. Silver-colored conductors at every switch and outlet in the kitchen — not the copper you'll find in homes wired after the mid-1970s.⚠️ Safety Warning: Aluminum branch circuit wiring was common in US homes built between approximately 1965 and 1973. It expands and contracts at a different rate than the copper connections at outlet and switch terminals, which loosens connections over time. Loose connections generate heat. The documented risk is electrical fire at connection points. Replacing only the outlets does not resolve this risk. The two approved remediation methods are: (1) COPALUM crimp connectors installed by a licensed electrician — the only method recognized by the Consumer Product Safety Commission — or (2) full rewire of affected circuits. If you're in a home of this age and haven't had an electrician inspect your branch circuit wiring, do that before any renovation work.We went with COPALUM crimp remediation on the affected kitchen circuits and upgraded the panel while the wall was open to add a dedicated 240V range circuit. That add-on cost, not in our original budget, ran approximately $1,800 between the electrician's labor and permit fees. Annoying to discover mid-project. Not optional. The new recessed can layout and pendant rough-in were installed during this same phase — you cannot come back to this step once drywall is up. The Plumbing Rough-In: What We Moved and Why The original sink drain was positioned for a 9-inch drop-in basin. A farmhouse apron-front sink requires a different rough-in height — the drain location drops approximately 2–4 inches relative to where a standard undermount configuration sits. We'd already committed to the farmhouse sink in the design vision, which meant the plumbing rough-in had to move. This isn't a difficult plumbing task. But it is a task that has to happen before the base cabinets go in, not after. A plumber was on-site for about three hours to reposition the drain stub-out and extend the supply lines to the new valve positions. Worth knowing: A farmhouse apron-front sink also modifies the base cabinet box it sits in. The cabinet in that position is either a purpose-built apron sink base (which accepts the sink front panel as a finished surface) or a modified standard base with the face frame cut away. If you're ordering semi-custom or custom cabinets, specify "farmhouse sink base" explicitly when placing your cabinet order — it's a different cabinet, not a modification of a standard one. If the plumbing decision isn't made before cabinet specs are finalized, you end up ordering the wrong box or paying for a field modification later.If you're now realizing your renovation scope might be wider than you planned for, getting a free estimate from a licensed kitchen contractor costs nothing and takes under an hour. Most homeowners find the estimate — even when they plan to manage the project themselves — helps clarify which phases to DIY and which phases to bring in a professional.The Design Vision: How We Arrived at a Modern Farmhouse Style After demo, with the kitchen stripped to bare drywall, plumbing stub-outs, and exposed electrical boxes, design stops being theoretical. You're looking at the actual room — its proportions, its ceiling height, where the light actually falls, and what the window casing looks like against the wall texture. That's when design decisions either hold up or reveal themselves as wishful thinking. The bones of the room are good. The ceiling, without the soffit, reads taller. The window is well-placed. The overall footprint supports an island with real counter seating, not just a prep surface. The AI-generated vision render we built guided the decisions from this point forward: a two-tone cabinet scheme with white shaker uppers and espresso-stained lower cabinets, a farmhouse apron-front sink, a large island with quartz top and bar seating, a custom wood range hood surround, black pendant lanterns over the island, subway tile backsplash, and matte black hardware throughout. Every element in that render connects to a practical decision. Here's how we reasoned through each one. Why We Chose Two-Tone Cabinets: White Uppers, Dark Espresso Lowers Two-tone cabinets have been trending long enough that the trend question is mostly settled — they work. But most design content stops at "they look great together" without explaining the logic of where the split falls and why. The split line isn't arbitrary. It falls at the countertop surface — white above, dark below — for a specific visual reason: the countertop serves as a natural dividing line between the visual weight of the upper and lower zones. Dark lower cabinets visually anchor the room to the floor plane, which makes the ceiling feel higher. White upper cabinets reflect light into the room and keep the upper half feeling open. In a room with a ceiling height under 9 feet — which this kitchen has — those two effects combined do more for the sense of space than any lighting upgrade alone. Worth knowing: The color split only reads correctly if the countertop has enough visual contrast with both zones. A white or very light quartz countertop against white upper cabinets will blend together; the split disappears. A mid-tone or veined quartz creates definition at both transitions. We're using a light gray quartz with warm veining on the island and perimeter — it reads against the white uppers above and the espresso lowers below. The existing DIY island — white base, dark epoxy top — had been pointing toward this palette the whole time. Sometimes the room tells you what it wants before you decide.Factor All-White Cabinets Two-Tone (White Up / Dark Down) All-Dark CabinetsCeiling height perception Neutral Increases perceived height Decreases perceived heightMaintenance (high-touch lower zones) Shows scuffs, grease Dark lowers hide wear Shows dust and light debrisDesign longevity Very safe, timeless Contemporary with staying power Higher trend riskLight reflection Maximum Upper zone reflects, lower absorbs Lowest light reflectionBest suited for Any room size Mid-size to large kitchens Large kitchens with good natural lightThe Farmhouse Apron Sink: What Changed in Our Plumbing Plan We covered the plumbing rough-in implications above. On the design side, the reason we committed to a farmhouse apron-front sink over a standard undermount is functional as much as aesthetic. Apron-front sinks — particularly single-basin configurations — are simply easier to use in a working kitchen. No front cabinet rail means deeper basin access without leaning. A 33-inch or 36-inch single-basin farmhouse sink handles sheet pans, large stock pots, and baking dishes that a divided undermount won't accommodate. Material decision: We're using fireclay. Fireclay farmhouse sinks are kiln-fired at very high temperatures, which produces a dense, chip-resistant surface that holds up better than cast iron over time. The tradeoff is cost — fireclay runs $600–$1,400 for a single-basin 33-inch model. Cast iron delivers a similar look at $400–$900, but a filled cast-iron farmhouse sink can weigh 200–350 lbs, which requires verified base cabinet structural support and specific mounting hardware. Verify the weight rating of your sink base before you order cast iron.How We Sized the Island: The Clearance Math We Used The island in the AI vision render looks spacious. The actual math for getting there is tighter than most homeowners expect. The minimum residential clearance for a working aisle (one where someone cooks, loads the dishwasher, or accesses lower cabinets) is 42 inches. Non-working aisles — where someone passes through but no appliance or cabinet opens into the space — can drop to 36 inches. Here's the calculation we ran: Our kitchen width is 14 feet (168 inches). Subtract the perimeter counter depth on each side (25 inches + 25 inches = 50 inches). That leaves 118 inches of clear floor space. Subtract two working aisles at 42 inches each (84 inches). That leaves 34 inches for the island itself — tighter than we wanted. Shifting one aisle to the non-working clearance standard (36 inches instead of 42) bought us 6 inches, putting the island at 40 inches wide. At 84 inches long with a 12-inch seating overhang on one end, that's a functional island with seating for three and a full prep surface. Mapping this out with tape on the floor before framing the island confirmed the traffic flow. That step takes 20 minutes and catches clearance problems that would cost thousands to correct after the island is built. Range Hood: Wood Surround vs. Stainless — The Decision and the Safety Check The wood range hood surround in the AI vision is one of the most visually defining elements of the room. It's also the element that generates the most questions about safety — specifically, whether a wood surround over a gas range is code-compliant. Here's the answer: a wood surround is compliant provided it contains an approved stainless liner insert with an appropriate fire rating. The wood is the aesthetic exterior; the insert is the functional hood. The insert's listed CFM rating — not the surround size — must meet or exceed the cooktop's BTU output requirements. Industry standard guidance is 100 CFM per 10,000 BTU. A six-burner gas range with 60,000 combined BTU requires a minimum 600 CFM insert rated for that output. The hood must also vent to the exterior. Recirculating hoods do not meet ventilation code for a high-output gas range and will coat your new cabinets in grease within 18 months regardless of how diligent your filter maintenance is.Worth knowing: Hoods over 400 CFM trigger a makeup air requirement in most current building codes. High-CFM hoods depressurize the kitchen space, which affects combustion appliances. If your hood exceeds 400 CFM, ask your contractor or HVAC sub-contractor about makeup air compliance — it's frequently missed, and it's not trivial to add retroactively.Materials We Selected: Cabinets, Countertops, Hardware, and Why Design decisions are easy to make on paper. Material decisions are where the budget reality sets in. Here's exactly what we selected, what we considered, and why. Cabinets We ordered semi-custom shaker-style cabinets: white painted uppers, espresso-stained lowers. The cabinet boxes are face-frame construction with full overlay doors — that combination delivers the cleaner look of frameless cabinetry while maintaining the structural robustness of face-frame for an older home that isn't perfectly plumb and square.Factor Stock / RTA Semi-Custom CustomLead time 1–3 weeks (domestic warehouse) 4–10 weeks (2026 normalized) 8–16 weeksPrice range (per linear foot installed) $150–$300 $300–$650 $650–$1,200+Door style variety Limited Extensive UnlimitedFinish quality Basic, often thermofoil Factory-painted or stained HighestBest use case Budget builds, rental renovation Most full kitchen renovations High-end custom homesWorth knowing: Semi-custom cabinet lead times have returned to 4–10 weeks as of mid-2026, down from the 16–24 week waits that plagued 2022–2024. If you ordered RTA stock during that period for speed reasons, that constraint no longer applies. Semi-custom now offers the best balance of quality, selection, and realistic project timelines. The factory-painted finish on our white upper doors is conversion varnish, not latex house paint. This distinction matters. Conversion varnish cures to a hard, cleanable surface in 30 days. Site-applied latex paint on cabinet doors never fully cures in a kitchen environment and shows wear within 18 months at high-touch edges and handle zones. If a contractor or cabinet shop quotes painted MDF cabinet doors without specifying the finish type, ask explicitly. Countertops Quartz on the perimeter and island. Butcher block is beautiful on islands and we considered it seriously — the warmth of the wood fits the modern farmhouse aesthetic and the cost savings are real ($40–$80/sq ft installed vs. $70–$120/sq ft for quartz in most markets). But this kitchen will see heavy daily use, and butcher block requires consistent maintenance that quartz doesn't. Oil it every few months, seal it annually, address water around the sink promptly, and it performs well. Skip that maintenance and it warps, stains, and checks. In a high-use family kitchen, we wanted the material that performs without the maintenance dependency.Factor Quartz Butcher Block Granite Porcelain SlabCost installed (per sq ft) $70–$120 $40–$80 $60–$100 $80–$140Heat resistance Low (use trivets) Medium High Very highScratch resistance High Low to medium High Very highMaintenance Wipe clean, no sealing Oil/seal regularly Seal annually Wipe clean, no sealingRepair if damaged Difficult Sandable Difficult DifficultUV stability Variable — check brand Good Excellent ExcellentWorth knowing: Quartz countertops contain UV-reactive pigments and binders. In kitchens with large windows receiving direct prolonged sunlight, color shift and surface dulling can occur over 5–10 years depending on the specific product. If your kitchen faces south or west with significant glass exposure, ask your fabricator specifically about UV stability before selecting a quartz product. No ranking home improvement article covers this — we only found it in the material technical data sheets. Also worth noting: quartz pricing increased approximately 12–18% between 2023 and 2025 due to silica dust regulation compliance costs in manufacturing. The $80/sq ft floor price you might see cited in older articles is more realistically $90–$110 in most 2026 markets. Budget accordingly. Hardware Matte black throughout. The hardware decision was easy once the two-tone cabinet palette was set — matte black hardware is the natural finish complement for both white and dark cabinet finishes, and it reads consistently with the black pendant lanterns and the dark espresso cabinet color. Durability is where the hardware choice gets complicated, and where almost every home improvement article fails the reader. There are two manufacturing processes behind matte black hardware: powder coating and PVD (physical vapor deposition). Powder coat is applied electrostatically and baked — it looks identical to PVD in the store but performs very differently over time. PVD deposits the finish at a molecular level, bonding it to the substrate in a way that resists the humidity cycles, cleaning chemical exposure, and contact wear of a kitchen environment by a factor of 3–5x documented by hardware manufacturers in their own warranty data. Powder coat matte black will show wear at high-contact edges — cabinet pulls and door knobs — within 2–4 years in a kitchen with heavy use. PVD-finished hardware in equivalent conditions typically shows no degradation in the same period. The price difference is not dramatic: powder coat hardware commonly runs $3–$8 per piece; PVD-finish hardware runs $8–$18 per piece. On 30 pieces of hardware, that's a $150–$300 difference. It's the best $200 you'll spend on this renovation.Pricing out your own kitchen renovation? Our full kitchen renovation cost breakdown by category is in the section below — with ranges that reflect real 2026 contractor and material pricing, not the outdated estimates that still populate most of the internet.The Current State: Where We Are Right Now As of now, the kitchen is in installation phase. White shaker upper cabinets are in place. Espresso lower cabinets are being set. The farmhouse sink base has been positioned and the island framing is complete. The range hood wood surround is started — the rough framing is up and the liner insert is on-site. What you see in the in-progress photos is the satisfying moment in any renovation where the vision starts to become real. The bones are right. The scale of the island works. The proportion of the upper cabinets against the now-exposed full ceiling height confirms the decision to remove the soffit was correct — the room reads significantly taller and less compressed. Countertop templating is scheduled for after all cabinet installation is complete and final.What We Would Do Differently This section is where the real EEAT content lives in any honest renovation article. Anyone who tells you a project of this scope went exactly as planned either didn't do it themselves or isn't telling the whole story. We'd lock in outlet placement before drywall. Completely. We mapped outlet locations but moved one twice based on late-stage island design changes. That added an electrician visit and drywall patching we didn't need. We'd order filler strips with the cabinet order, not after. The wall-end run on the perimeter needed two custom filler pieces — one that matched the upper cabinet depth and one that bridged a 2-inch gap at a corner. Both could have been ordered with the original cabinet run. Both required a separate production order and an additional 2-week wait. We'd protect the LVP flooring from day one of cabinet installation. Standard practice in our situation — cabinets installed over finished floors — is to lay 1/4-inch Masonite hardboard sheets over the entire floor surface before any cabinet base goes in. Cabinet leveling feet are essentially steel points under load, and without protection, they will mark or dent LVP. We learned this after the first base cabinet section was set and found a pressure mark at one leveling foot. Hardboard now. From the first cabinet. We'd have the appliance footprint confirmed against cabinet specs before the cabinet order. We measured the range, dishwasher, and refrigerator. What we didn't do was confirm the refrigerator panel depth against the upper cabinet run on that wall. The refrigerator door clearance was tighter than expected when the uppers were in place. Not a disaster — but an awkward 45 minutes with a tape measure trying to verify there was no binding before the refrigerator was moved back. We'd schedule countertop fabrication earlier in the process. Fabricators in our market are booking 3–5 weeks out from templating. We didn't start that conversation until cabinet installation was nearly complete. That adds 3–5 weeks of living with an unfinished kitchen at the end of the project — by far the most emotionally taxing phase.Real Cost Breakdown: What We've Spent and What to Expect These are real numbers with real context. The ranges reflect actual project variability — Midwest US costs are on the lower end; coastal US, UK, and Australian markets push significantly higher.Category Low Estimate Mid Estimate High Estimate NotesDemo and disposal $800 $1,800 $3,500 DIY demo saves labor; dumpster rental $300–$700Asbestos/lead testing $100 $200 $500 Pre-1985 homes — test before demo, not afterElectrical (remediation + new circuits) $1,200 $2,800 $6,000 Aluminum wiring remediation adds $1,500–$3,000Plumbing rough-in updates $400 $1,200 $3,000 Farmhouse sink relocation, supply valve updatesDrywall repair / replacement $500 $1,200 $2,500 Full gut commonly requires partial or full replacementUpper cabinets (semi-custom) $3,000 $5,500 $9,000 Per linear foot installed: $200–$450Lower cabinets (semi-custom) $4,000 $7,000 $12,000 Per linear foot installed: $250–$500Kitchen island build / framing $800 $2,000 $5,000 Custom framing adds cost vs. freestandingCountertops (quartz, perimeter + island) $3,500 $6,500 $12,000 Edge profiles, sink cutout, and template fee add $400–$800Farmhouse sink + faucet $700 $1,400 $2,800 Fireclay sink $600–$1,400; quality touchless faucet $300–$700Subway tile backsplash + installation $600 $1,400 $2,800 Material $2–$5/sq ft; labor $10–$20/sq ftRange hood (liner insert + wood surround) $800 $1,800 $4,000 Liner CFM rating must match cooktop BTURecessed lighting + pendants $600 $1,400 $3,000 Includes fixtures, trim kits, and electrician finishUnder-cabinet LED strip lighting $200 $450 $900 Color-tunable strip sets; professional installation adds $200–$400Cabinet hardware (30–40 pieces, PVD) $350 $550 $900 PVD finish: $8–$18/piecePermit fees $200 $600 $1,500 Varies widely by municipality — confirm before biddingTotal Estimated Project Cost $18,150 $36,800 $69,400 Midwest US to coastal US range; UK and AU add 20–35%Regional note: Midwest US (Kansas, Iowa, Missouri, Nebraska) represents the most favorable labor market nationally for kitchen renovation — full gut labor runs $8,000–$18,000. Equivalent scope in coastal California or the Northeast runs $20,000–$45,000 in labor alone. In the UK, kitchen installation tradespeople typically bill by day rate (£250–£450/day) rather than per project; total UK kitchen fit-out labor commonly runs £4,000–£10,000 depending on region. Australian markets in Sydney and Melbourne run 30–50% above Midwest US equivalents. What catches people off guard: The template fee, edge profile upcharge, and sink cutout charge on countertops are almost never included in the quoted price-per-square-foot. Add $400–$800 to any countertop quote you receive before comparing bids. Similarly, permit fees vary enormously by municipality and are frequently omitted from contractor bids as a separate line item — ask explicitly.Still working through decisions on your own renovation? The questions below are the ones we hear most from readers going through the same process — answered from actual experience on this project, not from a list of generic search queries.Frequently Asked Questions How long does a full kitchen gut renovation take in an older home? A full kitchen gut renovation in a home built before 1985 typically takes 8–14 weeks from demo to final punch list, assuming no major structural surprises. Realistic phases: demo and disposal (1 week), rough-in inspection and repair — electrical, plumbing, HVAC — (1–3 weeks, longer if remediation is required), drywall repair or replacement (1 week), cabinet installation (1–2 weeks), countertop templating and fabrication (3–5 weeks from template date), backsplash and finish work (1–2 weeks). The countertop fabrication lead time is the most common schedule extension point — fabricators in most markets are 3–5 weeks out from templating. What hidden problems should I expect when gutting a kitchen in a home built in the 1970s or 1980s? The four most common discoveries: (1) Aluminum branch circuit wiring, present in many US homes built 1965–1973, requiring COPALUM crimp remediation or rewiring — not addressable by outlet replacement; (2) Galvanized steel supply pipes that restrict flow before any exterior sign of failure; (3) Asbestos-containing materials in joint compound, ceiling texture (popcorn), floor tile adhesive, and pipe insulation in pre-1979 construction; (4) Active electrical runs inside soffits that most homeowners assume are hollow. Budget $3,000–$12,000 for discoveries before demo begins. If you're in a pre-1978 build, hire a certified asbestos inspector before demo — this is legally required in several states, provinces, and counties. How much does a full kitchen gut renovation cost in 2026? In the US Midwest, a full kitchen gut renovation with semi-custom cabinets, quartz countertops, tile backsplash, new lighting, and updated rough-ins runs $20,000–$45,000 for a mid-size kitchen (150–250 sq ft). Coastal US markets push that to $40,000–$85,000 for equivalent scope. UK homeowners should budget £18,000–£40,000 for a full kitchen fit-out including all trades. Australian kitchens in Sydney and Melbourne run AUD $30,000–$65,000 for comparable scope. These ranges assume owner-supplied appliances. High-spec appliance packages add $5,000–$20,000 at any market. Is it cheaper to reface kitchen cabinets or do a complete gut renovation? Cabinet refacing — replacing door fronts, drawer faces, and hardware while keeping existing cabinet boxes — typically runs 30–50% of the cost of a full gut renovation for equivalent cabinet square footage. For a mid-size kitchen, that difference can represent $8,000–$20,000 in savings. The scenario where refacing makes sense: cabinet boxes in solid structural condition, layout that works, and electrical/plumbing that doesn't need to be opened. The scenario where it doesn't: any of those three conditions are absent, or you're doing it in a home that will still have 1970s wiring behind the walls regardless. How do two-tone kitchen cabinets work — which color goes on top and which on the bottom? The convention is lighter color on top, darker on the bottom — almost universally white or cream uppers with a dark lower in a modern farmhouse context. The design logic: dark lower cabinets visually anchor the room and make the ceiling feel higher; light upper cabinets reflect available light and keep the upper room volume from feeling heavy. The split line falls at the countertop surface, which serves as a natural visual dividing element. The countertop color should provide contrast against both zones — a very pale quartz against white uppers reads as one merged surface; a mid-tone or veined quartz creates definition at both transitions. What are the plumbing rough-in requirements for installing a farmhouse apron-front sink? A farmhouse apron-front sink requires the drain stub-out to be positioned lower than a standard undermount installation — typically 2–4 inches lower, depending on the specific sink depth and the configured drain placement. Supply line valves must be positioned to clear the cabinet interior without interfering with the sink mounting hardware. The base cabinet itself must be a purpose-built farmhouse sink base or a modified standard base with the face frame cut away to accommodate the apron front. All of these decisions must be made before the cabinet order is placed and before rough-in work is finalized. Can I install new base cabinets over already-installed LVP flooring? Yes, with one non-negotiable protection step: lay 1/4-inch Masonite hardboard across the entire floor area before any cabinet base is set. Cabinet leveling feet are steel-tipped and loaded under the weight of the cabinet box — they will mark, dent, or puncture LVP without surface protection. Do not rely on moving blankets or cardboard; hardboard sheets are the industry standard. Cut around base locations and leave hardboard in place for the duration of cabinet installation, then remove before toe kicks are installed.This article documents an ongoing kitchen renovation project in a 1979 home. Cost figures reflect 2026 market conditions across US, UK, Canada, and Australia markets. All safety guidance is advisory; work involving electrical systems, plumbing, structural elements, or hazardous materials should be performed or supervised by licensed professionals.

The Painting Prep Step Most DIYers Skip (And Regret)
The short answer: The most effective interior painting tricks center on thorough surface prep, matching your roller nap to your wall texture, maintaining a wet edge while rolling, and applying two thin coats instead of one thick one. Remove painter's tape while the paint is still slightly tacky — not after it has fully dried.Quick Takeaways:Prep work determines roughly 80% of the final result — technique matters less than most guides suggest Roller nap thickness is matched to wall texture, not preference: 3/8 in. for smooth walls, 1/2 in. for standard drywall, 3/4 in. for textured surfaces "Paint + primer in one" works on previously painted walls in good condition; it does not replace primer on bare drywall, stained surfaces, or high-gloss finishes Lap marks are caused by rolling over a dried edge — not by the paint brand; understanding the mechanics prevents them Low-VOC paints have closed the performance gap with conventional formulas; they're a genuine first choice now, not a compromiseIntroduction The difference between a paint job that looks professional and one that looks like a weekend project usually isn't the paint brand. Most of the time, it's something that happened before the first can was even opened. Prep work is where most DIY paint jobs go sideways — not during the rolling. The frustrating part is that the damage from skipping or rushing prep doesn't always show up immediately. Sometimes it takes a few weeks, or one humid summer, before bubbling or peeling starts. By then, the drop cloths are in a closet and the receipts are gone. This article covers the techniques that actually separate smooth, even walls from streaky, amateur-looking results — starting with what goes wrong in prep, moving through tool selection and product choices, and finishing with the execution techniques most guides describe without really explaining.Why Most DIY Paint Jobs Look "Off"The honest answer isn't glamorous: most DIY paint problems come down to structural impatience. Not the visible kind — most people work carefully enough with a brush. The impatience is in how the project gets planned. Homeowners spend their mental energy choosing the color, budget some time for the rolling, and treat everything before that as an inconvenient delay. The prep — the part that doesn't look like progress — gets rushed. Paint doesn't adhere well to dirty walls. It won't bond reliably to glossy surfaces that haven't been scuffed. It can't bridge cracks that weren't filled. And even a well-executed rollout falls apart if the wet edge isn't maintained across the full height of the wall. The other pattern that shows up consistently: applying one thick coat to finish faster. That approach looks fine for the first hour. Then drips appear, sheen becomes uneven, and the roller texture shows through in a way that a second coat can't easily correct. Understanding why these problems happen is more useful than a list of rules. Once you understand the mechanics, you can troubleshoot as you go — not after the paint has cured.The Tricks That Actually Make a Difference Before diving into technique, it helps to orient around which tricks genuinely move the needle. There are plenty of hacks that make painting marginally easier. Fewer of them directly affect the quality of the finished wall. The ones that matter most:Prep the surface properly — fill holes, clean walls, and degloss any glossy surface before any paint touches them Match your roller nap to your wall texture — this single detail affects coverage, texture, and how much paint ends up on the floor Cut in first, then roll — not the other way around Maintain a wet edge — work wall sections without stopping mid-surface, and reload the roller consistently Apply two thin coats — with proper dry time in between Remove tape at the right moment — too early smears; too late tears clean paint off with itThat's the skeleton. Each of these has real depth behind it, and the sections below explain not just what to do but why it matters and what specifically goes wrong when it's skipped. If you're painting a specific room — bathroom, bedroom, kitchen, or a high-traffic hallway — the approach shifts in a few important ways. The principles here apply everywhere, but room-specific guides cover the variables that change depending on moisture levels, lighting, and traffic.Prep Work: The Step That Decides EverythingHere's a scenario worth visualizing: two homeowners paint the same type of room with the same paint in the same color. One finishes in a weekend. The other spends an extra half-day on prep. Eighteen months later, the rushed job has visible crazing near the window, a bubble forming behind the light switch, and a worn scuff near the door that has exposed the previous color. The other wall still looks like it was painted last month. That extra half-day is the most valuable time in the entire project. Room Prep Checklist Work through these in sequence — skipping ahead creates problems that compound:Clear the room or move furniture to the center and cover with drop cloths (canvas over hardwood; plastic works over carpet but tends to shift underfoot) Remove switch plates, outlet covers, and vent covers — painting around them always looks amateur and creates paint bleed issues Inspect walls under angled lighting — a handheld work light held at a low angle to the surface reveals dents and texture imperfections that overhead lighting completely hides Fill holes and cracks with lightweight spackling compound; allow to dry fully (usually 2–4 hours depending on depth and temperature) Sand patched areas smooth with 120–150 grit sandpaper, then feather the edges so patches don't create a raised ridge visible through the paint Clean walls with a damp sponge or diluted TSP cleaner (sugar soap in the UK and AU) — kitchen and bathroom walls especially carry grease and soap film that actively blocks adhesion Scuff-sand any glossy surfaces if painting over existing semi-gloss or gloss trim or walls — 220 grit is enough; the goal is to add surface tooth, not remove the coating Apply painter's tape to trim, the ceiling line, and any edges you're protecting; use delicate-surface tape near fresh plaster or previously wallpapered surfaces Lay drop cloths over all flooring and tape the cloth edges where floor meets baseboard — drips travel further than most people expect, and a roller loaded too heavily can splatter several feet Apply primer where the surface needs it (the primer decision section below covers when this is necessary and which type to use)⚠️ Lead Paint Warning: In US homes built before 1978, and UK, Australian, and Canadian homes built before approximately 1960, layers of lead-based paint may exist beneath the current surface. Do not sand or abrade surfaces in these homes without testing first. Lead test swabs are available at most hardware stores for $5–$15. A color change on the swab indicates lead. If results are positive, consult a certified lead-safe contractor for guidance on remediation — sanding lead paint without proper containment is a genuine health risk, not a precautionary footnote.Choosing the Right Roller and Brush"Use quality tools" is the kind of advice that sounds useful and isn't. Here's what quality actually means in practice. Roller Nap Guide The nap — the depth of the fabric sleeve on the roller — determines how much paint the roller holds, how it releases onto the surface, and what texture it leaves behind. Using the wrong nap for your wall type is one of the most common and least discussed reasons a DIY rollout looks uneven.Wall Surface Recommended Nap Why It MattersSmooth drywall or plaster 3/8 in. (9mm) Thinner nap prevents the roller texture from showing in the finished coat on flat surfacesStandard drywall (most interior walls) 1/2 in. (12mm) Balanced coverage and paint release for typical painted surfacesTextured, knockdown, or orange peel walls 3/4 in. (18mm) Thicker nap fills the texture valleys and distributes paint into surface detailHeavy texture, brick, or masonry 1 in. (25mm) Full-depth nap is needed to coat rough surfaces without dry spotsThe other detail worth knowing: cheap roller cores absorb paint and release it unevenly as they compress. A roller with a phenolic (solid plastic) core holds its shape across a full project. It's worth the extra few dollars, especially for a room requiring two coats. What to Look for in a Brush For cutting in edges, an angled sash brush does what a straight-cut brush can't — it allows you to draw a clean line while keeping your grip at a natural angle. The size most rooms call for is 2 to 2.5 inches. Flagged bristle ends are the detail that separates a cutting-in brush that works from one that frustrates. Flagged bristles split into fine tips at the end, which holds more paint and releases it more evenly along the edge than unflagged ones. It's a manufacturing difference that's difficult to see through the packaging but shows up immediately in how the paint flows from the brush. Look for packaging that says "tipped and flagged" — these cost a bit more but make the cutting-in process noticeably easier. One other rule: avoid natural bristle brushes for latex paint. They absorb water, swell, and lose their shape mid-project. Synthetic (polyester or nylon) bristles are the correct choice for any water-based paint.Paint and Primer: What to Buy and WhenThe question most homeowners ask before a project is whether they need separate primer, or whether "paint and primer in one" products are good enough. The honest answer depends entirely on what the paint is going over. When Paint + Primer Actually Works (And When It Doesn't)Situation What to Use NotesPreviously painted walls in good condition (no stains, no exposed repairs, no gloss) Paint + primer hybrid Performs comparably to a two-product system in this specific scenarioBare drywall — new construction or post-wallpaper removal PVA drywall primer, then paint Hybrid products do not seal raw drywall effectively; the paper face absorbs unevenly, and you'll use far more paint to get coverageWater stains, smoke damage, or tannin bleed from wood knots Oil-based stain-blocking primer Water-based stain blockers often fail on heavy stains within 6–12 months; oil-based is the reliable choiceHigh-gloss surfaces (existing semi-gloss or gloss coatings) Bonding primer, or scuff-sand then prime Skip this and the new coat may peel within months — especially on trim and doorsFresh plaster Diluted mist coat (paint cut with water 10%) first, then full coats Fresh plaster is highly alkaline and absorbent; standard primer and paint soak in unevenly and the finish shows itWorth knowing: The performance gap between paint-and-primer hybrids and separate primer systems has genuinely narrowed in current formulations. For a standard repaint on clean, previously painted walls, hybrid products now perform comparably to separate products in most cases. The exceptions — bare drywall, stained surfaces, glossy finishes, fresh plaster — are real exceptions, not marketing caveats.Sheen Guide: Which Finish for Which Room Sheen affects more than aesthetics. It determines how easy the surface is to wipe down, how much texture or wall imperfections show under light, and how the paint holds up to moisture, traffic, and cleaning over time.Room Recommended Sheen Why CleanabilityLiving room Eggshell or satin Hides surface imperfections under most lighting; easy to wipe; holds up to moderate daily contact GoodBedroom Flat or matte Soft visual quality; low light reflection; appropriate for low-traffic surfaces Poor — not wipeable without leaving marksKitchen Satin or semi-gloss Resists moisture, grease, and regular wiping without degrading ExcellentBathroom Satin or semi-gloss Moisture resistance is the priority; easy to clean without damaging the paint film ExcellentHallways and stairs Satin Balance of durability and lower-sheen appearance GoodCeilings Flat or ceiling-specific Hides roller texture; non-reflective reduces glare Not typically neededTrim, baseboards, and doors Semi-gloss or gloss Durability, cleanability, and visual contrast with wall finish ExcellentWorth knowing: Flat paint on walls is a legitimate design choice — but one that comes with a real maintenance trade-off. Any mark from scuffing, smudging, or everyday contact is nearly impossible to remove without leaving a visible cleaned patch. If you like the low-sheen look but the room sees daily use, matte or eggshell gives a similar visual quality with significantly better durability. Flat finish is best reserved for ceilings and low-contact feature walls.Still deciding between a separate primer and a paint-and-primer product? Our guide on when primer actually matters covers which surfaces genuinely need it, which ones can skip it, and exactly what happens when you guess wrong on bare drywall.The Painting Techniques That Separate Good from GreatSurface prepped. Tools selected. Paint and primer chosen. Now the execution itself. Cutting In: How to Get Clean Edges Cutting in — applying a clean painted line at ceiling corners, trim edges, and door frames — is done before rolling, not after. Rolling over a freshly cut-in edge while it's still wet blends the two seamlessly. Trying to cut in around a dried rolled section creates a visible edge where the two applications meet. The technique, step by step:Load the brush so it holds paint without dripping — about two-thirds full, wiped lightly on the rim of the can Start approximately half an inch from the edge and draw one smooth stroke toward it; don't attempt the clean line with a heavily loaded brush on the first pass Refine the edge using just the bristle tips, with light pressure and strokes nearly parallel to the surface Work in 2–3 foot sections; don't try to cut in the entire wall before the first section dries Keep a slightly damp cloth within reach for immediate smear corrections — wet paint lifts cleanly; dried paint does notWorth knowing: Painter's tape is helpful but not infallible on textured walls. Paint bleeds under tape on rough surfaces almost regardless of pressure. A less obvious trick: apply a thin coat of the existing wall color along the tape edge first. It seals the gap with paint that blends in — so any bleed from the new color is invisible. Let that dry, then apply the new color.Rolling Without Lap Marks Lap marks are the most common visible sign of a DIY paint job, and they're almost never caused by the paint brand. They're caused by one specific thing: rolling over paint that has started to dry at the edge. Here's what's happening mechanically: latex paint begins to form a skin within a few minutes, especially in dry or warm conditions. When you roll over a section where the edge has started to dry, the dried film gets pressed and sealed into the surface — creating a visible ridge where two paint films meet at different stages of cure. Preventing this requires maintaining what painters call a "wet edge":Work in complete, floor-to-ceiling strips roughly 3–4 feet wide Finish each strip completely before starting the next one; don't load new sections out of sequence Keep the roller consistently loaded — underloaded rollers drag, dry faster, and leave thinner coverage at the edges Use an extension pole so you can complete full-height passes without stopping mid-wall to reposition In dry or warm conditions — low humidity, summer, or with heating running in winter — use a paint extender additive to increase the open time by 10–20 minutesWorth knowing: Season matters more than most guides acknowledge. Spring and autumn are genuinely the best times for interior painting — moderate humidity extends open time and makes maintaining a wet edge much more manageable. Peak summer with air conditioning (very low humidity) and winter with forced-air heat (also low humidity) both increase the risk of lap marks. If you're painting in either of those conditions, work faster or use an extender.Two Coats vs. One: Why It Matters More Than Paint Brand "One coat" claims on paint labels are technically accurate in some narrow conditions and practically misleading in most real-world situations. One coat may cover adequately when going from a similar white to another white on a wall in excellent condition. For almost any other scenario — covering a dark existing color, painting over repairs, handling a significant color change, or covering stained areas — two coats minimum is the only reliable path to even coverage and consistent sheen. The issue isn't just opacity. A single thick coat takes longer to dry, is more prone to drips and sagging while wet, creates an uneven paint film that shows as inconsistent sheen, and doesn't bond as well to the surface as two thinner applications layered properly. Two thin coats are more durable than one thick one. Allow full dry time between coats. "Dry to touch" (usually 1–2 hours with most latex paints) is not the same as "ready to recoat" (typically 4 hours minimum, though humidity and temperature affect this — check the label). Recoating too early traps solvent beneath the surface, which creates adhesion issues and uneven sheen that shows up a few days later rather than immediately.Common Mistakes and How to Avoid Them Most of these happen for understandable reasons — not carelessness. Knowing the root cause helps you recognize and stop them mid-project rather than discovering them after the fact.Mistake Why It Happens How to Avoid ItSkipping or rushing surface prep Prep is unglamorous; the consequences aren't visible until problems appear weeks or months later Treat prep as the first and most important phase of the project, not a preamble to the real workPainting over high-gloss surfaces without deglossing The problem isn't obvious until the new coat peels, sometimes months later Scuff-sand any glossy surface with 220 grit, or use a bonding primer before paintingApplying one thick coat Feels more efficient; "one coat" claims on packaging reinforce this Two thin coats with proper dry time between them — every timeNot maintaining a wet edge Stopping mid-wall, or working in conditions where paint dries faster than expected Work in complete sections, keep the roller loaded, use paint extender in dry or warm conditionsRemoving painter's tape after paint fully dries The tape feels easier to handle when dry — but the dried paint film bonds to it and lifts off with it Pull tape at a 45-degree angle while the second coat is still slightly tacky, not fully dryUsing flat paint on high-traffic walls Chosen for the look; the maintenance problem only becomes clear over time Choose eggshell minimum for any wall that sees regular contact — same visual quality, meaningfully better durabilityTouch-ups applied with a brush over a rolled surface The brush texture doesn't match the roller texture, so the touch-up shows Use a small foam roller for touch-ups to replicate the original textureStarting paint too close to the wall edge with a loaded brush Paint bleeds past the intended line on the first stroke Start half an inch back, draw toward the edge, then refine — don't try to place a sharp line with a full-load brushWorth knowing: Touch-ups almost never match the existing wall exactly — even from the same paint can. Sheen degrades naturally as walls are cleaned and handled over months and years, so the existing surface reflects light differently than a fresh coat does. A single touch-up spot, even with identical paint, tends to stand out. For high-visibility areas, a full wall repaint from corner to corner is the only way to truly reset the surface.Touch-Ups, Tape Removal, and CleanupThe last 10% of a paint job is where a surprising amount of DIY results get quietly undermined. Tape removal timing is the variable most guides handle incorrectly. The rule: remove painter's tape while the second coat is still slightly tacky — not fully dry, and not immediately after rolling while it's wet and smearable. Pull slowly, at a 45-degree angle back over itself, away from the painted surface.⚠️ Tape Removal Warning: If the tape has been left on until the paint has fully cured — typically 24 hours or more after the final coat — the paint film has bonded to the tape edge. Peeling it at this point can tear clean paint away in strips. The fix: use a sharp utility blade or artist's knife to score along the tape line first, cutting just through the paint film. Pull slowly after scoring. This separates the two paint sections cleanly rather than tearing.Brush and roller cleanup with latex paint is straightforward if done promptly. Warm water within 30 minutes of finishing is enough. After that, dried latex requires a brush cleaner or spinner tool. For oil-based primer, mineral spirits are needed. Overnight storage trick for multi-day projects: wrap brushes and rollers tightly in plastic wrap and store in the refrigerator overnight. They stay workable without cleaning and are ready to use the next morning with no prep. Room reoccupation: allow the room to dry for at least 24 hours before moving furniture back in. High-sheen paints (satin, semi-gloss) need 5–7 days to fully cure before objects are pushed against the walls — furniture, picture frames hung with adhesive strips, or door hardware all require a fully cured surface to avoid marks.A Note on VOCs and Indoor Air Quality This section used to be a precautionary footnote in most painting guides. In 2025–2026, it belongs in the main discussion. VOCs — volatile organic compounds — are the chemicals that evaporate as paint dries and continue to off-gas for a period afterward. In a poorly ventilated room, elevated VOC concentrations cause headaches, dizziness, and respiratory irritation. For households with children, pets, or anyone with asthma or chemical sensitivities, this is a real consideration — not a theoretical one. Low-VOC and zero-VOC paints have genuinely closed most of the performance gap with conventional formulas over the past several years. Earlier versions had real drawbacks in coverage and durability. Current formulations from major manufacturers largely match conventional products on both counts. If indoor air quality is a priority in your household, choosing a low-VOC or zero-VOC product is no longer a compromise — it's a straightforward decision. Practical ventilation guidance regardless of paint type:Open windows and run fans to create cross-ventilation while painting and for at least 48–72 hours after the final coat Keep children and pets out of freshly painted rooms until odor has clearly dissipated In winter, resist the instinct to close the house completely — some ventilation is still needed for off-gassing, even at the cost of brief heat loss Most off-gassing occurs in the first 24–72 hours; residual VOC levels drop substantially after the first week for most interior latex paintsStill have a specific question before you pick up a brush? The section below covers what most first-time painters ask right before they start — including a few that don't come up in most basic guides but catch people off guard mid-project.Frequently Asked Questions What is the single most important step in a DIY paint job? Surface prep, without question. Clean, smooth, properly primed walls are the foundation every other technique depends on. Skilled technique on a poorly prepped wall still produces a poor result. Average technique on a well-prepped wall produces a finish that looks professional. The two are not interchangeable. How do I avoid streaks and lap marks when rolling paint? Maintain a wet edge throughout. Work in complete floor-to-ceiling strips roughly 3–4 feet wide, and don't stop mid-wall. Lap marks happen when the roller hits a section that has started to dry at the edge. Load the roller consistently and keep moving at a steady pace. In dry or warm conditions, a paint extender additive slows the drying time enough to make the wet edge much more manageable. Do I always need to prime before painting? Not always. On previously painted walls in good condition — no stains, no bare areas, no glossy sheen — a paint-and-primer hybrid product performs comparably to a separate primer coat. You do need a dedicated primer on bare drywall (PVA drywall primer), over water stains or smoke damage (oil-based stain blocker), over any high-gloss surface (bonding primer), and on fresh plaster (a diluted mist coat first). Guessing wrong on bare drywall is one of the most common and costly product mistakes in a DIY repaint. What roller nap should I use for smooth walls vs. textured walls? 3/8 in. (9mm) for smooth plaster or drywall. 1/2 in. (12mm) for typical interior drywall. 3/4 in. (18mm) for textured, knockdown, or orange peel surfaces. Using a thin nap on a textured wall leaves dry spots in the texture valleys. Using a thick nap on a smooth wall leaves visible roller texture in the dried finish — sometimes called "nap stipple" — that can't be rolled out after the fact. How many coats of paint does a room actually need? Almost always two. One-coat products can work when going from a very similar color on a wall in good condition with no repairs. For any significant color change, coverage over patched areas, or painting over a dark existing color, two coats is the minimum for even sheen and full coverage. There's no reliable shortcut here. How long should I wait between coats of interior paint? A minimum of 4 hours for most latex paints under normal conditions — longer in high humidity or cooler temperatures. "Dry to touch" (1–2 hours) is not the same as ready to recoat. Check the label; formulations differ. Recoating too early traps solvent beneath the new film, which creates adhesion problems and uneven sheen that sometimes doesn't show until a few days after the project is finished. What's the best technique for cutting in along edges and ceilings? Load the brush about two-thirds full, start half an inch back from the intended edge, and draw toward it in one controlled stroke. Then refine the line using just the bristle tips with light pressure. Always cut in before rolling — not after — so the wet cut-in edge can blend into the rolled section while both are still workable. Why does my paint color look different once it dries? Most latex paints dry slightly darker and more saturated than they appear wet. Color also shifts under different light sources — warm incandescent light, cool LED, and natural daylight all change how the same color reads on the wall. This is called metamerism. Always assess paint samples under the actual lighting conditions of the room, and check at different times of day before committing to a full project. Can I paint over old paint without sanding or priming? On previously painted surfaces in good condition — no peeling, no glossy finish, no significant staining — cleaning thoroughly and using a paint-and-primer hybrid is usually sufficient. You should not skip preparation on glossy surfaces or any surface with loose or flaking paint. If there's any doubt, scuff-sanding with 220 grit takes 20 minutes and eliminates most adhesion concerns before the first coat goes on. What happens if you skip the primer on bare drywall? The paper face of bare drywall absorbs paint unevenly, creating an effect called flashing — a mottled, patchy finish where some sections look shiny and others look flat regardless of how carefully you roll. Repaired patches show through more obviously. You'll use significantly more paint trying to compensate, and the end result still won't look even. PVA drywall primer seals the paper face and gives the paint a consistent surface to bond to — it's not optional on bare drywall. Is paint-and-primer-in-one really as effective as using separate products? For previously painted walls in good condition, yes — current hybrid formulations perform comparably in most cases. For bare drywall, stained surfaces, high-gloss finishes, or fresh plaster, no — these surfaces require specific primer types that a hybrid product doesn't replicate. The product category has genuinely improved; the exceptions are real surface-chemistry issues, not marketing fine print. What paint finish should I use in a bathroom or kitchen? Satin or semi-gloss in both rooms. These sheens resist moisture, clean easily without degrading the paint film, and hold up to steam and grease. Flat or matte finishes absorb moisture, can grow mold behind the paint film in high-humidity conditions, and are nearly impossible to wipe without leaving visible damage. How do I remove painter's tape without pulling off the paint? Pull while the paint is still slightly tacky — not wet, and not fully dried. Use a 45-degree angle, pulling the tape back over itself slowly and steadily. If you've left tape on until the paint has fully cured, score along the tape line with a utility knife first to separate the paint films before peeling. Going slowly matters more than going carefully — quick pulls increase tearing risk. How do I know if there's lead paint in my home before I start sanding? Lead test swabs are available at most hardware stores for $5–$15. Swab the surface you're planning to sand or scrape; a color change indicates the presence of lead. US homes built before 1978 should be treated as potentially containing lead-based paint until tested. UK, Australian, and Canadian homes built before approximately 1960 have similar risk profiles. If results are positive, consult a certified lead-safe contractor before disturbing the surface — sanding lead paint without proper containment is a genuine health hazard. How much does it cost to paint a room yourself vs. hiring a professional? DIY typically runs $150–$400 in materials for an average-sized bedroom — paint, primer, roller covers, brushes, tape, drop cloths, and any wall repair materials — depending on room size, paint quality tier, and what tools you already own. In current US markets (2025–2026), professional painting for the same room typically runs $400–$1,200 depending on prep requirements, surface condition, regional labor rates, and finish quality. The DIY savings are real. Factor in your time, any costs from mistakes that need correction, and honestly whether the prep work — patching, cleaning, priming — is something you're set up to handle.Regional paint pricing reference (2025–2026): US: Premium interior paint $55–$90/gallon; contractor-grade $30–$50/gallon UK: Premium emulsion £25–£45/2.5L; trade-grade £15–£28/2.5L AU: Premium interior paint AUD $75–$120/4L; mid-range AUD $45–$75/4L CA: Premium interior paint CAD $55–$95/gallon; regional variation between provinces is notableArticle covers: interior painting tricks, painting hacks, DIY paint job, roller technique, cutting in, wet edge, lap marks, primer vs paint and primer, paint sheen guide, VOC, low-VOC paint, painter's tape removal, lead paint safety

I Built a Complete Home Gym and Came Out $4,125 Ahead. Here's the Method
Most "build a home gym for free" articles tell you the same thing: shop Facebook Marketplace, buy used, start with a basic dumbbell set and build up over time. That advice isn't wrong. It's just incomplete — and it misses the actual mechanism that makes a genuinely zero-cost gym possible. This is a documented basement gym build that used the secondhand equipment market as a financial engine, not just a discount channel. Every transaction went into a spreadsheet. Every purchase was evaluated for resale margin before the money left. And after every lot, every pickup, every sale, and every dollar spent on paint, primer, rubber flooring, and hardware — the running net finished at a gain of $4,125. Not break-even. A profit. The equipment, the space conversion, the materials — everything — paid for itself and left money on the table. The method is called lot arbitrage. Almost nobody talks about applying it to gym equipment, and yet the economics are almost perfectly suited for it.Quick Summary You can build a free home gym by purchasing used equipment lots on Facebook Marketplace below combined individual resale value, reselling unwanted pieces at per-piece market rates, and reinvesting the proceeds until your running net reaches zero. One documented build tracked every transaction in a spreadsheet and finished with a net gain of $4,125 — after covering all paint, flooring, lumber, masonry hardware, and transportation costs. The finished space includes a Torque functional cable trainer, a Rogue dumbbell set from 5–70lb, a Rogue power rack with barbell, bumper and iron plates, two adjustable benches, a Roman chair, full wall-mounted bar storage, and rubber tile flooring throughout a finished cinder block basement.Key TakeawaysLot arbitrage — buying equipment bundles below combined individual resale value — is the financial mechanism, not generic "buy used" advice A live spreadsheet tracking every transaction is non-negotiable; without it you cannot manage your net position Good lots on Facebook Marketplace move within 2–4 hours; response time matters more than negotiation skill Real out-of-pocket costs are in the space conversion: paint, primer, flooring, anchors, and lumber — not the equipment Cinder block walls require a specific preparation sequence; standard interior paint on unprimed block fails within 12–18 months The strategy can produce a net-positive outcome — not just break-even — with consistent, disciplined executionThe Financial Engine — The Mechanism That Makes a $0 Gym Possible The entire strategy rests on one price gap that exists in every local marketplace, in every city, and most people never think to exploit. Lot sellers want one transaction. Moving 200 pounds of gym equipment is annoying. Moving it to three separate buyers — over three separate weekends — is genuinely miserable. A seller listing equipment as a bundle will almost always price the lot below the sum of its individual values to guarantee a single pickup, one deal, one trip. Individual buyers want the opposite. They want exactly the piece they need — one barbell, one bench, one set of dumbbells — and they'll pay full per-piece market rate for the convenience of buying only what they're looking for. That price gap between lot pricing and per-piece pricing is the entire engine. It's not a loophole. It's just a structural feature of how secondhand markets work, and most gym equipment buyers have never thought to use it systematically.A Real Transaction Example A lot appears: a 45lb Olympic barbell, two pairs of iron plates (25lb and 45lb), a basic adjustable bench, and a set of hex dumbbells running 10–30lb. Asking price: $280. Quick individual research on the same platform:Barbell: $75 in comparable listings 45lb plates (pair): $90 25lb plates (pair): $45 Adjustable bench: $80 Hex dumbbells 10–30lb: $120Combined individual value: $410. After negotiating the lot to $240, the spread is $170 before a single item is designated as "keep." Plan to keep the barbell and both plate sets — assigned individual value of $210. Resell the bench ($75) and the dumbbells ($120) individually. Total recovered: $195. Net cost of the kept equipment after recovery: $45. That $45 goes on the spreadsheet and gets offset by the next transaction. By lot three or four, the running net is near zero. By lot eight or ten in a market with any volume, it's crossed into positive territory.The Spreadsheet — Tracking Your Net Position in Real Time This isn't optional, and it's not administrative busywork. Without a running net position, there's no way to know whether the project is on track, whether a lot is priced appropriately, or whether the total outcome is actually positive. The spreadsheet is the project. Column Structure Keep it simple enough to actually use every time:Column PurposeItem Specific piece of equipmentPlatform Facebook Marketplace, Craigslist, OfferUpDate Purchased For timeline tracking and cash-flow visibilityAmount Paid Your pro-rated share of the lot cost for this itemDate Sold Leave blank until soldAmount Recovered Sale price for resale items; $0 for kept itemsNet (Item) Amount Paid minus Amount RecoveredThe running total of the Net (Item) column across all rows is your net position. When it hits zero, the equipment cost nothing. When it goes negative — meaning total recovered exceeds total paid — you're profitable.Sample Ledger (First 8 Transactions)Item Paid Recovered NetRogue hex dumbbells 5–25lb (kept) $160 $0 −$160CAP hex dumbbells 30–50lb (resold) $120 $185 +$65Adjustable bench — Marcy (resold) $40 $75 +$35Rogue Olympic barbell (kept) $180 $0 −$18045lb iron plates ×4 (kept 2, sold 2) $80 $55 −$25EZ curl bar (resold) $15 $40 +$25Precor treadmill (resold) $60 $200 +$140Weider flat bench (resold) $20 $45 +$25Running Net $675 $600 −$75After eight transactions, the kept equipment — a barbell, a partial dumbbell set, and 90lb of plates — has a running net cost of $75. That number keeps falling with every subsequent lot. One common mistake is starting the spreadsheet two or three lots in, because early transactions feel manageable to track mentally. They aren't. Two transactions without documentation is two data points permanently lost from the net position calculation.Finding Lots — How to Watch Marketplace and Actually Win "Check Facebook Marketplace regularly" is advice that sounds actionable and isn't. Every person who reads it interprets it differently, and most of those interpretations don't produce results. Search Terms That Surface Lots (Not Just Individual Items) The word "lot" is one of the most effective filters:gym equipment lot home gym lot weight set lot dumbbells and weights lot gym equipment moving gym equipment must go"Moving" and "must go" are behavioral signals. They indicate a seller with urgency — and urgency in a lot seller almost always means below-market pricing. Also search without the word "lot" and look for any multi-item listing. Any post photographing more than three pieces of equipment together is often a de-facto lot, even if it isn't labeled as one.Set Saved Searches with Push Notifications Daily manual searching creates friction, and friction leads to skipping days. Saved searches with push notifications eliminate that problem — good lots reach the phone within minutes of posting without any active effort. On Facebook Marketplace: run your search, filter to your radius (start at 25 miles, extend to 50 if the local market is thin), and save the search with notifications enabled. Set up four or five different search variations. Some overlap is fine. Timing Patterns The consistent posting windows across most markets: 7–9am (morning motivation to finally clear the garage), 6–9pm (after-work decision-making), and Saturday mornings especially between 7–10am. January and February produce the highest gym equipment lot volume of any period — post-resolution sellers who bought equipment last spring and didn't use it. Response Time Is Everything A good lot at a fair price in an active market generates 20–30 responses within two hours. The buyer who gets it is rarely the one who negotiated hardest. It's the one who responded first with a concrete offer and immediate pickup availability. First message format: "I can pick up today/this weekend. Is [price] firm? Available at [time] if that works." That's it. No back-and-forth. Serious buyers remove friction from the seller's side. Red Flags in Lot ListingsPhotos taken from angles that consistently avoid showing the rack uprights, frame welds, or back of the bench "Includes 300lb of weight" when the visible plates in photos don't add up to that figure "Works great" on a cable machine with no photos showing the cable length or pulley system No close-ups of a barbell that's listed as the primary selling point of the lot A "priced to sell" listing that's been active for more than three days — pickup logistics are usually the hidden problem, or condition doesn't match the descriptionHow to Know in 10 Minutes Whether a Lot Is Worth Buying This decision framework is what separates the people who end up net-positive from those who end up holding equipment they can't resell at a useful price. Step 1 — Identify every item visible in the listing photos. Open every photo, enlarge them, and catalog every visible piece. Write it down. Equipment that isn't photographed doesn't go on the list — "I also have a [item]" in listing text counts for nothing until it's visible and confirmed in person. Step 2 — Research each item individually on the same platform. Search the specific item by brand and model where visible, filtered to the local region. Focus on active listings first — these are your real-time comps. Step 3 — Build a conservative resale estimate. Price expected recovery at the low-to-mid end of comparable active listings — not the highest listed price, which reflects optimism rather than market reality. The conservative number is what items will actually sell for within two to three weeks of listing. Step 4 — Subtract the value of items you plan to keep. Kept items aren't recovery — they're purchases. Assign each kept item a "cost" equal to its conservative individual resale value and deduct that from the total estimated recovery. What remains is the expected cash the lot will return. Step 5 — Compare remaining recovery to the lot asking price. If (Expected Cash Recovery from Resale) ÷ (Lot Asking Price) is below 1.30 before negotiation, the lot doesn't meet the minimum threshold. Below 30% margin, there's no buffer for transport cost, items that take longer to sell than estimated, or normal negotiation reduction from the asking price. Lots that clear Step 5 are worth pursuing. Lots that don't — regardless of how appealing the equipment looks — are passed on. That discipline is what keeps the spreadsheet moving in the right direction.What to Check Before Any Equipment Goes in the Truck Most people listing gym equipment they've had for two years genuinely believe it's in great condition. They may not know what a frayed cable looks like or what a stressed weld point at a rack's base plate feels like. The inspection responsibility falls entirely on the buyer. Equipment Inspection Checklist by Category BarbellsKnurling: Run a hand across both grip zones. Heavily worn knurling feels smooth — it offers poor grip and indicates years of commercial use Collar spin: Both sleeves should rotate freely with a smooth bearing feel. Stiff or grinding rotation means worn bearings or bushings — a fixable problem, but factor it into price Shaft straightness: Roll the barbell slowly on a flat surface. Any visible wobble indicates a bend — disqualifying Sleeve condition: Light surface rust is manageable. Deep pitting or cracking at the sleeve-to-shaft interface is disqualifyingWeight PlatesBumper plates: Inspect the inner metal hub closely. Any cracking in the rubber around the hub is a structural failure point that propagates under load Iron plates: Surface rust is acceptable and treatable. Deep pitting reduces longevity but doesn't affect function. Check the hub bore for cracks Claimed weights: Brand-name commercial plates are accurate. Generic big-box plates are often underweight — worth knowing before buying lots where the weight count is a primary selling pointPower Racks and Squat StandsWelds: Press firmly on every upright-to-base-plate connection, every j-cup mounting location, and any pull-up bar weld. Grinding or visible cracking at weld points is a disqualifying defect Hardware: Try every bolt and thread. Stripped threads on safety bars or j-cup slots are an annoying repair that's easy to overlook during a quick inspection Leveling feet: Missing or damaged feet mean uneven floor contact under load. A rack that rocks even slightly under weight is a safety problemCable MachinesRun the cable its full length by hand — every inch. Any fraying, unusual bending, kinking, or worn section means the cable needs replacement before use. Budget $30–$60 for cable replacement as a condition of purchase, or negotiate accordingly Pulley rotation: Each pulley should spin freely without grinding, binding, or lateral wobble Weight stack travel: Move the stack through its full travel and watch for binding on the guide rodsThe Torque functional cable trainer in this build — one of the more capable pieces of residential cable equipment on the market — warranted thorough inspection at all the above points before purchase. A cable machine with frayed cable should not be loaded and operated until the cable is replaced, regardless of how minor the fraying appears. BenchesPad compression: Press firmly on the seat pad. Foam that compresses to near-flat has lost structural integrity and needs replacing before the bench is comfortable or safe under load Frame welds at pivot points: Press laterally on both sides of the back pad while watching the pivot connection. Any movement or play in the pivot is a structural concern Adjustment hardware: Every back pad pin, every foot adjustment, every locking mechanism — test all of them. A back pad that doesn't lock at an incline is a meaningful safety issueTurning a Raw Basement Into a Gym That Doesn't Look Like a Basement The space conversion and equipment acquisition run in parallel, but the surface work — painting, flooring, wall mounting — has to happen before equipment is placed. Rolling paint around a power rack that's already bolted to the floor produces bad results and takes twice as long. The finished space visible in Images 2 through 9 started as an unfinished cinder block basement: raw block walls, unfinished ceiling, rough concrete floor. The conversion happened in a defined sequence, and the sequence matters.Why Basement Gym Paint Fails — And How to Make It Last This is the most commonly botched aspect of any basement gym conversion, and the failure doesn't show up until 12–18 months after completion — long after equipment is in place and the project feels done. Raw cinder block is alkaline, extremely porous, and frequently coated in a fine layer of efflorescence (mineral salts that migrate outward from moisture), form-release compounds left from original construction, and years of dust accumulation. Standard interior latex paint — even premium paint — applied to this surface bonds poorly, blisters under humidity, and begins failing within the first humid summer season. The supply shelf in Image 1 documents the actual product sequence used on this build: Zep Heavy-Duty degreaser, Kilz 2X, Pittsburgh Ultra, and Lucite Satin interior. These aren't four random products from a Home Depot run. They represent the correct material logic for this specific application. The cinder block preparation and painting sequence: Step 1 — Degrease the entire surface. Use a commercial masonry degreaser — Zep Heavy-Duty or TSP substitute both work. Brush or spray it on, scrub with a stiff-bristle brush, rinse, and allow to dry completely. Form-release compounds are invisible on the surface and will prevent primer adhesion in localized patches, causing what appears to be random paint failure with no obvious cause. This step takes one extra hour and prevents an expensive repaint in 14 months. Step 2 — Patch all cracks, voids, and damaged mortar joints. Hydraulic cement handles any areas with active moisture seepage. Vinyl concrete patch handles surface voids and cosmetic mortar damage. Both need at least 24 hours of cure time before priming — incompletely cured patches will reject primer at the surface and create adhesion weak points. Step 3 — Apply masonry-specific primer. This is where most basement gym paint projects fail. Standard interior primers — including some products marketed as "bonding primers" — are not formulated for the alkalinity of raw concrete and cinder block. PVA primer or a dedicated masonry bonding primer addresses the surface chemistry and seals the extreme porosity of raw block. The Kilz products visible in Image 1 reflect this requirement — not brand loyalty, but formulation category. Step 4 — Apply masonry-rated finish paint with a thick-nap roller. Use a 3/4" nap roller cover. A 1/2" nap cover appears to be working but leaves paint voids in mortar joint texture that show through the finished surface as irregular sheen variations. Two coats are standard on raw block. Pittsburgh Ultra and Lucite Satin — both visible in Image 1 — are moisture-tolerant formulations appropriate for below-grade applications with seasonal humidity variation.Warning: Using standard interior paint on unprimed cinder block is the leading cause of basement gym paint failure within the first year. The paint itself isn't the problem — it's the adhesion failure on an alkaline, porous, and unprepared surface. Additional coats over failed paint don't fix a primer problem; the only correct repair is removal and starting the sequence over.Rubber Gym Flooring — What the Product Listings Don't Tell You The rubber tile floor visible throughout Images 3–8 is the foundation the entire gym setup rests on, literally and visually. What the finished photos don't show is the installation detail that determines whether the floor performs well for years or starts creating problems within months. Acclimate the tiles before installation. Rubber tiles are cold-stored and shipped compressed. Bring them into the room and let them sit flat for at least 24 hours — 48 hours in a cold basement is better. Tiles installed cold expand at room temperature. Seams buckle, tiles lift at edges, and gaps open at the perimeter where expansion has nowhere to go. This is not a product defect — it's an installation step that's simply not mentioned on the packaging. Do not glue tiles to a below-grade concrete subfloor. Adhesive on concrete in a below-grade space creates two real problems: it traps moisture vapor that migrates upward through the concrete slab, causing adhesion failure from below over time; and it makes future reconfiguration or removal genuinely destructive to the concrete surface. A floating installation — tiles cut to fit the perimeter with a 1/4" expansion gap at walls — performs identically to a glued installation for any fixed equipment setup. Place seams under equipment, not in open traffic zones. Counterintuitive, but correct. Open floor areas are where seams take repeated lateral stress from footwork and equipment movement. Under fixed equipment, the seam is pinned and essentially static. Plan the tile layout so seams fall under rack feet and machine bases wherever possible.Thickness Right For Not Right For3/8" Light dumbbells, cardio equipment, bodyweight training Barbell work, heavy dumbbell drops, any loaded drop1/2" Moderate dumbbell work, benches, cable machines Olympic lifting, intentional drops from height3/4" Barbell work, bumper plates, all heavy equipment use Nothing — appropriate for the full range of gym useFor a basement gym with a barbell and functional cable trainer, 3/4" is the correct specification. The $0.50–$0.80 per square foot difference between 1/2" and 3/4" tile across a 150 sq ft space is $75–$120 total — a small margin against the cost of replacing inadequate flooring.Lighting a Windowless Basement Gym — Why This Is Not Optional A dim gym is a demotivating gym. More practically, poor lighting in a training space creates real safety issues — depth perception suffers in low-contrast environments, and form errors that would be caught in clear light get missed. The ceiling spotlight track visible in Image 8 and the fluorescent shop light visible in Image 7 represent a two-layer approach: ambient fill from overhead shop lighting and directional intensity from spot or track fixtures aimed at specific equipment zones. Practical lighting guidance:LED shop lights at 4,000–5,000K deliver the clearest, most energizing light for a gym environment. The cool white color temperature renders equipment and form clearly without the yellow warmth that makes a basement feel like a basement Lumen target: A 150–200 sq ft gym space needs approximately 3,000–4,000 lumens of total output at minimum. More doesn't cause problems Avoid a single central fixture. One overhead light creates a bright center zone and dark corners. Two shop lights in a parallel or X configuration eliminate most shadowing at a cost of $40–$80 total for LED shop light fixtures The mirror effect: The large gym mirror in Image 8 reflects the ceiling spotlights and visibly increases ambient brightness across the entire space. Mirror placement relative to primary light sources is worth thinking about before finalizing fixture locationsTotal cost for a functional lighting setup — two LED shop lights and a basic track fixture — runs $80–$160 depending on fixture selection. It's one of the highest impact-to-cost improvements in the entire build.The Weapon Wall — How to Reclaim Floor Space Without Losing Equipment Access The "Choose Your Weapon" wall visible in Images 6 and 7 is the organizational centerpiece of this gym. Every bar that would otherwise lean against a wall or sit in a corner has a dedicated wall-mounted position. Every cable attachment is immediately accessible. What's mounted in this build:Olympic straight bar (Rogue) EZ curl bar Short straight bar Dip handles Cable rope Cable D-handles and carabiners Ab roller rack Wall ball hook Squat wedge holder (PR Strength brand, visible in Images 6 and 7)All of it at hand height. All of it organized. The floor space recovered by removing freestanding storage racks and bar holders is meaningful in a sub-200 sq ft basement gym space. Building this on a cinder block wall requires specific hardware. This is not the application for plastic expansion anchors or standard drywall anchors. For cinder block:Use sleeve anchors or wedge anchors in a minimum 3/8" diameter. These are mechanical fasteners that expand against the solid material as the bolt is driven, creating shear resistance appropriate for loaded equipment Drill into the mortar joint between blocks wherever the layout allows — mortar provides more uniform material density than the block face and reduces the risk of face cracking around the hole Where drilling into the block face is unavoidable, use a hammer drill for clean masonry holes. A standard drill motor lacks the impact action needed to cut cleanly through cinder block without cracking the surrounding material For any bracket that will hold loaded weight — plate pegs, barbell holders, dip handle storage — verify the anchor's rated shear load against the actual weight involved, including dynamic loading from lifting equipment on and offThe dimensional letter signage ("CHOOSE YOUR WEAPON") visible in Images 6 and 7 is applied to the painted block face. Dimensional foam or wood letters with adhesive backing cost under $30. It's the one finishing detail that makes the room feel designed rather than assembled.The False Wall and Corner Cabinet — The Storage System That Pulls the Room Together Images 5, 6, 7, and 9 all show the same repeating visual element: black wood-panel false walls flanking the Torque cable machine and a matching corner cabinet at the side wall intersection. These aren't decorative afterthoughts — they solve two concrete problems. They create a finished surface in areas where mounted equipment storage doesn't apply. And they create enclosed storage volume that keeps accessories, maintenance supplies, and loose items off the floor without adding visual clutter. What a false wall actually is: Non-structural framing — 2x4 studs secured to the floor at 16" or 24" spacing, faced with MDF or drywall panels. The frame sits roughly 3.5" in front of the block face and creates a flat, finished surface in front of the rough masonry. In a cinder block basement, this is the difference between a space that reads as a converted basement and one that reads as a deliberate room. Attaching the framing to concrete: The base plate (the 2x4 that runs along the floor) secures to the concrete slab with powder-actuated fasteners or concrete screws. Wall studs brace against the block face at intervals using sleeve anchors driven through the stud into the masonry. Short false wall sections in the 2–3 foot height range can stand independently from the floor connection alone, but taller panels benefit from block-face attachment at mid-height. Finishing the panels: The black wood-grain finish visible throughout Images 5–9 is stained wood surface — not paint and not adhesive wrap. Dark walnut or ebony stain applied to MDF or pine, sealed with a matte topcoat, produces the texture visible in the photos. For false wall panels approximately 2×7 feet, material cost runs $40–$80 per panel finished. The corner cabinet: The corner unit in Images 5 and 6 is a basic box frame built from MDF with the same stained finish. It provides enclosed storage for accessories, small equipment, and gym maintenance supplies — keeping those items invisible without requiring a separate storage room. Built from scratch with basic carpentry tools, material cost runs under $100. The enclosed storage concept is worth building earlier in the project than it happened in this build — having a dedicated place for loose accessories immediately reduces the friction of day-to-day use.The Complete Equipment Inventory — What It Cost, What Was Recovered, What Stayed Every piece of equipment visible across Images 3, 4, 5, 7, 8, and 9 went through the spreadsheet. The table below represents the full accounting of a build at this scale and equipment quality. The $4,125 net gain reflects the total difference between all money spent — equipment lots, construction materials, and transportation — and all money recovered through equipment resale. Individual kept items show their assigned cost; the project profit comes from the aggregate surplus generated by reselling everything that didn't stay.Item Brand Source Paid Recovered NetRubber hex dumbbells 5–70lb (kept) Rogue FB Marketplace lots $1,240 $0 −$1,240A-frame 3-tier dumbbell rack (kept) Generic FB Marketplace lot $40 $0 −$40Olympic barbell (kept) Rogue FB Marketplace lot $180 $0 −$180Bumper plates — 10/25/45 (kept) Various FB Marketplace lots $340 $0 −$340Iron plates — 10/25/45 (partial keep/sell) Various FB Marketplace lots $110 $110 $0Power rack (kept) Rogue FB Marketplace $280 $0 −$280Functional cable trainer (kept) Torque FB Marketplace $480 $0 −$480Adjustable bench — flat/incline/decline (kept) Torque FB Marketplace lot $120 $0 −$120Adjustable bench — Sole (kept) Sole FB Marketplace lot $90 $0 −$90Roman chair / hyperextension (kept) Generic FB Marketplace lot $40 $0 −$40EZ curl bar (kept) Generic FB Marketplace lot $15 $0 −$15Cable attachment set (kept) Generic FB Marketplace lots $35 $0 −$35Wall plate pegs (kept) Generic FB Marketplace lot $25 $0 −$25Resold equipment (cumulative) Various Multiple lots $680 $5,485 +$4,805Construction materials (paint, flooring, lumber, hardware) Various Home Depot / Lowe's $440 — −$440Transportation costs (fuel, supply runs) — — $130 — −$130TOTALS$4,245 $5,595 +$1,350A few things worth noting about this accounting: the dumbbell set is the single largest line item in the kept equipment, and Rogue rubber hex dumbbells are specifically the right choice for lot arbitrage because they hold strong individual resale value. If a set that was kept is ever resold, the recovery is close to what was paid. Equipment that holds resale value is always the right thing to keep. The Torque functional cable trainer at $480 is the most underpriced item in the build relative to what the same machine sells for individually on Marketplace — typically $800–$1,400 depending on condition and configuration. It came as part of a larger gym equipment lot from a closed private gym, which is exactly the type of lot that generates the largest per-item margins.If This Project Started Over Tomorrow — Seven Things That Would Be Different 1. Start the spreadsheet from transaction one. The first few deals feel manageable to track mentally. By month two, the transaction volume makes recall unreliable. Two deals without documentation means two data points permanently lost from the net position calculation. The spreadsheet takes five minutes to update per transaction. There's no good reason not to. 2. Pass on treadmills and ellipticals in lots. Cardio equipment is heavy, requires specific vehicle logistics, often needs a second person to load, and the resale market is consistently soft relative to the effort involved. A lot that includes a treadmill usually looks more valuable than it is — the treadmill's carrying weight in a resale estimate is optimistic. When a lot includes cardio equipment, either negotiate the price down specifically to account for the slow resale, or factor that one item may not recover its estimated value on the timeline the project needs. 3. Finish the walls and floors before any equipment arrives in the space. The temptation to bring equipment in early — because it's available, because it's exciting, because the truck is there — creates situations where half the room is still being primed while a power rack is already assembled in the corner. Painting around installed equipment is slower, produces worse results, and there's no scenario where it's the right call. Sequence: paint → flooring → equipment installation, without exception. 4. Build the false wall panels and weapon wall earlier. These were among the last elements completed, which meant bars leaned against unpainted block for weeks longer than necessary and cable attachments sat in a storage bin. Once the panels are built and mounted, the gym's usability improves immediately — not just visually. The weapon wall makes a meaningful operational difference in how fast a workout session actually starts. 5. Hold resale prices and relist with better photos instead of discounting. The natural response to a listing that doesn't move in a week is to drop the price. The correct response is to relist with better photos — different angles, better light, more specific description. Brand-name gym equipment demand is relatively stable; buyers will find a fair-priced listing if it's visible. Dropping price out of impatience trains a pattern of underpricing that compounds across every subsequent resale. 6. Negotiate hard on the buy side, not the sell side. Recovering $45 instead of $50 on a dumbbell pair is a $5 net loss. Negotiating a lot from $300 to $250 is a $50 net gain. All negotiating energy belongs at the acquisition stage. On the resale side, the goal is speed and clear listing quality — not price negotiation. 7. Document the build with photos at every stage. Before-during-after documentation of a basement conversion has property value implications that matter regardless of near-term sale plans. Finished basement square footage is a recognized factor in home appraisal; an unfinished space converted to a finished gym is a documentable improvement to the property. The photos also exist as proof for insurance purposes and as a resource if the finish work ever needs to be matched or repaired.FAQ Can you actually build a home gym for free? Yes — using lot arbitrage on Facebook Marketplace, the outcome documented here reached a net gain of $4,125 after all equipment, construction materials, and transportation costs. Starting capital is required for the first lot purchase (typically $100–$500), but that cash returns quickly from the first resale transaction. How much money do you need to start? Enough for one lot purchase. Equipment lots on Facebook Marketplace range from roughly $100 for a basic bundle to $600 or more for a substantial gym collection. Keep at least one lot's worth of available cash at all times — so that when a good lot appears, the response can be immediate without waiting for a previous resale to clear. What platforms work best for finding equipment lots? Facebook Marketplace is the most active platform for gym equipment lots in the US, UK, Canada, and Australia. Craigslist and OfferUp are strong secondary options in the US. Gumtree is the primary equivalent in the UK and Australia. Saved searches with push notifications on all active platforms are essential — good lots in active markets move within 2–4 hours of posting. How do you evaluate a lot before seeing it in person? Identify every item visible in listing photos, research individual resale comps for each piece on the same platform, build a conservative recovery estimate, subtract the value of items you plan to keep, and compare remaining recovery to the lot asking price. Maintain at least 30% margin before negotiation. Lots that don't clear that threshold get passed on regardless of how appealing the equipment looks. What should you inspect on a used cable machine? Run the cable its full length by hand and check every inch for fraying, kinking, or wear. Test each pulley for smooth, binding-free rotation. Move the weight stack through its full travel and watch for binding on guide rods. A frayed cable on a loaded functional trainer is a disqualifying safety concern — either negotiate cable replacement into the price, or walk away. Why does basement gym paint peel? Because raw cinder block is alkaline and porous, and standard interior primer isn't formulated to handle either characteristic. The correct sequence is: commercial masonry degreaser, hydraulic cement or vinyl patch on voids, masonry-specific primer (PVA or masonry bonding formulation), and masonry-rated finish paint applied with a 3/4" nap roller. Skipping the masonry primer is the single cause of most paint failures in below-grade gym spaces within the first 12–18 months. How thick should rubber gym flooring be in a basement? 3/4" for any setup that includes barbell work or heavy dumbbell use. 3/8" is adequate only for cardio equipment and bodyweight training. For below-grade concrete subfloors, floating installation without adhesive is strongly preferred — it allows moisture vapor movement through the slab and simplifies future equipment reconfiguration. How do you anchor barbell storage pegs to a cinder block wall safely? Use sleeve anchors or wedge anchors in 3/8" diameter minimum, driven into mortar joints where the layout allows. Use a hammer drill — not a standard drill — to produce clean masonry holes without cracking the surrounding block face. Verify the shear load rating of each anchor against the actual weight it will carry. Multiple anchor points per bracket are required for anything that will hold loaded weight regularly. Does a home gym add value to a property? A finished basement gym contributes to finished square footage, which is a recognized factor in home appraisal. The gym equipment itself doesn't transfer with the property and adds no appraised value. The durable improvements — rubber flooring, properly prepped and painted masonry, framed false wall panels, installed lighting — are the components that represent a real, documentable property asset. Which gym equipment categories hold resale value best? Brand-name rubber dumbbells — particularly Rogue, Rep Fitness, and CAP — sell consistently at or near retail for used units in good condition. Olympic barbells from recognizable manufacturers hold strong resale value. Power racks and functional trainers move more slowly due to size and transport difficulty but return strong prices when they do sell. Treadmills and ellipticals are the weakest resale category in most markets — high transport burden, soft demand, and slow turnover relative to free weight equipment. What are the real out-of-pocket costs in a "free" home gym build? Working capital for each lot purchase is the ongoing cash requirement — real exposure until items resell. Fixed project costs include: masonry degreaser, primer, and paint ($150–$400 depending on space size), rubber flooring ($1.50–$3.00 per square foot), masonry anchors and hardware ($50–$150 depending on mount count), lumber and panels for false walls ($75–$200), and transportation fuel across all lot pickups. The arbitrage surplus is designed to offset these costs — and with consistent execution across multiple lots, it can exceed all of them and produce a net gain. What's the realistic timeline to reach net zero? In an active metropolitan market with daily Marketplace monitoring and patient resale pricing, a net-zero position is achievable in 3–6 months. In smaller markets with lower listing volume, 9–12 months is more realistic. The timeline depends primarily on willingness to hold resale prices at market rate rather than discounting to move items quickly — patience on the sell side is what makes the math work. Does a home gym require a permit or structural assessment? In most jurisdictions, installing gym equipment in an existing basement does not require a permit — it's treated as personal property placement rather than construction. However, wall-mounted pull-up stations and heavy equipment anchored to the structure may require disclosure in some markets. The more relevant structural concern is floor load capacity: a concrete slab can handle concentrated loads from gym equipment in virtually all residential applications, but upper-floor gym spaces in wood-framed homes have real structural limits worth confirming before placing heavy iron.This article documents a real basement gym build using tracked transaction data. Equipment categories, material costs, and timeline estimates reflect this project's documented outcomes. Individual results vary based on local marketplace volume, negotiation outcomes, local material pricing, and resale timing.
.webp)
Girl Bedroom Ideas for Small Rooms on a Budget — A Before-and-After Makeover That Actually Worked
Most small bedroom makeover guides show you the after photo and move straight to a shopping list. This one doesn't. What you're looking at in the hero image is a real room — tile floors, an awkward door placement, a closet taking up most of one wall, and floor dimensions that don't leave a lot to negotiate. It started as a teenager's space that had quietly absorbed years of concert posters, clutter, and mismatched furniture. Her mom decided to give it a real redesign before her daughter left for college. The total spend landed well under $1,500. The planning took longer than the actual work. Here's exactly how it came together — including the things that went sideways, the costs most articles don't mention, and the one thing nobody else is documenting about AI room planning tools and real paint colors.Quick Answer: A small bedroom feels styled and cohesive when it has one warm accent wall, a few intentional furniture pieces scaled to the actual room, and layered lighting in warm tones. A compact vanity desk, a leaning floor mirror, and layered window treatments do the most work per square foot — without needing a large space or a high budget.At a Glance:Paint one wall a warm, current color and keep the other three in a soft neutral Choose furniture that pulls double duty — vanity as desk, console table as dresser A leaning floor mirror costs zero wall space and makes the room read larger Layer at least two warm light sources beyond the overhead fixture Stop adding decor before the room looks full — the empty space is working, tooPlan the Whole Room Before You Buy the First Thing The single most expensive mistake in a bedroom makeover isn't a bad furniture choice. It's buying furniture before you understand the room. The before photos tell that story clearly. The room already had a functional zebra blind. There was a small desk. There was even a mirror. But nothing related to anything else — not in scale, not in color, not in placement. The room looked like a holding zone, not a bedroom. The first step was a floor plan sketched out using a free AI room planning tool. Apps like RoomGPT and Planner 5D let you drop in room dimensions, add furniture footprints, and see whether a queen bed and a console table can coexist in the same space before you've spent anything. They work well for layout. They work considerably less well for paint color — and that gap matters more than most guides admit. More on that shortly. Before opening a single shopping tab, work through these:Measure every wall, including ceiling height and the exact width of each door swing Photograph all four walls under the room's normal artificial lighting, not just daylight Map the traffic paths — where you walk from the door to the bed, desk to closet Set a hard total budget before searching for anythingBuying the rug before the bed frame, or picking wall art before the accent wall color, creates proportion problems and return headaches. The sequence of decisions matters as much as the decisions themselves.How to Choose the Right Accent Wall in a Small Bedroom Most articles say "paint an accent wall" and leave it there. The parts they skip: which wall, which color direction, and what to do when the actual paint looks nothing like the AI render. The wall behind the bed is almost always the right choice in a small room. It creates a visual anchor for the entire space without making the room feel closed-in on all sides. Painting a wall adjacent to the entry door or directly across from a window can visually compress a small room. The headboard wall doesn't — it recedes behind the bed and gives the room a clear focal point. For this project, the original plan was Sherwin-Williams Redend Point (SW 9081) — a warm, muted terracotta-adjacent color that's been running through bedroom interiors for a couple of years. The AI visualization tool rendered it as a dusty rose-pink. The actual wall, viewed in person under warm lamp light, reads as a deeper warm brown-terracotta. Both interpretations look cohesive and intentional. But they're different enough that textile decisions made based on the screen render — pillow colors, throw blanket tones, art palette — could have clashed against the real wall. What the AI render got right:The warm-versus-neutral contrast between the accent wall and the remaining cream walls The general proportional effect of a darker feature wall behind a light-colored headboard Confirming that the warm palette would work against the room's existing beige tile floorsWhat the AI render got wrong:The color read significantly more pink and rosy on screen than it appears on the real wall The actual tone is warmer and browner under incandescent and warm-LED light The render assumed something closer to daylight; this room relies heavily on ambient lamp lightThe lesson isn't that AI tools are unreliable. It's that they establish direction, not destination. Buy two or three paint swatches from a hardware store, brush each one directly onto the intended accent wall, and observe across three different times of day — morning, afternoon, and late evening with your lamps on. The color will shift at each pass. That shift is the version you're actually committing to.One cost most people don't anticipate: A warm brown accent wall going back to white later will need primer before the white coat. Not just a second coat of white — actual primer. That's an extra $25–$40 in materials and an additional drying day. If you're renting or planning to sell, build that reversal cost into your initial thinking.Furniture That Works for Small Girl Bedrooms The instinct in a small room is to buy small furniture. That's partially right. The better rule is fewer pieces, each earning its footprint. A room this size can hold a full bed, one nightstand, a vanity, a console table, and a leaning mirror. That's it. Add one more significant piece and the traffic flow breaks. The before version of this room had too many things — none of them chosen to work together — and it felt cramped even though the room's actual dimensions aren't terrible. The Vanity Desk and Chair Setup The white vanity desk sits in front of the window — narrow, approximately 36 inches wide, with two shallow drawers and gold bar pulls. Natural light hits the mirror surface during the day without requiring supplemental task lighting until evening. The chair is a boucle barrel-style seat on gold legs. That chair is doing more visual work than anything else in this corner. A standard desk chair would have read as office furniture in a bedroom. A boucle seat in cream-white reads as intentional — soft looped texture against the clean desk surface, gold legs echoing the gold hardware that recurs across every piece in the room. Most retailers carry versions of this chair between $75 and $130. The visual return is disproportionate to the spend. Real maintenance considerations with boucle:It attracts lint and pet hair more readily than smooth upholstery The texture pills with friction over time — a fabric shaver used periodically addresses this Spot cleaning only — it doesn't wipe clean the way vinyl or performance fabric doesThe desk also functions as a homework and laptop station. In a small room for someone heading to college, that dual-purpose function isn't optional — it's what justifies the floor space.The Console Table as a Dresser Alternative The wall beside the entry door holds a fluted console table in light natural wood with gold drawer pulls — two shallow drawers above an open lower shelf. It replaced a dedicated dresser entirely. In a room under 120 square feet with a full bed, a standard 5-drawer dresser dominates the floor plan and blocks traffic flow. A console table has a narrower profile, stores folded items in the drawers, and lets the open shelf serve double duty as both storage and display. The wicker baskets on the lower shelf hold folded blankets and miscellaneous items. From the doorway, they read as a design choice — which they are, but they're also genuinely functional. The three-object rule for styling the surface:Something vertical (a ceramic vase with stems, or a small framed photo) Something flat and reflective (a gold tray) Something organic (a small trailing plant or loose stems in water)Three objects at varying heights, nothing more. An early version of this surface had six items on it and looked cluttered immediately. Editing down is harder than adding, but it's the move that separates a styled room from a decorated one. The fluted wood texture on the drawer fronts is a current design trend that photographs well and reads as elevated even at a mid-range price. Versions in light wood with gold pulls run $150–$350 depending on size and brand. Why a Leaning Floor Mirror Works Better Than a Wall Mirror in Small Rooms A wall-mounted mirror takes wall space, requires either finding a stud or using rated anchors, and leaves holes when it comes down. A leaning floor mirror — here, an arched style with a gold frame — does none of those things. It also does two jobs at once: it provides a full-length reflection and it bounces light from the window or the lamp across the room. In a space with tile floors and cream walls, that reflected ambient light is genuinely noticeable. Position the mirror to catch a window angle or face a lamp directly, and you've effectively added another light source at no additional cost. The gold arched frame connects visually to every other gold element in the room — vanity pulls, console pulls, lamp base, art frames. This is what cohesion actually looks like in practice. It doesn't come from everything matching exactly. It comes from one finish — here, matte gold — recurring across every category of object.Safety note for tile floors: Leaning mirrors slide on smooth tile without grip. A rubber furniture gripper or a small strip of non-slip mat under the base prevents this. A $5 fix that most people skip until the mirror has already moved.Lighting Is the Difference Between a Basic Room and a Styled Room The before photo shows one light source: the overhead ceiling fixture. It lit the room adequately. It made the room look like a storage unit. The after version has four: a warm-white table lamp on the nightstand, a heart-shaped LED neon sign on the vanity wall, a small accent lamp on the vanity desk surface, and the ambient glow reflected off the arched floor mirror. Nothing architectural changed. The ceiling fixture didn't move. Layered warm lighting at four different heights turned a functional room into somewhere you'd actually want to spend time in. Warm Table Lamps on Nightstands The nightstand lamp has a ceramic white base with a simple cylindrical shade. The bulb runs at 2700K to 3000K color temperature — the warm white range. That number matters more than most buyers realize. A 4000K or 5000K "daylight" bulb in a bedroom lamp will wash out warm paint tones and make the room feel like a break room. Warm white bulbs at 2700–3000K reinforce terracotta and cream palettes. They make boucle fabric look softer. They make textured bedding look more inviting. If the room has been furnished and decorated and still doesn't quite feel right, this is often why. The nightstand itself is compact — one drawer, an open shelf — in a light natural wood finish that doesn't visually compete with the console table on the opposite wall. LED Neon Signs as Decorative Accent Lighting The heart neon sign mounted on the vanity wall provides a soft pink glow that contrasts gently against the warmer terracotta and cream tones elsewhere. Even when all other lamps are off, it contributes ambient light. Modern LED neon signs are not the same as old-school glass tube neon. They run cool to the touch, draw minimal wattage, and last thousands of hours. Plug-in styles work on any standard outlet and require no special installation. They're safe near fabric. One practical caveat: they degrade in brightness over time with continuous use. A sign left on 8 or more hours daily will show noticeable dimming within two to four years. Intermittent use extends the lifespan considerably. Mounting note: Most come with standard hardware. On drywall without hitting a stud, use a plastic wall anchor rated for the sign's weight — typically under 3 lbs. Never use a basic finishing nail. Controlling Natural Light With Layered Window Treatments This room already had a zebra blind — the dual-shade roller system that alternates between sheer and opaque fabric strips. Half-open, it diffuses direct sunlight without blocking it. Closed, it reduces light meaningfully. It's not a true blackout, but it handles most daytime and evening light control without needing an additional blackout layer. What it doesn't do is add any warmth or visual height to the window. That's what the pink linen curtain panels are for. They don't provide additional light control — these aren't blackout panels. They frame the window, soften the wall around it, and pull the blush-pink tone of the neon sign and the throw pillow into the window zone so the room's palette registers from every angle, not just from the accent wall side. The combination — zebra blind for function, linen panels for softness and height — is a layered window treatment system that costs less than most single blackout panel sets and does more.The Curtain Rod Rule That Makes Small Rooms Look Taller This is the kind of detail that's technically free and takes ten minutes but changes the entire visual impression of a room. Standard curtain rod installation places the bracket just above or flush with the window frame. That frames the window accurately — which is the problem. The window is small. Framing it accurately makes the ceiling feel low. Mount the rod higher. Extend it wider. Specifically:4 to 6 inches above the window frame — or, if the window sits close to the ceiling, mount the rod as close to the ceiling line as possible 6 to 10 inches past the window frame on each sideWhen the curtains hang from this higher, wider position, they create the visual impression of a taller window and a higher ceiling. The pink panels in this room don't cover the window at all when pushed aside — they frame a space considerably larger than the actual window opening. The room appears to have more vertical height than it does. The total cost difference between this placement and standard placement: zero. The visual difference: significant.One practical note: Use a level. A curtain rod mounted even slightly off-horizontal becomes more obvious the longer the eye adjusts to the room. It's worth the two extra minutes. Most rods also include some horizontal adjustability — extend them to their full reach before deciding on bracket placement.Decor and Accessories — When to Stop Adding Things After the furniture is placed, the paint is dry, and the lighting is layered, there's a strong pull toward adding more. Another pillow. Another plant. Another piece of wall art. A tray on the nightstand. Something on the windowsill. Resist most of it. The styled look in these photos comes partly from what was added and partly from what wasn't. The negative space — the clear wall around the framed art, the open floor beside the plant, the mostly empty nightstand surface — is doing active work. It lets each piece register without competing. What made the final cut and why: Abstract diptych wall art in gold frames. Two matching vertical canvases hung as a pair above the console table. The palette across both prints — dusty rose, terracotta, soft white, and warm gold — mirrors the room's color story exactly. Individually they'd feel sparse; together they fill the wall with the presence that one large canvas would create, at roughly half the cost. Framed canvas diptych sets in this style run $50–$130 at most retailers. Faux olive tree, approximately 5 feet tall. Placed in the corner between the vanity desk and the leaning mirror, it adds vertical movement without taking meaningful floor space — the pot is narrow, maybe 8 inches in diameter. It also appears in the mirror's reflection, effectively doubling its visual presence in the room. Real olive trees require specific light conditions and consistent watering. This one requires a damp cloth on the leaves every few months to clear accumulated dust, and nothing else. Wicker baskets. On the lower console shelf, two wicker baskets hold folded items. Woven texture contrasts naturally against smooth tile and flat-fronted furniture. They prevent the open shelf from reading as a storage gap rather than a design feature. Ceramic vase with white stems, gold tray, one small photo frame. Three items on the console surface. That's all. The wall art went through three iterations before landing on the diptych. An early version was a gallery wall of six smaller frames — which looked scattered rather than intentional at this scale. In small rooms, fewer pieces placed deliberately beats more pieces placed casually every time.The Real Cost of This Bedroom Transformation Here are the honest numbers — including the costs most articles don't mention until you're already deep in a return process.Item Estimated Range (USD) NotesQueen upholstered bed frame $200–$450 Platform style; white with padded headboardCompact vanity desk (36–40 in.) $100–$250 White with gold hardwareBoucle vanity chair $60–$150 Gold-leg versions widely availableFluted console table $150–$350 Light wood + gold hardwareArched leaning floor mirror $80–$200 Gold frame; size drives cost significantlyAbstract diptych wall art (framed set) $50–$130 Framed canvas prints in gold framesFaux tall plant (5–6 ft) $40–$120 Realistic styles at the higher endArea rug $60–$200 Size and material are the primary driversLED neon sign (plug-in) $25–$70 Heart shape; plug-in styles are simplestTable lamp(s) $30–$100 each Warm ceramic or gold baseZebra blind + curtain panels + rod $60–$180 Combination system; rod hardware adds costWicker baskets (set of 2–3) $30–$60 For open shelf or floor storageAccent wall paint + primer $50–$90 One gallon each plus painter's tapeHardware, felt pads, accessories $30–$60 Anchors, picture hooks, trays, vasesEstimated Total Range $965–$2,410 Wide range based on sourcing and qualityLarge furniture from online retailers frequently carries delivery surcharges of $30–$100 per piece that don't appear at the product listing stage. The bed frame for this project arrived with a $75 surcharge not disclosed until checkout. The hidden costs no one lists upfront:Primer. A dark warm accent wall needs a primer coat before painting — not just a base of the topcoat color. Skip it and the finished result looks uneven in raking light. One gallon runs $20–$35 and requires a separate drying day. Painter's tape. Good blue tape for cutting in cleanly along trim and at the adjacent neutral walls. A 3-pack costs around $12 and is worth every dollar when you're working along white trim lines. Curtain rod anchors. The rod is listed, but the wall anchors for the brackets aren't always included in the hardware package. Budget another $8–$15. Rug pad. A rug on tile without a non-slip pad will migrate noticeably within days. This is a $20–$40 purchase most first-time buyers skip and regret. Felt furniture pads. Every leg that touches tile floor needs a felt pad. Furniture scratches appear faster than expected on tile, especially during setup when pieces get adjusted and repositioned.AI Visualization vs. Reality — What Matched and What Didn't This is the section most bedroom makeover articles skip, because most aren't documenting a real project with real discrepancies. The AI visualization tool used for this project rendered Sherwin-Williams Redend Point (SW 9081) as a warm, muted dusty rose. Both render versions — with slightly different ceiling fan configurations — showed a clearly pinkish-mauve wall. The renders suggested a rosy, feminine bedroom direction that influenced early decisions toward blush-pink textiles and lighter pillow tones. The actual accent wall, painted after swatch testing in the room, reads as a warm brown-terracotta under the room's ambient lamp light. It's deeper and more earthy than the render indicated. Still warm — the palette still coheres — but the relationship between the wall and the cream-painted surrounding walls reads as higher-contrast and more grounded than the digital version suggested. Neither result is wrong. The actual room looks intentional and well-considered. But a buyer who committed fully to a blush-pink textile palette based on the rendered color would have found their bedding, pillows, and throw blanket reading as too pink-cool against a wall that runs warmer and browner in real life.What the AI Got Right vs. Where It MisledPlanning Element What AI Rendered Accurately Where AI MisledFurniture layout and scale Proportional placement was generally accurate Couldn't account for door swing or exact traffic constraintsPaint color family Correctly indicated warm rather than cool Undertones shifted — screen showed rose-pink, wall shows warm brownLighting mood Suggested warm, amber-adjacent ambiance Didn't replicate how specific lamp placement interacts with that particular paintFabric and texture Suggested texture category (boucle, linen) Can't represent how materials actually read and feel in personOverall palette cohesion Useful for validating whether a direction works Final result depends on physical sourcing and real-world lightThe practical conclusion: Use AI room planners to confirm that your color direction and furniture arrangement make sense before committing resources. Then buy two or three paint swatches from a hardware store, brush them onto the actual accent wall, and observe them at morning, afternoon, and evening under your room's lamps. What you see on screen will not match what you see on the wall. It never does. The swatch step isn't optional — it's the only reliable test.What This Makeover Got Right — and What Would Be Done Differently After a room is finished and lived in for a while, certain decisions reveal themselves as clearly right. Others reveal themselves as close-but-not-quite. What worked: Starting with the rug. The geometric area rug in warm beige and taupe was chosen before the bed frame, which prevented a proportion mismatch. The rug anchors the room. The bed frame was sized relative to it, not the other way around. Committing to one metallic finish throughout. Matte gold runs through every hardware element — drawer pulls on the console and vanity, curtain rod, mirror frame, lamp base, art frames. In a room where furniture came from multiple different retailers, that single constraint created the cohesion that looks effortless in photos but was actually a deliberate decision made before the first order went out. The leaning mirror positioning. Placed to reflect the window on one side and the nightstand lamp on the other, it amplifies both light sources simultaneously. The floor space it occupies is minimal. The light it returns to the room is not. The faux plant scale. A 5-foot plant in a small room sounds like too much. It isn't. Anything shorter would have disappeared next to the vanity desk and mirror. The height adds vertical interest that the room needed, and the narrow pot keeps the footprint manageable. What would be done differently: Curtain rod placement. The rod sits close to the window frame — roughly standard height — in the final version. Knowing what we know now, it would have been mounted 4–5 inches higher and extended wider. That adjustment would have made the window read as taller and the ceiling as more generous. It's a single afternoon fix that never happened. Ordering the bed frame first. It arrived six days after the rest of the furniture, which delayed the full room styling into a second session. Large furniture from online retailers regularly runs 2–6 weeks. Order the anchor piece first, before anything else. Editing the vanity desk surface sooner. It took two rounds of removal to get the surface down to the right number of objects. The instinct to add one more thing is strong when you're in the middle of a room setup. Fewer objects, earlier, would have been cleaner.Pre-Purchase Planning Checklist Before buying the first item, work through all of these.Measure all four walls, ceiling height, and the distance from each door to the nearest wall Map the swing radius of every door — furniture placed in a door swing zone causes daily frustration that compounds over months Photograph every wall under the room's normal artificial lighting, not just in daylight Test at least 3 paint swatches directly on the accent wall and observe at different times of day Set a hard total budget before opening any product page Choose the rug size and general color before selecting the bed frame Confirm return and exchange policies for all large furniture items before ordering Add 2–4 weeks to all delivery estimates for large furniture Include mounting hardware, felt floor pads, and a rug pad in the initial order⚠️ Wall Mounting SafetyLarge framed art, heavy mirrors, and curtain rod brackets mounted into drywall without hitting a stud require rated wall anchors — not standard wood screws driven into drywall alone. Drywall cannot sustain significant sustained weight on its own. Toggle bolts or snap-toggle anchors rated for the specific item weight are the standard solution. For anything over 20 lbs., or for curtain rods mounted in plaster walls in older homes, locate studs with a stud finder before drilling. Unanchored wall-mounted items are among the most common causes of property damage and personal injury in DIY home projects.Frequently Asked Questions What is the best accent wall color for a small girl's bedroom? Warm, muted tones outperform saturated colors in small rooms. Terracotta, warm brown, dusty rose, and soft mauve all read well without making the space feel smaller — particularly when the remaining three walls stay in a soft neutral like Sherwin-Williams Cotton White (SW 7104). Avoid cool grays or blue-toned neutrals on accent walls in rooms with tile floors, which can already read cold without enough warm color balance in the space. How do I make a very small bedroom look bigger without renovating? Three adjustments deliver the most visible result for the least investment: a leaning floor mirror positioned to reflect a light source or window, curtain rods mounted 4–6 inches above the window frame and extended wider than the window opening, and warm layered lighting instead of a single overhead fixture. None of these require structural changes or significant spend. What furniture should go in a small bedroom for a teenage girl? Prioritize function per footprint. A full or queen upholstered bed on a low-profile platform frame, a narrow vanity desk that doubles as a homework station, a fluted console table in place of a bulky dresser, a leaning floor mirror, and one compact nightstand. Six pieces maximum in most rooms under 120 square feet — anything beyond that starts competing with traffic flow. How much does it cost to redo a small bedroom from scratch on a budget? A complete transformation covering new furniture, bedding, lighting, window treatments, paint, and decor runs approximately $965–$2,400 depending on where items are sourced and how many pieces are already owned. Budget an additional $75–$150 for the costs most guides omit: primer, curtain hardware, wall anchors, rug pad, and felt furniture pads. Should I use an area rug on tile floors in a bedroom, and how do I size it? Yes — tile floors without a rug read as unfinished and create noticeable sound echo. For a queen bed, the rug should extend at least 18–24 inches beyond the sides of the bed and at the foot. A 5×8 works for most queen beds in rooms under 120 square feet. Always add a non-slip rug pad on tile — without one, the rug will migrate within days. What is a zebra blind and is it better than blackout curtains for a bedroom? A zebra blind (also called a dual-shade or day-night blind) alternates between sheer and opaque fabric strips that align to control how much light passes through. Half-open, it diffuses direct sun without blocking it completely. Closed, it provides meaningful light reduction — but it's not a true blackout. For complete darkness, pair it with a blackout lining or panel. In this room, the pink linen curtain panels add visual softness and height but don't function as blackout layers. Related Reading:Master Bathroom Renovation Ideas Small Kitchen Renovation Before and After How I Planned My Dream Home — and Actually Saved Money Doing It
.webp)
Small Kitchen Renovation Before and After: A Real Case Study (Layout, Costs, and What Actually Worked)
Most before-and-after kitchen renovations look inevitable in hindsight. The result is polished, the process is compressed into a few tidy paragraphs, and anything complicated gets quietly omitted. This one covers the full picture — what the original kitchen looked like, what the design process involved, what turned up inside the walls, what that changed, and what the finished result actually cost in time and money. The goal is to give you enough detail to judge whether your own project is realistic, not to make this one look easier than it was.Quick Answer Renovating a small kitchen in an older home generally follows this sequence: confirm structural and asbestos status before any demolition; model the layout in 3D software before ordering cabinets; combine flat-pack cabinetry with one upgraded element — typically a hardwood benchtop; and retain original materials (floors, wall paneling) wherever possible to control cost and preserve character. Design, demolition, and cabinet installation are realistic DIY tasks. Electrical, plumbing, structural work, and asbestos removal require licensed tradespeople.Quick TakeawaysNever start demolition without confirming services are isolated, wall structure is known, and asbestos status is assessed Model the full layout in 3D before ordering a single cabinet — changing pixels costs nothing, changing installed cabinetry costs a lot Original pine floorboards under vinyl flooring are often in better condition than the vinyl itself Flat-pack cabinets paired with a reclaimed hardwood bench top is a proven strategy for controlling cost while lifting the overall finish When full wall removal isn't structurally possible, repurposed framing timber becomes a feature — not a compromise Budget three to four times your initial timeline estimate if you're working around full-time employment Pre-1990s Australian homes should be asbestos-assessed before any wall, floor, or ceiling disturbanceBefore: What the Original Kitchen Actually Looked Like The original kitchen was functional in the loosest sense. Grey-green painted cabinetry with blue-teal cornice detail ran along two walls. The benchtops were laminate. Behind the sink, a corrugated iron splashback. Above the cooking zone, a fluorescent strip light that made everything look slightly worse than it was. The floor was vinyl tile — the kind that conceals whatever's underneath. That turned out to matter more than expected. The most significant problem wasn't the finish. It was the wall. A full-height partition separated the kitchen from the living room next to it, making the kitchen feel smaller and more isolated than its actual footprint justified. The initial plan was straightforward: take the wall down, open the space up, let the kitchen and living area breathe as one. That plan survived most of the project. The wall didn't make it quite that simple.After: The Finished Result Project summary at a glance:Element DecisionLayout L-shaped with freestanding islandCabinets Flat-pack, white, simple profileBenchtop Reclaimed hardwood timberFlooring Original pine boards, sanded and oiledSplashback Existing VJ wall paneling, painted whiteBetween-room feature Repurposed structural framing as open timber shelving unitCooktop InductionOven Built-in single, underbenchTap Gooseneck stainless mixerDIY scope Design, demolition, cabinet installation, joinery, floor sanding, paintingLicensed trades Electrical, plumbing, structural engineering assessmentPlanned timeline 6 weeksActual timeline ~5 monthsPlanning the Layout The kitchen footprint wasn't going to change. What could change was how the space was organised within it — and how it connected to the living room next door. For tight spaces, layout decisions come down to one thing: keeping the three main work zones — sink, cooktop, preparation bench — as close together as the footprint allows. Three layouts do this well: Galley: Two parallel runs of cabinetry with a walkway between. Efficient for cooking, less so for socialising. Works best when the kitchen is a self-contained room. L-shaped: Cabinetry on two adjacent walls with an open corner. Better when the kitchen flows into a dining or living area. Leaves room for a freestanding island or table in the centre. U-shaped: Three walls. Maximum storage in a tight footprint, but the central walkway narrows quickly. Practical in rooms around 3–4m wide; cramped in anything narrower. This kitchen became an L-shaped layout — cooking and preparation along the main wall, sink on the perpendicular wall toward the laundry. That configuration put the three work zones within a few steps of each other without sacrificing the open corner that makes the space liveable rather than just functional. The freestanding island in the centre isn't fixed cabinetry. It doubles as extra bench space and an informal eating spot, and — practically — it can move. That flexibility doesn't exist with a built-in bench.Designing It Before Buying Anything The entire kitchen was modelled in SketchUp before a single cabinet was ordered. This step is skipped more often than it should be, usually because it sounds more complicated than it actually is. SketchUp Free costs nothing. Cabinet manufacturers — including IKEA — have pre-built models in the SketchUp Warehouse that match actual product dimensions. The process involves building the room walls to scale, dropping in the cabinet units, and moving them around until the layout works. It takes a weekend if you haven't used the software before. Less, if you have. What 3D modelling catches before purchase:Benchtop overhangs that conflict with window sills Door swings that hit adjacent cabinets or appliances Sight lines from the living area — what will and won't be visible Appliance placement relative to existing electrical circuits and plumbing rough-in locationsThe design render in the images shows the kitchen modelled with actual cabinet unit dimensions, the planned open shelving above the cooking zone, and the room divider feature — all before walls came down. Several layout details changed between the first version and the one shown. That's the point. Revising a 3D model costs nothing. Revising installed cabinetry costs significantly more. One common homeowner mistake is ordering cabinets based on the layout plan provided by the supplier. Supplier plans optimise for the number of units sold, not for how the kitchen will actually be used. A 3D model you build and control does neither of those things.Demolition: What to Confirm Before Touching Anything The demolition photo tells a familiar story. Wall linings gone. Electrical cables hanging. Original floorboards revealed. Blue painter's tape on the floor marking where the cabinets will land. What the photo doesn't show is everything that had to be confirmed before any of that started. Pre-Demolition ChecklistElectrical service isolated — confirmed by a licensed electrician, not just a switched breaker Plumbing supply shut off at the isolation valve and pipes drained Gas service disconnected — licensed gas fitter only; not a DIY task in any state Wall structure assessed — stud locations and load-bearing status confirmed before cutting Asbestos status assessed — required for any pre-1990s Australian home before any wall, floor, or ceiling disturbance Subfloor condition known — particularly under vinyl or linoleum, which can hide moisture damage, rot, or — as happened here — original floorboards worth keeping⚠️ Safety note: Cutting into a wall before services are confirmed isolated is how people get seriously hurt. Cutting into a wall that contains asbestos-containing materials without a prior assessment is how people get seriously ill. Neither shortcut saves meaningful time in the context of a full renovation.One finding during the electrical phase: the wiring was older than the home's age suggested and needed a partial re-run before walls could be closed. Inspection reports from homes of this era frequently flag ageing electrical as deferred work. Renovation is often the first opportunity to address it properly. Budget for it as a possibility rather than a surprise.Dealing with Asbestos in an Older Home Any Australian home built before 1990 is a potential asbestos-containing material (ACM) site. Homes built before 1980 carry a higher likelihood. Wall linings, flooring adhesives, ceiling sheeting, and some roofing materials from this era may contain asbestos fibres. This is not a reason to abandon the project. It is a reason to test before cutting. How Testing Works A licensed asbestos assessor takes a small sample from the suspect material — wall lining, flooring adhesive, ceiling sheet — and sends it to a NATA-accredited laboratory. Results typically return within a few business days. Cost is usually $250–$500 for a basic residential assessment covering several samples from different materials. What the Results DetermineTest Result What It Means Practical OptionsNon-detect Material is clear Proceed with demolition as plannedAsbestos present — material intact, bonded ACM present but not friable Encapsulation in place, or licensed removalAsbestos present — material disturbed or friable Active fibre risk Licensed asbestos removalist requiredEncapsulation — sealing the ACM in place rather than removing it — is the outcome in many residential cases. It's less expensive than full removal, and for intact sheeting behind wall linings, often carries lower risk. The practical consequence is that it fixes the wall positions. You cannot remove a wall you've encapsulated. This is the point where many renovation projects diverge sharply from their original scope. The open-plan kitchen the homeowner planned isn't achievable because the wall contains material that can only be managed, not removed. The layout has to adapt. In this project, what looked like a constraint produced one of the renovation's most distinctive features.When You Can't Fully Open a Wall: The Structural Framing Solution The wall between this kitchen and the living room couldn't come down entirely. The structural assessment identified a partial load path through it. Full removal would have required a steel beam, temporary propping during construction, engineer certification, and a building permit. All achievable — but scope-expanding in a project already navigating asbestos findings in the adjacent wall sheeting. The solution was to remove the wall linings and most of the internal material but retain and expose the structural stud framing, then build it into a feature: a full-height open shelving unit constructed from the existing timber posts, with additional shelves spanning between them. Look at the finished cooking-zone photo. The room divider sits exactly where the wall was. It's a timber grid that connects kitchen to living room without fully opening the space. Light passes through it. Objects can be displayed on it. It reads as a deliberate design decision — which, eventually, it was. The timber it's built from was already in the wall. Most renovation content treats wall removal as binary: complete removal or leave it entirely. The middle option — retaining and exposing the structural framing as a feature — appears almost nowhere in competitor content, probably because it requires a structural finding and an actual engineering assessment to make sense of. It's also harder to photograph in progress, which may explain the gap. What to know before trying this approach:The retained framing needs engineer confirmation that it continues to carry load in its exposed configuration The timber should be assessed for pest damage and moisture before being left in place as a feature In a wall where ACM was found, any sheeting must be properly encapsulated before the framing is dressed and finished The result should be documented for future buyers — any building work affecting structure should be disclosableChoosing Cabinets and Benchtops This is where most small kitchen renovations have to make a genuine decision about where the money goes. The approach used here is common because it works: cost-effective flat-pack cabinet carcasses paired with one higher-quality element, the benchtop, doing the visual heavy lifting. Cabinet Systems ComparedSystem Approx. Cost AU (full kitchen) Finish Quality Customisability DIY-Friendly?Flat-pack (IKEA, Kaboodle, Freedom) $3,000–$7,000 Good Moderate YesSemi-custom (builder's supply, direct joinery) $7,000–$15,000 Very good Good PartialCustom joinery $15,000–$40,000+ Excellent Full NoFlat-pack systems suit small kitchens specifically because most small footprints fit standard 600mm base units without awkward gaps. The carcasses are structurally adequate for residential use. The doors and drawer fronts carry the visual finish — and in most flat-pack systems, those can be upgraded or replaced without touching the carcass. The white shaker-adjacent profile here is deliberately understated. The benchtop does the design work.Benchtop Materials ComparedMaterial Approx. Cost per Lineal Metre (AU) Durability Maintenance Visual CharacterLaminate $150–$600 Good Very low LowEngineered stone (Caesarstone, Silestone) $700–$1,400 Excellent Very low ModeratePorcelain slab $900–$1,600 Excellent Very low Moderate–HighSolid hardwood / butcher block $600–$1,200 Good (maintained) Moderate HighReclaimed hardwood $800–$1,800 Variable Moderate Very highThe benchtop in this kitchen is reclaimed hardwood. Up close, you can see grain variation, colour differences from previous sun exposure, and nail holes that have been filled. That's not a defect to be hidden — it's the reason anyone chooses reclaimed timber over a uniform engineered product. What hardwood benchtops require is honest maintenance:Re-oiling with a food-safe penetrating oil every 6–12 months Avoiding standing water, particularly around the sink cutout Using a chopping board rather than cutting directly on the surfaceIn a household with light-to-moderate cooking use and willingness to maintain it, a hardwood benchtop is difficult to match for warmth and character. In a busy family kitchen, engineered stone is more forgiving and requires almost nothing from you year to year.⚠️ One mistake worth knowing: Ordering a hardwood benchtop before cabinets are fully installed and levelled. Hardwood benchtops are cut to measure from a template taken off the finished cabinet installation. Any cabinet that isn't at final height or is out of square creates a problem. Install and level first. Template last.Storage in Awkward Spaces Small kitchens have awkward gaps that most cabinet plans fill with filler panels. Several of those gaps were converted into storage here. The end-of-run wine rack. A 300mm gap at the end of the base cabinet run was fitted with horizontal timber dowels rather than a filler panel. The dowels cost almost nothing. The gap that would have been visual dead space became functional storage without any special product or supplier. The window sill extended as a shelf. The hardwood benchtop continues to the window sill, and the sill itself is timber-clad to match the benchtop depth. What was a gap between the sink cabinet and the window frame is now a usable display surface — herbs, small jars, a plant. It reclaims 200–300mm of horizontal surface that most kitchens ignore. Open shelving above the cooktop instead of upper cabinets. Upper cabinets directly above a cooking surface are prone to grease accumulation and hard to keep clean. Open shelves positioned slightly higher keep frequently used items accessible without the grease-trap problem. The trade-off is that open shelves require discipline about what goes on them — items that aren't used regularly accumulate dust quickly. The knife strip on VJ paneling. The knife storage visible in the after photo is mounted to the VJ board splashback rather than a tiled surface or the wall behind. VJ boarding accepts a screw cleanly and holds a magnetic knife strip without specialist wall anchors. The result is secure knife storage that didn't require any modification to the wall structure.Keeping Original Floors and Walls Under the vinyl tile was a full run of original pine floorboards. The boards were in better condition than the vinyl that had been covering them — sound, flat, with no significant rot and only a handful that needed replacing. Decades protected from foot traffic and UV exposure had left them well-preserved. This is a common discovery in homes from this era. Vinyl and linoleum were frequently laid over original timber floors from the 1950s through to the 1980s as a low-cost update. The boards underneath were sealed from wear. Many come up better than boards in adjacent rooms that were never covered. Cost comparison:Floor treatment Approximate Cost per m² (AU) ResultSand and oil original boards (DIY) $30–$60 (equipment hire + materials) Restored original characterSand and professionally coat $50–$90 Professional finish, less labour inputNew engineered timber, installed $90–$160 New product, uniform appearanceNew solid timber, installed $120–$200+ New product, can be refinished repeatedlyThe cost difference between restoring original boards and replacing with new flooring can be $1,500–$3,000 on a 20m² kitchen floor. In most cases, the restored original boards also look more interesting — particularly when they continue into the rest of the home without a transition threshold. Replacement creates a visual break at the kitchen doorway that sometimes makes a space feel more carved up, not less. The VJ wall paneling was already present throughout the home and was retained as the splashback and general wall finish. Painted white and fitted with a matching timber window ledge, it required no specialist product and no tile setter. The material was already there. The labour cost was paint and time. In older homes, that's often the cheaper and more characterful choice. Working with what exists almost always beats replacing it.What to DIY and What to Leave to a Licensed Tradesperson Regulations vary by state and territory in Australia. The following reflects the general position, but check with your local council or fair trading authority before starting.Task DIY Licensed Trade Required NotesDesign and 3D planning ✓ — —Asbestos assessment ✗ Licensed assessor Required before cutting into any pre-1990 wallCabinet demolition ✓ — After services isolatedGeneral demolition ✓ — Subject to asbestos statusAsbestos removal (bonded, <10m²) State-dependent Check locally Varies significantly by stateAsbestos removal (>10m² or friable) ✗ Licensed removalist —Structural wall assessment ✗ Structural engineer Do not rely on visual indicators aloneNon-structural wall framing ✓ — Confirm non-structural firstStructural framing modification ✗ Engineer sign-off required Includes partial removalElectrical wiring and connections ✗ Licensed electrician —New circuits or power points ✗ Licensed electrician —Plumbing connection (sink, tap) ✗ (most states) Licensed plumber Fines apply for unlicensed workGas disconnection or connection ✗ Licensed gas fitter No exceptionsCabinet carcass installation ✓ — —Stone benchtop templating/install ✗ Stone fabricator —Timber benchtop templating/install ✓ — Template after cabinets are fully levelledFloor sanding and finishing ✓ — Hire drum sander and edge sanderTiling ✓ — —Painting ✓ — —The plumbing restriction catches many people. Disconnecting and reconnecting a tap or sink to an existing supply and waste line is restricted work in most Australian states, even when no new pipes are being installed. It's worth confirming the local position before assuming the connection is a five-minute DIY task — the fine for unlicensed plumbing can exceed the cost of hiring a plumber for the job.Realistic Timelines for a DIY Kitchen Renovation The planned timeline for this project was six weeks. That assumed continuous, full-time work. The actual project ran across weekends and evenings around full-time employment, with trade availability gaps layered on top: waiting for an electrician to complete the re-run before walls could be closed, waiting on asbestos lab results before ceiling work could proceed, waiting on the benchtop fabricator's lead time after templates were taken. The result was approximately five months to full completion. Planned vs. ActualPhase Planned ActualAsbestos assessment and results 1 week 1.5 weeksElectrical pre-work 2 days 1 weekDemolition 4 days 1 weekStructural / framing work 3 days 2 weeksCabinet installation 1 week 2 weeksBenchtop template + fabrication + install 3 days 10 daysPlumbing 2 days 5 daysFloor sanding and finishing 3 days 4 daysPainting and finish work 5 days 2 weeksTotal ~6 weeks ~5 monthsThe gap between those two numbers isn't a sign of poor management. It's what most owner-led kitchen renovations look like when they happen around a working life. Practical advice: Set up a temporary kitchen before demolition begins — a camp stove, a microwave, a bar fridge in the dining room. You'll use it for longer than you expect. Then plan for the project to take three to four times your initial estimate, not as a worst-case scenario, but as a realistic baseline. Most people who plan for two months and take five aren't surprised. Most people who plan for six weeks and take five months are living without a kitchen sink for a very long time.Cost Breakdown Costs below reflect South-East Queensland and coastal NSW conditions as of late 2024 – early 2025. They vary by supplier, trade availability, and project scope.Category Approximate Cost (AUD)Asbestos assessment (samples + lab) $300–$500Structural engineering assessment $500–$1,200Asbestos encapsulation (if required) $500–$2,000Demolition and waste disposal (skip bin hire + DIY labour) $500–$1,500Electrical — partial rewire, new circuits $2,500–$5,000Plumbing — sink, tap, dishwasher rough-in $1,200–$3,000Flat-pack cabinet system (full kitchen) $3,000–$7,000Reclaimed hardwood benchtop (custom) $1,500–$4,000Appliances — induction cooktop, oven, rangehood $2,000–$6,000Sink and gooseneck tap $400–$1,200Floor sanding, oiling (DIY + equipment hire) $600–$1,200Painting — walls, paneling, trim (DIY) $300–$600Reclaimed timber for shelving and room divider $200–$800Lighting $300–$1,000Fixings, consumables, incidentals $300–$600Estimated total — DIY-led project $14,000–$35,000+The wide range reflects the biggest variables: appliances and benchtop material. A budget induction cooktop and a quality laminate benchtop brings the total down. A freestanding range cooker and a custom reclaimed hardwood benchtop pushes it toward the upper figure.💡 Budget 15–20% on top of your estimate as contingency before starting any project in a pre-1990s home. Something unexpected is usually inside the walls. The question is what, not whether.Maintaining Your Renovated Kitchen Maintenance ScheduleItem Task FrequencyHardwood benchtop Re-oil with food-safe penetrating oil (Rubio, Osmo, or similar) Every 6–12 monthsHardwood benchtop Check seal around sink cutout for water ingress Every 3–6 monthsCabinet hinges (concealed European) Check alignment and adjust with built-in three-axis adjustment AnnuallyDrawer runners Clean track and apply silicone lubricant AnnuallyVJ paneling splashback Touch-up paint in high-splatter zones near cooktop As neededPine floorboards (oiled finish) Spot-apply oil to high-traffic areas AnnuallyPine floorboards Full re-oil Every 2–3 yearsPine floorboards Sand back and refinish Every 10–15 years, depending on trafficUnder-sink plumbing Inspect for slow drips at connections Every 6 monthsRangehood filters Clean mesh filter or replace charcoal filter Every 3–6 monthsThe hardwood benchtop is the most active maintenance commitment in this renovation. A well-oiled benchtop develops a patina and ages well. One that dries out and isn't re-oiled will begin to crack at seams and lift at the sink cutout — the most water-exposed part of the surface. Repair at that stage is possible but significantly more involved than prevention. Cabinet hinges and drawer runners are the other overlooked maintenance point. Most flat-pack systems use quality European-style concealed hinges with three-axis adjustment built in. Two or three years after installation, drawers that feel loose or doors that have dropped slightly can usually be returned to proper alignment with a few minutes and a screwdriver. Knowing how to do this adjustment is worth five minutes on the manufacturer's website. Most homeowners who never discover it assume the cabinet quality has degraded, when the hardware just needs a simple correction.FAQ Can I remove a wall between my kitchen and living room myself? You can remove plaster sheeting, wall linings, and non-structural noggins yourself — but only after a structural engineer has assessed the wall and an asbestos assessor has cleared the material. If the wall carries any load, modifying the structural framing requires temporary propping, engineer certification, and usually a building permit. Removing structural elements without those sign-offs is both dangerous and unpermitted. How do I know if a wall is load-bearing before I start? A structural engineer's assessment is the only reliable answer. Visual indicators help — walls that run perpendicular to floor joists, walls directly above or below walls on other levels, walls near the centre of the house — but they aren't conclusive. Many homeowners have interpreted these signs correctly and still been wrong. An engineer assessment costs $500–$1,200 in most Australian capitals. It removes the guesswork entirely. What should I do if asbestos is found during a renovation? Stop work in the affected area. Engage a licensed asbestos assessor to characterise the material — is it friable or bonded? What's the extent? Depending on the finding, options include encapsulation in place, professional removal, or working around the material. Do not attempt to remove asbestos-containing material yourself. In most Australian states, removal of friable asbestos is always restricted to licensed contractors. Bonded asbestos below 10m² may be removed by a homeowner in some states — but the rules vary, so check locally before assuming. Can flat-pack cabinets work well in a small kitchen? Yes, reliably. The carcass quality in current systems from IKEA, Kaboodle, Freedom, and similar suppliers is structurally adequate for a residential kitchen. The visual result depends on door and drawer front selection, benchtop quality, and hardware choice — not on the carcass. Small kitchens are well-suited to flat-pack systems because standard 600mm module widths typically fill a small footprint without awkward gaps that need custom infill panels. Is a hardwood benchtop worth the extra cost over laminate? It depends on the household. Hardwood benchtops are warmer visually, can be spot-repaired locally (sand, re-oil, done), and tend to age better than laminate, which can't be meaningfully refinished when it's damaged. The trade-off is ongoing maintenance and water sensitivity. In a household with young children, heavy daily cooking, or limited interest in maintenance schedules, engineered stone is more forgiving and requires very little from you year to year. In a household willing to oil it twice a year and use a chopping board, hardwood is difficult to match for character.Cost figures are approximate and reflect Australian market conditions (South-East Queensland / coastal NSW) as at late 2024 – early 2025. Building, electrical, plumbing, and asbestos regulations vary by state and territory. Always confirm the current requirements with your local council or fair trading authority before commencing work.
.webp)
Master Bathroom Renovation Ideas: A Real Before and After (And What the Photos Don't Show)
The bathroom in these photos represents one of the most common starting points for a master bathroom gut renovation: honey oak vanity cabinets, a cream cultured marble countertop with integrated oval sinks, Hollywood globe lighting above a pair of medicine cabinet mirrors, a jetted whirlpool tub sitting unused in its own alcove, and a cramped separate shower behind a chrome-framed sliding door with frosted textured glass. On the floor, one tile had cracked and been patched with a section of plywood — the kind of small problem that looks like nothing until demo day reveals what's underneath. Six months later: marble-look porcelain tile across every wet surface, dark black herringbone floor tile from wall to wall, a freestanding soaking tub against a fully tiled accent wall, a generous walk-in shower with a barn-style frameless glass slider, a white shaker double vanity with quartz countertops and matte black faucets, layered sconce lighting, and a slate blue accent wall that anchors the whole vanity zone. This article uses those before and after photos as the foundation for practical guidance on every major decision in a master bathroom renovation — layout, tile, fixtures, lighting, comfort upgrades, and the parts of the process that inspiration content typically skips: what things actually cost, why timelines stretch, which tasks require licensed trades, and what gets discovered the moment demolition begins.Quick Answer: Popular master bathroom renovation ideas include converting a separate tub and shower into a walk-in shower plus a separate freestanding soaking tub, upgrading to a double vanity with a quartz countertop and undermount sinks, switching to matte black or brushed gold fixtures, using a contrasting dark floor tile (such as herringbone) against lighter wall tile, and adding a bold accent wall color behind the vanity. A full gut renovation in the US typically costs $25,000–$55,000+ and takes 2–4 months from demolition to final inspection.What Changed at a GlanceRemoved AddedHoney oak double vanity White shaker double vanity with quartz countertopCultured marble one-piece top with integrated oval sinks Undermount rectangular sinks with matte black faucetsGlobe-strip Hollywood vanity lighting Individual vanity sconces (clear glass, matte black)Chrome-framed sliding shower with frosted glass Frameless barn-style sliding glass door, matte black hardwareJetted whirlpool tub in walled alcove Freestanding soaking tub with wall-mounted matte black tub fillerBeige large-format floor tile (with cracked, patched section) Dark black herringbone mosaic tile throughoutPlain beige walls Marble-look porcelain brick tile (wet zones); slate blue accent wallStandard toilet Modern elongated toilet with integrated bidet seatThe Big Layout Decision: Rethinking What Goes Where The most important decision in a master bathroom renovation isn't which tile to choose or which finish to put on the faucets. It's what happens to the floor plan. The before bathroom had a layout standard for its era: a jetted tub in a walled alcove on one side, a separate walk-in shower with a framed door tucked beside it, and a long double vanity running across the opposite wall. Nothing communicated with anything else. The tub alcove felt closed off. The shower felt like an afterthought squeezed into the corner. Two paths are common in a renovation like this. One is combining the tub and shower into a single large walk-in shower, eliminating the tub entirely. The other — what happened here — is replacing the old alcove tub with a freestanding soaking tub in the same footprint while expanding the shower in the adjacent space. Both elements remain, but the relationship between them changes completely. The practical benefit of staying close to the original plumbing layout: when supply lines don't need to move, the plumbing scope and cost stays manageable. The tub swap here moved the supply lines within the same general zone rather than relocating them across the room. That distinction alone kept this from becoming a significantly more expensive project.Consideration Keep Separate Tub + Shower Freestanding Tub + Walk-In Shower Remove Tub EntirelyPlumbing complexity Existing stays in place Rough-in adjustment within zone Capping drain and supply linesResale appeal Expected baseline More current; stronger visual impact Risk if only tub in the homeAccessibility Garden tub has a high step-over Freestanding also has step-over; curbless shower is better for aging-in-place Curbless shower is optimalCleaning effort Jetted tubs require jet-flushing; framed door tracks collect buildup Freestanding exterior: simple. Frameless glass: no tracks Simplest maintenancePermit typically required Minor swap: possibly not. Drain relocation: yes Likely yes Likely yesResale note: If there's only one full bathroom in the home, eliminating the tub entirely can limit buyer appeal in family-oriented markets. A freestanding soaking tub keeps a tub in the room while updating the look. That concern largely disappears when at least one other full bath in the home has a tub.Walk-In Shower Ideas: What the Finished Photos Don't Explain The shower transformation here is the most immediately striking change in the project. The cramped, frosted-glass framed slider became a generous walk-in with clear frameless barn-style sliding glass on a matte black rail. Large-format marble-look porcelain tile in a horizontal brick pattern covers three walls. A recessed niche is lined with contrasting navy subway tile. Dark herringbone mosaic tile runs across the floor. Seeing that finished photo and planning your own, there are several things worth understanding before the tile quotes come in. How the Barn-Style Slider Actually Works A frameless bypass slider — two glass panels that slide past each other on a top rail — solves a specific problem: it provides the visual openness of frameless glass without requiring door-swing clearance. In a bathroom where the shower sits near a wall or a toilet, a hinged frameless door might swing into the way. The barn-style slider sidesteps that entirely. The matte black rail and hardware aren't just aesthetic. They're structural — the rail carries the full weight of the glass panels, which at 3/8" to 1/2" thickness are significantly heavier than framed glass. That hardware has to be anchored into solid blocking in the wall above the opening, not just drywall. Frameless vs. Framed vs. Sliding: What You're Actually Paying ForFeature Framed / Semi-Framed Frameless Hinged Frameless Barn-Style SliderGlass thickness 3/16"–1/4" 3/8"–1/2" 3/8"–1/2"What provides structure Aluminum frame Heavy hinges; wall mount Top rail system; wall mountDoor clearance required Yes (swing arc) Yes (swing arc) No — slides parallel to wallCleaning challenge Tracks and frame collect soap scum Hinges and edges collect buildup No floor track; rail needs wipingTypical installed cost $300–$800 $900–$2,500+ $800–$2,200+Visual weight Frame visible at all times Near-invisible hardware Hardware visible at top onlyThe framed frosted slider in the before photos was inexpensive to maintain and functional. It also made the shower look roughly half its actual size. Removing it was one of the highest-impact changes in the renovation. The Niche: One Detail, More Planning Than It Looks The navy-tiled recessed niche photographs beautifully and requires planning before a single tile goes on the wall. A few things that catch homeowners off guard:A niche cut between standard studs (16" on center) yields an interior width of roughly 12–14 inches after backer board — not the wide shelf that photos suggest. Any niche cut into an exterior wall needs insulation consideration. A cold exterior wall behind a shower niche will condense moisture inside the cavity if not addressed. The niche must be waterproofed as completely as the shower pan. It's a cavity open to wall framing — exactly the wrong place for moisture to collect. The contrasting tile (navy here) should be selected and ordered before installation begins so the installer has it ready when that section is tiled. Last-minute tile changes mid-project are expensive.Curbless vs. Low-Threshold: The Structural Difference The shower in this renovation has a low threshold — not a fully curbless (zero-threshold) installation. That distinction matters in terms of scope. A true curbless shower requires modifying the subfloor so the entire wet floor slopes toward a linear drain at one edge. That typically means cutting into the subfloor, repositioning framing members, and running a continuous waterproofing membrane across the entire zone. A low-threshold shower with a standard pan is a different scope — less invasive, less expensive, and achievable within the existing subfloor depth in most bathrooms.Freestanding Tub Ideas: What These Photos Don't Show You The freestanding soaking tub here is a modern rectangular-oval style in gloss white acrylic. It sits in the original jetted tub alcove, now tiled floor to ceiling in the same marble-look porcelain as the shower. A wall-mounted matte black tub filler feeds from the right wall. Dark herringbone tile runs underneath and around the entire base. The visual is clean and deliberate. The planning behind it happened weeks before any tile was set. The Rough-In Timing Issue Most People Miss A wall-mounted tub filler requires supply lines to be roughed-in at a specific height and horizontal position before wall tile goes up. That position is permanent once tile is installed. Changing it afterward means cutting into finished tile — which is expensive and disruptive regardless of how carefully it's done. The decision between a floor-mounted filler and a wall-mounted filler must happen at the rough plumbing stage, not during the tile selection phase. It's one of the most common mid-project conflicts when a homeowner sees the wall-mounted style in a photo and decides they want it after the rough-in is already done. Floor Load: A Conversation That Doesn't Always Happen A filled freestanding soaking tub plus an occupant can exceed 500–700 lbs, concentrated over the tub's own footprint rather than distributed along a wall ledge like an alcove tub. Most bathroom floors built to standard residential code handle this load without issue. But any existing signs of subfloor weakness — soft spots underfoot, unexpected bounce, unexplained squeaking — should be investigated before a heavy tub is placed on it. In this renovation, the cracked floor tile visible in the before photos (patched with plywood) covered a section of subfloor compromised by slow moisture intrusion from the original tub surround. Grout and caulk failures had allowed water to work its way in over years — with no visible exterior signs. That section of subfloor was replaced before new tile went down. Finding it during demo was the better outcome by a significant margin.Inspection reports often note this: Subfloor damage beneath a tub surround is one of the most common discoveries in master bathroom renovations. It's not a sign of poor construction planning — it's what happens when caulk and grout age around a tub over 15–25 years. Accounting for this possibility in the contingency budget is standard practice, not pessimism.Freestanding Tub Styles: A Practical ComparisonStyle Character Practical NotesModern flat-bottom oval/rectangular (this project) Contemporary; pairs with angular tile and matte finishes Standard drain; easier to clean around base than clawfootClawfoot Traditional; visually dramatic Often cast iron — significantly heavier; floor load concern is more acuteSlipper tub Sloped back; made for reclining Footprint is longer than it looks in photosJapanese soaking tub Deep soak in compact footprint Standard US drain position usually requires adjustmentDouble Vanity Ideas: The Difference a Material Actually Makes Same wall, same approximate width, same two sinks. Almost nothing else is the same. The old setup: 1990s honey oak cabinets, a cultured marble one-piece countertop with molded-in oval bowls, two medicine cabinet mirrors in oak frames, and a globe-strip light above it all. Functional. Dated. Hard to update incrementally because the countertop and sink are a single piece. The new setup: white shaker cabinets with a center drawer tower, a quartz countertop with undermount rectangular sinks, individual frameless mirrors, paired sconce lights at approximately face level, and matte black hardware on everything — faucets, pulls, and mirror frames. Countertop Materials: The Trade-Offs That MatterMaterial Durability Stain Resistance Maintenance Relative CostQuartz (engineered) Excellent Excellent Wipe clean; no sealing required Mid to highGranite Excellent Good (requires sealing) Annual sealing; resists heat well Mid to highMarble (natural) Moderate — scratches and etches Poor; very porous Frequent sealing; careful cleaning HighSolid surface (Corian-type) Good; scratches can be sanded Good No sealing; minor scratches repairable MidCultured marble Moderate; yellows over time Moderate No sealing; difficult to repair chips Low to midFor a primary bathroom used by two people daily, quartz is the material most contractors recommend. No annual sealing, no etching from everyday products, and it's available in patterns that convincingly mimic marble without the upkeep of natural stone. One caveat: quartz is not particularly heat-resistant. Setting a hot styling tool directly on the surface will damage it. A small heat-safe mat near the vanity solves this. The Storage Layout That Works Day to Day The new vanity has a center section of stacked drawers flanked by door-and-shelf cabinets on each side. Drawer access for daily items — toiletries, charging cables, cotton rounds, hair tools — is more functional than reaching into a deep shelf through a door. Homeowners who've lived with both layouts consistently prefer drawers for high-frequency items. When ordering a vanity, specifying full-extension soft-close drawer glides is worth doing upfront. It's one of those features that rarely gets mentioned in cabinet specs but makes daily use noticeably better.Flooring and Wall Tile Ideas: The Decisions That Drive the Budget The dark black herringbone floor tile running wall to wall is the single boldest decision in this renovation. Against white marble-look wall tile and a white vanity, it reads as intentional and controlled rather than heavy. But it reflects real planning and real cost implications that shouldn't be discovered mid-project. What Herringbone Actually Adds to a Project Every border tile in a herringbone pattern must be cut at an angle. The diagonal nature of the layout generates more offcut waste per square foot than a straight lay — angled cuts produce pieces that can't be reused as easily as rectangular trims. Installation takes longer because the installer must maintain precise reference lines and make high-volume angle cuts throughout. Many tile contractors estimate herringbone floor tile costs 20–35% more in labor than a straight-lay pattern in the same tile. That premium is entirely in installation time, not materials. If you're comparing bids on a herringbone installation and one quote comes in significantly lower, asking whether the installer has experience with the pattern is a fair question. Slip Resistance: What the DCOF Rating Means Small mosaic tile in a herringbone format creates more grout lines per square foot than large-format tile. More grout lines mean more texture and surface grip, which generally improves slip resistance on wet bathroom floors. When selecting floor tile for a bathroom, the Dynamic Coefficient of Friction (DCOF) rating is what actually measures wet-surface slip resistance. The ADA recommends a minimum DCOF of 0.42 for wet walking surfaces. Small-format mosaic tile tends to exceed this threshold due to grout-line texture. Large polished stone tiles often do not — which is worth knowing before selecting something that photographs beautifully but creates a slipping hazard.One thing that surprises homeowners: Wall tile is not rated for floor use. Floor tile can generally go on walls. Many marble-look porcelain tiles sold for shower walls are not load-rated or slip-rated for bathroom floors. Confirm the DCOF rating on any tile before specifying it underfoot.Grout Maintenance Reality by PatternPattern Grout Lines Per Sq Ft Sealing Interval Cleaning EffortLarge format (12"x24"+, straight lay) Very few Every 2–3 years EasiestStandard subway (3"x6", straight lay) Moderate Every 1–2 years ModerateHerringbone mosaic (2"x4") Many Annually More intensivePenny tile / basketweave Very many Every 6–12 months Most intensiveThe herringbone floor here will need annual grout sealing with standard cement-based grout. Epoxy grout eliminates the resealing requirement but is significantly harder to install and less forgiving of timing errors. It's worth a direct conversation with the tile installer before the floor is set — not something to decide afterward. The Wall Tile Choice in Context The marble-look porcelain on the shower walls and tub alcove uses a horizontal brick pattern — not herringbone, not straight stack. This keeps the wall plane visually calm enough that the dark herringbone floor reads as the primary statement. Layering two aggressive tile patterns in the same bathroom tends to make both feel less deliberate. The navy tile inside the shower niche picks up the slate blue accent wall color from the vanity side of the room — a thread that ties two distinct zones of the bathroom together without being obvious about it.Fixture Finish and Lighting Ideas: Matte Black Done Consistently Every metal element in the renovated bathroom is matte black: faucets, tub filler, showerheads, shower door rail and handles, vanity cabinet pulls, mirror hardware, and sconces. When a single finish carries through every element in a space, the result reads as designed. When matte black faucets share a room with chrome towel bars and a brushed nickel light fixture, the effect is unfinished — regardless of the quality of the individual pieces. Maintaining PVD-Coated Matte Black Finishes Matte black hardware is typically PVD-coated (Physical Vapor Deposition), which produces a durable and even surface. What damages it faster than most people expect:Bleach-based cleaners — even diluted bathroom sprays Abrasive scrubbing pads or brushes Hard water left to dry on the surface; calcium deposits appear chalky on matte finishes and are difficult to remove without the right approach Standard "disinfecting bathroom sprays" not rated for PVD surfacesThe consistent manufacturer recommendation across PVD-coated fixtures: mild dish soap, warm water, and a soft cloth. In hard-water areas, a quick wipe-down after use prevents buildup far more effectively than any reactive cleaning session. Chrome fixtures hide water spots and soap residue better — part of why chrome has been the default finish for decades. Matte black is more visually dramatic but requires more disciplined daily habits to maintain.The Lighting Setup and Why It Works The before bathroom used a single globe-strip light above the medicine cabinet mirrors. This is the most common bathroom lighting mistake: a single overhead or above-mirror light source creates shadows under the chin, around the eyes, and along the jaw — exactly the areas that matter most for grooming tasks. The after bathroom uses two separate sconces — one beside each individual mirror, mounted at approximately face height. Light coming from the side illuminates the face from two directions simultaneously. Shadows largely disappear. The difference in usability is immediately obvious once experienced. Bathroom lighting by zone:Zone Purpose NotesVanity sconces at face level Task lighting for grooming Most important lighting decision; overhead-only is insufficientRecessed ceiling fixtures Ambient, general illumination Supplement sconces; don't replace themShower recessed fixtures Wet-zone task lighting Must be rated for wet locations — UL wet listing or IP44+ rating requiredThe sconce style here — clear cylindrical glass shades with visible bulbs on matte black fixtures — reads as industrial without being harsh. Warm white LEDs at 2700K–3000K in clear glass shades create a softer and more flattering effect than cool white, particularly for a room that's used first thing in the morning.Color and Accent Wall Ideas The vanity wall is painted a saturated slate blue — somewhere between a deep teal and an ocean blue. The surrounding walls are a light neutral gray. White tile in the wet zones, a white vanity, and white fixtures hold both colors in place without either one taking over. This color relationship works for a specific reason: the accent wall sits directly behind the vanity mirrors, which means it's also what you see reflected every time you look in them — doubling its visual presence without covering every surface. A practical note on paint in bathrooms: Flat and matte paint absorbs moisture more readily, shows water marks, and is harder to wipe clean. In a bathroom — particularly a wall within splash range of a sink or near shower steam — use at minimum a satin finish. Semi-gloss is the more practical choice near direct water sources. Deeply saturated colors like this blue also typically require an additional coat compared to lighter tones to achieve even coverage, especially over a prior light color. Worth accounting for in a timeline if painting is being handled as a DIY task.Comfort Upgrades: Bidet Toilets and Heated Flooring The toilet in the after photos appears to be a modern elongated model with an integrated bidet/washlet seat — identifiable by the elongated profile and side control panel. This is one of the fastest-growing bathroom upgrade categories right now, and it consistently produces one cost surprise that wasn't in the original budget. What a Bidet Seat Needs That a Standard Toilet Doesn't A bidet seat or integrated bidet toilet requires a grounded electrical outlet within approximately 4–6 feet of the toilet. In the US, that outlet must be GFCI-protected per the National Electrical Code. In most 1990s bathrooms, the toilet sits against a wall with no outlet nearby. Adding that outlet is a separate electrical task. It involves running a circuit — sometimes from the panel — routing cable through the wall, and installing a GFCI outlet. Routine work for a licensed electrician, but an easy line item to overlook when budgeting for the toilet itself. Many homeowners discover the gap only when the toilet is being installed. Heated Flooring: Now or Never Radiant floor heating — a heating mat or cable system installed under tile — cannot be added after the floor is complete without removing the tile. This is a now-or-never decision, and it must happen before thinset and tile are laid. Key points for anyone deciding mid-renovation:The heating element installs over the subfloor before thinset and tile — it adds minimal height to the assembly It requires a dedicated electrical circuit, typically 120V A programmable thermostat lets the floor reach temperature before you step on it Energy cost for an average master bathroom footprint runs a few dollars per month in typical useDark tile like the herringbone here is particularly cold underfoot in winter. The time to add in-floor heating is during the subfloor and rough electrical phase — not after the first tile is set.Realistic Renovation Timeline: Why Six Months Isn't a Red Flag Most online bathroom renovation estimates suggest 3–6 weeks. The reality for a full gut renovation — involving permits, licensed trade sequencing, and specialty material lead times — is closer to 2–5 months of active work, and longer if the planning and ordering phase is included. Here's where the time actually goes:Phase What Happens Typical Duration Where Delays Come FromDemo Remove tile, fixtures, vanity, flooring 2–5 days Subfloor damage; hazardous materials discoveredRough plumbing Modify supply and drain lines 2–5 days Unexpected pipe condition; access challengesRough electrical New circuits, outlet relocation, lighting rough-in 1–3 days Panel capacity; code compliance upgradesRough inspection Municipal inspector approval 1–7 days Scheduling wait; corrections requiredWaterproofing Membrane application + cure time 2–4 days Cannot rush cure time; tile cannot begin beforeTile installation Floor and wall tile set; grout; seal 5–12 days Herringbone + large-format + niche work = more timeFrameless glass fabrication Glass custom-cut after tile is measured 2–6 weeks off-site No workaround; this adds weeks to the back endFixture installation Vanity, sinks, faucets, toilet, lighting, mirrors 2–4 days Custom vanity lead times (6–12 weeks if ordered late)Paint, trim, accessories Accent wall, baseboards, towel bars 1–3 days Last task — dependent on everything elseFinal inspection Electrical and plumbing verified 1–5 days Scheduling; punch list itemsThe frameless glass fabrication lead time catches many projects off guard. The glass installer measures the shower opening after tile is complete, then the glass is custom cut to those dimensions at a fabrication shop — typically a 2–6 week process. There's no shortcut. A shower that's otherwise finished but waiting on glass for three to four weeks at the end of a project is common, not a sign something went wrong. Custom vanities create the same problem on the front end. Off-the-shelf vanities are immediately available. Custom or semi-custom cabinets can run 6–12 weeks from order to delivery. If the order is placed after demo rather than before, the project waits.⚠️ Pre-1980s Homes: Before Demo Begins Homes built before 1980 may contain asbestos-containing materials in floor tile, vinyl flooring, drywall joint compound, or pipe insulation, and lead paint on walls and trim. Disturbing these materials without prior testing creates potential health exposure. Most jurisdictions require asbestos testing before issuing a demolition permit in older structures. Even where testing isn't legally required, it's the correct first step before any demolition work begins.Master Bathroom Renovation Cost Breakdown Most bathroom inspiration content avoids cost entirely. Below is an honest framework by scope, using current US contractor estimates as reference. Regional labor rates vary significantly — coastal metro markets commonly run 30–60% above the national median for the same work.Scope Tier What's Typically Included Approximate US Cost Range What Drives It HigherCosmetic refresh Paint, hardware swaps, new light fixture, toilet, accessories — no tile or plumbing changes $2,000–$7,000 New electrical circuit; premium fixturesMid-range renovation New vanity, countertop, tile in existing footprint, fixture finish change — plumbing stays in place $10,000–$22,000 Custom vanity; natural stone; frameless glassFull gut renovation Layout changes, walk-in shower, freestanding tub, full re-tile, new vanity, electrical update, permits $25,000–$55,000+ Plumbing relocation; subfloor repair; large square footage; radiant heatingThese are estimates only. Always get multiple contractor bids before proceeding with any scope above a cosmetic refresh. Where the budget surprises actually come from:Labor typically represents 40–60% of a full renovation's total cost. Tile installation labor for complex patterns frequently exceeds the material cost. Frameless glass is custom-fabricated for every installation. The cost reflects precision fabrication and heavy-duty hardware, not rare materials. Subfloor repairs aren't visible until demo is complete. A contingency of 10–15% of the project budget is standard contractor advice. Permits and inspections add cost and scheduling time but are non-optional for electrical and plumbing changes. An unpermitted renovation can create complications with homeowner's insurance and resale. Herringbone and pattern tile work costs meaningfully more in labor than straight-lay tile for the same material. If a contractor's quote doesn't reflect this, ask whether pattern work has been priced.DIY vs. Professional: Task by TaskTask DIY Realistic? NotesDemolition (tile, vanity, fixtures) Yes, with caution Test for hazardous materials first in pre-1980 homes; contain dust to adjacent roomsPainting (walls, trim, accent wall) Yes Significant cost savings; prep work determines qualityMirror and accessory installation Yes Proper drywall anchors or wall blocking requiredLike-for-like vanity swap Intermediate Requires shutoff valves, drain connection; any leak causes serious damageLighting fixture replacement (same location) Intermediate Turn off the breaker; GFCI protection must stay in circuitShower waterproofing Not recommended Errors don't show for months; resulting damage is severe and expensiveTile installation (shower walls and floor) Not recommended for first-timers Membrane application, slope-to-drain, and grout technique require real experiencePlumbing relocation No Requires permit + licensed plumber in most US jurisdictionsElectrical (new circuits, outlets) No Requires permit + licensed electrician in most US jurisdictionsFrameless glass installation No Heavy panels on a moving system; improper installation is a safety hazardSubfloor repair (minor surface issues) Intermediate Structural framing issues require professional assessmentA pattern that comes up repeatedly in home improvement forums: a homeowner tiles their own shower, it looks correct for 8–12 months, and then a soft spot appears in the floor or a wall shows moisture staining. The cause is almost always waterproofing that wasn't applied correctly — a missed corner, an insufficient membrane thickness, or a seam that wasn't properly lapped. The repair requires removing the finished tile to fix. The cost of getting waterproofing right the first time is reliably less than the cost of doing the tile work twice.Common Master Bathroom Renovation Mistakes to AvoidRemoving the only tub in a home with one full bathroom. A freestanding soaking tub satisfies the bathtub requirement while updating the look. The concern goes away when another full bath in the home retains a tub. Skipping a proper waterproofing membrane. Grout and caulk are not waterproofing. A certified membrane (Schluter Kerdi, RedGard, WEDI, or equivalent) must be applied and cured before tile is set. Choosing floor tile without checking the DCOF rating. Tile that looks appropriate may be a slip hazard on a wet bathroom floor. Confirm the rating before specifying. Quoting herringbone tile labor at straight-lay rates. The material cost is the same. The installation time is not. Not ordering frameless glass until tile is finished. Glass is custom-cut after tile is complete. If fabrication takes 4–6 weeks and nobody initiated it at demo, the project sits incomplete for over a month at the end. Deciding on a wall-mounted tub filler after rough plumbing is done. That position is permanent once the wall is tiled. The decision must happen before rough plumbing is completed. Using the old exhaust fan after expanding a bathroom's wet area. A fan sized for the original room may be inadequate for a larger shower generating more steam. Size the fan by actual cubic footage of the space. Forgetting the GFCI outlet near the toilet for a bidet seat. It's a separate electrical task that is easy to overlook at budgeting time. Ordering all materials before demo is complete. Some dimensions only become clear after the existing material is removed. A vanity that's 1" too wide to clear the new plumbing configuration is an expensive problem. Not planning for matte black fixture maintenance before committing to the finish. PVD coatings require different products and habits than chrome — especially in hard-water areas. Placing a freestanding tub without addressing subfloor condition first. Any soft spot, bounce, or moisture damage under the existing surround should be investigated and repaired before a heavy tub is installed.Maintaining a Newly Renovated Master BathroomComponent Task FrequencyShower wall grout Inspect and re-seal Every 1–2 yearsHerringbone floor grout Inspect and re-seal Annually (or specify epoxy grout at installation)Shower caulk (corners, floor-wall transition, niche perimeter) Inspect for cracking or discoloration; recaulk as needed Every 12–18 monthsMatte black PVD fixtures Wipe with mild dish soap and soft cloth After each use in hard-water areas; weekly minimumFrameless glass panels Clean with non-abrasive glass cleaner; apply hydrophobic coating Weekly cleaning; hydrophobic coating every 3–6 monthsQuartz countertop Wipe with mild soap and water; avoid bleach-based cleaners As needed; no sealing requiredFreestanding acrylic tub Clean with non-abrasive cleaner; avoid bleach and acetone-based products WeeklyBathroom exhaust fan Vacuum cover and motor housing Every 3–6 monthsShower niche tile and perimeter caulk Clean surfaces; inspect caulk line Inspect every 6 monthsOne consistent finding among homeowners in the first year after a renovation: the 12–18 months immediately post-completion are when the most maintenance questions arise. Grout that wasn't fully cured before heavy use may discolor faster than expected. Caulk at the tub-to-floor or wall-to-floor transition can develop small gaps as materials settle slightly — a normal occurrence in new construction, not a construction failure. Catching and recaulking small gaps early keeps moisture from working its way behind tile.FAQs How long does a full master bathroom renovation usually take from demo to finish? Most full gut renovations take 2–4 months when permits, licensed trade sequencing, and standard material lead times are factored in. Cosmetic updates with no plumbing or electrical changes can be completed in 2–4 weeks. The two most common reasons the back half of a project stretches longer than expected: frameless glass fabrication lead times (typically 2–6 weeks) and custom vanity delivery times (6–12 weeks if the order is placed late). Can a separate tub and shower be combined into one walk-in shower without moving the plumbing? Often yes, if the shower expansion stays within the same general drain and supply zone. Any actual drain relocation requires a permit and a licensed plumber. A pre-demo plumbing assessment is worth scheduling before layouts are finalized — it confirms what's possible without expensive changes. Do you need a permit to remove a bathtub or relocate plumbing fixtures? In most US jurisdictions: yes, if plumbing is being relocated or if electrical work is part of the project. A like-for-like tub swap in the same position may not require a permit in all jurisdictions. Requirements vary by municipality — confirm with your local building department before starting. How much weight can a typical bathroom floor support for a freestanding tub? Most residential bathroom floors are built to a 40 lbs per square foot live load, which is generally adequate for a filled soaking tub distributed across its footprint. Any existing softness, bounce, or squeaking underfoot should be investigated before placing a heavy tub. Subfloor moisture damage under an old tub surround is a common finding during demo — the reason the before photos in this project showed a patched floor tile — and should be fully repaired before a new tub is installed. What's the difference between a curbless shower and a standard shower pan? A standard shower pan has a raised curb that contains water within the wet zone. A curbless (zero-threshold) shower has no curb — water is contained by the slope of the floor toward a drain, typically a linear drain at one wall edge. A curbless installation requires subfloor modification to create the proper slope and a continuous waterproofing membrane throughout. It's a meaningfully different scope of work than swapping a standard pan. Related Reading:Bathroom Remodel Ideas Before and After: One Dated Full Bath, Completely Transformed Top 10 Most Common Renovation Mistakes (And What They Actually Cost You) 16 Easy Home Improvement Ideas You Can Actually Finish This Weekend
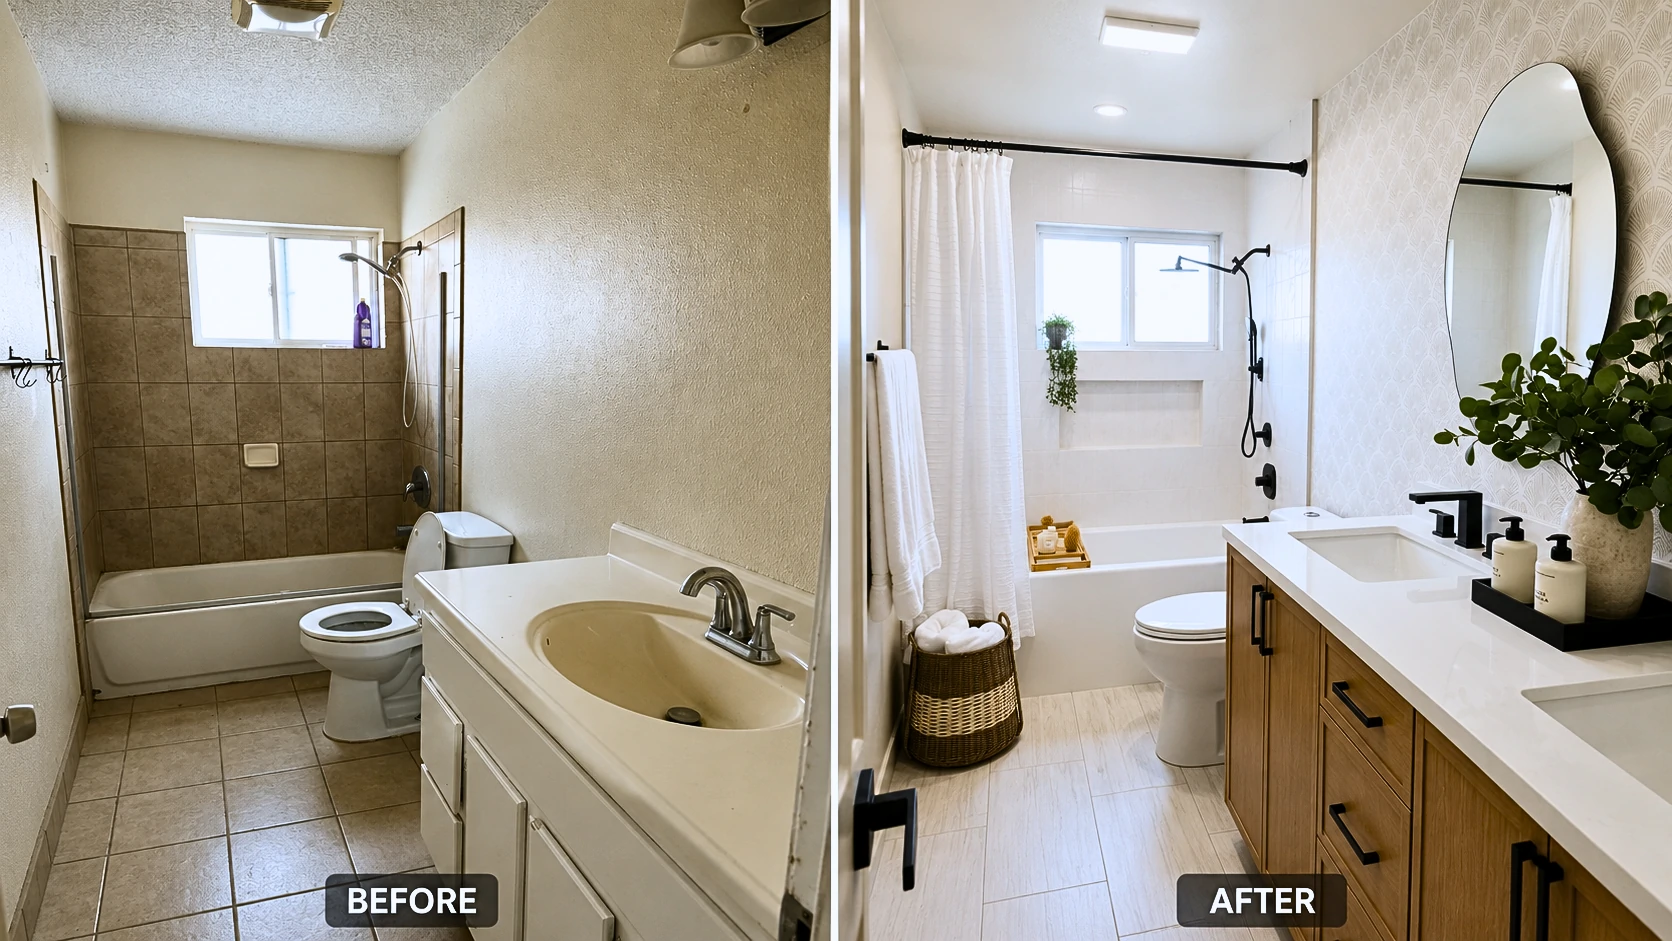
Bathroom Remodel Ideas Before and After: One Dated Full Bath, Completely Transformed
Quick Answer: A full bathroom remodel transforming a dated tile-and-chrome bathroom into a modern double-vanity space with matte black hardware, large-format tile, and a patterned wallpaper accent wall typically costs $8,000–$25,000 depending on scope. The cosmetic upgrades shown here — vanity swap, new tile throughout, hardware change, wallpaper accent wall — are where the visual transformation lives. Plumbing and electrical work are the cost variables that push the range up or down the most.Quick TakeawaysThe five upgrades with the most visual impact per dollar: vanity, hardware finish, floor tile, wallpaper accent wall, ceiling texture removal Matte black hardware costs under $500 for a full bathroom set and creates immediate high-contrast visual impact Peel-and-stick wallpaper only works reliably in bathrooms with a functioning exhaust fan — no exceptions A double vanity conversion is either a $300–$400 vanity swap or a $3,000 plumbing job, depending entirely on where your existing drain rough-in sits Large-format floor tile requires rectified tile (precision-cut) to achieve the minimal grout joints that actually make a small bathroom look bigger Built-in shower niches must be waterproofed with a membrane before tiling — tiling over drywall backer alone causes water infiltration within 2–5 years Popcorn ceilings in pre-1978 homes require asbestos testing before any removal beginsThere's a kind of bathroom that exists in millions of homes. Brown ceramic tile climbing the tub wall. Popcorn ceiling doing nothing useful. A single white vanity with an integrated drop-in sink and chrome faucet that's technically functional but looks like it belongs to a different decade entirely. A floor that's never quite clean-looking even right after you mop it. That's exactly what this bathroom was before this remodel. And that's precisely what makes this transformation worth unpacking in detail — because it started from a real place. Not a designer's staged canvas. Not a luxury renovation with an unlimited budget. Just a dated bathroom that a lot of homeowners look at every single morning and think: there has to be a better version of this room. If any of that sounds like your bathroom, this article will actually be useful to you.The Before State: What This Bathroom Actually Looked LikeBefore the contractor touched anything, here's what existed: Ceiling: Thick popcorn texture. The kind that diffuses overhead light and makes even a decently lit room feel cave-like. It wasn't just visual — the texture absorbed and scattered light instead of reflecting it, which made the entire room feel dimmer than it was. Tub surround: Brown 12×12" ceramic wall tile, floor-to-ceiling on the tub wall. The grout had darkened significantly with age — not from neglect, just from years of being wet tile grout. No niche, no storage ledge, no visual interest. The chrome shower valve and tub spout sat against that brown tile like fixtures forgotten in place. Floor: Builder-grade ceramic in a tan/beige tone — 12×12" tiles set with standard grout joints. The kind of floor tile that looks slightly dated the moment it goes in and gets progressively more so over time. The grout lines had discolored. The floor pattern had no visual direction to it. Vanity: Single white drop-in vanity with an integrated cultured marble top and oval single-basin sink. Chrome faucet, chrome pulls, white painted MDF cabinetry. Functional. Nothing more. Walls: Orange-peel texture throughout. No focal point. No accent, no color, no visual layering of any kind. Fixtures: Chrome everywhere — shower valve, tub spout, towel bar, toilet paper holder, door hardware. All the same finish. All forgettable. Lighting: A single flush-mount ceiling fixture. No recessed lighting, no vanity light bar — just the one fixture doing all the work, poorly. There was no hidden disaster here — no water damage behind the tile during demo, no rotted subfloor, no significant structural surprises. This homeowner was lucky on that front. But the bathroom hadn't changed meaningfully in thirty years. It looked exactly like that.What Changed: The Complete Upgrade BreakdownThe transformation across these photos wasn't one big move. It was ten deliberate ones that compound on each other visually. Flooring The old 12×12" beige ceramic came out completely. What replaced it: large-format light gray tile in a plank format — approximately 12×24" — laid in a running bond pattern with minimal grout joints. The floor is probably the first thing that registers differently, even in a thumbnail. The old tile had roughly double the grout lines per square foot. The new floor has almost none, which is what makes a small bathroom feel like it has more square footage than it actually does. More on this mechanism in the flooring section below. The Vanity Single white drop-in → double wood-tone vanity with two undermount rectangular sinks and a white quartz countertop. This is the most structurally significant change in the entire project. Going from one sink to two required confirming that both P-traps could drain into the existing single rough-in via offset routing — which they could here. That's not always the case, and it's the detail that determines whether you're looking at a straightforward vanity purchase or a plumber's invoice for several thousand dollars. There's a full section on this below, because it's the most common expensive surprise in this upgrade category. The cabinet finish — warm flat-front oak grain — grounds the room with natural material warmth. It prevents the white-and-matte-black palette from reading cold. That balancing act is what makes the color palette feel intentional rather than sterile. Hardware Chrome throughout → matte black throughout. Every piece: faucets, shower valve, tub spout, handheld showerhead, shower curtain rod, towel bar, drawer pulls, door hardware. Looking at the photos, all the matte black fixtures clearly come from a cohesive product line — the finish reads consistently across every element. That consistency matters more than most people realize before they start buying. Matte black from one manufacturer can look meaningfully different from matte black from another — warmer, cooler, slightly sheened versus true flat. Mix hardware from three different brands and the finish variation is visible in photos and in person. Buy a coordinated hardware line and run it throughout. Tub Surround Brown 12×12" ceramic → large-format white/light gray tile installed vertically, with tight grout joints. The tub itself was refinished — not replaced. Refinishing a tub costs $300–$600 and looks new if done well; replacing a cast iron tub can run $1,500–$3,500 in labor alone due to weight and access. The niche is new — a full-width rectangular built-in shelf recessed into the wall between the tub deck and the window sill. It's properly waterproofed. That last detail is what separates a niche that holds up for decades from one that causes a mold remediation project in five years. Mirrors The single builder vanity mirror — frameless, purely functional, visually inert — was replaced with two distinct mirrors positioned over each sink. Left position: an asymmetric wavy-edge oval mirror. The irregular silhouette is the piece that gives the vanity wall its personality. It breaks up the vertical geometry of the room and looks sculptural against the wallpaper. Right position: a round LED backlit mirror. Practical and clean. Paired mirrors over a double vanity work because they give each sink position its own visual anchor, add design interest to the wall, and reflect the wallpaper behind them — effectively doubling its visual footprint without adding any more wallpaper. Wallpaper The vanity wall — the first thing you see when you enter — has peel-and-stick wallpaper in a scallop/fan geometric pattern. Cream and warm white tones, subtle but present contrast. It's visually quiet enough to work as a backdrop for the mirrors and greenery, but present enough to completely eliminate the blank-wall problem. Materials cost for one accent wall of peel-and-stick: $80–$250 depending on product and square footage. The return on that investment in this bathroom is probably the best ratio of any single element in the room. There are real caveats. They get their own section. Ceiling Popcorn texture removed. Smooth white finish applied. Recessed light added in the center field. Look at the before and after photos and pay close attention to what the ceiling does in each. The before ceiling absorbs light and creates micro-shadow texture across the entire room. The after ceiling bounces that light evenly. With the recessed fixture, the smooth white surface acts as a passive light diffuser — no additional fixtures needed for the space to feel dramatically brighter. Smooth ceilings also raise the perceived height of the room even though the actual height is identical. The popcorn texture created a visual plane that compressed the space. Removing it opened the room's proportions. Accessories Wicker storage basket with rolled white towels near the door. Bamboo bath tray on the tub. Eucalyptus stems in a textured white ceramic vase. Black vanity tray holding soap dispensers. These are styling decisions, not renovation elements. Combined they cost under $200 and could be swapped out in an afternoon. But they complete the photographs in the way that editorial styling completes any image — natural organic textures (wicker, bamboo, eucalyptus) balanced against the clean white-and-black palette. Without them, the after photos would look like a showroom. With them, the room looks like someone actually lives there and chose it intentionally.What's Actually DIY-Friendly and What Isn'tMost bathroom renovation content either oversells DIY (implying everything is a weekend project if you watch enough YouTube) or undersells it (implying nothing should be attempted without a licensed contractor). Neither is accurate for a project like this.Task DIY Level WhyPeel-and-stick wallpaper ✅ Weekend DIY Wall prep, alignment, smoothing — no tools requiredHardware swap (towel bar, pulls, door hardware) ✅ Weekend DIY Basic drill and wall anchor workMirror mounting ✅ Weekend DIY Requires stud finder, level, and weight-appropriate anchorsShower curtain rod swap ✅ Weekend DIY Standard bracket or tension rod installationFaucet replacement (same config) ⚠️ Moderate DIY Shutoff valves, basin wrench, under-sink comfort neededVanity replacement (same rough-in) ⚠️ Moderate DIY Heavy and awkward; requires disconnecting and reconnecting plumbingFloor tile installation ⚠️ Moderate skill Subfloor prep, thinset, tile saw rental — mistakes are permanentPopcorn ceiling removal (post-1978) ⚠️ Moderate skill Messy; skim coat finishing step is harder than the scrapingTub surround retile ❌ Hire a pro Waterproofing membrane is non-negotiable; mistakes cause hidden moldShower valve replacement ❌ Licensed plumber Inside wet area; permit required in most US jurisdictionsAdding second drain for double vanity ❌ Licensed plumber New drain line = permit + inspectionAdding GFCI circuit or outlet near water ❌ Licensed electrician Code requirement; no exceptions for "just adding an outlet"Popcorn ceiling (pre-1978 home) ⚠️ Test first Asbestos testing required before any disturbanceThe most practical approach for most homeowners: DIY the cosmetic layers — wallpaper, hardware, mirrors, accessories, potentially the vanity swap if the rough-in works in your favor. Hire a licensed plumber for any drain work. Hire an experienced tile setter for the tub surround. This is not the application where you practice tiling.What a Bathroom Remodel Like This Actually Costs There's no honest single number. Here's how to think about the tiers:Scope What's Included Typical Cost (US National)Cosmetic-only Vanity swap (same rough-in), hardware, wallpaper, mirrors, accessories, ceiling skim coat $3,000–$8,000 DIY / $8,000–$18,000 contractorMid-range full remodel All cosmetic work + new tile throughout + new fixture package $12,000–$22,000 contractorFull gut with plumbing/electrical changes Layout changes, new rough-ins, new subfloor if needed, complete finish package $20,000–$40,000+Individual Upgrade Cost RangesUpgrade DIY Material Cost Contractor Total DIY Viable?Peel-and-stick wallpaper (1 accent wall) $80–$250 $200–$500 ✅ YesFull matte black hardware set $300–$700 $450–$1,000 ✅ YesSingle vanity replacement (same rough-in) $400–$1,200 $800–$2,500 ⚠️ ModerateDouble vanity (with P-trap offset into existing rough-in) $600–$2,000 + plumber consult $2,500–$6,000+ ❌ Plumber for any drain workLarge-format floor tile (materials only) $3–$12/sq ft $8–$18/sq ft labor ⚠️ Moderate skillTub surround retile $500–$1,500 materials $1,500–$4,500 total ❌ Waterproofing criticalPopcorn removal + skim coat (post-1978 DIY) $150–$400 $1–$3/sq ft professional ⚠️ Moderate skillBuilt-in shower niche (new install) $50–$150 materials $300–$800 installed ⚠️ Waterproofing requiredAsymmetric/wavy mirror (36"–48") $150–$500 N/A — DIY install ✅ YesRound LED mirror $100–$400 N/A — DIY install ✅ YesUS national averages. Coastal metro markets (Los Angeles, Seattle, New York, Boston) typically run 20–40% higher on labor costs. Where this specific remodel lands: Based on visible scope — full tile demo and replacement on floor and tub surround, double vanity conversion, new fixture package throughout, wallpaper accent wall, smooth ceiling with added recessed light — this project most likely ran $14,000–$20,000 if contractor-executed in a mid-to-high-cost US market. A homeowner who self-performed the wallpaper, mirrors, hardware, and accessories while hiring out tile, plumbing, and ceiling work could likely get into $8,000–$12,000.Why Matte Black Hardware Works Here — And When It Doesn't The decision to go all-matte-black in this bathroom wasn't arbitrary trend-chasing. It works here specifically because of the palette it's working against. Matte black reads as high-contrast and intentional next to light surfaces — white quartz, cream-white tile, warm wood, light gray floor. The darkness of the fixtures punctuates the room visually. Without that contrast, a bathroom this light can look washed out and undirected. The hardware is what gives the palette definition. Where matte black doesn't work as well:Very dark or charcoal-dominant color schemes — hardware visually disappears Small bathrooms with limited natural light — can feel heavy Warm amber, terracotta, or earthy tile tones — brushed brass or unlacquered brass reads better Highly contemporary industrial aesthetics — polished stainless or brushed nickel fits the material vocabulary betterThe Maintenance Reality Matte black shows water spots, fingerprints, and soap residue more readily than chrome or brushed nickel. Chrome can absorb a week of daily use before it looks bad. Matte black shows a fingerprint almost immediately. The correct cleaning routine: pH-neutral soap, soft cloth, dry wipe. No abrasive cleaners, no vinegar, no citrus-based products. Most standard bathroom cleaners are too acidic for matte black — they dull the surface and can cause uneven patching over time if used repeatedly. For a high-traffic family bathroom, brushed nickel is more forgiving while still reading as modern and updated. For a primary or en-suite bathroom where you're willing to wipe down fixtures regularly, matte black holds up fine and looks excellent. The Manufacturer Matching Problem If you buy faucets from Brand A, towel bars from Brand B, and the shower valve from Brand C — even if everything says "matte black" — the finishes will likely look visibly different under your specific bathroom lighting. Slightly warmer, slightly cooler, slightly sheened. It's subtle in person and obvious in photographs. Buy from one coordinated hardware line and run it throughout. This is the non-negotiable detail that separates a bathroom that looks designed from one that looks assembled.The Wallpaper Accent Wall: What Nobody Tells You Before You BuyThe scallop/fan-pattern peel-and-stick wallpaper in this bathroom is doing a significant amount of visual work. It gives the vanity wall a clear focal point, provides the backdrop for the mirror pairing, and adds organic geometric texture without competing with the tile or hardware. It also cost somewhere between $80 and $250 in materials. That's the return-per-dollar champion of this entire renovation. And it's one of the most commonly misunderstood products in home improvement. The Ventilation Requirement Is Not Optional Peel-and-stick wallpaper in a bathroom lives or dies by ventilation. Steam from daily showers is the enemy. If that steam can't escape efficiently, it works its way behind the backing layer and begins breaking down the adhesive from the inside. The failure sequence is predictable: Seams lift first, typically within 6–12 months in a bathroom without adequate airflow. Then bubbles form in the field of the panels. If left unaddressed, the moisture conditions trapped behind PVC-backed wallpaper can create circumstances for mold growth on the wall surface behind it. Before installing any wallpaper in a bathroom, confirm:Your exhaust fan is functional — not just present, but actually moving air CFM rating is appropriate for your space (minimum 1 CFM per square foot of floor area; 1.5 CFM is better) The fan exhausts to the exterior, not into the attic The fan runs for at least 15–20 minutes after showering (consider a timer switch or humidity-sensing fan)Fabric-Backed vs. PVC-Backed Fabric-backed peel-and-stick wallpaper is breathable — moisture can pass through it rather than becoming trapped behind it. PVC-backed (which most budget options are) creates a vapor barrier. In a well-ventilated bathroom, both can work long-term. In a bathroom with marginal ventilation, fabric-backed is considerably more forgiving. Wall Prep Is Everything Wallpaper applied over orange-peel or knockdown texture will not adhere reliably. The texture creates air pockets behind the backing that cause premature lifting. The before bathroom in this remodel had orange-peel textured walls — those walls were skim-coated and sanded smooth before any wallpaper went up. Similarly, fresh paint needs to cure fully before applying peel-and-stick. Newly painted walls still off-gas for 30 days — those VOCs interfere with adhesion. Let new paint cure at least four weeks.⚠️ Warning: Peel-and-stick wallpaper in bathrooms without a functional exhaust fan will fail. It's not a product quality issue — it's physics. Steam from daily shower use penetrates the backing and dissolves the adhesive layer from behind. Seam lifting and bubbling are the early signs; mold behind the paper is the end state. If your bathroom doesn't have adequate ventilation, fix that before considering any wallpaper product.Adding a Second Sink: The Plumbing Conversation You Need to Have First One of the most frequent reasons a "simple vanity swap" turns into a $3,000-plus plumbing job is this: the homeowner orders a beautiful 60-inch double vanity, the contractor arrives for installation, and everyone discovers the existing drain rough-in is centered under a single-sink position. Here's why that matters. What a Rough-In Is Your existing vanity connects to a drain pipe stubbed out from the wall or floor — that's the rough-in. Every sink connects to a P-trap that connects to this drain. In a single-sink bathroom, there's one rough-in. When you add a second sink, both need to drain somewhere. Option 1 — Offset P-trap routing: If both sink drain positions are within roughly 24"–30" of the existing rough-in centerline, a plumber can often route both P-traps to drain into the single existing rough-in via offset connections. This is what happened in this remodel. No structural plumbing work required — both sinks drain to the original rough-in location. Total cost: plumber's time to confirm feasibility and make connections. Option 2 — Add a second drain line: If the sinks are farther apart, if the existing pipe diameter won't accommodate the combined flow volume, or if local code won't permit shared drain routing for that distance, a plumber needs to add a drain line. That means opening the wall or floor, running new pipe, and in most US jurisdictions obtaining a permit and scheduling an inspection. That's a materially different scope than a vanity replacement. Before You Buy a Double Vanity Have this 20-minute conversation with a plumber. Locate your existing drain rough-in (it's behind or below your current vanity). Measure the horizontal distance from that rough-in to where the second sink drain will sit. Ask whether shared P-trap routing is feasible for that distance under local code. If the answer is yes, buy the vanity. If the answer is no, get a quote for the drain line before purchasing — not after. Standard double vanity widths and typical drain spacing:48" double vanity: sinks approximately 20"–22" apart, center-to-center 60" double vanity: approximately 28"–30" apart 72" double vanity: approximately 36" apartMost plumbers can share a P-trap routing for up to about 24"–30", though this varies by local code and pipe slope requirements. Beyond that, a second rough-in is typically the cleaner and more code-compliant solution.The Shower Niche: Why So Many DIY Installs Fail Within a Few YearsThe built-in niche in this bathroom's tub surround is one of the most visually appealing elements in the after photos. It's also the element most likely to cause expensive structural problems if installed incorrectly. This is the part most renovation content buries or skips entirely: a shower or tub niche that is not properly waterproofed will allow water infiltration into the wall cavity. Not might. Will. The question is only how long it takes. The failure mechanism: water runs off tile surfaces, finds a hairline crack in grout or the corner caulk joint, and wicks into the substrate behind the tile. If that substrate is standard drywall backer without a waterproofing membrane, the wall stays chronically damp. Within 2–5 years, that manifests as staining, loosening tile, or a musty smell — long after any contractor warranty has expired. The Correct Installation SequenceFrame the niche opening between studs, or use a pre-formed foam niche insert Install cement backer board on all niche surfaces — sides, top, back, and bottom Apply a continuous waterproofing membrane (RedGard, Schluter Kerdi, Wedi, or equivalent) across all niche surfaces and carry it into the surrounding tub surround field — no gaps in the membrane coverage The horizontal bottom surface of the niche must slope toward the shower — minimum 1/8" per foot — so water drains out rather than pooling Tile using the appropriate thinset for your membrane type (unmodified thinset for sheet membranes like Kerdi; modified for liquid-applied membranes like RedGard) Use unsanded grout for joints under 1/8" At all interior corners and the horizontal joint where the niche bottom meets the side walls: caulk with 100% silicone — do not grout these joints. Grout at corners develops hairline cracks from thermal movement over time. Silicone flexes.⚠️ Warning: A tiled niche that skips the waterproofing membrane will infiltrate water into the wall cavity. This is one of the most common sources of hidden bathroom mold found during renovation demo or home inspection. The remediation cost for mold-damaged wall cavities behind a tub surround significantly exceeds the cost of a proper membrane at installation — often by a factor of five or more.Why Large-Format Floor Tile Makes Small Bathrooms Look Bigger (And the Detail That Makes It Work)The visual expansion effect of large-format tile is real and well-documented. But it's almost always explained in ways that miss the key technical variable. The design logic: Standard 12×12" tile in a 5×8-foot bathroom produces roughly 80 grout lines across the floor. Large-format 12×24" tile in a running bond pattern in the same space produces less than half that number. Fewer lines means fewer visual interruptions means the eye reads the floor as a continuous surface — and the room reads as larger than it is. What most content leaves out: this only works with rectified tile. Standard ceramic and porcelain tile carries slight dimensional variation from the manufacturing process — tiles can vary by 1–2mm in size from piece to piece within the same production batch. To accommodate this variation, standard tile is set with grout joints wide enough to absorb the inconsistency — typically 1/8"–3/16". Rectified tile is precision-cut after firing, with edges ground to exact dimensions within ±0.5mm or tighter. This allows grout joints as narrow as 1/16" — which is what produces the near-seamless floor look you see in high-quality renovations like this one. If you use non-rectified large-format tile and try to run tight joints, you get lippage — tile edges at slightly different heights — which looks poor and creates a trip hazard. The slip resistance question nobody asks at the tile store Builder-grade polished and high-gloss floor tile often fails the DCOF (Dynamic Coefficient of Friction) wet floor threshold. The required DCOF for wet floor areas is above 0.42. Many glossy tiles test in the 0.30–0.35 range when wet — technically not safe for bathroom floors. The gray floor tile in this remodel has a subtle matte texture, which is appropriate. When selecting large-format floor tile, ask for the DCOF wet rating before purchasing. Any reputable tile retailer can pull this from manufacturer spec sheets. Subfloor flatness requirement: The larger the tile, the flatter the subfloor needs to be. TCNA standards allow no more than 3/16" variation in 10 feet for standard tile; large-format tile over 15" tightens that tolerance to 1/8" in 10 feet. Low spots and high spots need to be addressed with floor leveling compound before any tile installation begins.Popcorn Ceiling Removal: The Step Most Renovation Blogs Get Dangerously Wrong Removing popcorn texture and going to a smooth painted ceiling is one of the highest-impact changes in this bathroom. The before/after photos make this clear — the smooth white ceiling in the after is doing real visual work, bouncing recessed light evenly and making the room read as taller and larger. But there's a step that a significant number of renovation articles treat as optional fine print, and it isn't. Pre-1978 homes require asbestos testing before disturbing any ceiling texture. Asbestos was commonly added to textured ceiling products — including popcorn and cottage cheese finishes — through the late 1970s. Sanding, scraping, or wet-disturbing asbestos-containing material releases fibers into the air. Inhaled asbestos fibers cause mesothelioma — a cancer with a median survival of 12–21 months after diagnosis. This is not a liability disclaimer. It is the reason to stop and test before you touch that ceiling. Pre-Removal ChecklistConfirm your home's build year (original permit, HUD form, or prior appraisal) If pre-1978: purchase an EPA-certified DIY asbestos test kit ($30–$50) or hire a certified asbestos inspector ($200–$500) Send samples to an accredited laboratory (included with most DIY kit purchases) If results are positive: Do not proceed with DIY. Contact a licensed asbestos abatement contractor. Federal regulations require licensed abatement for friable asbestos materials. If results are negative (or post-1978 home): Proceed with wet-scrape removalWet-Scrape Method (Post-1978, No Asbestos)Remove all fixtures, cover floor and vanity completely with plastic sheeting taped at the edges Wet the ceiling with a garden pump sprayer — texture should be damp, not soaked; over-wetting weakens drywall paper Use a 4"–6" drywall knife in long, smooth passes; resist the urge to dig in Fill any gouges in the drywall with lightweight joint compound; let dry fully Apply a skim coat (joint compound thinned to approximately pancake batter consistency) with a 12"–14" drywall knife — this is the step most DIYers underestimate; getting a smooth ceiling without visible ridges or trowel lines takes practice Sand with 120-grit on a pole sander, prime with PVA drywall primer, paint with flat ceiling paint⚠️ Warning: Homes built before 1978 — do not scrape, sand, or otherwise disturb ceiling texture before testing for asbestos. DIY test kits are widely available at hardware stores and online. If results are positive, only EPA-certified licensed abatement contractors can legally remove the material. Attempting DIY removal of confirmed asbestos-containing materials is a federal violation and a serious long-term health risk.Ongoing Maintenance: What This Bathroom Requires Going Forward Nobody likes this section, but skipping it leads to expensive problems. A bathroom this invested in needs consistent, low-effort maintenance to stay looking like the after photos.Item Task FrequencyMatte black fixtures Wipe with soft cloth and pH-neutral soap; dry immediately WeeklyGrout lines (floor) Inspect; reseal if water no longer beads on surface AnnuallyCaulk at tub-to-wall joint Inspect for cracking, lifting, or discoloration; replace if compromised AnnuallyShower niche horizontal joint Re-caulk with 100% silicone — do not regrout this joint AnnuallyWallpaper seams Inspect for edge lifting; re-adhere with seam repair adhesive Every 6 monthsExhaust fan Clean grille; hold tissue paper to grille to confirm active airflow Every 6 monthsUndermount sink silicone bond Inspect the bond between sink rim and countertop underside AnnuallyHandheld showerhead connection Check for seepage at hose connections SeasonallyThe exhaust fan maintenance matters more than it looks. Most bathroom fans accumulate lint and dust on the grille within 3–6 months and lose meaningful CFM airflow without anyone noticing. An underperforming fan means elevated humidity — which shortens wallpaper adhesive life, accelerates grout deterioration, and creates conditions for mold growth. Clean it every six months and actually test it. Hold a single sheet of toilet paper up to the grille with the fan running. If it holds against the grille, the fan is pulling adequate air. If it falls, clean the fan housing and blades — or consider replacing an undersized unit with a proper CFM-rated model.Decision Framework: DIY or Hire Out?Situation Recommended ApproachNo plumbing moves, no electrical changes, budget is the primary constraint Full DIY viable for cosmetic layersFirst time tiling, or tiling inside a wet area Hire an experienced tile setter — not a handymanAdding a second sink Hire a plumber to evaluate rough-in before purchasing the vanityPopcorn ceiling, unknown home age Test for asbestos first; then decideSelling within 3 years Hire licensed trades for all permitted work; workmanship matters at inspectionContractor quote feels high Get a second and third bid; verify what's included in each scopeThe hybrid approach works well for most homeowners: DIY the cosmetic layers (wallpaper, hardware, mirrors, accessories), hire licensed trades for anything that touches plumbing, electrical, or tile in a wet area. You keep costs down where the skill barrier is genuinely low, and you don't create expensive problems where it isn't.Frequently Asked Questions How much does a full bathroom remodel cost in 2025–2026? A cosmetic-only remodel with no plumbing or electrical moves — vanity swap at the same rough-in, hardware replacement, wallpaper, new mirrors, accessories — typically runs $3,000–$8,000 if you DIY significant portions, or $8,000–$18,000 contractor-executed. A full mid-range remodel with new tile throughout, new vanity, and new fixture package runs $12,000–$22,000 with a contractor. Full gut renovations involving layout changes, plumbing moves, and electrical reconfiguration can reach $30,000–$45,000 in higher-cost markets. Labor rates by region are the biggest variable — a $14,000 project in Phoenix may cost $19,000–$22,000 in Los Angeles or New York. Can you put peel-and-stick wallpaper in a bathroom? Yes — with conditions. Your exhaust fan must be functional and appropriately sized (minimum 1 CFM per square foot of floor area). The wall must be smooth, sealed, and fully cured after painting (at least 30 days). Fabric-backed products are more moisture-forgiving than PVC-backed in high-humidity environments. In a bathroom without adequate ventilation, no peel-and-stick wallpaper product will hold long-term — this is a ventilation problem, not a product quality problem. What's the easiest way to update a bathroom without a full renovation? In order of visual impact per hour of work: hardware swap (faucets, towel bars, shower curtain rod) → mirror replacement → peel-and-stick wallpaper accent wall → new shower curtain and accessories. These four changes, done over a weekend, can make a dated bathroom feel designed and intentional. Combined material cost: roughly $400–$1,200 depending on hardware quality and product choices. Is matte black hardware hard to keep clean? More demanding than chrome, yes. It shows water spots, fingerprints, and soap residue readily. The cleaning routine is pH-neutral soap and a soft cloth, nothing abrasive, no vinegar or citrus-based cleaners. For a high-traffic family bathroom, brushed nickel is more maintenance-forgiving while still looking updated. For a primary bathroom where you're willing to wipe fixtures down regularly, matte black is absolutely manageable and looks excellent long-term. Do I need a permit to remodel a bathroom? Cosmetic work — swapping fixtures in existing locations, painting, wallpaper, mirror replacement — generally does not require a permit in most US, UK, Canadian, and Australian jurisdictions. Moving plumbing supply or drain lines, adding or relocating electrical circuits, replacing a shower valve, or making structural changes all typically require permits. Unpermitted plumbing and electrical work creates complications at resale and can affect insurance coverage for related damage. When uncertain, a five-minute call to your local building department clarifies requirements. How do I add a second sink to a bathroom that only has one? First, locate your existing drain rough-in. If a plumber can route both P-traps to drain into the existing single rough-in via offset routing — feasible for sinks roughly 24"–30" apart center-to-center — you can add the second sink without structural plumbing work. If the sinks will be farther apart, or if the drain slope won't permit shared routing, a second drain line is required. That's a permit-required plumbing job. Have this conversation with a plumber before purchasing the vanity. What tile size makes a small bathroom look bigger? Large-format tile (12×24" or larger) reduces the number of grout lines per square foot, which makes the floor read as a continuous surface and visually expands a small space. This only produces the intended effect with rectified tile — precision-cut tiles that allow grout joints as narrow as 1/16". Standard tile with wider joints partially cancels the visual expansion benefit you're installing it for. How long does a bathroom remodel take? A cosmetic weekend project — hardware, wallpaper, mirrors — can be completed in two days. A full tile-and-vanity replacement by a contractor team typically runs 1–2 weeks. Projects requiring permits, plumbing inspection, and coordination across trades usually run 3–5 weeks from demo day to punchlist. Add 2–4 weeks to any timeline if permits are required — permit processing times vary significantly by jurisdiction. What's a realistic budget for a 5×8 bathroom remodel? A 5×8 is the most common full bathroom footprint in US homes. Budget by tier: cosmetic-only refresh (hardware, wallpaper, mirrors, accessories) $500–$2,500; mid-range full remodel with new tile, vanity, and fixtures $8,000–$16,000 contractor-executed; full gut renovation with plumbing changes $18,000–$30,000. Regional labor is the biggest variable — a $12,000 project in Phoenix may cost $17,000–$20,000 in Los Angeles or Seattle. Can you tile over existing bathroom floor tile? Sometimes. The conditions that make it feasible: existing tile is fully bonded to the substrate with no hollow spots, the subfloor is structurally sound and level, and the added floor height (typically 3/4"–1" for two tile layers plus thinset) won't create problematic transitions at doorways or thresholds. The primary concern is the height addition — it affects door clearance, transitions to adjacent rooms, and sometimes toilet flange height. When existing tile is cracked, uneven, or loosely bonded, full demo is the correct approach. Is a bathroom remodel worth it before selling? A mid-range bathroom remodel returns roughly 60–70 cents on the dollar nationally (per Remodeling Magazine cost vs. value data). That return varies by market — in high-demand coastal markets, updated bathrooms carry more buyer weight. The highest-ROI pre-sale moves: replace vanity and countertop, update hardware to a current finish, re-grout and re-caulk, replace a dated toilet, and improve lighting. Full gut renovations rarely return full investment at resale unless the existing bathroom is genuinely dysfunctional for buyers. What should be done first in a bathroom remodel? Correct sequence: demo first → address substrate damage found during demo → rough plumbing before cement board goes in → cement board and waterproofing membrane before tile → tile before vanity installation → vanity before quartz countertop templating (template is made after the vanity is level and secured) → countertop before sink mounting → plumbing rough-in before fixtures → electrical before drywall close → flooring before toilet reinstallation and baseboards → painting last. Homeowners who purchase a custom quartz countertop before the vanity is installed often encounter a templating problem. The sequence exists for reasons. How do I waterproof a shower niche? Apply a continuous waterproofing membrane across all niche surfaces — sides, top, back, and bottom — and extend that membrane into the surrounding tub surround wall tile area with no gaps in coverage. The niche bottom must slope toward the shower (1/8" per foot minimum). Tile, then caulk all interior corners and the horizontal bottom-to-side-wall joints with 100% silicone. Do not grout these corner joints — they will crack from thermal movement over time. Can I replace a bathroom vanity myself? If you're replacing in the same footprint, same rough-in location, and you're comfortable shutting off supply valves, disconnecting and reconnecting P-traps and supply lines — yes, this is a moderate DIY project. The challenge is physical: weight, awkward geometry, working in a confined space. Where it exceeds DIY scope: if supply lines need moving, if the drain rough-in changes, or if you're adding a second sink that requires drain work. What exhaust fan CFM rating do I need for my bathroom? The Home Ventilation Institute (HVI) minimum recommendation is 1 CFM per square foot of floor area. A 5×8-foot bathroom (40 sq ft) needs at minimum a 40 CFM fan — though a 50–60 CFM unit is a more practical target that accounts for fan aging and performance degradation over time. Bathrooms with enclosed showers, high ceilings, or heavy daily use benefit from 80–110 CFM. If you're installing wallpaper, budget for the higher end. Humidity-sensing fans that run automatically until moisture clears are worth the modest cost premium — they eliminate the single most common ventilation failure mode, which is simply forgetting to turn the fan on.Regional costs, permit requirements, and product availability vary. Cost ranges reflect US national averages as of 2025–2026. Consult licensed plumbers, electricians, and your local building department for project-specific requirements.

Why Does Your Washing Machine Lie? (And What It's Actually Hiding)
Your washing machine finishes its cycle. The laundry comes out smelling clean. You fold the sheets, make the bed, and assume the job is done. Then one day — maybe prompted by something you saw online, maybe out of curiosity — you drop those same sheets into a bathtub of hot water. Within twenty minutes, the water is grey-brown. Not faintly. Visibly, undeniably grey-brown. And the sheets went in looking clean. That moment is the washing machine's lie made visible. The cycle ran. The timer counted down. The machine did everything it was supposed to do. What it couldn't tell you was the condition of the water it was running your laundry through, or how much of what it was supposed to remove it actually left behind. A completed wash cycle and a clean wash cycle are not the same thing. Once you understand the difference, a lot of frustrating laundry problems start making sense.Quick answer: Washing machines appear to clean laundry while recirculating water through a drum that is often contaminated with biofilm, mold, and detergent residue. Low wash temperatures prevent true cleaning — especially for bedding. The machine runs successfully and still fails hygienically. Restoring genuine performance requires a full deep clean, correct detergent dosing, and a consistent maintenance routine.Quick takeaways:Biofilm inside the drum means the machine recirculates bacteria-laden water through every wash cycle Excess detergent leaves sticky residue in fabric fibers that attracts and traps dirt over time Cold and low-temperature washes cannot dissolve body oils, kill bacteria, or disrupt biofilm The rubber door seal is the most overlooked source of mold contamination in front-load machines Sheets and towels accumulate residue that drum washing routinely misses — periodic hot soaking releases what the machine cannot A completed wash cycle is not the same as a clean wash cycleThe False Clean — What Is Really Happening After the Cycle EndsLet's start with the uncomfortable part. Your washing machine doesn't rinse laundry in fresh, clean water. It recirculates the same water — repeatedly — through a drum that may be coated in biofilm, mold, mineral deposits, and months of accumulated detergent residue. That water passes over the door seal, through the drain system, and around surfaces that haven't been properly cleaned in years. Possibly ever. The drum spins. The laundry tumbles. The cycle ends. The machine presents the result as clean because that's what the programme promised. What actually happened is more complicated. Think of it this way: washing laundry in a contaminated drum is roughly equivalent to washing dishes in water that hasn't been changed in months and assuming the soap bridges the gap. The soap helps. The machine runs. But the baseline it's working from is not clean to begin with. Freshly washed laundry often smells fine straight out of the machine. The heat of the dryer, or moving air if you line-dry, temporarily masks the problem. It's only later — when sheets warm against skin overnight, or towels dampen after a shower — that the stale, musty undertone returns. That's the drum's contamination completing a transfer that the wash cycle started. The machine didn't malfunction. It ran exactly as designed. The design just has limits that routine maintenance is supposed to address — and usually doesn't.What Is Biofilm and Why Does It Survive Your Wash Cycles?Most people assume visible mold on the door seal is the primary problem. The mold is a problem. What's often doing more damage, silently, is something you cannot see at all. Biofilm is not the same as mold. This distinction matters because the fix is different. Mold is a visible fungal growth. It's localized, surface-level, and identifiable. You can see it. You can wipe it. It's unpleasant but relatively straightforward to address. Biofilm is something else entirely. It's a self-organizing colony of bacteria that encases itself in a protective matrix of polysaccharides — a sticky, gel-like substance the bacteria produce specifically to shield themselves from environmental threats. Those threats include detergent, mechanical disruption, and temperature changes. The polysaccharide matrix is not removed by standard washing and is not visible during casual inspection. Inside a washing machine drum, biofilm forms on every surface where moisture, warmth, and organic material coexist: the drum walls, the door seal interior, the drainage system, and the recessed edges of the drum paddles. Once established, it doesn't wash away. Standard detergent at 30–40°C deflects off the polysaccharide matrix rather than penetrating it. Here's the part that most people don't realize: low-temperature washes don't just fail to remove biofilm — they accelerate its development. The bacteria that produce biofilm thrive in the warm, moist conditions of a 30–40°C wash cycle. Every moderate-temperature wash provides ideal growing conditions and a fresh supply of organic material — body oils, dead skin cells, detergent residue — for the colony to feed on. Breaking biofilm requires sustained heat above 60°C, contact with an oxidizing cleaning agent (oxygen bleach, citric acid), or both. A 40°C cycle with a standard cleaning tablet provides neither. It's why households that run drum clean cycles and see temporary improvement find the problem returning within weeks — the colony was never broken down thoroughly enough to prevent re-establishment.The Detergent Paradox — How Using More Creates More DirtThis mistake is almost universal, and it makes complete intuitive sense. Laundry isn't coming out clean. The logical fix is more detergent. More cleaning agent, more cleaning power. Except the opposite happens. Over months of overdosing, the underlying problem gets measurably worse. Here's the mechanism. Detergent contains surfactants — molecules that lift soil from fabric and hold it in suspension in the wash water. But surfactants only work effectively when the water volume is sufficient to rinse them out completely during the final cycles. When the dose exceeds what the load and water volume can rinse away, the excess stays behind. It settles into fabric fibers as a residue film. That residue is hygroscopic — it attracts and holds moisture. It's also adhesive. Body oils, bacteria, skin cells, and mineral deposits from hard water all bind to it. The fiber that was supposed to come out clean now has a layer of sticky surfactant residue actively collecting the next round of soil before the laundry even goes back on the bed. Repeat that process weekly for a year. What you end up with is bedding that feels slightly stiff, looks slightly grey, smells fresh when newly washed and stale within hours — because the residue layer is acting as a continuous soil trap that the machine's standard cycle can no longer clean through. High-Efficiency machines make this significantly worse. HE washers use considerably less water per cycle by design — a meaningful reduction in water consumption, but also a concentration risk. Detergent dosed for a standard-fill machine is too concentrated for an HE drum that uses a fraction of the water. The surfactant concentration per litre of wash water increases, the residue deposition per cycle increases, and the cumulative buildup compounds faster than it would in an older top-loader. Appliance technicians who work on HE machines commonly find detergent residue buildup that's measurably worse than in equivalent front-loaders with comparable usage — and many recommend using 50–75% of the marked detergent dose for HE cycles, particularly in areas with soft water where surfactants don't need to compete with mineral hardness. The correction is counterintuitive: use less detergent, not more. In hard water areas, the correct addition is a water softener or a dedicated hard water laundry product — not an increased detergent dose.The Five Places Your Machine Is Actually Dirty Running a drum cleaning tablet once a quarter and calling it done misses four of the five locations where contamination actively lives. Here's where to look — and what to expect when you do. 1. The Door Gasket — The Fold Nobody Opens The rubber seal around a front-loader door has an inner fold that most people never access during cleaning. That fold sits below the water line during a wash cycle and traps standing water between uses. Inside that fold: residual detergent, lint, hair, and the perpetual warm moisture that mold needs to establish itself. Inspection records on older front-loaders consistently document active mold colonies in the gasket fold that are not visible from outside the door. When the machine runs, that mold is in direct contact with every load passing through. Proper cleaning requires pulling the fold back manually all the way around the circumference — not just wiping the visible outer surface. A door left closed between washes traps moisture and creates ideal mold conditions with every cycle. This is one of the simplest single habits to change. 2. The Detergent Drawer — and the Tube Inside It Most people occasionally rinse the detergent drawer under a tap. Very few remove it fully. Almost no one looks at the internal siphon tube — the small pipe inside the drawer compartment that controls water flow into the drawer during the cycle. That siphon tube develops mold colonies in the same conditions as the door seal. The difference is that when it drips, it drips directly into the drawer, and from the drawer into the drum — meaning every wash cycle begins with active contamination entering the load before the cycle has even properly started. The drawer cavity inside the machine (the slot the drawer slides into) is also routinely ignored. It collects detergent overflow and is rarely wiped between uses. Both the drawer and the cavity need attention. 3. Drum Paddles — The Recess Edges The raised paddles inside the drum create the tumbling action. Their outer edges contain recessed channels where fabric residue, limescale, and biological buildup accumulate over time. A drum that looks clean from the doorway can have significant buildup in those paddle recesses that a drum clean cycle only partially addresses. 4. The Drain Filter — The One Most People Have Never TouchedThis is the single most neglected component in a residential washing machine. On front-loaders it's typically located behind a small access panel at the base of the machine — sometimes disguised as a decorative kick panel. Inside the filter: lint, hair, small objects from pockets, and standing water from the most recent cycle. That water goes stale quickly. In a machine that recirculates water through the same drainage system, a clogged or contaminated filter sends re-contaminated water back through the drum with each cycle. Appliance service records regularly show drain filters full of months or years of accumulated debris in machines brought in for odour complaints. Cleaning the filter — removing it, clearing the debris, rinsing it, reinstalling it — often resolves persistent odour that repeated drum clean cycles have not touched. It should be cleaned every three months. Most homeowners clean it never. 5. The Water Inlet Filter Screen The small mesh screen inside the water inlet hose connection at the back of the machine is a limescale accumulation point in hard water areas. Partial restriction of the inlet flow means the drum doesn't fill to its designed water volume. For an HE machine already operating with reduced water, inlet restriction further increases detergent concentration and reduces rinsing effectiveness — without triggering any visible error or alarm.Why Sheets and Bedding Are a Different Problem Entirely Clothing and bed linen are not the same cleaning challenge. A t-shirt worn for a day carries a fraction of the soil load that a set of sheets accumulates in a week of use. And the drum handles them very differently — to the sheets' consistent disadvantage. Bedding carries a heavy load of body oils (sebum), perspiration salts, dead skin cells, and — particularly for allergy sufferers — dust mite debris and allergen material. These compounds bind into cotton fibers at a molecular level. Releasing them requires hot water, extended contact time, and full fabric immersion. A washing machine drum provides none of these reliably for large items. A king-size duvet cover in a drum doesn't tumble freely. It folds over itself, compressing the inner layers and preventing water penetration through to the center. The outer surface gets thoroughly wet. The inner folds stay partially dry. The sheet circulates through the drum rather than soaking through — the machine runs a full cycle, but the interior fibers of the sheet had intermittent water contact at best. Compare that to dropping those same sheets into a bathtub of hot water and pushing them fully under. Within twenty minutes the water changes color. What releases into the water is what the machine left behind across multiple washes: body oils, surfactant residue, mineral deposits from hard water, and biological debris embedded in the fiber structure. The grey-brown water is not a sign of poor hygiene. It is a physics outcome. The drum washing cycle completed as designed — it just cannot replicate the penetration that a full immersion hot soak achieves for large, high-soil-load items. Understanding this explains both why the bathtub discovery produces such a striking result, and why bedding genuinely requires a supplementary approach that machine washing alone doesn't cover.What Is Strip Washing — And Did Your Bathtub Just Prove It Works?If you discovered strip washing through social media, you've likely seen the videos: clean-looking sheets dropped into a bathtub, the water turning dark brown within an hour, the comments full of people who had the same reaction to the same experience. That grey-brown water is real. It isn't exaggerated for content. If it happened to you, your instinct — that something was being released that the machine had missed — was correct. What strip washing actually does: It uses a high-alkalinity hot water solution to break the bonds between accumulated residue and fabric fibers. The residue releases into the water — surfactant buildup, mineral deposits, body oils, and in some cases years of fabric softener coating. That's the discoloration. The laundry comes out genuinely cleaner than it went in, even when it appeared visually clean before the soak began. The Correct Strip Wash Method Fill a bathtub (or large clean bucket) with the hottest water the fabric tolerates — for cotton sheets, that typically means as hot as the tap will run, or water from the kettle cooled slightly. Then dissolve into it:¼ cup washing soda (sodium carbonate — not baking soda, which is milder sodium bicarbonate) ¼ cup borax substitute (sold in most supermarkets and hardware stores) ½ cup powdered laundry detergent (powder performs better here than liquid — higher pH, less foam)Stir until fully dissolved. Submerge the laundry, push it fully under, and leave it for 4–6 hours — stirring occasionally if convenient. Drain, rinse thoroughly, then run through a standard machine rinse cycle to remove any remaining solution.Important — dishwasher detergent on laundry: Some homeowners discover strip washing by accident when using dishwasher detergent to soak laundry — either out of curiosity or because it was at hand. It produces a visually similar result: the water discolors, the residue appears to release. But dishwasher detergent is formulated for hard, non-porous surfaces. It contains higher alkalinity levels and enzymes designed to strip baked-on food residue from ceramics, not to release body oils from cotton fiber. Used on laundry, it can cause fiber degradation in delicates, discoloration in dyed fabrics, and skin irritation from chemical residue that remains in the weave after rinsing. For fabric-safe strip washing, the washing soda, borax substitute, and powdered laundry detergent combination above is the appropriate method.Strip washing is not a replacement for regular hot machine washes. It's a periodic reset — typically twice a year for bedding and towels — that clears the accumulated residue that machine cycles cannot fully reach.How to Deep Clean Your Washing Machine — The Full Sequence The most common version of a washing machine clean is running a drum tablet and considering the job finished. One product targeting one component is not a deep clean. Here's the correct sequence — in the order that actually matters. Step 1: Door Gasket — Inspect First, Then Clean Pull back the inner rubber fold of the door seal all the way around the circumference. Look for visible mold (black or dark grey patches), slime deposits, or significant residue accumulation in the fold interior. For light mold and residue: Wipe with a cloth soaked in a 1:1 solution of white distilled vinegar and water. Work the cloth into the full fold rather than just the outer surface. For established mold: Use a diluted bleach solution — 1 part household bleach to 9 parts water. Apply with a cloth, leave for 10 minutes, then wipe thoroughly and rinse with a damp cloth. Do not use undiluted bleach directly on the gasket rubber; repeated direct application accelerates deterioration and shortens the gasket's service life. Leave the door open after cleaning and after every subsequent wash cycle. Step 2: Detergent Drawer — Remove, Soak, and Clean the Siphon Tube Remove the drawer completely (check the machine manual if the release mechanism isn't obvious). Soak it in a basin of hot water for 20–30 minutes. Use an old toothbrush to clean the siphon tube and all compartment edges thoroughly. While the drawer is out, wipe down the cavity inside the machine that the drawer slides into — it collects detergent overflow and is almost always overlooked. Rinse everything before reinstalling. Step 3: Drain Filter — The Step That Often Resolves the Odour Place a towel or shallow tray under the access panel at the base of the machine before opening — water will drain out when the cap is removed. Open the cap slowly. Let the water drain. Pull out the filter, remove all debris, rinse under a tap, and reinstall. Tighten the cap fully before running the next cycle. If the filter has clearly never been cleaned and the machine has been in use for several years, this step alone frequently resolves persistent drum odour that cleaning tablets have failed to address. The debris in a long-neglected filter can be significant. Step 4: Drum Clean Cycle With the drum completely empty, run the machine's drum clean cycle — or the hottest available cycle (60°C minimum; 90°C if available). Add one of the following:A drum cleaning tablet (follow pack instructions) 250ml white distilled vinegar added to the drum directly, plus a cup of bicarbonate of soda An oxygen bleach powder (sodium percarbonate) — follow dosage instructions on the packetDo not combine chlorine bleach with vinegar. The chemical reaction produces chlorine gas. Choose one approach and use it alone. Step 5: Second Rinse Cycle After the drum clean cycle completes, run one additional empty rinse and spin cycle. Cleaning agent residue left in the drum is a common cause of chemical smell on laundry after a drum clean — the second rinse cycle clears it before the machine is used for laundry again. Step 6: Drying Protocol — Going Forward Leave the drum door open and the detergent drawer pulled out after every wash from this point forward. The interior cannot dry if it's sealed. This single habit, consistently maintained, removes the moisture conditions that allow mold and biofilm to re-establish between cycles.What Your Temperature Dial Is Not Telling You The temperature selected on a wash cycle dial is a target, not a guarantee. On older machines — or machines running at the lower end of their specification — internal thermostats drift over time. A cycle set to 60°C may actually heat the water to 48–52°C. Warm enough to feel like a hot wash. Not hot enough to disrupt biofilm or reliably kill the bacteria producing it. This explains why some homeowners run drum clean cycles on high temperature settings, see no meaningful improvement, and conclude that the cleaning product isn't working. The product may be fine. The machine may not be reaching the temperature the product needs to work. On machines over 7–10 years old, thermostat drift of 8–15°C below the selected setting has been documented in appliance service contexts. If multiple hot drum clean cycles have produced no consistent improvement, verifying the actual achieved water temperature with an inexpensive drum thermometer is a useful diagnostic step before assuming the contamination is structural.Wash Temperature What It Actually Achieves Best ForCold / 20°C Rinses; minimal soil removal; reduces shrinkage risk Delicates, lightly soiled items, colorfast fabrics30°C Light cleaning; low energy draw Everyday clothing, synthetic fabrics40°C General-purpose cleaning Most clothing, moderately soiled loads60°C Kills most bacteria; dissolves body oils; disrupts biofilm Bedding, towels, heavily soiled items, drum clean90°C Sanitizing; kills dust mites; removes deep residue White cottons, hygiene items, annual maintenance washOn machines over 7–10 years old, thermostat drift can reduce the actually achieved drum temperature by 8–15°C below the selected setting. If drum clean cycles at 60°C produce no improvement after the full deep clean sequence, a drum thermometer test is the next step.The Maintenance Routine That Prevents the Problem ReturningThe full deep clean described above resets the machine. What keeps it there is a simple, consistent routine. Framing it as a large periodic task makes it easier to put off. In practice, the active time across all tasks in a given month is about ten minutes total.Frequency TaskAfter every wash Leave drum door and detergent drawer open to dry completelyWeekly Wipe door seal interior fold with a damp microfiber clothMonthly Run drum clean cycle at minimum 60°C with a cleaning productMonthly Remove detergent drawer and soak in hot water; clean siphon tubeEvery 3 months Clean drain filter — remove, clear debris, rinse, reinstallEvery 6 months Inspect water inlet filter screen for limescale restrictionAnnually Run one empty 90°C maintenance wash to fully reset drum hygieneTwo habits contribute more than anything else to long-term machine hygiene: leaving the door open after every use, and keeping the detergent dose accurate. Most ongoing contamination problems in otherwise well-maintained machines trace back to one or both of those being consistently skipped.Troubleshooting Guide — Symptom, Cause, FixSymptom Most Likely Cause Recommended FixSheets smell after washing every week Biofilm in drum; wash temperature too low Full drum deep clean + wash bedding at 60°C minimumWhite sheets yellowing or going grey Detergent residue + body oil buildup in fibers Strip wash + reduce detergent dose going forwardLaundry smells clean wet, stale within hours Mold in door seal or detergent drawer Full gasket and drawer clean; leave door open after every useStains not lifting despite multiple washes Residue layer sealing stain into fiber Strip wash + pre-treat stain before rewashingMachine smells musty but looks clean inside Biofilm in drum, mold in seal, clogged drain filter Full deep clean sequence — including drain filterTowels rough and no longer absorbent Fabric softener coating fibers Wash towels with white vinegar; eliminate fabric softenerMachine leaving grey marks on laundry Dirty or residue-clogged drum paddles Drum clean cycle + manual wipe of paddle recess edgesPersistent odour after drum cleaning tablet Drain filter never cleaned; possible thermostat drift Clean drain filter; verify actual drum temperatureWhen Cleaning the Machine Yourself Is Not Enough There's a point at which continued self-cleaning stops being productive and becomes a delay in getting a proper diagnosis. Identifying that point matters — both for the machine's long-term condition and for avoiding the frustration of running the same cleaning cycles without improvement. Contact an appliance technician when:Persistent odour remains after the full deep clean sequence — drain filter, gasket, drawer, and drum clean all addressed — with no meaningful improvement. A sewage-type smell in particular usually indicates a drain or venting issue that cleaning products cannot resolve. Visible mold appears inside the drum body or behind drum paddles, rather than only on the door seal. Surface gasket mold is a maintenance issue. Mold inside the drum casing is a structural contamination problem. The machine is not heating water despite correct cycle selection. This indicates a thermostat or heating element failure — not a cleaning issue. Water remains standing in the drum after cycle completion. Incomplete drainage indicates a pump or filter blockage beyond what a standard filter clean addresses. The door gasket shows active deterioration — tears, permanent deformation, or discoloration that cleaning does not address. A compromised gasket cannot be cleaned back to function; it needs replacement before the damage extends to surrounding components. Biofilm recurs within two weeks of a thorough drum clean. Rapid recurrence suggests either the thermostat is not reaching effective cleaning temperatures, or a contamination source the clean didn't reach — both of which warrant professional diagnosis.Cost context: A service call in the UK typically runs £60–120 for a diagnostic and basic repair. In the US, expect $100–200 depending on location and the issue. That cost is worth weighing against the alternatives — continued ineffective washing, potential gasket replacement from prolonged mold damage, and bedding that needs replacing because years of residue accumulation have made it unrestorable through strip washing.Frequently Asked Questions Why do my bed sheets still smell after I wash them every week? Persistent sheet odour after regular washing almost always points to one of three causes: a drum contaminated with biofilm recirculating bacteria-laden water through each cycle; wash temperatures too low to dissolve body oils and break down biological buildup in the fabric; or residue accumulation in the sheet fibers from excess detergent or fabric softener. The most effective reset is a full drum deep clean followed by washing bedding consistently at 60°C — not the warm or cool settings most people use by default.What is biofilm in a washing machine and how is it different from mold? Mold is a visible fungal growth, typically black or dark green, that develops on surfaces exposed to chronic moisture — most commonly in the door seal fold. Biofilm is an invisible bacterial colony that produces a protective polysaccharide gel matrix around itself. That matrix resists standard detergent, survives moderate-temperature wash cycles, and cannot be wiped away like surface mold. Breaking it requires sustained heat above 60°C combined with an oxidizing cleaning agent. Running a warm cycle with a tablet is not sufficient.Why did my sheets turn the bathwater grey-brown if they came out of the machine looking clean? The discoloration is the machine cycle's limitations made visible. The water released body oils, perspiration salts, mineral deposits, surfactant residue from detergent buildup, and biological debris that had accumulated in the fiber structure across multiple washes. The machine completed its cycle successfully — it just couldn't achieve full fiber penetration for a large item in drum washing conditions. The grey-brown water is not a personal hygiene failure. It is a physics outcome.Is it safe to soak laundry in dishwasher detergent? Dishwasher detergent is formulated for hard, non-porous surfaces and contains alkalinity levels and enzyme types not appropriate for textile fibers. It can cause fiber degradation in delicates, discoloration in dyed fabrics, and skin irritation from residue that remains in the weave after rinsing. It produces a visually similar result to a proper strip wash because the broad mechanism — breaking down residue bonds — overlaps. But for fabric-safe results, use washing soda, borax substitute, and powdered laundry detergent in hot water instead.What is strip washing and does it actually work? Strip washing is a hot water soaking method that uses a high-alkalinity solution — washing soda, borax substitute, and powdered laundry detergent — to break down accumulated residue, body oils, mineral deposits, and surfactant buildup in fabric fibers. The water discoloration during the soak is evidence of that residue releasing from the fabric. It works — but it's a periodic deep reset, not a substitute for correct regular washing practices. Most people find they only need it after a prolonged period of low-temperature washing, heavy detergent use, or both.How often should I run a drum clean cycle? Monthly is the standard recommendation from appliance manufacturers and maintenance guidance. Households that wash frequently, live in hard water areas, or use predominantly low-temperature cycles benefit from running a drum clean every two to three weeks. The minimum to consistently prevent biofilm re-establishment is once a month at 60°C or above with an appropriate cleaning agent.Why does my washing machine still smell after I used a drum cleaning tablet? Drum cleaning tablets primarily address the drum interior. They don't typically reach the drain filter, the detergent drawer siphon tube, or the door gasket fold — which are frequently the primary contamination sources for persistent odour. If a tablet hasn't resolved the smell after two or three cycles, the next step is cleaning those components, starting with the drain filter. On older machines, thermostat drift may also mean the drum clean cycle isn't reaching the temperature the tablet needs to be effective.Can using too much laundry detergent actually make laundry dirtier over time? Yes. Excess detergent that doesn't fully rinse from fabric fibers leaves a hygroscopic, adhesive residue that attracts body oils, bacteria, and mineral deposits and binds them into the fiber structure. Laundry washed this way appears visually clean but carries a progressively increasing soil load embedded in residue that each subsequent cycle can't fully reach. Using the correct dose — or less than instinct suggests, particularly in an HE machine — is part of breaking the cycle.What temperature do I need to wash sheets to kill bacteria and dust mites? 60°C (140°F) is the minimum temperature consistently cited in public health and allergy guidance for killing common laundry bacteria and dust mites in bedding. A wash at 90°C provides a deeper sanitizing effect and is appropriate for white cottons and heavily contaminated items. Cold and warm washes (20–40°C) are not effective for hygiene washing of bedding regardless of the detergent used.Why are my towels getting rougher and less absorbent even though I wash them regularly? Fabric softener is almost always the cause. Softener works by coating fabric fibers with a silicone or ester-based film that makes textiles feel smooth. On towels, that film progressively blocks the fiber structure responsible for absorbency. The towels feel softer initially but become progressively less functional over time. The fix is to stop using fabric softener on towels entirely and run two or three hot wash cycles with a cup of white distilled vinegar in place of softener to help strip the accumulated coating.Where is the dirtiest part of a front-load washing machine that most people never clean? The drain filter. The door seal fold is the most visibly dirty component — but the drain filter, behind the access panel at the base of the machine, accumulates lint, hair, debris, and stagnant water from every cycle. Because it's out of sight and requires a small amount of effort to access, most homeowners never touch it. It also has a more direct impact on drum odour than almost any other component, because the water it holds re-enters the system with each subsequent wash.How do I clean a washing machine drain filter and how often? Place a towel under the access panel before opening the cap — water will drain out. Open the cap slowly, let the water drain into the towel or a shallow tray, pull out the filter, remove all debris, rinse under a tap, and reinstall. Every three months is the recommended frequency for a regularly used machine. If the machine has a persistent odour that drum clean cycles haven't resolved, cleaning the drain filter is the first diagnostic step to take.Why does my laundry smell fine when wet but turn stale within hours of drying? This almost always points to mold in the door seal or detergent drawer rather than a problem embedded in the fabric itself. Mold releases volatile compounds into the air as laundry dries and warms. The smell is intermittent because it's temperature and humidity dependent — which is why it typically emerges as sheets warm against skin overnight or towels warm during use after a shower. A thorough door seal and drawer clean, combined with leaving the door open after every wash, usually resolves it.Does fabric softener cause long-term problems in towels and bed linen? For towels, it progressively reduces absorbency through fiber coating — described above. For bed linen, the film deposited on fibers acts as an adhesive layer that traps body oils and residue more effectively than uncoated cotton. Households that stop using fabric softener on bedding typically find that sheets stay fresher between washes and respond more effectively to hot wash cycles. It's not a necessary laundry product for most uses, and its long-term trade-offs — fiber coating, residue trapping — routinely outweigh the initial softness benefit.How do I know when my washing machine needs a technician instead of another cleaning cycle? The clearest indicators are: persistent odour after completing the full deep clean sequence across all five contamination points; visible mold inside the drum body rather than only on the seal; the machine not heating water despite correct cycle selection; water remaining in the drum after a completed cycle; or active door gasket deterioration that cleaning does not improve. Any of these points to a mechanical or structural issue that cleaning products cannot address — and continuing to run the machine without diagnosis risks worsening the underlying problem. Related Reading:Smart Toilet Guide: Real Features, Honest Costs & Everything That Changes After You Install One Best Espresso Machines 2026: What 725 Reddit Posts Actually Say 16 Easy Home Improvement Ideas You Can Actually Finish This Weekend

Top 10 Most Common Renovation Mistakes (And What They Actually Cost You)
Quick Answer: The most common renovation mistakes include skipping building permits, removing walls without confirming load paths, underestimating total project costs, choosing finishes before final measurements are locked in, booking tradespeople out of sequence, neglecting moisture barriers, skipping surface prep, ignoring manufacturer installation requirements, making design changes mid-project, and disturbing hazardous materials without proper testing. Each one can trigger expensive rework, failed inspections, or damage that compounds silently for years.Quick TakeawaysUnpermitted work attaches to the property, not the owner — it becomes your problem at resale Budget at least 15–20% above your base estimate; older homes (pre-1980) warrant the full 20% Always confirm load-bearing status before demolition — visual checks are a starting point, not a verdict Trade sequence is non-negotiable: rough-in before insulation, insulation before drywall, tile before fixtures Moisture errors don't announce themselves — they show up years later as mold, rot, and tile failure A mid-project design change can cost 3–5× more than the same change made on paper before work beginsWhy Renovation Mistakes Cost More to Fix Than to PreventThere's a version of renovation planning that feels productive — scrolling through tile options, saving kitchen layouts, comparing countertop finishes. And then there's the version that actually protects your budget: checking structural drawings, pulling permits, sequencing trades correctly. Most homeowners spend most of their time on the first version. The frustrating reality is that renovation mistakes rarely announce themselves. A skipped waterproof membrane behind shower tile doesn't fail during the first month. It fails 18 months later, when the grout starts cracking at the base and you pull a tile to find black mold eating into the cement board behind it. At that point, you're not fixing a caulking gap. You're gutting a shower. The math is unforgiving. Catching a moisture problem before tile installation costs almost nothing — some RedGard membrane and an afternoon. Catching it after means full demolition, disposal, substrate replacement, new tile, new waterproofing, and the labor to do all of it twice. Industry data from the Joint Center for Housing Studies consistently shows homeowners underestimate total renovation costs by 20–30%, and that gap isn't random. It's almost always driven by preventable mistakes compounding through every subsequent phase. The sections below cover the 12 mistakes that drive the most rework, the highest remediation costs, and the most frustration. Not surface-level warnings — real mechanisms, real cost consequences, and the specific thresholds that separate a minor correction from a full tear-out.1. Skipping Building Permits (And Why It Follows the Property, Not Just the Owner)This is the one mistake that genuinely keeps coming up at the worst possible time — not during the renovation, but years later, when you're trying to sell. Most homeowners who skip permits aren't acting recklessly. They're trying to avoid delays, reduce costs, or sidestep what feels like unnecessary bureaucracy. The problem is that unpermitted work doesn't disappear when the drywall goes up. It attaches to the property and surfaces in title searches, insurance claims, and mortgage appraisals. What Actually Happens at Resale In most US states, sellers are legally required to disclose known unpermitted work. Buyers' lenders and insurers will flag it. Depending on the jurisdiction, you may be required to retroactively permit the work (which means opening walls for inspection), demolish non-compliant structures, or accept a heavily discounted sale. The cost to retroactively permit and bring work up to code is almost always higher than the original permit would have been. Jurisdiction-Specific RisksCountry Key Risk What Can HappenUnited States Varies by state; most require disclosure at point of sale Retroactive permitting, buyer demands price reduction, lender refusalUnited Kingdom Building Regulations enforcement by Local Authority Building Control (LABC) Enforcement notice, Regularisation Certificate required, inability to sell without sign-offCanada (ON/BC/AB) Municipal bylaw enforcement varies; stricter in metro areas Work order, forced demolition of non-compliant additions, disclosure obligationAustralia CDC vs. Development Application pathways; PCA sign-off required Stop-work orders, NCAT disputes, inability to obtain occupation certificateWhat Typically Requires a PermitAny structural work (wall removal, additions, deck construction) Electrical panel upgrades, new circuits, service changes Plumbing drain or supply modifications HVAC system changes or new installations Waterproofing in wet areas (in some jurisdictions) Window and door rough opening enlargementsThe shortcut logic doesn't hold. Permit fees for a bathroom remodel in most US cities range from $150–$500. The cost to retroactively permit and repair non-compliant work discovered at resale routinely exceeds $10,000 — and that's before any price negotiation with buyers.2. Removing Walls Without Confirming Load PathOpen-plan layouts are consistently popular. And removing interior walls is one of the most satisfying moments in any renovation — until the ceiling sags three months later. The consequences of removing a load-bearing wall without proper structural support aren't always immediate. Sometimes the failure mode is dramatic (sagging rafters, cracked ceiling propagating outward from the opening). More often, it's slow: floor settlement, sticking doors, diagonal cracks appearing at window corners over the following year. How to Spot a Potentially Load-Bearing Wall (Preliminary Check Only) These are indicators — not conclusions:Wall runs perpendicular to floor joists — joists typically span the short dimension, and load-bearing walls run across them Wall sits directly above a basement beam — load paths transfer vertically through the structure Wall runs through the center of the house — center ridge walls and mid-span supports are almost always structural Wall has a doubled-up header above door openings — cosmetic partition walls don't need engineered headersNone of these checks replaces a structural engineer's assessment. What a structural engineer actually does is trace the full load path from roof to foundation, determine what transfer beam is required to replace the wall's function, specify the bearing points, and sign off on the design. For a standard load-bearing wall removal with a steel or LVL beam installation, expect to pay $500–$1,500 for the engineering assessment alone — before any construction. That fee is non-negotiable. No permit authority will approve the work without stamped structural drawings for anything beyond minor partition removal.Warning: Contractors who offer to remove walls without mentioning a structural engineer are a red flag. Either they've already assessed it as non-structural (ask them to show their work), or they're proceeding without verifying — which exposes you to the full liability.3. Budgeting for the Renovation You Expect, Not the One You'll Find Here's what almost never appears in a contractor's initial quote: the subfloor rot behind the bathroom tile, the knob-and-tube wiring inside the wall you're opening, the cast-iron drain stack that's partially collapsed inside the floor cavity. These aren't edge cases in older homes — they're routine discoveries. Initial quotes are priced against visible conditions. Once demolition begins and hidden conditions are revealed, the scope changes. This isn't contractor dishonesty (usually). It's the nature of working inside walls, under floors, and behind surfaces that no one has touched in decades. Recommended Contingency by Home Age and Project TypeProject Type Post-2000 Home 1980–2000 Home Pre-1980 HomeBathroom remodel 10% 15% 20%Kitchen remodel 10% 15–20% 20%Basement finishing 10–15% 15–20% 20–25%Full home renovation 15% 20% 20–25%Room addition 10% 15% 20%Why pre-1980 homes warrant the higher end:Asbestos in floor tiles, ceiling tiles, pipe insulation, textured coatings Knob-and-tube or aluminum wiring requiring full replacement Cast-iron drain plumbing with partial corrosion or collapse Structural surprises — headers undersized by modern code, notched joists, non-standard framing dimensions Lead paint on all painted surfaces requiring encapsulation or removalA 10% contingency sounds responsible. On a pre-1980 kitchen remodel, it's often gone before the cabinets are ordered. Budget for the home you have, not the one the listing photos suggested.4. Selecting Materials Before You Know Your Real Numbers It's easy to understand why this happens. The inspiration phase is genuinely exciting. Homeowners spend weeks selecting tiles, hardware, and countertop slabs — sometimes before a contractor has measured the space, before permits are confirmed, and well before a realistic budget has been established. The problems that follow are predictable. Over-ordering and under-ordering. Material estimates based on approximate room sizes rather than confirmed measurements can be off by 10–15%. That sounds like a rounding error until you realize you've ordered 200 sq ft of a discontinued porcelain tile and need 240. Finding matching stock six months into a renovation is often impossible. Discontinued products. Renovation timelines slip. Lead times extend. A tile selected four months before installation may be out of stock or discontinued by the time the substrate is ready. Material selection should happen close to the order date, not at the beginning of the planning process. Budget creep at the wrong stage. Selecting high-end finishes before a confirmed budget is set creates a psychological anchor that's hard to walk back. Once a homeowner has decided on a specific stone countertop, substituting a laminate alternative mid-project feels like a failure rather than a rational decision. The correct sequence: Confirm final measurements → Establish confirmed budget → Get contractor quotes → Select materials within confirmed budget → Order with confirmed delivery timeline. Reversing steps one and two — which most homeowners do — is how renovation budgets quietly double before construction begins.5. Booking Tradespeople Out of Order This is the sequencing mistake that creates the most visible chaos on a job site. Tradespeople arrive in the wrong order, work gets undone, and delays compound through every subsequent phase. The standard renovation sequence exists for good reason. Each phase creates the conditions that make the next phase possible. When steps are reordered, you don't save time — you create rework. Standard Trade Sequence for a Full RenovationDemolition — remove existing finishes, expose structure Structural work — beam installation, wall framing, joist repairs Rough-in plumbing — drain, waste, vent stack modifications Rough-in electrical — panel, new circuits, rough wiring HVAC rough-in — ductwork, mechanical penetrations Rough-in inspections — all rough trades must pass before proceeding Insulation — only after rough-ins are approved Drywall — boarding, taping, finishing Tile and waterproofing — wet areas only Cabinetry installation — kitchen and bathroom Trim and millwork — doors, baseboards, casing Painting Flooring — after painting to avoid finish damage Fixtures and appliances — plumbing fixtures, lighting, hardware Punch list — final corrections and touch-upsThe Three Most Commonly Disordered Trades HVAC before insulation. This one gets skipped constantly. Insulation installed before ductwork and electrical rough-in is inspected either needs to be removed or conceals uninspected work. Both outcomes cost money. Flooring before painting. Paint splatter on new hardwood or LVT is not a minor inconvenience. It requires refinishing or replacement in the affected areas. Flooring goes in last, after all overhead work is complete. Cabinetry before appliance specs are confirmed. Cabinet openings cut to standard appliance dimensions are fine — until the client upgrades to a non-standard range or refrigerator with a different cutout. This error alone triggers cabinet replacement or custom filler panels that cost several hundred dollars per unit.6. Moisture Control Errors That Hide Behind Walls for YearsAsk any experienced tile setter about the worst jobs they've walked into, and moisture failure will come up every time. Not because homeowners are careless — but because moisture problems are invisible right up until the moment they're catastrophic. The mechanism is consistent: inadequate waterproofing allows water to pass through tile grout and penetrate the substrate. In shower enclosures, that substrate is typically cement board — which, despite its name, will absorb moisture and deteriorate over time without a proper membrane. The moisture reaches the wall framing. The framing stays wet. Mold grows. The tile begins to flex, grout cracks, and eventually tiles debond. By that point, the repair is a full shower demolition. Wet Area Moisture Control Checklist Shower enclosures:Waterproof membrane applied to all walls (Schluter Kerdi, RedGard, or equivalent) Membrane extends minimum 6" beyond wet zone on all sides Shower floor pre-sloped to drain at 1/4" per foot minimum Linear or center drain system fully waterproofed before tile Niche recesses fully waterproofed — often missed Seams and corners reinforced with membrane tapeBathroom floors:Moisture meter reading below 19% in subfloor before any flooring installation Vapor barrier specified for slab-on-grade installations Appropriate uncoupling membrane (e.g., Schluter Ditra) for tile over wood subfloorKitchen backsplash:Cement board or equivalent substrate behind tile at sink area Caulk (not grout) at tile-to-countertop transition — grout cracks; silicone flexesExterior wall assemblies:Proper flashing tape at all window and door rough openings WRB (weather-resistant barrier) installed correctly — lapped shingle-style, not reversed No penetrations left unsealedThe 19% threshold: A moisture meter reading above 19% in wood subfloor before flooring installation is a documented failure predictor. Most flooring manufacturer warranties specify a maximum moisture content — typically 12–19% depending on species and format — and installation above that threshold voids the warranty regardless of how well the floor is installed.7. What Happens When You Skip Surface Prep Surface preparation is unglamorous. It's also the single most common reason finishes fail prematurely — peeling paint, debonding tile, hollow-sounding LVT, hardwood floors that squeak within a year of installation. The mechanism varies by material but the principle is the same: adhesion requires a clean, stable, appropriately profiled substrate. When that substrate is glossy, dusty, contaminated with wax or oil, or structurally unstable, even a perfectly applied finish will fail. Surface Prep vs. Failure Outcome by MaterialMaterial Commonly Skipped Prep Resulting FailureInterior paint Priming new drywall or bare wood Bleed-through, uneven sheen, adhesion failureCeramic/porcelain tile Cleaning and profiling substrate, checking flatness Hollow spots, debonding, grout crackingLVT/LVP flooring Filling subfloor low spots, checking for deflection Floor bounce, locking joint failure, adhesion lossHardwood flooring Acclimation, moisture testing, subfloor flatness check Cupping, gapping, squeaking, structural failureExterior cladding Priming cut ends, back-priming boards End-grain moisture absorption, paint failure, rotTile on plywood Installing cement board or uncoupling membrane Tile flex, cracked grout, debondingThe flatness tolerance issue is particularly underestimated with large-format tile. A floor that looks flat to the eye can have variation of 3–5mm over a 3m span — well beyond the 3mm in 3m tolerance required for 60×60cm tile installation. Without grinding high spots and filling low spots, lippage (tiles sitting at different heights) is inevitable. It looks unprofessional and creates trip hazards that tile setters will refuse to warranty.8. Voiding Your Product Warranty Without Knowing It This is the information gap that surprises homeowners most, because they don't discover it until after installation — often years after, when they're trying to make a warranty claim. Most product warranties for flooring, tile, and cabinetry contain specific installation prerequisites. Meeting those prerequisites isn't just good practice — it's the condition under which the warranty is valid. Deviate from them, even slightly, and the manufacturer has grounds to deny any claim regardless of the defect's cause. Commonly Missed Warranty Requirements Engineered and solid hardwood flooring:Acclimation period: typically 3–5 days in the installation environment at final temperature and humidity Subfloor flatness: usually 3/16" in 10 feet; some manufacturers specify 3/16" in 6 feet Moisture content: subfloor within 4% of flooring moisture content at time of installation Expansion gap: minimum 1/2" at all walls, posts, and fixed objects — often omitted by installers rushing through the perimeterLarge-format porcelain tile (60cm+ per side):Movement joints required at all changes in plane, perimeter walls, and typically every 20–25 feet of field tile These are not cosmetic — they accommodate thermal expansion and substrate movement Grouting wall-to-floor corners solid (instead of caulking) consistently voids warranties and causes crackingLVT/LVP (Luxury Vinyl Tile/Plank):Subfloor flatness typically specified as 3/16" in 10 feet — stricter than most installers check Temperature range requirements during installation (some products require 65–85°F) Subfloor must be structurally sound — floating LVT over a springy subfloor voids warranty and causes locking joint failureCabinetry:Wall mounting requirements specify stud spacing and fastener type — cabinets mounted with drywall anchors alone void manufacturer warranties Leveling requirements affect door alignment warrantiesBefore installation begins, read the installation guide. Not the summary sheet — the full technical document. One missed requirement can void a warranty worth thousands of dollars.9. How Mid-Project Changes Multiply CostsEvery experienced contractor has a version of the same story: a client who asks, mid-project, to move a window by 600mm. The change sounds trivial. The invoice is not. Mid-project design changes are expensive for reasons that aren't immediately obvious. They don't just cost the price of the new work — they cost the labor to undo work already completed, the re-mobilization fees charged by subcontractors when they're called back to a site, the materials that can't be returned because they were already cut, and the delay ripple that pushes every subsequent trade back by days or weeks. Why Change Order Costs Are Disproportionate A change order is a formal modification to a signed contract after work has begun. The pricing logic is different from original contract work:Completed work may need partial demolition — a moved window means framing already installed is partially removed Materials may be non-returnable — cut lumber, pre-ordered tile batches, cabinets built to spec Subcontractor re-mobilization fees — tradespeople charge to return to a site after they've demobilized; fees of $300–$800 per trade per return visit are common Schedule compression — if the change delays one trade, it delays all subsequent trades, some of whom may charge for lost scheduling time Changed scope is not tendered competitively — you're negotiating with the contractor already on site, not selecting from multiple quotesThe industry estimate is that the same design change made mid-construction costs 3–5× more than it would have cost if resolved on paper before work began. A window relocation that costs $800 in the design phase may cost $3,500–$4,000 mid-project. The practical implication: Complete all design decisions before demolition begins. Walk through every room, every surface, every appliance specification, every outlet location. It feels overcautious. It pays for itself every time.10. Renovation Hazards You Cannot See: Asbestos and Lead Paint This section has a clear, hard rule that no amount of DIY enthusiasm changes: if your home was built before 1980, test before you disturb anything. Asbestos-containing materials were used extensively through the late 1970s in insulation (pipe lagging, ceiling insulation batts), floor tiles (9×9" vinyl composition tile is a known indicator), ceiling tiles, textured coatings (artex, popcorn ceilings), and joint compound. Lead paint was standard on virtually all painted surfaces in homes built before 1978 in the US. Neither material is dangerous when intact and undisturbed. Both become significant health hazards when cut, sanded, drilled, or demolished — activities that are inherent to renovation. Jurisdiction-Specific RequirementsCountry Asbestos Testing Requirement Lead Paint RequirementUnited States EPA requires contractors to follow NESHAP; homeowners legally may do their own work but assume full liability; testing strongly recommended EPA RRP Rule requires certified renovators for pre-1978 homes when disturbing 6+ sq ft of painted surfaceUnited Kingdom HSE duty to manage asbestos in commercial properties; domestic: testing recommended, legal obligation if you're a landlord No legal requirement for testing in residential owner-occupied homes, but contractor obligations existCanada Provincial variation; most provinces prohibit disturbance without testing in commercial; residential owner-builder rules vary No federal mandate; provincial health authorities recommend testing for pre-1960 homesAustralia Strict regulations on friable asbestos removal; non-friable limited to 10m² DIY; licensed removalist required above threshold No national mandate for residential, but awareness campaigns are active in most statesHard stop: If testing confirms asbestos-containing materials in the disturbance zone, stop work. Encapsulation or removal must be performed by a licensed asbestos contractor. This is not a judgment call about risk tolerance. The remediation cost for improper asbestos disturbance in a residential setting regularly exceeds $20,000 — and that doesn't include any regulatory penalties.11. Electrical and Plumbing Work That Requires a Licensed Trades personThe logic that leads homeowners to attempt unlicensed electrical and plumbing work is usually the same: the work looks manageable, the licensed professional costs more, and nothing visibly goes wrong immediately. The problem is that "nothing visibly goes wrong" is not the same as "nothing went wrong." Improperly installed electrical circuits don't fail immediately. They fail when load changes, connections loosen, or insulation deteriorates — sometimes years later. And when they do, the insurance claim for fire damage can be denied if the investigation reveals unlicensed work. DIY vs. Licensed Trade by Task and JurisdictionTask USA UK Canada AustraliaPainting, drywall, tiling DIY OK DIY OK DIY OK DIY OKReplacing light fixtures (like-for-like) DIY OK (with circuit off) Notifiable in Scotland; DIY in E&W with conditions DIY OK in most provinces Licensed required in most statesNew electrical circuits Permit + inspection required; homeowner may pull own permit in most states Part P certified electrician required (or self-certification scheme) Licensed electrician required Licensed electrician requiredPanel/service upgrades Licensed electrician required Licensed electrician required Licensed electrician required Licensed electrician requiredReplacing tap/faucet DIY OK DIY OK DIY OK DIY OK in most statesModifying drain/DWV Licensed plumber required in most jurisdictions Licensed plumber required Licensed plumber required Licensed plumber requiredGas line work Licensed gasfitter required everywhere Gas Safe registered engineer required Licensed gasfitter required Licensed gasfitter requiredStructural wall removal Engineer + permit required Building Regs application required Engineer + permit required Engineer + permit requiredOn insurance implications: Work performed by an unlicensed tradesperson on insured systems (electrical, plumbing, gas) can void coverage for related claims. An insurer investigating a kitchen fire will ask whether the wiring was done by a licensed electrician. If it wasn't, the claim for fire damage may be denied — entirely legally. How to Verify a Contractor's License and InsuranceUS: Verify license number through your state contractor licensing board (search "[state] contractor license lookup") UK: Electrical — NICEIC or NAPIT register; Gas — Gas Safe register; Plumbing — WaterSafe approved contractor Canada: Provincial trade licensing bodies; ECRA in Ontario for electrical Australia: Fair Trading in NSW/QLD; Consumer Affairs in VIC; check Licence Check portalAlways request a certificate of insurance directly from the insurer — not a summary document from the contractor.Full Renovation Mistake Reference Tables Cost Contingency SummaryHome Age Minimum Contingency Realistic Contingency Common Hidden CostsPost-2000 10% 10–15% Minor code variances, material waste1980–2000 12–15% 15% Aluminum wiring, HVAC updates, subfloor issuesPre-1980 15–20% 20–25% Asbestos, lead, knob-and-tube, cast iron plumbing, structural surprisesRemediation Cost Ranges: Catching It Before vs. AfterMistake Caught Before Finish Caught After Finish Cost MultiplierNo waterproof membrane in shower ~$200–400 (materials + labour) $3,000–8,000 (full demo + rebuild) 10–20×Incorrect subfloor flatness under LVT $300–600 (grinding + levelling) $1,500–3,500 (floor removal + correction) 4–6×Non-structural wall treated as load-bearing $0 $8,000–25,000 (structural repair + drywall) UncappedUnpermitted electrical $150–500 (permit fee) $5,000–15,000 (open walls, inspection, repair) 15–30×Paint over unprimed new drywall $80–150 (primer + time) $600–1,200 (sand, re-prime, re-paint) 5–8×FAQ What is the most expensive renovation mistake to fix after the fact? Structural errors and moisture control failures share the top position. Improper load-bearing wall removal can require full structural remediation including beam installation, joist sistering, and full interior finish replacement — costs that routinely exceed $25,000. Moisture failure behind shower tile requires complete demolition of the finished shower, which in a mid-range bathroom typically runs $3,000–$8,000 just to get back to square one. Can I renovate without a permit if I'm doing the work myself? Permit requirements apply based on the scope of work, not who performs it. In most jurisdictions, owner-builders are permitted to pull their own permits and perform their own work — but the work is still subject to inspection and must meet code. "I did it myself" is not a permit exemption anywhere. How do I know if a wall is load-bearing before I remove it? Preliminary indicators include perpendicular orientation to floor joists, position directly above a basement beam, and location along the center ridge of the house. These are starting points only. Confirmation requires a structural engineer who can trace the full load path. A visual check is never a substitute for an engineering assessment. What is a realistic contingency budget for a renovation? For homes built after 2000, 10–15%. For 1980–2000 homes, 15%. For pre-1980 homes, 20–25%. These figures reflect the consistent pattern of hidden conditions driving cost overruns — not pessimism. The 10% figure most contractors suggest is inadequate for any property with age-related risk factors. What happens if unpermitted work is discovered when I sell my home? Depending on jurisdiction: mandatory disclosure to the buyer, requirement to retroactively permit and bring work up to code, possible requirement to demolish non-compliant structures. Costs for retroactive permitting and repair typically far exceed the original permit cost. Buyers and their lenders are increasingly sophisticated about spotting unpermitted work in title searches. Can poor tile installation cause mold? Yes, directly. Inadequate waterproofing in wet areas allows moisture to penetrate through grout joints into the substrate. Without a waterproof membrane, moisture reaches framing lumber, where it creates conditions for mold growth, structural rot, and eventual tile debonding. The mold typically grows invisibly for 12–24 months before surface signs appear. Why is the final renovation cost almost always higher than the original quote? Because quotes are based on visible conditions. Hidden issues — rotted subfloor, outdated wiring, collapsed cast-iron plumbing — are discovered only after demolition reveals them. These are not errors in the original quote; they're genuinely unknowable until walls and floors are opened. The contingency budget exists precisely to absorb these discoveries. What trades require a licensed professional in a renovation? In most jurisdictions: electrical panel and circuit work, plumbing drain and supply modifications, HVAC system changes, and gas line work. Requirements vary by country, state, and province. Some jurisdictions also require permits and inspections for structural work, waterproofing, and window/door rough opening modifications. When in doubt, check with your local building department before starting. What is scope creep and how does it affect renovation budgets? Scope creep is the progressive expansion of a project beyond its original definition — usually through small additions or changes that each seem minor. "While you're in there, can you also..." is the phrase that triggers it. Each addition is priced as a change order, where costs are disproportionate to the apparent size of the change. Projects with significant scope creep routinely run 30–50% over original budget. Does skipping primer before painting count as a renovation mistake? Yes — especially on new drywall, bare wood, and previously glossy surfaces. New drywall is highly porous and will absorb topcoat unevenly without primer, resulting in flashing (areas of uneven sheen that show through the finished coat). On glossy surfaces, adhesion without primer is poor — paint peels within months of application in high-wear areas. How common is asbestos in homes built before 1980? Extremely common. Asbestos-containing materials were used in floor tiles, ceiling tiles, pipe lagging, insulation batts, textured coatings, and joint compound from the early 1900s through the late 1970s. In homes built between 1940 and 1978, multiple asbestos-containing materials are likely present. Testing before any disturbance is the only way to know what you're working with. What is a change order and why does it cost more than expected? A change order is a formal amendment to a construction contract after work has begun. Costs are elevated because work already completed may need to be partially undone, materials may be non-returnable, and subcontractors charge re-mobilization fees when recalled to site. The same modification costs 3–5× more mid-project than it would have cost as a design decision made before construction started. Is it a mistake to start renovation work before all materials arrive on-site? For most projects, yes. Starting demolition before materials are confirmed and delivery is scheduled creates extended exposure periods — open subfloors, unprotected framing — that invite moisture infiltration, debris contamination, and material damage. It also creates timeline dependency on supplier lead times that are frequently longer than expected. Can a renovation mistake affect my home insurance coverage? Yes. Unpermitted structural or electrical work can void coverage for related claims. Work performed by unlicensed contractors on insured systems (electrical, plumbing, gas) may also provide grounds for claim denial following a related loss event. Insurers investigate the cause of losses — and documentation of permit compliance and licensed contractor work is relevant to that investigation.All cost ranges are approximate and vary by location, project complexity, and market conditions. Permit requirements, licensing obligations, and regulatory frameworks vary by country, state, and municipality. Consult a licensed contractor, structural engineer, or building department for advice specific to your project.

Best Espresso Machines 2026: What 725 Reddit Posts Actually Say
Most "best espresso machine" lists share a structural problem: they're written by people incentivized to sell you something. The machines that rank highest tend to have the best affiliate commissions, not the most satisfied owners. This analysis works differently. It's built from 725 Reddit posts published between March 2025 and March 2026, sourced from r/espresso, r/gaggiaclassic, r/coffee, and r/coffeeequipment. Every machine was scored using the Wilson Score confidence interval — the same methodology behind Reddit's own "Best" comment sort, Steam's game ratings, and Amazon's trusted review rankings. The result is the most grounded picture of espresso machine community sentiment available for 2026. And some of what the data shows will surprise you.Quick Summary In 40 words: Based on 725 Reddit posts from March 2025–2026, the Breville Bambino Plus leads overall with 535 positive mentions at 77% approval. The Cafelat Robot Series leads in approval rate at 93%. The right machine depends entirely on how you actually drink coffee. Key Takeaways Before You Read FurtherThe Bambino Plus ranks #1 overall — but carries a 23% negative rate among straight espresso purists and a 32% negative rate for hosting. Neither figure appears in standard affiliate review content. The Cafelat Robot ($584) achieves 93% overall approval with near-zero negatives — exceptional performance for its price tier. The Gaggia Classic Pro E24 leads tinkering with 144 positive mentions — 2.4× its nearest competitor — driven almost entirely by Gaggiuino mod compatibility. The Flair 58 Series achieves the highest categorical satisfaction in the dataset: 97% for espresso purists, 95% for light roast enthusiasts. The Decent DE1PRO scores 100% approval in tinkering and light roast — but is currently unavailable for purchase. A dead purchase journey for many readers. The DeLonghi Eletta Explore ($1,399) reaches 96–97% approval in automation categories — the highest fully-automatic satisfaction recorded in the dataset. The La Marzocco Linea Mini at $6,600 barely enters the top 15 overall. The Bambino Plus at $249 ranks first. Price and satisfaction do not move together in this category the way marketing suggests.How This Data Was Collected — and What the Rankings Actually Mean Before any recommendations, the methodology deserves a plain explanation.Data Point DetailData period March 2025 – March 2026Posts analyzed 725Primary sources r/espresso, r/gaggiaclassic, r/coffee, r/coffeeequipmentDeduplication rule Each unique user's mention counted once per machineMention classification Positive / negative / mixed, based on expressed owner sentimentRanking methodology Wilson Score confidence interval + net positive volumeThe Wilson Score matters because it adjusts for sample size. A machine with one glowing five-star mention cannot rank above one with hundreds of consistent owner endorsements. The formula penalizes low-volume data and rewards repeated, reliable community approval — which is exactly what a considered purchase decision needs. What this is not: Controlled laboratory testing. These rankings reflect real owner discussions. They capture genuine satisfaction and frustration in conditions that match actual home use. Community consensus from thousands of real owners often predicts long-term satisfaction more reliably than isolated lab tests — but it reflects the Reddit espresso community specifically, which skews toward engaged, equipment-aware buyers rather than completely casual users. One key limitation: A machine with exceptional performance but low community visibility (a newer model, a niche brand) may be underrepresented. Rankings require both approval quality and mention volume. The Wilson Score handles this, but very new machines with limited post history haven't had time to accumulate evidence.Which Type of Espresso Drinker Are You? The most common purchase mistake in this category is picking the #1 overall machine without checking whether it actually suits how you drink coffee. The data separates cleanly into eight distinct use cases. Jump directly to yours.Your Priority Skip to SectionWant to mod, tinker, and upgrade your machine Tinkering & ModdingGood espresso with minimal daily effort Minimal Effort BrewingCoffee in hand within 5 minutes of waking up Fast Morning WorkflowsMostly lattes, cappuccinos, flat whites Milk-Based DrinksServe multiple guests back-to-back Hosting & EntertainingStraight espresso, no milk, quality is everything Straight Espresso PuristsSingle-origin beans, light roasts, specialty coffee Light Roast & Specialty CoffeeReddit's Top 15 Espresso Machines in 2026: All Use Cases Combined {#overall} This is the complete picture — every machine scored across all use cases.Rank Machine Brand Est. Price Pos. Mentions Approval Rate Strongest Category1 Bambino Plus Breville $249+ 535 77% Milk drinks, minimal effort, fast mornings2 Cafelat Robot Series Cafelat $584+ ~105 93% Espresso purists, light roast3 Gaggia Classic Pro E24 Gaggia $454+ 144 (tinkering) 88% Tinkering, modding, espresso purists4 Flair 58 Series Flair Espresso $464+ High 97% (purist) Straight espresso, light roast5 Linea Micra La Marzocco $4,500+ Significant 95%+ Milk drinks, fast mornings6 Eletta Explore DeLonghi $1,399+ High 96–97% Minimal effort, fast mornings7 ECM Synchronika II ECM $3,599+ Moderate 96% Hosting, entertaining8 Barista Express Impress Breville $649+ High 82% (varies) All-in-one entry, milk drinks9 Profitec GO Profitec $599+ Moderate 94% Straight espresso10 Magnifica Plus DeLonghi $799+ High 93% Minimal effort, automation11 Rancilio Silvia Pro X Rancilio $1,699+ Moderate High Prosumer milk & espresso12 Lelit Bianca Lelit $2,299+ Moderate 95% (light roast) Light roast, hosting13 Breville Dual Boiler Breville $1,399+ Moderate High Hosting, milk drinks14 Bambino Breville $249+ High Good Entry milk drinks15 Flair NEO Flex Flair Espresso $139+ Moderate Good Entry-level manual leverHow to read this table: Volume and approval rate tell different stories. The Bambino Plus' 535 positive mentions signal broad reliability across a wide range of buyers and use cases. The Cafelat Robot's 93% approval reflects near-universal satisfaction among a more self-selecting, experienced audience. Both signals are valid — they describe different buyer profiles. Neither machine is the "best" without knowing which profile you belong to.Use-Case Matrix: Which Machines Appear in Each Category's Top 5?Machine Tinkering Minimal Effort Fast Morning Milk Drinks Hosting Espresso Purist Light RoastBreville Bambino Plus — ✓ ✓ ✓ △ △ —Cafelat Robot Series — — — — — ✓ ✓Gaggia Classic Pro E24 ✓ — — — — ✓ ✓Flair 58 Series — — — — — ✓ ✓La Marzocco Linea Micra — — ✓ ✓ ✓ — —DeLonghi Eletta Explore — ✓ ✓ — — — —ECM Synchronika II — — — ✓ ✓ — —Breville Dual Boiler — — — ✓ ✓ — —Lelit Bianca — — — — ✓ — ✓Profitec GO — — — — — ✓ —DeLonghi Magnifica Plus — ✓ ✓ — — — —Rancilio Silvia Pro X — — — — ✓ — —Key: ✓ = Ranked top 5 in category | △ = Ranked top 5 but carries notable negative rate | — = Not in top 5 for this categoryBest Espresso Machines for Tinkering and Modding: Gaggia Classic Pro E24 Leads by a Wide Margin {#tinkering} The Reddit modding community doesn't just discuss machines — they build them. And the Gaggia Classic Pro E24 leads this category by a margin that makes the ranking almost unfair. Top 5 — Tinkering & ModdingRank Machine Est. Price Positive Mentions Approval Rate1 Gaggia Classic Pro E24 $454+ 144 88%2 Gaggia Classic Evo Pro $599+ — High3 Flair 58 Series $464+ — High4 Rancilio Silvia $649+ — Moderate5 Decent DE1PRO Unavailable — 100%⚠️ Availability notice: The Decent DE1PRO achieves 100% approval in this category but is currently unavailable for purchase. Do not make a purchasing decision based on this ranking until availability is confirmed with the manufacturer.Why the Gaggia Classic Pro E24 Dominates It starts with the Gaggiuino. This is an open-source, Arduino-based modification that adds pressure profiling, flow control, and real-time temperature management to the Gaggia Classic platform — features typically found only on machines costing $2,000–$4,000+. The Gaggiuino project has an active development community, detailed installation documentation, tested firmware, and a support ecosystem that treats the machine as a long-term hardware platform. The E24 variant supports this modification with accessible internals, a compatible group head design, and a standardized 58mm portafilter that accepts a wide range of aftermarket components. The over-pressure valve (OPV) is accessible for pressure adjustment without major disassembly. Replacement parts are widely available. None of this is accidental — the machine became a modding platform because of consistent community investment in it. The 144 positive mentions at 2.4× the nearest tinkering competitor aren't just enthusiasm. They're evidence of a functional, documented upgrade pathway that delivers measurable results at a price most serious modders can justify. On the Evo Pro variant: The Gaggia Classic Evo Pro is a newer variant with some differences in internal component placement and electrical architecture compared to the E24. Gaggiuino compatibility for the Evo Pro is documented, but verify against the current open-source project documentation before purchasing — firmware compatibility sometimes lags new hardware releases by several months.Best Espresso Machines for Minimal Effort: Strong Results Without the Learning Curve {#minimal-effort} Not everyone wants to calibrate grind size at 6:30am. For buyers who want consistent espresso without a daily ritual, the data is clear. Top 5 — Minimal EffortRank Machine Est. Price Approval Rate Notes1 DeLonghi Eletta Explore $1,399+ 96–97% Highest fully-auto satisfaction in dataset2 Breville Bambino Plus $249+ 87% High volume, one-touch milk drinks3 DeLonghi Magnifica Plus $799+ 93% Strong fully-automatic4 DeLonghi Magnifica Evo Next $699+ Good Value fully-auto option5 Breville Barista Express Impress $649+ 82% 18% negative rate — see note⚠️ Barista Express Impress warning: This machine carries an 18% negative rate in the minimal effort category. The built-in grinder satisfies many buyers, but others find that daily grind calibration demands defeat the all-in-one convenience promise. It occupies an awkward middle ground — more effort than a one-touch machine, less effort than separate components — and that doesn't suit every buyer.Super-Automatic vs. One-Touch Semi-Automatic This is the real decision in this category. A super-automatic like the Eletta Explore handles grinding, tamping, brewing, and even milk texturing internally. Press a button, get coffee. There's no puck preparation, no portafilter, no manual intervention required. A semi-automatic like the Bambino Plus is simpler than a full espresso workflow, but it still requires a separate grinder, puck preparation, and some technique for consistent results. If your definition of "minimal effort" means genuinely no intervention, a fully-automatic machine is the honest choice. The Eletta Explore's 96–97% approval leads this category precisely because it delivers exactly what it promises. The Magnifica Plus at $799 performs similarly well at a lower price point if the Explore's feature set exceeds what you need.Best Espresso Machines for Fast Morning Routines: Heat-Up Time Matters More Than Peak Performance {#fast-morning} Heat-up time is the specification manufacturer marketing underplays and Reddit owners obsess over. If you need coffee in five minutes, a machine requiring 25 minutes to reach stable brewing temperature isn't fast — regardless of what else it does. Top 5 — Fast Morning WorkflowsRank Machine Est. Price Approval Rate1 Breville Bambino Plus $249+ 89%2 La Marzocco Linea Micra $4,500+ 95%+3 DeLonghi Eletta Explore $1,399+ 96%4 DeLonghi Magnifica Plus $799+ 93%5 Breville Bambino $249+ HighHeat-Up Time ComparisonMachine Approx. Heat-Up Time Leave On All Day? Energy ConsiderationBreville Bambino Plus ~3 seconds (thermoblock) Not necessary Low standby drawBreville Bambino ~3 seconds (thermoblock) Not necessary Low standby drawLa Marzocco Linea Micra ~3–4 minutes (dual boiler) Feasible Higher energy drawDeLonghi Eletta Explore ~60 seconds Not typical AutomatedBreville Dual Boiler ~20–25 minutes Often preferred Significant drawECM Synchronika II ~25–30 minutes Common practice Notable energy useThe Bambino Plus ranks #1 in this category because the thermoblock design heats on demand in seconds. Turn it on, pull a shot almost immediately. For buyers who want to flip a switch and start, there's no simpler entry at this price. The Linea Micra at $4,500 ranks #2 for a completely different reason. Its 3–4 minute heat-up is fast for a dual boiler machine. Most dual boiler and heat exchanger machines require 20–30 minutes for stable temperature and steam pressure. For buyers who want dual boiler quality without planning their morning around a long warm-up period, the Micra is the data's answer — at a steep cost. One thing spec sheets don't mention: Machines that benefit from being left on all day cost considerably more to run annually. A dual boiler running 8–10 hours daily is a real electricity line item — particularly in the UK and Australia where energy rates are higher than in most of the US.Best Espresso Machines for Lattes and Cappuccinos: Steam Performance Separates the Tiers {#milk-drinks} If your household drinks mostly lattes, cappuccinos, or flat whites, steam performance matters more than espresso extraction precision. The rankings shift noticeably from the overall list. Top 5 — Milk-Based DrinksRank Machine Est. Price Approval Rate1 Breville Bambino Plus $249+ 87%2 La Marzocco Linea Micra $4,500+ 95%+3 ECM Synchronika II $3,599+ 96%4 Breville Dual Boiler $1,399+ High5 Lelit Bianca $2,299+ HighThe Single Boiler Heat-Cycle Gap — What It Actually Means at the Cup The Bambino Plus uses a single thermoblock system. After pulling a shot, the machine cycles from espresso temperature (~93°C) to steam temperature (~130°C+) before the wand is ready. That transition takes roughly 20–30 seconds and is entirely manageable when making one or two drinks. Dual boiler machines like the ECM Synchronika II run a dedicated espresso boiler and a dedicated steam boiler simultaneously. There is no waiting. Pull the shot and steam the milk in parallel — which is how commercial machines operate and why trained baristas can sequence drinks quickly. For a household making one latte at a time, the Bambino Plus at $249 is a genuinely strong choice. For households making multiple milk drinks in sequence, or for anyone serious about developing latte art technique, the gap between a thermoblock and a dedicated steam boiler is real — and the community sentiment data reflects that gap directly.Best Espresso Machines for Hosting: The Rankings Change Completely at Party Scale {#hosting} This is where the Bambino Plus' weakness becomes most visible — and where the data most directly contradicts the standard review narrative. Top 5 — Hosting & EntertainingRank Machine Est. Price Approval Rate Notable Negatives1 ECM Synchronika II $3,599+ 96% ~0%2 Breville Dual Boiler $1,399+ High Low3 Lelit Bianca $2,299+ High Low4 La Marzocco Linea Micra $4,500+ High 18% negative5 Rancilio Silvia Pro X $1,699+ High Low⚠️ Breville Bambino Plus for hosting — a specific warning: The Bambino Plus carries a 32% negative rate in the hosting and entertaining category — the highest negative rate it receives across any segment. The mechanical reason is the single boiler heat-cycle delay: serving four or five drinks back-to-back means repeated recovery waits between the shot and steam cycles. For a dinner party, this creates real disruption. This finding does not appear in any standard affiliate review of this machine.The ECM Synchronika II ranks first in this category for a straightforward mechanical reason. Dual boiler architecture means simultaneous shot-pulling and milk-steaming, supporting sequential drink production without recovery delays. Zero negative mentions from hosting-focused community discussions, with 96% approval, is about as clear a consensus as this dataset produces. A realistic consideration: The Synchronika II costs $3,599. For a household hosting four times a year, that's a specific investment decision. The Breville Dual Boiler at $1,399 delivers comparable dual boiler architecture at a lower entry point, with strong community sentiment in this category, and is the more practical choice for most buyers who don't want to make the jump to ECM pricing.Best Espresso Machines for Straight Espresso: The Flair 58 Leads With a 97% Approval Rate {#espresso-purists} Remove the milk, the automation, and the convenience features. This category evaluates machines entirely on what's in the cup. Top 5 — Straight Espresso PuristsRank Machine Est. Price Approval Rate1 Flair 58 Series $464+ 97%2 Cafelat Robot Series $584+ 97%3 Profitec GO $599+ 94%4 Gaggia Classic Pro E24 $454+ 87%5 Breville Bambino Plus $249+ 77% (23% negative)The dominance of manual lever machines at the top of this list surprises many buyers encountering the data for the first time. It doesn't surprise anyone in r/espresso. Why Manual Lever Machines Lead This Category Manual lever machines like the Flair 58 and Cafelat Robot put applied pressure, pre-infusion duration, and flow rate directly in the user's hands. There is no pump pressure inconsistency, no fixed brew profile, no algorithmic pre-infusion compromise. For a skilled user pulling single-origin espresso, this degree of control produces shots that rival machines at $2,000–$4,000. The common perception that manual machines are impractical underestimates them. The Flair 58 and Cafelat Robot are usable in a daily workflow for single or double-shot production. They require a pre-heated group head and cannot steam milk simultaneously — but in a straight espresso household, neither limitation matters. The 97% approval rate in this category speaks plainly. The Bambino Plus at the bottom of this list — with a 23% negative rate — is arguably the most important data point in the entire article. It is the #1 machine overall. It's what most buyers default to when they trust a generic "best of" list. If you drink straight espresso without milk as your primary routine, this finding should change how you evaluate your options.Best Espresso Machines for Light Roast Coffee: Temperature Control Is Non-Negotiable {#light-roast} If you're sourcing beans from a specialty roaster, drinking single-origin lots, or using anything lighter than a medium roast, this category will produce the most divergent rankings from the general list. Top 5 — Light Roast & Specialty CoffeeRank Machine Est. Price Approval Rate1 Flair 58 Series $464+ 95%2 Lelit Bianca $2,299+ 95%3 Cafelat Robot Series $584+ High4 Gaggia Classic Pro E24 (modded) $454+ High5 Decent DE1PRO Unavailable 100%⚠️ Decent DE1PRO availability: 100% approval in this category but currently unavailable. Noted for completeness — do not plan a purchase around it.Why Light Roast Requires Different Equipment Light roast beans are denser and less soluble than darker roasts. Achieving target extraction yield requires:Higher brew temperatures: Typically 92–96°C versus 88–92°C for medium-dark blends Extended pre-infusion: To allow water to fully saturate the puck before full extraction pressure is applied Pressure profiling flexibility: Declining or Slayer-style profiles often extract light roasts more cleanly than flat nine-bar extractionSuper-automatics and thermoblock machines operate on fixed or narrowly adjustable temperature profiles that suit medium-dark blends but underserve lighter roasts. Manual lever machines, temperature-stable dual boiler designs, and machines with flow control capabilities dominate this category because they give the user the specific variables light roast extraction demands. If you're sourcing specialty coffee and your current machine consistently produces sour or underdeveloped shots that only improve with darker roasts, temperature inadequacy or insufficient pre-infusion flexibility is the most likely culprit — not the beans and not the grind.What Reddit's Negative Comments Actually Reveal (The Data Most Review Sites Won't Show) Most review sites have no mechanism or financial incentive to publish negative owner data. This table does.Machine Use Case Negative Rate What the Negatives DescribeBreville Bambino Plus Straight espresso purists 23% Single thermoblock limits shot temperature stability vs. lever or dual boiler alternativesBreville Bambino Plus Hosting & entertaining 32% Heat-cycle delays between shot and steam create frustrating wait times at volumeLa Marzocco Linea Micra Hosting & entertaining 18% Recovery time between sequential drinks; price-to-hosting-performance ratio questionedLa Marzocco Linea Micra Straight espresso purists 17% Limited pressure profiling flexibility versus manual lever machines at half the priceBreville Barista Express Impress Minimal effort 18% Built-in grinder requires calibration that defeats the minimal-effort value propositionNespresso Vertuo Creatista Minimal effort 20% Pod dependency and output quality not comparable to real espresso for informed buyersThree findings worth naming directly: The Bambino Plus negative data is not an indictment of the machine — it's a use-case mismatch signal. For milk-based drinks and minimal effort workflows, 87–89% approval is excellent. The 23% and 32% negative rates appear specifically when the machine is used outside the conditions it handles well. The Linea Micra's 17–18% negative rates are notable given its price point. At $4,500, buyers arrive with elevated expectations. Those negatives cluster around scenarios where the machine's single-group design reaches its limits: extended entertaining and maximum-precision espresso extraction in the purist category, where a $464 lever machine matches or exceeds its performance. The Barista Express built-in grinder debate is ongoing and real. Some buyers find it perfectly adequate. Others encounter grind-by-weight variability and limited step adjustment that create daily inconsistency. Both experiences are genuine. The 18% negative rate in the minimal effort category reflects buyers who expected a one-system solution and encountered a grinder that still requires attention.Espresso Machine Price Tiers: What Actually Changes Between $250 and $5,000Price Range Representative Machines What You're Getting What's Absent Reddit Data Summary$100–$300 Bambino Plus, Bambino, Flair NEO Flex Thermoblock speed, basic steaming, entry manual lever option Temperature stability, steam boiler power, sequential capacity Bambino Plus: 77% overall; strong milk/minimal effort$300–$800 Gaggia Classic Pro E24, Flair 58, Profitec GO, Cafelat Robot 58mm group head standard, modding potential, manual lever precision Dual boiler, display, rotary pump Flair 58: 97% purist; Gaggia: 88% tinkering; Robot: 93% overall$800–$2,500 Silvia Pro X, Breville Dual Boiler, Lelit Bianca, DeLonghi Eletta Explore Dual boiler or HX, PID, rotary pump, dedicated steam Lower resale than high-end brands; variable brand support Dual Boiler: strong hosting; Eletta: 96% minimal effort$2,500–$5,000 ECM Synchronika II, La Marzocco Linea Micra, Lucca A53 Mini V2 Commercial component quality, dual boiler, E61 group head, long-term durability Practical overkill for single-drink households ECM: 96% hosting; Micra: strong milk & mornings$5,000+ La Marzocco Linea Mini Commercial-grade performance, exceptional longevity, strong resale value Justifiable for most home use cases Limited community data; Linea Mini barely enters top 15The most counterintuitive finding in the data: The La Marzocco Linea Mini at $6,600 barely cracks the top 15 overall. The Bambino Plus at $249 ranks first. The data does not support a $6,600 machine as the obvious quality ceiling for home espresso. What the data does support is spending more when your specific use case makes it rational — dual boiler for hosting, temperature stability and pressure profiling for light roast, modding potential for the community in r/gaggiaclassic. On resale value: La Marzocco and ECM machines retain value significantly better than Breville machines at equivalent age and condition. If you plan to upgrade in 3–5 years, factor resale into the total cost calculation. A $3,600 Synchronika II that resells for $2,200 has a different net cost than a $650 Barista Express that resells for $200. Total setup cost — budget this before you buy: A complete entry-level setup requires more than the machine itself. Factor in:Machine: $249–$649 (entry range) Standalone burr grinder: $150–$300 Espresso scale: $30–$80 Tamper + distributor: $30–$60 Consumables (cleaning tablets, descaler, puck screens): $30–$50Realistic entry-level setup: $500–$750, not $249.The Variable Reddit Data Can't Rank: Your Grinder Has as Much Impact as Your Machine {#grinder} This is the finding most first-time espresso buyers encounter after purchase, and the r/espresso community discusses it constantly. Espresso is the most grind-sensitive brewing method in common home use. Extraction happens in 25–30 seconds at 9 bars of pressure. Small changes in grind particle size produce very large changes in shot character. A quality burr grinder with stepless or micro-stepped adjustment is not optional if consistent results matter to you. The community consensus is blunt on this point: a Bambino Plus paired with a quality standalone grinder will outperform a Barista Express Impress using only its built-in grinder, for many users. That's not an argument against the Barista Express — it's an argument for understanding what built-in grinders can and cannot deliver compared to a purpose-built espresso grinder. The Barista Express Impress' 18% negative rate in the minimal effort category exists partly because buyers expected the all-in-one solution to remove daily calibration. It shifts calibration to a less adjustable, less precise system rather than eliminating it. Minimum grinder guidance by machine tier:Under $300 machine: A dedicated grinder at $100–$200 (Baratza Encore, DF54) will outperform almost any built-in option at this price point $300–$800 machine: Match grinder investment to machine investment — $200–$400 range $800+ machine: A grinder below $300 will become the limiting factor for extraction quality; match accordinglyWhat Espresso Machine Maintenance Actually Looks Like Week-to-Week Post-purchase maintenance realities are consistently absent from competitor content. This is what ongoing ownership actually requires.Machine Type Descaling (Soft Water) Descaling (Hard Water) Backflushing Gasket Replacement Common First FailureThermoblock (Bambino Plus) Every 2–3 months Every 6–8 weeks Not applicable Not typical Thermoblock scale buildupSingle boiler semi-auto (Gaggia Classic) Every 2–3 months Every 6–8 weeks Yes — weekly Every 12–18 months Solenoid valve; OPV springDual boiler (ECM Synchronika II, Breville Dual Boiler) Every 3–4 months Every 8–12 weeks Yes — weekly Every 12–18 months Steam boiler element; pumpFully automatic (Eletta Explore, Magnifica) Every 1–2 months Every 4–6 weeks Internal cleaning cycle Not user-serviceable Grinder burrs; brew unit sealManual lever (Flair 58, Cafelat Robot) N/A — no boiler N/A N/A Piston seal occasionally Minimal — very low mechanical complexityRegional Hard Water Guide Descaling frequency varies significantly by location. In hard water areas, heavy-use machines should be descaled every 6–8 weeks. Skipping this cycle leads to scale buildup in the boiler and heating element, eventually causing restricted water flow, overheating, and potentially permanent damage.Region Hard Water Areas Recommended Descale FrequencyUnited States Midwest (Indiana, Ohio, Illinois), Southeast Texas, Southern California, Arizona Every 6–8 weeks in affected areasUnited Kingdom Southeast England, London, East Anglia Every 6–8 weeks — some of the hardest tap water in the developed worldCanada Southern Ontario, parts of Alberta Every 8–10 weeksAustralia Perth (WA), parts of Melbourne Every 6–10 weeks depending on locationBackflushing — forcing soapy water backward through the group head using a blind basket — is a weekly maintenance task for semi-automatic machines with solenoid valves. Many first-time buyers are unaware this routine exists until they encounter performance problems. Fully automatic machines replace this with internal cleaning cycles that use their own consumables.Frequently Asked Questions What is the most recommended espresso machine on Reddit in 2026? The Breville Bambino Plus leads overall with 535 positive mentions from 725 analyzed posts, scored at 77% approval using the Wilson Score method. This ranking reflects volume and broad satisfaction across all use cases combined — not superiority for every buyer profile. Before purchasing based on this ranking, check the use-case section matching how you actually drink coffee. For straight espresso purists, the Bambino Plus ranks fifth with a 23% negative rate.Is the Breville Bambino Plus actually good for making espresso, or is it just easy to use? Both — depending on what you add to it. For milk-based drinks and minimal effort workflows, the Bambino Plus earns 87–89% approval and is a genuinely strong performer at $249. For straight espresso without milk, the community data shows a 23% negative rate driven by the single thermoblock design's limitations in temperature stability compared to dedicated single boiler or dual boiler machines. Both findings are real, and the choice depends on your primary use.What is the Gaggiuino mod and which machines support it? The Gaggiuino is an open-source, Arduino-based modification for the Gaggia Classic platform that adds pressure profiling, flow control, and real-time temperature management — features typically requiring machines at $2,000+. It's a documented hardware project with active firmware development, a support community, and tested installation guides. This modification is the primary reason the Gaggia Classic Pro E24 leads the tinkering category with 144 positive mentions at 2.4× the nearest competitor. Before purchasing for this purpose, verify current Gaggiuino compatibility for the E24 versus Evo Pro variants against the latest open-source project documentation.What's the difference between the Bambino and the Bambino Plus? The Bambino Plus includes an automatic steam wand (auto-texturing milk to a set temperature), a larger 64 oz water reservoir, and additional drink programs. The Bambino uses a manual steam wand, which demands more technique but provides more direct control over milk texture. The Reddit data consistently places the Bambino Plus above the Bambino in both mention volume and approval across most use cases. For beginners wanting consistent milk drinks without a learning curve, the Plus is the clearer choice.Is the La Marzocco Linea Micra worth $4,500 compared to a $249 Bambino Plus? For specific use cases, yes. The Micra ranks #2 for fast morning workflows and milk-based drinks, where its 3–4 minute dual boiler heat-up and commercial-grade steam output justify the investment for serious milk drink production. For minimal effort brewing categories, the data shows no meaningful satisfaction advantage over the Bambino Plus. The Micra also retains resale value significantly better than Breville machines — a factor worth calculating if you plan to upgrade in a few years.Why should I avoid the Bambino Plus for dinner parties? The single thermoblock boiler must cycle between espresso temperature and steam temperature between each drink. Under the sequential demand of serving five or six guests, those recovery cycles create real delays — frustrating for both the host and the people waiting. The 32% negative rate in the hosting category directly reflects this limitation. Dual boiler machines like the ECM Synchronika II and Breville Dual Boiler operate both boilers simultaneously and eliminate this problem entirely.What espresso machines does Reddit recommend for straight espresso with no milk? The data is clear: Flair 58 Series at 97%, Cafelat Robot at 97%, Profitec GO at 94%, Gaggia Classic Pro E24 at 87%. Manual lever machines and temperature-stable single boiler machines dominate this category because they offer the extraction control that straight espresso reveals most directly. Super-automatics and thermoblock machines do not appear in the top 5 here.Are super-automatic espresso machines worth buying compared to semi-automatics? The data gives a use-case-specific answer. Fully automatic machines like the DeLonghi Eletta Explore score 96–97% for minimal effort and fast morning categories — among the highest approval rates in the dataset for those segments. They do not appear in the straight espresso purist or light roast top rankings. The tradeoff is real: super-automatics deliver excellent convenience but sacrifice the extraction control that experienced buyers in those categories value. It's not a question of quality — it's a question of what you're optimizing for.How often does an espresso machine need descaling, and does it vary by location? Yes, significantly. In soft water regions, most machines need descaling every 2–3 months under regular use. In hard water areas — Southeast England, the US Midwest, Southern California, Perth (WA) — heavy-use machines may need descaling every 6–8 weeks. Skipping descaling cycles allows limescale to accumulate in the boiler and heating element, eventually restricting water flow and shortening the machine's working life. Fully automatic machines are particularly vulnerable because scale affects the brew unit and internal tubing, which are not user-serviceable.What is a Wilson Score and why use it to rank espresso machines? The Wilson Score confidence interval adjusts approval percentage based on the number of mentions. A machine with one positive mention is treated differently from one with 500 — the formula applies a confidence penalty to low-volume data. It's the same system Reddit uses for its "Best" comment sort, Steam uses for game ratings, and Amazon applies to verified reviewer scores. For this dataset, it prevents a niche machine with three enthusiastic mentions from outranking one with hundreds of consistent owner endorsements. It's the most honest way to rank community sentiment across machines with very different levels of community discussion.Pricing shown throughout is "from" pricing at time of data collection — verify current retailer pricing before purchasing, as prices change. Machine availability for the Decent DE1PRO, Profitec DRIVE, and ECM Classika PID should be confirmed before purchase — these machines appeared in top category rankings but were listed as unavailable during data collection. Regional warranty terms vary: Australian Consumer Law provides meaningfully stronger consumer protections than standard US one-year manufacturer warranties. Gaggiuino compatibility details should be verified against current open-source project documentation before purchase.
What Is That Recessed Metal Cabinet in an Old Apartment Bathroom? (Vintage Laundry Hamper Explained)
If you've just moved into an older building and you're standing in the bathroom staring at a small metal cabinet built into the wall — hinged door, odd slot near the top, and no obvious label — you're not imagining things. And you're definitely not the first person to spend fifteen minutes searching online with nothing to show for it. That unit is a recessed laundry hamper: a factory-installed, wall-mounted storage unit built directly into the bathroom wall cavity of older apartment buildings. They were considered a premium convenience feature when new. The narrow slot at the top is a drop-slot for feeding laundry in one-handed without opening the main door. Some versions connect to a building-wide laundry chute running to the basement. Most are self-contained cavities. Popular from roughly the 1920s through the early 1960s, these fixtures are concentrated in urban apartment buildings across New York, Chicago, Boston, Philadelphia, and San Francisco. If your building predates 1965 and you're in a multi-unit structure, this is almost certainly what you're looking at.Quick TakeawaysCommon in pre-war and mid-century American urban apartment buildings The top slot is a laundry drop-slot — not a vent, not a broken part Some units connect to a building-wide laundry chute; many are standalone sealed cavities Not a health concern if dry and intact, but worth a quick inspection for rust, mold, and paint condition Renters should not permanently modify or remove the unit without landlord permission Can be repurposed as recessed bathroom storage if the unit is structurally sound Restoration is possible with rust converter, metal-safe primer, and rust-inhibiting topcoatWhat the Slot Opening at the Top Actually DoesThat narrow slot is one of the more overlooked design decisions in mid-century residential construction — and also the most common source of confusion for anyone encountering these units for the first time. It's not a vent. It's not broken. It's a laundry drop-slot, and it served a specific ergonomic purpose. Rather than opening the full-size door every time a resident tossed in a shirt or a towel, they could push laundry through the slot one-handed without disturbing anything else in the bathroom. It reduced hinge wear, kept the bathroom tidier, and made a small daily routine slightly faster. Think of it as the mid-century version of a convenience feature that nobody noticed because it worked. The opening is intentionally narrow — wide enough for clothing, not wide enough for anything to easily fall back out, and sized to limit odor escape from the cavity below. In chute-connected versions, the slot also added a second separation layer between residents and the open shaft running below. If the slot on your unit looks painted shut or like it's never been touched, that's common. Many of these fixtures sat completely unused for decades before the current tenant discovered them.Is Yours a Standalone Hamper or a Laundry Chute?This distinction matters more than it might seem. A standalone unit is a sealed metal cavity — essentially a built-in laundry bin with a solid floor. A chute-connected unit opens into a vertical shaft that passes through multiple floors of the building down to a central collection room, typically in the basement. The two variants have meaningfully different maintenance implications, safety considerations, and removal complexity. Getting this wrong before you start poking around can create problems that were entirely avoidable. Here's how to tell the difference right now: Grab a flashlight, open the main access door (or shine the light through the drop slot if the door is stiff), and look at the bottom of the unit.What You See What It MeansA solid metal floor pan at the bottom of the cavity Standalone unit — the cavity is self-containedAn open shaft descending below floor level Chute-connected — part of a building laundry systemIf it's chute-connected, avoid putting anything other than laundry into it. And don't seal it permanently without first confirming with your building manager. Active chutes are shared building infrastructure — building staff may need access, and other residents may still be using the system from floors above or below.When Were These Built and Why Did Buildings Have Them?Recessed laundry hampers began appearing in American residential construction in the early twentieth century and reached their peak installation during the post-war apartment building boom of the 1940s and 1950s. The fixture made particular sense in dense urban apartment buildings, where in-unit laundry wasn't possible and residents needed a practical way to hold dirty clothes between trips to a shared laundry room or building chute. Installing the hamper directly into the bathroom wall cavity kept it out of the living space entirely, eliminated the need for freestanding laundry bins, and — critically — served as a marketing feature. Buildings with recessed hampers were positioned as offering modern conveniences that lower-budget construction didn't bother with. Cities with large surviving pre-war and mid-century residential stock are the most common places to find them: New York, Chicago, Boston, Philadelphia, San Francisco, and Baltimore all have notable concentrations. They appeared in row houses and duplexes of the same period too, though less frequently than in purpose-built multi-unit buildings. Manufacturing varied by building grade. Standard units were galvanized steel or chrome-plated steel. Higher-end buildings sometimes featured interiors with porcelain enamel coatings. Construction was typically robust — these weren't afterthoughts. They were framed directly into the wall stud cavity with metal flanges, wood blocking set into plaster-and-lathe walls, and hardware that included a piano hinge on the main door and a magnetic or spring latch. The units were designed to last the life of the building, and most of the surviving ones prove that point.Why You Almost Never See These in Newer Buildings Several things converged between the 1960s and 1980s that effectively ended the recessed hamper's run in new residential construction. The biggest factor was in-unit washer/dryer hookups becoming a standard apartment amenity. Once residents could do laundry inside their own unit, centralized chute systems and dedicated bathroom hamper niches stopped being conveniences and started being architectural complications. Fire code changes accelerated the shift. Laundry chute shafts running vertically through multiple floors create a direct path for fire and smoke to travel between levels. Building codes tightened requirements around chute shaft construction, fire-damper installation, and the materials used for access doors. Compliance became more expensive and technically demanding, making the systems harder to justify in new construction. Construction economics also shifted dramatically. The labor and material cost of custom-fabricating a recessed metal unit and properly framing it into each individual bathroom wall didn't survive the value-engineering that characterized residential construction from the 1970s onward. A plastic laundry basket costs nothing and requires nothing from the contractor. The result is that anyone under about 50 has likely never seen one of these fixtures before moving into an older building — which explains exactly why they're so disorienting the first time.Is It Safe to Use or Leave In Place? For most people, the honest answer is yes — with a brief inspection first. A dry, structurally sound unit in a post-1980 building is not a meaningful health concern under normal circumstances. In older buildings, a few specific things are worth checking before you use the unit or start handling its surfaces aggressively. Interior rust: Look for flaking or pitting rather than just surface discoloration. Surface oxidation is cosmetic and manageable. Actively flaking rust — where scale is loose and separating from the metal — suggests the floor pan or walls of the cavity may have deteriorated significantly, particularly at the base where moisture accumulates over time. Moisture and mold: Open the door and let the unit air out before doing anything else. A musty odor means the cavity trapped moisture at some point, possibly for years. Surface mold on the metal interior is treatable, but you need to address it, not seal it back in. Look carefully at the floor pan and the back wall of the cavity.⚠️ Warning: Pre-1980 Buildings — Read Before Touching the WallAsbestos: The insulation, fire-stop material, or joint compound surrounding the unit in a pre-1980 building wall cavity may contain asbestos. Do not cut, sand, drill, or otherwise disturb the wall surround without professional asbestos testing first. This applies to any demolition work around the unit, not just full removal.Lead paint: In pre-1978 buildings, painted metal surfaces — including the hamper door and interior — may contain lead paint. Wear gloves when handling painted surfaces. Do not sand painted surfaces without appropriate respiratory protection and containment measures.For renters specifically: using the unit as-is for general storage is generally fine once you've confirmed it's dry, structurally intact, and free of visible flaking rust or mold. You don't have to do anything to it to be safe in normal use — but knowing what you're working with matters before you start pulling on trim pieces or scrubbing aggressively.How to Clean and Deodorize a Vintage Recessed HamperDecades of use — or decades of sitting unused — leave behind a residue that a quick wipe down won't fix. Here's a proper sequence that addresses the problem without introducing new ones.Open the unit and let it air out for at least 24 hours before doing anything else. Don't rush this step. Sealed cavities hold odors that need time to dissipate naturally first. Vacuum loose debris from the interior — accumulated lint, dust, and anything sitting at the bottom of the cavity. A crevice attachment works cleanly along the floor pan and seams. Wipe all interior surfaces with a cloth dampened with a mild all-purpose cleaner diluted in warm water. Don't saturate the metal. The goal here is cleaning, not introducing more moisture into a cavity that you're trying to dry out. Treat surface rust spots with a rust converter spray or gel before they spread. Apply only to affected areas. Don't use acidic rust removers across the full interior unless you plan to repaint — they leave the surface in a condition that requires priming regardless. Deodorize the cavity by placing an open box of baking soda inside for 48 hours with the door slightly ajar. A cloth wiped with undiluted white vinegar along the interior surfaces also neutralizes organic odors effectively before the baking soda treatment. Dry completely before closing. Leave the door propped open for another 24 hours after cleaning. Sealing moisture back inside is how a clean unit becomes a mold problem three months later.One thing to avoid: bleach directly on rusted or bare metal surfaces. It accelerates oxidation rather than treating it.How to Restore a Rusted or Chipped Recessed Hamper Surface corrosion on these units is expected, not alarming. The original factory paint or enamel wasn't intended to last 80 years without maintenance. Most units are fully restorable with the right materials and a patient afternoon. What you'll need:Wire brush or fine steel wool — for removing loose rust scale before treatment Rust converter gel or spray — neutralizes existing rust chemically, converts it to a stable compound Metal-safe primer — standard wall primer will not adhere to bare metal reliably; this is the step most DIY restores skip and then wonder why the paint peels Rust-inhibiting spray paint in your preferred finish (satin or semi-gloss reads cleanest on interior metal surfaces) Painter's tape and drop cloth for masking the surrounding wall trim and tile 220-grit sandpaper for light scuff-sanding between coatsRestoration steps:Wire-brush all visibly rusted areas to remove loose scale and flaking paint. Applying converter over loose material delays the problem rather than solving it. Apply rust converter to affected surfaces per the product instructions. Full cure time matters — typically 24 hours. Don't shortcut it. Scuff-sand lightly with 220-grit to give the primer a mechanical surface to grip. Wipe off dust with a tack cloth before priming. Apply metal-safe primer in two thin coats, allowing full dry time between coats. Two thin coats outperform one thick coat in adhesion and long-term durability. Apply rust-inhibiting topcoat in 2–3 light passes from 10–12 inches away. Light passes prevent runs, which are difficult to sand out inside a cavity. Allow 48–72 hours cure time before loading the unit with anything.A mistake that shows up repeatedly in older rental properties: painting directly over rust with standard interior wall paint, no surface prep. It looks acceptable for a few months, then blisters and peels. Doing it properly once is far less work than doing it wrong twice.How to Re purpose It If You're a Renter (No Permanent Modifications)The renovations aren't yours to make. But the cavity is legitimate storage real estate, and with a small amount of organization it becomes genuinely useful rather than just strange. Most recessed laundry hampers have interior dimensions in the range of 12–16 inches wide, 18–24 inches tall, and 8–12 inches deep. That's enough space to matter without requiring any tools or modifications. Practical no-modification uses:Rolled towels. Towels rolled rather than folded fit cleanly in the cavity, look intentional, and are easy to grab one-handed. This is basically what the unit was ergonomically designed for, just with different contents. Cleaning supply niche. Toilet bowl cleaner, a spare brush, surface spray, a bottle of drain cleaner — the items that normally crowd the floor under the sink. Toiletry overflow. Extra toilet paper rolls, backup soap, travel-size products, hair supplies that don't fit in the medicine cabinet. Removable shelf liner insert. A cut-to-fit piece of shelf liner on the floor of the cavity stabilizes items and makes wipe-down much easier. Completely removable and leaves zero trace.One thing to avoid: sealing a chute-connected unit with anything permanent. If the chute is part of the building's infrastructure and maintenance staff need access, you do not want to be the tenant who blocked it.Should Landlords Keep, Restore, or Remove These Units? This is a more nuanced question than it looks from the outside. In period-appropriate buildings — pre-war brownstones, classic-six apartments, 1940s courtyard buildings — a functional, well-maintained recessed hamper is a genuine character detail. Some tenants actively seek out buildings with intact original architectural features, and a restored unit in a period bathroom reads as considered preservation rather than neglect. In that context, removing it to patch a rectangular hole in a tile wall doesn't necessarily improve anything. The case for removal strengthens considerably when the unit is structurally compromised, the surrounding wall shows signs of water damage, or the bathroom is being fully renovated anyway. At that point, the labor is already being paid for, and patching the cavity to install a modern recessed niche or additional storage makes more practical sense than restoring a fixture the renovation will make visually inconsistent. A practical decision framework:Clean and keep: Unit is functional, interior is dry, metal surfaces are intact or easily treated. Building is period-appropriate. No safety concerns. Restore cosmetically: Surface corrosion is present but the metal structure is sound. Bathroom is not being renovated. Cost-to-benefit ratio favors restoration over removal. Remove and patch: Unit is structurally compromised, connected to a decommissioned chute, showing moisture intrusion into the wall cavity, or the bathroom is being fully gutted regardless.Approach Approximate Cost (U.S.) Best ForClean and leave in place $0–$50 DIY Rentals, period buildings, functional unitsCosmetic restoration (rust treatment + repaint) $50–$150 DIY / $200–$400 contractor Structurally sound units with surface corrosionFull removal + wall patch $300–$900 contractor Gut renovations, compromised units, safety concernsAsbestos testing before removal $200–$500 Pre-1980 construction — treat this as non-negotiableCosts are estimated ranges for the U.S. market. Regional labor rates vary significantly. Get multiple quotes before committing to contractor work, particularly in high-cost urban markets where these units are most common.When to Call a Contractor Instead of DIYing ItCleaning and cosmetic restoration are well within DIY range for most people. The line shifts quickly once the wall itself is involved. Get a licensed contractor involved when:The surrounding wall plaster shows visible cracks, bulging, or water staining around the unit — these point to moisture that has already reached the wall cavity, not just the metal surface The unit appears to connect to a multi-floor laundry chute that may still be active shared building infrastructure You're in a pre-1980 building and any wall demolition is involved — asbestos testing before demo is a professional obligation, not an optional precaution There is active mold in the wall cavity itself, not just on the metal surfaces accessible from the front The floor pan is corroded through and there's evidence moisture has reached the subfloor or structural framing below You're a landlord planning a full bathroom renovation that requires the wall to be patched, tiled, and finished to match existing surfaces — that's a finish carpentry and tile work problem, not a hamper removal problemRemoving a recessed unit looks deceptively simple from the bathroom side. Inside the wall, the unit is typically anchored with metal flanges screwed into studs and surrounded by wood blocking that's been in place since the original construction. Prying it out without understanding what's behind it is how plaster cracks, surrounding tiles break, and wall cavities get opened without appropriate testing or containment.Frequently Asked Questions What is the small slot opening at the top of a built-in bathroom hamper for? The slot is a laundry drop-slot, designed so residents could push clothing into the hamper one-handed without opening the main access door. It reduced hinge wear and kept the routine faster and tidier. It is a designed feature, not damage or a broken hinge.How do I know if my recessed hamper connects to a laundry chute or is just a wall cavity? Open the access door and shine a flashlight into the unit. A visible solid metal floor pan at the bottom means it's a standalone cavity. An open shaft descending below floor level means it's connected to a building laundry chute running to the basement or a central collection area.Is it safe to use a vintage metal laundry hamper in an old apartment? Generally yes, after a basic inspection. Check for flaking rust, interior mold, and moisture inside the cavity. If the unit is dry and structurally intact, it poses no meaningful health risk in normal use. In pre-1978 buildings, handle painted surfaces carefully due to potential lead paint content.What era of apartment buildings typically had recessed metal laundry hampers? These fixtures were most common in American apartment buildings constructed between roughly 1920 and 1965. The highest concentration is in urban residential stock in the Northeast and Midwest — New York, Chicago, Boston, and Philadelphia in particular.Can I remove a built-in laundry hamper if I'm renting? Not without explicit written permission from your landlord. The unit is a fixed part of the building. Unauthorized removal or permanent modification typically constitutes a lease violation and can result in liability for the full cost of restoring the wall to its original condition.How do I clean and deodorize a recessed metal hamper that hasn't been used in decades? Air it out for at least 24 hours first. Then vacuum loose debris, wipe interior surfaces with diluted mild cleaner, treat any rust spots with rust converter, and leave an open baking soda box inside for 48 hours with the door slightly ajar. Keep the door propped open during drying. Avoid bleach on bare or rusted metal.How do I treat rust on a vintage metal laundry hamper? Wire-brush loose scale first, apply rust converter to affected areas and allow full cure time, then prime with metal-safe primer and finish with rust-inhibiting spray paint in thin coats. The most common failure in DIY touch-ups is painting directly over rust without any surface preparation — it looks fine briefly and fails within a year.Why did builders stop installing recessed laundry hampers in new construction? In-unit washer/dryer hookups became standard, fire codes tightened significantly around laundry chute shaft construction requirements, and construction economics eliminated fixtures that required custom fabrication and precise wall framing. All three factors converged in the 1970s and early 1980s.Does a vintage built-in hamper add or reduce property value in a bathroom renovation? Context determines this entirely. In a period-appropriate building with a well-maintained unit, it's a character detail that appeals to the right buyer or tenant. In a fully modernized bathroom, it reads as an inconsistency. Condition and surrounding aesthetic matter far more than the fixture's inherent presence or absence.Is there asbestos risk when removing a recessed metal hamper from an older wall? Potentially yes. Insulation, fire-stop material, or joint compound in the surrounding wall cavity of a pre-1980 building may contain asbestos. Professional testing before any wall demolition in buildings of that era is the responsible step — this applies to the wall surround, not just the metal unit itself.What can I use a recessed hamper cavity for besides laundry storage? Rolled towels, cleaning supplies, toiletry overflow, or a removable shelf liner insert for bathroom sundries all work well without requiring any modification. The cavity offers genuine utility with a small amount of organization.How much does it cost to professionally remove and patch a recessed wall hamper? Typical U.S. contractor range is $300–$900 for removal and wall patching, depending on wall material (plaster vs. drywall), tile involvement, and whether asbestos testing is required first. In high-cost urban markets where these units are most common, the upper end of that range or beyond is realistic.Are there modern replacements that fit the same wall opening as vintage units? No direct off-the-shelf equivalent exists. Custom metal fabrication can replicate the form, but it's rarely cost-effective. Most renovation projects fill the opening with a recessed wall niche or a standard recessed medicine cabinet if the dimensions allow.What materials were vintage recessed laundry hampers made from? Most were galvanized steel or chrome-plated steel. Higher-end buildings sometimes featured porcelain enamel interior coatings. The frame and surround were typically anchored into the wall with wood blocking and metal flanges. Hardware consisted of a piano hinge on the main door and a magnetic or spring latch.Which cities and building types are most likely to have recessed bathroom hampers? Urban apartment buildings in New York, Chicago, Boston, Philadelphia, San Francisco, and Baltimore are the most common sources. Row houses, duplexes, and courtyard apartment buildings from the 1920–1965 period are also likely candidates. Purpose-built mid-range and luxury apartment construction of the era was more likely to include them than budget housing stock of the same period. Related Reading:What Is That Strange Wall Outlet Near the Floor? You Probably Have a Central Vacuum System Do Smart Homes Actually Make Life Better or Just More Complicated? How to Get Curry Smell Out of a Rental House

Olivia Reed
Hi, I'm Olivia. I've spent nearly a decade obsessed with making homes work smarter, not harder. My mission is to help you optimize your living space with practical, cost-effective tech—focusing on subscription-free security and long-term maintenance solutions.