PEOPLE ALSO READ...
.webp)
The Homeowner Maintenance Cheat Sheet That's Actually Worth Saving
Quick answer: A homeowner maintenance cheat sheet covers monthly, seasonal, and annual tasks — from changing HVAC filters and testing smoke detectors to servicing the water heater and inspecting the roof. Following it prevents roughly 80% of the most expensive home repair emergencies, most of which cost under $20 and 20 minutes to avoid.Why Most Homeowners Are Flying Blind (And How Much It Costs Them) Nobody hands you a manual when you get the keys. You sign the paperwork, do the walk through, shake some hands — and then you're standing in a house that contains a furnace, a water heater, a roof, a sewer line, an electrical panel, and somewhere between 30 and 80 things that will eventually fail. Nobody tells you when. Nobody tells you what to watch for. Most people learn the hard way.The Repair That Made Me Build This Cheat Sheet Three years into owning my first home, the water heater quit. Not dramatically — it just started making a low rumbling sound, then the water went lukewarm, then cold. The repair tech who came out pulled out something called an anode rod. Or what was left of it. Completely corroded through. Replacing it would have cost $20 and about 45 minutes every 3–5 years. I had never heard of it. The repair, including the partial tank replacement, came to $1,200. That was the moment I stopped trusting that I'd "figure it out when something breaks." The problem isn't that homeowners are careless. It's that nobody gives them a real schedule. Real estate agents don't. Home inspectors hand you a 40-page report about what's wrong right now, not what needs attention in six months. Builder warranties cover defects, not wear. So most people default to the reactive approach — fix it when it breaks — which is consistently the most expensive way to own a house. The 1% Rule: How Much You Should Actually Budget You've probably heard the "1% rule": budget 1% of your home's purchase price annually for maintenance. On a $350,000 home, that's $3,500 a year. Here's the honest reality: 1% works for newer homes in mild climates. For homes over 15 years old, or in regions with harsh winters or heavy rainfall, 2–3% is more realistic. A $350K home in Minnesota with a 20-year-old roof is not a $3,500/year maintenance situation. Budget $7,000–$10,000 and you'll be less surprised. The other thing nobody mentions: maintenance costs aren't evenly distributed. Some years cost almost nothing. Then one year the furnace dies, the roof needs a repair, and the sump pump fails during a rainstorm, all within four months. Keep a dedicated home maintenance fund and resist the urge to raid it.The Complete Homeowner Maintenance Cheat Sheet (Month-by-Month) This is the actual cheat sheet. Save it, print it, add it to your calendar — whatever works. The goal is a system, not a scramble.January–March: Winter Maintenance Tasks Cold does specific, predictable damage if you're not watching for it.Task Frequency DIY or Pro? Approx. CostCheck for ice dams on roof edges Monthly (cold climates) DIY inspect, Pro remove $0 / $300–$700Test smoke and CO detectors Monthly DIY $0Check pipes in unheated spaces After hard freezes DIY $0Replace HVAC filter Monthly–every 90 days DIY $8–$40Reverse ceiling fan direction (clockwise) Once at winter start DIY $0Check attic insulation and vents Once in January DIY $0Inspect weatherstripping on doors/windows January DIY $0–$30Schedule chimney cleaning if not done in fall January Pro $150–$300Flush water heater sediment Once annually (any month) DIY or Pro $0–$100Climate note for northern US, Canada, UK: Ice dam formation happens when heat escapes through the roof and melts snow that then refreezes at the eave. It's an insulation and ventilation problem, not just a cold-weather event. If you see icicles more than a few inches long forming at your roofline repeatedly, that's a symptom worth investigating beyond just winter — it signals heat loss. April–June: Spring Checklist Spring is the most important inspection window of the year. Whatever winter damaged, spring reveals. Spring Checklist:Clean gutters (post-winter debris plus spring seed-fall) Inspect roof for winter damage — shingles, flashing, valleys Check exterior caulking and reseal as needed Service air conditioner before peak season (replace filter, clean condenser coils) Test sump pump before rainy season Flush water heater if not done in winter Check outdoor spigots and irrigation for freeze damage Inspect window and door screens; repair or replace Clear dryer vent from outside (birds sometimes nest there in spring) Check deck/patio for winter damage, reseal if needed Test GFCI outlets (press the "test" button — it should cut power) Schedule HVAC tune-up before cooling season if not done recently Walk the perimeter: check grading (water should slope away from the foundation) Inspect foundation for new cracks from freeze-thaw cycles Check attic for signs of winter moisture or animal intrusionDon't rush the AC service. A unit that runs all summer without a pre-season checkup is a unit that fails on the hottest day in July. Schedule an HVAC tune-up in April or early May — before technician schedules fill up. You'll wait 3–5 days in April; you'll wait 2–3 weeks in July. July–September: Summer Tasks Summer has its own failure modes. Heat, humidity, and insects all stress different systems.Task Frequency NotesCheck window AC units (if applicable) Monthly Clean filters; check drainageInspect attic ventilation Once in summer Poor ventilation causes heat damage to roof deckingCheck for signs of pest activity Monthly Mud tubes = termites; droppings near baseboards = rodentsTest smoke detectors Monthly Replace batteries in any that chirpClean refrigerator condenser coils Once in summer Pull unit out; vacuum coils; adds 2–3 years of lifeCheck hose connections to washing machine Once Rubber hoses should be replaced every 5 years; braided steel every 7–10Inspect and clean bathroom exhaust fans Once Clogged fans cause moisture buildup and moldCheck crawl space moisture Summer and fall High humidity = mold risk; consider a dehumidifierPest note for southeastern US and Australia: Termite season peaks in late spring and summer. Walk your perimeter in early July looking for mud tubes at the foundation, hollow-sounding wood, or piles of tiny wings near windows. If you see any of those — call a pro. Termite damage is not a DIY situation. October–December: Fall Prep Fall maintenance protects your home through winter. It's also when your HVAC makes the switch from cooling to heating — which is when most furnace failures get discovered. Fall Checklist:Clean gutters after leaves drop (late October or November) Inspect roof before winter — look for missing/cracked shingles now Service furnace or heat pump (or schedule a pro) Replace HVAC filter before heating season Drain and disconnect exterior hoses; shut off outdoor water supply Check and seal gaps around pipes, cables entering the house Test sump pump before freeze season Reverse ceiling fan direction (counterclockwise in summer, clockwise in winter) Clean chimney if you use a wood-burning fireplace Check smoke and CO detectors and replace batteries Drain and store irrigation system if applicable Inspect attic insulation before winter Check weatherstripping on all doors Stock emergency supplies (flashlight, blankets, generator fuel if applicable)The 7 Maintenance Mistakes That Cost Homeowners the Most Money Before diving into system-by-system detail, here are the specific mistakes that show up over and over — the ones that turn a $150 task into a $5,000 repair. 1. Ignoring the HVAC filter until the AC dies. A clogged filter doesn't just reduce air quality. It starves the system of airflow, causing the evaporator coil to ice over. Ice on an evaporator coil = no cooling + potential compressor damage. Compressor replacements run $1,500–$2,500. 2. Never flushing the water heater. Sediment builds up at the bottom of the tank. It reduces efficiency (you pay more to heat the same water), accelerates tank corrosion, and causes that rumbling sound that means the end is near. A $0 annual flush extends life by 3–5 years. Most homeowners have never done it. 3. Skipping the chimney inspection. You might only light the fireplace 10 times a year. Doesn't matter. Creosote builds up on the flue lining and is the primary cause of chimney fires — roughly 25,000 per year in the US. Annual cleaning: $150–$300. Chimney fire damage: $5,000–$50,000. 4. Letting small roof issues become large ones. A missing shingle costs $150–$400 to replace. Left alone through one wet season, water gets under the decking, damages the sheathing, and you're looking at $2,000–$8,000 in repairs. Roofs are one of the clearest "a stitch in time" systems in any home. 5. Ignoring grading and drainage. Water that pools near your foundation is slowly working its way into your basement or crawl space, and eventually into your foundation itself. Most homeowners don't even look at this. Re-grading a small section: $200–$500. Foundation waterproofing: $3,000–$15,000. 6. Forgetting about the dryer vent. This is a safety issue, not just an efficiency one. Dryer fires cause approximately 2,900 house fires in the US annually. The lint that doesn't catch in the trap accumulates in the vent duct and becomes fuel. Clean the dryer vent once a year, more often if you do heavy laundry. It's a 30-minute job with a $25 brush kit. 7. Assuming new homes are low-maintenance. Builder-grade components are, in many cases, the cheapest version of a given product. The water heater installed in a new construction home is typically a bottom-of-the-range unit. Same for HVAC systems, flooring, fixtures, and windows. New homes still need maintenance. They just have a warranty for the first few years — which is not the same thing as being maintenance-free.HVAC Maintenance: The System Most Homeowners Ignore Until It Fails87% of HVAC failures happen during peak demand — the first really hot week of summer or the first hard freeze of winter. The system that seemed fine in mild weather gets pushed to its limit and fails at the worst possible moment. That's not bad luck. That's deferred maintenance meeting stress. How Often to Change Your Air Filter (and Why the "Every 90 Days" Advice Is Often Wrong) The "change your filter every 90 days" advice assumes a lot: that you have one person, no pets, no allergies, a standard MERV-8 filter, and a home without excessive dust or nearby construction. In real life, most of those assumptions don't hold. Here's a more honest guide:Household Type Recommended Filter Change IntervalSingle person, no pets, no allergies Every 90 daysCouple, no pets Every 60–90 daysHousehold with 1 pet Every 60 daysHousehold with 2+ pets Every 30–45 daysAnyone with allergies or asthma Every 30–45 daysUsing a MERV-13 or higher filter Every 30–60 days (clogs faster)Home near construction or gravel road Every 30 daysThe right filter rating: A MERV-8 filter is fine for most households. A MERV-11 is worth it if anyone has mild allergies. MERV-13 provides near-hospital-grade filtration but creates more airflow resistance — verify that your HVAC system is rated for it before installing one, or you risk reducing airflow enough to stress the blower motor.Most homeowners overlook this: The evaporator coil. It's the indoor component that actually does the cooling work. When it gets coated in dust and grime — which happens even with regular filter changes — it loses efficiency significantly. A dirty evaporator coil can reduce cooling capacity by 30%+. This is a pro job: expect $150–$300 for a coil cleaning, done during annual maintenance.Annual HVAC Tune-Up: What It Actually Includes and Whether It's Worth It A real HVAC tune-up (not a $49 "inspection" that's really just a sales call) includes:Checking refrigerant levels and inspecting for leaks Cleaning evaporator and condenser coils Lubricating moving parts in the blower motor Inspecting heat exchanger for cracks (critical — a cracked heat exchanger leaks carbon monoxide) Testing thermostat calibration Checking electrical connections and capacitor Inspecting condensate drain for clogsCost: $80–$150 for a legitimate tune-up from a reputable technician. Worth it? Yes — a well-maintained system runs 15–20% more efficiently and lasts 5–8 years longer on average. The alternative is a $6,000–$12,000 system replacement 5 years early. Smart Thermostat Maintenance: Does Automation Actually Help? Honest answer: partially. Smart thermostats like the Ecobee or Nest are genuinely useful for energy optimization, scheduling, and runtime monitoring. The Ecobee in particular has a filter reminder feature that tracks runtime hours and notifies you when a change is due. But here's the thing nobody talks about: a significant portion of smart thermostat owners ignore those notifications. The notification habit is easy to dismiss — it shows up as an app alert among 40 other daily notifications. Plenty of people have a Nest reminding them to change the filter every week for two months before they actually do it. Automation improves your maintenance routine. It doesn't replace it. HVAC Warning Signs Every Homeowner Should RecognizeSymptom Likely Cause DIY Fix? UrgencyShort cycling (turns on/off rapidly) Dirty filter, refrigerant leak, or oversized unit Check filter first; then Pro HighUnusual banging or rattling Loose parts, debris in blower Pro Medium-HighMusty smell from vents Mold in evaporator/drain pan Pro MediumYellow or orange flame on furnace Incomplete combustion — potential CO risk Pro immediately CriticalIce on refrigerant lines Low refrigerant or restricted airflow Replace filter; then Pro HighWarm air from AC vents Low refrigerant, dirty coil, or compressor failure Pro HighSkyrocketing energy bill without usage change Loss of efficiency — multiple possible causes Pro diagnosis MediumBurning smell on first heat of season Dust burning off coils (normal) Monitor Low⚠️ Gas appliance warning: A yellow or orange flame on a gas furnace or water heater means incomplete combustion. This is how carbon monoxide enters a home. Do not dismiss this. Turn off the appliance and call a licensed HVAC technician the same day.Plumbing Maintenance: The Slow Failures That Become Expensive EmergenciesThis is the system where "if it ain't broke" thinking genuinely destroys budgets. Plumbing failures rarely announce themselves dramatically. They drip, seep, and corrode slowly for months or years before the day you walk downstairs and find four inches of water on the floor. By then you're not just replacing a pipe — you're replacing drywall, flooring, and possibly dealing with mold remediation. Water Heater Maintenance: Anode Rod, Sediment Flush, and When to Replace The anode rod is the single most important and most ignored water heater maintenance item. It's a magnesium or aluminum rod inside the tank that sacrificially corrodes instead of letting the tank corrode. When it's depleted — which takes 3–5 years — the tank itself starts corroding. You replace a $20–$30 rod every few years, or you replace a $600–$1,500 tank every 8–10 years instead of 15. To replace it yourself: shut off water and power (or gas), connect a socket wrench to the hex head on top of the tank, and swap the rod. It's a 45-minute job with moderate difficulty. If the rod is fused with corrosion (common if it's been 5+ years), call a plumber. Sediment flushing: Connect a hose to the drain valve at the bottom of the tank, run it to a floor drain or outside, and open the valve until clear water runs out. Do this once a year. On hard water systems (common in the southwestern US, parts of UK), do it every 6 months. When to replace, maintenance aside:Water Heater Age Action0–7 years Maintain normally7–10 years Inspect anode rod; budget for replacement10–12 years Plan replacement; don't invest in major repairs12+ years Replace proactively — failure is imminentGutters and Drainage: The Most Neglected System in Most Homes Clean gutters twice a year: once in late spring (after seed pods and pollen), once in late fall (after leaves). In heavy tree cover, four times a year. What happens when gutters clog? Water overflows and runs down the fascia boards (they rot), pools at the foundation (basement water intrusion), saturates the soil under the eaves (foundation undermining in freeze-thaw zones), and gets under the soffit (attic moisture). A $200 annual gutter cleaning prevents a $4,500–$15,000 fascia, foundation, or roof repair. That math is not close.Most homeowners overlook this: Grading and drainage. Walk around your home after a heavy rainstorm. Watch where the water goes. If it flows toward your foundation — or if you see pooling within 6 feet of the house — that's a problem. You may need to add soil to redirect drainage, extend downspouts, or install a French drain. None of these is expensive if caught early. All of them become expensive if ignored for years.Leak Sensors and Smart Shutoffs: How a $50 Device Prevents $10,000 in Damage Water damage is the single largest category of homeowner insurance claims in the US and UK. The average claim is $11,000. Most of it is from slow leaks that went undetected for days or weeks — not from burst pipes. A basic water leak sensor (Govee, Wink, or similar) placed under the sink, behind the refrigerator water line, near the water heater, and at the base of the washing machine costs $15–$30 each and screams at you the moment it detects moisture. That's it. That's the whole solution for a huge percentage of leak scenarios. A step up: the Moen Flo or Phyn Plus monitors your whole-home water usage and learns your baseline. When flow is detected at 2am for 4 hours — which almost certainly means a leak — it alerts you and can automatically shut off the main supply. These run $400–$700 installed, which sounds expensive until you remember that the average water damage claim is $11,000. Where to place basic sensors:Under every sink (especially kitchen) Behind the refrigerator (ice maker line) Next to the water heater Behind the washing machine Near the sump pump (monitor its well for overflow) In the basement near any exposed pipesCost of skipping leak detection:Item skipped Average cost of skipping$25 under-sink sensor $2,000–$8,000 in cabinet/floor water damage$400 whole-home monitor $11,000 average insurance claimAnnual washing machine hose inspection $1,000–$3,000 hose burst damage (happens mid-cycle, unattended)Electrical and Safety Systems: The Annual Checks That Can Save Your Life Some sections of this guide are about saving money. This one is about something more important. Smoke and Carbon Monoxide Detectors: Most Homeowners Test These Wrong Testing a smoke detector by pressing the "test" button confirms the alarm sounds. It does not confirm the sensing element still works. The only way to test the actual detection capability is to expose the sensor to real smoke (a smoldering piece of paper or a smoke test aerosol). What most homeowners don't know about CO detectors: Carbon monoxide has no smell, no color, and no taste. The only warning you get is the detector — or symptoms of CO poisoning, which feel like flu: headache, nausea, dizziness. By the time symptoms appear, you're already impaired. CO detector placement matters more than most people realize:Place detectors on each level of the home Install within 15 feet of sleeping areas Height: CO is roughly the same weight as air, so placement at outlet height (12–18 inches from the ceiling) is fine — contrary to the common myth that CO sinks to the floor (that's propane)Critical detail nobody mentions: CO detectors expire. The sensing element degrades after 5–7 years. The alarm still sounds when you press the test button — because that tests the alarm, not the sensor. Check the manufacture date on the back of your detector. If it's over 7 years old, replace it regardless of whether it's beeping. Replacement cost: $20–$50 for a basic CO detector. $100–$150 for a Nest Protect (combined smoke/CO, smartphone alerts, gentler nighttime warnings). The Nest Protect is worth considering for families with sleeping children or anyone who travels. Electrical Panel Inspection: When to Stop and Call an Electrician Your electrical panel is not a DIY maintenance item beyond visual inspection. Here's what visual inspection means:Open the panel door and look for scorch marks or discoloration around any breaker Check whether any breakers sit at a slight angle (signs of physical stress) Note whether breakers trip frequently with normal usage Check the panel brandStop and call a licensed electrician if:You see any scorch marks, burning smell, or melted plastic Breakers trip more than once a month under normal load Your panel is a Federal Pacific Electric (Stab-Lok) or Zinsco brand — these have documented design flaws and elevated fire risk, and most electricians will recommend replacement Your panel is over 25 years old and you're adding modern loads (EV charger, hot tub, additional appliances) You have a fuse box instead of a breaker panel⚠️ Hard rule: Electrical panel work is permit-required, code-governed, and in most jurisdictions requires a licensed electrician. This is not a gray area. If you see scorching, flickering, or persistent tripping — do not investigate further. Call a pro. Cost: Panel inspection by a licensed electrician: $100–$200. Panel replacement: $1,500–$4,000. Electrical fire: $50,000+ in damage, plus the immeasurable. GFCI Outlets, Dryer Vents, and the Maintenance Nobody Thinks About GFCI outlets (those with the "test" and "reset" buttons, required near water sources by code) should be tested monthly. Press "test" — power cuts to the outlet. Press "reset" — power restores. If power doesn't cut or doesn't restore, replace the outlet. Cost: $15–$25 for the outlet, 20 minutes to swap it yourself. Dryer vent cleaning: As mentioned earlier — 2,900 house fires annually in the US from dryer lint ignition. Clean the external vent duct once a year. Disconnect the dryer, use a long flexible brush kit from the back of the appliance to the exterior vent. Also check the exterior vent flap; birds and squirrels love to nest there.Roof, Foundation, and Exterior: Catching Problems Before They Become StructuralThis section covers the systems where the gap between a small problem and a catastrophic one is just time. Roof Inspection Basics: What to Look For and What Signals Professional Attention You don't need to walk the roof yourself. Binoculars from the yard work for a visual check. What you're looking for:Missing, curled, or cracked shingles — especially in the valleys and around penetrations (vents, chimneys, skylights) Flashing that looks lifted, bent, or separated (flashing is the metal strip sealing every roof-to-wall or roof-to-penetration junction — it's the most common leak source) Dark staining on shingles (algae — mostly cosmetic but worth treating) Sagging in any section of the roofline (structural — call a pro immediately) Granules filling the gutters (shingles are shedding their protective coating — getting toward end of life)Inside the attic: Check for water stains on the decking, light coming through anywhere it shouldn't, and soft or spongy areas in the decking. Do this after a rainstorm. Cost of skipping annual inspection: One season of undetected flashing failure around a chimney can mean $3,000–$6,000 in decking and interior damage. A roof replacement you could have deferred 5 years costs $8,000–$20,000 if you let the underlying decking rot.Roof Age (Asphalt Shingles) Condition Action0–10 years Annual visual inspection10–15 years Professional inspection every 2 years15–20 years Annual professional inspection + budget for replacement20–25 years Plan replacement; inspect twice yearly25+ years Replacement is overdue in most climatesClimate note: In high-UV environments (Arizona, Nevada, southern Australia), shingles age faster. A 20-year-rated shingle in Phoenix may need replacement at 14–16 years. Foundation Cracks: What's Normal, What's Not, and When to Panic Not all foundation cracks are created equal. Generally fine:Hairline cracks less than 1/16 inch wide in poured concrete, running vertically or diagonally — normal concrete shrinkage Efflorescence (white mineral deposits) on concrete block — water is moving through, but slowlyWorth monitoring:Cracks wider than 1/8 inch, especially if growing Horizontal cracks in block foundations (block walls crack horizontally under lateral soil pressure — this is more serious) Cracks near corners of window openings (stress concentration points)Call a structural engineer or foundation specialist:Any crack that has grown visibly over 3–6 months Horizontal cracking in block walls — this can indicate wall bowing Cracks with one side higher than the other (differential settlement) Doors or windows that suddenly stick or have gapsA foundation inspection by a structural engineer runs $300–$700. Not cheap. But infinitely cheaper than foundation repair, which starts at $3,000 and can reach $30,000+ for serious differential settlement. Caulking, Sealing, and Weatherstripping: The $15 Maintenance Nobody Does This is the most overlooked, most cost-effective maintenance task on this list. Caulking and weatherstripping prevent three things simultaneously: drafts (which increase heating and cooling costs), moisture intrusion (which causes rot and mold), and pest entry. Check all caulking where exterior surfaces meet — around windows, doors, plumbing penetrations, where siding meets trim. Caulk that's cracked, peeling, or missing gaps costs $5 a tube and takes 20 minutes to fix. Water damage through those same gaps costs $2,000–$8,000. Replace door weatherstripping when you can feel a draft with the door closed, or when you can see daylight around the door frame. A full weatherstripping kit: $20–$40. The energy savings in heating and cooling typically pay for it within one season.How Smart Home Technology Turns Reactive Maintenance Into PreventiveThe honest pitch for smart home devices in a maintenance context isn't "they do the maintenance for you." They don't. The real value is earlier detection and fewer missed tasks — which, for specific failure modes, translates into significant money saved. Devices That Catch Failures Before They HappenDevice What It Monitors Maintenance It Prevents Price RangeSmart water leak sensor Standing water under appliances/pipes Water damage $2K–$15K $15–$30 eachWhole-home water monitor (Moen Flo, Phyn) Abnormal flow patterns, slow leaks Water damage, mold remediation $400–$700 installedSmart thermostat (Ecobee, Nest) Runtime hours, filter reminders, temp swings HVAC efficiency loss, early failure $150–$280Smart smoke/CO detector (Nest Protect) Smoke + CO levels, self-testing House fire, CO poisoning $100–$150Whole-home energy monitor (Emporia Vue) Circuit-level power draw Identify appliances running inefficiently $100–$150Smart sump pump controller Pump runtime and failure Basement flooding $50–$150Setting Up Maintenance Reminders Without Overcomplicating It The simplest effective system: a recurring calendar reminder, set up once.HVAC filter: Every 30, 60, or 90 days depending on your household (see the table above) Smoke/CO detector test: First of every month — takes 30 seconds Seasonal checklist: March 1, June 1, September 1, December 1 Annual inspections: Set a recurring annual reminder for HVAC tune-up (April), chimney (September), roof (October)If you use Alexa or Google Home: set a routine for the first of each month that reminds you to test detectors and check the filter. It takes about 3 minutes to set up once. When Smart Devices Create a False Sense of Security This is the part most smart home articles skip. A Nest thermostat sending filter change notifications doesn't guarantee you change the filter. Notifications are easy to dismiss. The homeowner who has ignored 7 consecutive Nest alerts about a dirty filter still has the same dirty filter as the homeowner with no smart thermostat at all. Smart devices improve your odds. They're not a replacement for the habit of doing the thing. Likewise: a water leak sensor doesn't replace knowing where your main water shutoff is. A smart sump pump monitor doesn't replace testing the pump before rainy season. These are tools that give you earlier warning — the response is still on you. Know where your main water shutoff is. Know where your electrical panel is. Know where the gas shutoff is. These are the foundational things that no app replaces.DIY vs. Hiring a Pro: An Honest Guide for Every System in Your Home Not every homeowner has the same skill level, the same tools, or the same risk tolerance. This table is designed to reflect that. The Complete DIY vs. Pro BreakdownTask DIY Difficulty DIY Cost Pro Cost Skip RiskHVAC filter change Very Easy $8–$40 N/A $200–$2,500 in HVAC damageGutter cleaning (single story) Easy $0–$25 $100–$250 $3,000–$8,000 foundation/fasciaWater heater sediment flush Easy $0 $75–$100 Shortened tank life, $800+ early replacementAnode rod replacement Moderate $20–$30 + tool $150–$250 Tank failure, $800–$1,500 replacementCaulking and weatherstripping Easy $20–$60 $200–$500 Energy loss, moisture damageDryer vent cleaning Easy-Moderate $25 kit $100–$170 House fire riskHVAC tune-up Pro Only — $80–$150 15–20% efficiency loss, early system failureChimney cleaning Pro Only — $150–$300 Chimney fire, CO intrusionRoof inspection (visual) Easy (ground level) $0 $150–$400 Undetected leak damageRoof repair Moderate-Hard $50–$300 $300–$1,500 Structural water damageElectrical panel inspection Visual only $0 $100–$200 Fire risk, code violationsGFCI outlet replacement Moderate $15–$25 $75–$150 Electrocution risk near waterWater heater replacement Hard / Pro advised $600–$1,200 $900–$1,800 installed —Foundation crack monitoring Easy $0 $300–$700 (engineer) Structural failureTasks You Should Never Attempt YourselfGas line work of any kind — connections, re-routing, appliance installation. Licensed plumber or HVAC tech only. Electrical panel work — opening the main panel, adding circuits, replacing breakers. Licensed electrician, pulled permit. Structural repairs — sistering joists, repairing load-bearing walls, foundation work. Structural engineer evaluation first. Asbestos or lead paint disturbance — any home built before 1978 may contain lead paint; homes before 1980 may contain asbestos insulation or tile. Do not sand, drill, or remove without testing first. Remediation requires certified professionals. Chimney re-lining — beyond cleaning. A CSIA-certified chimney sweep.The decision tree:Is it electrical or gas? → Pro Does it require a permit in your jurisdiction? → Pro (pulling a permit yourself without a license is usually prohibited) Is there structural risk if you do it wrong? → Pro Do you need specialized tools you don't own? → Evaluate whether rental makes sense vs. pro cost Have you never done this before and the consequences of failure are expensive? → ProHome Maintenance by Age: What Changes at 10, 20, and 30+ Years Your home's age is one of the biggest variables in your maintenance burden — and most general checklists completely ignore it. New Construction (0–10 Years): The Warranty Window Builder warranties in the US typically cover:1 year: workmanship and materials (defects in finish work) 2 years: mechanical systems (HVAC, plumbing, electrical) 10 years: structural defectsWhat this means practically: Document everything. If a system fails within the warranty period, it's the builder's problem — but only if you've reported it and have a paper trail. Keep records of every repair request and every builder response. New construction specific watch items:Settling cracks in drywall — normal for the first 1–2 years as the home settles; genuine structural cracks appear differently Builder-grade appliances and components — often the least expensive units available. Your new furnace may be at the bottom of its manufacturer's product line. Maintain it carefully; it may need replacement sooner than expected. Irrigation systems — new construction irrigation is notorious for improper coverage and runoff. Walk the zones in year one and adjust heads.Mid-Age Homes (10–25 Years): When Systems Start Reaching End-of-Life This is when your original components start hitting their design lifespan. Typical end-of-life timelines:System/Component Average LifespanAsphalt shingle roof 20–30 yearsHVAC system 15–20 yearsWater heater (tank) 10–15 yearsDishwasher 10–13 yearsRefrigerator 12–17 yearsWashing machine 10–14 yearsExterior paint 5–10 yearsWood deck (untreated) 10–15 yearsCaulking and weatherstripping 5–10 yearsSmoke detectors 10 years (sensing element)A home entering its 15th year is also a home where original plumbing connections, original caulking, original weatherstripping, and original appliance hoses are all near their service limits simultaneously. Budget accordingly. Older Homes (25+ Years): The Systems That Need Special Attention Older homes have character, often have better bones than new construction, and require more vigilance about specific systems.Wiring: Homes built before 1965 may have aluminum wiring in the branch circuits (not just the service entrance), which requires specific outlet and switch types to be safe. Homes before 1985 may have insufficient grounding. Have a licensed electrician assess if you're unsure. Plumbing: Galvanized steel pipes (common in homes pre-1970s) corrode from the inside and gradually reduce water flow and water quality. Signs: rust-colored water, reduced pressure. Replacement is a significant project but often necessary. Insulation: Pre-1980 homes may have insulation well below current standards. An attic with R-11 insulation (2–3 inches of loose fill) compared to the recommended R-38 to R-60 is losing significant heating and cooling energy daily. Lead and asbestos: Any renovation in a pre-1978 home should begin with testing. This is not optional. Both materials are hazardous when disturbed, and remediation adds cost to any project.5 Home Maintenance Myths That Cost Homeowners Thousands Myth 1: "New homes don't need as much maintenance." Reality: New homes need maintenance immediately. Builder-grade components are often minimum-cost units. The first year is actually critical for establishing your baseline — checking that gutters were installed correctly, that grading drains properly, that all appliances are functioning within spec. Myth 2: "I can skip the filter change if the AC is still cooling." Reality: A clogged filter restricts airflow, which causes the evaporator coil to ice over. The system may still produce cool air — right up until the compressor fails. By the time cooling degrades noticeably, you may already have caused damage. Myth 3: "If there's no leak, the roof is fine." Reality: Active leaks are often the last symptom, not the first. Damaged flashing, cracked shingles, and compromised underlayment can be allowing water infiltration for months before it shows up as a ceiling stain. Myth 4: "Annual inspections are only necessary for older homes." Reality: Annual inspection of key systems (HVAC, smoke/CO detectors, water heater) is relevant at every age. Manufacturer warranty on HVAC equipment often requires documented annual maintenance to remain valid. Myth 5: "Homeowners insurance covers maintenance failures." Reality: Homeowners insurance covers sudden and accidental damage — a pipe bursting from a freeze, for example. It does not cover gradual deterioration, neglected maintenance, or slow leaks. If your water heater corrodes over three years and finally fails, that's maintenance — and it's on you.Frequently Asked Questions About Home Maintenance How much should I budget for home maintenance each year? Start with 1% of your home's value, but adjust up for age and climate. A $300,000 home should have $3,000/year set aside minimum; a $500,000 home should have $5,000. If your home is over 15 years old, increase to 2–3%. If you're in a harsh climate (heavy winters, hurricane zone, high-UV desert), add another 0.5–1%. Keep this in a dedicated account. Don't wait until something breaks to fund it. What maintenance do new homeowners always forget? In order of how expensive the oversight gets: dryer vent cleaning (fire risk, often completely ignored), water heater anode rod replacement (no one tells you it exists), knowing where the main water shutoff is (you'll need this in an emergency, usually at 2am), chimney inspection (low awareness, high risk), and HVAC filter replacement on a real schedule rather than "when I remember." How often should I change my HVAC air filter? Every 30–90 days depending on your situation. Single person, no pets, no allergies, mild climate: 90 days. Multiple people, one or more pets, or anyone with allergies: every 30–45 days. Using a MERV-13 filter: every 30–60 days — these filter more but clog faster. Check the filter monthly and change it when it's visibly gray. Don't wait for the interval if it looks dirty. Do smart home devices actually reduce maintenance costs? Yes, but specifically and not broadly. Water leak sensors and whole-home water monitors have the clearest ROI — the average water damage claim ($11,000) vastly exceeds the cost of detection ($15–$700). Smart thermostats improve HVAC efficiency and remind you about filter changes. Beyond those, the ROI becomes less clear. Smart bulbs and smart speakers don't prevent the failures that cost homeowners real money. What's the most expensive home repair to ignore? Foundation issues, roof damage, and HVAC failure are the top three. Foundation repairs start at $3,000 and can reach $30,000+. Roof replacement runs $8,000–$20,000. HVAC replacement is $6,000–$12,000. All three are largely preventable with consistent, inexpensive maintenance. The fourth one most homeowners don't expect: water damage from undetected leaks, which averages $11,000 per insurance claim. How do I know if my electrical panel needs replacing? Age over 25 years is a flag worth investigating. The brands Federal Pacific Electric (Stab-Lok) and Zinsco are documented safety hazards and should be replaced proactively — a licensed electrician can confirm the brand if you're unsure. Functional warning signs: breakers that trip frequently under normal load, any scorch marks or burning smell, flickering lights throughout the house (not just one circuit). Have a licensed electrician evaluate — a proper panel assessment costs $100–$200 and gives you clarity either way. Is a home warranty worth it? For older homes (10+ years) with aging systems, potentially yes — especially if you're not handy and can't absorb a sudden $3,000 HVAC repair. Read the fine print carefully: most home warranties exclude pre-existing conditions, have per-item claim caps, and may send their own contractors (who may not be your preferred vendors). For new construction under builder warranty, a home warranty is usually redundant and not worth the annual premium ($400–$700/year). For a 15-year-old home with original HVAC and appliances — worth calculating. What home maintenance should I do every spring? The spring priorities in order of importance: clean gutters, inspect the roof for winter damage, service the air conditioner before cooling season, test the sump pump before rainy season, check grading and drainage around the foundation, inspect exterior caulking and weatherstripping, check for pest activity (especially termite signs in warmer climates), and flush the water heater if you didn't do it in the fall.This guide covers general maintenance applicable to most homes in the US, UK, Canada, and Australia. Regional building codes, climate conditions, and local contractor costs vary. For safety-critical systems — electrical, gas, structural — always consult a licensed professional in your jurisdiction. Last updated: 2026. Costs reflect US market averages; UK, Canadian, and Australian pricing will vary by region and market conditions.
.webp)
Basic Home Maintenance: The Complete Homeowner's Guide
Quick answer: Basic home maintenance means regularly inspecting and servicing your home's core systems — HVAC, plumbing, roof, electrical, and exterior — on a seasonal schedule. Done consistently, it prevents the kind of expensive failures that catch most homeowners completely off guard. At a glance:Replace HVAC filters every 1–3 months Clean gutters at least twice a year Test smoke and CO detectors every six months Service your water heater annually Budget 1–2% of your home's value per year for maintenance Seasonal checklists can reduce emergency repair costs by 30–50%Why Basic Home Maintenance Gets Skipped (And Why That's a Costly Mistake) Here's something no one warns you about when you buy a house: the maintenance doesn't announce itself. A slow gutter clog doesn't sound an alarm. A failing water heater anode rod doesn't send you a reminder. And by the time you notice something's wrong — the water stain on the ceiling, the unusually high energy bill, the sudden furnace failure in January — you're already past the point where a $40 fix would have worked. Most homeowners skip maintenance for three reasons: they don't know what to do, they don't know when to do it, or they assume everything's fine because nothing has visibly broken yet. All three are completely understandable. But they're also how a $200 gutter cleaning turns into a $4,000 foundation repair. This guide fixes that. It's a practical, honest resource — not a checklist you'll print and forget, but a framework you can actually use.The Real Numbers: What Deferred Maintenance Costs Homeowners The 1% rule is the most common benchmark in home maintenance budgeting: expect to spend roughly 1% of your home's purchase price on maintenance each year. A $400,000 home? Budget around $4,000 annually. That sounds like a lot until you price out what deferred maintenance actually costs:Neglected Task DIY Prevention Cost Repair Cost When It FailsGutter cleaning $0–$150/year $1,500–$10,000 (water damage, foundation)HVAC filter changes $10–$40/year $300–$1,200 (coil replacement, efficiency loss)Water heater flush $0 DIY $800–$1,500 (premature replacement)Caulking windows/doors $10–$30 $200–$800 (water intrusion, rot)Roof inspection $0–$200 $5,000–$15,000+ (full replacement)Sump pump test $0 $2,000–$10,000 (basement flooding)The pattern is consistent: the tasks that cost almost nothing to maintain reliably produce the most expensive failures when ignored.How Smart Home Tech Changes the Maintenance Game Smart home devices won't do your maintenance for you — but they can make it dramatically harder to forget. A smart thermostat like a Nest or Ecobee tracks filter runtime and sends reminders when it's time to swap. Leak sensors placed under sinks, near the water heater, and behind the washing machine catch slow drips before they become floods. Smart smoke and CO detectors log self-test results and notify you when batteries need replacing. The honest trade-off: these devices add cost upfront and require their own occasional maintenance (firmware updates, battery checks). But for households where "I forgot" is the most common reason maintenance gets skipped, they earn their keep quickly. One caveat worth flagging: no sensor replaces a physical walkthrough. A leak detector under your kitchen sink won't catch a slow roof leak working its way through your attic insulation. Tech augments attention — it doesn't replace it.The Complete Seasonal Home Maintenance Checklist Organizing maintenance by season isn't just a formatting choice — it's how the work actually flows. Your gutters need clearing after leaves fall, not in July. Your HVAC system should be inspected before you need it, not the day temperatures drop.Spring Home Maintenance Tasks Spring is your assessment season. You're looking for damage winter left behind and preparing for summer heat and rain. Exterior checks:Inspect roof for missing, cracked, or curled shingles — binoculars from the ground work for most homeowners Check gutters and downspouts for debris, sags, or separation from fascia Look at exterior caulking around windows, doors, and where siding meets trim — winter freeze/thaw cycles crack it reliably Walk the perimeter and look for foundation cracks, soil erosion, or areas where water pools near the houseInterior and systems:Schedule your HVAC tune-up before summer demand makes appointments scarce Replace the HVAC filter if you haven't since fall Test all smoke and CO detectors (replace batteries if needed; replace the unit if it's more than 10 years old) Check the water heater for corrosion, rust-colored water, or rumbling noises during heating — signs sediment has built up Turn on exterior hose bibs slowly and check for drips that suggest freeze damageOutdoor prep:Check deck or patio for loose boards, popped nails, or soft wood that indicates rot Reconnect and test any irrigation or sprinkler systems Trim back any branches overhanging the roofSummer Home Maintenance Tasks Summer is your upkeep season. Less emergency work, more optimization and prevention.Clean dryer vent thoroughly — lint buildup is a genuine fire hazard and a leading cause of reduced dryer efficiency Inspect and clean bathroom exhaust fans (they accumulate lint and dust faster than most people expect) Check attic ventilation — poor airflow in summer drives up cooling costs significantly Test the sump pump if you have one: pour water into the pit and confirm the float triggers the pump Inspect window and door screens; patch or replace any that have gaps or tears Service lawn equipment while you have time (rather than scrambling before the first mow) Check the exterior of your home's air conditioning unit — clear any plant growth or debris from around the condenserFall Home Maintenance Tasks Fall is your most critical maintenance season. What you do here determines how your home handles winter. Heating system prep:Schedule furnace or boiler service if you haven't done it in a year Bleed radiators if you have a hot-water heating system (trapped air causes cold spots) Stock up on HVAC filters so you're not scrambling mid-winterWeatherproofing:Inspect and replace weatherstripping on exterior doors — hold a piece of paper in the closed door; if it slides out easily, you're losing heat Caulk around windows where any gaps or cracks appeared since spring Check attic insulation levels; adding insulation is one of the highest-ROI home improvements availableExterior winterization:Clean gutters after the last leaves fall — this is non-negotiable in most of North America and the UK Drain and store garden hoses; shut off exterior hose bib valves inside the house Check the roof one more time before heavy snow arrives Inspect chimney and fireplace if you use it (annual professional inspection recommended)Safety systems:Test smoke and CO detectors again (second of the twice-yearly checks) Check fire extinguisher pressure gaugeWinter Home Maintenance Tasks Winter is your monitoring season — most major prep should be done. Focus on watching for problems and managing systems under load.Monitor for ice dams forming at roof edges (signs: icicles larger than normal, water stains appearing on interior ceilings) Keep attic temperature regulated — a warm attic causes snow to melt, refreeze at the eaves, and back up under shingles Check that dryer, bathroom, and kitchen exhaust vents remain clear of snow or ice blockages Run water in infrequently used sinks and tubs during cold snaps to prevent pipe freezing Know where your main water shutoff valve is — in a burst pipe scenario, every second counts Check basement and crawl space for condensation or moisture during heavy rain or snowmeltRoom-by-Room Maintenance Guide A seasonal checklist covers most of what you need. But it's easy to overlook specific rooms during a quick walkthrough. This section gives you a focused lens for each area.Kitchen Maintenance Checklist The kitchen has more mechanical systems per square foot than anywhere else in the house.Refrigerator coils: Clean underneath and behind your fridge annually. Dusty coils make the compressor work harder and shorten the appliance's life. A coil brush costs $10 and takes five minutes. Dishwasher filter: Most people don't know their dishwasher has a filter — check your manual and clean it every few months Range hood grease filter: Soak it in hot water and degreaser monthly if you cook frequently Garbage disposal: Run it with cold water and a few ice cubes occasionally to clean the blades; check under the sink monthly for any drips from the P-trap Supply lines: Check the braided lines running to the fridge icemaker, dishwasher, and sink faucets. Aged rubber lines are a common source of slow, invisible leaks.Bathroom Maintenance Checklist Moisture is the defining challenge in every bathroom. Your maintenance focus here is preventing water damage before it starts.Caulk and grout: Inspect the caulk line where the tub or shower meets tile or the surround panel. Any gaps or discoloration that doesn't clean off signals water is getting behind the wall — address it immediately. Toilet innards: Lift the tank lid and check the flapper and fill valve periodically. A running toilet can waste 200 gallons of water per day — and it often sounds like silence. Exhaust fan: Run it during every shower and leave it running for 10–15 minutes after. If the fan doesn't clear steam within a few minutes of use, it's undersized or clogged. Supply line under the sink: Check for mineral deposits or corrosion where the supply line meets the shutoff valve. Shower drain: Clean hair and debris monthly to prevent slow drainage that backs up and tests your caulk lines.Basement and Attic Checks Both spaces tend to be out of sight and out of mind — which is exactly why problems there get expensive. Basement:Look for new cracks in the foundation wall — hairline cracks are common; horizontal cracks or ones wider than 1/4 inch warrant a professional opinion Check for any white chalky residue (efflorescence) on concrete walls, which indicates water is moving through the masonry Inspect sump pump and pit quarterly Check exposed pipes for condensation or dripping during humid monthsAttic:Look for daylight where there shouldn't be any (around vents, at the ridge) Check insulation for compression, moisture damage, or gaps Look at rafters for dark staining, which can indicate past or current moisture intrusion Make sure bath and kitchen exhaust vents exit fully outside — improperly terminated vents that dump humid air into the attic are a surprisingly common source of mold problemsHVAC Maintenance: The System Most Homeowners Neglect Of every home system, HVAC is the one that takes the longest to visibly fail and causes the most financial damage when it does. A slow decline in efficiency is easy to miss — until you compare your energy bills to two years ago and realize you've been spending $30–$50 a month extra for a problem a $15 filter change would have prevented.How Often to Change Your Air Filter (And Which Type to Buy) The answer most homeowners get wrong: not every three months across the board.Household Type Recommended Filter Change IntervalSingle person, no pets, no allergies Every 6–12 monthsAverage family home Every 90 daysOne pet in the home Every 60 daysMultiple pets or allergy sufferers Every 30–45 daysHigh-dust environments (near construction, gravel roads) Every 30 daysWhich filter to buy? The MERV rating (Minimum Efficiency Reporting Value) is what matters.MERV 1–4: Basic fiberglass filters. Protect the HVAC equipment but do essentially nothing for air quality. MERV 8–10: The sweet spot for most homes. Captures dust, pollen, mold spores, and pet dander without restricting airflow. MERV 11–13: Good for allergy sufferers. Verify your system can handle the added restriction before upgrading. MERV 14+: Hospital-grade. Most residential systems aren't designed for this level of restriction — using them without verifying compatibility can damage your blower motor.Smart HVAC filters with built-in sensors that track usage and alert you via app are worth considering if you have a history of forgetting. They're a modest upgrade that solves a consistent human problem.Annual HVAC Service: DIY vs Calling a Tech What you can do yourself:Change filters on schedule Clear 2 feet of clearance around the outdoor condenser unit Straighten bent fins on the condenser (a fin comb costs $10) Clean the condensate drain line with diluted bleach annually Change batteries in the thermostatWhat warrants a professional:Annual tune-up (cleaning coils, checking refrigerant levels, testing electrical connections, lubricating motors) Any unusual noises — grinding, squealing, or banging aren't "it'll probably go away" situations Repeated cycling on and off without reaching set temperature Refrigerant issues — handling refrigerant requires EPA certification and is never a DIY taskThe typical HVAC annual service runs $80–$150 in most US markets, $60–$120 in the UK, and similar ranges in Canada and Australia. It's one of the better-value professional services you can buy — a tech who spots a failing capacitor during a tune-up saves you from a full no-cool emergency in August.Plumbing Maintenance Tasks Every Homeowner Can HandleMost plumbing maintenance isn't plumbing — it's observation. The goal is catching the early signs before they become emergencies. Monthly:Run water in any sink, shower, or tub you don't use regularly; P-traps dry out and allow sewer gas into the home Check under kitchen and bathroom sinks for drips or moistureEvery 6 months:Test every shutoff valve under sinks and behind toilets by turning them off and back on; valves that seize open are worthless in an emergency Inspect washing machine hoses — braided stainless is worth the upgrade if yours are rubber and older than five years Pour a gallon of water into floor drains to keep P-traps filledAnnually:Water heater flush: Connect a garden hose to the drain valve at the base of the tank, run it outside or to a floor drain, and flush until the water runs clear. This removes sediment that reduces efficiency and accelerates corrosion. On tankless heaters, annual descaling is the equivalent task. Anode rod inspection: This is the one most homeowners have never heard of. The anode rod is a sacrificial metal rod inside your water heater that corrodes so the tank doesn't. When it's depleted, the tank starts corroding instead — and replacement is simply a new water heater. Inspect the anode rod every three years; replace it if more than 50% is depleted. This single task can double the life of a water heater. Check the pressure relief valve on your water heater — it should lift and release easily⚠️ Safety note: Never work on gas lines yourself. A licensed plumber or gas fitter handles anything involving gas connections, even if the task looks simple. The consequences of an error are severe and immediate.Roof and Exterior: What to Look For (Without Getting on the Roof) The good news: you can assess most roofing issues from the ground with a decent pair of binoculars. The better news: catching problems early dramatically narrows your repair options from "full replacement" to "spot repair."What to look for from the ground:Missing shingles or shingles that look raised, curled at the edges, or darker in patches (signs of moisture absorption) Granules accumulating in gutters — some granule loss is normal, but heavy accumulation signals aging shingles Sagging anywhere along the roofline — this indicates structural issues beneath the surface Flashing around chimneys, vents, and skylights that looks lifted, bent, or separatedGutters: Clean them in late fall and again in spring. A gutter full of debris does far more damage than most homeowners realize — water backs up, sits against the fascia board, soaks into the roof deck, and eventually finds its way inside. In colder climates, packed gutters cause ice dams. Exterior caulking and paint: Inspect every joint where different materials meet — wood siding to trim, trim to window frames, around any penetrations (pipes, vents, electrical boxes). Failed caulk is the single most common entry point for water intrusion in older homes.Home Maintenance Cost Guide: What to Budget Per Year The 1% rule is a starting point, but it skews depending on your home's age, size, and condition. A newer home with a warranty may cost far less in the early years. A 40-year-old home with original systems may run closer to 2–3%.Here's a realistic breakdown of annual maintenance costs by task:Task DIY Cost Professional Cost FrequencyHVAC filter changes $40–$120 N/A Monthly–quarterlyHVAC annual service N/A $80–$150 AnnuallyGutter cleaning $0–$50 (own ladder) $100–$250 2x/yearWater heater flush $0 $80–$120 AnnuallyDryer vent cleaning $0–$30 $80–$150 AnnuallySmoke detector batteries $10–$20 N/A AnnuallyWindow/door caulking $10–$30 $150–$400 Every 2–5 yearsRoof inspection $0 (DIY ground check) $150–$300 AnnuallyChimney cleaning N/A $150–$250 Annually (if used)Pest inspection N/A $75–$150 AnnuallyRough annual total for a median US home (DIY-leaning): $500–$1,500 Fully professional maintenance: $2,000–$4,000+ These numbers cover routine maintenance only — not repairs, not replacements, not emergencies.DIY vs Hiring a Pro: How to Decide The most common mistake homeowners make isn't attempting too much DIY — it's attempting the wrong tasks.Task DIY? WhyHVAC filter changes ✅ Yes No tools or expertise requiredGutter cleaning ✅ Yes (with ladder safety) Straightforward; equipment is minimalCaulking windows ✅ Yes Low stakes; easy to correct errorsWater heater flush ✅ Yes Standard DIY with basic instructionsHVAC tune-up ❌ Pro Refrigerant, electrical, and calibration workRoof repairs ❌ Pro Fall risk; improper repairs accelerate damageElectrical panel work ❌ Pro Safety-critical; often requires permitGas line connections ❌ Pro Always. No exceptions.Foundation repair ❌ Pro Structural; incorrect repair makes things worseChimney repointing ❌ Pro Requires specialized technique and materialsThe general framework: if the task involves working at height, involves gas or electrical systems, requires a permit, or could make the problem worse if done incorrectly — call a licensed professional.Common Home Maintenance Myths (And What's Actually True) Myth: "If it ain't broke, don't fix it." Reality: Most home systems fail slowly, invisibly. By the time something is visibly broken, the damage is usually already done. A water heater doesn't just stop working — it corrodes from the inside for years first. Myth: "Smart home devices make maintenance mostly automatic." Reality: Connected devices help with reminders and monitoring, but they don't replace physical inspection. A leak sensor under your sink doesn't check your roof. They're useful tools, not a maintenance program on their own. Myth: "New construction homes don't need maintenance for the first few years." Reality: New homes often have settling cracks, caulking failures, and grading issues in the first few years that are easier to address early. The systems may be new, but they still need regular attention. Myth: "Annual professional inspections are overkill." Reality: A single professional inspection can catch issues a homeowner would never identify — and often pays for itself with one prevented repair. Myth: "I'll do it when I notice a problem." Reality: The most expensive home repairs are the ones that didn't show themselves until they were severe. Waiting for visible problems is the most expensive maintenance strategy available.Frequently Asked Questions How much should I budget for home maintenance per year? The standard benchmark is 1–2% of your home's value annually. A $350,000 home should have roughly $3,500–$7,000 budgeted for maintenance and minor repairs each year. Older homes, homes with original systems, and homes in harsh climates trend toward the higher end. What is the 1% rule for home maintenance? The 1% rule suggests budgeting 1% of your home's purchase price per year for maintenance costs. It's a rough guideline rather than a precise formula — the real variables are your home's age, construction quality, location, and how consistently you've maintained it in prior years. What home maintenance can I do myself vs call a professional? As a general rule: anything that doesn't involve height, gas, structural elements, or the electrical panel is a reasonable DIY candidate with proper research. HVAC filter changes, caulking, gutter cleaning, minor drywall patching, and fixture replacement are typically accessible. Anything involving the roof, electrical panel, gas lines, foundation, or HVAC refrigerant should go to a licensed pro. How often should you get your house inspected? Most home inspectors and building professionals recommend a full home inspection every three to five years, particularly for older homes. Annual professional checks on specific systems — HVAC, chimney, roof — make sense on their own schedule. A pre-sale inspection is always worth commissioning before listing a home. Why is my energy bill high even with a smart thermostat? A smart thermostat optimizes your heating and cooling schedule, but it can't compensate for underlying inefficiencies. The most common culprits are a dirty HVAC filter restricting airflow, poor attic insulation allowing heat transfer, failing window seals, or an aging HVAC system losing efficiency. Use your thermostat's energy reports as a diagnostic tool — sudden increases in runtime often signal a maintenance issue rather than a thermostat problem. What maintenance does a new homeowner need to do in the first year? Start by understanding your home's systems: locate the main water shutoff, the electrical panel, the furnace, and any cleanouts. Complete a full seasonal inspection cycle to establish a baseline. Service the HVAC, flush the water heater, clean gutters, test all safety devices, and note the age of every major appliance. You're not just doing maintenance — you're learning what you own. Can skipping maintenance void my home insurance? Yes — and this is significantly underreported. Most homeowner policies include a "neglect" clause that can void coverage for damage directly attributable to deferred maintenance. A roof leak that's been ignored for two years is unlikely to be covered if the insurer's adjuster determines the damage was preventable. Keeping records of your maintenance activities provides meaningful protection here. What smart home devices actually help with home maintenance? The most practical options by impact:Smart water leak detectors (under sinks, near water heater, washing machine): catch slow leaks before they cause structural damage Smart thermostat (Nest, Ecobee): filter change reminders, runtime tracking, energy reporting Smart smoke and CO detectors: self-testing, app alerts, interconnected alarm coverage Home energy monitor (Emporia Vue, Sense): identifies efficiency losses and unusual consumption patterns Smart water shutoff valve: automatically shuts off water in a leak event — high value for vacation homes or anyone frequently travelingNone of these replace maintenance; all of them make it easier to stay ahead of problems.Last updated: 2026. Costs reflect US market averages; UK, Canadian, and Australian pricing will vary by region and market conditions.

The Best Security Systems for Small Businesses in 2026
Picture this: It’s 11:00 PM, and you’ve just locked the doors to your storefront after a grueling 14-hour shift. As you pull out of the parking lot, a familiar, sinking feeling hits. Did the back exit lock properly? Did the new hire remember to arm the alarm? For too many small business owners, walking away from their livelihood every night brings a silent wave of anxiety. A decade ago, enterprise-grade commercial alarm monitoring required a massive IT budget and drilling through cinderblock walls. But the landscape has shifted. The line between high-end smart home automation and commercial security has blurred completely. Today, the robust, AI-powered tech that protects Fortune 500 warehouses is highly accessible and scalable for local coffee shops, boutique retail stores, and small dental practices. If you're still relying on a grainy closed-circuit TV system from 2015, you are leaving your most valuable assets exposed. Upgrading to a modern, cloud-based setup isn't just about catching a thief—it's about environmental monitoring, liability protection, and even cutting down your monthly energy bills. Expert Tip: How We Evaluated These Systems Trusting a system with your business requires more than just reading the box. Our methodology for 2026 focuses heavily on real-world reliability. We evaluated these systems based on emergency response times, cellular backup stability, cloud-recording limitations, and how effortlessly a manager can control employee access permissions. Top Business Security Systems Compared (At a Glance)Before we dive into the granular details of each platform, here is a breakdown of the top contenders in the commercial security space for 2026.Note: Monthly costs fluctuate based on the specific tiers of professional monitoring and video cloud storage you select. 1. ADT: Best Overall for Comprehensive Coverage When the stakes are high, experience matters. ADT remains the absolute heavyweight in the security industry, leveraging an unmatched infrastructure of 12 interconnected, redundant monitoring centers across North America. If a localized power grid fails during a storm, another center instantly picks up your business's monitoring feed without missing a beat. For businesses with significant square footage, high-value inventory, or strict compliance requirements, ADT’s commercial solutions (often operating under their Everon commercial division) offer a level of ironclad protection that DIY systems simply cannot match. Their 2026 systems integrate advanced AI Deterrence, which uses smart video analytics to identify trespassers and deliver real-time verbal warnings through camera speakers before a break-in even occurs. Subtle Upgrade Opportunity: ADT excels at environmental monitoring. Integrating a commercial-grade water-leak sensor near your backroom water heater or commercial refrigerators might seem like an afterthought. However, an unnoticed pipe burst over a long weekend destroys more inventory than the average smash-and-grab burglary.Pros & Cons of ADT for Business Pros:Lightning-fast emergency dispatch (averaging under 30 seconds). Massive variety of hardware, including heavy-duty PTZ (Pan-Tilt-Zoom) cameras. Flawless integration with advanced environmental sensors (smoke, heat, flood). In-person, professional risk assessment prior to installation.Cons:Requires signing a long-term contract (typically 36 months). Mandatory professional installation fees can increase upfront costs. Premium video monitoring tiers are relatively expensive.2. SimpliSafe: Best Budget & DIY Option for Retail Not every business has the capital to wire a 5,000-square-foot facility. If you run a local boutique, a small independent bakery, or a pop-up shop, SimpliSafe is an incredibly attractive option. SimpliSafe built its reputation on straightforward pricing, no-contract monitoring, and hardware that anyone can set up in under an hour. Their 2026 business offerings highlight their proprietary "Active Guard Protection" (formerly Live Guard). When an alarm is triggered, professional monitoring agents can instantly access the indoor live video monitoring feed. They can see the intruder, speak directly through the camera to warn them that police are on the way, and provide 911 dispatchers with verified video evidence—which drastically speeds up police response times in jurisdictions that deprioritize unverified alarms. Because SimpliSafe is entirely wireless, criminals cannot simply snip a phone line or coax cable on the exterior of your building to blind the system.Pros & Cons of SimpliSafe for Business Pros:Highly affordable hardware and transparent monthly monitoring costs. No long-term contracts; you can cancel or pause monitoring anytime. True 100% cellular connection (doesn't rely purely on your store's Wi-Fi). Incredibly simple DIY setup with adhesive mounts for entry sensors.Cons:The base station has a cap of 100 devices (limiting for massive warehouses). Hardware feels a bit more "consumer-grade" compared to heavy commercial options. Lacks the complex access control features needed for large corporate offices.3. Vivint: Best for AI & Smart Automation Vivint sits at the intersection of high-end security and intelligent automation. If your business operates a small fleet of company vehicles parked overnight, or if you want a system that actively discourages crime rather than just recording it, Vivint is top-tier. The crown jewel of their system is the Vivint Outdoor Camera Pro, equipped with Smart Deter technology. Using sophisticated AI, the camera establishes a virtual perimeter around your property. If someone lingers near your loading dock for too long after hours, the camera triggers a bright LED ring and plays a customized warning tone, letting the lurker know they are actively being watched. Vivint also shines in the automation department. You can easily create Home Automation Routines that Save Money—and apply them to your business. For instance, you can link the arming of your security panel to your smart thermostat and lighting. When the last employee arms the system at night, the HVAC automatically drops to an energy-saving temperature and the interior lights shut off, instantly lowering your overhead costs.Pros & Cons of Vivint for Business Pros:Industry-leading AI deterrence that proactively stops loiterers. Seamless integration with smart locks, lighting, and climate control. Sleek, modern touchscreen hub that is easy for employees to use. Excellent local video storage options via their Smart Drive.Cons:High upfront equipment costs (proprietary hardware is expensive). Moving locations incurs a steep re-installation fee. Strict reliance on professional installation.4. Frontpoint & Lorex: Alternatives for Niche Needs While the big three dominate the market, specialized business models require tailored solutions. **Frontpoint **is the ideal middle-ground for business owners who want the DIY ease of SimpliSafe but crave the robust, heavy-duty sensors typically associated with ADT. Frontpoint utilizes alarm.com's backend, making their mobile app incredibly powerful for remote business management. They also boast some of the highest-rated customer service in the DIY sector. Lorex, on the other hand, is the go-to for hardware-heavy, local video surveillance without mandatory monthly fees. If your primary goal is covering every square inch of a busy retail floor with 4K cameras to prevent employee shrinkage or monitor liability (like slip-and-falls), Lorex is unmatched. They specialize in NVR (Network Video Recorder) systems that store weeks of high-resolution video locally. You pay for the equipment upfront, wire it yourself (or hire a local contractor), and skip the ongoing monthly subscriptions. Key Factors to Consider When Upgrading Your Business Security Choosing a system isn't just about picking the sleekest camera. You need to map the technology to your daily operational friction points. Professional Monitoring vs. Self-Monitoring Self-monitoring means alerts go directly to your phone. If you are on an airplane, asleep, or in a meeting, you might miss a break-in notification. Professional monitoring means a dedicated dispatch center receives the alert and contacts the authorities on your behalf. For any business with physical inventory or physical cash, professional monitoring isn't an option; it's an absolute necessity. Furthermore, most commercial insurance providers require a certificate of professional monitoring to qualify for premium discounts. Cloud-Based Video vs. Local DVR/NVR Storage Cloud-based systems (like SimpliSafe and Frontpoint) upload clips to remote servers. This prevents a burglar from simply smashing your recording hard drive to destroy the evidence. However, cloud systems consume significant internet bandwidth and usually charge monthly storage fees. Local storage (like Lorex or Vivint's Smart Drive) keeps the footage on a physical hard drive tucked away in your back office. This allows for continuous 24/7 recording without bogging down your network. Recommendation: If you opt for heavily cloud-reliant cameras, you must ensure your local network can handle it. Consider upgrading to a robust mesh Wi-Fi 6E/7 router system. This ensures your 4K security footage uploads smoothly without throttling the guest Wi-Fi you offer to your customers. Smart Access Control & Employee ManagementManaging physical metal keys is a security nightmare. When an employee quits or loses a key, you are faced with the costly chore of calling a locksmith to re-key the physical doors. Transitioning to commercial access control—utilizing smart locks with individual PIN codes or NFC key fobs—solves this instantly. You can assign temporary codes to morning delivery drivers and restrict employee access to specific hours. When someone leaves the company, you simply delete their profile in the app. Be sure to check our dedicated Smart Home Security & Access Control hub for a deep dive into the best commercial-grade smart locks. 3 Security Mistakes Small Businesses Make in 2026 Even with the best hardware on the market, poor implementation can leave your business wide open. Avoid these critical errors:1. Ignoring Cybersecurity and Network Segmentation If your IP security cameras run on the exact same Wi-Fi network as your Point of Sale (POS) system, you are creating a massive vulnerability. Hackers frequently use poorly secured IoT (Internet of Things) devices like smart cameras to pivot into the main network and steal credit card data. Always use network segmentation—set up a dedicated, isolated VLAN specifically for your security hardware. 2. Skipping Environmental Monitoring Burglary is terrifying, but water and fire are statistically far more likely to bankrupt a small business. Neglecting to install monitored smoke, carbon monoxide, and temperature/water sensors is a massive oversight. A simple freeze sensor in a restaurant's walk-in freezer can prevent thousands of dollars in spoiled inventory if the compressor dies overnight. 3. Treating Security as a Sunk Cost Stop viewing your security system as a grudge purchase. Modern platforms are powerful ROI drivers. Video surveillance reduces inventory shrinkage and protects against fraudulent slip-and-fall lawsuits. Automation features slash utility bills. **Expert Insight: **"The biggest point of failure we see in commercial setups is a total reliance on grid power and local internet. If a thief cuts the coaxial cable on the side of your building, a Wi-Fi-only system goes completely blind. You absolutely must ensure your system has a built-in cellular backup and a 24-hour battery reserve. If the Wi-Fi drops, the cellular chip takes over seamlessly." — Lead Security Architect, Smart Home Optimization Speaking of power failures, to ensure the longevity of your base stations and NVR hard drives, always plug your central security hardware into an Uninterruptible Power Supply (UPS). You can learn more in our guide on Protecting Your Tech from Power Surges. How to Audit Your Own Business (A 5-Minute Checklist) Ready to secure your storefront? Take five minutes before you lock up today to run through this practical site audit. The Perimeter & Access ChecklistLighting: Are the alleyways, back entrances, and loading docks brightly illuminated? (Pro tip: Linking your alarm system to smart exterior floodlights creates a formidable, highly visible perimeter). Sightlines: Are your window displays blocking the view from the street? Police cruisers need a clear line of sight into the store at night. Glass Integrity: Are all ground-floor windows and glass doors covered by acoustic glass-break sensors? (Motion sensors won't trigger if a thief simply reaches through a broken window to grab an item). Hardware Maintenance: Are exterior camera lenses clean and free of spider webs? (Check our guide on Preventive Maintenance for Smart Cameras for optimal cleaning schedules). Access Audit: Do you know exactly who holds physical keys or active PIN codes to the building right now? Network Health: Have you changed the default manufacturer passwords on all your security cameras and base stations?Frequently Asked Questions Do I need professional installation for a small business security system? It depends entirely on the size and complexity of your operation. A small, 800-square-foot boutique or home office can easily utilize a DIY system like SimpliSafe. However, if you are outfitting a large warehouse with high ceilings, complex fire code requirements, and heavy commercial doors, you absolutely need the white-glove professional installation provided by ADT or Vivint. Can I use a smart home security system for my business? You can, but proceed with caution. The technology crossover is seamless, but the legalities are not. Local commercial fire codes and commercial insurance policies often mandate that your hardware meets specific commercial-grade certifications (like UL-listed fire monitoring). Always verify with your insurance agent before slapping a residential system into a commercial space. How much does a commercial security system cost monthly? In 2026, realistic monthly monitoring costs range from $30 on the low end (for basic cellular monitoring via DIY brands) up to $100+ for enterprise systems featuring 24/7 continuous cloud video recording, advanced AI analytics, and multi-location management. What happens if the power or Wi-Fi goes out? Top-tier systems are designed to survive grid failures. The base station contains a backup battery that typically lasts 24 hours. Simultaneously, a "cellular backup" module instantly kicks in. This module operates on networks like AT&T or Verizon, ensuring your alarm signals still reach the dispatch center even if your local internet service provider is down.
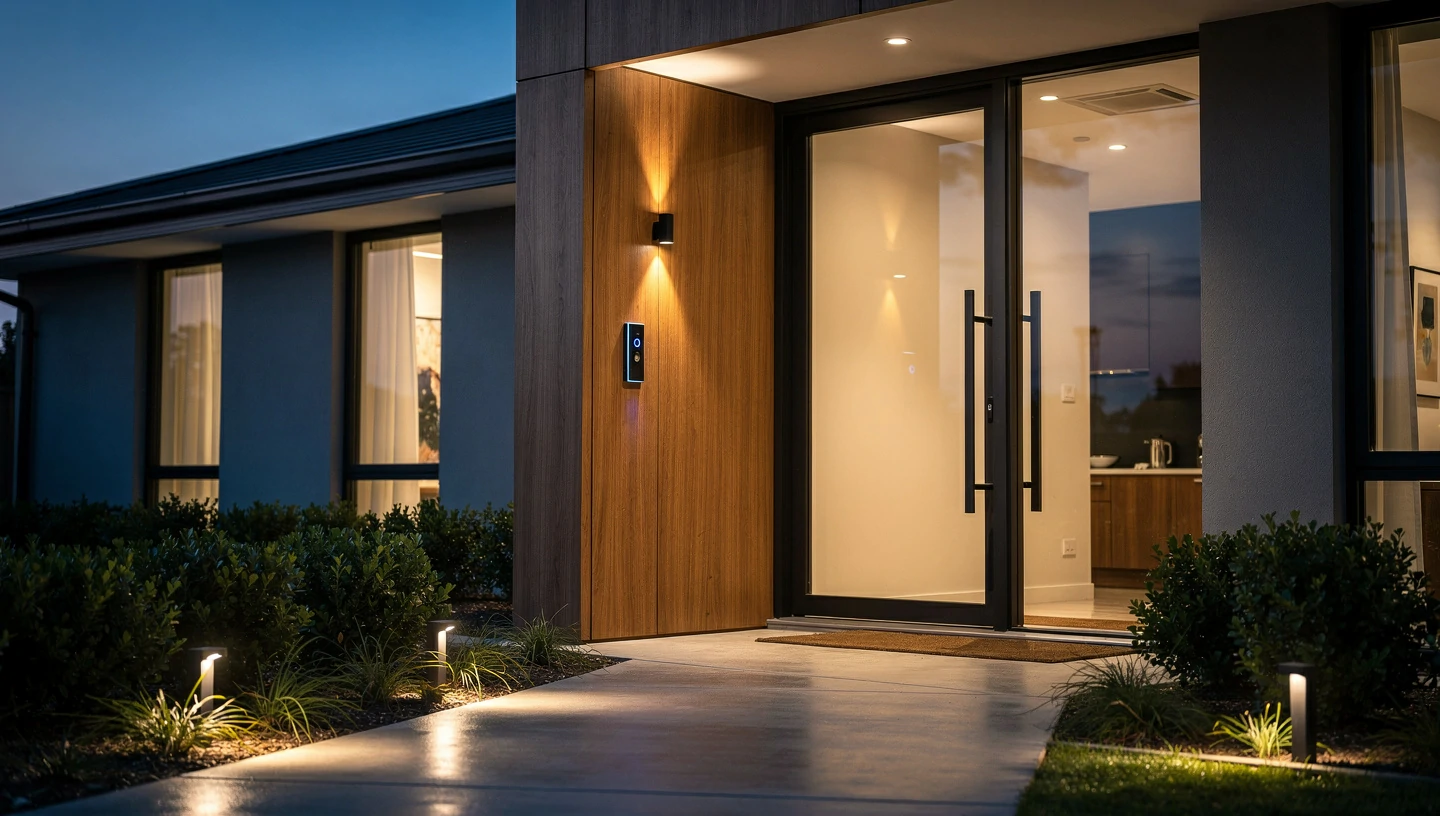
15 Inexpensive Ways to Secure Your Home & Prevent Break-Ins (2026 Guide)
Over 30% of burglars enter a property through an entirely unlocked door or window. This means that the single most effective home security measure you can take today costs absolutely nothing but a moment of your time. While high-end smart home automation ecosystems and professional monitoring services offer peace of mind, protecting your household shouldn't require a second mortgage. The emotional toll of a break-in is massive, but the financial cost of preventing one doesn't have to be. This guide was built using insights from real-world law enforcement security audits, former burglary statistics, and rigorous testing of budget-friendly smart home tech. You can easily harden your home’s perimeter, secure your entry points, and outsmart opportunistic intruders on a shoestring budget. Strengthen Your First Line of Defense: Doors and WindowsMany homeowners assume that a locked door is a secure door. Unfortunately, standard construction practices prioritize speed over security, leaving your primary entry points highly vulnerable to physical force. Fortunately, fixing these structural weak points is incredibly affordable. Upgrade to 3-Inch Strike Plate Screws (Cost: < $5) Take a look at the strike plate on your front door—the metal piece attached to the door frame where the deadbolt latches. If your home is like most, that plate is held in place by flimsy half-inch screws that only penetrate the flimsy decorative wood molding. A single solid kick can instantly splinter the frame and open the door. By replacing those factory screws with 3-inch heavy-duty wood screws, you anchor the strike plate deep into the structural wall studs behind the frame. This simple DIY home protection upgrade makes the door exponentially harder to kick open, converting a five-second breach into a noisy, time-consuming struggle. Reinforce Sliding Glass Doors with Blocking Bars (Cost: < $10) Sliding glass doors are a favorite target for intruders because their standard latches are notoriously easy to bypass or pop off their tracks. You don’t need an expensive secondary lock to secure them. Dropping a simple wooden dowel or a heavy-duty plastic blocking bar directly into the bottom track prevents the door from sliding open, even if the latch is picked. For an even cleaner look, adjustable tension bars specifically built for patios are widely available online for under ten dollars.Install Window Stops and Security Pins (Cost: < $20) Ground-floor windows are inherently vulnerable, especially during warmer months when you might want to leave them cracked for ventilation. Standard window latches offer minimal resistance to a pry bar. Installing inexpensive window stops or security pins restricts how far a window can be raised. By setting these stops to allow only a 4-to-6-inch opening, you can safely enjoy fresh air without leaving a gap large enough for a person to crawl through. For older wooden windows, simply drilling a hole through the frame and inserting a sturdy metal pin achieves the exact same result for pennies. The 5-Minute Entry Point Audit Run through this quick checklist right before bed or prior to leaving for an extended trip to ensure your physical barriers are functioning perfectly:Deadbolt Check: Ensure the deadbolt fully extends into the door frame strike plate rather than stopping halfway. Window Latches: Verify that every ground-floor window is completely latched and that any secondary window stops are firmly engaged. Garage Pass-Through: Test the interior door leading from your garage to your living space. It should be solid-core and equipped with a heavy-duty lock. Sliding Track Clear: Check that your patio door dowel or blocking bar is seated firmly in the track with zero wiggle room. Hinge Inspection: Examine exterior doors to ensure your hinge pins are either internal or tamper-resistant so they cannot be easily tapped out from the outside.Smart Tech on a Budget: 2026 Automation HacksThe smart home landscape has evolved dramatically. You no longer need to sign a multi-year contract with a traditional security provider to get remote monitoring, intelligent alerts, and real-time video streaming. Install Affordable Wi-Fi Cameras and Video Doorbells (Cost: $35 - $60) You don't need a sprawling, wired multi-camera network to deter a burglar. A single standalone video doorbell or an strategically placed outdoor Wi-Fi camera acts as a massive psychological deterrent. Burglars look for paths of least resistance, and visible lenses mean a high risk of identification. Modern budget-friendly cameras provide crisp HD resolution, reliable motion tracking, and instant smartphone notifications. Positioning a camera at your primary entrance helps eliminate front-door package theft and prevents bad actors from casually scoping your property. Simulate Occupancy with Smart Plugs & Bulbs (Cost: $15 - $30) An empty home is a primary target. Traditional mechanical light timers turn lamps on and off at the exact same minute every single day, a pattern that savvy burglars easily spot during a stakeout. Modern smart plugs and bulbs offer a sophisticated fix through localized "Away Modes." This automation routine randomizes your lighting schedule, turning lamps, radios, or televisions on and off in a pattern that convincingly mimics real human activity inside the house. Add Standalone Door and Window Sensors (Cost: $20 - $40) If you want to secure an apartment or keep your costs strictly contained, standalone magnetic contact sensors are incredibly effective low-cost burglar deterrents. These battery-powered units stick directly to your doors and windows using double-sided adhesive. When the magnetic connection is broken while the system is armed, the unit emits a piercing 120-decibel local alarm. These standalone sensors don't require internet connectivity, hubs, or recurring subscription fees, making them ideal for budget-conscious renters and homeowners alike.Top Budget Smart Security Devices (2026 Comparison)Exterior & Landscape Adjustments (Zero to Low Cost)Securing your home shouldn't stop at your front door. Hardening your property's perimeter makes your home fundamentally unattractive to potential intruders before they even get close to a window. Install Motion-Activated Solar Lighting (Cost: $20 - $40) Burglars thrive in the shadows. Dark pathways, side alleys, and obscured back patios provide the perfect cover for a forced entry attempt. Fortunately, you don't need to hire an electrician to run expensive exterior wiring. Modern solar-powered motion-sensor lights can be mounted to fences, gutters, or siding using a couple of basic screws. They charge throughout the day and instantly flood dark corners with bright LED light the moment movement is detected. Follow the "3-Foot/6-Foot" Landscaping Rule (Cost: Free / Sweat Equity) Overgrown landscaping is a gift to a prowler. Dense bushes right next to your home provide an excellent place to hide while working to pry open a window. **Expert Insight: **"Security and law enforcement professionals universally recommend adhering to the 3-foot/6-foot landscaping rule. Keep all foundation shrubs trimmed down below 3 feet in height, and ensure your lower tree canopies are pruned up above 6 feet from the ground. This preserves clear lines of sight from the street and completely eliminates potential hiding spots near your entry points." Display Security Signs and Decals (Cost: < $15) The psychological aspect of home defense is incredibly powerful. Even if your home doesn't feature an enterprise-grade alarm system, a burglar cannot verify what is happening behind closed doors. Placing prominent yard signs and window decals near your main entryways indicating that the home is protected by a security network forces an intruder to second-guess the target. It is a highly effective, low-cost investment that relies entirely on a psychological barrier. Behavioral Security: Habits That Cost NothingSome of the most critical security vulnerabilities have nothing to do with hardware or technology. They stem from simple day-to-day habits that inadvertently invite risk. Never Hide Spare Keys Outside The classic "hide-a-key" locations are common knowledge to anyone looking to gain unauthorized entry to your property. ⚠️ Common Mistake to Avoid Placing a spare key underneath a doormat, inside a plastic fake rock, or on top of a door frame makes your home incredibly easy to infiltrate. Burglars check these exact locations first. Instead, invest a small amount into a heavy-duty mechanical lockbox mounted in an inconspicuous location, or simply leave a spare key with a trusted neighbor. Delay Your Vacation Social Media Posts It can be incredibly tempting to share real-time photos of your beach vacation or family holiday. However, broadcasting your location to social media networks serves as a public announcement that your house is completely vacant. Train your household to wait until you have returned home to post your travel galleries. Additionally, review your privacy settings regularly to ensure your posts aren't visible to the general public or indexable by search tools. Protect Your PII (Personally Identifiable Information) Home security isn't just about protecting your television or jewelry; it's about safeguarding your identity. Many burglaries start as simple daytime property scouting where individuals look through unsecured curbside recycling bins or mailboxes. Shred all documents containing personal data, financial account numbers, or utility details before throwing them away. Keep your sensitive physical financial records inside a locked filing cabinet within the home. Your Budget Security Action Plan Building a secure home environment doesn't have to happen all at once. Use this tiered action plan to scale your home defense measures based on your current budget constraints. [Level 1: Under $20] --------> [Level 2: Under $75] --------> [Level 3: Under $150] - 3-Inch Strike Screws - Smart Plugs for Lights - Budget Video Doorbell - Window Security Pins - Solar Motion Lights - Standalone Indoor Camera - Landscape Pruning - Contact Entry Alarms - Heavy-Duty Deadbolts Tiered Security Implementation MatrixEffective home protection isn't about buying a single expensive piece of equipment. It is about Effective home protection isn't about buying a single expensive piece of equipment. It is about implementing layers of deterrence. A burglar actively looks for the path of least resistance. By applying these budget home security ideas, you turn your home into an unpredictable, high-effort target that opportunistic criminals will gladly skip past. Frequently Asked Questions Are fake security cameras effective at preventing break-ins? Fake security cameras offer a minor psychological deterrent against casual opportunists, but experienced burglars can easily spot them. Fake units often lack realistic wiring, have blinking red lights that real cameras do not use, or feature cheap plastic finishes. Investing a tiny bit more into a real, low-cost Wi-Fi camera provides actual utility and genuine security. What is the most common entry point for a burglar? Statistically, the front door is the most common entry point, followed closely by first-floor windows and back patio doors. Because these areas are used most frequently by the household, they are also the most likely to accidentally be left unlocked or unreinforced. Does leaving a porch light on at night deter burglars? Leaving a porch light on continuously can actually backfire. A light that stays illuminated 24/7 during daylight hours signals to observers that the homeowners are away on vacation. Using motion-activated lighting or utilizing smart bulbs that cycle on and off dynamically is a vastly more effective deterrent. Can I secure my home without paying a monthly subscription? Absolutely. You can easily secure a house or apartment without recurring monthly fees by prioritizing physical entry-point reinforcements, using standalone high-decibel magnetic window alarms, and opting for smart security cameras that support local storage via onboard MicroSD cards. Related Reading:Home Improvement Decisions I Regret — And the Smart Home Lessons They Taught Me The Home Upgrades Actually Worth Your Money — And a Few That Disappointed Everyone Are Expensive Robot Vacuums Actually Worth It? A Realistic Long-Term Owner's Analysis

What's the Best Home Security System That Is Actually Worth the Money in 2026?
Shopping for home security feels like navigating a minefield of 36-month contracts, pushy salespeople, and hidden cloud storage fees. You just want to protect your home and family without taking out a second mortgage to pay for it. The landscape has drastically changed over the last few years. You no longer have to settle for proprietary equipment that becomes obsolete the moment you cancel your monitoring plan. The Bottom Line Up Front: If you want the absolute best overall value and flexibility, SimpliSafe remains the top choice for its easy DIY setup and lack of contracts. For homeowners with higher budgets who want a premium, hands-off setup integrated deep into their smart home, Vivint takes the crown. If you strictly refuse to pay monthly subscription fees, a local-storage setup from Eufy or Reolink is your best financial move.Expert Insight: "The most expensive system isn't always the most secure. True home security comes from strategic camera placement, reliable cellular backup, and a system you actually understand how to use—not just a high monthly price tag."The New Standard: What Makes a Security System "Worth It" Today? The days of the local alarm guy drilling holes in your walls and locking you into a three-year agreement are over. Modern smart home retrofitting has changed expectations. To evaluate whether a security system is truly worth your hard-earned money in 2026, you need to look at three key factors. The Death of the Long-Term Contract Month-to-month security is the new baseline. Hardware has become affordable enough that companies no longer need to subsidize the cost of your entry sensors with a mandatory 36-month monitoring contract. You should own your equipment outright. If a company requires a multi-year commitment just to access basic app features, walk away. AI-Powered Threat Detection vs. Standard CCTV A camera that alerts you every time a neighbor's cat walks across the driveway is worse than useless; it creates alert fatigue. Modern AI motion detection processes video locally to differentiate between people, packages, animals, and vehicles. This kind of false alarm reduction preserves your peace of mind and ensures that when your phone buzzes, it actually matters.Ecosystem Agnosticism Your security system shouldn't live in isolation. It needs to play nicely with your existing routines. Whether you use Amazon Alexa, Google Nest, or Apple HomeKit, ecosystem compatibility ensures you can arm your system with a voice command or trigger smart lights when an outdoor camera detects motion. The 5 Best Home Security Systems Ranked by True ValueBrand Upfront Cost Monthly Fee Installation Type Best For...SimpliSafe $$ $0 – $30 DIY Overall value & flexibilityVivint$40+ Professional Premium automation & complex homesEufy / Reolink $$$ $0 DIY Avoiding subscription fees entirelyADT + Google $$$ $25 – $45 Pro or DIY Traditional reliability with modern techAbode $$ $0 – $25 DIY Apple HomeKit & Z-Wave power users1. SimpliSafe: Best Overall Value & Month-to-Month Flexibility SimpliSafe disrupted the market years ago and still holds the title for the most balanced DIY home security system. You buy the hardware upfront, stick the sensors to your doors, and plug in the base station. There are absolutely no contracts. You can turn professional monitoring on before a vacation and turn it off when you get back.Pros & ConsPro: Unmatched DIY ease; setup takes under 30 minutes. Pro: Highly affordable hardware bundles. Pro: Built-in cellular backup keeps the system alive if your Wi-Fi drops. Con: Cameras are good, but lack the ultra-premium 4K resolution of higher-end competitors. Con: Basic app features require a monitoring plan.2. Vivint: Best Premium Smart Home Automation If you have a large property, a complex layout, or just want someone else to handle the ladder work, Vivint is the premium choice. Their professional installers map out your home, hardwire where necessary, and ensure everything communicates flawlessly. Expert Tip: Paying for professional installation is almost always worth it if you are mounting hardwired floodlight cameras or integrating the security hub with your home's HVAC thermostat and lighting systems. It saves you days of frustrating troubleshooting.3. Eufy & Reolink: Best "No Monthly Fee" Options (Local Storage) Subscription fatigue is real. Paying $15 a month for cloud storage doesn't sound like much until you realize it costs you $900 over five years. Eufy and Reolink solve this by offering robust local video storage via a central NVR (Network Video Recorder) or HomeBase hub. Your footage stays private, stored right inside your house. For outdoor wireless setups, both brands offer proprietary solar panel add-ons. This completely eliminates the chore of climbing a ladder every three months to charge camera batteries. 4. ADT (Partnered with Google Nest): Best for Traditional Reliability ADT brings 150 years of professional monitoring trust to the table. By partnering with Google Nest, they finally solved their outdated hardware problem. You now get ADT's unmatched emergency response infrastructure paired with the sleek, AI-driven hardware of Google Nest Cams and Nest Doorbells. It’s the perfect middle ground for homeowners who want legacy reliability with 2026 technology. 5. Abode: Best for Apple HomeKit & Z-Wave Enthusiasts Abode is the darling of the tech-savvy smart home enthusiast. It is one of the few systems that natively supports Apple HomeKit, allowing you to arm your house via Siri or your Apple Watch. It also features Z-Wave compatibility, meaning you can connect hundreds of third-party smart home devices—like automated blinds or water leak sensors—directly to the Abode hub. 4 Costly Mistakes to Avoid When Buying a Smart Security System 1. Ignoring your Wi-Fi upload speeds before buying 4K cameras. Homeowners often buy a pack of high-res cameras only to find they constantly buffer. High-definition PTZ (Pan-Tilt-Zoom) cameras eat up massive amounts of bandwidth. Before investing, test your upload speeds. If your signal struggles to reach the driveway, upgrading to a mesh Wi-Fi network (like eero or Google Nest Wi-Fi) is a necessary prerequisite for a stable system. Read more: [How to Eliminate Wi-Fi Dead Zones for Outdoor Smart Cameras] 2. Falling for "free equipment" traps. If a flyer promises a "free" security system, read the fine print. You are almost certainly signing a legally binding 3-year contract at an inflated monthly monitoring rate. You will end up paying triple the actual cost of the hardware over the life of that contract. 3. Overlooking cellular and battery backup. A Wi-Fi-only system plugged into a wall outlet is useless during a power outage or if an intruder cuts your internet line. Always ensure your central hub has a 24-hour backup battery and a cellular backup chip to reach emergency dispatchers when the grid goes down. 4. Placing cameras in high-glare or blind-spot zones. Mounting a camera directly facing the sunrise will blind the lens during critical morning hours. Similarly, placing cameras too high up means you'll only capture the tops of hats, not faces. Keep cameras 8 to 10 feet off the ground and angled downward. Pre-Purchase Checklist: How to Audit Your Home’s Security Needs Before adding a single camera to your cart, walk your property and run through this audit:Count your ground-floor entry points: Tally up every accessible door and window. This dictates exactly how many contact sensors you need. (Hint: This is also a great time to check if your deadbolts need upgrading to compatible smart locks like the Yale Assure or Schlage Encode). Check Wi-Fi signal strength: Stand where you plan to mount outdoor cameras and run a speed test on your phone. Decide on monitoring: Are you comfortable self-monitoring via smartphone alerts, or do you want a 24/7 call center to dispatch police for you? Verify ecosystem compatibility: Check the box to ensure the new system speaks the same language as your current smart speakers and displays.The Verdict: Where Should You Spend Your Money? If you are a renter on a budget or a homeowner who loves a weekend DIY project, buy SimpliSafe or Eufy. They offer the best financial flexibility and pack up easily if you move. If you want a premium, hands-off experience where professionals handle the wiring and integrate everything into a seamless smart home dashboard, invest in Vivint or ADT. Ultimately, the best security system is the one that fits your daily routine so naturally that you actually remember to arm it. Frequently Asked Questions (FAQ) Do I really need a monthly subscription for a smart home security system? No. Brands like Eufy, Reolink, and Abode allow you to self-monitor and store video locally without paying a dime in monthly fees. Subscriptions are generally only required if you want professional emergency dispatch or cloud video storage. Will my wireless security system work if the Wi-Fi or power goes out? It depends on the system. High-quality hubs (like SimpliSafe and Vivint) feature built-in battery backups that last up to 24 hours, plus cellular backup chips that keep them connected to the monitoring center even without Wi-Fi. Are AI security cameras actually better than standard motion-sensor cameras? Yes. Traditional pixel-based motion sensors trigger whenever a tree branch blows in the wind or a car drives by. AI-enabled cameras process the image to identify human shapes, significantly reducing annoying false alarms. Can a professionally monitored security system lower my homeowners insurance? Yes. Most major insurance providers offer discounts ranging from 5% to 20% on your premium if you install a security system with active 24/7 professional monitoring. Self-monitored systems rarely qualify for the same discount. Related Reading:The Home Upgrades Actually Worth Your Money — And a Few That Disappointed Everyone The Best Security Systems for Small Businesses in 2026 Home Energy Monitoring Systems: The Complete Homeowner's Guide (2026)

Do Smart Homes Actually Make Life Better or Just More Complicated?
Picture this: It's 11:30 PM. You're standing in your dark kitchen, exhausted, shouting at a plastic cylinder to turn off the overhead lights. The voice assistant confidently replies, "I'm sorry, I don't understand that command." Frustrated, you pull out your phone, toggle through three different apps, and manually switch off the lights. At that exact moment, you have to ask yourself: Are smart homes actually making life better, or just adding unnecessary steps to my day? Contrast that with a different morning scenario. You wake up at 7:00 AM. Your home's AI has already analyzed your local weather and your schedule. The thermostat bumped up two degrees an hour before you woke, the blackout blinds silently roll open, and the coffee machine is finishing its brew. You haven't touched a single app or spoken a single command. The reality of home automation in 2026 is that it completely depends on how your ecosystem is built. We've officially moved past the era of gimmicky gadgets and Wi-Fi party tricks. The industry is currently shifting toward adaptive automation—systems that learn your habits and run quietly in the background. But getting to that frictionless state requires navigating a minefield of incompatible protocols, app fatigue, and network bottlenecks. Let's strip away the marketing hype and look at the realistic pros, the undeniable cons, and how to build a system that actually serves you instead of frustrating you. The Reality of Smart Home Tech: Expectation vs. Reality If you bought into the smart home craze a few years ago, you likely experienced the massive gap between what commercials promised and what the hardware delivered. Early home automation required constant micromanagement. Today, the landscape is shifting from reactive commands to predictive systems. Here is a look at how those early expectations are finally aligning with reality in 2026.The Expectation The Old Reality (Pre-2024) The 2026 Solution"Devices anticipate my needs." Required programming complex, rigid If/Then routines that broke if your schedule changed. AI Predictive Automation natively learns household behavior and adjusts environmental settings on the fly."Everything works together." Buying specific brands that only worked with Amazon, Apple, or Google, locking you into one walled garden. The Matter 1.5 Protocol allows devices to communicate across platforms seamlessly via Thread mesh networks."It saves me money." Minimal savings. Smart thermostats offered basic scheduling but couldn't read grid prices. Integration with Time-of-Use (TOU) pricing, dynamically shifting heavy electrical loads to off-peak hours."It's effortless." "App fatigue." Needing 8 separate applications to manage lighting, security, and climate. Unified local control. Thread border routers process commands instantly without bouncing to the cloud.4 Ways a Smart Home Genuinely Makes Life Better When deployed correctly, a smart home stops being a toy and becomes an invisible utility. The best integrations are the ones you forget are even there. Focusing on cost-awareness and real-world efficiency over luxury, here are the practical benefits. Predictive Energy Efficiency & Cost ReductionThe most undeniable benefit of smart home technology in 2026 is its impact on utility bills. Modern smart panels (like those from Span or Leviton) and smart thermostats no longer just run on basic timers. They communicate directly with your utility provider. If your household is on a Time-of-Use (TOU) pricing plan, electricity is cheaper during off-peak hours. A predictive energy system will automatically pre-cool or pre-heat your home before peak pricing hits. It will also intelligently route power to high-load appliances—like your HVAC system, water heater, or EV charger—when rates drop. This active energy management can reduce monthly bills by 15% to 25% without you lifting a finger. Adaptive Automation (No More Manual Scheduling) We are saying goodbye to the tedious process of writing complex automation scripts. The latest smart home hubs utilize ambient sensing and AI to adjust to your life natively. Instead of setting your living room lights to turn on precisely at 6:00 PM, adaptive automation relies on motion, presence, and ambient light sensors. If you walk into a room on a cloudy Tuesday at 4:00 PM, the system knows to blend artificial light with the natural light available. It adjusts the color temperature of your bulbs to match the time of day, easing eye strain and syncing with your circadian rhythm. Enhanced Security & Peace of Mind Smart home security has evolved far beyond your phone buzzing every time a squirrel runs across your driveway. Intelligent threat detection now uses localized AI to distinguish between a package delivery, your dog, a familiar face, and an unknown vehicle. Furthermore, automated routines simulate occupancy when you are out of town. Smart blinds open and close, and lights turn on organically in different rooms, mimicking human behavior rather than running on an obvious, predictable loop. Improved Accessibility for Aging in Place For the elderly or mobility-impaired, a smart home is life-changing. It provides a level of independence that wasn't possible a decade ago. Voice controls eliminate the need to navigate poorly lit hallways at night to flip a switch. Automated door locks grant access to caregivers without hiding a physical key outside. Intelligent medication reminders and non-intrusive motion sensors can alert family members if there hasn't been movement in the kitchen or bathroom by a certain time of day, offering crucial peace of mind. The "Complicated" Side: Why Smart Homes Become Frustrating Despite the advancements, building a smart home can still be a deeply frustrating endeavor. The technology is marketed as plug-and-play, but the reality often requires patience and troubleshooting. App Fatigue and Fragmented Ecosystems There is nothing "smart" about having to unlock your phone, find an app, wait for it to load, and tap a screen just to dim a lightbulb. This is known as app fatigue. Homeowners often buy a video doorbell from one brand, smart bulbs from another, and a thermostat from a third. Because these manufacturers historically used proprietary software, you end up juggling half a dozen apps. Trying to get these isolated gadgets to communicate with a central voice assistant often results in lagging response times or outright failure. The Wi-Fi Dependency and Power Outage Trap What happens when your internet goes down? For poorly designed smart homes, everything stops working. If your devices rely on cloud servers to process simple commands, a dropped internet connection means you suddenly can't turn on your kitchen lights. Relying entirely on Wi-Fi for dozens of smart devices also congests your router bandwidth. This leads to dropped Zoom calls and agonizingly slow streaming speeds, simply because your smart plugs are fighting for network priority. Privacy, Cybersecurity, and Update Fatigue Connecting the locks on your front door and cameras inside your living room to the internet inherently introduces risk. Cybersecurity anxiety is a valid concern for homeowners. There is also the headache of constant firmware updates. You might wake up to find your automated morning routine is completely broken because a third-party app pushed a software update overnight that severed its integration with your central hub.Mistake to Avoid: Buying cheap, generic Wi-Fi devices off the internet is the #1 beginner mistake. These gadgets crowd your 2.4GHz network, drag down your internet speed, and frequently phone home to unverified foreign servers, posing a massive security risk. Always look for local-control protocols instead of Wi-Fi reliance.How the "Matter" Protocol is Killing Smart Home ComplexityIf you are thinking about upgrading your home or starting fresh, you need to understand the Matter protocol and Thread networks. Released in late 2022 and reaching maturity with version 1.5 in 2026, Matter is the unified standard that the entire industry (Apple, Google, Amazon, Samsung) finally agreed upon."Matter fundamentally changes home automation because it prioritizes local control. Devices communicate directly with each other over a low-power Thread mesh network instead of bouncing data to a cloud server hundreds of miles away. It’s faster, incredibly reliable, and finally means your Apple Home app can flawlessly control a Google Nest thermostat without any complex workarounds."— Smart Home Integrator & Tech ExpertBy utilizing Thread—a low-power mesh network that builds a resilient, self-healing web across your devices—your smart home stays functional even if your internet goes offline. How to Build a Simple, Frustration-Free Smart HomeYou don't need an engineering degree to build a reliable smart home. You just need a solid foundation and a strict set of rules. Follow this step-by-step checklist to avoid the usual headaches. Your Setup Checklist:Upgrade the Foundation: Your smart home is only as strong as its network. Invest in a high-quality Mesh Wi-Fi 6 or Wi-Fi 7 system before buying smart devices. A stable foundation is non-negotiable. Choose an Ecosystem: Commit to one primary controller (Apple Home, Google Home, Amazon Alexa, or Home Assistant for power users). Mixing controllers creates chaos. Look for the Matter Badge: Future-proof your investments. Only buy new locks, lights, and sensors that carry the Matter certification logo to ensure they work locally and securely. Set Up Guest Networks: Isolate your smart home gadgets from your personal data. Put all IoT devices on a dedicated guest network so that if a smart bulb gets compromised, hackers cannot access your laptop or banking info. Keep the Physical Switch: Never remove your ability to physically control your home. Install smart wall switches rather than relying purely on smart bulbs. If the network crashes or a guest visits, flipping the wall switch should always turn the lights on.The Final Verdict: Is It Worth the Hassle? So, do smart homes actually make life better? Yes—but only if you prioritize function over flash. The Pros:Passive energy savings through intelligent TOU optimization. Reliable, instant control via Matter and Thread networks. Enhanced security and proactive monitoring for your property. Massive accessibility benefits for aging family members.The Cons:High initial investment for quality, unified hardware. A steep learning curve when setting up network infrastructure. Troubleshooting network drops if you rely too heavily on Wi-Fi instead of local mesh protocols.Smart homes genuinely improve your quality of life when they are designed as unified, background systems. If you treat home automation like an invisible utility rather than a collection of disjointed parlor tricks, the convenience absolutely outweighs the complexity. 6. Frequently Asked Questions Do smart homes actually save you money on energy bills? Yes. While smart plugs offer minimal savings, installing a smart thermostat and smart electrical panel can reduce heating and cooling costs by 15% to 25%. They achieve this by learning your schedule and avoiding high-demand grid pricing during peak hours. What happens to my smart home if the internet goes down? If you rely on cheap, cloud-dependent Wi-Fi devices, they will stop working. However, if your home utilizes local-control protocols like Z-Wave, Zigbee, or Matter over Thread, your automated routines, lights, and locks will continue to function flawlessly without an active internet connection. Can my smart home be hacked? Any device connected to the internet carries risk. To protect your home, always enable Two-Factor Authentication (2FA) on your central hub accounts, avoid reusing passwords, and place all smart devices on an isolated "Guest Network" separate from your personal computers and phones. Are smart homes a turn-off for homebuyers? Integrated, invisible tech (like smart thermostats, automated blinds, and hardwired security cameras) increases real estate appeal. However, highly customized, complex DIY setups that require a massive handover manual can intimidate buyers. Keep the core functionality tied to physical switches to maintain broad appeal. Related Reading:Home Network Upgrades and Improvements: Real Costs, Smart Choices, and What Actually Works Installing a DIY Solar Kit from Solar Wholesale: My Full Experience (Costs, Mistakes & Savings) The Complete Solar Panel Buying Guide: What Actually Matters (And What Doesn't)

Olivia Reed
Hi, I'm Olivia. I've spent nearly a decade obsessed with making homes work smarter, not harder. My mission is to help you optimize your living space with practical, cost-effective tech—focusing on subscription-free security and long-term maintenance solutions.