PEOPLE ALSO READ...

How I Planned My Dream Home — and Actually Saved Money Doing It
The decisions that matter most happen long before you pick a paint color.Quick Answer: Planning a dream home affordably starts with anchoring every design decision to a fixed budget — not the other way around. Build in a 10–20% contingency before design begins, prioritize structural and energy performance over cosmetic finishes, and understand which construction phases allow meaningful DIY involvement without triggering code compliance problems or voiding warranties.Most planning guides tell you to start with inspiration. Collect images, find your style, dream big. That advice is genuinely terrible if you care about finishing the project without financial disaster. The homes that go over budget rarely do so because of bad luck. They fail because decisions were made in the wrong order: design before budget, inspiration before reality, want before need. Understanding that sequencing — and reversing it — is where the real savings begin. Here's what actually matters, organized the way a contractor, an architect, and a financially burned homeowner would explain it if they were being completely honest.1. Start With a Budget, Not a Blueprint Before you open a design app or call an architect, you need one number. The maximum you can spend — including everything: design fees, permits, construction, site work, landscaping, and a contingency reserve. Not a rough range. A hard ceiling. This sounds obvious. It almost never happens in practice. The typical sequence runs like this: the homeowner designs, falls in love with the design, then discovers what it costs. At that point, they're either cutting the design apart in ways they'll regret for years, or committing to a budget they can't actually sustain. Neither outcome is good. What professional project managers learn early is that design decisions lock in cost — not immediately, not visibly, but by the time you've settled on a floor plan, a roof profile, and a material palette, roughly 70% of your project cost is already determined. Whether you know it or not.What Does It Actually Cost to Build Right Now? Construction costs vary significantly by region, labor market, site conditions, and specification level. The ranges below reflect 2024–2025 data for standard single-family homes with mid-range finishes. Use them as starting points, not guarantees.Country Budget Tier Mid-Range PremiumUnited States $150–$200/sq ft $200–$350/sq ft $350–$600+/sq ftUnited Kingdom £1,500–£2,000/sq m £2,000–£3,500/sq m £3,500–£6,000+/sq mCanada CAD $175–$250/sq ft CAD $250–$400/sq ft CAD $400–$700+/sq ftAustralia AUD $1,500–$2,200/sq m AUD $2,200–$3,800/sq m AUD $3,800–$6,500+/sq mThese figures cover construction only. Site preparation, permits, utility connections, professional fees, and landscaping typically add 15–30% to the base construction number. Something most guides skip: renovation costs don't scale the same way as new construction. Gut renovations in existing homes consistently run 20–40% more per square foot than comparable new builds — because of demolition, the unknowns hidden behind walls, and the inefficiency of working inside an occupied structure. If you're choosing between a major renovation and a new build, that cost relationship is worth understanding before you commit either way.2. The Design Decisions That Quietly Control Your BudgetHere's something most homeowners don't encounter until it's too late to change: the most expensive decisions in your entire build are made during the early design phase — often before you've spoken to a single contractor. Architectural geometry drives cost in ways that aren't intuitive. A simple rectangle with a gabled roof is significantly cheaper to frame, insulate, and roof than a design with multiple wings, bump-outs, and a complex hip roof. Not primarily because of material cost — because of labor. Every outside corner requires more cutting, more detailing, more time. Every roofline transition is an opportunity for water intrusion, and every water intrusion risk needs additional flashing, underlayment, and skilled labor to seal correctly. These aren't aesthetic trade-offs. They're cost multipliers built into the shape of the house before a nail is driven.Design Choice Cost ImpactRoofline complexity (simple gable vs. complex hip with dormers) 15–25% increase in roofing and framing labor; more flashing points = elevated long-term water riskNumber of exterior corners $300–$800 per additional outside corner across framing, sheathing, trim, and flashing tradesCeiling height above 9 feet Increases wall framing lumber, drywall quantities, HVAC duct runs, and scaffolding requirementsTwo-story vs. single-story footprint Two-story typically 10–15% cheaper per sq ft — smaller roof and foundation relative to living areaNumber of plumbing wet walls Each additional plumbing cluster (kitchen, bath, laundry) adds rough-in cost; grouping plumbing saves meaningfullyGarage: attached vs. detached Attached shares framing and roofline costs; detached requires its own foundation, walls, and roofFoundation type Full basement adds $30,000–$80,000+ but doubles usable sq footage without increasing the above-grade footprintThe practical implication: if you're working with an architect, have the cost conversation at the schematic design stage — before design development begins. Changes made to a rough sketch cost almost nothing. Changes made to a fully drawn set of construction documents cost significantly more, because drawings must be revised and contractors must re-estimate. That cost relationship is rarely explained upfront. It should be.3. What the Initial Quote Never IncludesHere's the uncomfortable reality about builder quotes: most of them are not complete project costs. They are construction costs for the structure as defined in the drawings. That is a narrower number than it sounds. The costs below are routinely absent from initial estimates — and disclosed, if at all, only after contracts are signed. Hidden Costs Checklist Permits and InspectionsBuilding permit fees ($500–$5,000+ depending on project value and jurisdiction) Engineering review fees where required Separate trade permits: electrical, plumbing, mechanical (often $200–$800 each) Inspection and reinspection chargesSite Preparation and EarthworkLand clearing and tree removal ($1,500–$10,000+ depending on site) Grading and excavation ($3,000–$20,000+ for challenging sites) Rock excavation — impossible to estimate accurately until work begins; can add $10,000–$50,000+ on rocky sites Soil testing and geotechnical engineering where required Erosion control measures during constructionUtility ConnectionsWater and sewer tap fees ($2,000–$15,000+ depending on municipality and distance to main) Electrical service from pole to meter base ($2,000–$8,000+) Gas service connection ($500–$3,000+) Septic system for rural builds ($8,000–$25,000+) Well drilling and pump installation ($5,000–$20,000+ depending on depth and geology)Temporary Costs During BuildTemporary housing if vacating your current home ($12,000–$36,000+ for a 12-month build) Temporary power connection ($500–$2,000)Finishes and Items Frequently ExcludedAppliances (often entirely outside builder contracts; $5,000–$30,000+) Window treatments and blinds ($2,000–$15,000+) Landscaping and irrigation ($5,000–$50,000+ depending on scope) Driveway and hardscape ($3,000–$30,000+) Fencing, exterior lighting, mailbox, address signage⚠ Before comparing quotes: Ask every contractor for a written list of project exclusions. Two quotes with identical totals can represent entirely different scopes of work. The exclusions list is where the real comparison happens.4. Why a 15% Contingency Isn't Optional Almost every planning guide mentions contingency budgets. Very few explain what contingencies actually absorb — or how to calibrate the percentage to your specific project type. A contingency budget is not a buffer for scope additions you decide to make mid-build. It is a buffer for the unexpected: hidden site conditions, material price increases between bidding and ordering, subcontractor errors, weather delays that extend temporary accommodation costs, and inspection failures requiring rework. The 15% figure commonly cited is a reasonable baseline for a standard new build. It's too low for renovation projects and often too high for simple cosmetic remodels. Here's how to calibrate it.Project Type Recommended Contingency RationaleNew custom build (standard site) 10–15% Fewer unknowns than renovation; risk concentrates in site conditions and material pricingNew custom build (challenging site or complex design) 15–20% Slope, rock, flood zone, or tight access amplifies cost volatility significantlyGut renovation (older home, major systems) 15–20% Hidden conditions behind walls: old wiring, plumbing deficiencies, structural issues, asbestos, moisture damageStructural addition to existing home 18–25% Interface with existing structure creates unpredictable conditions; code upgrade requirements often triggeredCosmetic remodel (no structural or systems work) 5–10% Fewer unknowns, but material delays and subcontractor scheduling gaps still occurOne thing that gets consistently overlooked: keep the contingency in a separate account, completely isolated from your project budget. Mentally combining it with your build budget makes it too easy to draw it down for scope additions — which defeats its purpose entirely. And if you don't spend it? That's not a sign you over-budgeted. That's the correct outcome.5. Choosing the Right Build Model — Contractor, Design-Build, or Owner-Builder The way you structure your project delivery affects cost, schedule, stress, and risk more than almost any other single decision. There is no universally best model. There's the one that matches your situation, your time, and your realistic skill level.Build Model Cost Control Timeline Hands-On Involvement Risk Level Best ForGeneral Contractor (GC) Moderate — GC markup applies (typically 15–25%) GC manages schedule; limited owner leverage Low to moderate Moderate — depends heavily on GC quality Most homeowners; first-time buildersDesign-Build Lower — single contract covers design and construction; fewer scope gaps Often faster than separate design + bid + build Low Lower — integrated accountability for design and construction Homeowners who want simplicity and fixed pricingConstruction Manager (CM) Higher — you pay trades directly; CM charges management fee You control pace but carry scheduling coordination High — active decision-making required Higher — you absorb trade performance risk Experienced homeowners with time and construction familiarityOwner-Builder Highest potential savings (20–40% labor cost reduction possible) Typically longer — you coordinate all subcontractors Very high — effectively a second full-time job Highest — full legal and financial responsibility Experienced builders with construction knowledge, time, and legal eligibilityOwner-Builder: What the Model Actually Requires The owner-builder path attracts significant interest and deserves an honest explanation — because the reality differs substantially by country. Australia: Owner-builder permits are regulated under state law. In most states, you can only act as owner-builder once every 5–7 years, for your primary residence only. Under NSW and Queensland law, selling within 6–7 years of completion requires disclosure of owner-builder status. The absence of builder's warranty insurance affects resale — some buyer financing products have complications with uninsured owner-built homes. Understand this before selecting the path, not after. United States: Requirements vary significantly by state. Some impose no restrictions; others require the home to be your primary residence or limit resale timing. Check your state's contractor licensing board before assuming eligibility. United Kingdom: Self-build mortgages release funds in stages rather than upfront, which shapes your cash flow and contractor payment capacity throughout the build. The VAT Reclaim Scheme (HMRC Notice 431) allows claiming back VAT on qualifying materials — potentially a meaningful saving — but it requires consistent documentation throughout the project, not just at completion.6. Why the Lowest Bid Usually Costs the Most in the EndThe number at the bottom of a contractor's quote tells you very little. It doesn't tell you what's included, what's excluded, what the quality assumptions are, or whether the contractor priced the same job you asked for. Most homeowners compare total prices. Professionals compare line items. How to Level Contractor Bids — Step by Step Step 1: Verify scope alignment Before comparing any numbers, confirm every contractor is pricing the same plans, specification documents, and finish schedules. If your drawings aren't complete when you go to bid, every quote will contain different assumptions — and those differences will surface after you've signed. Step 2: Identify and compare allowance items Ask each contractor to list every allowance item in the bid — the placeholder dollar amounts for finishes, fixtures, and products not yet specified. Compare allowance amounts across bids. A $12/sq ft flooring allowance in one bid and a $22/sq ft allowance in another represent thousands of dollars in expected out-of-pocket spending above the base contract. Neither number is wrong; they reflect different assumptions about what you'll select. Step 3: Review the exclusions list in writing Every professional bid should include a written exclusions list. If a contractor doesn't provide one, request it in writing before proceeding. Common exclusions: landscaping, appliances, window treatments, permit fees, utility connections, dumpster rental, temporary utilities. A bid that excludes these items is not meaningfully comparable to one that includes them. Step 4: Examine the payment schedule Lump-sum upfront payment requests from a contractor are a serious red flag. Legitimate payment schedules are milestone-based or draw-based, aligned with defined construction completion stages. Front-loaded payment schedules transfer financial risk to you before work is performed. Step 5: Confirm lien waiver provisions Your contract should require lien waivers from the general contractor and major subcontractors upon each payment. Without lien waivers, a contractor who fails to pay their subcontractors can expose you to property liens even after you've paid the GC in full. This is a documented, recurring problem in residential construction. It has an easy contractual solution.⚠ Red flags in contractor proposals: No written exclusions list. Unusually low allowance amounts. Vague or front-loaded payment schedule. Resistance to contract modifications. No comparable project references. Inability to provide current proof of insurance and licensing on request.7. Value Engineering — Where Cutting Costs Is Safe and Where It Isn't Value engineering is a construction term that gets misapplied constantly. It does not mean cutting corners. It means analyzing the cost-to-value relationship of each component and identifying where reduced spending does not compromise performance, safety, or durability. The distinction matters enormously, because some cuts are genuinely safe — and some create problems that cost far more to remediate than you saved.Category Spend More Here Safe to Save HereFoundation Waterproofing membrane and drainage board Ornamental landscaping adjacent to foundation (do later)Structural framing Engineered lumber (LVL beams, I-joists) where spans require it Lumber grade upgrades beyond what engineering requiresRoofing Underlayment quality; ice/water shield coverage at eaves and valleys Roof color and profile (within manufacturer specs)Windows and exterior doors U-factor and SHGC performance ratings (climate-appropriate selection) Brand name — performance specs matter more than the labelHVAC system Properly sized, high-efficiency equipment and duct design Thermostat brand (quality third-party options perform well)Insulation Achieving at or above code minimum in walls and attic Insulation brand within the same product categoryAir sealing Continuous air barrier; spray foam at rim joists and penetrations Cannot be safely reduced; foundational to energy performanceExterior cladding Proper flashing at all penetrations, windows, and transitions Material choice between fiber cement and quality vinyl at comparable thicknessInterior finishes — All flooring types, cabinet door styles, hardware finishes, paint brandsFixtures and fittings — All plumbing fixtures, light fixtures, and interior hardware are safely value-engineeredLandscaping Grading and drainage away from foundation (functional requirement) Ornamental plantings, retaining walls beyond functional need, mature specimen treesOne clarification worth making explicitly: value engineering structural systems is not the same category of decision as choosing a less expensive tile. Skipping or downgrading foundation waterproofing to save $3,000 is fundamentally different from choosing a builder-grade toilet over a premium model. The first creates a long-term moisture intrusion problem with no simple fix. The second is a fixture you can replace on a Saturday afternoon. The test: if the cut is visible, replaceable, and cosmetic — it's probably safe. If it involves water, structural performance, or thermal control — it probably isn't.8. What You Can Realistically Do Yourself — and What You Shouldn't TouchSweat equity has genuine value. The question is where it applies safely, and where it creates problems that end up costing significantly more to fix than you saved. A realistic assessment requires understanding three things: code compliance requirements in your jurisdiction, warranty implications for the systems involved, and the specific regulations around licensed work where you're building.Task DIY-Appropriate? NotesInterior and exterior painting ✅ Yes One of the highest-value DIY contributions; large labor cost, no code implicationsLandscaping and basic hardscape ✅ Yes Grading near the foundation is the exception — get professional oversight on drainageCabinetry installation ✅ With skill Standard flat-pack and box cabinets are DIY-friendly; custom built-ins require moreFlooring installation ✅ With skill LVP and laminate are very DIY-friendly; tile is harder; solid hardwood is skill-dependentFixture installation (toilets, faucets, vanities) ✅ Yes Basic plumbing fixture swaps are permissible in most jurisdictions without a licenseLight fixture replacement (no new circuits) ✅ Yes Like-for-like fixture replacement is generally permissible; new circuits are notBatt insulation in accessible areas ✅ With caution Attic batt insulation is often DIY-accessible; spray foam requires a licensed installerRough-in plumbing ❌ No Licensed plumber required in all Australian states, most US jurisdictions, and UKElectrical rough-in and new circuit installation ❌ No Licensed electrician required in Australia and UK; US varies significantly by stateStructural framing ❌ No Engineering sign-off required; structural errors are not correctable post-build at reasonable costConcrete foundation work ❌ No No realistic DIY application; licensed, insured subcontractor requiredNew construction roofing ❌ No Fall hazard, warranty implications, and framing inspection requirements make this professional-onlyGas line installation ❌ No Licensed gasfitter required in all jurisdictions; zero tolerance for unlicensed work anywhereA jurisdiction note that actually matters: In many US states, a homeowner can perform electrical and plumbing work in their own primary residence without a contractor's license — but the work must still be permitted and pass inspection. In Australia, unlicensed electrical work is illegal regardless of owner status. In the UK, certain electrical work falls under Part P of Building Regulations and must be completed by a registered electrician or formally notified to the local authority. Determine your jurisdiction's rules first. Then decide what you'll take on.9. The Upgrades Worth Paying More for Upfront Energy-efficient upgrades are frequently presented as "a good investment" without quantifying what that means. What homeowners actually need is a financial framework: what does it cost more upfront, what does it save per year, and how many years until the investment pays back. The ranges below draw from US Department of Energy published research, UK Energy Saving Trust guidance, and Australian government energy agency data. Climate affects payback meaningfully — colder climates generally see shorter payback periods for heating-related upgrades.Upgrade Approximate Cost Premium Estimated Annual Savings Payback Range Climate/Region NoteInsulation above code minimum (walls and attic) $2,000–$8,000 $300–$800/yr 4–12 years Shorter payback in cold climates; worthwhile in all climates for comfort and moisture controlAir-source heat pump vs. gas furnace $2,000–$6,000 $400–$1,200/yr 3–10 years Most effective in moderate climates; cold-climate models now viable to −15°C/5°FHeat pump water heater vs. tank water heater $500–$1,200 $300–$600/yr 2–5 years One of the best payback ratios available; high value across all climatesDouble-glazed vs. single-glazed windows $3,000–$10,000 $200–$600/yr 8–20 years Greater benefit in cold climates; reduces condensation and improves comfort in mild zonesTriple-glazed windows over double-glazed $4,000–$12,000 $100–$300/yr 15–30 years Best justified in very cold climates (northern US, Canada, northern UK, Tasmania); marginal in mild zonesSolar-ready electrical design (conduit runs, panel sizing, roof orientation) $500–$1,500 Enables future savings N/A — reduces future solar install cost by $5,000–$15,000 Worth doing in virtually every new build; minimal cost at construction, significant savings when solar is addedERV/HRV balanced mechanical ventilation $2,500–$6,000 Indoor air quality benefit + reduced HVAC load 10–20 years (energy basis) Essential in tight, well-sealed homes; required in some climate zones with spray foam constructionThe practical framing most homeowners find useful: The question isn't whether these upgrades pay back. Most do. The question is whether you'd rather absorb the premium at construction — where it's rolled into your build loan and installed at minimum disruption — or retrofit it later, when it requires invasive work, finished surface disturbance, and higher per-unit installation costs. Insulation added during framing costs a fraction of what it costs after drywall is hung. That relationship is true across almost every energy upgrade on this list. The build phase is the cheapest possible time to do it.10. Permits and Approvals — What Skipping Steps Actually Costs The instinct to avoid permits is understandable. They cost money, they take time, and they feel like bureaucracy standing between you and your build. But the financial and legal consequences of unpermitted work are substantially worse than the inconvenience of compliance. Here's what actually happens when unpermitted work is discovered: at best, you pay for retroactive permits, inspections, and any remediation work required to bring the work to code. At worst, unpermitted structural or systems work must be exposed, verified, brought to code, and re-covered — at your cost. In some jurisdictions, unpermitted work that can't be remediated must be demolished. At resale, unpermitted work must be disclosed in most jurisdictions and can materially affect property value, insurability, and buyer financing eligibility. Regional Permit OverviewRegion Process Typical Approval Timeline Common Delay CausesUnited States Building permit from local municipality; separate trade permits (electrical, plumbing, mechanical) typically required 2–12 weeks depending on jurisdiction and project complexity Incomplete drawings, plan check correction cycles, backlogged municipal review queuesUnited Kingdom Full Planning Permission for new builds, extensions, and structural changes; Building Regulations approval is separate Planning: 8–13 weeks for householder applications; Building Regs: 5–10 working days (initial notice route) Neighbor objections for planning applications; incomplete structural or thermal details for Building RegsCanada Building permit from municipal authority; province-specific requirements for electrical and mechanical work 4–16 weeks depending on municipality and current office workload Plan check comments, missing engineer schedules, busy permit offices in metro marketsAustralia Development Application (DA) for new builds and major alterations; Construction Certificate (CC) separate; staged inspections required DA: 6–12 weeks typical; longer with objections, heritage, or flood/bushfire overlays Heritage or environmental overlays, neighbor objections, incomplete application documentsAustralian resale disclosure note: Owner-builders who sell within 6–7 years of completion (timeframe varies by state) must disclose owner-builder status and provide statutory documentation. The absence of Home Warranty Insurance (called the Home Building Compensation Fund in NSW) affects some buyer financing options. If you're considering the owner-builder path, understand these resale implications before construction begins — not at the time of sale.11. Timeline Realities Most Planning Guides Don't Tell You Here's a number almost nobody states directly: a custom home, from initial design to Certificate of Occupancy, typically takes 14–24 months. Often longer. That range isn't pessimistic — it reflects the actual time requirements of design documentation, plan checking, permit review, construction sequencing, inspection scheduling, material procurement, and the normal pace of a multi-trade project with weather dependency and a dozen points where one delayed delivery stalls everything downstream. Phase-by-Phase TimelinePhase Typical Duration Key Delay RisksSchematic design 4–8 weeks Slow client decision-making; unlimited revision loops without clear design briefDesign development and construction documents 8–16 weeks Design complexity; engineering review cycles; specification decisionsPermit application and approval 4–16 weeks Plan check corrections; backlogged review queues; incomplete applicationsSite preparation and earthwork 2–6 weeks Weather; unexpected subsurface conditions; utility conflict resolutionFoundation 2–6 weeks Concrete cure time; inspection scheduling delays; weather holdsFraming 4–8 weeks Weather; engineered lumber procurement; crane availabilityRough-in (plumbing, electrical, mechanical) 4–8 weeks Trade scheduling gaps; HVAC equipment lead times; panel deliveryInsulation and drywall 3–5 weeks Insulation inspection required before closing in; drywall finishing cure timeInterior finishes 8–16 weeks Longest and most labor-dense phase; cabinet and millwork lead times; flooring schedulingPunch list and final inspections 2–6 weeks Inspector scheduling; outstanding corrections; CO processing timeA few things that consistently extend timelines beyond what initial schedules show: HVAC equipment and windows have had extended lead times in some markets since 2021 — occasionally 12–20 weeks for specific product lines. That doesn't mean ordering from stock; it means ordering at the right project phase so equipment arrives when the structure is ready, not six weeks before or after. Inspection scheduling varies enormously by jurisdiction. In busy markets, getting a framing inspection booked can add one to three weeks to your timeline with no ability to accelerate it. Material substitutions made after construction documents are finalized cost time even when they seem minor. Changing a window manufacturer mid-permit can require drawing revisions and sometimes re-approval — adding weeks for what felt like a simple swap.12. The Decisions Other Homeowners Wish They'd Made DifferentlyThese aren't theoretical mistakes. They're the frustrations that appear consistently in homeowner communities — the decisions that seemed reasonable at the time and became expensive or limiting after the fact. Designing before budgeting. The most common and most costly mistake in the entire process. The homeowner develops a detailed design, develops real emotional attachment to it, then discovers what it costs. The resulting cuts — removing features, downgrading systems, simplifying the design — produce a compromise that satisfies no one. This mistake is structurally nearly impossible to fix once you're inside it. The only real solution is prevention: establish the maximum budget before the first sketch exists. Treating change orders as a normal part of the process. Change orders are not a normal cost of doing business — they're a symptom of a design that wasn't finished before construction began. Each one carries a 15–25% markup above material and labor because it disrupts workflow and requires administrative processing. A homeowner who makes four "small" changes during framing can easily add $10,000–$30,000 to a project through change orders alone. Finish the design. Lock it. Make peace with it before breaking ground. Not understanding allowance items before signing the contract. The $15/sq ft flooring allowance in your contract sounds reasonable until you visit the tile showroom and discover that the floor you want costs $38/sq ft. That difference across 1,800 square feet is $41,400 — and it's real money that comes due at selection time, regardless of what the contract says. Read every allowance item and research actual product costs before signing. Skipping inspections to recover time. Inspections aren't bureaucratic obstacles — they're the only formal verification step in the process. A skipped framing inspection that would have caught a structural error is a very large gamble. An insulation inspection bypassed by a contractor eager to close in on schedule can leave thermal performance problems that no retrofit will fully correct. The time savings are real. The risk is also real. Hiring on price without verifying scope. The contractor who comes in $40,000 below the others almost always has a reason. Sometimes it's genuine efficiency. More often it's allowance cuts, exclusions not clearly disclosed, or a scope that doesn't match what the others priced. The bid leveling process in Section 6 exists precisely for this situation. Use it before you hire. Building entirely for personal taste with no thought for resale. Unusual finishes, unconventional layouts, and idiosyncratic design choices are your prerogative — it's your home. But if you're borrowing to build it, understanding how it will appraise and whether a future buyer pool exists is a reasonable financial consideration. The most likely buyer for your home in ten or fifteen years has different preferences than you do today. That's worth at least a brief conversation with a local real estate agent before you commit to choices that permanently narrow your buyer pool.Frequently Asked Questions How much does it realistically cost to build a house from scratch in 2025–2026? Mid-range custom home construction currently runs $200–$350/sq ft in the US, £2,000–£3,500/sq m in the UK, CAD $250–$400/sq ft in Canada, and AUD $2,200–$3,800/sq m in Australia. These figures cover construction only. Site preparation, permits, utility connections, design fees, and landscaping typically add 15–30% to the base construction figure. Published national averages routinely understate real total project costs, particularly for custom builds with specific site challenges. What is the most common mistake people make when planning a home build? Designing before establishing a firm budget. The homeowner develops a detailed design, becomes emotionally attached to it, and then discovers the cost. The compromise that follows — removing features, downgrading systems, simplifying the plan — usually satisfies no one. The fix is structurally simple: set the maximum budget before any design session begins. How much contingency budget should I set aside? Calibrate to project type. New custom build on a standard site: 10–15%. Challenging site or complex design: 15–20%. Gut renovation of an older home: 15–20%. Structural addition to an existing home: 18–25%. Cosmetic remodel: 5–10%. Keep the contingency in a separate account — it's a buffer for the unexpected, not a reserve for scope additions you decide to make mid-build. Can I act as my own general contractor to save money? Yes, with conditions. The owner-builder model can reduce labor costs by 20–40%, but it requires substantial time, real subcontractor coordination experience, and legal eligibility that varies significantly by jurisdiction. In Australia, owner-builder permits carry eligibility restrictions and resale disclosure obligations. In the US, requirements vary by state. In the UK, self-build mortgages and the VAT reclaim scheme create financial structures that require planning from the very start of the project. What costs are usually left out of initial builder quotes? Commonly excluded items include permit fees, site preparation and land clearing, utility connection fees, rock excavation if encountered, temporary housing during the build, appliances, window treatments, landscaping, driveway, and hardscape. Always request a written exclusions list from every contractor before comparing quotes — without it, total prices are not comparable. What is a change order and how much extra does it typically cost? A change order is a formal modification to your contract's agreed scope. They typically carry a 15–25% markup above material and labor cost because they disrupt trade scheduling and require administrative overhead. The most effective prevention strategy is completing and locking the design before construction begins — not designing continuously throughout the build. What is value engineering in home construction — and is it safe? Value engineering means identifying where reduced cost doesn't compromise performance, safety, or durability. Reducing cosmetic finishes, fixture grades, hardware, and ornamental landscaping is generally safe. Reducing structural framing, foundation waterproofing, roofing underlayment, air sealing, or HVAC sizing is not. The practical test: if the cut affects water management, structural performance, or thermal control — it's probably not a safe value engineering decision. When is it worth paying more for energy-efficient upgrades in a new build? When the upgrade is integrated at construction, it costs significantly less than retrofitting it later. Heat pump water heaters, above-code insulation, and solar-ready electrical design all have payback periods under 10 years in most climates and cost far less when built in than added after the fact. Triple-glazed windows are more climate-dependent and are best justified in cold northern regions. How long does it take to build a custom home from start to finish? Most guides only cover the construction phase. The realistic total timeline — from initial design meeting to Certificate of Occupancy — is 14–24 months for a custom build. This includes design (3–6 months), permitting (1–4 months), and construction (8–14 months). Material lead times and inspection scheduling regularly extend these ranges beyond what initial project schedules show. What should I look for when comparing construction quotes? Compare scope, not totals. Verify every contractor priced the same plans. Identify and compare all allowance item amounts. Review the exclusions list. Examine the payment schedule structure — milestone-based is appropriate; large upfront lump sums are a red flag. Confirm lien waiver provisions in the contract before signing. Do I need an architect, or can a draftsperson design my home? It depends on complexity and jurisdiction. Simple, standard residential construction can often be competently documented by an experienced residential draftsperson. Complex structural designs, difficult sites, or projects requiring significant engineering coordination benefit from architectural oversight. In most jurisdictions, structural calculations must be signed by a licensed structural engineer regardless of who draws the architectural plans. How does a construction loan work, and what is a draw schedule? A construction loan releases funds in stages — called draws — typically triggered by completion of defined construction milestones, verified by lender inspections. During construction, you pay interest only on funds drawn to date. At substantial completion, the loan typically converts to a permanent mortgage. Understanding the draw schedule before you start is essential — it directly affects when you can pay contractors and how your cash flow is structured throughout the build. What permits do I need to build a home? It varies by jurisdiction. US: building permit from your local municipality, plus separate trade permits for electrical, plumbing, and mechanical in most areas. UK: planning permission for new builds and major structural alterations, plus separate Building Regulations approval. Canada: building permit from your municipal authority, with province-specific trade licensing requirements. Australia: Development Application (DA) and Construction Certificate (CC), with mandatory staged inspections throughout construction. Start the permit process earlier than you think you need to — review queues in active markets can add months. What is the difference between a custom build, semi-custom, and spec home? A spec home is designed and built by a developer for a generic buyer — finish selections may be available from a limited menu, but the design belongs to the developer. A semi-custom home offers design flexibility within a builder's standard floor plan range. A custom build starts from your brief and a blank site, giving you control over every decision — at meaningfully higher cost and a longer timeline than either alternative. What maintenance should I expect in the first year of a new build? New builds require early attention across several areas. Concrete settling produces hairline shrinkage cracks in slabs and driveways — generally cosmetic and normal, but worth monitoring. Caulk at exterior penetrations and door frames will shrink and may need re-sealing after the first full seasonal cycle. HVAC systems should be properly commissioned after installation and filter schedules established early. Check grading and drainage away from the foundation after the first significant rain event. Know your warranty structure: structural elements (framing, foundation) are typically warranted for 10 years; systems (HVAC, plumbing, electrical) for 2 years; finishes for 1 year. Warranty claims require prompt notification — document any defect as soon as it appears.The most valuable resource in this entire process is a clear decision sequence: budget first, design second, everything else after. The rest of this article gives you the information to execute each stage without the surprises that derail most builds. Related Reading:How to Get Curry Smell Out of a Rental House New Homeowner Home Maintenance Checklist: Your Complete First-Year Guide The Homeowner Maintenance Cheat Sheet That's Actually Worth Saving
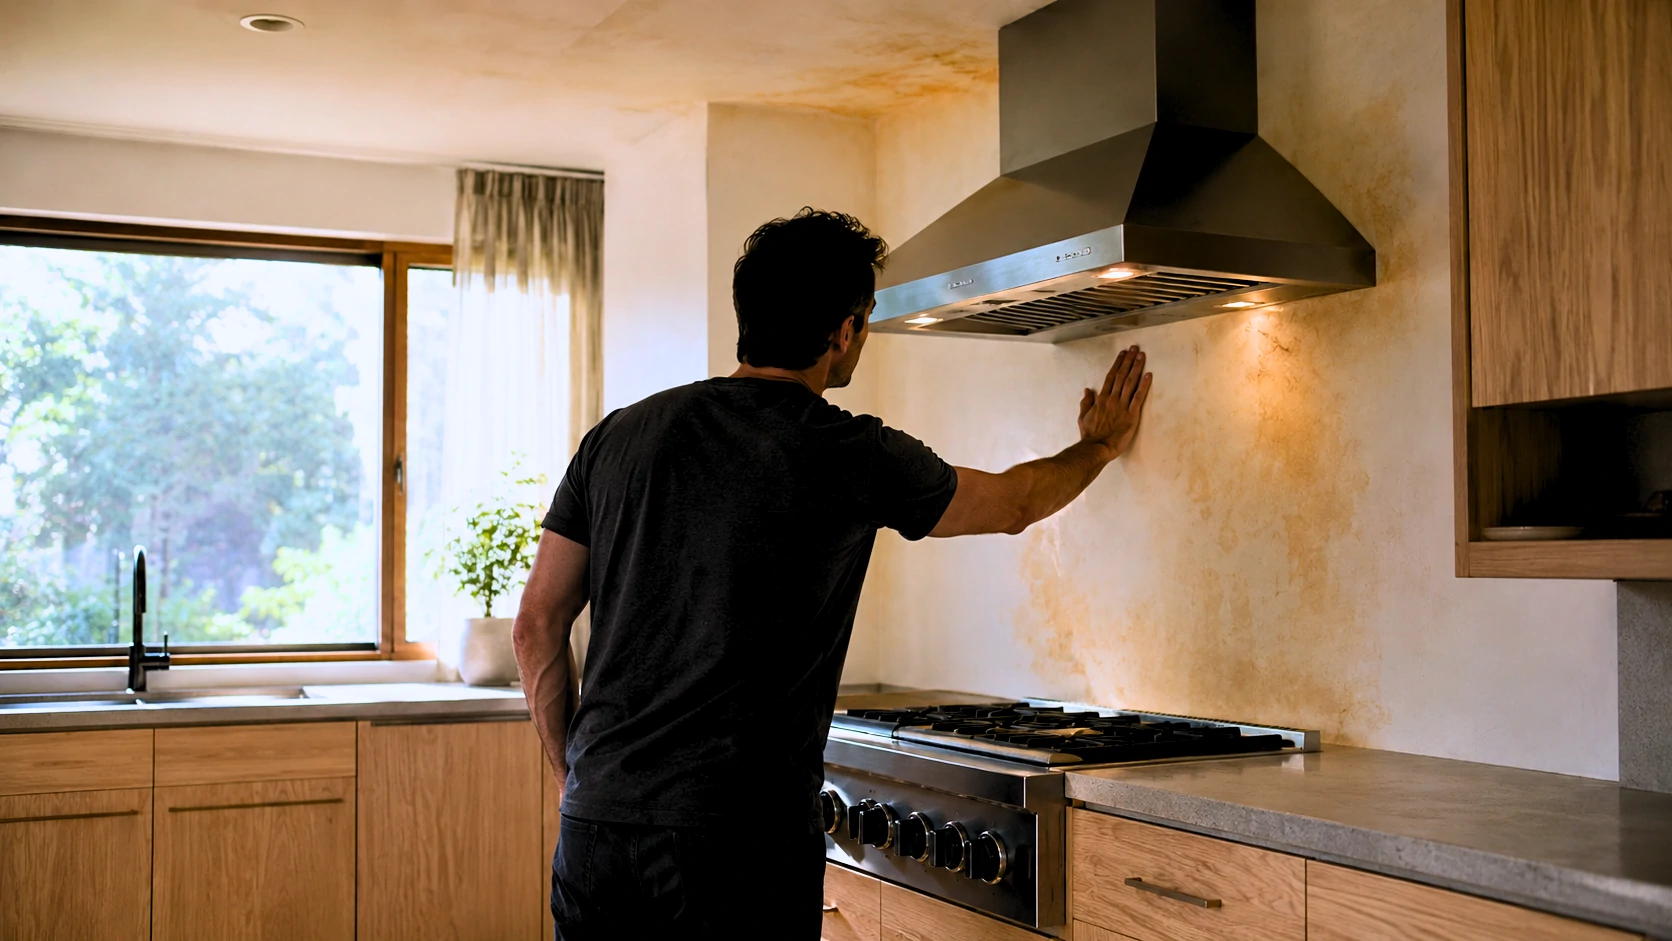
How to Get Curry Smell Out of a Rental House
Moving into a rental that carries years of embedded curry smell is one of those problems that makes you question whether anything will actually work. You open every window. You run fans. You try a few sprays and a bowl of baking soda. A week passes. The smell is still there — if anything, it seems worse on warm afternoons. Here's the honest explanation for why that happens, and what actually fixes it.The direct answer: Curry odor is not an air quality problem — it's a material penetration problem. Spice-based oils called oleoresins and terpene compounds bond to porous building materials, including drywall paper, wood, grout, and the biofilm that forms on HVAC evaporator coils. Cleaning and ventilation remove what's floating in the air. They do nothing to what's sitting inside the wall. Permanent remediation requires encapsulating those surfaces with an oil-based or shellac-based blocking primer, fully cleaning the HVAC system (coil and drain pan included), treating or replacing the subfloor beneath any carpet, and using ozone treatment for severe cases — after sealing is complete, not instead of it.Quick TakeawaysCeilings typically hold more embedded odor than walls — cooking vapor rises and deposits on ceiling drywall, particularly above the stove and around recessed fixtures KILZ Original (oil-based) outperforms KILZ Restoration for severe cases; Zinsser BIN (shellac) provides the strongest encapsulation and is the professional standard for extreme contamination Ozone cannot replace sealing — it oxidizes airborne compounds and surface-adjacent molecules, but doesn't penetrate porous materials. Run it after priming, not instead of it The subfloor beneath old carpet frequently holds years of accumulated odor and will contaminate new flooring if left untreated Smell returning after treatment almost always means an unsealed surface or an inadequately cleaned HVAC system — not a failure of the products themselves Standard duct cleaning is not full HVAC odor remediation. The evaporator coil and drain pan must be included in the scopeWhy Curry Smell Is Harder to Remove Than Other Cooking OdorsNot all cooking odors behave the same way. Bacon grease leaves a surface residue. Garlic creates a strong airborne smell that dissipates over days. Curry is a different problem entirely. The spice blends used in curry-based cooking — turmeric, cumin, coriander, fenugreek, and others — contain oleoresins and terpene-based volatile organic compounds that are oil-soluble, highly adhesive, and persistent. Curcumin, the active compound in turmeric, is particularly stubborn. It deposits on surfaces as a yellow-orange pigment, bonds chemically to porous materials, and continues volatilizing over time. This means the embedded compound keeps releasing odor even after the cooking stopped years ago. In practical terms, the smell isn't floating in the air anymore — it's inside the wall. The paper facing on drywall is porous enough to absorb these compounds during repeated cooking and trap them permanently at a depth where surface cleaning can't reach. This explains why homeowners who scrub thoroughly, paint over everything, and still smell curry on warm, humid days aren't imagining things. They painted over an active off-gassing source without encapsulating it first. The heat and humidity increased the compound's volatility, and it pushed right through the finish coat. Ventilation, baking soda, vinegar wipes, and air purifiers can reduce airborne concentration temporarily. None of them address what's embedded in the material.Where Curry Smell Actually Hides Most remediation attempts that fail do so because they treat 80% of the sources and leave the rest. Whatever is left keeps off-gassing indefinitely. Before starting any treatment, identify every contaminated surface in the property. Walls are the obvious starting point, but they're not always the worst. Wall surfaces adjacent to the cooking area accumulate deposits over time, but the extent depends on how the space was used and ventilated. Ceilings are consistently underestimated — and consistently ignored by most remediation guides. Cooking vapor rises. The ceiling above and around the stove, extending throughout the kitchen and into adjacent rooms, often holds more embedded odor than the walls. The area around recessed light fixtures is especially problematic, because warm air gathers at fixture openings and deposits compounds on the surrounding drywall. Cabinet interiors — the shelf boards, drawer boxes, and interior cabinet box sides — are raw or minimally finished wood that has absorbed cooking vapors through open cabinet doors for years. These surfaces are heavily contaminated in most homes with persistent curry odor and are almost universally skipped. Drawer boxes and any paper or cardboard cabinet liners should be removed and discarded. The liner material is too porous to treat effectively. The subfloor beneath carpet is one of the most overlooked sources in the entire remediation process. Carpet acts as a filter. Over years of use, cooking vapors pass through the carpet and deposit in the padding and the OSB or plywood subfloor beneath. The carpet and padding get removed. The contaminated subfloor stays, and the odor migrates up through whatever new flooring gets installed. Grout lines in kitchen and dining area tile are highly porous and hold volatile organic compounds from spice oils at a depth that standard cleaning doesn't reach. The tile itself is usually fine. The grout is not. HVAC ductwork accumulates odor compounds through particulate settling in ducts over time. This is well-known and usually addressed by duct cleaning. The evaporator coil and drain pan are less well-known but often more problematic than the ducts themselves. The coil surface develops a biofilm — a layer of organic matter that acts as an adhesive for odor compounds. The drain pan beneath it accumulates moisture and organic residue. Standard duct cleaning typically doesn't touch either of these. Exhaust fan housings — the actual metal housing of the kitchen range hood and bathroom exhaust fans — accumulate grease and odor compounds in the body of the unit, not just in the removable filters. Window frames and sills, particularly in kitchens where condensation and cooking vapor repeatedly interact, accumulate surface deposits. Baseboards and trim — the finished paint surface can be cleaned, but if the underlying wood was never properly primed, it absorbed compounds through the paint layer over time. Hollow-core interior doors are rarely mentioned in odor removal discussions, but the cardboard honeycomb core inside a standard hollow-core door is surprisingly absorbent. A kitchen door that's been in daily use during heavy cooking can hold detectable odor even after everything else has been treated.The Correct Remediation SequenceThe order of operations matters more than most people realize. Working out of sequence means cleaning a surface and then re-contaminating it, or installing new flooring over an untreated subfloor. Step 1 — Replace HVAC filters immediately Before anything else, install fresh filters. Running the HVAC system during cleaning with contaminated filters recirculates odor compounds back into the space throughout the entire project. Step 2 — Remove contaminated soft materials Carpet, padding, fabric window treatments, and cardboard cabinet liners need to leave the property. They cannot be treated in place to an acceptable standard when contamination is severe. Step 3 — Clean all hard surfaces with TSP solution Trisodium phosphate (TSP) mixed per product instructions — typically ¼ cup per gallon of warm water — removes surface grease, odor residue, and improves primer adhesion significantly. Scrub walls, ceilings, cabinet interiors (interior and exterior surfaces), trim, baseboards, and window frames. Wear chemical-resistant gloves and eye protection; TSP is caustic. Allow surfaces to dry completely before priming — at least 24 hours in a ventilated space.⚠️ Safety note: TSP should not be used on aluminum, polished metals, or bare wood floors. Rinse surfaces with clean water after scrubbing and before priming.Step 4 — Schedule full-scope HVAC cleaning Book HVAC cleaning to happen after surface cleaning but before final priming and painting. If the HVAC system runs contaminated air over freshly primed surfaces during the project, compounds will re-deposit on those surfaces. The HVAC cleaning scope must include coil cleaning, not just duct brushing — see Section 6 for exactly what to confirm. Step 5 — Assess and treat the subfloor After carpet removal, inspect and smell-test the subfloor before any new flooring goes down. If odor is present, prime the subfloor before installation — see Section 7 for the full protocol. Step 6 — Prime all porous surfaces Walls, ceilings, cabinet interiors, subfloor, trim, and baseboards — every porous surface gets a coat of blocking primer. The primer choice is critical and depends on odor severity. Do not skip the ceiling. Step 7 — Ozone treatment (when indicated) Ozone is most effective after surfaces are sealed. Running ozone before sealing treats airborne compounds but leaves the embedded source material intact — and the odor returns as the source continues off-gassing. If using ozone, run it after priming and before final paint and flooring installation. Step 8 — Apply finish paint over dried primer Two coats of quality latex paint over fully cured primer. Step 9 — Install new flooring Only after the subfloor is treated, ozone cycle is complete, and the space has fully aired. Step 10 — Final filter replacement Install fresh HVAC filters after all work is complete. This starts the occupancy period with a clean baseline.Choosing the Right Primer — KILZ Restoration vs. KILZ Original vs. Zinsser BINThis is the single most important product decision in the entire remediation process, and it's the one most guides handle vaguely or incorrectly. KILZ makes multiple products with different base chemistries that perform meaningfully differently on severe cooking odors. Treating "KILZ" as a single solution is a common mistake that leads to incomplete results and repeated priming cycles.Primer Base Chemistry Odor-Block Level Best Use Case Key LimitationKILZ Restoration Water-based latex Moderate Mild to moderate odor; easy cleanup May not fully encapsulate severe embedded cooking odorsKILZ Original Oil-alkyd Strong Moderate to severe odor; established cooking contamination Slow dry time; solvent cleanup; significant fumes — ventilate wellZinsser BIN Shellac (alcohol-based) Highest Severe odors; years of cooking contamination; extreme cases Strong application odor; shorter shelf life after opening; cleanup requires ammonia or denatured alcoholHow to choose: If the curry smell is moderate and the property wasn't used for heavy daily cooking, KILZ Restoration is worth testing first. Apply it, let it cure fully — 24 hours minimum — then smell-test the primed surface before painting. If odor is still detectable through the dried primer, the Restoration coat is not sufficient and needs to be followed by KILZ Original or Zinsser BIN before painting. If the smell is strong, has clearly been accumulating for years, or there is visible yellow-orange staining on wall or ceiling surfaces, start with KILZ Original or Zinsser BIN. Applying Restoration and discovering it's inadequate costs time and materials without gaining useful ground. Why shellac outperforms oil and latex: Zinsser BIN is dissolved shellac — a natural resin — in denatured alcohol. When it dries, it forms a denser, less permeable film than either oil-alkyd or latex primers. The shellac film is essentially non-porous, which is why it's the professional standard for extreme smoke and cooking odor situations. It encapsulates rather than just covering. The practical trade-offs are real. Shellac dries to touch in roughly 45 minutes, which is fast enough to create lap marks if application pace is slow. Cleanup requires ammonia or denatured alcohol, not water. The application odor is significant — open windows, run fans, wear a respirator rated for solvent vapors. Applying BIN over existing Restoration: If KILZ Restoration is already on the walls and drying hasn't eliminated the detectable odor, applying Zinsser BIN over the fully dried Restoration coat is a standard and effective approach. Shellac adheres over most dried paint and primer surfaces. This avoids stripping the existing Restoration coat and is commonly used when initial treatment proves insufficient.Ozone Treatment — What It Does, What It Doesn't, and Whether You Need ItOzone (O₃) works through oxidation. The unstable third oxygen atom breaks apart odor-causing molecules by attaching to them and disrupting their chemical bonds. It's effective on airborne volatile organic compounds and on molecules present at or very near the surface of materials. It does not penetrate significantly into porous materials like drywall, OSB subfloor, or wood. This is where the misunderstanding causes failures. A homeowner ozone-treats a house, the smell disappears, and then returns two weeks later. The ozone eliminated what was airborne and accessible at the surface. The embedded oleoresins inside the drywall paper kept off-gassing after the ozone dissipated. Without sealing first, the ozone treatment addressed the symptom while the source continued. Ozone is a complement to encapsulating primer. It is not a replacement for it.⚠️ Ozone Safety — Non-Negotiable Requirements Ozone is hazardous to humans, pets, birds, and certain materials at treatment concentrations. OSHA's permissible exposure limit for ozone is 0.1 parts per million. Treatment generators operate at many times this level. The following requirements are not optional:Every person and animal must completely vacate the building before treatment begins, including pets in cages and fish tanks (cover tanks and disconnect pumps) Post-treatment airing period is a minimum of 4–6 hours with active ventilation before re-entry — longer is safer Protect or remove rubber components — refrigerator door gaskets, HVAC rubber seals, rubber weatherstripping, leather furniture Electronics and artwork should be removed from treatment areas Before re-entering, confirm the generator is off and smell for ozone's distinctive sharp, metallic scent — if detectable, continue ventilating Do not rely on timer-only shutdown; physically verifyProfessional vs. Consumer Rental Equipment Consumer ozone rental units typically generate under 600 mg/hr output. Professional remediation equipment operates at 1,000–4,000 mg/hr or higher. For a full house with severe contamination, a rental unit may require extended run times and still fall short of professional-grade results in larger spaces. If the home is significantly contaminated and larger than approximately 1,000 square feet, comparing the cost of professional ozone treatment ($200–$600 depending on square footage) against multiple rental days plus the time investment is worthwhile. The gap in equipment output is real. Hydroxyl Generators — The Occupant-Safe Alternative Professional remediation companies increasingly use hydroxyl radical generators as an ozone alternative. Unlike ozone, hydroxyl generators can operate with people present, don't damage rubber or electronics, and are effective on residual airborne compounds after sealing is complete. They act more slowly than ozone, which makes them better suited for ongoing treatment rather than a single shock treatment. Consumer rental availability is limited but growing. Ozone Decision FrameworkSituation RecommendationMild smell, all surfaces fully sealed and painted Ozone likely unnecessary — ventilate and reassess after 30 daysModerate smell, surfaces sealed but some odor remains Ozone treatment beneficial as a final step before occupancyStrong smell with unsealed surfaces still present Seal first — ozone before sealing wastes the treatmentHVAC not yet professionally cleaned Clean HVAC first — the system will reintroduce odor after ozone treatmentConsidering rental machine for a full house Understand output limitations; may require extended treatment or multiple cyclesHVAC Cleaning — What to Actually Ask ForStandard duct cleaning is not full HVAC odor remediation. The difference matters, and many homeowners don't discover it until the smell comes back through the vents after they've paid for a cleaning. A typical duct cleaning service inserts brushes and vacuums into accessible duct sections to remove accumulated dust and debris. Useful, but insufficient for embedded cooking odors. Cooking vapor compounds deposit on the evaporator coil surface, which develops a biofilm over time — a layer of organic matter that acts as an adhesive for additional deposits. The drain pan beneath the coil accumulates moisture and organic residue. The air handler cabinet interior holds contaminated material. None of these are reached by duct brushing. This is the specific reason homeowners report that the curry smell is still strongest at the supply registers even after professional duct cleaning — the duct interiors were cleaned, but the air handler and coil are still contaminated and conditioned air passes through them on every cycle. HVAC Cleaning Scope Confirmation Checklist Before booking, confirm every item on this list with the contractor:Evaporator/air handler coil will be cleaned with an approved coil cleaner (not just rinsed) Drain pan will be cleaned and treated Air handler cabinet interior will be vacuumed and wiped down All filters and media will be replaced at the end of service Return air plenum (the large return box near the air handler) is included in the scope All supply and return registers will be removed, cleaned, and reinstalled Kitchen range hood ductwork run will be included if accessibleA contractor who confirms the full list above is performing complete HVAC odor remediation, not just duct vacuuming. Expect a higher invoice — typically $300–$550 versus $150–$200 for a basic duct cleaning. The additional scope is the correct investment for an odor remediation situation. On scheduling: A common mistake is completing all surface work and then scheduling HVAC cleaning as a final step. If the system runs contaminated air over freshly primed or painted surfaces during the project, compounds can re-deposit on those new surfaces. Schedule HVAC cleaning to coincide with the mid-project phase — after TSP cleaning, before or during the priming stage.Carpet Removal and Subfloor AssessmentCarpet in a home with years of curry odor is not salvageable through cleaning. The fibers, padding, and often the subfloor beneath have absorbed volatile compounds beyond the threshold that any in-place treatment can address. Remove carpet and padding entirely and dispose of them. After removal, the critical step that most remediation guides skip entirely: assess the subfloor before installing anything new. Subfloor Assessment ChecklistPerform a smell test at floor level immediately after carpet and padding removal (before ambient odor dissipates) Visually inspect the OSB or plywood surface for yellow, orange, or brown discoloration, particularly in kitchen-adjacent and high-traffic areas Check seams and fastener points where vapors can penetrate over time Note any soft spots or moisture-related damage (separate issue, but worth flagging during assessment)If odor is detectable in the subfloor: Apply one coat of KILZ Original or Zinsser BIN across the entire subfloor surface, including seams and fastener areas. Allow full cure. Smell-test again before flooring installation. If odor is still detectable through one dried coat, apply a second before proceeding. When the subfloor may need replacement: If the OSB or plywood shows significant saturation — particularly in homes where cooking happened on upper floors, or where subfloor has prolonged contact with heavily contaminated carpet padding — replacement may be more practical than continued priming. The specific indicators are:Primer coat shows yellow or orange bleed-through discoloration within 24 hours of application (oleoresin is migrating through the primer before it cures) Odor remains clearly detectable through two full, dried coats of shellac primer Visible organic staining is deep and extensive rather than limited to isolated areasIn these cases, cutting out and replacing the affected subfloor section, then priming the new OSB and the surrounding framing before flooring installation, is the more reliable outcome. New flooring timing: Never install new flooring before the subfloor smell test passes and primer has fully cured. The odor migrates upward through even non-porous flooring materials via the edges, seams, and expansion gaps.Surfaces Most People Miss These are the overlooked sources that cause smell to return after a homeowner has completed what they believe is a full remediation. Cabinet interiors — the shelf boards, interior box sides, and drawer boxes inside kitchen cabinets are raw or minimally finished wood that has been absorbing cooking vapors for years. Cleaning with TSP, followed by primer application inside each cabinet, is tedious. It's also necessary. One consistently missed cabinet is the one immediately above the stove, where heat-driven vapor rises directly into the cabinet interior. Grout lines — kitchen tile is easy to wipe down. The grout between tiles is porous and holds oleoresins at a depth that surface cleaning doesn't address. After TSP scrubbing, allow grout to dry fully, then apply a penetrating grout sealer. This step is almost universally absent from competing remediation guides. Ceiling light fixture boxes — recessed lighting creates gaps in ceiling drywall where warm, contaminated air has been gathering for years. Wipe down the interior of each fixture box with TSP solution and prime the surrounding ceiling drywall with extra attention and coverage. Exhaust fan housing — the range hood and bathroom exhaust fan housings, not just the replaceable filters, accumulate grease and odor compounds in the sheet metal body. Where possible, remove the fan assembly and clean the housing interior with degreaser before replacing with new filters. Window sills and frames — particularly wooden sills in kitchen areas where condensation and cooking vapor interact repeatedly. These are visually easy to overlook during surface prep. Hollow-core interior doors — the cardboard honeycomb core inside a standard hollow-core door is absorbent. A kitchen door in daily use during years of heavy cooking can hold measurable odor. Prime all door surfaces, including both sides and edges. If smell persists in a room where every other surface has been treated, temporarily remove the door and compare odor levels. Replacement is the permanent solution when the door is the remaining source. Return air vent surroundings — the drywall immediately adjacent to return air vents is often more contaminated than surrounding wall surface, because return vents draw air (and airborne compounds) across that area continuously. It's frequently undertreated because it doesn't look different from the rest of the wall.Cost Breakdown — DIY vs. Professional Remediation One of the more frustrating discoveries mid-project is that incremental DIY spending can quietly approach professional remediation costs without achieving equivalent results. This comparison helps make that decision clearly.Item DIY Cost Range Professional CostTSP cleaning supplies $15–$40 Included in serviceKILZ Original, per gallon $30–$42 Included in serviceZinsser BIN, per quart $24–$30 Included in serviceHVAC full-scope cleaning $300–$550 $300–$550Ozone machine rental (per day) $50–$100 N/AProfessional ozone treatment N/A $200–$600Carpet removal (self-performed) Disposal fees only $1–$2 per sq ft (labor)Subfloor primer treatment $40–$80 Included in serviceFull professional odor remediation N/A $800–$2,500+For a moderate case in a 1,200 sq ft rental — TSP supplies, two gallons of KILZ Original, HVAC full-scope cleaning, two days of ozone rental, and subfloor primer — DIY material costs typically run $500–$750 before any labor consideration. Two additional realities worth factoring in: Failed first rounds have real costs. If KILZ Restoration was purchased and applied before discovering it's insufficient for the contamination level, that's $25–$35 per gallon spent without resolution, plus the time to reprime. Multiple partial attempts compound quickly. Professional mobilization is one event. A professional remediation company that completes the project correctly in a single mobilization at $1,200–$1,500 can be cost-equivalent to a drawn-out DIY process on a badly contaminated property — with better equipment and a cleaner outcome. The calculation shifts clearly toward professional remediation when: the property exceeds 1,500 square feet, the HVAC system is complex or difficult to access, subfloor replacement becomes necessary, or more than two complete DIY treatment cycles have been attempted without resolving the odor.When DIY Is Not Enough The full DIY protocol described in this guide resolves most curry odor situations in rental properties. But there are clear indicators that the contamination level exceeds what consumer products and rental equipment can handle. Recognizing these early prevents continued spending on a situation that requires professional equipment. ⚠️ Consider professional remediation when any of the following apply:Smell returns within two to three weeks of completing the full treatment sequence — TSP cleaning, oil-based or shellac primer on all surfaces, full-scope HVAC cleaning, ozone treatment Odor is still detectable after two full coats of shellac-based primer on the same surface, after both coats have cured completely Smell is strongest at HVAC supply registers despite confirmed coil and drain pan cleaning — suggests contamination is deeper in the air handler or the system has a component that wasn't addressed Primer bleeds through with yellow or orange discoloration within 24 hours of application, indicating oleoresin saturation at a level topical treatment cannot contain Subfloor requires replacement and the project scope is expanding significantly The property was used for commercial cooking, large-scale food preparation, or cateringProfessional odor remediation companies have access to equipment that is not available at consumer rental counters: high-output ozone generators, hydroxyl radical machines, thermal foggers that carry encapsulant deep into porous surfaces, and commercial-grade sealants. For a severely contaminated property, the gap between professional capability and DIY capability is real and meaningful. If two full rounds of DIY treatment have been completed with continued odor presence, a professional assessment before additional material investment is the right next step. A remediation company can identify what was missed and give a specific estimate — which may confirm the remaining work is DIY-manageable or clarify that professional equipment is needed to cross the finish line.Frequently Asked Questions Is KILZ Restoration strong enough for severe curry smell, or do I need the oil-based KILZ Original? KILZ Restoration (water-based) is adequate for mild to moderate odors where the smell is noticeable but not overwhelming. For severe, long-standing curry contamination — strong odor, visible staining, years of cooking — KILZ Original (oil-based) or Zinsser BIN (shellac) is the appropriate starting point. The latex binder in Restoration forms a less dense film than oil or shellac. If Restoration has already been applied and odor is still detectable through the dried primer, apply a coat of Zinsser BIN over it before painting.Will curry smell come back after priming and painting if I skip ozone? If every porous surface is fully and correctly sealed with quality blocking primer, ozone is not strictly necessary. Ozone eliminates residual airborne compounds after encapsulation is complete — it doesn't replace encapsulation. Smell returning after a seemingly complete treatment almost always indicates a missed surface (cabinet interiors, ceilings, hollow-core doors, grout) or an HVAC system that wasn't fully cleaned, not the absence of ozone.What does an ozone machine actually do that cleaning and priming doesn't? Ozone oxidizes volatile organic compounds present in the air and at the surface layer of materials by attaching an unstable oxygen atom to odor molecules and breaking them apart chemically. Cleaning removes surface residue. Primer encapsulates embedded compounds. Ozone addresses what remains airborne and surface-accessible after those steps. The three methods target different parts of the problem — they're complementary, not interchangeable.How long does a house need to air out after ozone treatment before it's safe to re-enter? A minimum of 4–6 hours with active ventilation — windows open, fans running. Larger generators or longer treatment cycles need proportionally longer airing time. Test by smell before entry: ozone has a sharp, distinctive metallic or electrical odor. If it's detectable at the door, continue ventilating. Don't shorten this step.Can curry smell embed in drywall permanently, or does sealing always work? Without encapsulation, yes — oleoresins bonded to drywall paper can off-gas for years. Proper sealing stops the off-gassing by creating a barrier between the embedded compound and the air. In extreme cases where drywall is heavily saturated and shellac primer bleeds through within 24 hours even after two coats, replacing the affected drywall section and priming the new material before finishing is the more reliable outcome than additional primer layers.My HVAC was professionally cleaned but I can still smell curry from the vents. What was missed? The most common answer is that the evaporator coil and drain pan were not cleaned — only the duct interiors were vacuumed. Cooking odor compounds embed in the biofilm on coil fins and in organic residue in the drain pan; standard duct brushing doesn't address either. Contact the company and ask specifically whether the coil was cleaned with an approved coil cleaner and whether the drain pan was treated. If those items weren't in scope, schedule a supplementary coil cleaning.Should I prime the subfloor after removing carpet before laying new flooring? Yes, if any odor is detectable after carpet and padding removal. New flooring installed over an untreated contaminated subfloor will carry the odor upward through seams, edges, and expansion gaps. Prime with KILZ Original or Zinsser BIN, allow full cure, and smell-test the primed surface before flooring installation.Does Zinsser BIN shellac primer work over KILZ Restoration that's already on the walls? Yes. Shellac adheres over most dried surfaces, including dried latex primer. Allow the Restoration coat to fully cure, lightly sand if the surface is very smooth or glossy for better adhesion, then apply BIN. This combination is commonly used when an initial water-based treatment proves insufficient.Will a HEPA air purifier eliminate curry smell, or does it just mask it? HEPA filters capture particulates — airborne particles, dust, and some larger molecules. They have limited effect on volatile organic compounds like the ones responsible for curry odor, which are gas-phase and pass through HEPA media. A purifier that combines HEPA with a substantial activated carbon filter layer will capture some VOCs, but it's managing the symptom rather than eliminating the source. Air purifiers are a reasonable supplementary measure during and after remediation — not a substitute for encapsulation.What questions should I ask an HVAC contractor before booking? Ask specifically whether the scope includes: evaporator coil cleaning with an approved coil cleaner, drain pan cleaning and treatment, air handler cabinet interior cleaning, all filter replacement at completion, return air plenum cleaning, and register cleaning. A contractor who confirms the full list is offering genuine odor remediation scope. One who hedges on coil and drain pan cleaning is quoting standard duct vacuuming, which is insufficient for cooking odor situations.Can hollow-core interior doors really hold onto curry smell? The cardboard honeycomb core inside a standard hollow-core door is porous and absorbent. A kitchen door with years of daily use during heavy cooking can hold detectable odor even after every other surface in the room has been treated. If smell persists in a room where everything else is addressed, temporarily remove the door and compare odor levels over 24 hours. If the room improves significantly, the door is a source. Prime all surfaces of the door, including edges, or plan for replacement.At what point is replacing drywall more practical than continuing to prime? When two full coats of shellac primer show bleed-through discoloration within 24 hours of application, or when odor remains clearly detectable through two dried shellac coats, the contamination level in that section of drywall may exceed what any topical sealant can contain. At that threshold, cutting out and replacing the affected section, priming the new drywall and the surrounding framing before finishing, is more practical than adding more primer layers.Is professional hydroxyl treatment a better option than ozone for occupied homes? Hydroxyl generators are safer around occupants, don't degrade rubber or electronics, and are effective on residual airborne compounds after sealing. They operate more slowly than ozone, which makes them better suited for ongoing maintenance treatment than a single concentrated shock treatment. For a vacant property being prepared for occupancy, professional ozone with proper evacuation protocol is generally faster. For a situation where the space needs to remain partially occupied during treatment, hydroxyl generation is the more practical option.
16 Easy Home Improvement Ideas You Can Actually Finish This Weekend
Quick Answer: The best weekend home improvement ideas combine quick visible wins — like swapping cabinet hardware or installing smart bulbs — with longer-payoff upgrades like smart thermostats, water leak detectors, and energy monitors. Most can be done in under four hours with basic tools.Saturday morning hits differently when you've been staring at the same kitchen handles for three years. You know something needs to change. You've got 48 hours, a moderate budget, and absolutely no desire to tear out a wall. Here's the thing most lists won't tell you: you don't need all 16 of these projects this weekend. Pick three, do them right, test them, and actually enjoy the result. The goal isn't a completed checklist — it's a home that works better by Sunday evening. After testing smart home devices across dozens of setups, dealing with C-wire nightmares, and discovering that "30-minute install" means something very different at 9pm versus 9am, this guide is built on what actually happens — not what the product box promises. What you'll learn in this guide:16 realistic weekend home improvement projects — no contractor required for most Which ideas actually save money on energy bills vs. which just look nice Smart home upgrades that beginners can install in under an hour Honest time and cost estimates for every project The three upgrades most homeowners wish they'd done sooner What to skip if you're renting or have HOA restrictionsAll 16 Projects at a Glance# Project Difficulty Time Cost Saves Energy? Renter-Friendly?1 Replace cabinet hardware ⭐ Easy 1–2 hrs $30–$80 No ✅ Yes2 Install smart LED bulbs ⭐ Easy 30–60 min $40–$120 ✅ Yes (~$8/mo) ✅ Yes3 Smart plugs + energy monitoring ⭐ Easy 20–30 min $20–$60 ✅ Yes (variable) ✅ Yes4 Under-cabinet LED strip lighting ⭐ Easy 30–60 min $30–$90 ✅ Minor ✅ Yes5 Install a video doorbell ⭐⭐ Moderate 1–2 hrs $80–$250 No ⚠️ Check lease6 Smart lock upgrade ⭐⭐ Moderate 30–90 min $100–$300 No ⚠️ Check lease7 Motion sensor exterior lighting ⭐⭐ Moderate 30–60 min $20–$80 ✅ Yes ⚠️ Check lease8 Smart thermostat ⭐⭐ Moderate 1–3 hrs $80–$250 ✅ Yes ($150–$300/yr) ⚠️ Check lease9 Water leak detectors ⭐ Easy 10 min/unit $25–$50/unit ✅ Prevention ✅ Yes10 Energy automation routines ⭐ Easy 1–2 hrs $0 ✅ Yes (up to 23%) ✅ Yes11 Whole-home energy monitor ⭐⭐ Moderate 2–4 hrs $150–$300 ✅ Yes (insight) ❌ Usually No12 Wi-Fi network audit + upgrade ⭐ Easy 1 hr $0–$200 No ✅ Yes13 Smart switches (high-traffic rooms) ⭐⭐⭐ Advanced 30–60 min/switch $15–$60/switch ✅ Yes ❌ Usually No14 Smart smoke + CO detector ⭐⭐ Moderate 15–30 min $100–$130 No ⚠️ Check lease15 Smart irrigation controller ⭐⭐ Moderate 1–2 hrs $80–$200 ✅ Yes (water bill) ❌ Usually No16 Smart garage door opener/retrofit ⭐⭐⭐ Advanced 2–4 hrs $100–$200 No ⚠️ Check lease🏠 The Weekend Home Improvement Reality Check Most "easy home improvement" lists were written by people who have never installed a smart thermostat at 9pm and discovered the HVAC wiring doesn't match the diagram. The projects in this guide have been chosen because they're genuinely completable in a weekend — and because they make a real, measurable difference. Start with smart plugs and an energy audit if savings are your motivation. Start with cabinet hardware and lighting if you want the fastest visible result.How to Pick the Right Projects for Your Weekend (and Your Home) Most people open a list like this, feel overwhelmed by option 4, and end up doing nothing. Let's skip that part. Start With Your Biggest Pain Point Three categories cover most homeowner frustrations. Find yours: If energy bills are climbing: Start with projects 8, 3, and 10 — smart thermostat, smart plugs, and automation routines. These three together can realistically cut $150–$300 off your annual electricity costs. The thermostat alone pays for itself in under a year on most heating/cooling setups. If security keeps you up at night: Projects 5, 6, and 7 form a natural package — video doorbell, smart lock, and motion lighting. You don't need all three this weekend. The doorbell makes the biggest visible difference first. If you want the fastest transformation: Projects 1 and 2. Replace cabinet hardware and swap your bulbs. You'll be surprised how different a kitchen or bathroom feels after just a few hours. These cost almost nothing by comparison and deliver instant visual results.Renter vs. Homeowner — Know Before You Start This is the section most guides skip entirely. If you're renting, you're not locked out of this list — but you do need to know which projects require approval before you begin.Project Renters NotesSmart plugs, LED bulbs ✅ No approval needed Fully removable, no modificationUnder-cabinet LED strips ✅ Usually fine Use adhesive strips — avoid screwsWi-Fi audit + upgrade ✅ No approval needed Your network, your callWater leak detectors ✅ No approval needed Battery-powered, no installation requiredAutomation routines ✅ No approval needed Software onlyVideo doorbell (battery) ⚠️ Ask first Some leases prohibit doorbell changesSmart lock ⚠️ Ask first Lock replacement is typically prohibited without permissionSmart thermostat ⚠️ Ask first May need landlord to verify wiringSmart switches ❌ Usually not without approval Involves electrical modificationsWhole-home energy monitor ❌ Requires electrical panel access Always landlord territoryHOA households: Exterior changes — including video doorbells, motion lights, and certain door hardware — may require approval. Check your CC&Rs before buying anything that mounts to an exterior wall.What You Can Realistically Do in Two Days Here's an honest weekend plan. These time blocks assume you've already ordered supplies. Add 2–3 hours if you're shopping Saturday morning.Time Block Activity NotesSaturday 8–10am Unbox, read instructions, gather tools Don't skip instructions — most failed installs start hereSaturday 10am–12pm Quick wins: bulbs, plugs, cabinet hardware Build confidence with easy projects firstSaturday 12–1pm Lunch + measure and plan any wiring work Don't rush electrical projectsSaturday 1–4pm Intermediate installs: doorbell, thermostat Best done in daylight with a helper nearbySaturday 4–6pm Test everything installed so far Fix issues before Sunday while it's freshSunday 9–11am Advanced projects: switches, energy monitor Fresh eyes, rested — electrical work deserves thisSunday 11am–2pm App setup and automation routines The most underrated step that most people rushSunday 2–4pm Review, troubleshoot, document Photograph your wiring and panel for future referenceThe Quick Wins — Projects That Take Under an Hour These four projects can all be done before lunch on Saturday — and two of them will visually change your home today. 1. Replace Cabinet Hardware (1–2 Hours, $30–$80)This is, dollar for dollar, the fastest visual transformation in any kitchen or bathroom. New handles and pulls shift the entire feel of a room — and most people dramatically underestimate how much old hardware was holding the space back. The only trap to avoid: measure your existing hole spacing before ordering anything. Cabinet pulls use two mounting holes. The center-to-center distance varies — typically 3", 3.75", or 5". Buy pulls that match your current spacing, or you'll be drilling new holes. That's a 20-minute project that becomes a 90-minute one. Practical tip: Brushed nickel and matte black are both versatile and widely available. Knobs are faster to install than pulls but handles tend to look more substantial. If you're mixing kitchen and bathroom hardware, buying the same line in each room creates visual cohesion without requiring a renovation. Trade-off: Cabinet hardware is a reversible change, but the screw holes stay. If you drill new holes to fit a different spacing, the originals need to be filled before you sell. Keep the originals in a labeled bag.2. Swap Every Old Bulb for Smart LED Bulbs (30–60 Minutes, $40–$120)Sixty-watt incandescent bulbs draw 60W. An equivalent LED draws 8.5W. In a room with six bulbs running four hours a day, that's a measurable difference on your monthly bill — roughly $8–$12 per month in heavily used spaces. Smart LED bulbs go one step further: they're dimmable via app, change color temperature on a schedule, and integrate with Alexa, Google Home, or Apple HomeKit without any hub. They're also one of the most renter-friendly smart home upgrades — screw in, screw out, take them when you leave. The smart bulb vs. smart switch debate starts here. This matters more than most beginners realize. Smart bulbs are easy and immediately gratifying. But they have a quirk: if someone turns off the light switch at the wall, the bulb loses power and becomes unresponsive to the app. Smart switches solve this permanently — but they require wiring work. More on that in Project 13. For now: if everyone in your home is willing to stop using the wall switches and control lights via app or voice, smart bulbs work great. If that sounds like a recipe for household conflict, bookmark Project 13. Setup tip: When you first open the bulb app, name your rooms properly. "Living Room Lamp 1" is not a room name. Take the five minutes to label things intuitively — it makes every automation you build later much cleaner. ⚠️ Safety note: Smart bulbs are not compatible with most traditional dimmer switches. If you put a smart bulb in a socket that's controlled by an old dimmer, you'll get flickering, buzzing, or shortened bulb life. Either replace the dimmer with a standard switch or buy bulbs that list explicit dimmer compatibility.3. Install Smart Plugs and Actually Check the Data (20 Minutes, $20–$60)The remote on/off feature is the part that gets advertised. The energy monitoring is the part that changes behavior. Most people install a smart plug, confirm it turns on and off from the app, and never look at the energy data again. That's like getting a fitness tracker and never checking your steps. The data is where the value lives. Plug in a smart plug on your TV, gaming setup, coffee maker, or any device that runs daily. Then check the energy monitoring app after one week. What you'll typically find:A gaming PC or console in standby: 150–250W (that's $13–$22/month for a "turned off" device) An older flat-screen TV: 40–80W standby A coffee maker with a clock display: 3–5W 24/7 — not huge, but it's always onThe average US household wastes around $165 per year powering devices that appear to be off. Smart plugs let you find and eliminate those draws selectively.💡 Real Talk: Most smart home "starter kits" are a bad value. You're buying 5 devices from one ecosystem at a bundle price — but your home might only need 2 of them. Buy plugs first. Use the data to decide what to address next.⚠️ Safety warning: Only purchase UL-listed (US), CE-marked (UK/Europe), or SAA-approved (Australia) smart plugs. A $25 plug from an unknown brand with no certification markings is a documented fire risk. This isn't theoretical — counterfeit plugs have caused fires. Spend an extra $5–$10 for a brand that's been tested.4. Add Under-Cabinet LED Strip Lighting (30–60 Minutes, $30–$90)This is the most underrated kitchen upgrade on this list. Under-cabinet lighting eliminates the shadow your upper cabinets cast on your countertop — the shadow that makes food prep harder and the kitchen feel darker than it is. Plug-in vs. hardwired: For a weekend project, plug-in strip lights win without question. They take 30 minutes to install, use adhesive mounting, and require zero electrical work. Hardwired looks cleaner but needs a cabinet that already has an outlet inside or an electrician to add one. Color temperature matters here more than most people realize:2700K (warm white): Cozy, amber-toned — great for living areas, not ideal for task lighting 3000K: A good kitchen balance — warm enough to feel comfortable, bright enough to see what you're doing 4000K (cool white): Clinical, bright — excellent for detail work, less pleasant for everyday useMany smart-enabled strip lights let you adjust this from an app. Worth the $10–$20 premium if you use the kitchen in the evening. Renter note: Adhesive-mount strips work well and leave minimal residue on clean cabinet surfaces. Test on an inconspicuous area first, and store the original mounting template if your strip lights came with one.Smart Security Upgrades That Actually Work Here's an uncomfortable truth: most smart home security articles skip the most important part of making a smart lock actually secure. 5. Install a Video Doorbell This Afternoon (1–2 Hours, $80–$250)Studies consistently show that visible security tech — cameras, doorbells, motion lights — deters opportunistic burglars. A video doorbell doesn't just tell you who's at the door. It creates a visible deterrent, logs delivery confirmations, and gives you a permanent record of porch activity. Wired vs. battery-powered: Wired doorbells connect to your existing low-voltage doorbell wiring and never need charging. Battery-powered units are far easier to install and work in homes without existing doorbell wiring — but you'll recharge them every 1–6 months depending on traffic and settings. If your home has existing doorbell wires and you're willing to do basic wiring, go wired. If not, battery is a fully capable alternative. What actually matters in specs:1080p resolution is sufficient for facial recognition and package identification — 4K is marketing for doorbell cameras Two-way audio is genuinely useful, not a gimmick Local vs. cloud storage: Cloud storage often requires a monthly subscription ($3–$10/month). Check this before buying — it affects the real costCommon mistake: Buying a video doorbell before checking if it works with your existing chime. Some battery doorbells bypass the chime entirely; others require a compatible mechanical or digital chime. Check the compatibility list for your specific model before purchasing. ⚠️ Privacy note for UK and Australia residents: Some budget video doorbells route footage through overseas servers and have unclear data retention policies. Under UK GDPR and Australian Privacy Act obligations, check where your footage is stored and what the provider's data sharing policy covers before purchasing.6. Upgrade to a Smart Lock (30–90 Minutes, $100–$300)Guest access codes. No more hiding keys under a rock. A log of who entered and when. Smart locks deliver genuine, everyday convenience that's hard to go back on once you have it. Deadbolt replacement vs. retrofit: Deadbolt replacements swap your entire existing deadbolt for a new smart one — they're the cleanest solution and work with almost any door. Retrofit models clip over your existing deadbolt's thumb turn and don't require replacing the lock cylinder — useful if you want to keep your keyed hardware. Retrofit models are typically faster to install (15–30 minutes) but bulkier. Check your door backset before ordering. The backset is the distance from the edge of the door to the center of the lock hole. Most doors use either a 60mm (2-3/8") or 70mm (2-3/4") backset. The wrong size won't fit. Measure before you order. Keep a physical key. This should be obvious, but every year people get locked out because their phone died, the app had an outage, or the Wi-Fi went down. The app is the convenience layer — the key is the backup. Store one somewhere smart, not the same spot where everyone hides a spare.🔴 Expert Warning: Smart locks are only as secure as your Wi-Fi network. A smart lock on a compromised network with a default router password is worse than a standard deadbolt. Before installing any smart lock, complete Project 12 (Wi-Fi security audit) first.Modern smart locks with 256-bit AES encryption are genuinely secure — more tamper-resistant than most standard deadbolts. The vulnerability isn't the lock hardware. It's the network it runs on.7. Add Motion Sensor Exterior Lighting (30–60 Minutes, $20–$80)Motion-activated lighting is one of the highest-value security upgrades per dollar on this list. It startles, it illuminates, and it's visible evidence that the property is actively monitored. Wired replacement vs. battery stick-up lights: Replacing an existing exterior light fixture with a motion-sensor version takes 30–45 minutes, requires the circuit breaker off, and delivers a permanent, weatherproof result. Battery-powered stick-up lights (like the Blink or Ring floodlight models) require zero wiring and can be mounted on almost any exterior surface — ideal for renters and for spots without existing wiring. Lumen output guide:500–700 lumens: Subtle, accent-style — enough to notice, not blinding 1,000–2,000 lumens: Standard security coverage — this is what you want for driveways and garage areas 3,000+ lumens: Strong deterrent, commercial-feel — appropriate for larger propertiesSmart motion lights can trigger your phone when they activate — useful for verifying whether that 2am alert was a raccoon or something worth calling about.Cost-to-Payback Summary: The Energy-Focused ProjectsProject Avg. Cost Annual Savings Payback PeriodSmart thermostat $80–$250 $150–$300/yr 5–18 monthsSmart LED bulbs (6 bulbs) $40–$120 $60–$90/yr 8–24 monthsSmart plugs (4 units) $60–$100 $30–$120/yr 6–30 months (varies by device)Smart irrigation controller $80–$200 $50–$150/yr (water bill) 12–36 monthsAutomation routines $0 Up to $200/yr (with devices) ImmediateWhole-home energy monitor $150–$300 $120–$240/yr (behavioral) 12–24 monthsSavings figures based on US average energy rates and EPA WaterSense data. UK/Canada/Australia results vary with local utility pricing.Smart Home Myth vs. RealityMyth Reality"Smart home devices are complicated to set up" Most Matter-compatible devices pair in under 3 minutes"Smart thermostats work with all HVAC systems" Single-stage systems: yes. Multi-stage, heat pump, or radiant heat: check compatibility first"Smart plugs save significant energy by themselves" They save standby draw — meaningful for TVs and gaming rigs, negligible for phone chargers"You need a hub to start" No — most 2026 devices run natively on Wi-Fi or Matter without a proprietary hub"Smart locks aren't secure" Modern smart locks with AES-256 encryption are more tamper-resistant than most standard deadbolts"You have to set everything up at once" The most effective smart homes were built device by device, not kit by kitThe Energy-Saving Upgrades That Pay for Themselves Standby power costs US households approximately $165/year on devices that appear to be off. That's just standby. Add poor thermostat scheduling and unmanaged irrigation, and the number climbs quickly. 8. Install a Smart Thermostat — The Upgrade With the Longest Payback (1–3 Hours, $80–$250)A Google Nest Thermostat installed in a 2,200 sq ft home in Minnesota saves around $23/month during winter — roughly $276/year for a $130 device. That math holds up across most climates when you actually configure the schedule. The issue is that most people install a smart thermostat and never touch the scheduling settings. That's the equivalent of buying a hybrid car and driving it exclusively in combustion mode. Before you buy, do the C-wire check. The C-wire (common wire) provides continuous power to the thermostat so it can maintain a Wi-Fi connection. About 30% of older HVAC systems don't have a C-wire connected at the thermostat — even if one exists at the HVAC control board. Most modern smart thermostats include a C-wire adapter that draws power from existing wiring without requiring a new wire run. Check your current thermostat's wiring terminal before ordering. If you see terminals labeled R, G, Y, W, and no C, you'll likely need the adapter. Compatibility check before buying:Single-stage heat/cool systems: compatible with virtually all smart thermostats Multi-stage systems (two-speed HVAC): compatible with most — verify the model Heat pump systems: require specific heat pump-compatible thermostats — not all are Radiant heat, baseboard heaters, or line-voltage systems: most smart thermostats won't work⚠️ Expert Warning: Thermostat wiring errors can damage your HVAC control board — a repair that typically costs $300–$800. If your existing wiring is unclear, unlabeled, or you're working with a multi-stage or heat pump system, a 1-hour HVAC technician visit ($75–$120) is genuinely worth it. Regional rebates: In the US, many utility companies offer $50–$100 rebates for qualifying smart thermostat installations. Search the EnergyStar rebate finder with your zip code before buying. In Canada, check provincial energy efficiency programs. UK homeowners may qualify under the Great British Insulation Scheme. Australian states have varying rebate structures through energy efficiency programs.9. Install Water Leak Detectors (10 Minutes Each, $25–$50 per Unit)There's one smart home device that most lists underemphasize — but it has the highest damage-prevention ROI of anything here. It's this one. The average water damage claim in the US runs between $10,000 and $15,000. A water leak sensor costs $30. The math is uncomfortable. Place sensors in these locations:Under every kitchen sink Behind the washing machine Under the water heater In the basement near the floor drain Under bathroom vanities in older homesThe sensor sits on the floor. When moisture reaches the contacts, it sends an app alert in under 30 seconds. That's the difference between a mop and an insurance claim. Wi-Fi vs. Zigbee/Z-Wave sensors: Wi-Fi sensors connect directly to your network and alert through a dedicated app — no hub required. Zigbee and Z-Wave sensors require a compatible smart hub but use far less power and have stronger mesh-network reliability. For most beginners, Wi-Fi sensors are the easier starting point. The maintenance blind spot: These sensors sit under sinks and behind appliances for years. When the battery dies, the protection disappears — silently, without any notification in most models. Check batteries annually. Set a calendar reminder. The sensor that hasn't been touched in two years is probably not protecting anything.💡 Real Talk: The first time you get a phone alert while you're at the grocery store and come home to a contained drip under the sink — instead of a flooded cabinet and water damage in the subflooring — is the moment you stop thinking of these as optional. Put them everywhere that has a water connection.10. Set Up Energy Automation Routines (Free — Uses Devices Already Installed)This project costs nothing if you already have a smart thermostat, bulbs, or plugs. It uses what you've installed and turns it into an actual system. Three routines account for most of the energy savings from home automation: Morning routine: Thermostat starts heating/cooling 30 minutes before you wake up instead of running overnight. Lights in high-traffic rooms turn on at wake time. Coffee maker pre-heats via smart plug. Away mode: When the last person leaves, thermostat shifts to an efficiency setpoint, non-essential device plugs cut power, and exterior lights activate on motion-only. This single routine — configured properly — delivers the majority of smart thermostat energy savings. Bedtime routine: Non-essential lights turn off, thermostat drops to sleep setpoint, charging strips turn on. Properly configured thermostat and lighting routines can reduce HVAC and lighting costs by up to 23%, according to DOE and ENERGY STAR data. The failure mode nobody warns you about: Routines that conflict with each other. A morning routine that turns on the kitchen lights conflicts with a motion-sensing routine that turns them off when no motion is detected for 10 minutes. Build routines one at a time, test each one, and give them at least a week before adding the next. Quarterly audit is not optional. Automation routines set in January don't account for summer sunset times, school schedule changes, or remote work days. Every 90 days, open your automation app and review what's running. Routines drift, and a routine that fails silently wastes money without telling you.11. Install a Whole-Home Energy Monitor (2–4 Hours, $150–$300)Smart plugs show you what individual devices use. A whole-home energy monitor shows you everything — circuit by circuit, in real time. Devices like Sense and Emporia Vue clamp onto your main electrical panel's service lines and learn to recognize individual appliances by their electrical signatures. Within a few weeks, your app identifies which circuit is the refrigerator, which is the A/C compressor, and which is that mystery draw that's been adding $18/month since you moved in. The DIY vs. professional question matters here. The monitor clips onto wires inside your main electrical panel. This involves working adjacent to lines that carry live 120/240V current even when your breakers are off. If you've worked in a panel before and know how to identify the service entrance conductors, this is a manageable DIY job. If you haven't, the $100–$150 electrician service call is the right call. This is the one project on this list where the safety stakes are high enough to be direct about it. What you'll typically discover: The refrigerator and water heater are the two biggest consistent draws in most homes. The HVAC is the highest peak draw. Everything else is usually smaller than people assume — except old second refrigerators in garages, which are often the biggest surprise on the bill.Smart Home Infrastructure — The Projects Most People Skip These projects don't look impressive on Instagram. They're also the reason some smart homes work flawlessly and others are a constant source of frustration. 12. Audit and Upgrade Your Home Wi-Fi Network (1 Hour, $0–$200)Running 20 smart devices on a 5-year-old router with a default admin password isn't a smart home. It's an unlocked door. Network quality is the single biggest factor in smart home reliability. A device that drops off the network every few days isn't broken — it's usually fighting a congested 2.4GHz band, a router that's too far away, or simply a budget router that can't handle 15+ connected devices. Quick Wi-Fi audit checklist:Change the router's default admin credentials (not just the Wi-Fi password — the admin login) Enable firmware auto-updates if available Create a separate guest network for all IoT/smart home devices — keeps them isolated from your main computers and phones Check your router's placement — it should be centrally located, not stuffed in a closet Test speeds in rooms where smart devices are struggling2.4GHz vs. 5GHz: Most smart home devices use 2.4GHz — it has better range and penetrates walls more effectively than 5GHz. The trade-off is slower speeds and a more congested band in dense neighborhoods. Don't try to put smart home devices on your 5GHz network unless the device specifically supports it. Mesh network vs. range extender: Range extenders are cheap and create a noticeably worse experience — they halve your bandwidth each time a device hops through them. A mesh system (Eero, Google Nest WiFi, or similar) creates a single network with seamless handoff. If your home is over 1,500 sq ft or has multiple floors, a mesh setup is worth the $150–$200 investment.13. Replace Smart Switches (Not Just Bulbs) in High-Traffic Rooms (30–60 Min/Switch, $15–$60/Switch)Here's the argument that settles the smart bulb vs. smart switch debate for most homes: switches control entire circuits, not individual bulbs. One smart switch for your living room overhead light costs $30–$60 and controls everything on that circuit. Six smart bulbs for the same room cost $60–$120 and still get turned off at the wall by any guest who's ever used a light switch. Smart switches win for rooms with multiple bulbs, frequent guests, and anyone in the household who hasn't fully committed to app-only lighting control. Before you buy a single switch, check for a neutral wire. The neutral wire (typically white) completes the electrical circuit and is required by most smart switches to power their electronics. Older homes — particularly those built before the mid-1990s — sometimes have switch boxes with only two wires: a hot (black) and a traveler or return. No neutral means most standard smart switches won't work. There are no-neutral options available (Lutron Caseta is the most reliable), but they cost more and have a shorter compatibility list. ⚠️ Always turn off the circuit breaker before opening any switch box. Confirm the circuit is dead with a non-contact voltage tester before touching any wires. This is a $15 tool that belongs in every homeowner's toolkit. 3-way switch warning: If a light is controlled by two switches — common in hallways, stairwells, and large rooms — that's a 3-way circuit. Smart 3-way setups work, but they require purchasing the correct companion switch (sometimes called an add-on or remote switch) rather than two standard smart switches. If your research on 3-way wiring is making your head spin, this is a reasonable project to hand off to an electrician.14. Install a Smart Smoke and CO Detector (15–30 Minutes, $100–$130)The case for smart smoke detectors over standard ones is simple: when you're away from home, a standard detector screams into an empty house. A smart detector sends you an alert within seconds, identifies which unit triggered, and in some cases reads the ambient CO level in real time. Interconnected detectors are the more important upgrade. In homes with interconnected alarms, when one triggers, all of them sound. Standard interconnected detectors use physical wiring. Smart detectors like the Nest Protect use wireless interconnection — if the basement detector triggers, every detector in the house sounds. Test immediately after installation — same day, before sleeping. Press the test button and confirm the alarm sounds at full volume. Confirm the app registers the test event. Never defer this test. ⚠️ Rental compliance note: In some jurisdictions, landlords are required to provide and maintain smoke detectors, and tenants replacing landlord-provided units — even with better ones — may create liability confusion. Check your lease and local tenancy laws before replacing existing detectors in a rental.The Outdoor and Specialty Upgrades Worth Your Sunday Afternoon These projects feel more ambitious than the quick wins, but most only take half a Sunday — and they deliver results that extend well beyond the weekend. 15. Install a Smart Irrigation Controller (1–2 Hours, $80–$200)Fixed-timer sprinkler systems run on schedules set once and forgotten. They water on Tuesdays and Saturdays regardless of whether it rained Tuesday morning. Smart irrigation controllers use local weather data to skip watering cycles when rain is forecast or soil moisture is sufficient. The EPA's WaterSense program documents 30–50% water use reduction from smart irrigation controllers compared to time-only controllers. At average US water rates, a household that's overwatering a medium-sized lawn could save $50–$150 per year on the water bill. EPA WaterSense certification matters beyond just water savings — it's also the key to rebate eligibility. Many municipalities and water utilities offer $25–$100 rebates on certified smart controllers. Search your local utility's website for "irrigation rebate" before purchasing. Compatibility check: Most smart controllers replace your existing timer unit and connect directly to your existing valve wiring. Multi-zone systems (more than 6 zones) require a controller that supports the right number of zones. Count your zones before ordering. ⚠️ Freeze climate note: Smart irrigation controllers don't winterize your system. In climates with freeze risk, you still need an annual compressed-air blowout of the lines. The controller won't know the pipes need draining — that's still a manual process.16. Add a Smart Garage Door Opener or Retrofit Kit (2–4 Hours, $100–$200)"Did I leave the garage open?" is a thought that hits about 12 minutes into every road trip. A smart garage door opener eliminates it completely — you can check and close the door from your phone anywhere in the world. Full replacement vs. retrofit add-on: If your opener is more than 15 years old, a full replacement is often the better investment — newer openers are quieter, have built-in obstacle detection improvements, and integrate natively with smart home systems. If your existing opener is newer and working well, a retrofit kit (Meross, Chamberlain myQ, or similar) clips onto the opener and adds app control for $30–$80. Safety requirement: Any garage door opener sold in the US since 1993 must include auto-reverse safety sensors at floor level. If your opener doesn't have these, it's operating outside federal safety standards — replace it regardless of the smart home angle. Common mistake: Buying a retrofit kit before checking your opener's protocol. Some older openers use proprietary security codes that budget retrofit kits can't decode. Check the compatibility list for your specific opener model before purchasing.What to Expect After You're Done — The 12-Month Reality Check Here's what nobody tells you after the weekend is over. Maintenance Tasks You Actually Need to Do Smart devices require more maintenance than people expect. Not much — but the "set it and forget it" reputation is slightly misleading. Quarterly (every 90 days):Review all automation routines — update for season changes, schedule changes, sunset time shifts Check smart plug energy data and review any unexpected changes in usage patterns Test water leak sensors by touching a damp cloth to the sensor contactsEvery 6 months:Check firmware updates for all smart home devices — most update automatically, but some require manual triggers Audit your Wi-Fi router admin credentials and IoT network settings Test smoke and CO detectorsAnnually:Replace batteries in all wireless sensors (leak detectors, motion sensors, door/window sensors) Physically inspect HVAC filter — a smart thermostat monitors run time, not filter condition Review smart home device subscriptions — cancel unused cloud storage plansWhen Things Stop Working — The Most Common Failures Device dropped from Wi-Fi after router reboot: Smart plugs and bulbs often need to be physically power-cycled after a network interruption. If a device goes offline after a router reboot, turn it off at the switch or outlet for 10 seconds. Prevention: configure your router to always assign the same IP address to smart home devices (static DHCP leases). Smart bulb unresponsive after a power outage: Most smart bulbs return to "on" after power is restored, then accept app commands within 60 seconds. If a bulb stays unresponsive, power cycle it three times — most brands have a physical reset sequence. Thermostat app disconnection in summer: High HVAC demand can overload network-connected smart hubs and third-party app servers. If your thermostat shows as "offline" in the app but is still controlling your HVAC correctly, this is a cloud service issue — not a device failure. The physical controls will still work. Water leak sensor battery dead silently: This is the most consequential maintenance blind spot. When a battery-powered leak sensor dies, it simply goes offline. It doesn't sound an alarm. It doesn't send a low-battery alert in all models. Your app dashboard might show the device as inactive — or it might not show anything. Annual battery replacement isn't optional.The 9 Mistakes Homeowners Make With These Projects (And How to Avoid Every One) Mistake 1: Buying smart devices without checking platform compatibility You buy a smart thermostat, a video doorbell, and a smart lock — from three different brands — and discover they don't all work in the same app. Before buying anything, decide on your ecosystem (Alexa, Google Home, or Apple HomeKit) and confirm every device supports it, or choose Matter-compatible devices, which work across all major platforms. Mistake 2: Skipping the C-wire check before ordering a smart thermostat This is the most common smart thermostat installation problem. It's also completely avoidable with a 5-minute inspection of your current thermostat before placing an order. Remove the thermostat cover and photograph your wiring. If you don't see a wire connected to the "C" terminal, read the installation guide's C-wire adapter section before proceeding. Mistake 3: Installing a smart switch without checking for a neutral wire Half of smart home support line calls are about this. No neutral wire means most standard smart switches won't install. Check the switch box before purchasing. The neutral is the white wire — it's typically bundled with other whites at the back of the box, not necessarily connected to the switch. Mistake 4: Using uncertified smart plugs in high-load outlets A $25 uncertified smart plug connected to a space heater, air conditioner, or hair dryer is a fire risk. High-load devices generate sustained heat, and uncertified plugs may not handle sustained current draw safely. Only use UL/CE/SAA-certified plugs, and check the plug's rated amperage against the device you're connecting. Mistake 5: Never testing automation routines after setup My automation routine that turned off all lights when we left worked perfectly — except on the mornings my partner left 20 minutes before me. Test every routine with real-world scenarios: one person leaving, power outage recovery, app offline behavior. Edge cases are where routines fail. Mistake 6: Adding smart devices without securing the network first Adding a smart lock, security camera, and doorbell to a network with a default admin password and no guest network isolation is a security problem. Secure the network (Project 12) before connecting devices that control physical access to your home. Mistake 7: Installing a smart lock without a physical key backup Smart lock batteries last 6–12 months. Apps have outages. Wi-Fi goes down. Keep a physical key somewhere accessible — not inside the house the lock is protecting. Mistake 8: Replacing smoke detectors without testing them that same day Install, test, sleep. That order matters. A smoke detector that's been installed but not tested is worse than none — it creates a false sense of coverage. Press the test button. Confirm the app notification. Confirm every interconnected unit also sounds. Mistake 9: Treating this as a checklist rather than a priority framework The single most common outcome from these lists: someone attempts all 16, gets stuck on project 8 (thermostat C-wire issue), loses momentum, and ends up with a half-done home and a bad weekend. Pick 3 projects that match your biggest pain point. Complete them. Live with them for two weeks. Then come back for the next three.Frequently Asked Questions What home improvements add the most value? Smart thermostat installation (average $150 cost, $150–$300 annual savings), smart locks (security and convenience value), and video doorbells (insurance discount eligibility in some regions) consistently offer the highest ROI for weekend-scale projects. For resale value, cabinet hardware upgrades and lighting improvements have a documented impact on buyer perception in home staging research. How long does it take to install a smart thermostat? Most modern smart thermostats take 45–90 minutes for a standard single-stage HVAC system. The process is longer if you need to install a C-wire adapter (add 30–60 minutes) or if your system is multi-stage or a heat pump. Always verify compatibility before purchasing. Can renters do any of these projects? Yes — a meaningful portion of this list is renter-friendly without requiring landlord approval: smart plugs, smart LED bulbs, under-cabinet lighting, Wi-Fi upgrades, water leak detectors, and automation routines. Projects involving wiring, lock replacement, or exterior mounting typically require landlord permission first. Are smart plugs actually worth it? Smart plugs are worth it if you use the energy monitoring data they generate. The plug itself saves nothing — the savings come from identifying high-standby devices and changing behavior accordingly. For entertainment centers and gaming setups, the savings are typically $5–$15/month. For phone chargers, the savings are negligible. What should I upgrade in my home first? If saving money is the goal: smart thermostat first, then smart plugs for energy monitoring. If security is the priority: video doorbell or smart lock. If you want the fastest visible transformation: cabinet hardware and lighting, both completable in under two hours. Do I need a smart hub for any of these projects? Not anymore. In 2026, most smart home devices support Wi-Fi directly or use the Matter protocol, which works across platforms without a proprietary hub. If you plan to expand to a larger ecosystem or want deeper automation capabilities, a hub gives you more control — but it's not a prerequisite for starting. My smart thermostat says "no C-wire" — what do I do? Don't stop the project — this is the most common installation issue. Most smart thermostats include a C-wire adapter that draws power from existing wiring without running a new wire. Check both ends of your system: some HVAC control boards have a C terminal with a wire that was never connected at the thermostat end. Check before ordering an adapter. Will a smart lock work if my Wi-Fi goes down? Yes. Smart locks store access codes locally and operate offline. App-based features (remote unlock, access logs) require internet connectivity. The physical keypad and key cylinder always work regardless of network status. This is one of the reasons keeping a physical key backup is important. Why won't my smart bulbs work with my existing dimmer switch? Smart bulbs are not compatible with most traditional dimmer switches. You need a standard (non-dimming) switch for smart bulbs, a smart dimmer switch designed for LED loads, or smart bulbs that list explicit compatibility with your specific dimmer. This is the most common smart lighting problem and the most frequently asked question in smart home forums. Is it safe to install a whole-home energy monitor myself? Physically possible as a DIY project, but it involves working inside your main electrical panel adjacent to high-voltage service entrance conductors that remain live even when your main breaker is off. If you've worked in a panel before and can identify the service entrance feeds, this is manageable. If you haven't — and especially if your panel is older or unfamiliar — a licensed electrician's service call ($100–$150) is genuinely worth it for this specific project.One Last Thing Before You Start You've got a solid list. You've got honest time estimates. You know which ones are right for your situation. Here's the perspective worth keeping through the weekend: a home that's 30% smarter and 100% functional is more valuable than one that has 16 partially finished projects and six app notifications you stopped reading. Pick the three that match your biggest frustration — energy costs, security, or aesthetics — and do those first. Do them carefully, test them properly, and give yourself Sunday evening to actually enjoy what you built. The other 13 projects will still be here next weekend.Before starting any electrical work, confirm your circuit breaker is off and test with a non-contact voltage tester. If you're uncertain about your home's wiring — particularly in homes built before 1990 — consult a licensed electrician before proceeding.
.webp)
Home Network Upgrades and Improvements: Real Costs, Smart Choices, and What Actually Works
Last week I replaced my ISP-provided router, installed a 24-port gigabit switch, and ran Ethernet cable to two more rooms in my house. Total cost: $138. Not a rough estimate. That's the actual receipt. The performance difference was immediate. Devices that used to fight over bandwidth stopped fighting. My smart home cameras — all eleven of them — stopped dropping. The NVR stopped buffering. My home office, which had been running on sketchy Wi-Fi for two years, finally had a stable wired connection. And the frustrating part? None of it was complicated. It just required knowing what to do and in what order. Home network upgrades typically involve replacing your ISP router with a dedicated device, adding a network switch for wired connections, running ethernet cable to key rooms, and repurposing old hardware as wireless access points. Costs range from $50 to $500+ depending on scope — but a genuinely good upgrade for a medium-sized home costs $100–$200 done right.🏆 Best Takeaway: The single biggest improvement most homeowners can make is replacing their ISP-provided router/modem combo with a dedicated router and running ethernet cable to the rooms where it matters most. Everything else — mesh systems, Wi-Fi 7, fancy switches — is secondary to getting that foundation right. And it doesn't have to cost more than $150.Quick Summary: What This Guide Covers✅ Replace your ISP router first — it's almost always the weakest link ✅ Add a 24-port unmanaged switch for under $70 — more useful than an 8-port ✅ Run Cat5E or Cat6 ethernet to bedrooms, offices, and entertainment areas ✅ Re-purpose your old router as a free wireless access point ✅ Segment smart home devices onto a separate network for security ✅ Budget realistically: a solid upgrade for a medium home costs $100–$300 DIY ✅ Cat5E is still sufficient for most homes — stop reading Cat6A marketing copyPre-Upgrade Checklist: Do This Before You Buy AnythingCount all connected devices in your home (use your router's admin page or the Fing app) Run a speed test at the router and at problem areas — compare the gap Identify your actual pain points: dead zones? Dropped devices? Slow wired connections? Check if your ISP modem supports bridge/passthrough mode Decide your scope: router only? Switch? Full ethernet runs? Set a realistic budget before you open Amazon Check for any existing Cat5E or Cat6 cable already in your wallsWhy Your Home Network Probably Needs More Than a New RouterMost people buy a new router when their Wi-Fi gets slow. That's understandable — it's the most visible piece of hardware. But in a lot of cases, the router isn't actually the problem. Or it's one of the problems, but fixing it alone doesn't do much. The honest answer is that a home network is a system. The router, the switch, the cabling, the access points — they all affect each other. A great router on a flat, Wi-Fi-only network with 40+ IoT devices will still feel sluggish. The Real Reason Your Wi-Fi Feels Slow (It's Not Always the Router) Before you spend a dollar, figure out which problem you actually have. ISP speed problem: You're paying for 500 Mbps but your speed test at the router shows 120 Mbps. That's an ISP issue, not a network issue. No router swap will fix it. Wi-Fi coverage problem: Your speed test at the router is fast, but it drops to 20 Mbps across the house. That's a coverage problem — you need access points or ethernet, not a faster router. Network architecture problem: Speeds are fine but devices drop constantly. Smart devices conflict with each other. Streaming stutters even on wired connections. That's a network design problem — usually a combination of ISP hardware limitations and no device segmentation. Most homeowners with a real complaint fall into category two or three. A $200 Wi-Fi 7 router doesn't fix either of those. Signs Your Home Network Is Actually Holding You Back You probably don't need a diagnosis if you're experiencing any of these:Wi-Fi dead zones on upper floors or far rooms Smart home cameras constantly going offline Gaming or video calls dropping every 20–30 minutes 4K streaming that buffers even though you have fast internet Wired devices that feel slower than Wi-Fi (often a bad cable or ISP modem limitation) Smart speakers that can't reach devices across the houseThe last one trips people up. Most homeowners assume speed is the problem. Stability and coverage are almost always the real issue. The Equipment Most Homeowners Don't Know They're Missing A properly built home network has four components:A router — manages traffic between your home and the internet A network switch — expands wired port capacity Ethernet cabling — gives wired connections to key rooms Wireless access points — extends Wi-Fi to dead zonesMost homes have only the first one, and it's usually the ISP-provided combo unit that does everything adequately and nothing well.Understanding Your Home Network Before You Upgrade Anything Spending money on the wrong upgrade is worse than spending no money at all. Spend twenty minutes understanding what you have before you open a cart. Router vs. Switch vs. Access Point — What Each One Actually Does These get confused constantly. Here's the short version. Router: The brain. It connects your home to the internet, assigns IP addresses to devices, and manages traffic flow. One router is all you need. Switch: The mailroom. A switch doesn't route internet traffic — it just gives you more wired ethernet ports. Your router might have 4 LAN ports. A 24-port switch gives you 24. Connect one cable from your router to the switch, and the switch handles everything from there. Access Point (AP): A wireless extension. An AP connects to your network via ethernet and broadcasts Wi-Fi in a new location. It does not route traffic. Think of it as a Wi-Fi antenna that borrows your router's internet connection. A mesh system node is essentially a wireless access point with a wireless backhaul. The problem is "wireless backhaul" — that means the node is communicating with the main router over Wi-Fi, which cuts available bandwidth and introduces latency. Mapping Your Current Network (The Step Everyone Skips) Download the Fing app on your phone and run a network scan. Or pull up your router's admin page — it shows every device currently connected. Do this before you buy anything. Most people are surprised by what they find. Twenty-two devices when they thought they had twelve. Smart bulbs they forgot about. A camera that's been offline for six months still holding a DHCP lease. This step takes ten minutes. It'll save you from buying the wrong hardware. Why Your ISP's Combo Router/Modem Is Limiting You There's a reason ISP routers never get good reviews on Reddit — and it's not just brand bias. ISP-provided combo units are built to serve ISP network management priorities. They're designed to be cheap to manufacture, easy to support remotely, and serviceable across millions of customers. They are not designed to give your specific home the best network performance possible. Common limitations of ISP-provided equipment:No VLAN support (can't segment IoT devices) Limited QoS controls Locked firmware — you can't update it independently Weak Wi-Fi radios compared to dedicated hardware Double NAT issues when you try to add your own routerPutting your ISP modem in bridge mode — and using your own dedicated router — is a prerequisite for almost every meaningful upgrade. More on that below.Home Network Upgrade #1 — Replace Your Router (The Highest-Impact Change)This is the most impactful single upgrade. The right router gives you VLAN support, QoS control, proper firewall rules, and stable DHCP management for a house full of devices. The wrong router just looks good on a spec sheet. Consumer Router vs. Mini PC Router — Which Is Right for You? The honest comparison no manufacturer wants you to see:Router Type Typical Cost Performance DIY Difficulty Best ForISP-provided combo unit $0 (rental fee) Basic None Renters, minimal devicesConsumer router (TP-Link, Asus) $60–$300 Good Low Most homeownersMini PC + OPNsense $60–$150 (used) Excellent Medium Tech-comfortable DIYersUbiquiti Dream Machine $200–$500 Excellent Medium Prosumer setupspfSense appliance $150–$400 Excellent Medium–High Advanced usersConsumer routers win on ease. Unbox, plug in, follow the app. Done in 15 minutes. That genuinely matters if you don't want to spend an afternoon on networking documentation. Mini PC + OPNsense wins on cost-to-performance. A refurbished Lenovo ThinkCentre M910q with a dual-NIC card costs around $68 used — and running OPNsense on it gives you enterprise-grade firewall features, DNS-level ad blocking, VLAN support, and connection tracking that a $150 consumer router simply can't match. Using a Refurbished Mini PC as a Home Router (OPNsense/pfSense) The $68 mini PC that outperformed my $150 consumer router — and why that actually makes sense. OPNsense and pfSense are both open-source router/firewall operating systems that run on commodity hardware. They're used in small businesses and home labs. The performance-per-dollar case for running them on a used mini PC is genuinely compelling.🔧 Expert Insight: OPNsense and pfSense both run on commodity hardware because the networking software does all the heavy lifting. A 10-year-old mini PC with adequate RAM will outperform a brand-new consumer router at routing tasks. The hardware matters less than most people think.The trade-off here is real: OPNsense has a learning curve. If you've never touched a firewall before, expect to spend a weekend on it, not an afternoon. The documentation is good, the community is helpful, but it is not plug-and-play.⚠️ Warning: Don't put your new router behind your ISP modem without understanding double NAT. If the ISP modem is still acting as a router and your new device is also routing, you'll get confusing network behavior that's hard to diagnose. Put the ISP device in bridge/passthrough mode first.What to Expect From OPNsense as a First-Time User The first hour is rough. The interface is not designed for beginners. You'll look at the dashboard and wonder why there are fifteen menu categories for a home network. After that first hour — after the setup wizard runs and devices start appearing — it clicks. You realize you have a proper firewall log. You can see every DNS query. You can shape traffic per device. I blocked my smart TV's phone-home traffic inside five minutes once I figured out traffic shaping. The Lenovo ThinkCentre was slower to boot than a consumer router, but after it was up, the connection stability was noticeably better — especially with 40+ devices connected. No more DHCP conflicts. No more random drops. Putting Your ISP Modem in Bridge Mode — The Missing Step Most upgrade guides skip this completely. It's a critical step. Bridge mode (sometimes called "passthrough mode") tells your ISP's modem to stop acting as a router. It just passes the internet connection through to your own device without interfering. Without this, you have two devices competing to manage the same traffic — double NAT — and your new router can't work properly. How to check: Log into your ISP modem's admin page (usually 192.168.100.1 or similar). Look for "bridge mode," "passthrough," or "IP passthrough" in the settings. Enable it, enter your new router's MAC address if prompted, and reboot both devices. Important: Not all ISP modems support bridge mode. Some locked firmware versions disable it. If yours doesn't, ask your ISP for a modem-only replacement, or put your new router in the DMZ — a partial solution that avoids double NAT for the primary device. How to Set Up a Mini PC as Your Home RouterDownload OPNsense ISO and write it to a USB drive (use Balena Etcher) Install two NICs in the mini PC — or use a USB-to-ethernet adapter for the WAN port Boot from USB and complete the OPNsense text-based installer Connect the WAN port to your ISP modem (in bridge mode) Connect the LAN port to your network switch Log into the OPNsense web GUI at 192.168.1.1 Run the setup wizard — assign WAN and LAN interfaces, configure DHCP Update OPNsense to the latest version immediately Configure DNS resolver — NextDNS or Cloudflare (1.1.1.1) are both solid Run a speed test, verify all devices connect, check the DHCP lease tableWhat to Actually Look for in a Consumer Router (Beyond the Marketing Numbers) If OPNsense isn't for you, here's what actually matters in a consumer router: Ignore: Maximum theoretical speeds (AX6000, BE19000 — marketing theater). Wi-Fi 7 unless your devices actually support it. Focus on:CPU performance and RAM — handles more simultaneous device connections without dropping VLAN and guest network support — essential for IoT segmentation Firmware update history — manufacturers that stop updating firmware after 18 months are a security problem Number of ethernet LAN ports — 4 is minimum, 6+ is better MU-MIMO and OFDMA support — matters for houses with many simultaneous Wi-Fi devicesThe TP-Link AX5400 and Asus RT-AX86U sit in a solid mid-range zone. Both have legitimate firmware support histories, proper VLAN support, and strong Wi-Fi radio hardware. Neither costs more than $150 on sale.Home Network Upgrade #2 — Add a Network Switch (More Ports, More Stability)I almost bought an 8-port switch. One port-count calculation convinced me to get 24. Do You Actually Need a Network Switch Right Now? If you have three or four wired devices, honestly — the router's built-in ports might cover you. Fix the router situation first. But if you're planning to run ethernet to multiple rooms, connect a NVR, add PoE access points, and wire up a TV and desktop in the same room — you need a switch. And you probably need more ports than you think. Managed vs. Unmanaged Switches — What Homeowners Actually NeedSwitch Type Port Count Cost Managed? PoE? Best Use CaseNetgear GS308 8-port $25–35 No No Small setups, single roomNetgear GS324 24-port $65–80 No No Whole-home wired setupTP-Link TL-SG1016D 16-port $40–55 No No Medium homesNetgear GS308EP 8-port $70–90 No Yes PoE cameras/APsTP-Link TL-SG2428P 28-port $150–200 Yes Yes Prosumer smart homeFor most homes — unmanaged is fine. Unmanaged switches just work. Plug devices in, they get network access. Zero configuration. You only need a managed switch if you want to implement VLANs to segment IoT devices across physical ports. If you're running everything on a single flat network or segmenting at the wireless SSID level only, a basic unmanaged gigabit switch handles it cleanly. Why a 24-Port Switch Is Often Better Value Than an 8-Port Do the math. An 8-port Netgear switch costs around $35, which is $4.38 per port. A 24-port Netgear switch costs $69.99 — that's $2.92 per port. You're paying roughly 30% less per port for the 24-port version and getting three times the capacity. Modern smart homes regularly connect 30–50+ devices. Between phones, tablets, smart TVs, gaming consoles, cameras, smart speakers, smart bulbs, thermostats, and NVRs — you hit 8 ports faster than you expect. Buy the 24-port once. Don't buy the 8-port twice. PoE Switches — Only Worth It If You're Powering APs or Cameras Power over Ethernet lets you power devices — access points, IP cameras, VoIP phones — through the ethernet cable itself, no separate power adapter needed. If you're using PoE-powered access points like the TP-Link EAP670 or Ubiquiti U6-Lite, a PoE switch is genuinely useful. It eliminates power adapter runs to each AP location. If you're not powering any PoE devices, skip it. PoE switches cost significantly more per port for a feature you won't use.💡 Most homeowners overlook this: Ethernet cable runs need to be tested before you close up walls. A $25 cable tester takes 30 seconds per run. Finding a bad crimp after drywall is installed is an expensive problem.Home Network Upgrade #3 — Run Ethernet Cable Through Your HouseThe cable run that took 45 minutes ended up being a 3-hour project. Here's what I'd do differently. No wireless upgrade replaces a wired connection. That's not an opinion — it's physics. Ethernet doesn't deal with interference, signal loss, or competing devices on the same spectrum. If you can wire a room, wire it. Cat5E vs. Cat6 vs. Cat6A — Settle This Before You Buy Cable Cat5E is not a compromise. It is the right cable for almost every home. Stop reading Cat6A marketing copy.Cable Type Max Speed Max Distance Cost (per foot) Shielding Best ForCat5E 1 Gbps 328 ft (100m) $0.10–0.15 Unshielded Most homes — still excellentCat6 1 Gbps (10G at 55m) 328 ft $0.15–0.25 Optional Future-proofing considerationCat6A 10 Gbps 328 ft $0.30–0.50 Shielded High-density or prosumer setupsCat7 10 Gbps 328 ft $0.40–0.60 Fully shielded Rarely needed for home useSince most home internet plans max out well below 1 Gbps, Cat5E is the bottleneck in essentially zero real-world home scenarios. Your ISP connection is almost certainly the limiting factor, not your cable. Cat6 makes sense if you're running cable near heavy electrical interference (in conduit alongside AC wiring, near industrial equipment) or if you're planning to deploy 2.5G switches in the next few years. Cat6A makes sense in high-density prosumer setups. For a typical three-bedroom home — Cat5E is fine. The Real Reason People Overbuy on Cable Cable packaging uses marketing language that implies Cat5E is outdated. It isn't. The physics of signal transmission at gigabit speeds over 100 meters haven't changed. Cat5E was engineered to those specs and still meets them perfectly. The Cat6-or-bust advice you see in forums is often from people who installed 10G networking at home, which is a real but rare use case. If your router is gigabit and your switch is gigabit, Cat5E does not limit you. That's just true. Planning Your Ethernet Runs Before You Drill a Single Hole Poor planning is how a 45-minute cable run becomes a 3-hour one. Before drilling anything:Sketch your floor plan — mark every room that needs an ethernet drop Identify your central wiring point (basement utility room, network closet, hallway panel) Count your total planned drops — this determines switch port needs Measure approximate cable lengths — add 30% for routing overhead Identify obstacles: concrete floors, finished walls, HVAC runs, fire blockingOne mistake people make is planning a "straight line" route when the actual physical path through walls, across floors, and around obstacles can double the cable length. Measure real paths, not air distances. Running Cable Through a Finished Home — What No Guide Tells You Running cable through a third-floor finished wall took four times longer than expected. I needed a fish tape, a 5-foot drill bit extension, and more patience than I thought I had. The challenge isn't drilling holes. The challenge is hitting fire blocking — horizontal 2×4 studs inside walls that stop cable from traveling vertically. Older homes, in particular, can have fire blocking every few feet. You can't predict where it is without opening the wall. The tools you actually need (and only these):Fish tape or fish sticks — for pulling cable through closed walls Extended drill bits — for drilling through top and bottom plates Cable tester — non-negotiable; test every run before closing walls Keystone punch-down tool — for terminating at wall plates cleanlyStep-by-Step: Planning and Running Ethernet in a Finished HomeSketch your floor plan — mark exactly where each Ethernet drop needs to go Identify your central wiring point (basement, utility closet, or network shelf) Locate wall studs with a stud finder before drilling — avoid cutting into structure Drill entry and exit holes — typically through top or bottom wall plates Use a fish tape or fish sticks to pull cable through the wall cavity Leave 12–18 inches of slack at each end (critical — don't cut it short) Terminate with keystone jacks or RJ45 connectors Test every run with a cable tester before closing walls or stapling cable Label both ends of every cable immediately — future you will thank present you⚠️ Warning: Keep ethernet cable at least 6 inches from AC electrical wiring when routing in the same wall or conduit. EMI from electrical lines can cause signal interference at high cable densities. Cat5E and Cat6 are unshielded — proximity to power runs matters.When to DIY and When to Hire a Low-Voltage Electrician Clear signals to hire a pro:Multi-story older homes with plaster walls and no accessible attic Brick or concrete construction where drilling is specialized work More than 6 drops in a time-constrained situation Any run that requires opening finished drywall and you're not comfortable patching itDIY tool cost: ~$50–80 total (fish tape, bit extension, cable tester). Pro installation typically runs $100–200 per run, depending on complexity and region. If you have two straightforward drops in a single-story home with attic access — do it yourself. If you have eight drops across three finished floors — get quotes. The math sometimes favors the pro.Re-purposing Old Hardware as Wi-Fi Access Points — The Smartest Cheap UpgradeThat Netgear router I was about to throw away now covers my entire upper floor as a dedicated access point. It's doing more useful work now than it ever did as a primary router. Total cost: $0. Why a Wired Access Point Beats a Wireless Mesh Node Every TimeFeature Wired Access Point Mesh NodeConnection to router Ethernet cable (reliable) Wireless backhaul (variable)Backhaul reliability ★★★★★ ★★★☆☆Setup complexity Medium LowCost $80–$200 (or $0 with old hardware) $100–$250/nodePerformance stability Excellent Good (varies by mesh system)Can repurpose old router? Yes NoBest for Multi-story homes with ethernet Rentals, no cable runs possibleMost mesh system buyers don't realize they're paying for a wireless backhaul that a $10 ethernet cable would eliminate. A mesh node with a wireless backhaul splits its radio capacity between serving your devices and communicating with the main router. That's a real performance cost. A wired AP uses the full ethernet connection for backhaul and dedicates all its radio capacity to your devices.🔧 Expert Insight: When placing wireless access points, the goal isn't maximum range — it's consistent signal overlap between APs. A -70 dBm signal at the edge of your AP's range causes more problems than a dead zone. Better to have APs closer together with stronger signals than one AP stretching to cover a whole floor.How to Turn Your Old Router Into a Wireless Access Point (Step-by-Step)💡 Most homeowners overlook this: When repurposing an old router as an AP, the DHCP server must be disabled — not the DHCP client. Getting these confused results in two devices fighting to assign IP addresses to your whole network, which takes down everything connected.Factory reset the old router (usually a pinhole button held for 10 seconds) Log into the admin page and disable the DHCP server — critical step Assign the old router a static IP on your existing network (e.g., 192.168.1.2) Connect an ethernet cable from your switch to a LAN port on the old router — not the WAN port Set the SSID and password to match your main network (enables seamless roaming) Set a different Wi-Fi channel from your main router — non-overlapping (channels 1, 6, or 11 for 2.4GHz) Test connectivity from the area you're trying to cover Verify no DHCP conflicts in your router's admin panelThe WAN port error is the most common mistake. I made it myself — connected via the WAN port the first time. Everything on that side of the network had no internet access. Took 20 confused minutes to figure out what happened.⚠️ Warning: Access points on the same SSID as the router need careful channel selection. Two APs blasting the same channel cause more interference than the dead zone they were meant to fix.Access Point Placement — Where You Put It Matters More Than Which One You Buy The temptation is to center the AP in the middle of the floor. That's often wrong. The goal is coverage overlap, not maximum range. You want the signal from your AP and the signal from your main router to overlap enough that devices can roam smoothly between them. An ideal overlap zone is 10–20% of coverage area — enough for a seamless handoff. If your dead zone is at one end of the house — put the AP near that end, not in the middle. A signal at -55 dBm at the far corner is far better than -72 dBm across a longer distance from a centered AP. Common bad placements: in a closet (walls absorb signal), directly behind the TV (interference from display electronics), at floor level (signals radiate outward, not down).Network Security After a Home Network Upgrade (Most People Skip This)You just added new hardware, new firmware, new network segments. It's the worst time to ignore security. Most homeowners do exactly that. Why You Need a Separate Network for Smart Home Devices🔧 Expert Insight: The number of smart home devices matters more than their individual bandwidth consumption. A home with 40 IoT devices is primarily challenged by connection count and DHCP management — not raw throughput. A router with a strong CPU and adequate RAM handles this better than a spec-sheet speed leader.Smart home devices — cameras, smart bulbs, thermostats, voice assistants — often have poor security. Their firmware is infrequently updated by manufacturers, default credentials are often weak, and many communicate with external servers in ways you can't audit.⚠️ Warning: Adding 20+ IoT devices to a flat home network without VLAN segmentation is a genuine security risk. A compromised smart plug can be used as a pivot point to reach your laptop, NAS, or other networked devices.The simplest solution that doesn't require a managed switch: create a separate 2.4GHz SSID (e.g., "Home-IoT") and put all your smart home devices on it. On OPNsense, you can firewall this SSID to allow internet access but block it from reaching your main LAN. On most consumer routers, a guest network with "client isolation" achieves something similar.💡 Most homeowners overlook this: Smart home devices — cameras, smart bulbs, thermostats — use far less bandwidth than most people expect. Network stability and coverage matter far more than raw speed for these devices. An old router with stable Wi-Fi serves them better than a new router with spotty coverage.The Two Minutes of Security Setup Most New Network Owners Skip Change default admin credentials. On every device you added. Router, switch (if managed), and access points. Default credentials for common hardware are published online and known by anyone who wants to try them. "admin / admin" is a starting point for automated credential attacks. This is a five-minute task that matters more than any firewall rule. Guest Network Setup — More Important Than It Looks A guest network does two things: it isolates visitor devices from your main network, and it gives you a second SSID to segregate devices you don't fully trust. Smart TVs, game consoles, and IoT devices you want internet access but not full LAN access — the guest network handles them cleanly on most consumer routers. It's not as granular as a VLAN, but for most homes it's sufficient. Enable it. Set a separate password. Use it.Using Your Router USB Port for Shared Storage (The Forgotten Feature) Many mid-range and high-end consumer routers include a USB port for attaching an external drive and sharing it over the network. Most people have no idea it exists. Netgear ReadyShare and Router USB Storage — What It Can and Can't Do Netgear calls it ReadyShare. Other brands have similar features under different names. The concept is straightforward: plug a USB drive into your router, and it appears as a shared network folder accessible from any device on your network. What it does well:Basic file sharing for documents, photos, media No dedicated server hardware required Zero additional cost if you have an external driveWhat it can't do:True simultaneous multi-user access (one connection at a time, typically) RAID redundancy (one drive fails, files are gone) Fast media streaming from large uncompressed files Reliable 24/7 uptime under heavy loadFor casual photo sharing and basic document access across household devices — it's genuinely useful. For anything more demanding, it runs into limits quickly. When USB Router Storage Is Enough vs. When to Get a Real NAS If you're sharing a folder of vacation photos between two or three family members — router USB storage is fine. If you're streaming 4K Plex libraries, running Time Machine backups from two Macs, hosting a shared document repository for a home business, or storing security camera footage — you need a proper NAS. The Synology DS223j with a pair of WD Red drives is the most sensible entry-level NAS for home use. It's not cheap ($200–300 for the unit plus drives), but it's a different category of device.Real-World Home Network Upgrade Costs — Three Budget Tiers $138 for a complete network overhaul. Here's the exact breakdown. Budget Tier (Under $200 — The Real Homeowner Build)Component Option CostRouter Refurbished mini PC (M910q) + OPNsense (free) $68Switch Netgear 24-port unmanaged $69.99Access Point Repurposed old router $0Cable Cat5E (already owned) or 100ft bulk $0–$15Connectors/keystones Basic RJ45 kit $10–$20Total$138–$173The $138 total project cost isn't a marketing estimate — it's the actual receipt. The key to this build is using what you already have: old cable, old router as an AP, free OPNsense firmware on used hardware. Mid-Range Tier ($200–$500)Component Option CostRouter TP-Link Archer AX55 or Asus RT-AX82U $80–$150Switch TP-Link 16-port managed gigabit $55–$80Access Point TP-Link EAP670 or Ubiquiti U6-Lite $80–$120Cable 500ft Cat6 bulk + keystones/patch panel $60–$100Total$275–$450This tier is for homeowners who want plug-and-play simplicity with legitimate performance. The TP-Link EAP670 is a particularly strong value for a dedicated access point — real Wi-Fi 6 performance without the Ubiquiti price tag. Prosumer Tier ($500+)Component Option CostRouter Ubiquiti Dream Machine Pro or pfSense box $200–$500Switch Ubiquiti USW-24-PoE or Netgear managed $200–$400Access Points (2–3 units) Ubiquiti U6-Pro or U6-LR $200–$500Cable Cat6A + structured cabling + patch panel $150–$300UPS APC Back-UPS 700VA $80–$120Total$830–$1,820💡 Most homeowners overlook this: Power fluctuations can corrupt router firmware and cause hardware failures. A basic APC UPS costs around $80 and protects your entire network stack. This is the most-overlooked purchase in home networking and one of the most cost-effective.Home Network Myths vs. Reality Most of the bad advice in home networking comes from outdated information that never gets corrected.Myth Reality"You need Cat6 or Cat6A for a future-proof home network" Cat5E supports full gigabit speeds for 100m — the bottleneck is almost always your ISP connection, not your cable type"Mesh systems are always better than access points" Wired access points outperform wireless mesh on backhaul stability and cost significantly less per node"Wi-Fi 7 means you can skip ethernet runs" Wireless technology has always had ceiling performance below wired — ethernet still wins for reliability-critical devices"A 24-port switch is overkill for a home" Modern smart homes regularly have 30–50+ connected devices; port capacity matters more than most people expect"ISP routers are fine for most people" ISP routers are optimized for ISP network management, not homeowner performance — they often throttle QoS and restrict advanced features"You need a professional to run ethernet cable" Most cable runs in a home are DIY-achievable with $30 in tools, patience, and a fish tape — the hard part is planning, not executionMistakes Homeowners Make When Upgrading Their Home Network These are the ones I've either made personally or watched others make. All of them waste money or time. 1. Replacing Wi-Fi hardware before diagnosing the real problem New router, same dead zones. Because the problem was AP placement, not hardware generation. Run a speed test first. Understand what you're solving. 2. Buying a mesh system when wired APs would cost less and perform better Mesh is convenient. It's also expensive per node and limited by wireless backhaul. If you can run ethernet, run ethernet and buy a dedicated AP. 3. Forgetting to put the ISP modem in bridge mode Double NAT causes unpredictable behavior. This is the most common post-upgrade complaint, and it's a 5-minute fix that most setup guides never mention. 4. Forgetting to disable DHCP on an old router used as an AP Two DHCP servers on one network hand out conflicting IP addresses and take down the whole network. Every time. Disable DHCP on the secondary device before connecting it. 5. Buying Cat6 when Cat5E would have been fine Marketing won. Your network didn't need it. Save the money. 6. Not labeling ethernet runs during installation Cat5E and Cat6 look identical in walls. Label both ends the moment you run them. Unlabeled ethernet creates expensive troubleshooting problems years later when you've forgotten which cable goes where. 7. Placing access points too close to the main router Overlap is good. Overlap within 10 feet causes interference, not coverage. APs need distance from each other to serve different zones. 8. Never updating firmware after setup An unpatched router is one of the most common home network security vulnerabilities. Manufacturers push security updates — set a calendar reminder for quarterly firmware checks. It takes 10 minutes.💡 Most homeowners overlook this: Firmware updates on routers and switches aren't optional. Set a quarterly calendar reminder — it takes 10 minutes and matters more than any hardware upgrade.9. Putting everything on one flat network with no segmentation A flat network with 40+ devices — including IoT hardware — is a security liability and a performance challenge. A basic IoT SSID or guest network costs nothing to configure. 10. Buying too small a switch and having to buy again The 8-port switch that seemed fine at the time. Then you add another camera. Then a NAS. Then a second AP. Then you're buying a 16-port switch six months later. Buy the 24-port once.Home Network Maintenance Schedule — What to Actually Do and When A network isn't set-and-forget hardware. This schedule takes roughly 90 minutes per year total.Task Frequency NotesRouter/AP firmware update Every 3 months Check manufacturer portal or enable auto-updatesSpeed test at router and endpoints Monthly Compare against ISP plan — flag any unexplained dropsCheck all physical cable connections Every 6 months Look for bent, kinked, or partially ejected patch cablesReview connected device list Monthly Spot unauthorized devices; flag unknown MAC addressesUpdate router admin passwords Annually Especially after any household changeClean dust from equipment Every 6 months Overheating shortens hardware lifespan significantlyReview DHCP leases and static assignments Every 6 months Remove stale entries from old devicesReview firewall rules (OPNsense/pfSense) Every 6 months Remove unused rules, update blocklistsCheck UPS battery health Annually UPS batteries typically last 2–5 yearsFull network audit Annually Map all devices, review segmentation, update documentationPost-Upgrade Maintenance Checklist Complete this within 24 hours of any new hardware install:Update router and AP firmware immediately Change all default admin passwords Set up guest/IoT network for visitors and smart devices Label all ethernet runs (both ends) Photograph or sketch your network diagram Save a backup of your router configuration Set a quarterly calendar reminder for firmware checksQuick Reference — What to Upgrade First Based on Your Situation START: What's your main problem? │ ├── "Wi-Fi dead zones or weak signal in certain rooms" │ ├── Have ethernet to that location? → Add wired access point │ └── No ethernet available? → Mesh node (temporary) or run cable (permanent) │ ├── "Overall slow speeds despite a fast ISP plan" │ ├── Using ISP-provided router? → Replace it first (biggest single upgrade) │ └── Using personal router already? → Check for interference, upgrade AP placement │ ├── "Not enough wired ports for my devices" │ └── Add a network switch (8, 16, or 24-port depending on device count) │ ├── "Smart home devices dropping off constantly" │ ├── All devices on same network? → Add IoT VLAN or separate 2.4GHz SSID │ └── Signal too weak at device location? → Add AP or move existing one │ └── "Want to future-proof the whole setup" └── Plan: Replace router → Add switch → Run ethernet → Add APs → Add VLAN segmentationFrequently Asked Questions About Home Network Upgrades Q: What is the best way to upgrade a home network? Start by replacing your ISP-provided router with a dedicated router or mini PC running OPNsense. Then add a network switch for more wired ports, run ethernet cable to key rooms, and repurpose old hardware as wireless access points. The whole setup can cost under $200 if you're strategic about hardware choices. Q: How much does it cost to upgrade a home network? A basic but effective home network upgrade — new router, 24-port switch, and ethernet runs to 2–3 rooms — can be done for $100–$200 DIY. A mid-range setup with managed switching and dedicated access points runs $300–$500. Prosumer builds with Ubiquiti hardware typically cost $800–$1,500+. Q: Is Cat5E cable good enough for home networking in 2026? Yes. Cat5E supports full gigabit speeds over standard home cable run distances. Since most home internet plans top out well below 1 Gbps, Cat5E is the bottleneck in essentially zero real-world home scenarios. Cat6 or Cat6A is worth considering only if you're running near heavy electrical interference sources or planning future 2.5G/10G deployments. Q: What is the difference between a router and a network switch? A router connects your home to the internet and manages traffic between devices. A switch simply expands the number of wired ethernet ports available — it doesn't route internet traffic on its own. Think of the router as the postmaster and the switch as the mailroom with more sorting slots. Q: Should I buy a mesh system or a wired access point? If you can run an ethernet cable to the problem location, buy a wired access point — it will outperform a mesh node on reliability and cost less over time. Mesh systems make sense in rentals or homes where cabling is genuinely impossible. Q: I replaced my router but Wi-Fi didn't get faster. What went wrong? Most likely you didn't put your ISP modem in bridge mode. If the ISP modem is still acting as a router, you now have double NAT — two routers in sequence — which creates conflicts and often caps performance. Access the ISP modem's admin page and enable bridge or passthrough mode. Q: Can I really use a $68 mini PC as a home router? Yes, with one honest caveat: it requires installing OPNsense or pfSense, which has a real learning curve. If you're comfortable reading documentation and don't mind spending an afternoon on setup, the performance-per-dollar is genuinely excellent. If you want plug-and-play simplicity, a consumer router is the better choice. Q: Can I use my old router as an access point? Yes — almost any consumer router can function as an AP. Key steps: factory reset it, disable DHCP on it, assign it a static IP on your network, and connect via a LAN port (not the WAN port) to your switch. Using the WAN port is the most common mistake, and it breaks connectivity for every device connected to that AP. Q: How do I know if I need a managed or unmanaged switch? For most home users — unmanaged is fine. You only need a managed switch if you want VLANs to segment IoT devices across physical ports, or if you're running a prosumer setup with multiple PoE-powered APs. An unmanaged gigabit switch just works with zero configuration. Q: Is it worth running ethernet to bedrooms that mostly just have phones and tablets? Debatable. For rooms that primarily host mobile devices, Wi-Fi is genuinely adequate. Prioritize ethernet runs for: desktop computers, smart TVs streaming 4K, gaming consoles, IP cameras, NVR systems, and home office workstations. Those get the most measurable benefit from a wired connection. Q: How do I segment IoT devices with OPNsense if I don't have a managed switch? You can create a wireless VLAN on your access point and assign it a separate SSID for IoT devices. OPNsense handles the routing between VLANs. You don't strictly need a managed switch if your AP supports VLAN tagging — many do, including APs running OpenWRT or Ubiquiti firmware. Q: What happens if I connect a switch to a switch? That's called daisy-chaining and it's perfectly normal. The key caveat: don't create a loop — switch A connected to switch B via two cables simultaneously — without Spanning Tree Protocol enabled. A loop without STP will bring down your entire network almost immediately. Q: Is ReadyShare over a router USB port safe for sensitive documents? It's not encrypted in transit on the local network by default. For basic file sharing between trusted household members on a secured home network, it's convenient and acceptable. For sensitive documents, consider a proper NAS with SMB encryption or a dedicated file server.This guide covers the practical reality of home network upgrades — hardware selection, realistic costs, installation challenges, and long-term maintenance. If you're running into a specific problem not covered here, the configuration decision tree above is a good starting point for diagnosis before you spend anything. Related Reading:Smart Toilet Guide: Real Features, Honest Costs & Everything That Changes After You Install One The Home Upgrades Actually Worth Your Money — And a Few That Disappointed Everyone How to Keep Track of All Your Home Maintenance Tasks (The System That Actually Works)
.webp)
What Is That Strange Wall Outlet Near the Floor? You Probably Have a Central Vacuum System
Found a mysterious spring-loaded port near your baseboard? That's a central vacuum inlet. Here's exactly what it does, how to use it, and what to check first.What Exactly Is That Thing? (The Quick Answer) If you're staring at a spring-loaded flap near your baseboard right now, wondering whether the previous owners left something weird behind — they didn't. That's a central vacuum inlet. It's a feature, not a mystery.The short answer: That spring-loaded port near your floor is a central vacuum system inlet. It connects through PVC tubing inside your walls to a power unit — usually in your garage or basement — that provides whole-home suction. Insert a compatible hose into the port to activate the motor and vacuum your home. No extension cords. No lugging a machine from room to room.Quick takeaways:Central vacuum inlets are wall-mounted ports connected to a whole-home suction system built directly into the home's structure Inserting a hose into the port automatically activates the motor in a remotely located power unit The small outlet visible inside the port powers an electric motorized brush attachment — not a regular household outlet Power units are typically found in the garage (wall-mounted), basement, or utility closet Homes built between 1990 and 2010 commonly had central vacuums installed as a standard or premium feature Central vacuum motors typically last 20–30 years — yours is likely still functional, even if it hasn't been used in yearsMost new homeowners discover their central vacuum system completely by accident — usually while moving furniture or repainting near the baseboards. If that's you, keep reading, because what you have is more useful than most people realize, and getting it running again is usually simpler than it looks.Breaking Down What You're Actually Looking AtThat inlet on your wall has a few distinct parts, and they all do different things. Before you touch anything, it helps to know what you're looking at.Component What It Looks Like What It DoesInlet Cover / Flap Spring-loaded rectangular door Seals the opening when not in use; keeps dust and pests out of the tubingCircular Port Large dark round hole, 1.5"–2" diameter Where the vacuum hose inserts; the direct connection to your wall tubingElectrical Contact / Outlet Small 2-prong outlet or flat metal contacts Either signals the motor to start (low-voltage) OR powers an electric powerhead (120V)Wall Plate / Surround Flat rectangular frame Mounts the inlet to the wall; color-matched in most homesSpring Mechanism Coil spring on internal hinge Keeps flap closed under slight pressure; opens when hose is insertedThat small outlet inside the port is the piece that throws everyone off. Most people assume it's a standard electrical outlet in a strange location. It isn't. Depending on your system, it either sends a low-voltage signal to the power unit to switch the motor on, or it delivers 120V to power a motorized brush head attached to your hose. More on that distinction later — it matters when you go to buy accessories. Why It's Placed Near the Floor Practical reason, not aesthetic. Installing the inlet low — typically 6–12 inches from the floor — lets you insert the hose at a natural downward angle without bending the hose sharply against the wall. It also draws air from the floor level, which is where most household dust actually settles. Building codes for central vacuum installations in most US states and Canadian provinces specify this low-wall placement for exactly this reason.How a Central Vacuum System Actually Works Think of it like a whole-home vacuum with its engine hidden somewhere you've probably never looked. The concept is simple — the execution, when you encounter it without instructions, feels anything but. Here's the basic flow: the power unit creates suction. That suction travels through smooth-bore PVC tubing running inside your walls, under your floors, or through the basement ceiling. Each inlet valve taps into that tubing. Insert a hose at any inlet, and suction is right there waiting — no carrying a machine, no extension cords, no repositioning between rooms. The Power Unit — Where It's Hiding in Your HomeThis is almost always the part new homeowners struggle to find first. In homes built between 1990 and 2010, the power unit follows a predictable pattern — but nobody tells you that upfront. Where to look:Garage — mounted on the wall, usually the one shared with the house interior. This is the most common placement in North American homes built during this era. Basement — often near the utility area, close to the HVAC system or water heater Utility or mechanical room — sometimes in a laundry room or a dedicated mechanical closet Large storage closet — less common, but found in some townhouses and condosWhat it looks like: A cylindrical or rectangular canister, roughly 18–24 inches tall. It'll have a bag compartment at the bottom, an exhaust vent (often with a hose running to an exterior wall), a power cord, and usually a brand name on the face. In homes from this era, the most common brands are NuTone, Beam, Vacuflo, Vacu-Maid, and Electrolux AirVac. If yours is anything like the units found in 2005-era construction, the power unit is almost always in the garage on the wall directly opposite the main garage door. That's not universal — but it's a reliable first place to check. In older homes, the basement mechanical room is the next best bet, often mounted near the furnace or tucked behind the water heater. One homeowner's account of finding theirs covered in dust directly behind a spare water heater is not unusual at all.💡 Expert Observation: NuTone was the dominant central vacuum brand in US homes built between 1990 and 2010. If your power unit carries either the NuTone or Broan name, consider yourself fortunate — those two brands share components, and parts remain widely available at reasonable prices. Beam and Electrolux systems are similarly well-supported.The Tubing Network Inside Your Walls You'll never see it, and you don't need to. During original construction, installers ran smooth PVC tubing through the framing — behind walls, under floors, through ceiling cavities — connecting every planned inlet location to the power unit. The whole network is permanently sealed inside the structure, and in a properly installed system, it should be maintenance-free for decades. Most homes have between two and five inlets depending on size and how the original builder configured the system. Standard placement is in main hallways, the kitchen, and near bedroom entrances — anywhere you'd regularly vacuum. A 2,500 sq ft home typically has three to four inlets positioned so a 30-foot hose can reach every corner of every room they serve. One thing worth knowing: not every inlet in your home is necessarily connected to the main tubing. Some builders installed inlet housings during rough-in construction and then capped certain ones before finishing the walls — particularly in spec homes where the system was installed as a standard feature whether or not the buyer wanted full coverage. If you find an inlet that shows zero suction even with a working system, it may be a capped rough-in rather than a malfunction. How the Motor Activates When You Insert the Hose There's a clever bit of engineering at work. When you push a hose into an inlet, either a physical contact or a small magnet triggers a low-voltage circuit — typically running at 24 volts — that signals the power unit to start the motor. Remove the hose, the circuit breaks, and the motor stops. Fully automatic. No switches to flip. Some older systems use a simple air-pressure trigger instead of electrical contacts. Inserting the hose opens the airflow path, and the pressure change itself activates the unit. The result is the same from your end. The 120V outlet inside the inlet is a completely separate circuit. That's exclusively for powering the motorized brush head on an electric powerhead hose attachment. It has nothing to do with activating the main motor.⚠️ Safety Note: The small outlet inside your inlet valve carries 120V AC. It's designed exclusively for the electric powerhead attachment. Do not attempt to plug standard household items into it — the circuit is purpose-built and is not protected the same way a standard household outlet is.Is Your Central Vacuum System Still Working?Before you assume it's dead — most "broken" central vacuums aren't actually broken. This is probably the most important thing to understand if you've just moved into a home with a system you've never used. In 60–70% of cases, a system that seems non-functional has one of three issues: a full collection bag, a choked filter, or a stuck inlet gasket. Every single one of those is a 10-minute DIY fix that costs under $25. Let's work through it methodically. Step 1 — Find the Power Unit Using the location guidance above, track down the unit. Once you find it, check:Is it plugged in? Surprisingly common — the previous owners may have unplugged it and forgotten it, or a circuit breaker may have tripped it. Is there a power switch or reset button on the unit? Most have one on the face or side. Is the exhaust vent clear? A vent blocked by storage boxes or debris causes thermal shutdown. Check the exhaust hose runs to an unobstructed exterior vent. Is the bag compartment accessible? Open it carefully. If the system hasn't been maintained in years, the bag may be overfull, and opening the compartment without preparation can release a cloud of fine dust.Note the brand name before you close it up. You'll need it when buying accessories. Step 2 — Quick Power-On Test Once plugged in, switch it on. You should hear a consistent motor hum — not grinding, not rattling, not silence. If the unit trips off immediately, it's likely in thermal overload. This happens when the motor has been running hot, or when it's trying to pull air through a completely blocked bag or filter. Give it 30–60 minutes to cool, then try again. Most units have a thermal overload protection switch that resets automatically with rest. If the motor runs but sounds rough or unusually loud — a grinding, rattling, or high-pitched whine — that's worth a professional inspection before you run it for extended periods. Don't force a struggling motor. Step 3 — Check the Bag and Filter First This is the step most people skip, and it's the one that resolves most problems. Central vacuum collection bags are large, but they do fill up. In a home where the system sat unused, the bag might be years old and at capacity. A completely full bag doesn't just reduce suction — it can restrict airflow enough to cause the motor to overheat, or worse, force fine particles back toward the motor housing. Checking the bag: Open the canister compartment. If the bag looks swollen, stiff, and heavy, replace it before running the system. Brand-specific bags run $8–$25 each, and buying them in multi-packs is nearly always cheaper. Checking the filter: Most units have a secondary filter between the bag compartment and the motor — usually a foam ring, felt pad, or pleated paper element. If it's visibly grey or packed with dust, either rinse it out (foam or felt) or replace it (pleated paper). A filter that's been neglected for years is often the sole reason a system feels underpowered even with a new bag installed.⚠️ Before You Start: If the system hasn't been used in years, do not run it at all before replacing the bag. An overfull bag under heavy motor load can damage the motor. Change the bag first — even if you're only testing functionality.Step 4 — Test the Inlet Valves Once the power unit is confirmed to be running cleanly, go to each inlet in the home and:Press the flap inward — it should move freely and spring back promptly when released Look at the rubber gasket around the circular port — it should be soft and slightly flexible, not cracked, brittle, or pulling away from the housing If you have access to a compatible hose, insert it and check for suction at each inlet individuallyA cracked inlet gasket is one of the most commonly overlooked causes of suction loss. That rubber ring costs about $8 to replace and can recover 30–40% of lost suction on a system that seems chronically underpowered. It's worth checking every single inlet, especially in a home you've just purchased.✅ Central Vacuum First-Check ChecklistLocate the power unit (garage, basement, or utility closet) Confirm the unit is plugged in and powered at the breaker Turn it on — listen for a clean, consistent motor hum Open the bag compartment; check fill level, replace if full or swollen Inspect the secondary filter — rinse or replace if visibly dirty Confirm the exhaust vent is clear and unobstructed Test each inlet flap — should open smoothly and spring back Check inlet gaskets for cracks, dryness, or separation Note the brand name and model on the power unit Inspect inlet housings for debris caught in the hinge mechanismThe First Thing You Should Buy (And What to Watch Out For) Here's where new owners get burned — almost always by the same compatibility mistake. If the previous owners didn't leave a hose behind, you'll need to buy one. That sounds simple. It isn't, quite. Central vacuum hoses are not universally interchangeable, and ordering the wrong one is exactly as frustrating as it sounds: you unbox it, it doesn't fit, you pay return shipping, you order again. Avoid this by checking two things before you spend a dollar. Understanding Hose Compatibility Before You Buy AnythingTwo things determine whether a hose fits your system: port diameter and locking mechanism. Port diameter: The most common sizes are 1.5 inches and 2 inches. Measure your inlet port before ordering. Don't eyeball it — use a ruler or a piece of cardboard cut to size. Two inches looks remarkably like 1.5 inches until your $120 hose won't seat properly. Locking mechanism: Different manufacturers use different systems for securing the hose at the inlet. The main types are twist-lock, slide-in, and button-release. NuTone/Broan and Beam systems each have their own standard, and while some third-party hoses bridge multiple formats, many don't. Brand families and what they mean for you:NuTone and Broan — same parent company, shared inlet standard, widest accessory availability in the US Beam and Electrolux AirVac — compatible systems; parts interchange easily Vacuflo and Vacu-Maid — different inlet design; verify compatibility carefully before ordering Hide-a-Hose — retractable in-wall hose system with its own inlet requirement; not compatible with standard hosesIf you can't identify the brand from the power unit, check the inlet valve cover itself. Many have the manufacturer name molded into the plastic on the back side. If there's nothing on the valve, a Google Image search for your power unit's model number almost always turns up the documentation.💡 "The single biggest performance difference between a 'working' and 'great' central vacuum system is the hose seal at the inlet. A worn cuff gasket that costs $8 to replace can rob 40% of your suction — and it's the last thing most people check."Air-Driven vs. Electric Powerhead — Which One Do You Need? This distinction matters more than most buying guides bother to explain. An air-driven hose kit uses airflow alone to agitate and lift debris — no electrical components in the hose itself. These kits are lighter, simpler, and less expensive ($60–$150). They work extremely well on hard floors, low-pile area rugs, and light carpet. An electric powerhead hose kit includes a motorized rotating brush in the floor tool. That brush is powered by a small motor wired through the hose, drawing 120V from the electrical contact in the inlet. These kits cost $150–$350 and deliver genuinely better performance on medium-to-deep pile carpet — comparable to what you'd get from a top-tier portable vacuum. The catch: to use an electric powerhead, your inlet valve needs to have the 120V electrical contact. If your inlet has only the vacuum port and no visible outlet or contacts inside, you're limited to air-driven hose kits. Upgrading the inlet valves to support electric powerheads involves electrical work and is a job for a licensed electrician or central vacuum technician. Check your inlet carefully before you buy anything. It's a 30-second check that determines which $200+ purchase is right for you. What This Will Actually CostItem Cost Range NotesReplacement collection bag (each) $8–$25 Brand-specific; buy in multipacks for savingsReplacement HEPA filter $15–$50 Annual replacement for allergy householdsBasic hose + attachments kit $60–$150 Verify inlet compatibility before orderingElectric powerhead hose kit $150–$350 Motorized brush for carpet; requires 120V inlet contactProfessional service call $75–$150 Diagnostics and basic maintenanceInlet valve replacement $20–$60 per inlet + labor If gaskets fail or valve housing cracksDuctwork blockage clearing $100–$300 If debris is lodged in the tubingMotor replacement $150–$400 + labor Power unit motor swapFull system replacement (installed) $800–$2,500 New power unit plus professional installationHide-a-Hose retractable upgrade $500–$1,200 installed Hose retracts into the wall — premium optionIf the power unit tests functional, a basic hose and attachment kit converts it into the highest-performing vacuum in your home for $60–$150. That's a hard argument against.Maintaining Your Central Vacuum System — A New Owner's Reality Check Good news: this is one of the lowest-maintenance home systems you'll own. One task, done once a year, covers the vast majority of it. Central vacuum systems have fewer wear surfaces than portable vacuums. The motor runs cooler because it's not enclosed in a handheld unit under constant thermal stress. The PVC tubing doesn't age meaningfully unless it's physically damaged. Most problems — including the ones that look serious from the outside — trace directly back to consumables: the bag and the filter. Annual Maintenance That Takes 20 Minutes Bag check and replacement: During regular use, check the bag every 3–4 sessions. Replace it every 3–6 months, or sooner if the unit has a bag-full indicator light. The single fastest way to destroy a central vacuum motor is to run it month after month on an overfull bag. It doesn't take long, and it isn't dramatic — the motor just runs progressively hotter until it fails. Filter inspection and cleaning: The secondary filter sits between the bag and the motor and catches what the bag misses. Inspect it every 6–12 months. Foam and felt filters can usually be rinsed under water, dried completely, and reused. Pleated paper filters need replacing. Budget $10–$30 for a new one depending on the model. Inlet valve gaskets: Once a year, make a quick pass through every inlet in the home. Press the gasket — the rubber ring around the circular port — with your fingernail. It should feel soft and pliable. If it's hardened, cracked, or pulling away from the housing, replace it. This is an $8 fix that most homeowners never do, and it's the reason many central vac systems gradually lose suction over the years with no apparent cause. Maintenance ScheduleFrequency Task DIY or Pro? Est. CostEvery 3–4 uses Check bag fullness indicator DIY FreeEvery 3–6 months Replace collection bag DIY $10–$25Every 6–12 months Clean or replace secondary filter DIY $10–$30Annually Inspect all inlet gaskets for cracks DIY Free–$15Annually Check hose cuff seal and connection DIY FreeEvery 2–3 years Full system inspection by technician Professional $75–$150Every 5 years Replace HEPA filter if equipped DIY $20–$50Every 10–15 years Motor service or replacement consideration Professional $150–$400Every 20–30 years Full system replacement consideration Professional $800–$2,500The 5-Year and 10-Year Checkpoints At five years, it's worth having a central vacuum technician do a full inspection — not because something is likely wrong, but because a trained eye catches developing inlet valve wear, can test motor amp draw, and confirms the tubing network is clear. A service call at this stage runs $75–$150 and can extend the system's useful life considerably. At 10+ years, the motor brushes may begin showing wear. You'll notice it as a subtle change in motor sound, or intermittent suction drops that don't trace back to the bag or filter. Motor brush replacement costs $150–$300 at a service center and commonly buys another decade of use from a unit that would otherwise need replacement.💡 "Most service techs who work on HVAC or appliances don't service central vacuums. Search specifically for 'central vacuum service' or 'built-in vacuum technician' in your area — not just 'vacuum repair shop.'"What Previous Owners Often Left Behind (And What They Usually Didn't) Stored near the power unit, you might find old bags still in packaging, a hose stored on a hook, or an attachment kit in a box. That's the optimistic scenario. What's almost always missing: the electric powerhead (an expensive accessory people take with them), a HEPA-grade filter replacement, and any documentation at all. What's frequently neglected: the collection bag sitting in the unit right now. If the power unit looks dusty on the outside, assume the bag inside is full. Check it before you run anything.Central Vacuum vs. Just Buying a New Portable Vacuum — An Honest ComparisonA Dyson V15 costs $600. Your built-in system, if functional, could be running for $100 in accessories — and outperform it in raw suction. That's not dismissing portable vacuums. It's just how the specs work.Factor Central Vacuum Portable VacuumSuction Power 3–5x stronger (600–1,400 air watts typical) 100–400 air watts typicalAir Quality Exhausts air outside the home; no indoor recirculation Recirculates fine particles back into the roomNoise Level Very quiet at the inlet (motor is remote) Loud at the point of useWeight to Carry Hose only, 5–8 lbs Full unit, 10–20 lbsWhole-Home Coverage No repositioning required Must carry room to roomInitial Cost $0 if already installed $150–$1,200Ongoing Cost Bags and filters, $30–$80/year Bags and filters, $40–$120/yearMaintenance Annual bag/filter check Per-use filter cleaningLifespan 20–40 years 5–12 yearsAllergy Benefit High — vents to the exterior Low — recirculates allergensThe air quality point is worth dwelling on for households with allergies or asthma. Portable vacuums — even excellent ones with multi-layer HEPA filtration — recirculate some fine particulate matter back into the room. Central vacuums exhaust through a duct to the exterior. For sensitive households, that difference in indoor air quality is real and clinically meaningful, not marketing language. The honest trade-off: a central vacuum doesn't replace a compact cordless unit for quick counter cleanups, car interiors, or tight spaces. Most households that actively use their central vac system end up keeping a small handheld for fast spot cleaning and using the built-in system for full-floor sessions. That's the practical reality — not a limitation, just a division of use cases.Can You Integrate a Central Vacuum with a Smart Home?Central vac is already more "smart" than most people realize — it just doesn't advertise itself. The hose-insertion auto-activation, the thermal overload protection, the bag-full indicator light on modern units — these are all automated responses built into the base system. No configuration required. The system already reacts to conditions and protects itself without any input from you. What's Already AutomaticMotor auto-on/off via the hose insertion circuit — insert the hose, motor starts; remove it, motor stops Thermal overload protection — the motor shuts itself off if it runs too hot, then resets after cooling Bag-full indicator lights on most units manufactured after 2000 (check the face of the power unit)Modern Central Vac Smart Features (2024–2026) Some newer power units from Beam and NuTone include WiFi connectivity with companion app control, allowing you to monitor bag fill status, view runtime logs, and receive maintenance alerts on your phone. These are features on upper-end units — not something you'd typically find on an inherited system from 2005, but worth knowing if the topic of full replacement ever comes up. For older inherited systems, smart home integration is possible but limited in practical upside: Smart switch integration: A compatible smart outlet or relay switch wired to the power unit allows Alexa or Google Home to turn the unit on or off via voice command or automation. Since the motor only draws air when a hose is physically inserted at an inlet, voice activation mostly serves remote shutdown or as a home-automation trigger — not a hands-free vacuum experience. Automated vacuum pans: Some kitchen renovation projects include a flush-mounted vacuum pan installed in the kickplate beneath base cabinetry. Stepping on the pan or pressing a button opens the vent and sweeps floor debris directly into the central system. These can be triggered by home automation routines for kitchens that already have central vac tubing nearby. The honest take on smart integration: unless you're already building out a whole-home automation system, the practical benefit over the existing auto-activation is genuinely minimal. It works, and it's cool — but don't buy a new power unit just for the app.When It's Time to Call a Professional (And When It's Not) Most issues are DIY. But there are two situations where you should not go it alone. The dividing line is clear once you know it. Anything involving consumables (bags, filters), seals (gaskets, hose cuffs), or basic diagnostics (testing suction at inlets, locating blockages at the inlet end) is within reach for any homeowner comfortable with basic maintenance tasks. No special tools required. Professional help is warranted for: motor work, ductwork clearing beyond the inlet valve, and electrical contact repair inside the inlet valve. Troubleshooting GuideSymptom Most Likely Cause Fix DIY?No suction at all Full bag, clogged filter, or unit not powered Check bag/filter first; verify unit is on ✅ YesWeak suction everywhere Partial bag, worn filter, or small blockage Replace bag; clean filter; test all inlets ✅ YesMotor runs but no suction Hose not sealing properly at inlet Check hose cuff gasket; replace if cracked ✅ YesMotor won't start Thermal overload tripped from overheating Let unit rest 30–60 min, then retry ✅ YesInlet flap won't open Debris in hinge or spring broken Clean debris; replace valve if spring failed ✅ / ⚠️Burning smell during operation Full bag or failing motor Stop immediately; check bag; inspect motor ⚠️ ProUnusually loud motor Bearing wear or debris inside motor Professional inspection ⚠️ ProElectric contact not activating powerhead Wiring issue at inlet or hose Check hose wiring connection ⚠️ ProGood suction at most inlets, not one Localized tubing blockage Try a clearing run; call duct specialist ⚠️ ProFinding the right technician: Not every appliance repair shop services central vacuums. HVAC technicians generally don't either. Search specifically for "central vacuum service" or "built-in vacuum repair" — not just "vacuum repair shop." In most metro areas, there are dedicated central vacuum service companies that handle everything from routine maintenance to full system replacement. They're worth the extra effort to find.Myth vs. Reality — What New Homeowners Get Wrong About Central Vacuums Almost everything the internet tells you about central vacs is either outdated, oversimplified, or written by someone selling something. Let's sort through the ones that come up most often.Myth Reality"Central vacuums are outdated technology" Modern units offer WiFi monitoring, HEPA filtration, and variable motor power. The form factor hasn't changed much; the performance ceiling has risen considerably."If it hasn't been used in years, it's probably broken" Central vac motors are designed for longevity. 20–30 year lifespans are normal. More likely: full bag, clogged filter, or seized inlet gasket."I need the original brand hose" Many third-party hoses work with common inlet sizes. But you must verify port diameter and locking mechanism first — that's where the compatibility mistake happens."Central vacs are only for large homes" Effective in homes from around 1,200 sq ft upward. Coverage depends on power unit strength and inlet placement, not home size category."Exhaust air goes into the wall cavity" Systems vent externally through the wall or a dedicated exhaust duct. Exhaust does not recirculate indoors under any normal operating condition."Retrofitting a home without central vac is cheap" New installations in existing homes cost $1,500–$3,000+. If your system is already there and working, you have a premium home feature most buyers specifically look for.Frequently Asked Questions What is the spring-loaded flap near the floor in my house? It's a central vacuum system inlet valve. The round opening behind the flap connects to PVC tubing inside your walls, which runs to a power unit — usually in the garage or basement — that provides suction throughout the home. Inserting a compatible hose into the port activates the motor automatically. How do I know if my central vacuum still works after buying a home? Start by finding the power unit in the garage, basement, or utility closet, plugging it in, and turning it on. If you hear a clean motor hum without grinding or rattling, it's likely functional. The next step is checking the collection bag — a full bag is the most common reason an otherwise working system loses suction. Start there before assuming anything is broken. What does the small outlet inside the central vacuum inlet do? It provides 120V power to an electric powerhead — a motorized brush attachment that connects through the hose to the inlet's electrical contact. Not all inlets have this. Air-driven systems only have the suction port. If yours has the electrical contact or outlet, you can use a full electric powerhead kit for deep carpet cleaning. Can I use any hose with a central vacuum inlet? Not automatically. Hoses must match your inlet's port diameter (1.5" or 2") and locking mechanism style. The most common mistake new owners make is buying a hose without checking these two specifications first. Find the brand on your power unit before purchasing anything. Where is the central vacuum power unit typically located? In homes built between 1990 and 2010, it's almost always in the garage (wall-mounted), a basement mechanical area, or a utility closet. Look for a cylindrical or rectangular unit roughly 18–24 inches tall, with a bag compartment at the bottom, a power cord, and an exhaust vent. How long do central vacuum systems last? Longer than most people expect. The motors routinely last 20–30 years with basic maintenance. If your home was built in 2005 and the system was used occasionally, it likely has a decade or more of useful life remaining. Age alone is not a reason to replace it. Is it worth buying accessories for an inherited central vacuum? In most cases, yes. A basic hose and attachment kit ($60–$150) unlocks 3–5x more suction than a comparable portable vacuum. If the power unit tests functional, that's the lowest-cost vacuum upgrade available to you. The question isn't really whether to buy accessories — it's whether your system is functional enough to justify them, which the first-check checklist above will tell you. My central vacuum runs but has weak suction — what's wrong? Start with the bag — an overfull bag causes near-complete suction loss even when the motor runs perfectly. Then check the secondary filter. If both are fine, inspect the hose cuff gasket for cracks — air leaks at the hose connection are a very common source of lost suction that's easy to miss. If suction is strong at some inlets but weak at one specific location, there may be a blockage in the tubing serving that inlet. Can I connect my central vacuum to a smart home system? Yes, with some limitations. Newer power units from Beam and NuTone include WiFi control and app monitoring. For older systems, adding a smart outlet or relay switch to the power unit allows basic Alexa or Google Home voice commands. The practical upside over the system's existing auto-activation is limited for most setups — worth doing if you're already building out smart home infrastructure, not worth a power unit upgrade on its own. Should I replace or repair an old central vacuum system? If the motor runs cleanly and the tubing is intact, repair is almost always the better value. Replacing the bag, filter, and buying a hose kit costs under $200 total and gives you a fully operational system. Full replacement makes most sense when the motor has failed and the unit is 25+ years old with no available replacement motor — at that point, the economics of a new system become reasonable.The Bottom Line for New Homeowners There's a moment — usually about an hour into researching that wall port — when most new homeowners realize they've stumbled into something unexpectedly useful. Central vacuum systems aren't glamorous. They don't get YouTube reviews or influencer unboxings. They're just a functional piece of home infrastructure that was installed by a builder, forgotten about by the previous owners, and left for you to figure out. Which, it turns out, doesn't take long at all. If the power unit tests functional — and statistically, it probably does — you have a whole-home vacuum system that outperforms most retail options under $500. The first step is knowing what you have. The second is the 30-minute diagnostic process above. After that, a $100 accessory purchase gets you running. That's not a bad situation to be in.*Related reading: *Home Network Upgrades and Improvements: Real Costs, Smart Choices, and What Actually Works Are Expensive Robot Vacuums Actually Worth It? A Realistic Long-Term Owner's Analysis The Homeowner Maintenance Cheat Sheet That's Actually Worth Saving
.webp)
Small Home Upgrades That Actually Keep Runners Consistent
Most people think the problem is motivation. It usually isn't. There's a specific type of drawer in a lot of runners' homes. It holds a tangled charging cable for a GPS watch, one earphone from a pair that lost the other somewhere, a running armband that fits a phone from two upgrades ago, and — if it's a particularly good drawer — a foam roller that's been there long enough to flatten on one side. This drawer is a diagnostic. It describes the gap between runners who train consistently at home and the ones who don't. The treadmill sitting folded in the corner tells the same story differently. A thousand dollars of genuine intention, folded against the wall, because every session requires ten minutes of setup, the noise complaints from downstairs, and enough cognitive overhead to make the option of skipping feel reasonable by comparison. Here's what actually separates the consistent home runners from the inconsistent ones: they've removed enough friction from the process that skipping became the harder choice. That's it. Not willpower. Not better equipment. Friction removal. This isn't a product catalogue. It's a look at what actually helps — the upgrades that runners use daily versus the ones that end up in Facebook Marketplace listings after six months. Some cost almost nothing. Some are worth real money. The measure for all of them is the same: does it make starting feel like a default rather than a decision? The upgrade that runners consistently underestimate isn't the walking pad. It's the thing that actually makes the walking pad get used. More on that in a moment.Why Small Upgrades Beat Big Equipment When It Comes to Staying ConsistentThere's a particular type of optimism that accompanies expensive fitness equipment purchases. The thinking goes: I've invested this much, so I'll definitely use it. In practice, the opposite tends to happen. Equipment that requires significant setup, floor space, or psychological commitment to access gets used less than modest, frictionless alternatives that are already out and ready. A $1,400 folding treadmill that takes four minutes to set up and five to fold away will get used less than a $350 walking pad that slides from under the sofa in 20 seconds — not because the treadmill is a worse machine, but because of those four minutes. Those four minutes are enough to create a decision point. And at 5:15am, decision points default to the path of least resistance. The quality of your home training environment isn't measured by the equipment in it. It's measured by how fast you can go from intention to actually moving. Everything else follows from this. The Two-Minute Rule for Home Workout Spaces David Allen's productivity principle — if a task takes less than two minutes, do it immediately — has a direct application in home gym design. If getting started requires more than two minutes of preparation, you've engineered a system that defaults to skipping. Picture a typical morning run scenario. Alarm goes off at 5:20am. You need to locate your shoes, find your GPS watch (and hope it charged overnight), dig out your earphones, remember where the reflective vest ended up, and then realize the space you planned to warm up in has your partner's yoga mat rolled across it. By the time the friction has stacked up, "should I just skip today?" has a real argument on its side. Apply this test to every upgrade in this article. Does it reduce the time between "I should work out" and "I am working out"? If yes, it belongs. If it adds steps or decisions, skip it. What Real Runners Actually Said About Their Home Setups When runners talk about what genuinely helped at home — across subreddits, running club chats, forum threads — a few patterns emerge consistently enough to be worth paying attention to. Walking pads dominate the equipment conversation. Not full treadmills. Not under-desk bikes. The things that fold flat and take 30 seconds to deploy. The second most consistently mentioned upgrade surprised people: lighting. Not because anyone set out to optimize their light fixtures, but because they accidentally discovered the contrast between training at 5am under warm-dim bedroom light versus a properly bright daylight space. Multiple people described the difference as going from "forcing myself to move" to "actually being awake before I'd started." Gear storage came up constantly and was almost universally described as underrated. Boring, unsexy, practically free — and the change that eliminated the most real friction for morning runners. Mirrors divided people sharply. Useful for form work in a clean, defined zone. Uncomfortable in a general-purpose room where they reflect household chaos. Smart home integration appeared regularly from runners who already had some infrastructure — and almost always with the observation that they wished they'd connected it to their fitness routine earlier.The Walking Pad — The Upgrade Runners Keep Coming Back ToIf one piece of equipment dominates the "what actually made a difference at home" conversation, it's the walking pad. Compact, substantially quieter than full treadmills, storable flat under a bed or sofa, and priced at a level where the investment doesn't trigger a guilt spiral if usage is lighter than planned. Worth being clear on what a walking pad is — and what it isn't.Feature Walking Pad Compact Treadmill Full TreadmillPrice range $250–$650 $500–$900 $800–$2,000+Max speed 3.7–6 mph (some to 7.5) 8–10 mph 10–12+ mphBelt length 39–47 inches 47–52 inches 54–60 inchesStorage footprint Flat under bed/sofa Folded vertical Folded vertical, largeRunning suitability Zone 2 / easy pace only Moderate training Full training useNoise level Low Moderate Moderate–HighSmart features App + Bluetooth (most models) Varies Most include consolesMaintenance Belt lube every 3 months, belt ~18–24 mo. Belt + deck care Regular service neededBest for Easy days, habit formation, bad weather Regular indoor training Dedicated home runnerHonest Assessment — Is a Walking Pad Actually Enough for Serious Runners? Here's what most walking pad articles won't say directly: if you run at pace, a walking pad is a habit tool, not a training tool. Most models cap between 4–6 mph. A few newer options push to 7.5 mph, which covers easy to moderate effort. But if your regular training runs sit at 8 min/mile or faster, the walking pad is not replicating that. It excels at Zone 2 aerobic base work — the conversational-effort intensity that most recreational runners actually underutilize anyway. There's also the belt length issue that almost nobody mentions. Many walking pads run 40-inch belts. Fine for walking, fine for shorter runners. For anyone over 5'8", at any genuine running pace, the stride feels constrained. It shortens pushoff, slightly alters arm swing, produces a gait pattern that's technically different from your outdoor form. Not dangerous — but not authentic running. If this matters to you, prioritize belt length alongside max speed when comparing models. Anything under 45 inches deserves scrutiny for actual run use. Where walking pads genuinely deliver: bad weather substitutions, active recovery days, post-injury return-to-running protocol, morning sessions when leaving the house isn't practical, and — the most undervalued case — building the daily movement habit that transfers directly to outdoor consistency.⚠️ Expert note: Walking pads improve habit formation more reliably than training quality. Be honest with yourself about which you're buying it for. Those are different problems and both are legitimate — but confusing them leads to disappointment.Walking Pad and Smart Home Integration — Worth Setting Up? Most walking pad owners plug them in and use them. A basic smart home connection adds two genuinely useful things. First: real electricity cost data. A smart plug with energy monitoring — the TP-Link Kasa EP25 is the standard recommendation — shows you that a 300–500W walking pad at 45 minutes of daily use costs approximately $3–8/month at US average electricity rates (~$0.16/kWh). UK rates (~£0.28/kWh) and Australian rates (~AUD$0.30/kWh) push that to $8–14/month equivalent. Not alarming, but knowing the number is useful. Add a scheduled auto-shutoff after 60 minutes and you also eliminate standby vampire draw — some motors pull 5–15W continuously on standby. Second: workflow automation. Pair the smart plug with a Google Home Routine or Apple Shortcut, and a single trigger — one tap or "Hey Google, start my workout" — brings up daylight-temperature lighting, adjusts the thermostat, starts your workout playlist, and limits your pad session automatically. For pre-5am sessions when decision fatigue is genuinely real, this reduces the activation energy to nearly zero. ✅ Walking Pad Buyer's Checklist Before purchasing, confirm these:Belt length 45 inches or longer (essential for runners over 5'7") Maximum speed at least 6 mph (7.5 mph preferred for running use) Weight capacity covers your body weight with a safety margin Multi-layer deck cushioning (reduces impact versus hard surfaces) Folds flat or rolls for storage — check actual folded dimensions against your storage space Bluetooth app connectivity for session logging Motor warranty 24 months or more Return window minimum 30 days — belt length issues only surface once you're actually on it Confirm the brand ships to and warranties in your country before orderingWalking Pad Brands Worth Considering in 2025–2026 Premium — WalkingPad (KingSmith): Strong app integration, quiet motor, genuinely solid build. The platform cohesion between device and app is better than most competitors. Available in US, UK, and AU with reasonable warranty support. Mid-range — Mobvoi TreadMill Go: Consistently the best balance of durability and features in the $350–$500 range. Quiet motor, adequate belt length, doesn't feel like it'll fail in 18 months. Most recommended across running communities. Budget — Urevo Foldi: Accessible price point, works as described. Belt durability draws questions with heavy daily use. Buy the extended warranty if you plan to use it every day. UK and Australia note: Some models ship through third-party sellers with longer lead times and limited local warranty support. Verify regional warehouse availability before assuming standard return terms.But here's the thing — I've seen more abandoned walking pads than abandoned running shoes. The setup around it matters more than the pad itself.The Workout Corner — Cheapest Upgrade, Highest Consistency ImpactNo equipment required. Modest or zero cost. And potentially the highest consistency return of anything in this article. A defined workout zone — even a 6×6 ft area carved from a living room corner, a bedroom edge, or a section of garage — creates what behavioral researchers call an environmental cue. The zone signals to your brain what happens there. A commercial gym achieves this automatically by design. Your living room, in its default configuration, doesn't. The act of defining the zone is the upgrade. Everything else supports it. Setting Up a Workout Corner in a Shared Space — Step by StepMeasure and mark your zone. 6×6 ft is the functional minimum for stretching, bodyweight work, and a walking pad. 6×8 is more comfortable. Use painter's tape initially to visualize it before laying flooring. Clear the zone — permanently. Not mostly cleared. The zone has one purpose. Items that don't belong there don't return, even temporarily. Lay flooring first. This is what transforms a corner into a zone. Visual definition creates psychological ownership. Install wall hooks near or above the zone. Eye-level hooks for gear, a shelf below for shoes, a USB hub plugged in nearby. This becomes your gear station. Address the lighting overhead. Swap the bulb to 5000K daylight temperature. Literally takes three minutes and costs under $8. Add one anchor piece. Walking pad, pull-up bar, yoga mat, resistance band setup — the single item that signals "this is where training happens." Run the 2-minute test. From sitting on your sofa, time how long it takes to have shoes on, gear in hand, and be standing in the zone ready to move. Over two minutes means something needs to change.Rubber Flooring — The Upgrade Runners Consistently Undervalue Here's why rubber flooring tiles aren't just about cushioning: they're about zone definition. Laying interlocking rubber tiles on a section of a shared floor does something that no amount of mental reframing achieves — it creates visible ownership of a space. The flooring signals "this corner is different from the rest of the room." Without that physical cue, the zone collapses back into being part of the general room within weeks. Practical specs: Minimum 3/8-inch thickness for daily foot traffic and general workout use. If you do any plyometrics or jump training, use 1/2-inch. Thinner than 3/8-inch degrades quickly under daily foot traffic and provides minimal impact protection. Cost guide: $1.50–$2.50/sq ft for standard rubber tile, $3–$4/sq ft for premium brands. A 6×6 zone needs roughly 36 sq ft: $54–$144 depending on brand and thickness.⚠️ Worth knowing before you order: Cheap EVA foam puzzle tiles can off-gas VOCs during the first week, which matters in a small enclosed bedroom or studio. Ventilate actively for the first 5–7 days. This concern is substantially reduced with quality rubber tiles, but worth flagging regardless.Wall Mirror — It's Actually About Running Form, Not Vanity The mirror conversation in fitness spaces almost always defaults to aesthetics or motivation framing. That undersells it for runners specifically. Being able to observe yourself during stride drills, tempo intervals, or even dynamic warm-up movements is a genuine injury prevention tool. Arm carriage at fatigue, posture collapse mid-run, excessive vertical oscillation — these are things you can self-identify in real time with a mirror that you simply can't notice without one. Two things need to be said plainly before installation: Mirrors not anchored properly into wall studs or with appropriate drywall anchors are a real injury risk. A large mirror falling from a wall is seriously dangerous. IKEA full-length mirrors at $25–$40 are excellent value, but their included hardware isn't designed for workout space vibration. Budget 20 minutes and the correct anchor hardware. Anti-shatter safety film ($12–$18 for a standard roll) should be applied to any large mirror in a workout space before mounting. It won't prevent breakage but eliminates the shattered glass scatter pattern that causes lacerations. Film first. Mount second. The 2-Minute Test — Does Your Corner Actually Pass? Run the test one month after setup. Morning routines drift. Gear migrates back to previous spots. Partners leave things in the zone. Household entropy is real. If the test has crept past two minutes, something structural has slipped. The zone is competing with other household purposes. Fix it then, not after six consecutive skipped sessions have compounded into a lapsed habit. ✅ Morning Runner Home Setup ChecklistZone floor is clear — nothing non-fitness stored there permanently Flooring is slip-resistant (rubber or quality interlocking foam tiles) Lighting can activate bright without waking the house All gear is in one location, accessible within 30 seconds Water bottle filled and accessible — no kitchen trip required Device charging point is in or adjacent to the zone Recovery tools are adjacent (foam roller at minimum) Zone is free from competing household items: laundry, kids' toys, random storageIf you run before 7am, the next section will probably surprise you.Lighting That Makes You Actually Want to Work Out at 5:30amThis is the section with the most disproportionate effort-to-impact ratio in this entire article. Replacing one lightbulb in a workout space can meaningfully change how alert and willing to move you feel at 5am. That sounds like marketing copy. It isn't. Why Runners Underestimate What Lighting Does to Their Motivation Warm, dim light — the kind a standard bedroom lamp produces at 2700–3000K — actively signals your brain that it's still night. It suppresses cortisol release, promotes melatonin continuation, and blunts alertness. This is exactly what it's supposed to do in a sleep environment. The problem is that you're trying to train in that same biological context — working directly against your own neurochemistry. Bright, daylight-temperature light at 5000K or higher triggers the cortisol release and alertness response that a natural sunrise produces. This is applied chronobiology, not wellness marketing. It's the same photobiological mechanism that makes full-spectrum light therapy effective for seasonal mood patterns — applied here to the specific problem of motivating movement at predawn hours. The cheapest circadian optimization available: One 5000K LED bulb from a hardware store, under $8, swapped into the overhead fitting above your workout zone. The contrast with warm-dim light at 5am is not subtle once you've experienced it. Smart Lighting for Workout Spaces — A Practical Setup Guide If you already have smart home infrastructure, connecting your workout zone lighting is worth the 15 minutes it takes. A "Workout Mode" scene:Brightness: 100% Color temperature: 5000–6500K (daylight to cool white) Trigger: scheduled at your standard workout time or voice command Auto-off: 90 minutes from activationOne counterintuitive note on smart bulbs in high-toggle environments: frequently switched smart bulbs have shorter lifespans than the same bulbs on standard wall switches. In a workout space where lights flip daily, a smart switch controlling standard LED bulbs is more reliable, longer-lasting, and often cheaper long-term than smart bulbs in each socket. Same functional result, less hardware failure over time. Brand comparison:Govee — budget-accessible, basic but functional, limited automation depth LIFX — no hub required (direct WiFi), excellent brightness output, higher per-bulb cost Philips Hue — most complete automation ecosystem, hub required, highest cost, best Google Home and Apple Home integrationBudget Lighting That Works Without Any Smart Home Involvement Not everyone wants an app controlling their lights. That's a completely reasonable position. The lowest-cost, highest-impact option for garage, basement, or dedicated workout spaces: 4-foot LED shop lights at 5000K. Available at hardware stores for $20–$35, they mount with included chains or brackets, plug into a standard outlet, and produce significantly more output than most residential fixtures. No hub. No app. No bridge. Just very bright, daylight-temperature light. Many are linkable — daisy-chain multiple units for larger spaces. For anyone without existing smart home infrastructure, this option is often practically superior to building a smart lighting system just for a workout zone.Running Gear Storage — The Most Underrated Upgrade on This Entire ListThis is the one that runners universally agree on in retrospect and consistently underinvest in upfront. The logic at the time is: "I know where my stuff is." The reality at 5:30am on a Tuesday when the alarm went off 20 minutes ago and you've found one shoe but not the other, and the watch is somewhere but not charged, is considerably less organized. The Real Cost of Gear Chaos for Runners Let's be specific, because vague references to "disorganization" undersell the actual problem. The GPS watch charger migrated to wherever you last used a USB port. The earphones are in the running vest pocket, or the jacket, or the gym bag — depending on the last three places you ran. The reflective vest has no permanent home. The race belt with gels still in it is probably in the car. This morning, the tights are in the laundry. Each of these is a small decision. Research on decision fatigue is clear: the more micro-decisions compound before a task, the higher the probability the task doesn't happen. "I couldn't find my stuff" is a more common real-world skip reason than "I didn't feel like it" — runners just frame the latter more publicly. For morning runners especially, there's no buffer time. You have 30 minutes before the house wakes up. The gear needs to be instantly accessible or the window closes.🔍 Most runners don't skip because they lack motivation. They skip because starting has too much friction. Those are genuinely different problems with different solutions.Storage Systems That Actually Work in Real Homes The gear station concept reduces to its simplest effective form: one wall panel, one shelf, one charging point, in one fixed location. Wall-mounted hook panels near the exit door are the highest-ROI single item in this category. The IKEA SKÅDIS pegboard system ($15–$25 for the base panel, plus $15–$30 in accessories) handles most of this efficiently — hooks for gear, small trays for accessories, space configured to your actual equipment. Not aspirational staging. What you actually own, stored where you actually use it. Add a shelf below for shoes. Add a multi-port USB charging hub on that shelf. Everything charges in one spot overnight. Everything hangs in one spot when not in use. When this system is working, pre-run gear access takes under 60 seconds. The Race Packet System — Lay It Out the Night Before Competitive runners preparing for a race always lay out the full kit the night before. Bib pinned. Shoes out. Nutrition packed. Timing chip on. This happens universally across experience levels because it eliminates morning chaos — but also because it creates psychological commitment. You've prepared. Not running tomorrow becomes an active choice to undo that preparation, not a passive decision made when the alarm goes off and nothing is ready. Apply the same logic to daily training. 6-item nightly checklist:Running shoes set at the door GPS watch on charger Earphones on charger Full outfit laid out, including socks — this genuinely matters at 5am Water bottle filled and in the fridge Tomorrow's route or workout logged in Garmin Connect, Strava, or Apple HealthThe Recovery Corner — The Runner Upgrade Most Lists Completely Skip Most "home runner setup" content focuses entirely on the workout side. You go, you exert, you're done. This is partly why recreational injury rates stay stubbornly high. Recovery is not separate from training. It is training. Treating it as something that happens wherever there's a free patch of floor — rather than as a designed, frictionless part of the home fitness environment — is one of the quieter reasons runners get hurt. Why Recovery Is Part of Your Home Running Setup, Not a Separate Thing Consider the typical post-run recovery sequence. You finish a 45-minute tempo session. You need to stretch hip flexors and hamstrings, roll out calves and IT band, maybe use a massage tool on the tibialis. If the foam roller is in a different room, slightly inaccessible, or buried under other things, the probability that you actually do this drops considerably. Same mechanism as the workout itself. Friction predicts skipping. A recovery station in the same zone as your training setup — or immediately adjacent to it — means the transition from workout to recovery is spatial, not effortful. You finish. You step to the side. You cool down without an additional decision point. Runners who stay injury-free over years aren't doing dramatically more sophisticated recovery work. They're doing basic recovery consistently, because it's frictionless to access. What a Budget Recovery Station Looks Like — and What It Actually Costs A functional setup requires fewer items than most people expect. Core setup under $80:Foam roller ($20–$40): Get EPP (expanded polypropylene) over EVA foam. EPP is firmer, maintains structural integrity under daily use, and lasts years. EVA feels softer initially and degrades noticeably within months with consistent heavy use — the thing you're rolling on with your body weight compresses and flattens until it's nearly useless. Wall-mounted mesh bag ($8–$15): Holds the roller when not in use, plus bands, lacrosse balls, and smaller tools. One dedicated spot on the same wall as your gear hooks. Ice packs ($10–$15): A designated shelf in the freezer or a small cooler beside the zone. Sounds excessive until you have a developing calf issue and you know exactly where the ice lives.Enhanced setup, $150–$250 total: A mid-range massage gun adds $60–$180 and meaningfully extends what you can do for soft tissue maintenance between training days. The Theragun Mini and Ekrin B37 both balance effectiveness and noise level better than the category average. A dedicated wall hook keeps it accessible rather than buried in a bag. Most runners don't add a recovery station because nobody framed it as belonging in the same conversation as the workout space. It does.Smart Home Automations That Actually Support Your Running RoutineThis section is for runners who already have some smart home infrastructure, or who are curious enough to build minimal infrastructure for a specific purpose. If you have neither interest nor existing devices, the rest of this article still works completely without any of it. For the subset who do have it — or who want to build it — the connection between smart home automation and running routine support is genuinely underexplored.Automation Trigger Actions Platform DifficultyMorning Run Mode Alarm time or voice command Lights 100% daylight, thermostat 68°F, start playlist Google Home / Apple Shortcuts ⬛⬜⬜ EasyPre-Run Cool-Down 45 min before workout time Lower thermostat 2°F, phone reminder Google Home / Ecobee ⬛⬛⬜ ModeratePost-Run Recovery Voice command after finishing Dim lights to 40% warm tone, white noise on Google Home / Philips Hue ⬛⬜⬜ EasyGear Reminder Night before a scheduled run Notification: "Lay out kit for tomorrow" Apple Shortcuts / Google Home ⬛⬜⬜ EasyWalking Pad Timer Activates with workout scene Smart plug auto-off after 60 minutes TP-Link app / Google Home ⬛⬜⬜ EasyThe "Morning Run" Scene — How to Build It in Under 10 Minutes In Google Home: Open the app → Routines → Add Routine → Set starter (scheduled time, or voice command: "Hey Google, start my workout") → Add actions: adjust lights (select your zone lights, set 100% brightness and 5000K+ color if using compatible bulbs), adjust temperature (thermostat to 68°F), play media (your workout playlist on your preferred speaker). Save. Done. Total time: 8–10 minutes. In Apple Shortcuts: Open Shortcuts → Automation tab → New Automation → Time of Day (or "When I tap" for manual trigger) → Add actions: Control Home (HomeKit lights, 100% brightness), Set Thermostat (if Ecobee or similar), Play Music (Spotify or Apple Music). Total time: 10–12 minutes. What this creates is a single trigger that collapses three separate morning decisions — lights, temperature, music — into one. For a pre-5am session when decision energy is at its lowest, that consolidation matters more than it sounds on paper. Pre-Cooling Your Home Before a Run — Why It Matters and What It Costs Running in a warm home raises your perceived exertion at any given pace. Your cardiovascular system is simultaneously managing heat dissipation and the aerobic demands of the workout, which pushes heart rate higher than the same effort in cooler conditions. This is straightforward exercise physiology. Pre-cooling your training space to 65–68°F, triggered 30–45 minutes before your workout via a smart thermostat schedule, is a measurable quality-of-life improvement for hard indoor sessions. Ecobee SmartThermostat, Google Nest, and Honeywell Home all handle scheduled pre-conditioning in their base apps without any advanced setup. The energy cost: approximately $0.10–0.20 per session for a typical home. Negligible in both dollar terms and environmental terms. The workout quality improvement is not negligible. Energy Monitoring Your Workout Equipment — The Numbers Most Runners Don't Know A 300–500W walking pad at 45 minutes of daily use costs approximately $3–8/month at US average electricity rates. UK rates (~£0.28/kWh) and Australian rates (~AUD$0.30/kWh) can push the same usage to $8–14/month equivalent — still not alarming, but worth knowing. A smart plug with energy monitoring — the TP-Link Kasa EP25 is the consistent recommendation — provides live wattage data and cumulative monthly cost. It also enables scheduled auto-off to eliminate phantom standby draw. Some walking pad motors pull 5–15W continuously on standby. Over a year at US rates, that's roughly $5–13 in electricity for doing nothing. A smart plug schedule eliminates this entirely.💡 A note on air quality: In small sealed spaces — apartments, bedrooms, compact home offices used as workout zones — sustained cardio at moderate-to-high intensity will measurably elevate CO2 levels within 20–30 minutes. This isn't dangerous, but it does affect perceived effort and performance. Cracking a window or door during longer indoor sessions isn't just comfort; it's a mild performance variable worth being aware of.The most useful thing in this article might be what I'm about to tell you not to buy.What Didn't Work — Honest Lessons From Runners Who Tried Everything There's a specific type of courage required to write this section. Product-list articles that discuss abandonment patterns are fighting against their own commercial incentives. But the information here is more useful than another walking pad recommendation.Upgrade The Myth The RealityYou need a dedicated room A spare room guarantees a proper gym A contested room with rubber tiles beats a spare room you feel intimidated byExpensive equipment ensures use Spending more creates commitment Price guilt can increase avoidance; accessibility creates useSmart home is overkill for fitness Automations are too complex for most people A single morning routine takes 10 minutes to build and reduces daily friction meaningfullyMirrors are just about vanity No real functional value for runners at home Form observation reduces injury risk, particularly for stride and drill workRubber flooring is for weight training only Overkill for a running-focused space Zone definition is the actual value — the cushioning is secondaryThe Upgrades That Sounded Great but Got Abandoned Folding treadmills are the most commonly cited investment-to-abandonment story. The fold-and-unfold sequence immediately kills the two-minute rule. They're substantially louder than walking pads on most settings. Many end up as expensive drying racks within three to six months of purchase. Under-desk bikes get purchased with optimism and typically abandoned within 30 days. They work biomechanically, but the sitting-pedaling motion feels disconnected and strangely infantilizing to runners who associate exercise with full-body exertion. The range of motion feels cramped for anyone with longer legs. Fancy resistance band wall systems — the branded anchor kits with guided programs — look genuinely impressive on delivery. Without a specific, pre-existing strength training protocol that requires them, the complexity becomes a barrier and they become the most decorative items in the room. Full-length mirrors in cluttered multi-use spaces are actively demotivating. A mirror that reflects a laundry pile, a partner's bike, and the general ambient entropy of a non-gym room during your workout does not create the psychological ownership effect a workout zone needs. In a properly defined zone, a mirror is a useful tool. In a general-purpose room, it's a larger reflection of chaos. The Single Setup Mistake That Kills Consistency Faster Than Anything Else A workout zone that competes for other purposes never survives long-term. The pattern: you set up a corner for training. It works for three weeks. Guests arrive, and a folding table goes in the zone. Seasonal coats need somewhere — a hook goes up. Kids leave toys there after playtime and they get moved, but not immediately. The rubber tiles are under a storage bin. Your partner's yoga mat is rolled across half the floor. By week six, it's just a corner of the room with some fitness aspirations. Psychological ownership of a space is effectively binary. It either belongs to a purpose, or it doesn't. A corner defined with cheap rubber tiles that everyone in the household understands is off-limits for other uses will outperform a $3,000 setup in a room that doubles as storage. This is the conversation to have with your household before you lay the first tile — not after you've discovered that the zone has quietly been reclaimed.💡 Even a zone defined only by rubber tiles and a coat hook maintains its fitness identity better than an undefined corner with expensive equipment sitting in it.Cost vs Value — What's Actually Worth Spending On FirstBudget Core Upgrade Estimated Cost Consistency Impact Smart Home CompatibleUnder $100 Gear station (hooks + USB hub) + 5000K bulb + floor tape to mark zone $25–$70 High — eliminates gear friction entirely No — standard plug-in only$100–$300 Rubber flooring (6×6) + wall mirror + LED shop light $120–$250 Very High — physically and visually defines zone Optional smart switch$300–$600 Walking pad (mid-range) + flooring + gear station $380–$560 Highest — full indoor training option, low friction setup Smart plug recommended$600+ Premium walking pad + full setup + smart lighting + recovery station $600–$900 Highest — complete frictionless runner home ecosystem Full integration supportedThe honest recommendation for most runners: start at the Under $100 tier, live with it for 30 days, and only invest further if the habit has genuinely formed. Buying more than you'll use is the most reliable way to end up resenting the investment and writing off home training entirely.Frequently Asked Questions What is the best small home upgrade for runners? For most runners, a dedicated workout corner with rubber flooring and organized gear access delivers the highest consistency impact at the lowest cost. If budget allows one equipment upgrade, a walking pad handles easy indoor training days without requiring a full treadmill footprint. Is a walking pad worth it if you already run outside? Yes, for specific situations: bad weather days, Zone 2 easy effort, post-injury return to movement, early mornings when leaving the house isn't practical. It doesn't replicate outdoor running and shouldn't replace it — but it fills the gaps that would otherwise become skipped weeks. How much does it cost to build a home runner setup? A functional setup without a walking pad runs $80–$200 for flooring, hooks, and a lighting upgrade. With a mid-range walking pad, budget $380–$560 total for a well-equipped, frictionless home space. My partner doesn't want a treadmill in the house. What's a compromise? A walking pad is the standard middle ground. It stores flat under a sofa or bed, quieter than most treadmills, and disappears in under 30 seconds when guests arrive. It doesn't dominate the room the way a full treadmill does. Will a walking pad work on carpet? Usually yes — check manufacturer guidance for your specific model. A rubber mat under the pad is strongly recommended regardless of floor type. It protects the surface, reduces vibration transmission, and prevents the pad from migrating during use. I live in an apartment. Is a dedicated workout corner realistic? A 6×6 ft corner is genuinely enough for stretching, mobility work, bodyweight training, and a walking pad. The critical factor is defining the zone clearly — rubber tiles help significantly — and keeping other household uses out of it.The runners who stay most consistent at home didn't necessarily start with better discipline or better equipment. They made one change that reduced friction, saw it work, and kept going. The gear station that eliminated the pre-run search. The $8 bulb that made 5am feel less like punishment. The rubber tiles that turned a living room corner into somewhere training actually happened. Pick the single upgrade that most directly addresses your specific skip reason. Not the most impressive upgrade. Not the most expensive one. The one that targets the friction point that has actually cost you training days. And implement it this week. Not next month when the timing is better. This week. Related Reading:Home Improvement Decisions I Regret — And the Smart Home Lessons They Taught Me 15 Inexpensive Ways to Secure Your Home & Prevent Break-Ins (2026 Guide) Smart Toilet Guide: Real Features, Honest Costs & Everything That Changes After You Install One
.webp)
The Home Upgrades Actually Worth Your Money — And a Few That Disappointed Everyone
Most homeowners have a running mental list of things they keep meaning to fix. The lighting that's always been slightly harsh. The front door that demands a specific angle to unlock. The thermostat that needs attention every time the season changes. None of it feels urgent enough to call someone about — but all of it is solvable, often for less than a nice dinner out. This isn't a list of renovations. It's a guide to the small upgrades that homeowners consistently describe as their best low-cost decisions — the ones they wish they'd made two years earlier. It also covers the ones that disappointed nearly everyone who tried them, because that's the half of the story most articles skip.Quick Answer: The Most Worthwhile Affordable Home Upgrades The best affordable home upgrades include smart thermostats, dimmer switches, under-cabinet LED lighting, and bidet attachments. Most cost between $15–$250, require no professional installation, and deliver daily quality-of-life improvements that homeowners consistently describe as their best low-cost decisions. Top 8 picks at a glance:Dimmer switches ($15–$40): Immediate atmosphere transformation, 15–20 min install Smart thermostat ($100–$250): 8–15% average energy savings, 12–24 month payback Under-cabinet LED lighting ($30–$80): Functional kitchen upgrade with real aesthetic value Bidet attachment ($30–$80): Daily comfort + toilet paper savings over 12–18 months Smart plugs with energy monitoring ($15–$35): Reveals hidden energy waste on day one Weatherstripping ($20–$60): Silent upgrade that reduces heating/cooling loss year-round USB/USB-C wall outlets ($15–$25): Eliminates adapter clutter with disproportionate daily satisfaction Motion-activated lights ($20–$50): Convenience and passive energy saving combinedAffordable Home Upgrades: Cost vs Daily Impact at a GlanceUpgrade Avg Cost DIY Difficulty Daily Impact Payback PeriodDimmer switches $15–$40 ea Easy ⭐⭐⭐⭐⭐ Immediate (comfort)Smart thermostat $100–$250 Moderate ⭐⭐⭐⭐⭐ 12–24 mo (energy)Under-cabinet LED lighting $30–$80 Easy ⭐⭐⭐⭐⭐ Immediate (functional)Bidet attachment $30–$80 Easy ⭐⭐⭐⭐⭐ 12–18 mo (paper savings)Smart plugs (energy monitoring) $15–$35 Very Easy ⭐⭐⭐⭐ Immediate (awareness)USB/USB-C wall outlets $15–$25 Easy ⭐⭐⭐⭐ Immediate (convenience)Weatherstripping $20–$60 Easy ⭐⭐⭐ 12–24 mo (energy)Motion-activated lights $20–$50 Easy ⭐⭐⭐⭐ Immediate (convenience)Smart door lock $100–$250 Moderate ⭐⭐⭐⭐ Immediate (convenience)Under-sink water filter $50–$150 Moderate ⭐⭐⭐⭐ 6–12 mo (vs bottled)Cabinet hardware replacement $40–$120 Easy ⭐⭐⭐ Immediate (aesthetic)New showerhead $30–$80 Very Easy ⭐⭐⭐⭐ Immediate (comfort)Why This Question Keeps Getting Honest Answers Online There's something specific about home improvement advice that gets better the longer someone has lived with a decision. First-week reviews are enthusiastic. Six-month reviews start to surface the real friction. Two-year reviews — the kind you find in deep Reddit threads on r/homeimprovement and r/DIY — are where the genuinely useful information lives. "Wish I'd done this years ago" is a phrase that shows up constantly in those threads. Not about kitchen renovations or bathroom remodels. About dimmer switches. Bidet attachments. Under-cabinet lighting. The small stuff that affects something you interact with every single day. That's the pattern this article is built around — not what looks good in a before/after photo, but what actually changes daily life over the long haul. The "Daily Touch" Test — How to Evaluate Any Upgrade Before spending anything, ask one question: does this affect something I physically touch, see, or interact with every single day? If yes, it's worth optimizing. If you interact with it once a month, it's not your first priority. A garage storage system is satisfying on a Saturday. A light switch you hit every evening at 6pm is something you interact with 365 times a year — the cumulative impact of improving it is far higher than a weekend project you'll mostly forget about. This test cuts through the noise faster than any budget calculation.Smart Home Upgrades That Actually Changed How People Live There's a specific moment that happens with the right smart home upgrade that doesn't happen with most home improvements: you forget you installed it. That sounds like failure. It isn't. It means the technology became infrastructure — it works seamlessly enough that you stop thinking about it and start depending on it. That's the bar. Not impressive demos. Not automation routines that make guests say "cool." Quiet, consistent, daily usefulness. The Smart Thermostat — High Setup Effort, Real RewardThe honest case for a smart thermostat isn't the marketing number. Nest claims up to 23% energy savings. Ecobee says similar things. The real-world average for most households is closer to 8–12% on heating and cooling costs — roughly $50–$150/year depending on your utility rates, climate, and how disciplined (or not) you were with your old thermostat. At a $150–$250 purchase price, that's a 1–3 year payback. For most households, that's a reasonable return. But here's the more honest pitch: the real value isn't the schedule optimization — it's the data. The first time the app shows you a heating runtime graph broken down by hour, you'll understand exactly where your gas or electric bill is going for the first time. That visibility changes behavior more than any automation rule. ⚠️ 5-Minute Check: Is Your Home Ready for a Smart Thermostat? Not all smart thermostats work with all HVAC systems. Installing an incompatible one can damage control boards. Do this before buying: Step 1: Turn off power to your HVAC system at the thermostat or breakerStep 2: Remove the current thermostat cover — usually one screw or a snap-off plateStep 3: Photograph the wiring before touching anything — this step is importantStep 4: Count the wires and check terminals — look specifically for a wire on the "C" terminalStep 5: Visit Ecobee's or Nest's online compatibility checker and enter your wire configurationNo C-wire found? Ecobee includes a Power Extender Kit that solves this for most systems. Nest has a workaround for some configurations using the Rh wire. Don't guess — use the manufacturer's tool.2-wire system? (Heat-only, older boiler systems) Options are limited. Check Ecobee EMS or Honeywell's heat-only compatible lineup before purchasing anything.Nest vs Ecobee — the distinction that actually matters: The Nest gets more marketing attention, but the Ecobee with remote sensors is often the better fit for larger homes or homes where different rooms run at significantly different temperatures. Nest learns your schedule; Ecobee actually measures where you are. That distinction matters more than it sounds if your bedroom is consistently 5°F warmer than your living room. One more thing most people miss: Configure the HVAC filter reminder on day one, before you replace the thermostat cover. It takes 30 seconds and prevents the single most common HVAC maintenance failure. Most homeowners never find this setting.Smart Thermostat: Pros & Cons✓ Pros ✗ ConsReal energy savings of 8–15% average (real-world, not manufacturer claim) C-wire required for most models; missing C-wire needs adapter or compatible modelRemote control and scheduling via app — especially valuable for irregular schedules Incompatible with some 2-wire systems, certain heat pump configs, and radiant floor setupsUsage reports reveal exactly where your energy goes, hour by hour App dependency: manufacturer cloud shutdown reduces functionalityBuilt-in HVAC filter reminder (set this on day one — it's underused) Learning mode takes 1–2 weeks to optimize before acting "smart"Most work without any hub — direct Wi-Fi connection Limited added value if your household already has very disciplined manual habitsWhen to skip it: If you already turn your thermostat down manually every night and you're in a mild climate, a smart thermostat's payback period stretches past 3 years. For you, weatherstripping is the better first move.🇬🇧 UK homeowners: Combi boilers use a different control wiring standard — not all US smart thermostat models are compatible with every combi boiler configuration. Nest's UK site has a specific compatibility checker. Use it before buying. British Gas Hive is worth considering for its strong native UK compatibility. 🇨🇦 Canadian homes: Ecobee is a Canadian company (Toronto-based) with strong support for Canadian HVAC configurations. Freeze protection mode is available on most models — configure it before winter. 🇦🇺 Australian homes: Cooling optimization is the priority in most climate zones. For ducted reverse cycle AC, Nest AU and Ecobee both work with limitations — verify compatibility for your specific system.Smart Plugs — Start Here If You've Never Done Any of This Zero installation anxiety. Zero risk. No wiring. Smart plugs are the best possible first smart home device, and the reason is simple: if you don't like it, you unplug it. But the more interesting use case isn't the on/off scheduling — it's energy monitoring. A $20 smart plug with a calibrated energy sensor revealed something unexpected: an idle gaming PC drawing 180 watts constantly. Just sitting there, doing nothing in particular, costing real money. A laser printer drawing 8W 24/7. A TV on standby pulling more than expected. That kind of awareness — seeing exactly what each device costs to run — changes three or four habits immediately without any deliberate effort. That's the real value proposition. Worth knowing before you buy: cheap smart plugs are fine for basic on/off switching. They're not fine for energy monitoring — the sensors in the $8 range have measurement errors significant enough to make the data nearly useless. If you're buying for energy awareness, spend $15–$25 for a model with a calibrated sensor. Kasa EP25 is the standard recommendation at this price — Matter-compatible, accurate monitoring, no hub required. One non-negotiable rule: Never use cheap smart plugs for high-draw appliances. AC units, space heaters, electric dryers — these draw current that budget smart plugs aren't rated for. It's a fire risk. Spend properly here or don't use a smart plug for these devices at all. Pick your voice assistant platform first (Alexa, Google Home, or Apple HomeKit), then choose your plug brand accordingly. Buying devices that don't match your ecosystem just creates another app silo.Motion-Activated Lighting — The Upgrade You Stop Noticing Because It Just Works The best compliment you can give smart home tech is "I forget it's there." Motion-activated lighting earns this more reliably than almost any other category. The use cases that work best: hallway at 2am, staircase after dark, garage when your hands are full, bathroom night light that doesn't blind anyone, outdoor path lighting from dusk to dawn. These are all situations where reaching for a switch is genuinely inconvenient — and where motion activation removes a tiny but daily friction point. Battery vs hardwired comes down to your situation. Battery-operated motion lights are genuinely useful for areas without existing wiring — closets, garages, basements. They also install in about five minutes. The trade-off is battery replacement and slightly slower response. Hardwired options are more reliable and permanent, but they require the same basic electrical comfort as a dimmer switch. The motion sensor that's been running for six months without anyone thinking about it has done its job perfectly.Smart Door Locks — Genuine Quality-of-Life or Gadget? The honest answer: it depends entirely on your household. If you live alone and rarely lose your keys, a smart lock is probably a convenience upgrade that doesn't change much. If you have teenagers who forget keys, regular houseguests, a cleaning service, or you travel frequently, it's a different story. Households with multiple people who come and go on varied schedules consistently rate smart locks among their most useful upgrades. The security issue most homeowners overlook: The weakest point on most front doors isn't the lock — it's the strike plate, held in by 1-inch screws that pull out of soft wood framing in seconds under force. A 3-inch security strike plate with 3-inch screws costs $10–$20 and installs in 10 minutes. Install it when you install the smart lock. It does more for actual security than any lock upgrade.⚠️ Safety reminder: Always test your smart lock with the door open before relying on it. Confirm the physical key backup works before completing setup. A dead battery on a keypad lock is manageable — but only if you know what to do.Budget note: Budget smart locks in the $60–$80 range have a specific failure pattern: connectivity drops, delayed response, and firmware that stops getting updates. This is the one category where spending mid-range isn't optional. Schlage Encode Plus, August Wi-Fi Smart Lock, and Yale Assure Lock 2 are the reliable choices. What Happens When the Battery Dies Most keypad locks have a 9V contact point on the exterior of the lock — touch a 9V battery to it and it provides enough emergency power to enter a PIN and get inside. Show every person in your household where this is. The time to discover it is not at midnight in the rain. Set a phone calendar reminder for annual battery replacement, regardless of what the indicator light says.Smart Home Ecosystem Quick Reference (2026)Platform Voice Control Strength Hub Required? Matter SupportAmazon Alexa ✓ Widest device compatibility No (most devices) ✓Google Home ✓ Best automation logic No (most devices) ✓Apple HomeKit ✓ Best privacy/local processing Sometimes ✓Samsung SmartThings ✓ Best Z-Wave/Zigbee range Yes (hub) ✓Matter (universal) All of the above Future-proofed cross-platform No NativeWhen in doubt, buy Matter. Matter-certified devices work across all platforms above — it's the single best future-proofing decision available in 2026.✓ Build a Smart Home That Actually Makes Sense — In This Order ☐ Start: 2–3 smart plugs (energy monitoring type) — learn your usage patterns first☐ Next: Smart thermostat — run the C-wire compatibility check before purchasing☐ Then: Smart lighting in the room you spend the most evening time in☐ Add: Motion-activated lights for hallway, staircase, or garage☐ When ready: Smart door lock — front door only, to start☐ Upgrade: Smart smoke/CO detector — this is a safety upgrade, not a convenience one☐ Consider: Video doorbell once basic automation feels comfortable☐ Advanced: Whole-home energy monitor (Emporia Vue or Sense) once usage patterns are understood The biggest mistake first-time smart home buyers make isn't choosing the wrong device — it's not choosing an ecosystem first. Once you have 10 devices across 4 different apps, the "smart" home starts feeling less smart and more like a second job.Lighting Upgrades — The Most Underrated Category in Home ImprovementArchitects charge significant fees to design lighting plans. The reason is that lighting is the fastest and most powerful way to change how a space feels without changing anything structural. A homeowner with a $40 budget and a free afternoon can achieve 80% of that result with a few dimmer switches. This is genuinely one of the best-kept secrets in home improvement — not because it's obscure, but because most people don't fully believe it until after they do it. Dimmer Switches — The $18 Upgrade Most Homeowners Wish They'd Done Years EarlierHere's what nobody explains clearly in most installation articles: the hardest part isn't the wiring. It's the old switch plate that's been painted over three times and won't come off cleanly. Have a flathead screwdriver and a utility knife ready. Once the plate is off, the actual wiring takes 10 minutes. Your first dimmer switch will take 20–40 minutes — including the time you spend second-guessing yourself. The third one takes 10 minutes. Confidence is the variable.⚠️ Electrical safety — read this first: Always turn off the circuit breaker, not just the wall switch. Verify power is off with a non-contact voltage tester ($12–$18) before touching any wiring. Smart dimmer switches often require a neutral wire — homes built before approximately 2000 may not have one in the switch box. Check your wiring configuration before purchasing.The before/after is immediate: turn the living room dimmer down to 40% for movie night and the room genuinely feels like a different space. That's a $18 switch. Most homeowners who do this say — with some frustration — that they lived with bad overhead lighting for years before doing it. Lutron Caseta is genuinely better than a $15 Leviton dimmer. But if you're not building a full smart home system and just want better light control in one room, the Leviton works fine and the $25 difference is real money. Buy the Lutron if you're going all-in; buy the Leviton if you're dipping a toe in. 🇬🇧 UK note: UK 2-way switch wiring uses different terminology and wire colors (blue/brown/grey vs US black/white) but the same functional concept. UK-specific smart dimmers are required — not US models.What to Check Before Buying a Dimmer SwitchLight Type Works with Standard Dimmers? NotesIncandescent ✓ Yes Universal compatibilityDimmable LED (rated) ✓ Mostly Check bulb+dimmer compatibility list on manufacturer siteNon-dimmable LED ✗ No Will buzz, flicker, or fail earlyCFL ✗ Not recommended Most CFLs not designed for dimmingSmart bulbs (Hue, LIFX, etc.) ✗ Never Use the smart bulb's own app-based dimming insteadHalogen ✓ Yes Works well, similar to incandescentAlso check: Does your switch box have a neutral wire? Smart dimmers (Lutron Caseta, Leviton Decora Smart) require it. Standard mechanical dimmers do not.Under-Cabinet LED Lighting — Function and Atmosphere for Under $80 Two things are true about kitchen lighting simultaneously: overhead lights make food prep possible, and they make kitchens look terrible. Under-cabinet lighting fixes the second problem while improving the first. Task lighting directly over the counter makes meal prep noticeably easier. The same lights at 30% create ambiance that makes the kitchen feel intentional rather than utilitarian. Both uses from the same $40–$80 kit. Plug-in vs hardwired: Plug-in LED strips install in 10 minutes and are reversible — good if you rent or aren't sure you want to commit. Hardwired options look cleaner, no cord to hide, but require the same basic outlet-box comfort. For most kitchens, plug-in is the right call unless you're doing a broader kitchen refresh. Worth knowing before you buy: Under-cabinet LED kits fail at the driver (transformer), not the LED strip. If you buy a kit with a proprietary driver that can't be replaced separately, the whole kit is trash when the driver fails at year 3. Buy a kit where the driver is a standard replaceable part. This distinction is worth knowing before you purchase. Smart vs. standard: the extra $20 for app control is worth it if you already have a smart home ecosystem. It's not worth it if it means another standalone app.Replacing Builder-Grade Fixtures — When It's Worth the Effort "Builder grade" has a specific meaning: minimum-spec fixtures installed to pass code, not for quality or aesthetics. The most universally disliked example is the flush ceiling fixture — the semi-flush dome light that became known colloquially as a "boob light" — installed in bedrooms, hallways, and living rooms across decades of residential construction. Replacing one with a simple flush-mount or semi-flush LED fixture that costs $30–$60 makes a room look like it was updated by someone who actually cared. The rooms with the highest return: entry, dining room, bedroom, primary bathroom. These are spaces where lighting is part of the visual experience, not just a functional necessity. DIY vs electrician: Check your junction box's weight limit (stamped inside) before buying a fixture. If the fixture weighs more than what the box is rated for, you need a fan-rated or fixture-rated box — a quick hardware store fix, but check first.Smart Bulbs vs Smart Switches — The Ongoing Debate For most homeowners in most situations: smart switches win. Smart switches preserve normal operation — anyone can flip them without thinking, they work without a phone, and they don't conflict with how the rest of the house operates. Smart bulbs need constant power; if anyone cuts power at the switch (which everyone does, instinctively), the bulb loses its Wi-Fi connection and automation stops working. Smart bulbs win when: you're renting and can't change switches, you need color or tunable white temperature, or you don't have a neutral wire and the bulb can replace a smart switch. The critical warning: Never install a smart switch that controls power to a fixture that also contains smart bulbs. The two systems will fight — the smart bulb needs constant power to receive app commands, and the smart switch cuts that power. Choose one or the other per fixture, not both.The Invisible Upgrades — Things You Feel But Never See Some of the best home upgrades are completely invisible. You won't see them in a photo. You won't point them out to guests. You'll just notice, every day in winter, that the house doesn't have that cold draft anymore — or that you stopped thinking about how much energy you're wasting. Weatherstripping — The Draft You've Been Ignoring Is Costing More Than You Think Late fall, before the heating season, is when weatherstripping problems are most obvious — and also when the motivation to fix them is highest. If you wait until January, you'll feel the draft but won't want to deal with it until spring. Do it in October. Every year that you don't is just a heating bill being paid to the outdoors. Find Where Your Home Is Losing Heat (Takes 10 Minutes) Step 1: On a cold or windy day, light a stick of incense or hold a lit candleStep 2: Move it slowly along door frames, 1–2 inches from the surfaceStep 3: Repeat along window edges, outlet covers on exterior walls, and attic access panelsStep 4: Watch for lateral smoke movement — any sideways pull indicates air infiltrationStep 5: Mark each leak with painter's tape while you workStep 6: Measure total linear footage needed and buy weatherstripping appropriate to each gap typeFor door bottom gaps: Door sweep or automatic door bottom (best seal)For door frame sides/top: Foam tape for temporary, rubber bulb seal for lasting fixFor windows: V-strip tension seal for sliding/double-hung; foam tape for gaps over 3/8"The product quality distinction matters more than most people realize. Foam tape costs $5–$8 but compresses and fails within one heating season. Rubber bulb seal costs $12–$20 and lasts 3–5 years. Buying foam tape annually is more expensive over time, and more annoying, than spending the extra $6 once for the version that works. 🇨🇦 Canadian homes: Extreme temperature differential between inside and outside makes weatherstripping unusually high-value. Exterior door quality and threshold seals should be priority one before any smart home work. 🇬🇧 UK older homes: Drafts frequently come from window glazing, not just door frames. Check single-glazed or older double-glazed units specifically — the gap between frame and glass is a common culprit.Smart Power Strips and the Energy Your Devices Waste While "Off" A typical entertainment center setup — TV, cable box or streaming stick, soundbar, gaming console — draws 30–60 watts on standby. Constantly. Not when you're watching anything. Just sitting in standby mode, waiting. That's vampire power, sometimes called phantom load. The solution isn't inconvenient. A smart power strip that cuts standby power when the primary device (say, the TV) is off eliminates this automatically. Set it once, forget it. The energy monitoring version — worth the extra $10–$15 — also shows you exactly how much each device costs to run over time. This is also the awareness that makes other habits change. Once you see that a single cable box costs more to run on standby than your refrigerator costs to run normally, the cable box starts seeming optional.USB and USB-C Wall Outlets — The Smallest Upgrade With Disproportionate Daily Satisfaction This one sounds too minor to matter. It doesn't feel that way after living with it for a week. The specific scenario: three devices that need charging, one power strip, and two chunky adapter blocks that take up three slots each, meaning a six-outlet strip effectively has two usable spots. USB and USB-C wall outlets eliminate this. The charger stays in the wall permanently; the cable goes straight to the device. What to look for in a USB outlet: At least 2.4A per port (anything less charges slowly). USB-C ports should be Power Delivery (PD) capable — look for PD labeling on the packaging. A combined USB-A and USB-C outlet on the same faceplate covers most devices. Installation is the same process as a standard outlet replacement, and significantly less anxiety-inducing than dimmer switches because outlet boxes always have a neutral wire.Bathroom Upgrades Homeowners Consistently LoveBidet Attachments — The Upgrade People Laugh at Until They Try One This is the upgrade with the highest "I can't believe I waited this long" rate. If you haven't used one, the reaction feels like social proof; if you have, you already know the reaction is accurate. The practical case is straightforward. An average household spends $80–$120/year on toilet paper. A mid-range bidet attachment costs $35–$60. Payback is typically under a year. After payback, it's pure savings. Cold water reality in cold climates: A cold-water bidet attached to exterior plumbing in Minnesota or Ontario in January will use genuinely cold water. In mild climates, this is barely noticeable year-round. In genuinely cold climates, a heated bidet seat — $150–$300 range — isn't an indulgence. It's a practical upgrade. The Tushy Classic is the standard entry-level recommendation: does exactly what it promises, installs in under 30 minutes with no tools except possibly an adjustable wrench, makes the point immediately. The Bio Bidet SlimEdge steps up with adjustable pressure and a slimmer profile that fits more toilet designs.Safety reminder: Turn off the toilet water supply valve before installation. Have a towel ready — there will be drips even after shutoff.Showerhead Replacement — Simplest Upgrade, Daily Impact Fifteen minutes. Adjustable wrench. Plumber's tape. That's the entire install. What actually matters when choosing a showerhead: flow rate (check local restrictions — California, for example, caps at 1.8 GPM; most areas allow 2.0–2.5 GPM), spray pattern range, and whether handheld or fixed suits your bathroom better. EPA WaterSense certified heads save roughly 20% water usage compared to standard showerheads without meaningfully reducing pressure for most users. The Moen Attract Magnetix with its magnetic docking handheld deserves a mention — the magnetic connection sounds like a gimmick until you use it daily and realize you never fumble with the holder again. 🇬🇧 UK note: Check thermostatic bar mixer compatibility before buying a pressurized rain shower head. Not all existing UK mixer valves handle the pressure requirements — verify before purchasing.Under-Sink Water Filtration — When the Bottled Water Math Stops Making Sense A household spending $30–$50/month on bottled water spends $360–$600/year. A standard under-sink carbon filter costs $50–$100 installed, plus $20–$40 in filter replacements every six months. The math becomes favorable within the first year, and the convenience of unlimited filtered water on tap is worth something independently. Standard carbon filter vs reverse osmosis: A standard carbon filter removes chlorine, sediment, VOCs, and many heavy metals — sufficient for most municipal water supplies. Reverse osmosis removes more (including dissolved solids and minerals) but wastes 2–4 gallons of water for every gallon filtered. For most urban homeowners on municipal water, carbon filtration is the appropriate choice. The maintenance issue nobody mentions clearly: An overdue filter doesn't just stop working — it can actually concentrate contaminants to levels higher than unfiltered water. Set a calendar reminder for replacement on installation day. A six-month filter that runs for 18 months is actively making your water worse.Safety reminder: Turn off the water supply valve under the sink before beginning. Have towels ready — there will be drips.Kitchen Upgrades That Cost Almost Nothing and Look Like They Didn't Cabinet Hardware — $60 That Can Transform a KitchenNew cabinet pulls and knobs are among the highest visual-impact upgrades per dollar in residential home improvement. Brass hardware on dark-painted cabinets reads as contemporary and deliberate. Simple brushed nickel on white or cream cabinets reads as clean modern. Either combination looks intentional in a way that builder-grade hardware almost never does. The common mistake: hole spacing varies. 76mm/3 inches (center-to-center) is the most common standard, but it's not universal. Measure your existing hardware before ordering anything — don't assume. Also: order 10% more than you think you need. A mis-drilled cabinet door is easier to fix if you have a spare pull. Calculate quantity carefully: every drawer face typically gets one pull; every door typically gets one pull or knob. Count all of them before ordering.Faucet Replacement — The DIY Job That Feels More Intimidating Than It Is Most kitchen faucets use standard mounting hole configurations — one hole for single-handle, three holes for two-handle with sprayer. As long as you match the hole count of your existing faucet, installation is straightforward: turn off supply valves, disconnect the old supply lines, remove the mounting nut, drop in the new faucet, reconnect. The honest friction point is the old mounting nut under the sink that won't budge. It's often rusted or over-tightened, in an awkward position with limited hand clearance. The solution: penetrating oil, 10 minutes of patience, and a basin wrench (a specialized tool, about $15–$20, that makes this job 10 times easier). This one problem causes most DIY faucet replacements to take an hour longer than expected. Know this going in.How to Prioritize — A Simple Framework for Your Home Upgrade List Decision paralysis is real in home improvement. The list of things to potentially improve is always longer than the time and budget to do them. These questions cut through it. ✓ 6 Questions to Ask Before Spending a Dollar ☐ Does this affect something I physically interact with every single day?☐ Will I notice the improvement within the first week — not after six months of adjustment?☐ What are the hidden costs? (Batteries, subscriptions, replacement parts, hub requirements)☐ If I move, can I take it with me — or is it easily reversible without damage?☐ Does it work with my existing smart home platform, or does it create another app silo?☐ What does maintenance look like at 1 year, 3 years, 5 years?Start Here: What Do You Actually Want to Improve? PRIMARY GOAL? │ ├── SAVE MONEY ON BILLS │ └── Smart thermostat → Weatherstripping → Smart plugs (energy monitoring) │ └── Advanced: Whole-home energy monitor (Emporia Vue or Sense) │ ├── MAKE DAILY LIFE MORE CONVENIENT │ └── Smart lock → USB outlets → Motion lights → Smart plugs │ └── Advanced: Full smart lighting + automations │ ├── IMPROVE HOW YOUR HOME FEELS │ └── Dimmer switches → Fixture replacement → Fresh paint → Under-cabinet lighting │ └── Advanced: Smart lighting with scene presets │ ├── IMPROVE LONG-TERM HOME QUALITY │ └── Water filtration → Air quality → Better insulation → Organization │ └── Advanced: DIY home energy audit │ └── NEW TO SMART HOME TECH └── 1 smart plug → Learn usage patterns → Smart thermostat → Expand gradually └── Buy Matter-compatible devices throughoutWhat a Complete Smart Home Starter Upgrade Actually CostsUpgrade Budget Option Mid-Range PremiumSmart thermostat $70 (Honeywell RTH9585) $179 (Ecobee Smart) $249 (Nest Learning)Smart plugs (4-pack) $25 (Kasa EP25) $45 (Wemo Mini 4-pk) $65 (Lutron Caseta)Dimmer switches (3) $45 (Leviton 3-pk) $90 (Lutron Caseta 2-pk) $150 (Lutron RA2)Smart bulbs (4-pack) $25 (Govee Wi-Fi) $55 (LIFX Mini 4-pk) $120 (Hue White + hub)Under-cabinet LED $30 (wired standard) $55 (Kasa LED strip) $90 (Hue Play)Total ~$195 ~$424 ~$674Budget tier: Fully functional with minor ecosystem limitations. Mid-range: Best value-to-quality ratio for most homeowners — this is the sweet spot. Premium: Only justified if building a multi-room integrated system.The Stacking Effect — Why 8 Small Upgrades Beat 1 Big OneThis is the framing shift that changes everything about how to think about home improvement budgets. No single $400 upgrade transforms a home. But $400 distributed across eight strategic categories — better lighting control, updated fixtures, cabinet hardware, weatherstripping, a bidet, a smart plug, a decent showerhead — creates a compounding effect that feels like a renovation. Better lighting makes a room feel newer. Updated hardware makes cabinets look intentional. A draft-free house feels tighter and quieter. Each improvement makes the others feel more deliberate. The perception change is real. Visitors notice — they just can't identify what changed. That's the best possible outcome from small-upgrade spending.The Upgrades That Sounded Great — and Delivered Disappointment For every upgrade that genuinely delivered, there are others that homeowners installed, lived with for six months, and quietly removed or ignored. The frustration isn't just financial — it's the time and optimism spent on something that ended up in a drawer. Here's what consistently disappoints. Cheap Smart Devices — When Saving $20 Costs More in Frustration The failure pattern in budget smart devices isn't always immediate. It shows up at 18 months, when the app gets abandoned by the manufacturer and the device becomes a dumb device with an extra step. Or at month 3, when the Wi-Fi connection becomes intermittent and the "smart" plug requires manual intervention half the time. The specific failure modes by category:Smart plugs: Budget is fine for on/off. Not fine for energy monitoring accuracy. Smart bulbs: Cheap no-name LEDs often fail at 6 months, start flickering, and emit light that shifts color temperature over time. Smart locks: This is where underspending genuinely creates daily frustration. Connectivity failures on the one device you need to work reliably — your front door — is a specific kind of annoying that wears thin fast.The rule of thumb: the more frequently you interact with a device, the more the quality difference between budget and mid-range actually matters.Peel-and-Stick Upgrades — The 6-Month Honeymoon Peel-and-stick backsplash looks acceptable in photos and feels like a win when you first install it. In a kitchen environment — steam, grease, heat fluctuation — the adhesive begins to fail within months. Corners lift. Seams separate. By the one-year mark, it often looks worse than before. Removable wallpaper has improved significantly in the past five years, but it still behaves poorly in humid rooms. Bathroom and kitchen applications are where it fails first. Contact paper works well for low-traffic, low-friction surfaces — inside drawers, shelf lining, the back of shelving units. It fails on any surface that gets touched regularly or exposed to heat. These products aren't home upgrades. They're temporary improvements that have a shelf life. Describing them as anything more than that sets up disappointment.Over-Automation — When Smart Home Gets Annoying The trap is subtle: you automate everything, and then you live with a home that acts unexpectedly. The most common example: motion-activated lights in the living room that turn off while you're watching a movie because nobody moved for 15 minutes. Or a morning routine that runs correctly on Tuesday but wakes everyone up on Saturday. Or a lock that auto-unlocks when your phone is nearby but unlocks when your neighbor's phone has the same SSID. The rule: automate high-frequency, low-attention tasks — outdoor lighting, sleep mode, HVAC scheduling. Keep manual control for anything that requires contextual judgment. Your house shouldn't be making decisions that surprise you.Avoid These Before Spending Anything These are the most common smart home and upgrade mistakes — specific enough to be actually useful:Buying smart home devices before choosing a platform ecosystem — pick one voice assistant platform first Purchasing a smart thermostat without running the C-wire compatibility check — check before ordering Installing smart dimmer switches without verifying neutral wire presence in older homes Choosing the cheapest smart lock — the one category where $20 in savings creates consistent daily frustration Installing smart bulbs AND a smart switch on the same fixture — they conflict; choose one Buying a smart home starter kit instead of building intentionally by use case Installing all smart home upgrades simultaneously — learn each device before adding the next Neglecting the strike plate when upgrading to a smart lock (replace with 3-inch screws) Using foam weatherstripping tape expecting it to last more than one heating season Buying non-dimmable LED bulbs, then being surprised when the new dimmer buzzesRegion-Specific Considerations Most home improvement content is written for US homes in mild climates. If you're reading this in the UK, Canada, or Australia, some of the standard advice needs adjustment. UK Homeowners — What's Different UK homes use ring main electrical wiring rather than US-style home runs — smart plugs work identically, but smart switches require UK-specific models. US-designed smart switches won't work in UK switch boxes. Combi boiler compatibility is the most important check for smart thermostat buyers. Not all configurations are supported by any single brand. Nest has a UK compatibility checker; Ecobee has UK-specific guidance. British Gas Hive is specifically designed for UK systems and worth considering if international compatibility feels uncertain. Most smart plug listings on UK Amazon are already UK-spec (13A), but verify before buying anything listed as an "import."Canadian Homes — Heat-First Upgrade Logic Extreme cold changes the upgrade priority hierarchy. Before anything else: weatherstripping and a smart thermostat. Heating season runs longer, baseline energy usage is higher, and the ROI on energy-efficiency upgrades is correspondingly better. Ecobee is worth knowing as a Canadian company — the Toronto-based team has strong understanding of Canadian HVAC configurations and the app handles extreme temperature differentials well. Their freeze protection mode is real and worth configuring before the first hard freeze of the year. Smart thermostat savings in a climate where the heat runs for six or seven months are genuinely higher than manufacturer claims suggest — because those claims are calibrated to moderate US climates.Australian Homes — Cooling-First and Solar Integration In most Australian climate zones, cooling optimization comes before heating. The priority order reverses: smart thermostat for ducted reverse cycle AC is a higher priority than weatherstripping in Perth or Brisbane. In cooler southern zones — Melbourne, Hobart — the logic aligns more closely with northern hemisphere priorities. For homeowners with solar panels, smart plugs and time-of-use scheduling become genuinely high-value when appliance operation is aligned with solar generation windows. Running the dishwasher, washing machine, and EV charger during peak solar hours is a meaningful cost optimization that basic automation handles well. Smart pool pump controllers are an AU-specific upgrade worth investigating — pool pumps are significant energy consumers, and automated scheduling around off-peak rates and solar generation is one of the highest-ROI smart home additions available in AU climates.Common Myths vs What Actually HappensThe Claim The Reality"Smart thermostats save up to 23% on energy bills" Real-world average for most households: 8–12%. Highly dependent on pre-existing habits and climate zone."LED lighting pays for itself in months" Only if the bulb runs 4+ hours daily. Rarely-used lights can take 2–5 years to break even."A smart lock makes your home more secure" Not if the strike plate uses 1-inch screws. Security starts with the door frame, not the lock."Bidet attachments require a plumber" No. Cold-water bidets install in under 30 minutes with no specialized tools."Generic smart plugs are as good as name brands" For on/off switching: essentially yes. For energy monitoring accuracy: no. For high-draw appliances: never risk it."Paint is just cosmetic, not a real upgrade" Fresh neutral paint in key rooms has one of the highest perceived-value-to-cost ratios in both real estate and homeowner satisfaction research."Smart home starter kits are the best way to begin" Most bundles pair devices that don't match real use cases or lock you into a single ecosystem. Build intentionally, not by kit.Frequently Asked Questions What home upgrade has the best return on investment? For resale value, minor kitchen refreshes, bathroom updates, and curb appeal improvements consistently rank highest. For daily quality-of-life ROI, smart thermostats, dimmer switches, and under-cabinet LED lighting rank highest among homeowners — because they affect things you interact with multiple times every single day. These two ROI calculations are different and both valid, depending on your goal. What is the cheapest home improvement that makes the most difference? Dimmer switches. At $15–$40 per switch and a 15–20 minute install, they transform the atmosphere of any room immediately. A house with good lighting control feels qualitatively different from one without. Most homeowners who install them say they wish they'd done it years earlier — and that reaction is hard to get from a $20 purchase. Is a smart thermostat actually worth the money? For most households, yes — with honest expectations. Real-world savings average 8–12% on heating and cooling costs, roughly $50–$150/year depending on utility rates and climate. At $150–$250 purchase price, payback is typically 1–3 years. If you already have disciplined manual thermostat habits, savings will be smaller. For many people the real value is visibility: seeing exactly where your energy goes changes how you use it. What home upgrades can renters do without asking the landlord? Fully reversible upgrades include: smart plugs (unplug on move-out), LED smart bulbs (swap back the originals when leaving), removable organizational systems using Command strips, showerhead replacement (keep the original in the cabinet), bidet attachments (remove on move-out), plug-in under-cabinet LED lighting, and tension-mounted shelving. USB outlet face plate inserts — which replace only the faceplate, not the outlet — also qualify in most lease contexts. Buy Matter-certified devices wherever available. Matter is the universal smart home standard now supported by Apple, Google, Amazon, and Samsung — devices work across ecosystems without lock-in. This eliminates the single biggest regret pattern in smart home history: buying devices tied to an ecosystem or protocol that got deprecated. Even if you're adding only two or three devices, choosing Matter-compatible hardware means you won't regret those purchases as your system grows. The Honest Takeaway The goal isn't a smart home. It's a home that works — one that reduces friction in daily life rather than adding it. Eight small upgrades chosen strategically will do more for how your home feels than one expensive renovation chosen impulsively. Better lighting, weatherstripping that actually seals, a thermostat that learns instead of demanding, a front door that works without thinking — none of these make it into magazine spreads. All of them make daily life noticeably better. The best upgrade isn't the one with the best specs. It's the one that reduces friction in something you do every single day. That's the only ROI metric that ultimately matters — and it's the one almost no upgrade calculator includes.Article covers smart home upgrades, energy efficiency improvements, lighting control, bathroom and kitchen upgrades, and home maintenance for US, UK, Canadian, and Australian homeowners. Pricing ranges reflect 2026 market conditions. Always verify product compatibility with your specific home systems before purchasing. Related Reading: Smart Toilet Guide: Real Features, Honest Costs & Everything That Changes After You Install One Home Energy Monitoring Systems: The Complete Homeowner's Guide (2026) The Homeowner Maintenance Cheat Sheet That's Actually Worth Saving
.webp)
Home Improvement Decisions I Regret — And the Smart Home Lessons They Taught Me
Some of these cost money. Some cost time. The worst ones cost both — and they started with decisions that made complete sense at the time.Quick Answer: The most common home improvement regrets involve smart home ecosystem lock-in, purchasing budget devices that lost software support, skipping ethernet or conduit during renovation, over-automating routines before understanding how you actually live, and prioritizing aesthetics over long-term infrastructure — all mistakes that consistently cost more to fix than they would have cost to prevent.I still think about the afternoon I stood in my kitchen genuinely arguing with a light switch. Not a person. A switch. I had just spent 45 minutes trying to figure out why a routine I'd built over a weekend had stopped working — again — and the answer turned out to be that a firmware update had silently changed how the device reported its state. My entire "smart" kitchen was temporarily dumb, and I had no one to blame but the series of quick decisions I'd made during a renovation eighteen months earlier. That experience changed how I think about smart home upgrades. Not because it was catastrophic — it wasn't, it just required an irritating Sunday afternoon to fix — but because it was the moment I realized how many of my "improvements" had actually created new, invisible categories of maintenance I'd never budgeted for. This isn't a list of things you already know. It's the stuff that only becomes obvious after you've lived with these decisions for two or three years.Smart Home Regrets at a GlanceRegret Type Who It Affects Most Difficulty to Fix Estimated Cost to CorrectWrong ecosystem choice Everyone Medium $300–$2,000Skipped ethernet during renovation Renovators Hard $800–$3,500Cheap smart devices Budget buyers Easy $150–$600No neutral wire Lighting upgraders Medium $50–$400 per roomOver-automation All smart home users Easy (time only) $0–$50Poor Wi-Fi infrastructure High-device-count homes Easy $150–$350Cloud-dependent security Security-focused homes Medium $100–$300Why Home Improvement Regrets Hit Different When Tech Is InvolvedA bad paint color is annoying. A bad tile choice is expensive. But a bad smart home decision? That one grows with you. It doesn't stay contained to the room you made it in — it follows your automations, your app, your monthly subscription, and eventually your relationship with the technology in your home. The reason tech-related home improvements carry such a high regret weight is that they create dependencies. A poorly chosen smart lighting system doesn't just mean you have lights you're unhappy with. It means your switch choices, your hub, your routines, your voice assistant commands, and eventually your devices in other rooms are all quietly influenced by that one early decision. Unlike a bad paint color, a bad ecosystem decision doesn't peel off the wall. The other thing most articles miss: the regret often doesn't surface immediately. At month one, everything works fine, you're excited, the automation fires and the lights dim and it all feels like the future. By month eighteen, you've noticed the app hasn't been updated in six months. By month thirty, the device shows up on a Reddit thread titled "is [brand] abandoning their product line?" You're not wrong to feel blindsided. But looking back, the signals were always there. The Problem With Making Smart Decisions During a Renovation Rush Here's something no one talks about: renovations create terrible decision-making conditions. You're managing contractors, budgets, timelines, and a hundred decisions per day. The question "what smart switches do you want?" lands at hour three of a day that started with a flooring debate and ends with a plumbing change order. You go with whatever you already have, or whatever your contractor knows, or whatever was on sale at the hardware store that week. That's how most bad smart home decisions get made — not through ignorance, but through exhaustion. The infrastructure decisions made in those moments tend to outlast everything else in the renovation. The cheap smart switches stay. The missing conduit stays missing. And the neutral wire situation you never thought to check becomes someone else's expensive problem five years later — except that someone else is future you.Regret #1 — Choosing the Wrong Smart Home EcosystemI picked my first smart home platform because it was what my first smart speaker ran on. I didn't know I was signing a three-year lease. That's not an exaggeration. The ecosystem you choose first doesn't just affect your current devices — it shapes which devices you'll buy next, which automations you can build, which hubs and bridges you'll need, and how much of your setup you'll need to replace if you ever want to change direction. By the time most homeowners realize they're on the wrong platform, they've invested enough that switching feels genuinely painful. The ecosystem lock-in problem is worse than it looks on a spec sheet because it compounds. Each new device you add deepens your commitment. Each automation you build is one more thing to rebuild on a new platform. And if the platform itself starts showing signs of instability — a product line gets killed, a hub loses a key integration, a monthly fee quietly appears — you have to decide whether to absorb the problem or absorb the cost of migrating. What Ecosystem Lock-In Actually Costs Over 3 Years People underestimate this. A lot.Phase Conservative Estimate Realistic EstimateInitial device investment $300 $800Devices that become incompatible $150 $450Subscription fees (3 years) $180 $540Replacement devices after migration $200 $700Time cost (reconfiguration, troubleshooting) — 15–40 hoursTotal 3-Year Real Cost $830+ $2,490+That $2,490 number isn't a worst-case scenario. It's what happens when you bought a solid collection of devices in an ecosystem that's now slightly misaligned with where the industry moved. Imagine if you were on a platform that actually got deprecated. Why Matter Protocol Doesn't Fully Solve the Problem (Yet) Matter — the cross-platform smart home standard backed by Apple, Google, Amazon, and others — was supposed to eliminate ecosystem lock-in. And it does help, genuinely. Devices that support Matter can work across multiple platforms without bridges or workarounds, which is real progress. But Matter isn't a silver bullet in 2026, and treating it as one leads to its own set of regrets. Not every device category has strong Matter support yet. Thread-based devices (the underlying network protocol Matter often uses) require a Thread border router in your mesh. Your existing non-Matter devices aren't magically upgraded. And the platforms themselves still compete for feature differentiation above the Matter baseline — which means certain advanced automations still lock you into a specific ecosystem's app. Matter is the right direction. It's just not a reason to buy carelessly today on the assumption that "it'll all work together eventually." The Brands That Have "Killed" Their Smart Home Products This list should be mandatory reading before choosing a platform:Wink (2020) — Wink Hub went to a subscription model overnight; thousands of users abandoned Insteon (2022) — Shut down abruptly with no warning; devices became inoperable the same day Logitech Harmony (2023) — Full product line discontinued; cloud service later shut down Iris by Lowe's (2019) — Entire platform shut down after massive investment from homeowners iRobot Genius app (partial, 2024) — Features removed, some older robots lost functionality Google Nest Secure — Discontinued with limited migration pathThe pattern isn't always incompetence. Sometimes it's acquisition, sometimes it's an unprofitable product line, sometimes it's a strategic pivot. The result for homeowners is the same regardless of cause. Platform Comparison for Regret Avoidance:Platform Best For Long-Term Risk Matter Compatible Local Control OptionGoogle Home Android users, Nest owners Medium (Google product kills) Yes LimitedAmazon Alexa Wide device compatibility Medium-Low Yes LimitedApple HomeKit iOS users, privacy-focused Low-Medium Yes StrongHome Assistant Advanced users, DIY Very Low Yes ExcellentSamsung SmartThings Mixed-brand households Medium Yes ModerateRegret #2 — Skipping Ethernet and Conduit During the RenovationAsk any experienced smart home installer what single thing they wish more homeowners knew during a renovation. This comes up every time. The single hour it takes to run conduit during a renovation is worth more than any smart device you'll ever buy. I didn't run conduit during my renovation. I told myself Wi-Fi would handle everything and that running cable through freshly framed walls was an unnecessary expense. That reasoning cost me $1,400 in electrician fees two years later when I needed a hardwired connection to a room where the Wi-Fi dead zone was creating constant device drop-offs. There's a specific frustration that comes with fishing a wire through a finished wall — and it's completely, fully, totally avoidable. The people who've done it describe it in almost identical terms: "I should have just done it when the walls were open." You hear this phrase in every smart home forum, every subreddit discussion, every conversation with anyone who's retrofitted network infrastructure into a finished home. Most homeowners overlook that conduit costs roughly $0.50–$1.00 per foot to install in open walls. An electrician fishing cable through finished walls typically charges $100–$200 per hour, and a single run can take most of a morning. What "I'll Just Use Wi-Fi" Costs You Two Years Later Wi-Fi is genuinely good now — Wi-Fi 6 and Wi-Fi 6E support fast, low-latency connections and handle many smart home use cases well. But "I'll use Wi-Fi for everything" has real limits that only appear under load. Video-based devices (cameras, video doorbells) are bandwidth-heavy and perform significantly better on 5GHz networks with strong signal. Smart TVs and streaming devices struggle with Wi-Fi congestion in dense environments. Home offices running on the same band as IoT devices experience interference. And battery-operated sensors that rely on 2.4GHz face a different problem: every neighbor's router competing for the same channels. Hardwired connections don't have interference issues. They don't drop during a router reboot. They don't compete with the neighbor's Sonos system. For devices that are fixed in place and benefit from consistent connectivity — smart TV, desktop computer, NAS, media hub, wired security cameras — ethernet is still the right answer in 2026. Pre-Renovation Smart Home Infrastructure Checklist If you're in the middle of a renovation — or planning one — this is the list to go through before your walls close. Print it out if you have to. BEFORE YOUR WALLS CLOSE — Smart Home Wiring Checklist□ Run Cat6 ethernet to every room where you may want a hardwired device □ Install conduit in walls wherever feasible — even if not using cables yet □ Run low-voltage wiring for future smart switches (confirm neutral wire access) □ Add electrical outlets at smart TV heights, desk positions, and cabinet undersides □ Install a dedicated network closet or media panel location □ Plan mesh Wi-Fi node positions before insulation goes in □ Add USB-C/A outlets in key locations (kitchen, office, bedroom) □ Run speaker wire if in-wall audio is a future possibility □ Add an outlet to the garage ceiling for future EV charging infrastructure prep □ Verify main electrical panel has capacity for future loadsWhich Rooms Need Hardwired Connections Most If you can only run ethernet to a few locations, prioritize in this order:Home office / dedicated workspace — Video calls, large file transfers, and anything requiring stable latency Living room / home theater position — Smart TV, streaming box, gaming console Network equipment location — Where your router, hub, and NAS will live Primary security camera positions — Especially outdoor, always-on cameras Smart home hub location — If using a local hub like Home Assistant, hardwire itRegret #3 — Buying Cheap Smart Devices to Save Money Upfront The $25 smart plug works great. Until it doesn't. And then you're digging through app settings at 11pm wondering why half your automations stopped — and whether the issue is the plug, the app, the Wi-Fi, or the firmware update that apparently shipped three weeks ago. I've owned both $30 and $150 versions of basically the same smart switch. The difference between them is nearly invisible on day one. It shows up around month eighteen, when the budget switch's app receives its last update and the manufacturer quietly moves on to their next product line. To be fair — cheap devices aren't always the wrong choice. If you're renting, experimenting with automation before committing, or setting up a temporary space, a $30 device makes complete sense. The regret only appears when you buy budget devices expecting them to anchor your permanent home setup. That's the miscalculation. The 18-Month Rule for Cheap Smart DevicesMost budget smart home brands follow a predictable lifecycle: strong initial launch support (to capture reviews and sales), steady updates for the first year, then declining attention as development resources shift to the next product generation. By 18–24 months, firmware updates slow. By 36 months, the app may show compatibility warnings on newer phone OS versions. Cheap Smart Devices ($15–$60)✅ Low upfront cost ✅ Good for testing and experimenting ✅ Replaceable without major financial pain ❌ Firmware support typically ends 18–36 months after launch ❌ Unreliable local control; heavy cloud dependency ❌ Privacy risks from unaudited data practices ❌ Replacement cost often exceeds quality alternative within 3 yearsQuality Smart Devices ($60–$200+)✅ Better long-term firmware support (3–7+ years from established brands) ✅ Matter/local control options more common ✅ More stable integration with major platforms ✅ Stronger privacy and security standards ❌ High upfront cost, especially for whole-home coverage ❌ Premium pricing doesn't guarantee against product discontinuation📌 Long-Term Reality Check: A $30 device that needs replacing twice in five years is a $90 device with extra frustration built in. Budget that cycle into your purchase decision from the start.Which Device Categories Are Worth Spending More On Not every smart device has the same consequence for failure. A smart plug that stops working is annoying. A smart lock that stops working is a security concern. A smart thermostat that behaves erratically in winter is potentially expensive. Spend more on: smart locks, smart thermostats, critical security cameras, smart smoke/CO detectors, hub/bridge devices. These are long-lived, structurally important, and painful to replace mid-setup. Save on or experiment with: smart plugs (for non-critical circuits), smart bulbs in secondary rooms, smart sensors for non-security automations. The Sunset Device Problem — Brands That Abandoned Their Products Beyond the brands that killed entire platforms, individual product lines get quietly discontinued all the time. Signs your device is approaching end-of-life:App store reviews mentioning crashes on the latest iOS/Android Firmware release notes that say "bug fixes" without detail for multiple consecutive releases Company blog goes quiet for 6+ months Reddit community activity decreases significantly Product delisted from the manufacturer's own websiteRegret #4 — The Neutral Wire Problem Nobody Warned Me About I bought eight smart switches before discovering my home didn't have neutral wires at the switch boxes. That was an expensive afternoon. The neutral wire issue is probably the most technically specific smart home mistake on this list, but it affects a surprising number of homeowners — particularly in homes built before the 1990s. Most smart switches require a neutral wire (the white wire in a standard US wiring setup) to maintain a low-level power draw that keeps the switch's radio and chip powered even when the light is off. Older wiring configurations often ran only the hot wire to the switch box, with the neutral going straight to the fixture. The symptom is simple: you install a new smart switch, and either it won't power on, flickers, or the bulb behaves strangely. The cause: no neutral wire. The fix depends on how you approach it. How to Check If Your Home Has Neutral Wires Before Buying Smart Switches⚠️ Safety Note: Always turn off the circuit breaker before inspecting switch wiring. If you're uncomfortable with electrical inspection, have a licensed electrician confirm your wiring configuration before purchasing smart switches.Step 1 — Turn off the circuit breaker for the switch you're inspecting. Step 2 — Remove the switch faceplate and carefully pull the switch out from the box without disconnecting anything. Step 3 — Count the wires going into the electrical box. A neutral wire is typically a white wire bundled with other white wires (a "wire nut" group) at the back of the box — separate from the wires connected to the switch itself. Step 4 — If there's a bundled white wire group that is NOT connected to the existing switch, you likely have neutral access. Photograph it before reinstalling. Step 5 — If there are only two wires going to the switch (one black, one white used as a traveler), you likely don't have a proper neutral. Confirm with an electrician before proceeding. No-Neutral Switch Options and Their Trade-Offs Good news: the no-neutral situation isn't a permanent dead end. Options include:No-neutral smart switches (Lutron Caseta, certain Leviton models) — work without a neutral but may require compatible LED bulbs; some have dimming limitations Smart bulbs instead of smart switches — bypass the switch issue entirely, but require physical switches to stay powered-on always (which confuses guests) C-wire adapter style workarounds — less common for switches but emerging Hiring an electrician to run a neutral wire — the cleanest solution; typically $150–$400 per switch location depending on accessThe Lutron Caseta system, specifically, has a strong reputation for no-neutral reliability and has been around long enough to have a solid support track record. It's worth mentioning as a genuine option rather than a compromise.Regret #5 — Over-Automating Before Understanding How You Actually LiveI spent a weekend building 40 automations. I disabled 35 of them within 90 days. This is embarrassing to admit, but it's also one of the most common smart home patterns there is. The first month in a smart home often involves a kind of automation fever — you discover what's possible, you build routines for everything, and for about three weeks it all feels incredibly clever. Then life happens. You have a late night and the bedroom automation turns the lights off while you're still reading. Your partner overrides everything manually because the triggers don't match her schedule. The "good morning" routine runs on a weekend and wakes up the kids. The automations that survive are the simple ones. The light that turns on when you walk into a dark room. The thermostat that adjusts when everyone leaves. The front porch light that turns off at sunrise. These fire and you forget they exist — which is exactly how a good automation should feel. The 40-routine setup required constant maintenance, constant adjustment, and eventually constant resentment. That felt genuinely bad at the time. But looking back, it taught me something useful: complexity in a smart home is a liability, not an asset. The Automation Complexity Trap — Why More Rules = More Failures Every automation you add is a dependency. It depends on device state, network connectivity, hub availability, sensor accuracy, and trigger timing. The more automations you have, the more potential points of failure exist in parallel. Common Smart Home Frustrations and Their Causes:Symptom Likely Root Cause FixRoutines stop working randomly Cloud server dependency or Wi-Fi drop Switch to local control; improve routerVoice assistant responds incorrectly Overlapping trigger phrases Rename devices; use distinct room labelsSmart lights won't turn off via switch Physical switch cut power to smart bulb Install smart switches; keep power always onAutomation works sometimes, not always Sensor battery low or motion delay mismatch Replace batteries; adjust delay settingsDevices show offline despite working IP address conflict / DHCP renewal Assign static IPs to smart devicesSmart home slow after years of use Too many cloud-dependent devices Audit and remove unused devices💡 Insight: The most reliable smart home automations are the ones you forget exist — they just work. If you're constantly troubleshooting or manually overriding an automation, it's failing its one job.The "One Month Rule" for Smart Home Automations Before building any new automation, live with the behavior you want to automate for one month without it. This isn't theoretical — it changes what you actually build. Most homeowners over-automate because they're imagining an idealized version of how they'll live, not observing how they actually live. The routine that seems obvious before you've moved in often turns out to be irritating in practice. But the automation you'd build after three months of observing your real patterns? That one actually gets used.Regret #6 — Upgrading Smart Devices Before Upgrading the Wi-Fi Most "smart device problems" are router problems in disguise. This isn't something device manufacturers are in a hurry to advertise, but it's one of the most consistently validated frustrations in smart home communities. I didn't realize how much my router was the bottleneck until I replaced it — and suddenly devices I'd nearly returned started working perfectly. A 2019 consumer router managing 30+ smart devices in 2024 isn't failing because the router is broken. It's failing because it was designed for maybe 15 simultaneous connections, is running 2.4GHz on an overcrowded channel shared with every neighbor on the block, and has DHCP lease management that wasn't built to handle dozens of IoT devices cycling on and off throughout the day. Most homeowners overlook that their smart devices compete for the same Wi-Fi channels as their neighbors' devices. In a dense apartment building or suburban street, 2.4GHz congestion is real and measurable. A dedicated IoT network on a separate SSID, or 2.4GHz/5GHz band steering configured properly, makes a tangible difference. How Many Smart Devices Can Your Router Actually Handle? The "maximum device" count printed on router packaging is almost always theoretical. Real-world performance depends on concurrent connections, traffic types, and protocol handling (especially for devices using Zigbee bridges, Z-Wave, or Thread via a hub). A practical framework:Under 15 smart devices: A mid-range Wi-Fi 6 router handles this comfortably 15–30 devices: Consider a mesh system with a dedicated IoT SSID 30+ devices: A mesh system with VLAN capability; consider a local hub (Home Assistant, Hubitat) to move Zigbee/Z-Wave traffic off Wi-Fi entirelyRecommended Network Setup for 20+ Smart DevicesReplace any router over 4 years old with Wi-Fi 6 minimum (Wi-Fi 6E if budget allows) Create a separate IoT network (SSID) — keeps smart device traffic isolated from personal devices Assign static IP addresses to hubs, bridges, and always-on devices Use a local protocol hub (Zigbee/Z-Wave coordinator) to reduce Wi-Fi load for sensors and switches Check 2.4GHz channel congestion with a Wi-Fi analyzer app (Wifi Analyzer on Android is free) and switch to a less-crowded channel (1, 6, or 11)Regret #7 — Trusting "Smart" Features on Cheap Appliances The smart refrigerator that sends you a notification when the door is left open is a $3,200 solution to a problem a buzzer solved for $400. That's a little harsh — there are genuinely useful smart appliances. But the category has a significant gap between what's marketed and what most homeowners actually use. Smart washing machines that can be started remotely require you to have already loaded and prepped the machine, which removes most of the convenience. Smart ovens controlled by app offer real utility for precision cooking, but for everyday use, most people just use the buttons on the front. The deeper problem is what happens to smart features on appliances when the app support ends — and it ends faster on appliances than on dedicated smart home devices. Your washing machine firmware is not a product line the manufacturer is actively developing for five years. It's a feature added to sell the machine. Budget accordingly. Which Smart Appliances Have the Worst Long-Term Track RecordsSmart refrigerators — High-maintenance screens, app-dependent features with poor longevity, expensive repairs when smart components fail Smart ranges and ovens with wi-fi features — Connectivity features routinely lose support; core oven functionality unaffected, but marketed features disappear Smart dishwashers — App connectivity is the first thing to lose support; limited practical utility even when working Smart vacuums with mapping features — Generally more reliable, but budget brands (particularly those rebranded from the same manufacturers) lose update support quicklyBetter smart appliance bets: smart thermostats, smart water heaters with energy scheduling, and whole-home energy monitors. These are purpose-built for connectivity and tend to receive longer software support.The Ones That Weren't Tech-Related — But Still Hurt Not every regret involves a circuit board. Some of the worst involve tile, insulation, and assumptions. The smart home angle dominates this article for a reason — it's where most intermediate homeowners are losing money in ways that aren't obvious until later. But it would be dishonest to pretend the non-tech decisions don't hurt just as much. Energy Efficiency Upgrades That Didn't Deliver Expected Savings The pattern is consistent: homeowners invest in insulation, window replacements, or HVAC upgrades with an expectation of energy savings that takes much longer to materialize than marketing suggests — or sometimes never fully arrives. Window replacement is the most common example. New windows are genuinely better than old windows. They're more comfortable, reduce drafts, and improve the feel of a room significantly. But the "you'll save on energy bills" pitch is often overstated for typical climates. The payback period for window replacement is commonly 15–30 years based on energy savings alone. If you're buying them for comfort, aesthetics, and property value — that's a defensible decision. If you're buying them purely for ROI, recalibrate your expectations. Insulation upgrades and air sealing, on the other hand, often do deliver measurable returns — particularly in older homes where air infiltration is the real efficiency problem, not the R-value of the walls. The "While We're At It" Renovation Trap "While we're opening up that wall, we might as well…" Those seven words have cost more homeowners more money than almost any other phrase in renovation history. It starts rationally. You're already paying for labor, you're already in a disrupted state, and adding something now seems cheaper than doing it separately later. Sometimes that's true. Often, it's a way of making an unbudgeted decision feel justified by proximity to a budgeted one. The while-we're-at-it additions that tend to go wrong: upgrading fixtures that didn't need upgrading, moving walls that didn't need moving, and adding smart features to a renovation that was already at budget. The additions that tend to be worth it: running infrastructure (conduit, ethernet, electrical capacity) while walls are open.What I'd Do Differently — A Practical Recovery PlanNone of these regrets are permanent. Most are expensive to undo, but nearly all are manageable with a clear-headed audit and a realistic plan. The homeowners who turn things around fastest are the ones who stop adding new things and spend a few hours understanding exactly where they actually stand. The Smart Home Audit — How to Assess Where You Actually Stand Step 1 — Inventory every device (15 minutes) List every smart device, its platform, whether it still receives firmware updates, and its monthly subscription cost. Don't skip the dormant ones — the devices you stopped using often still carry a cost. Step 2 — Identify actual vs. intended usage (10 minutes) Which automations run daily without being manually overridden? Which have been disabled or ignored? Any automation you've bypassed for more than three months should be considered for removal. Step 3 — Check firmware and app support status (20 minutes) For each device: when was the last firmware update? Is the companion app still maintained on current phone OS versions? Look up the brand's support lifecycle policy — a 30-minute search now can save $300 in surprises later. Step 4 — Identify single points of failure (10 minutes) Which device or hub would break the most automations if it failed tonight? Create a manual fallback for anything critical — particularly HVAC and security. Step 5 — Calculate your actual smart home cost (15 minutes) Add up device replacement cycles, monthly subscriptions, and a realistic estimate of your time maintaining the system. Compare that to what you expected when you started. Step 6 — Plan your next moves (20 minutes) Prioritize: What needs replacing now? What can wait? What should simply be retired? What single infrastructure fix would solve the most problems? The Decision Framework — Should You Fix, Replace, or Accept?Situation Recommended ActionDevice works but app support is declining Plan replacement within 12 months; switch to Matter-compatible alternativeEcosystem is functional but you're unhappy with it Migrate gradually using Matter devices that work across platformsAutomations are unreliable Audit for cloud dependencies; consider local control hubWi-Fi is causing device issues Fix the router before replacing devicesMissing infrastructure (no ethernet, no conduit) Prioritize during next wall-opening project; accept Wi-Fi as interimOver-automated and frustrated Pare back to 5–8 core automations; rebuild slowly based on real usageWhen to Call a Professional vs. Handle It Yourself Is the fix electrical (wiring, panel, conduit)? → YES: Call a licensed electrician — no exceptions → NO ↓Does it require accessing inside finished walls? → YES: Consider professional — structural damage risk is real → NO ↓Does it involve network infrastructure (router, ethernet runs)? → YES: DIY-able with research; professional optional for large installs → NO ↓Is it app-based, device replacement, or routine reconfiguration? → YES: Fully DIY⚠️ Important: In the UK, any new circuit or significant electrical work falls under Part P building regulations and must be done by a certified electrician or self-certified to your local authority. In Australia, unlicensed electrical work is illegal regardless of scope. In Canada and most US states, panel work and new circuit installation require a licensed electrician.Myth vs. Reality — Smart Home Misconceptions That Lead to Regret This is where most people get led astray — not by bad advice, but by slightly wrong assumptions that feel reasonable until they hit real-world conditions.Myth Reality"Any smart device will work with any other smart device" Ecosystem fragmentation still exists in 2026. Matter helps significantly but isn't universal across all device categories yet."Smart home = lower energy bills automatically" Only true with active management and compatible HVAC. Savings rarely happen passively without deliberate setup."Cheap smart devices are fine for basic tasks" Often fine at launch; becomes problematic 18–24 months in when app support drops and cloud services age."I can always add ethernet later" Technically yes, practically expensive. Fishing cable through finished walls typically costs $100–$200/hour in labor."The most popular platform is the safest long-term" Google has killed widely-used products (Nest Secure, Stadia, Google+). Popularity does not equal longevity."Setting up smart home automation is a one-time task" Most homeowners redesign their setup multiple times in the first three years as living patterns change."Smart home is for tech people only" The best smart home setups are actually the simplest ones — and those are accessible to anyone.Frequently Asked Questions Q: What is the most common home improvement regret? Among homeowners who have renovated, the most consistent regret is not running additional wiring — ethernet, conduit, electrical capacity — while walls were open. For smart home owners specifically, choosing the wrong ecosystem or buying devices that lost software support rank highest in community discussions.Q: Is smart home automation actually worth the investment? It depends heavily on planning quality. Homeowners who set up smart homes without infrastructure investment consistently report lower satisfaction. Those who plan network infrastructure first and automate gradually tend to find genuine, lasting value — particularly with thermostat scheduling, lighting automation, and security.Q: How do I know if my smart home devices are about to lose support? Check the manufacturer's support page annually. Look at how frequently the app and firmware receive updates. Research whether the brand has discontinued other product lines. Community forums — particularly Reddit's r/smarthome — often surface end-of-life announcements before official channels do.Q: What smart home platform has the lowest risk of regret? Home Assistant (self-hosted, local control) has the lowest lock-in risk because it doesn't depend on any manufacturer's cloud infrastructure. Among commercial platforms, Apple HomeKit has a stronger track record of not abandoning devices. Amazon Alexa has the widest compatibility but relies on cloud connectivity for nearly everything.Q: Can you undo a bad smart home ecosystem decision? Yes, but it costs time and money. The easiest migration path is through Matter-compatible devices, which can work across multiple ecosystems. A full platform migration typically means replacing or re-pairing most devices. Budget $300–$800 minimum and 10–20 hours of reconfiguration for a mid-sized setup.Q: My automations randomly stop working. Is it my devices or my setup? Usually the setup. Automations that depend on internet connectivity are the first to fail during service interruptions or router issues. Switching to local-control devices and a local hub dramatically improves reliability for households experiencing this.Q: My smart home is too complicated and my family can't use it. What went wrong? A very common problem. The technical household member builds a system that requires their mental model to operate. The fix: simplify to physical-switch-compatible controls, add a simple bedside or countertop tablet for common controls, and reduce automations to the five or six that everyone actually wants.Q: I bought a smart thermostat and my HVAC is incompatible. What do I do? Most smart thermostats require a C-wire (common wire) for continuous power. If your system lacks one, options include: a C-wire adapter kit (typically $15–$30), having an electrician run the wire ($150–$350), or choosing a thermostat with a power-stealing feature. Certain Ecobee models handle no-C-wire situations better than most competitors.Q: How do I future-proof my smart home infrastructure in 2026? Run Cat6 ethernet to all fixed device locations. Install conduit in walls during any renovation — even empty conduit is valuable. Choose Matter-compatible devices where available. Use a local hub to reduce cloud dependency. And document your setup: keep a spreadsheet of every device, its firmware version, its platform, and its IP assignment. It sounds tedious. The first time you need it at midnight, you'll be grateful.Q: Where should a beginner start with smart home devices? One ecosystem. One device category. Stable Wi-Fi first. Most beginners who regret their smart home started by buying a mixed collection of devices without a clear platform strategy. Start with smart lighting or a smart thermostat, get comfortable with one platform, then expand deliberately.The Honest Summary Most smart home regrets aren't about the devices. They're about the infrastructure decisions made before the devices ever showed up — and the platform decisions made in the first 30 minutes of setup, usually without enough information. The good news is that the list above is fairly short. There are really only a handful of decisions that create lasting, expensive problems: wrong ecosystem, skipped wiring, and under-powered network infrastructure. Everything else is either cheap to fix, easy to work around, or genuinely manageable over time. The expensive lesson, if you've already paid it, has real value. The homeowners who've been through smart home regret and come out the other side tend to build much better systems the second time — quieter, simpler, more reliable, and much harder to break. That's worth something, even if the tuition was steep.Last updated for 2026 smart home conditions. Smart home platform support statuses change frequently — verify ecosystem compatibility directly with manufacturers before purchasing. Related Reading:Installing a DIY Solar Kit from Solar Wholesale: My Full Experience (Costs, Mistakes & Savings) The Complete Solar Panel Buying Guide: What Actually Matters (And What Doesn't) 15 Inexpensive Ways to Secure Your Home & Prevent Break-Ins (2026 Guide)
.webp)
Home Improvement ROI Ranked: 25 Projects From 268% Down to 55% (With Real Cost Data)
Most homeowners approach renovation backwards. They spend $25,000 on a composite deck because they want somewhere to entertain — then list their house a year later and wonder why the appraisal didn't move as much as they expected. Meanwhile, a $4,672 garage door would have returned $12,507 in added value. Almost triple their investment. That's not a knock on enjoying your home. It's just what the data shows when you actually look at it. This guide ranks all 25 of the most common home improvement projects by return on investment — from the ones that genuinely pay you back more than you spend, down to the ones that are, frankly, more about personal enjoyment than financial strategy. Both are valid. But you should know which is which before you commit a significant chunk of money.Quick answer: The home improvement project with the highest ROI is replacing a garage door at 268%, adding ~$12,507 in resale value for ~$4,672 spent. Lawn care (217%), steel entry door replacement (216%), and manufactured stone veneer (208%) round out the top four. All four are exterior projects — which tells you something important.What "ROI" Actually Means in Home Renovation (And Why Most Guides Get It Wrong) Before the numbers, a clarification that most renovation guides skip entirely. Home improvement ROI — as used in this article and most cost-vs-value reports — measures the percentage of a project's cost you can expect to recoup through increased resale value. So a 268% ROI on a garage door means: spend $4,672, add roughly $12,507 to your home's market value. You don't pocket the difference; it's realized when you sell. That's a specific definition. And it's not the only one that matters. The Difference Between Resale ROI and Lifetime ROI Resale ROI is what most reports measure. It's useful if you're planning to sell within a few years. But if you're staying in your home for a decade, a different calculation matters more — one that includes:Ongoing utility savings (particularly relevant for HVAC conversions and new windows) Maintenance cost reduction (fiber-cement siding vs. wood siding, for example) Quality of life value (harder to quantify, but real) Energy efficiency rebates and tax credits (which can significantly alter the actual cost basis)A converted HVAC system might only return 72% on resale. But over 10–15 years of utility savings, combined with available IRA tax credits of up to $2,000, the real-world ROI for a long-term homeowner can push well past 120%. You won't see that in any standard report. The point: use resale ROI for pre-sale planning, and lifetime ROI for long-term decision-making. They answer different questions. Why National Averages Should Always Be Adjusted for Your Market Every number in this guide is a national average. That sounds obvious, but it has real consequences. A garage door replacement in a $700K median-price neighborhood in suburban Boston returns differently than the same project in a $180K market in rural Oklahoma. Appraisers work comparatively — they look at what nearby homes have, and they assess whether your home is above, at, or below that standard. If every comparable home already has a modern garage door, yours isn't adding value by upgrading. You're just catching up to baseline. The same logic applies to smart home upgrades. In certain tech-forward urban markets, a fully integrated smart home system moves buyers emotionally in a way it simply doesn't in other demographics. Know your market before you invest.The Full ROI Ranking: All 25 Projects at a Glance Before we go project by project, here's the complete picture.Rank Project Avg Job Cost Resale Value Added ROI DIY Feasible?1 Replace Garage Door $4,672 $12,507 268% No2 Standard Lawn Care Service $415 $900 217% Yes3 Replace Entry Door (Steel) $2,435 $5,270 216% Partial4 Install Manufactured Stone Veneer $11,702 $24,328 208% No5 Sand & Refinish Hardwood Floors $3,400 $5,000 147% Partial6 Install New Hardwood Floors $5,000 $6,500 118% No7 Replace Siding (Fiber-Cement) $21,485 $24,420 114% No8 Paint Interior $1,000–$3,000 $1,070–$3,210 107% Yes9 Landscape Maintenance $4,800 $5,000 104% Yes10 Upgrade Landscape $9,000 $9,000 100% Partial11 Replace Siding (Vinyl) $17,950 $17,313 97% No12 Install Backup Power Generator $13,534 $12,902 95% No13 New Wood Deck $18,263 $17,323 95% Partial14 New Patio (Concrete Paver) $10,500 $10,000 95% No15 New Composite Deck $25,096 $22,199 89% No16 Smart Home Upgrades $3,026 $2,533 87% Yes17 Grand Entrance Upgrade (Fiberglass) $11,754 $9,999 85% No18 Install Irrigation System $6,000 $5,000 83% No19 Replace Windows (Vinyl) $22,073 $16,657 76% No20 Convert HVAC (Fuel to Electric) $19,484 $14,053 72% No21 Replace Windows (Wood) $26,781 $18,764 70% No22 Landscape Lighting $6,800 Varies 59% Yes23 Add Outdoor Fire Feature $9,000 ~$5,040 56% No24 Closet Remodel $500–$2,500 $2,000 55–60% Yes25 Paint Exterior $1,500–$4,000 $625–$2,200 55% PartialBefore you look at the full ranking, there's one number in this list that almost always surprises people — and it's not the garage door. The cheapest project on this list ($415 for lawn care) delivers the second-highest ROI at 217%. Why aren't more homeowners doing this before they list? Keep reading.The Top Tier — Projects Returning More Than You Spend (100%+ ROI)These are the projects where the math genuinely works in your favor. Spend $X, add more than $X to your home's value. Not common in renovation. Not something to take for granted. The pattern here is striking. Every single project in the 100%+ ROI tier is either an exterior improvement or an interior finish upgrade. None of them are structural. None of them are "major renovation" territory. The implication is clear: buyers respond to what they see, and what they see first is the outside. #1 — Garage Door Replacement (268% ROI) Cost: ~$4,672 | Value Added: ~$12,507 | ROI: 268% This one genuinely earns its top spot, and if you understand why, it changes how you think about curb appeal entirely. A garage door often covers 30–40% of a home's visible front facade. In listing photos — which is where most buyers make their first impression — it's one of the largest single visual elements in the image. A dated, dented, or visually mismatched garage door doesn't just look old. It signals deferred maintenance to buyers before they've set foot inside. The ROI isn't magic. It's psychology. What type of garage door maximizes value? You don't need to go premium to get the full ROI benefit. The data reflects mid-range steel doors in contemporary styles — nothing extravagant. A raised-panel steel door in a neutral color (white, gray, or a color matched to the home's exterior palette) is sufficient. Where you can meaningfully upgrade: adding windows to the upper panels, which adds visual interest and natural light to the garage without dramatically increasing cost. If you're already replacing the door, consider adding a smart garage door opener with integrated connectivity. The incremental cost is $150–$250, it future-proofs the install, and it's the kind of detail that resonates with tech-aware buyers. When a garage door replacement is NOT worth it:If your HOA restricts door styles and you're locked into a dated design regardless If the garage itself has structural issues (water damage, settling) that would offset any visual improvement In markets where detached garages are uncommon and buyers don't factor the door into their mental valuation⚠️ Appraiser's note: Your garage door replacement only earns its full 268% ROI if comparable homes in your area also have updated doors. In markets where modern doors are universal, a dated one is a deduction from baseline — not just a missed upgrade opportunity.Pros:Highest ROI of any project on this list Relatively modest upfront cost Dramatically improves listing photos Quick installation (usually 1 day) Compatible with smart home opener upgradesCons:HOA approval required in many communities Style mismatch with home architecture can undermine the investment Insulated doors (better long-term value) cost more upfront#2 — Standard Lawn Care Service (217% ROI)Cost: ~$415 | Value Added: ~$900 | ROI: 217% This is the one that surprises people. $415 — less than a week of groceries for a family of four — returning $900 in added resale value. The second-highest ROI on the entire list. Here's the asterisk that matters: this is timing-sensitive. A perfectly manicured lawn the season before listing can look like neglect three months later if it's not maintained. The ROI is realized when buyers see it, not when you pay for it. Timing lawn care for maximum appraisal impact:Schedule professional service 4–8 weeks before listing, not the day before Include edging, aeration, and overseeding in addition to mowing — the fuller and greener, the better Spring and early fall listings benefit most; summer listings in drought-prone regions are more variable Add fresh mulch in beds — it's inexpensive, looks intentional, and photographs extremely wellThe practical reality: this is also the most DIY-adaptable entry on the high-ROI list. A homeowner who mows regularly, edges cleanly, and maintains their beds can capture most of this ROI for nothing but time.#3 — Steel Entry Door Replacement (216% ROI) Cost: ~$2,435 | Value Added: ~$5,270 | ROI: 216% The entry door is the handshake moment of your home. It's what buyers look at while the agent fumbles with the lockbox. It's what's in the foreground of every exterior listing photo. A steel entry door at this price point delivers fiberglass-quality durability with better impact resistance, better insulation values than older wood doors, and a cleaner, more contemporary look. The resale math is straightforward. One thing most renovation articles don't mention: the hardware matters almost as much as the door itself. A crisp new door with tarnished 1990s brass hardware sends a mixed message. Budget $100–$200 to replace the handle set, deadbolt, and exterior light fixture at the same time. The total investment is still well under $3,000 — and the visual coherence is worth it.#4 — Manufactured Stone Veneer (208% ROI) Cost: ~$11,702 | Value Added: ~$24,328 | ROI: 208% This is the highest absolute dollar return in the top tier — nearly $24,000 in added value. And it's one of the projects that generates the most questions from homeowners, because $12K for exterior stone work feels significant. The key is what it does visually: stone veneer on the lower portion of a home's facade adds texture, weight, and a perception of permanence that buyers associate with quality construction. It photographs exceptionally well and differentiates listings in competitive markets.⚠️ Critical caveat: Not all stone veneer contractors are equally experienced. Poor installation — gaps in mortar, improper flashing, inadequate drainage — creates moisture infiltration problems that can develop within 2–3 years. A botched stone veneer job is worse than no veneer at all. Get references and check previous work specifically.#5–8 — Hardwood Floors, Interior Paint, and Landscape Upkeep (100–147% ROI)These four deserve grouping because they share a characteristic: they're relatively approachable, budget-friendly compared to structural work, and they signal to buyers that the home has been cared for. Sand & Refinish Hardwood Floors (147% ROI) $3,400 investment, $5,000 in added value. This is one of the most underappreciated projects on the list because many homeowners don't realize their existing hardwood floors can be refinished rather than replaced. Refinish vs. replace — what's the actual answer? If your floors have hardwood under them, refinishing is almost always the right call. You get 80–90% of the visual impact of new floors at a third to half the cost. The break-even on replacing vs. refinishing generally requires the floors to be structurally compromised, too thin from previous refinishes (hardwood can be sanded down 4–6 times in its life), or the wrong wood species for current buyer preferences. New hardwood floors (118% ROI at $5,000) return less per dollar than refinishing — but they're necessary when the existing subfloor situation doesn't support refinishing. Both are in positive territory, which is more than you can say for a lot of home improvements. Interior Paint (107% ROI) This is where DIY dramatically changes the math. Professional interior painting returns about 107% — solid, but not spectacular. DIY interior painting returns considerably more, because the added value ($1,070–$3,210) stays roughly the same while your cash outlay drops to the cost of paint and supplies. The color strategy matters. Neutral warm whites and greiges photograph well, feel universally appealing, and don't require buyers to mentally repaint before they can envision living there. Bold accent walls have their place, but they introduce subjectivity at a moment when you want buyers focused on the home's positives. Landscape Maintenance (104%) and Landscape Upgrades (100%) Both return essentially what you spend, which is actually quite good for exterior work. The distinction: maintenance (mowing, edging, pruning, mulch refresh) is perpetually worthwhile. Landscape upgrades (new walkways, planters, trees, hardscape) return 100% and create a sense of arrival that photographs well. The short version: exterior first, always. The data makes this conclusion unavoidable.The Middle Ground — Projects That Nearly Pay For Themselves (80–99% ROI) Here's where it gets counterintuitive. A 90% ROI sounds like losing money — you spend $25,000 and "only" get $22,500 back. But that framing misses the point for homeowners who actually use and enjoy the improvements. The question is whether the gap between cost and recovery is worth the enjoyment, not whether the number exceeds 100%. Siding Replacements — Fiber-Cement vs. Vinyl Compared (97–114% ROI) These are two of the higher-cost projects on the list, so the comparison matters.Fiber-Cement Siding Vinyl SidingAvg Job Cost $21,485 $17,950Resale Value Added $24,420 $17,313ROI 114% 97%Lifespan 30–50 years 20–40 yearsMaintenance Low (paint every 15–20 yrs) Very lowMoisture resistance Excellent (when properly installed) GoodDIY feasible? No NoPermit required? Usually yes Usually yesFiber-cement costs more and returns more — both in percentage and absolute dollars. The roughly $3,500 additional cost over vinyl yields an extra $7,107 in added value, which is a favorable spread. For most homeowners, fiber-cement is the better financial choice if you can absorb the upfront cost.⚠️ Contractor warning: Fiber-cement requires professional installation with precise moisture barriers and joint caulking. Improper sealing voids most manufacturer warranties and creates water intrusion risk that can eliminate the ROI entirely within 3–5 years. This is not a project to cut corners on labor costs.Backup Power Generator (95% ROI) — The ROI That Changes With Your Geography Cost: ~$13,534 | Value Added: ~$12,902 | ROI: 95% At face value, a 95% ROI on a generator looks like a near-break-even. But this number varies enormously by location in a way that most national averages obscure. In markets that have experienced significant power outages — hurricane corridors in the Gulf Coast and Southeast, tornado-prone areas of the Midwest, ice storm regions in the Northeast — standby generators move buyers emotionally in a way that's hard to quantify in a resale value figure. In some of these markets, a whole-home standby generator is becoming a baseline expectation, not a luxury. In markets with reliable power grids and mild weather, the case is weaker.⚠️ Safety and permitting: Standby generators require permitted electrical work and a gas or propane line connection. This is one project where DIY installation will almost certainly void homeowner's insurance coverage and may create code violations that surface at sale. Budget for licensed installation.Deck Additions — Wood vs. Composite and the Hidden Maintenance CostBoth wood decks (95% ROI) and composite decks (89% ROI) are high-cost projects. The ROI difference between them is modest — 6 percentage points. But the lifetime cost difference is not.Wood Deck Composite DeckAvg Build Cost $18,263 $25,096Resale Value Added $17,323 $22,199ROI 95% 89%Annual maintenance cost $200–$400 (staining/sealing) ~$0Lifespan (typical) 15–25 years 25–30 yearsAppearance over time Fades, grays without maintenance ConsistentIf you're selling within 2–3 years, a wood deck is the smarter financial choice — lower cost, comparable ROI. If you're staying put and plan to use the deck regularly, composite's zero-maintenance profile becomes increasingly valuable with every passing summer you skip the staining weekend. One thing both deck projects share: their ROI is significantly affected by whether the deck is permitted. Unpermitted decks are increasingly flagged in pre-listing inspections, and buyers can request removal or price reduction. If it's not permitted, it often doesn't count toward appraised value.★ Smart Home Upgrades (87% ROI) — The Most Underrated Line Item on This Entire ListCost: ~$3,026 | Value Added: ~$2,533 | ROI: 87% Here's the entry that most people scroll past without realizing it has the most interesting math on this list. At 87% ROI, smart home upgrades don't top the chart. But look at the cost: $3,026 average. That's the lowest absolute investment of any project in the middle and upper tier. The gap between what you spend and what you recover ($493) is smaller in absolute terms than almost everything above it. And here's what the resale ROI figure entirely misses: smart home devices have an ongoing monthly value that no renovation project on this list can claim. A smart thermostat saves $150–$200 a year on heating and cooling. A smart irrigation controller saves $100–$150 annually on water bills. A smart security system may reduce your homeowner's insurance premium. These aren't one-time resale value events — they're perpetual returns. Which smart home devices drive the most resale value? Not all smart devices are equal in buyer appeal. Based on what moves buyers and appraisers:Device Buyer Appeal Avg Install Cost NotesSmart thermostat (e.g., Ecobee, Nest) Very High $250–$400 Strong energy savings narrativeVideo doorbell High $150–$300 Security visibility, very recognizableSmart locks High $200–$400 Convenience + security combinationSmart lighting (whole-home) Medium-High $500–$1,500 Higher impact when hub-controlledSmart security system High $500–$1,200 Particularly valued in family buyersSmart garage door opener Medium $150–$300 Best paired with garage door replacementSmart smoke/CO detectors Medium $100–$250 Safety upgrade with insurance implicationsHow to "stack" smart home ROI on top of other projects This is the angle most renovation articles miss entirely. Smart home upgrades at 87% ROI are respectable standalone. But their real power is as a multiplier when paired with higher-ROI projects:Garage door replacement + smart opener: The door brings 268% ROI; the opener adds ~$150–$250 and makes the entire system connected, app-controlled, and appealing to the buyer demographic most likely to value smart home features HVAC conversion + smart thermostat: The HVAC system brings 72% ROI; a smart thermostat adds energy optimization and a visible "smart home" marker that helps justify the premium of the heat pump system to buyers Landscape upgrade + smart irrigation controller: The landscaping brings 100% ROI; a smart irrigation controller (Rachio, Orbit B-Hyve) adds water savings and the kind of detail that signals to buyers this home has been thoughtfully maintained New deck/patio + smart outdoor lighting: The deck brings 89–95% ROI; connected outdoor lighting adds evening usability, security, and listing photo quality — all for a few hundred dollarsSmart home ROI by buyer demographic Smart home value isn't distributed evenly across all buyers. Millennials and Gen X buyers aged 28–50 — who now represent the majority of home purchases — consistently rank smart home features in their top 10 "desirable features." Buyers over 65 are more mixed. If your market's buyer pool skews younger, smart home upgrades carry more weight. If it skews older, focus investment elsewhere.💡 Smart home reality check: The 87% ROI figure reflects installed home tech as an integrated system. A single smart lock doesn't move the needle. A coordinated system — thermostat + security + lighting + locks tied to a single hub or app — is what creates the "smart home" perception that buyers respond to. Fragmented devices from different ecosystems with no central control feel like clutter, not value.The Long Game — Projects With Lower Resale ROI But Real Lifetime Value (55–83%) Now for the projects most renovation articles quietly skip over — the ones where the short-term resale math doesn't fully work, but the long-term picture is more nuanced. HVAC Conversion — Fuel to Electric (72% ROI) Cost: ~$19,484 | Value Added: ~$14,053 | ROI: 72% On paper, 72% ROI means spending $19,484 and recouping $14,053. A $5,431 gap. For a pre-sale renovation, that's hard to justify. For a homeowner staying put? The calculation changes entirely. Modern heat pump systems — the primary driver of fuel-to-electric HVAC conversions — are 2–3x more efficient than traditional gas furnaces in moderate climates. Annual utility savings of $600–$1,200 are common, depending on local electricity rates and climate. Over 10 years, that's $6,000–$12,000 in savings — enough to close the resale gap and then some. The other factor: the Inflation Reduction Act provides federal tax credits of up to $2,000 for heat pump installations, potentially reducing the actual cost basis to $17,484 or less. Many states add additional rebates. The effective ROI when these incentives are applied can clear 80% on resale before any utility savings are factored in. One genuine caveat: heat pump efficiency drops significantly in climates with sustained temperatures below 0°F (-18°C). In northern Canada, Minnesota, or Wisconsin, the utility savings argument is weaker. In the Southeast, Southwest, and Pacific Coast — where heating demands are moderate and cooling is substantial — heat pumps make strong economic sense.Window Replacements — Vinyl vs. Wood and the Energy Savings EquationVinyl Windows Wood WindowsAvg Cost $22,073 $26,781Resale Value Added $16,657 $18,764ROI 76% 70%Maintenance Very low High (painting, sealing)Longevity 20–40 years 30–50 years (with maintenance)Energy performance Good Good to excellent (wood is natural insulator)The counterintuitive finding: wood windows cost $4,708 more than vinyl but return less in ROI percentage. You're paying significantly more for a worse return on investment. The only arguments for wood over vinyl are aesthetic (certain architectural styles genuinely require wood to look right) and in very high-end markets where buyers expect wood windows. For most homeowners? Vinyl windows are the financially superior choice. Full stop. Neither window type has a compelling pre-sale ROI case on its own. Windows make the most sense as a simultaneous investment when: you're replacing anyway due to failure (seals broken, frames rotting), you're in a region with extreme temperatures where the energy savings are substantial, or you're doing a comprehensive exterior renovation where mismatched windows would undercut everything else.Irrigation Systems, Landscape Lighting, and Outdoor Fire Features These three cluster together in the 56–83% ROI range — all decent, none outstanding. Irrigation systems (83% ROI) make the most sense paired with significant landscape investments. If you're putting $9,000 into landscape upgrades (100% ROI), protecting that investment with a $6,000 irrigation system makes the combined case considerably stronger. On its own, it's a convenience and water-savings play more than a resale play. Landscape lighting (59% ROI) is legitimately undervalued in the resale data because it primarily affects evening showings, open houses, and listing photography. In markets where homes sell quickly and buyers view multiple properties in a single evening, landscape lighting creates a distinct impression. The ROI figure also doesn't capture the security benefit (illuminated entries deter opportunistic break-ins) or the year-round enjoyment value. Outdoor fire features (56% ROI) are the clearest example of lifestyle-over-ROI spending on this list. People love outdoor fire features. Buyers often notice them. But a $9,000 fire pit returning roughly $5,000 in value is not a financially motivated upgrade. That's fine — it's just honest.Closet Remodels — The Highest DIY ROI Multiplier on the List Cost: $500–$2,500 | Value Added: ~$2,000 | ROI: 55–60% (professional) | DIY ROI: Potentially 200%+ The listed ROI for closet remodels is 55–60%. That's modest. But this is also the project with the highest DIY ROI multiplier on the entire list. The reason: at the low end ($500–$1,000 for a modular closet system), a homeowner with a weekend and basic tools can install a dramatically improved closet organization system themselves. The resale value added (~$2,000) stays roughly the same regardless of who installs it. With $500 in materials and a Saturday, you're looking at 300–400% ROI on actual cash outlay. Master closet organization is also one of the features buyers mention most frequently in post-purchase surveys. It's punching above its price point in buyer perception.How to Sequence Renovations for Maximum Combined ROIMost homeowners make one critical mistake: they treat renovation projects as independent decisions. They're not. The order in which you complete projects affects your total return — both in terms of appraisal timing and in terms of avoiding damage to completed work. Here's the sequence that maximizes combined ROI for a homeowner planning to sell within 12–18 months. Phase 1: Exterior and Curb Appeal (6–12 months before listing) Start outside. Always.Siding replacement — if needed (do this first; it's messy and can damage landscaping) Garage door replacement — highest ROI, do early so it's not rushed before listing Entry door replacement — quick win, can be done at any time but pair with siding if possible Stone veneer — if applicable to your home's architecture Landscape upgrades — save final lawn care maintenance for 4–8 weeks before listingPhase 2: Systems and Efficiency (4–8 months before listing) These take longer to permit and install, and buyers increasingly ask about them.HVAC conversion (if applicable and you're staying long-term, or in regions where buyers actively seek it) Backup generator (if in storm-prone markets) Smart home system installation — do this after siding and painting, not before; avoids rework Irrigation system — install when landscaping work is completePhase 3: Interior Polish (1–3 months before listing) Save the interior for last. These are perishable improvements — floors show wear, paint accumulates scuffs.Hardwood floor refinishing or replacement Interior painting — final rooms last, so they're fresh at listing Closet organization systems Any remaining touch-up work💡 The sequencing principle: Do work that generates dust, debris, or construction traffic before work that creates finished surfaces. Never refinish floors before installing a new HVAC system. Never paint before the contractor runs new electrical for smart home devices. Think in phases, not tasks.5 Renovation ROI Myths Most Homeowners Still Believe Myth 1: Kitchen renovations always have the best ROI. Reality: Full kitchen remodels typically return 60–80% on investment — below the midpoint of this list. Minor kitchen updates (cabinet refinishing, new hardware, updated fixtures) return considerably better. The myth persists because kitchens are the emotional center of a home and generate strong buyer reactions, but emotional response and financial return are two different things. Myth 2: Smart home devices scare off older buyers. Reality: This was more true in 2015 than it is now. The majority of home buyers in today's market are millennials and Gen X — demographics that are comfortable with and actively value smart home features. Even in older buyer demographics, simple interfaces (voice control, well-labeled apps) reduce friction significantly. The concern is more about complexity than technology itself. Myth 3: A deck adds more value than a patio because it's a permanent structure. Reality: Concrete paver patios and wood decks both return ~95% ROI — essentially identical. Patios cost significantly less ($10,500 vs. $18,263 for wood) and require no ongoing maintenance. In many markets, buyers prefer patios for the low-maintenance lifestyle they imply. Myth 4: Fresh exterior paint is always a smart pre-sale investment. Reality: At 55% ROI, exterior painting is one of the lowest-return projects on this list. It's worth doing if the current condition is actively deterring buyers (peeling, faded, unusual color). As a proactive investment in a home with acceptable existing paint, it rarely makes financial sense. The data is clear on this one. Myth 5: Vinyl windows are a lower-quality option and will hurt resale. Reality: Vinyl windows consistently outperform wood windows in ROI (76% vs. 70%), require dramatically less maintenance, and are the standard expectation in most markets. The perception that wood is always superior is largely a holdover from an era when vinyl quality was genuinely poor. Modern vinyl windows are thermally efficient, durable, and visually clean.Your ROI Decision Framework — What to Prioritize Given Your Situation Selling within 12 months and have $5,000 or less: Start with a garage door replacement (~$4,672). If budget allows after, add lawn care service ($415). You've deployed less than $5,100 and potentially added $13,400 in resale value. Nothing else on this list delivers that combination of low cost and high return. Selling within 12 months and have $10,000–$20,000: Prioritize garage door + entry door + stone veneer (if architecturally appropriate) + landscape upgrade + hardwood floor refinishing. Stack the high-ROI, high-impact exterior projects first, then add interior polish. Staying 5+ years and focused on smart home investment: Build a cohesive integrated system: smart thermostat + video doorbell + smart locks + connected lighting. Total cost $1,500–$3,000 depending on scope. Pair with any exterior work you'd do anyway (the garage door opener, smart irrigation alongside landscaping). The monthly operational savings start compounding immediately. Staying 5+ years and focused on energy efficiency: HVAC conversion + vinyl windows + smart thermostat. The resale ROI is modest. The lifetime ROI — factoring utility savings, available tax credits, and reduced HVAC maintenance — is considerably better. Prioritize HVAC in your climate zone first; windows are secondary. Focused on enjoying the home with some eye toward eventual resale: Deck or patio (pick based on maintenance tolerance), landscape lighting, and smart home system. These are the projects that improve daily quality of life while still maintaining reasonable resale recovery. The outdoor fire feature and closet remodel can follow.Pre-Sale Home Improvement Checklist Before listing, work through this list systematically. The items in the top tier should be prioritized if not already done; the bottom tier items are conditional. Tier 1 — Do Before You List (if not already done)Replace garage door if more than 15 years old or visually dated Professional lawn service: aeration, overseeding, edging, fresh mulch Entry door: replace if damaged, repaint if faded, replace hardware Refinish hardwood floors if scratched or dull Fresh interior paint in neutral tones throughout Deep clean all windows (inside and out) Repair any visible exterior damage (siding cracks, trim rot, fascia)Tier 2 — High Impact If Budget AllowsInstall stone veneer on facade (if architecturally appropriate) Landscape upgrade: new plantings, walkway, defined bed edges Smart home system: thermostat + doorbell camera + smart locks minimum Fresh exterior paint if current color is unusual or condition is poorTier 3 — Conditional / Market-SpecificBackup generator (Gulf Coast, Southeast, storm-prone regions) Siding replacement (only if current siding is visibly failing or severely dated) Window replacement (only if seals are broken or frames are rotting) New deck or patio (only if current outdoor space is unusable)Frequently Asked Questions What home improvement has the highest ROI? Replacing a garage door delivers the highest ROI at 268%, adding approximately $12,507 in resale value for a ~$4,672 investment. Lawn care service (217%), a steel entry door replacement (216%), and manufactured stone veneer (208%) round out the top four. All are exterior improvements. Are smart home upgrades worth it before selling a house? Smart home upgrades return about 87% ROI on average — below the top tier, but at only ~$3,026 average cost, the absolute risk is low. The stronger case comes from pairing smart devices with higher-ROI projects: a smart thermostat alongside an HVAC conversion, connected outdoor lighting alongside a deck or landscape upgrade. This stacking approach maximizes both the resale signal and the ongoing operational savings. Does a deck add more value than a patio? In ROI terms, they're essentially identical — wood decks and concrete paver patios both return around 95%. Wood decks cost significantly more ($18,263 vs. $10,500 for a concrete paver patio) and require ongoing maintenance. Composite decks return slightly less at 89% on a higher upfront cost. If you're purely optimizing for ROI, a concrete paver patio is the most efficient outdoor living investment. Is converting HVAC from gas to electric worth it for resale? On resale ROI alone: 72%, which is below average. The better case is for long-term homeowners: federal IRA tax credits (up to $2,000), annual utility savings of $600–$1,200 in compatible climates, and significantly reduced long-term maintenance costs all change the real-world ROI picture substantially. For pre-sale investment, it's generally not the first priority. What's the best home improvement if I'm selling in 6 months? Focus exclusively on curb appeal: garage door replacement, professional lawn care, entry door refresh, and clean siding or fresh paint if current condition is poor. These are fast, impactful, and photograph well. Avoid major structural or interior projects with long timelines, permitting requirements, or high disruption — the payback window is too short.Data sourced from Ace Handyman Services Home Improvement ROI survey. Cross-referenced with Remodeling Magazine Cost vs Value Report. ROI figures represent national averages and will vary by region, market conditions, installation quality, and timing. Always consult local real estate professionals before making significant pre-sale renovation decisions. Related Reading:Home Improvement Decisions I Regret — And the Smart Home Lessons They Taught Me How to Keep Track of All Your Home Maintenance Tasks (The System That Actually Works) Home Energy Monitoring Systems: The Complete Homeowner's Guide (2026)
.webp)
White Kitchens Are Out — The New Neutral Designers Can't Stop Using in 2026
The all-white kitchen had a good run. Twelve-plus years of subway tiles, bright cabinet fronts, and marble-look countertops that showed every crumb. If you renovated between 2010 and 2022, there's a solid chance you went white — and if you did, you're now watching the world quietly move on without you. The shift isn't subtle anymore. Design publications, cabinet manufacturers, and renovation contractors are all seeing the same pattern: warm neutrals — specifically greige, soft putty, and what some people call "quiet beige" — are taking over kitchens at a pace that mirrors the gray boom of the early 2010s. This article will tell you exactly what's replacing white, why it's actually a better practical choice for most homes, and how to make the switch without landing in an expensive mistake.✦ Quick AnswerWhite kitchens are giving way to warm greige, putty, and mushroom tones. These neutrals feel less sterile, hide daily wear better, and pair naturally with wood and stone — the materials dominating modern kitchen design in 2025. The most popular replacements include greige (gray + beige blend), soft putty, and warm off-white, with paint shades like Sherwin-Williams Agreeable Gray (SW 7029), Benjamin Moore Pale Oak (OC-20), and Farrow & Ball Skimming Stone (No. 241) leading the shift.The New Neutral in Brief:Greige (gray-beige blend) is the dominant replacement for pure white Warm putty and mushroom tones are the quieter, more subtle alternatives Off-white and cream offer a middle ground for those not ready to fully commit These shades pair better with the warm wood, zellige tile, and brass hardware defining 2025 kitchen design They're more forgiving with fingerprints and daily kitchen use than whiteWhy White Kitchens Dominated — And Why That Era Is Ending You can't understand the shift without understanding how white took over in the first place. The White Kitchen Peak (2010–2020): What Actually Drove It The white kitchen wasn't an organic design movement. A significant part of it was algorithmic. When Pinterest launched in 2010 and Instagram followed, interior design content became shareable at scale for the first time. Bright, light-filled kitchens with white cabinetry photographed beautifully on phone screens — they looked clean, they looked expensive, they got saves. Couple that with the rise of open-plan living and buyers' obsession with "making spaces feel bigger," and white became the default answer to nearly every kitchen brief. Real estate agents pushed it. HGTV normalized it. Staging consultants recommended it without hesitation. Design publications like Architectural Digest and House Beautiful spent a decade featuring white-dominant kitchens. Builders saw the signals and started offering white as the primary cabinet option in new constructions. White subway tile in white grout became so standard it felt almost mandatory. By 2018, you could walk into new home developments in Atlanta, Manchester, Sydney, or Toronto and see essentially identical white kitchens. Which, in retrospect, should have been the first signal that the trend was peaking. When a design choice becomes indistinguishable from builder-grade standard, aspirational buyers stop wanting it. The Maintenance Reality Nobody Warned You AboutHere's what nobody told you before you chose white: it's genuinely hard to maintain. Not impossible — but hard in ways that show up every single day. White cabinet fronts near a range hood yellow. It doesn't happen overnight, but two to three years in, the uppers closest to your cooking area shift to a faint, uneven cream. The rest of the kitchen hasn't moved. You can't touch up white paint the way you can with a neutral — even the same code from the same brand will look different once it's aged, because white has no tint to mask the inconsistency. The fingerprint situation is worse than most people expect. Satin white cabinets near the refrigerator, dishwasher, and pantry door show every handprint within hours of cleaning. Matte finishes hide it slightly better but are harder to wipe clean and chip faster in high-contact areas. Grout on white subway tile backsplashes requires consistent sealing and eventually full cleaning or replacement. Around the range, it goes gray-brown no matter what you do short of regrouting every couple of years. None of this makes white a categorically bad choice. But it makes it a higher-maintenance choice than most people were prepared for when they committed. Why Designers Started Pulling Back First Interior designers tend to move away from trends 18–24 months before the general market catches up. As early as 2021, designers on platforms like Houzz and Dezeen were flagging a shift toward "warmer, more human" kitchens. The vocabulary started changing — cozy, textural, layered became the new aspirational words where clean, bright, and minimal had been. The pandemic accelerated it. Suddenly people were cooking three meals a day at home, and a cold, clinical white kitchen that looked beautiful in listing photos felt exhausting to actually live in. Designers started hearing this from clients. Briefs changed. At the same time, material direction was tilting hard toward the warm and natural — wide-plank oak floors, zellige tile, limewash walls, honed stone countertops. White cabinets don't integrate naturally with any of those. Warm neutrals do.Meet the New Neutral: What's Actually Replacing White Greige: The Dominant New Neutral (with Specific Paint Codes)Greige — the blend of gray and beige — has been building quietly for years, but 2024 and 2025 pushed it firmly into the mainstream. It reads contemporary without feeling cold. It works with warm wood tones, brass and unlacquered hardware, and honed stone in a way that pure gray never quite managed. The key to choosing greige well is the undertone. Greige shades with pink or red undertones can read muddy under certain lighting. Greige with golden undertones stays clean and pairs with most countertop materials. The color name tells you nothing useful — the undertone tells you everything. Best greige shades for kitchen cabinets:Paint Brand Code LRV Undertone Best ForAgreeable Gray Sherwin-Williams SW 7029 60 Warm beige-gray Most kitchen orientationsAccessible Beige Sherwin-Williams SW 7036 58 Warm beige North-facing or cooler roomsPale Oak Benjamin Moore OC-20 68 Warm beige-gray Lighter, airier spacesRevere Pewter Benjamin Moore HC-172 55 Warm gray-green High-contrast, bolder kitchensElephant's Breath Farrow & Ball No. 229 40 Warm brown-gray Statement kitchens, deeper toneSkimming Stone Farrow & Ball No. 241 55 Warm stone-putty Versatile; works most orientationsNatural Linen Behr N290-1 61 Warm beige Budget-accessible warm neutralWhat is LRV? Light Reflectance Value measures how much light a color bounces back into a room. Higher numbers mean lighter. For kitchens with limited natural light, aim for LRV 55 or above. Deep shades below LRV 45 can feel cave-like in small or north-facing kitchens — beautiful in the right context, but not forgiving if you're trying to brighten a dim space.Agreeable Gray (SW 7029) remains one of the most searched kitchen colors in North America. It's also one of the most misunderstood — it reads considerably different in different rooms. In a south-facing kitchen with warm light, it looks inviting and beige-leaning. In a north-facing kitchen, it can go blue-gray. This isn't a flaw; it's a behavior to test before committing. Warm Putty and Mushroom: The Quieter Alternatives Putty and mushroom tones sit between greige and off-white. Less gray, more beige-brown, and they tend to feel warmer in the evening under lower Kelvin LED lighting. These are the colors design writers mean when they describe a kitchen as organic, earthy, or having a quiet quality. They don't demand attention the way white does, but they add depth and warmth that's difficult to define until you see it in a real kitchen. Warm putty and mushroom shades worth exploring:SW Accessible Beige SW 7036 — acts as both a soft greige and a putty depending on your lighting; LRV 58; one of the most versatile options on this list BM Pale Oak OC-20 — cream-adjacent with a warm gray pull; reads more contemporary than traditional beige despite the name F&B Skimming Stone No. 241 — currently one of the most popular kitchen shades in UK and Australian markets; reads nearly off-white in strong light, warm stone in lower light BM Revere Pewter HC-172 — yes, the classic. Often dismissed as "overdone," but in a kitchen with warm wood floors and unlacquered brass hardware, it's hard to beatThe risk with mushroom tones: they can veer toward dated if you pair them with the wrong hardware. Cool chrome or brushed nickel makes mushroom look dingy. Warm metals — brushed gold, unlacquered brass, warm matte black — are essential companions. Off-White and Cream: The Compromise Option Not everyone is ready to fully abandon white. Off-white and cream offer a softer landing — warmer than pure white without the commitment of full greige.BM Ballet White OC-9 (LRV ~82) — warm white with a faint yellow undertone; beautiful in natural light, especially on shaker-style cabinets SW Alabaster SW 7008 (LRV 82) — the most popular warm white in North America right now; slightly softer and more human than pure white BM Simply White OC-117 (LRV ~89) — cleaner and brighter than most off-whites; closer to true white but with a hint of warmth F&B Strong White No. 2001 — chalky, architectural, particularly favoured in UK and Australian marketsPros & Cons: Greige vs. Warm Putty vs. Off-WhiteGreige Warm Putty / Mushroom Off-White / CreamFingerprint visibility Low–medium Low Medium–highTouch-up ease Moderate Moderate Difficult (undertone shifts with age)Hardware flexibility High Medium (warm metals work best) HighResale appeal High (growing) Medium-high High (established)Lighting sensitivity High — tests carefully Medium Low–mediumTrend longevity 10–15 year forecast 8–12 year forecast Classic, indefinitePairs with Oak, stone, warm brass, shaker Oak, limewash, warm stone Marble, chrome, classic tileMain risk Goes blue in north-facing rooms Can look muddy if undertone is wrong Yellows near range hood over timeWhite vs. the New Neutrals — An Honest Comparison Most online comparisons are vague. Here's what actually matters in daily life. Full Comparison: White vs. Greige vs. Warm Putty vs. Off-WhiteCriteria Pure White Greige Warm Putty Off-White/CreamFingerprints Very visible Low visibility Low–medium VisibleGrease marks Very visible Moderate Moderate VisibleTouch-up difficulty Very high (yellowing risk) Medium Medium HighCleaning frequency Daily near range Weekly near range Weekly Daily near rangeHardware Chrome, brushed nickel, most metals Warm brass, matte black Unlacquered brass, warm gold Chrome, brushed nickel, brassWarm wood floors High contrast — clashes Pairs naturally Pairs naturally Soft complementListing photography Bright, high-contrast Warm, inviting Rich, textural Soft, neutralUS resale appeal Widely accepted; less differentiated Growing premium signal Niche premium Widely acceptedUK/AU resale appeal Dated in many markets Strongly positive Positive PositiveLight requirement Forgiving in dark rooms Needs decent natural light Moderate ForgivingFingerprints, Grease, and the Daily Reality The single most common complaint from homeowners with white kitchens: they look good for about 45 minutes after a full cleaning. Greige and warm neutrals genuinely perform better here — not dramatically, but noticeably. The subtle depth in the color means fingerprints blend rather than contrast sharply against the surface. You'll still see grease marks near the stovetop regardless of what color you choose, but they're far less visually jarring in a warm neutral than on a white cabinet. One pattern that comes up consistently: white cabinets near the dishwasher are the first casualty. The door handle area, the adjacent cabinet, the area where steam escapes — all of it shows grime faster than anywhere else. In a warm greige, that same zone shows far less between cleaning sessions. How Each Color Photographs — This Matters More Than You Think for Resale If you're planning to sell in the next five to seven years, photography matters enormously. Most buyers form an opinion based on listing photos before setting foot in the property. Pure white kitchens photograph with high contrast and brightness. In good daylight, they look excellent. In overcast light or under warm artificial lighting, they read flat and clinical. Real estate photographers often boost warmth in post-production for white kitchens — which then creates a jarring mismatch when buyers arrive in person. Greige and warm neutrals photograph better in ambient, mixed, and lower light. They tend to look richer and more textured in photos, which contributes to the "warm and welcoming" first impression that drives click-through in listing searches. One thing most guides skip: greige photographs very differently depending on the direction of natural light in your kitchen. A north-facing kitchen with greige cabinets can look cold and gray in photos — and that's a problem to solve at the lighting stage before you finalize the color.The Lighting Factor — Why Most People Get This Wrong More kitchen color mistakes happen here than almost anywhere else. Most homeowners choose a paint color based on how it looks on a phone screen or a small chip under bright hardware store lighting — and then wonder why their kitchen looks nothing like they expected after painting. It happens constantly, and it's almost entirely preventable. How LED Color Temperature Changes Everything Kitchen lighting in 2025 is almost universally LED. That's fine — but LED bulbs have a color temperature measured in Kelvin (K) that dramatically changes how every neutral reads.2700K (warm white): Makes greige look golden and inviting. White looks like cream. Putty looks rich and deep. This is what most restaurants use to make food — and spaces — feel warmer. It's the most flattering for warm neutral cabinets. 3000K (soft warm white): A good middle ground for kitchens. Slightly cooler than 2700K but still flattering to warm neutrals. Works well for a kitchen used throughout the day. 4000K (cool white): The danger zone for warm neutrals. Greige can read as cold gray. Putty can look dingy. Off-white looks nearly stark. This is the temperature sold at most hardware stores because it's practical for task lighting — but it's unforgiving for color evaluation and daily living if you're using warm palettes. 5000K–6500K (daylight): Useful specifically for under-cabinet task areas. Avoid as primary overhead kitchen lighting if you're working with a warm palette — it will make every warm tone look wrong.Most builders and renovation contractors install 4000K LEDs by default. If you currently have 4000K and you're evaluating kitchen colors, either swap the bulbs to 2700K–3000K before testing, or consciously account for the cool shift in everything you're evaluating. The Smart Bulb Test: Preview Your New Neutral Before You PaintHere's one of the most practically useful tips in this entire article — and it uses a smart home tool most people already own but have never thought to use this way. If you have Philips Hue, LIFX, or any tunable white LED system, you can preview how a kitchen neutral behaves at different color temperatures without painting a single cabinet door. Set your kitchen bulbs to 2700K in the evening and observe your existing kitchen. Live with that light for a day. Then switch to 4000K and watch everything flatten and cool. You're not previewing the new color directly — you're understanding exactly how the color will shift under different conditions, which is the information you actually need before buying paint. More practically: before finalizing any shortlisted paint shades, set your smart bulbs to the exact color temperature you plan to live with. Then evaluate your physical swatches under those conditions. What you see is what you'll get. Smart bulbs worth using for this purpose:Philips Hue White Ambiance A19 — tunable 2200K–6500K, accurate across the full range, reliable app controls for precise Kelvin adjustments LIFX Mini White — strong output, tunable, no hub required; good for kitchens where you want high brightness and flexibility Govee Matter smart bulbs — the budget option; fully functional for the swatch-testing application if you don't have a smart system yetBonus insight: The color temperature experiment also helps you understand how your kitchen will feel at different times of day. Many homeowners now program 2700K for evening cooking — warmer, more relaxing — and 3000K for morning prep when clarity matters more. This is one of the most underutilized smart home features in kitchens, and it costs nothing once you have tunable bulbs.North- vs. South-Facing Kitchens: Why Orientation Changes Your Choice Kitchen orientation is the most underweighted factor in color selection. It matters enormously, and it changes the correct answer. North-facing kitchens receive no direct sunlight. The light inside skews cool and blue-tinted year-round. In these kitchens:Pure greige frequently reads too cold or gray Agreeable Gray (SW 7029) can veer toward blue-gray — test carefully Off-white and cream tend to work better because the warmth in the undertone compensates for cool ambient light If you're committed to greige, go warmer-leaning — Accessible Beige (SW 7036) over Agreeable GraySouth-facing kitchens get abundant warm direct sunlight. They're the most forgiving kitchens for warm neutrals because the light is naturally flattering. Almost any greige works. The risk flips: strongly warm tones like deep putty can feel heavy and overly saturated by midday. East-facing kitchens get bright morning light that cools through the afternoon. Cool-to-neutral greige (Agreeable Gray, Pale Oak) tends to behave consistently. Strong warm tones can feel heavy in the afternoons. West-facing kitchens receive golden afternoon light, which flatters nearly everything — especially mushroom and warm putty. Evening cooking in a west-facing greige kitchen can look genuinely beautiful.The Real Costs of Making the Switch Before committing, here's the honest financial picture. Professional Repainting vs. DIY: What the Numbers Actually Look LikeCabinet Repainting Cost Breakdown by Market (2025 Estimates):Market Professional Repaint DIY Materials Only Hardware ReplacementUnited States $1,200–$3,500 $200–$600 $150–$800United Kingdom £900–£2,800 £150–£450 £100–£600Australia $1,800–$4,500 $250–$700 $200–$900Canada $1,400–$3,800 $200–$550 $150–$750Ranges vary by kitchen size, number of cabinet doors, existing finish type, and whether doors are removed for spray finishing or painted in-place. Spray finishes — the professional standard — look better, last longer, and hide prep imperfections better than brush-applied paint. A professional cabinet refinisher with spray equipment will almost always produce a result that outperforms even a careful DIY job, and the quality gap on kitchen cabinets (where finish wear is daily) is particularly meaningful. That said, the cost difference is real, and DIY is a genuine option for the right kitchen and the right person. Hidden Costs: Hardware, Backsplash Compatibility, Touch-Up Paint This is where the budget surprises consistently happen. Hardware replacement is almost inevitable when moving from white to a warm neutral. Chrome and cool-toned brushed nickel hardware that looked fine against white often looks jarring against greige. Budget for a hardware refresh — even affordable brushed brass or matte black pulls can run $150–$400 for a full kitchen depending on the number of doors and drawers. Backsplash compatibility is the harder conversation. If you have cool gray subway tile or stark white marble-effect backsplash tile, warm greige cabinets may clash — sometimes in a pleasant, high-contrast way, sometimes in a way that looks unfinished. Test the combination with large samples before committing. If the backsplash is a problem, budget for the possibility of replacing it alongside the cabinets. Touch-up paint reality: Buy two extra quarts of your chosen color when you first paint. Cabinet paint gets scratched and chipped over years of daily use. Touch-up from the same tin works. Touch-up from a fresh batch mixed to the same code, two years later, often doesn't — particularly with warm tones where pigment mixing has slight batch-to-batch variance. Store the extra paint somewhere temperature-stable. Write the code and finish on the lid. Step-by-Step: The 10-Step Transition from White to a New Neutral Whether you're planning to DIY or just want to understand what the process involves before hiring, here's the honest sequence. Step 1 — Identify your cabinet material. Solid wood and MDF prime and accept paint reliably. Thermofoil cabinets (heat-sealed vinyl wrap over MDF, very common in 2000s–2015 builds) will eventually peel and cannot be reliably painted for the long term. If you have thermofoil, price out door replacement first before committing to paint. Step 2 — Assess your current finish. Previously painted cabinets are the easiest to repaint. Factory lacquer (common on new builds and IKEA cabinetry) requires sanding and a bonding primer. Veneer needs careful prep to avoid raising the grain. Know what you're working with before buying supplies. Step 3 — Run your undertone analysis. Before choosing any color, note the dominant undertone of your countertop, flooring, and primary light source. Write it down: cool gray? warm brown? creamy yellow? Your cabinet color needs to complement, not fight, at least two of the three dominant materials. Step 4 — Order large peel-and-stick swatches. Services like Samplize offer 12×12-inch peel-and-stick samples in most major paint brands. They're the most accurate way to preview color in your actual kitchen without brush-applying. Order 3–5 shortlisted shades. Step 5 — Run the smart bulb test. Set tunable white bulbs to 2700K and 4000K and evaluate each swatch under both. The shade that looks right under 4000K is the one to choose for kitchens with strong task lighting. If 4000K kills it, go warmer in LRV or undertone. Step 6 — The 48-hour swatch test. Pin your top two shades to an actual cabinet door. Observe at 7am, noon, 3pm, and 8pm. Two full days. Take photos at each. The color that looks best in photos is the color that will look best in listing photos when you sell. Step 7 — Choose your finish. Satin is the standard for kitchen cabinets: wipeable, durable, low-moderate sheen. Eggshell is softer and better at hiding prep imperfections but less scrubbable on heavily used surfaces. Matte looks luxurious but chips faster near high-contact areas. Avoid gloss unless it's a deliberate design statement. Step 8 — Make the DIY vs. professional call. Use the decision framework in the next section. If you have more than 30 cabinet doors, thermofoil panels, factory lacquer, or custom cabinetry, professional is the lower-risk choice. Step 9 — Prep properly. This is where DIY jobs succeed or fail. More than 60% of DIY cabinet paint failures trace back to inadequate prep. Clean with TSP substitute or degreaser, degloss with liquid deglosser, sand with 220-grit, apply bonding primer to all surfaces, and only then topcoat. Skipping degreasing, skipping primer, or rushing dry times are the three most common mistakes. Each one leads to peeling within 12–18 months. Step 10 — Document everything and buy extra. Note the exact paint code, brand, finish, and sheen on a label inside a cabinet. Store two quarts in a temperature-stable location. Photograph your original cabinet color before starting. These three minutes of admin save significant money and frustration two or three years down the line.How to Choose the Right New Neutral for Your Kitchen The Undertone Test: Why This Matters More Than the Color Name Every neutral has an undertone — a secondary color that emerges and becomes dominant under certain lighting conditions. This is the most important thing to understand before committing to any cabinet color, and it's what most homeowners skip. Greige undertones can be:Yellow/gold — the most flattering and versatile; works with most stone and wood Pink/red — warm but can turn muddy; clashes with marble or veined gray stone Green — subtle but present in some mid-LRV neutrals like Revere Pewter; causes adjacent whites to look almost blue Purple/lavender — rare but real; avoid for kitchensHow to identify an undertone: Hold a pure white card next to the paint swatch in natural light. The undertone becomes immediately visible by contrast. This works in seconds and is more reliable than any description on a paint store label. The 48-Hour Swatch Test: How Designers Actually Choose ColorsEvery experienced interior designer gives the same advice: don't choose a cabinet color from a chip in a hardware store. Paint store lighting is specifically designed to make colors look flattering — usually with a warm overhead light that looks nothing like your actual kitchen. The real process:Get physical swatches at least 12×12 inches — Samplize peel-and-stick samples are worth the cost for this decision Place them on an actual cabinet door face, not on a wall — the surface finish and angle matters Don't look at them for the first hour; reset your perception Observe at morning light, midday, afternoon, and after dark under your actual kitchen lighting Photograph each swatch in each condition with your phone Compare the photos side by side — the color that looks best in photos is the one that will serve you best in listing photos5 Mistakes Homeowners Make When Switching from White These come up consistently and most of them are expensive to reverse.⚠️ Mistake 1: Testing tiny chips. A 2×3-inch paint chip is essentially useless for cabinet color evaluation. Color perception changes with surface area — a shade that looks soft and subtle on a chip can feel heavy and saturated when it's applied across 30 cabinet doors. Always test at full scale.⚠️ Mistake 2: Choosing color in the store, not your kitchen. Every designer who works with homeowners has a version of this story. Client loves the shade in the store. Hates it at home. The light is fundamentally different in ways that matter. Decisions must be made in your actual kitchen, under your actual conditions.⚠️ Mistake 3: Ignoring the undertone. Homeowners frequently choose a color because the name appeals — "Dune," "Warm Linen," "Mushroom" — without checking the undertone. Names are marketing copy. What matters is whether the undertone works with your specific combination of countertop material, flooring, and light source. Test before assuming.⚠️ Mistake 4: Forgetting the hardware. New cabinet color, same old hardware. This is one of the most common reasons a kitchen renovation looks "almost right" but not quite. Chrome handles against warm greige cabinets are the visual equivalent of a mismatched outfit. Even a modest hardware upgrade — $150–$300 for brushed brass pulls from a mid-range supplier — transforms the overall result.⚠️ Mistake 5: Painting upper cabinets only. Upper and lower cabinets need to match, or there needs to be a very deliberate, well-executed reason they don't. Many DIYers start with just the uppers to "test" the color — and then end up either stuck with a half-done result or repainting everything twice. Do all or plan both from the start.Will the New Neutrals Also Go Out of Style? This is the anxiety underneath every renovation decision: I'm about to spend real money on a trend that might look dated in five years. It's the right question. The honest answer has genuine nuance. Myth vs. Reality: The New Kitchen NeutralsThe Claim The Reality"White always photographs better for resale" Only in ideal lighting. Warm neutrals perform equally well or better in ambient light — which is how most listing photos are taken in real conditions."Greige will date like gray did" Unlikely. Gray was a fashion-forward trend. Greige is a warm neutral — a close relative of beige, which has had sustained market appeal for four decades. The specific shade matters; the category doesn't cycle the way color-forward trends do."Bold is riskier than neutral" True for resale broadly. But "neutral" doesn't mean "white." Greige is a neutral. Putty is a neutral. Color theory doesn't change because white happens to feel familiar."Online swatches are accurate" Categorically false. Monitor calibration, browser rendering, photography lighting, and screen brightness all distort color significantly. Always evaluate physical samples in your actual space."Warm neutrals only work in rustic kitchens" False. Greige performs in contemporary, transitional, and modern kitchens. The hardware and countertop choices shift the stylistic context — not the cabinet color itself.The deeper truth: Trends cycle. Design movements don't — at least not quickly. The shift away from white is part of a broader move toward warmth, texture, and human-scale design that's been building since 2020. Natural materials. Real wood. Handmade-looking tile. Imperfect surfaces. Greige and putty don't just follow this movement — they're architecturally suited to it in a way white never was. For historical context: warm beige dominated kitchens from roughly 1985–2005. Gray came in around 2008 and peaked around 2016. White overlapped with both and peaked around 2018–2020. Warm neutrals (greige) have been building since 2019. Based on how design cycles have tracked, we're likely looking at a 10–15-year run for warm neutrals before the market shifts meaningfully again.Regional Trends: Does the New Neutral Work Everywhere? Not quite the same everywhere — but the direction is consistent across markets. United States: Greige, particularly Agreeable Gray (SW 7029) and Accessible Beige (SW 7036), has become the top-selling kitchen neutral in most US markets. Real estate data from major platforms has shown homes with warm neutral kitchens spending fewer days on market in key metros including Denver, Atlanta, and Phoenix. White still sells in coastal luxury markets — New York, Los Angeles, Miami — but is losing ground even there. United Kingdom: The shift has been more decisive. Farrow & Ball's warmer palette — Elephant's Breath, Skimming Stone, Cornforth White — already had strong market penetration before the broader trend. UK buyers tend toward warmer kitchens by tradition, so the transition has felt more natural. The trend here is moving toward mushroom, soft sage, and chalky warm whites rather than heavy greige. Australia: Warm neutrals are tracking strongly in Sydney and Melbourne. The strong, warm natural light in Australian homes means greige and putty read beautifully without the risk of going flat or cold. Limewash and Venetian plaster finishes have also grown significantly as accent surfaces alongside warm-toned cabinetry. Canada: The trend mirrors the US with regional variation. In Quebec, softer, more European-influenced palettes — cream, warm off-white, light putty — have stronger appeal. In Ontario and BC, the West Coast modern aesthetic favors cleaner, more muted warm tones: putty over saturated greige. One important caveat: Local resale markets vary in ways that national trend data can't capture. If your neighborhood skews conservative and traditional in renovation taste, white or off-white may still be the safer resale choice. Your own observation of recently sold homes nearby is more reliable than any national statistic.DIY vs. Professional: Making the Right Call This is a decision with real financial and aesthetic consequences. Here's the honest framework.Factor DIY Can Work Go ProfessionalCabinet material Solid wood or MDF in good condition Thermofoil (strongly advise against DIY)Number of doors Up to 20–25 26+ (labor math shifts quickly beyond this)Current finish Previously painted over primer Factory lacquer, veneer, specialty coatingsBudget Under $400 total for materials If finish quality matters more than cost savingsTimeline Can allocate 3–7 days across prep and drying Need professional-grade result within a weekPrior experience Have painted furniture or trim before No previous furniture or cabinet paintingExisting condition Good, no major chips or peeling Multiple failing areas, water damage near sinkResale timeframe Living in home 5+ more years Selling within 2 yearsThe honest truth about DIY cabinet painting: Prep takes twice as long as you expect. The first coat looks alarming — normal; apply a second. Runs and brush marks happen to everyone the first time. The result can be very good with patience, but truly professional-level finish quality requires spray equipment, a temperature-controlled environment, and more practice than most homeowners have had. When hiring a professional, ask specifically:Do they spray or brush-apply? (Spray = significantly better finish) Do they remove doors or paint in-place? (Door removal + spray = best result) What primer do they use? (Bonding primer is essential on previously painted surfaces) Do they replace or re-hang hinges? (New hinges matter more than most people realize) Do they provide a touch-up kit on completion? (Standard practice with reputable refinishers)For finding qualified cabinet refinishing contractors, both Angi and HomeAdvisor offer vetted contractor listings with verified reviews and project photos — useful for comparing approaches before committing.Frequently Asked Questions What color is officially replacing white kitchens in 2025? There's no single replacement color, but greige — the blend of gray and beige — is the most dominant. Specific shades like Sherwin-Williams Agreeable Gray (SW 7029), Benjamin Moore Pale Oak (OC-20), and Farrow & Ball Skimming Stone (No. 241) are seeing the highest uptake in current renovations. Warm putty and mushroom tones are running close behind for homeowners who want something quieter and less gray-leaning.Is greige better than white for kitchens? For most real-world kitchens, yes — in practical terms. Greige hides fingerprints and daily wear more effectively, pairs better with warm wood and stone materials, and doesn't yellow near range hoods the way white does. The primary trade-off: greige is more sensitive to lighting conditions and requires more careful swatch testing before committing.Will warm kitchen neutrals go out of style quickly? Unlikely within the next decade. Warm neutrals are different from trend-forward colors. Greige is in the same family as beige, which has had continuous relevance in residential design for over 40 years. The specific implementation — hardware, countertops, tile — affects longevity more than the base color. A well-executed greige kitchen with quality materials is unlikely to feel dated within 10–12 years.What neutral color has the best resale value for kitchens? Based on current market data, warm neutrals — especially greige and off-white — are outperforming pure white in most US and UK residential markets. White still performs well in premium urban and luxury markets where buyers expect high contrast. For most suburban and regional markets, a warm neutral with updated hardware appeals to the broadest buyer pool and is increasingly being interpreted as a premium signal rather than a safe default.How do I properly test a paint color before painting cabinets? The most reliable method: large peel-and-stick samples of at least 12×12 inches (Samplize is the best service for this) applied to an actual cabinet door face, observed over 48 hours under different lighting conditions. If you have smart tunable bulbs, switch between 2700K and 4000K to understand how the color shifts across lighting conditions. Never choose based on a chip in a hardware store.My kitchen faces north — which greige should I choose? North-facing kitchens need warmer, more beige-leaning greige to avoid the color reading cold and gray. Accessible Beige (SW 7036), Pale Oak (BM OC-20), and F&B Skimming Stone tend to work better than cooler greige options like Agreeable Gray in limited natural light. Aim for LRV 58 or above to keep the space feeling open rather than heavy.The Bottom LineThe white kitchen isn't dead — but it's no longer the automatic answer. If you're renovating, specifying a new build, or wondering whether your existing white kitchen is working against your resale value, the design data and material logic both point the same direction: toward warmer neutrals that live better, photograph well, and feel more like a home than a showroom. The shift won't leave you stranded. Greige, putty, and warm off-white are genuinely better performers for most real-world kitchens under most conditions. They're more forgiving. They age more gracefully. And they work naturally with the materials defining kitchen design right now — the oak, the brass, the stone, the handmade tile. Test carefully. Swatch at full scale. Use your smart lighting to its full potential before buying a drop of paint. And don't rush the decision — a $2,500 cabinet repaint that misses the mark is one of the more avoidable expenses in home renovation.Want to explore how smart home lighting can let you preview kitchen colors before committing to a full renovation? Our complete guide to LED color temperature for home interiors covers exactly that. Related Reading:The Homeowner Maintenance Cheat Sheet That's Actually Worth Saving Basic Home Maintenance: The Complete Homeowner's Guide Paint Tricks Designers Use to Make Small Rooms Look Bigger (And Why They Actually Work)
.webp)
How to Keep Track of All Your Home Maintenance Tasks (The System That Actually Works)
Quick Answer: The most effective way to track home maintenance tasks combines a digital tracking app, a seasonal checklist organized by month, and recurring calendar reminders. Homeowners with smart home systems can add automated sensor-based alerts for critical tasks like HVAC filter changes and water heater servicing. Key Takeaways:Use a dedicated app or template (HomeZada, Centriq, or a Notion spreadsheet) to log every system and appliance Layer in calendar reminders — recurring Google Calendar events for monthly, quarterly, and annual tasks Download or build a seasonal checklist — one per season, covering 10–15 priority tasks Connect smart home devices when possible — smart thermostats can trigger automatic filter reminders Start with your biggest risks first: HVAC, water heater, gutters, and smoke detectors Review your tracking system quarterly — the system itself needs maintenance or it goes staleHere's what most maintenance guides won't tell you: the tracking system itself needs maintenance. And that's exactly where most homeowners' systems quietly fall apart. You probably don't think about your HVAC filter until the HVAC technician mentions it in a service call — or worse, until the unit stops working in August. You might remember the gutters when you're standing in the driveway in November watching leaves pile up, three weeks after you should have cleaned them. This isn't laziness. It's the nature of home systems: they fail invisibly, quietly, and expensively. After working through various tracking methods — and watching plenty of them fail — the pattern is consistent. The system that survives long-term isn't the most sophisticated. It's the one with the lowest friction. This guide walks through exactly how to build that system: from a simple home inventory to smart home integration, seasonal checklists, and the apps worth your time in 2026.Why Most Homeowners Fall Behind on Maintenance (And Why Good Intentions Aren't Enough)Most people who fall behind on home maintenance aren't irresponsible homeowners. They're busy, they're dealing with competing priorities, and most critically — home systems don't give obvious warnings before they fail. The "Out of Sight, Out of Mind" Problem With Home Systems Your HVAC filter doesn't light up red when it's clogged. The gutter pulling away from your fascia does it slowly, over two winters, invisible from the ground. The water heater sediment builds up for years before the efficiency drop shows up on your energy bill — and even then, most people blame the utility company. This is the core problem. Maintenance tasks have no built-in trigger. There's no error message. The appliance looks fine until suddenly it isn't, and by that point, a $15 fix has become a $3,200 repair. First-time homeowners fail here because they don't know what to track. Experienced homeowners often fail for a different reason — they know exactly what needs doing, they just don't have a reliable system to prompt them. Both groups end up in the same place: reactive, expensive, and frustrated. What Skipping Maintenance Actually Costs You "Maintenance is expensive" misses the point. Deferred maintenance is what's expensive.Maintenance Task Routine Cost If Deferred (Estimated Repair) Deferral WindowHVAC filter change $60–$120/year $2,000–$8,000 compressor replacement 12–18 months of neglectGutter cleaning $150–$300/year $4,000–$15,000 foundation/fascia repair 2–4 yearsWater heater flush $0–$100 (DIY) $800–$1,500 early replacement 3–5 yearsRoof inspection $150–$300 every 3 years $8,000–$25,000+ full replacement 5–8 yearsSmoke detector battery $5–$15/year Life safety — no price VariableExterior caulk/seal $20–$50 (DIY) $500–$3,000 water intrusion 3–5 yearsReal example: A family ignores gutter cleaning for three years. Not because they forgot — they had it on a list somewhere. But the list wasn't connected to any reminder, any calendar, or anything visible. Water pooled against the foundation through two wet winters. Repair estimate: $11,500. Annual gutter cleaning cost: $200. That's not a home maintenance problem. That's a tracking system problem. The Deferred Maintenance Snowball Effect Here's what makes this worse: missed tasks compound. A clogged filter strains the HVAC blower motor. A strained blower motor runs hotter, wearing out the capacitor. A failed capacitor in July means an emergency service call at 1.5x–2x standard rates — while you wait in the heat for a technician who's already booked solid. One $18 filter becomes a $600 emergency visit. Skip the annual service on top of that and the compressor is next. The snowball rolls fast.🏠 Most homeowners overlook this: Appliance manufacturers often include a maintenance schedule in the product manual that, if not followed, can void your warranty. Check your HVAC, water heater, and dishwasher manuals specifically — manufacturer-recommended service intervals are legally significant.The Four Main Ways Homeowners Track Maintenance (With Honest Trade-Offs)There's no universally superior method. The right system is the one you'll actually use — not the one that looks best in a productivity YouTube video.Method Setup Time Ongoing Effort Cost Best For Biggest WeaknessPaper binder/notebook 1–2 hours Low $0 Simple households, tech-averse owners No reminders; easy to loseSpreadsheet (Google/Excel) 2–4 hours Medium $0 DIYers comfortable with data No automatic reminders; discipline-dependentCalendar reminders only 30–60 min Very low $0 Minimalists, beginners No task history or loggingDedicated maintenance app 3–5 hours Low $0–$12/month Homeowners who want all-in-one Setup friction; abandonment riskSmart home automation 4–8 hours Very low $50–$300 hardware Smart home households Alert fatigue; complex setupCombination system (recommended) 4–6 hours Low-medium $0–$25/month Most homeowners Initial time investmentPaper Systems and Binders — Still Underrated Paper binders get mocked online. I've seen them outlast three different apps in real-world use. If you're a pen-and-paper person — if you actually write grocery lists by hand and keep them — don't fight your nature. A well-organized home binder with tabbed sections (HVAC, plumbing, appliances, exterior) and a simple task log can work for years. The limitation is real: paper can't remind you of anything. You have to remember to open it. If you're the type who checks a physical planner daily, this works. For most people, a paper system needs to be paired with at minimum a calendar reminder layer. On its own, the binder becomes an archive, not a system. Spreadsheets and Templates — Flexible But Demanding Google Sheets and Airtable templates give you maximum control over how information is organized. You can track install dates, model numbers, warranty expiration, service history, and cost — all in one place. Notion has a strong home maintenance template community if you prefer a more visual layout. The honest limitation: spreadsheets don't push reminders. You have to pull them. That requires a discipline habit that most people don't sustain past the first month without a prompt. If you use Google Sheets, you can trigger email reminders via Apps Script — but that requires setup. For most people, the spreadsheet becomes a record-keeping tool after the fact, not an active tracking system. Dedicated Home Maintenance Apps — When They Work and When They Don't I've tested most of the major ones. The apps that survived the longest shared one trait: they made logging a completed task faster than the temptation to skip it. Apps that bury the log function three taps deep lose to apps with a single "Done" tap. The other reality: most maintenance apps require a full initial setup to be useful. That setup — entering every appliance, pulling service dates — takes 3–5 hours for a typical home. Apps that let you start with just reminders, then add inventory later, have a much better chance of sticking. Full app comparison is in the section below. Smart Home Automation for Maintenance Reminders — The Emerging Approach If you already have a smart thermostat, water sensors, or a connected home platform, you have tools that can generate maintenance signals automatically — without you setting a reminder at all. This approach has the lowest ongoing effort once configured. It also has the most complex setup and, importantly, a specific failure mode worth understanding before you go all in on it. Full detail in the smart home section below.How to Build Your Home Maintenance Tracking System From ScratchIf you've never had a system, or if yours collapsed and you're starting over — this is the process. It's sequential for a reason. Skipping steps creates the gaps that cause tracking systems to fail. Step 1 — Create a Complete Home Inventory (This Is Where Most People Skip) This is the foundation. Without it, every other part of the system has holes. Block a full Saturday afternoon for this — not a Tuesday evening. For a 2,000–3,000 sq ft home, a complete inventory takes 3–5 hours the first time. Rushing it means missing things. Document every major system and appliance:Category (HVAC, plumbing, electrical, appliances, exterior) Make and model number Year installed or estimated age Last known service date Warranty expiration (if known) Location of manual and warranty documents Expected service interval based on manufacturer specWalk the house systematically: basement first, then mechanical room, then room by room. Don't forget garage door opener, water softener, sump pump, and outdoor irrigation — these are the most commonly omitted items.⚠️ Safety Note: During your inventory walkthrough, test every smoke detector and CO detector. Check the manufacture date on the back. Units older than 10 years should be replaced regardless of battery condition. This is a life-safety step, not optional.Step 2 — Categorize Every Task by Frequency Once you have your inventory, pull the manufacturer-recommended service intervals for each item. Most manuals have a maintenance schedule section. If you've lost the physical manual, most manufacturers publish them online — or use an app like Centriq, which can scan your appliance label and retrieve the manual automatically. Sort every task into frequency tiers:Monthly: HVAC filter check, test smoke/CO detectors, inspect sump pump (if applicable), clean range hood filter Quarterly: Exterior walk-around, check caulking at windows/doors, clean refrigerator coils, flush tankless water heater (per manufacturer) Semi-annual: HVAC service (spring and fall), gutter cleaning, check weatherstripping, inspect attic insulation Annual: Water heater flush and anode rod check, roof inspection, chimney inspection (if applicable), dryer vent cleaning, garage door spring lubrication Every 3–5 years: Exterior repaint or restain, deck refinishing, septic pumping (if applicable), whole-home re-caulking assessment As-needed: Any repair triggered by inspection findingsBuilding Your Task Library From Manufacturer Manuals This step is where most tracking guides stop short. Manufacturer manuals don't just list service intervals — they define them. HVAC warranties from major brands like Carrier, Lennox, and Trane often require documented filter changes at specified intervals to remain valid. If your unit fails and you can't prove filter maintenance was performed, the manufacturer warranty may not cover it. Apps like Centriq automate the manual-retrieval step. For a mixed-appliance home with 15–20 items, that's a significant time save over hunting down PDFs individually. Step 3 — Choose a Tracking Tool That Matches Your Behavior Here's the mistake most people make: they choose the tool that sounds best in theory, not the one that matches their actual behavior. Ask yourself honestly: Do you check your phone for task reminders, or do you ignore notification badges? Do you open apps proactively, or only when prompted? Do you use your calendar daily, or rarely? The behavior-matching principle:If you live in your calendar → Google Calendar is your primary system, everything else is secondary If you're highly digital but want history logging → HomeZada or Centriq If you're a spreadsheet person → Google Sheets with a companion calendar for reminders If you have smart home infrastructure → Layer in automation, but keep a manual backupFor shared households: The "one person manages everything" approach creates a fragile system. If that person gets sick, goes on a trip, or simply burns out from carrying the mental load — everything falls apart. Use a shared calendar (Google Calendar allows per-person notification settings), and ensure both partners can see the current season's task list. A physical whiteboard in the kitchen listing the month's active tasks is sometimes more effective than any app. Step 4 — Build a 3-Layer Reminder Architecture Single-point-of-failure reminder systems don't hold up long-term. The most resilient approach uses three independent layers: Layer 1 — The Log (App or Spreadsheet) Your record of what's been done and when. HomeZada, Centriq, a Google Sheet — whatever you chose in Step 3. This is your source of truth. Layer 2 — The Trigger (Calendar Reminders) Recurring Google Calendar or Apple Calendar events tied to every task in your frequency categories. Set them 1 week ahead for anything requiring scheduling a contractor. Set them the same day for DIY tasks. Make them repeat automatically. Layer 3 — The Physical Signal (On-Appliance Label) Write the next service date directly on the appliance with a marker or label. Put the HVAC filter change date on the filter slot door. Put the water heater flush date on the unit itself. This layer catches the tasks that slip past digital reminders — especially when you're standing in front of the appliance and the date is written right there.⚠️ Expert Note: Don't rely on a single reminder layer. Smart home alerts get dismissed, calendar notifications get buried, and apps get ignored. Critical maintenance tasks — anything with a safety or high-cost consequence — need at least two independent reminder triggers.Step 5 — Schedule Your First Quarterly Review Right Now Before you close this tab, schedule a 20-minute calendar block 90 days from today. Title it "Home Maintenance System Review." Every quarter, use that block to:Check which reminders fired and which tasks were actually completed Update any appliance or system changes (new water heater, replaced HVAC filter brand) Add any new items discovered during inspections Remove outdated reminders for appliances you've replacedThe tracking system itself decays without this. Reminders accumulate for appliances you've already replaced. Seasonal tasks that were completed stay in the "open" column. Over time, the noise overwhelms the signal — and the whole system gets abandoned, usually around month four.The Best Home Maintenance Apps and Digital Tools in 2026I've tested most of these apps over extended periods. The ones that survived had one thing in common — and it wasn't the feature list. It was low-friction logging. The moment completing a task in an app takes longer than skipping it, the skip wins.App Price Smart Home Integration Standout Feature Honest Limitation Best ForHomeZada Free / $8.99/month Limited Full home inventory + document storage Paid tier required for full value Detail-oriented homeownersCentriq Free / $5.99/month Appliance scanning Scan appliance labels for instant manuals US-centric database Appliance-heavy householdsOurHome Free None Family task sharing with calendar sync Gamification feels patronizing to most adults Shared household coordinationGoogle Calendar Free Via IFTTT/Routines Zero learning curve; already in use No task history or completion log Minimalists and beginnersNotion (template) Free None Fully customizable; excellent for DIY systems Requires template-building time upfront Power users and spreadsheet peopleHome Assistant Free (self-hosted) Excellent Full smart home integration and automations Steep technical learning curve Advanced smart home usersFree Home Maintenance Tracking Options That Hold Up Google Calendar is the most underrated home maintenance tool available. It's free, it's already on your phone, and it supports recurring events with custom notification timing. A well-configured Google Calendar system — with recurring annual, quarterly, and monthly events and a seasonal checklist shared between household members — outperforms a forgotten $99 app every single time. BrightNest (free) offers curated maintenance tips and task reminders without requiring a full home inventory, which makes it a good starting point for first-time homeowners who feel overwhelmed by the inventory step. HomeZada's free tier covers basic task reminders and a limited home inventory — enough to get started without committing to a subscription. For Notion users: the Notion community has solid home maintenance templates that combine inventory, task library, and seasonal checklists in a single workspace. The trade-off is setup time — expect 2–3 hours to configure a template that covers your home. Premium Apps Worth the Monthly Cost HomeZada Pro ($8.99/month) adds full document storage — warranty PDFs, service invoices, appliance manuals, and contractor receipts stored in one searchable location. For homeowners approaching resale, or anyone who's ever scrambled to find a warranty during a repair conversation, that document vault alone justifies the cost. Centriq's premium tier ($5.99/month) is most valuable for appliance-heavy households. The appliance scanning feature — point your phone's camera at an appliance label, and Centriq retrieves the model-specific manual and maintenance schedule — saves hours of manual inventory work. Honest limitation: Centriq's database is strongest for US-market appliances. Imported brands or older models sometimes come up empty. Who should hold off on paid apps: anyone who hasn't maintained a free system for at least 60 days. If you haven't proven to yourself that you'll engage with the tracking habit, a paid subscription won't change that — it'll just add guilt to the equation. Which App Is Best for Smart Home Users Specifically? None of the dedicated maintenance apps have deep native smart home integration yet — that's the honest answer. HomeZada doesn't read from your Ecobee thermostat. Centriq doesn't pull sensor data from your Flo by Moen. For genuine smart home maintenance integration, Home Assistant is the most capable platform — but it's a self-hosted, technical product that requires meaningful setup investment. IFTTT-based bridges between maintenance apps and smart home platforms work in limited cases but are fragile and require ongoing management. The practical approach for most smart home households: use your smart home devices for condition-based alerts (the Ecobee notifies you when HVAC runtime exceeds the filter replacement threshold), and use a separate app or calendar for history logging and scheduled tasks. Two systems, connected loosely, is more reliable than waiting for one app to do everything. Using Voice Assistants for Home Maintenance Reminders Voice reminders work better for some households than others — specifically, those where at least one person regularly engages with Alexa or Google Home for other routines. If nobody in the house talks to the smart speaker regularly, maintenance reminders shouted at an empty kitchen don't work. For households that do use voice actively, reminders serve as an audio Layer 2 — a spoken prompt that backs up the calendar notification. How to Set Up a Recurring Maintenance Reminder on Amazon AlexaOpen the Alexa app on your phone Tap More → Routines → Create Routine Under "When this happens," tap Schedule and set your recurring day and time Under "Add action," tap Alexa Says → Customized → type your reminder ("Time to check the HVAC filter") Select which Echo device announces the reminder Save and confirm it fires correctlyImportant limitation: Alexa reminders are announcements only. They don't log completion, don't link to your app, and don't know whether the task was actually done. Treat them as a prompt, not a record. Google Home Routines for Seasonal Home Maintenance Google Home routines work similarly — set a scheduled routine that has Google Assistant announce a maintenance prompt at a specific time on specific days. Google Home's advantage is slightly better integration with Google Calendar, so if your maintenance events are calendar-based, the assistant can reference them directly. Neither platform replaces a logging system. They're reminder triggers — useful as part of the 3-layer architecture, not as a standalone solution.How Smart Home Technology Can Automate Home Maintenance TrackingThis is where most home maintenance articles stop. They treat smart home integration as a footnote — "and if you have smart devices, use them." That's not enough. For smart home households, sensor-based maintenance alerts represent the single biggest quality-of-life improvement available for home upkeep. Smart HVAC Filters and Air Quality Monitoring Standard HVAC filter reminders are time-based: change every 30, 60, or 90 days depending on filter type. The problem is that actual filter lifespan depends on how much the system runs, indoor air quality, pets, and construction activity nearby. A time-based reminder is an approximation. Ecobee thermostats track HVAC runtime hours and generate filter replacement reminders based on actual system use rather than a fixed calendar. A filter in a lightly used vacation home lasts much longer than the same filter in a home where the system runs 12 hours a day. Filtrete Smart filters take this further — the filter itself connects to an app and tracks its own usage, sending a replacement alert when airflow restriction reaches a defined threshold. After seeing how my filter-change habits improved with this setup, the behavioral change is real: a notification tied to measurable data is harder to dismiss than a generic calendar reminder. Air quality monitors (Dyson, Awair, Airthings) provide an indirect maintenance signal. Sustained PM2.5 or VOC readings above normal in a home with a fresh filter often indicate the HVAC system needs cleaning, the ductwork needs inspection, or there's a ventilation issue worth investigating. Water Heater, Plumbing, and Leak Detection Automation A leak detection sensor is the single highest-ROI smart home purchase for most homeowners, and it's one of the most underused. Flo by Moen monitors your home's entire plumbing system — flow rate, pressure, temperature — and can detect anomalies that indicate a developing leak, a failing valve, or a running toilet. It generates alerts before visible damage occurs. A $200 device preventing a $12,000 subfloor repair is not a hypothetical — it's what these sensors are designed for, and what they deliver when installed correctly. Govee water detector sensors ($20–$30 each) are the budget entry point: place one under the water heater, under the refrigerator, under bathroom vanities, and in the basement near any drain or sump. They don't provide the diagnostic depth of Flo by Moen, but they catch the most common catastrophic leaks — a slow valve failure, a hose connection letting go — before they become structural problems. Maintenance angle: an abnormal pressure reading from Flo by Moen isn't just a leak alert. It can indicate your pressure regulator is failing — a $200 professional repair if caught early, or $800+ if left until a pipe joint fails.🏠 Most homeowners overlook this: A sudden spike in your heating or cooling bill is often the first symptom of a maintenance problem — dirty coils, a clogged filter, failing insulation, or a duct leak. Treat an unexplained 15%+ increase in energy use as a maintenance signal, not just a billing quirk.Appliance Runtime Monitoring for Maintenance Alerts Smart plugs with energy monitoring — Kasa EP25, Emporia Vue — track appliance power draw over time. A refrigerator that's working 40% harder than usual to maintain temperature is either running in a hot environment, has dirty condenser coils (clean them annually — almost nobody does), or is beginning to fail. The energy data tells you before any other symptom does. For HVAC runtime, your smart thermostat already has this data. Review the monthly usage report most smart thermostats generate — a system that runs significantly longer to reach set temperature in comparable weather conditions is signaling something: low refrigerant, dirty evaporator coils, or a duct leak worth investigating. Building a Centralized Smart Maintenance Dashboard Home Assistant (free, self-hosted) is the platform that makes this possible for serious smart home households. You can aggregate alerts from Ecobee, Flo by Moen, smart plugs, air quality monitors, and any other connected device into a single dashboard with a dedicated "Maintenance Signals" panel. This isn't a beginner setup. Expect to spend a weekend on configuration. But for a home with significant smart infrastructure, having all maintenance signals surfaced in one place — instead of scattered across five separate apps — is a meaningful quality-of-life improvement. The Problem With Relying Solely on Smart Home Automation Here's the thing about smart home maintenance alerts that most enthusiast content glosses over: alert fatigue is real, and it's quietly making some smart home owners worse at maintenance than homeowners with no automation at all. When an alert fires repeatedly and gets dismissed — three times, five times, ten times — the brain learns to categorize it as background noise. The Ecobee filter reminder that's been snoozed for six weeks isn't protecting you anymore. It's just another notification you've trained yourself to ignore. The practical rule I use: if any maintenance alert has been dismissed or snoozed more than twice without action, it needs to be physically scheduled on a calendar with a specific completion date. An alert that keeps getting dismissed is a process failure, not a reminder success. Smart home alerts are prompts. They are not completion guarantees. The calendar backup is non-negotiable.The Complete Seasonal Home Maintenance Checklist for Smart HomeownersThe tasks homeowners most regret skipping aren't the obvious ones. Here are the ones that consistently become expensive surprises. Spring Home Maintenance Checklist (March–May) Spring is the highest-stakes season. You're coming out of winter with potential damage you haven't seen yet, and heading into cooling season with systems that need to be ready.HVAC: Switch to cooling mode, replace filter, schedule professional service before heat hits (technicians book out fast) Gutters: Clean winter debris, check downspout extensions are directing water away from foundation Roof: Post-winter inspection — look for lifted shingles, damaged flashing, granule loss in gutters Exterior caulk: Inspect around all windows and door frames; freeze/thaw cycles crack caulk that looked fine in fall Deck/patio: Check for rot, loose boards, and fastener corrosion after freeze/thaw cycles Sump pump: Test it — pour water in the pit to confirm the float triggers the pump. If it hasn't run in months, this is when you find out it failed. Smoke/CO detectors: Test every unit, replace batteries (if not using 10-year sealed units) Irrigation system: Inspect sprinkler heads after winter shutoff; check controller schedule for summer settings Smart home: Update thermostat schedule for cooling season; test outdoor sensors and cameras for weather seal integrity Crawlspace/basement: Check for moisture accumulation from snowmelt; inspect vapor barrierSummer Home Maintenance Checklist (June–August) Summer maintenance is lighter on HVAC but heavy on exterior systems and pest access points.AC system: If cooling efficiency seems down, have refrigerant levels and condenser coils checked professionally Outdoor hose bibs: Check for any dripping at the connection; summer pressure can expose loose fittings Sprinkler heads: Walk the yard with the system running — look for heads not rotating or spraying sideways Pest inspection: Check crawlspace, attic access, and foundation perimeter for new entry points; summer is peak pest activity Window screens: Repair or replace damaged screens before mosquito season peaks Deck/wood surfaces: Apply stain or sealant if due; do this in moderate temperatures, not peak summer heat Smart irrigation: Review Rachio or RainBird WiFi settings for heat conditions — bump run times for drought weeks Smoke detector batteries: Pick a fixed summer date (July 4th works well — easy to remember) for a full battery replacement cycleFall Home Maintenance Checklist (September–November) Fall is the most task-dense season. Get ahead of it. A scrambled November is the result of a September that didn't happen.HVAC: Switch to heating mode, replace filter, schedule furnace or heat pump service before the first cold snap — not after it when technicians are overwhelmed with emergency calls Gutters: Clean after leaves have finished falling (late October to mid-November in most climates), not before Weatherstripping: Check all exterior doors for gaps — run your hand along the seal on a cold day; you'll feel the drafts immediately Pipe insulation: Insulate any exposed pipes in unheated spaces; drain and shut off outdoor hose bibs before first freeze Water heater: Flush sediment, inspect the anode rod, check temperature setting (120°F is the recommended default) Roof: Clear any debris from valleys and gutters; post-storm inspection if you had fall wind events Fire extinguisher: Check pressure gauge — needle should be in the green zone Smart home: Update thermostat heating schedule; check smart sensor battery levels (cold weather accelerates drain) Dryer vent: Clean the duct annually — lint accumulation is a documented fire hazard and frequently skipped⚠️ Safety Note: Dryer vent cleaning is the most commonly overlooked fire-risk maintenance task. Lint restricts airflow, causes the dryer to run hotter, and can ignite. Annual duct cleaning — either DIY with a dryer vent kit or professional — is non-negotiable for homes where the dryer is used regularly.Winter Home Maintenance Checklist (December–February) Winter maintenance is largely about monitoring and emergency preparedness — the goal is no surprises.Furnace/heat pump: Check the filter monthly during heavy-use months, not quarterly CO detectors: Test monthly — a properly functioning CO detector is not optional when gas heating is running continuously Roof/attic: Watch for ice dam formation at eaves; check attic insulation adequacy if you're seeing significant ice buildup Pipes: Know where your main shutoff is. In a severe cold snap, keep cabinet doors open under sinks on exterior walls. Know the signs of a frozen pipe before it becomes a burst pipe. Emergency preparedness: Verify flashlight batteries, backup heating option (space heater, fireplace supply), and your utility company's emergency number is saved in your phone Smart sensors: Check battery levels on all sensors — cold temperature accelerates battery drain in unheated spacesThe Biggest Mistakes Homeowners Make With Their Maintenance Tracking System If you've tried building a maintenance tracking system before and it fell apart, it almost certainly failed for one of these reasons. Building a System Too Complex to Sustain The most common failure mode isn't laziness — it's overengineering. Someone spends a productive Saturday building a gorgeous, color-coded spreadsheet with 47 maintenance categories, automated conditional formatting, and a separate sheet for each appliance. They feel great about it. They never open it again. A system you use 80% of the time beats a system you use 0% of the time by an enormous margin. Start with the minimum viable tracking system: your top 15 highest-risk tasks, a calendar, and one log location. Complexity should be earned through actual use, not built in anticipation of future discipline. Forgetting to Maintain the Maintenance System Itself Systems decay. Categories become outdated. Reminders fire for appliances you replaced two years ago. Calendar events drift — a quarterly reminder that was snoozed twice is now six weeks late. Links to manufacturer PDFs go dead. Without a quarterly review session — even just 20 minutes — the system slowly fills with noise until it stops being a useful signal. The homeowners who maintain their systems longest treat the system review as a task in the system. Ignoring Manufacturer-Recommended Service Intervals Most people use generic intervals — "change HVAC filter every 90 days" — because that's what the internet says. Manufacturer documentation often says something more specific: 300 runtime hours, or "monthly during high-use periods," or "annually by a certified technician." The difference matters most for warranties. HVAC manufacturers like Carrier and Lennox can and do deny warranty claims when documented maintenance wasn't performed at manufacturer-specified intervals. If your unit fails under warranty and you can't produce a filter change log, you may be looking at an out-of-pocket repair for a system that should have been covered.💡 Long-term observation: Homes with documented maintenance histories sell faster and command higher negotiated prices. Real estate agents report that buyers treat maintenance records as a significant trust signal — especially for homes over 10 years old. Keep receipts. Keep service invoices. Keep a dated maintenance log. These are transferable assets.Treating Smart Home Alerts as Optional The "3-strike rule" is something I apply to any smart home maintenance alert: if an alert has been dismissed or snoozed three times without action, the task gets manually calendared with a specific completion date. A dismissed alert isn't a reminder that worked. It's a reminder that failed three times. The system needs to respond to that failure — by escalating the reminder to a harder-to-ignore format, not by continuing to fire the same ignored notification. What to Do If Your System Has Already Collapsed If you started something before — an app, a spreadsheet, a folder of good intentions — and it's been months since you opened it, don't try to revive it. Start over. Treat it like moving into a new home. Re-inventory, even briefly. Simplify aggressively — five tasks on a calendar is infinitely better than 50 tasks in an abandoned app. Choose the lowest-friction format available. Start with your four highest-risk categories (HVAC, gutters, smoke detectors, water heater) and prove to yourself the habit works before adding anything else. Common Maintenance Myths vs. RealityMyth Reality"I'll remember when it needs doing" Human memory is not reliable for tasks without a visible trigger. The HVAC filter looks fine until it doesn't."If it ain't broke, don't fix it" Most maintenance prevents failure rather than responds to it. The water heater looks fine before it floods your basement."Smart home alerts cover everything" Alerts require setup, maintenance, and human follow-through. They are prompts, not guarantees."An expensive app will motivate me" Sunk cost does not drive behavior. The tool you use consistently beats the tool you intend to use."I'll set up a system when I have time" "When I have time" is not a time. Schedule it now.DIY Tracking vs. Calling in Help — Knowing the LineTracking maintenance tasks is a DIY activity. Executing some of those tasks is not. Tasks That Should Always Be Professionally Handled Gas appliances: Annual professional inspection of your furnace, boiler, or gas water heater is a non-negotiable safety task. Carbon monoxide leaks and incomplete combustion are not detectable by visual inspection alone. Electrical panel: Not a DIY inspection. Homes over 20 years old should have an electrician perform a visual inspection of the panel periodically — specifically to check for aluminum branch wiring, double-tapped breakers, or signs of heat damage. Structural inspections: Cracks in foundation walls, unusual floor flex, or roof decking that appears to be sagging require a structural engineer or qualified inspector — not a YouTube tutorial. HVAC refrigerant: EPA regulations require certification to purchase and handle refrigerant. If your AC is low on refrigerant, a professional handles it. Period. Roofing work at height: Fall prevention is the real issue. Single-story gutter cleaning with proper equipment is manageable. Roof work on anything with significant pitch is a professional task for most homeowners. Building Your Maintenance Professional Network Before You Need It The worst time to find a good contractor is during an emergency. Emergency service rates run 1.5x–3x standard rates — and in peak summer or winter, you may not have a choice of provider because every reputable HVAC technician in your area is already booked. Build your network during calm conditions:Identify your HVAC company and schedule annual service before peak seasons Find a plumber through neighbor referrals or verified reviews before you need one urgently Have a roofing inspector's number saved before storm season Pre-vet an electrician for the periodic inspection your home needsThumbtack, Angi, and local neighborhood groups (Nextdoor, Facebook groups) are useful for initial vetting — but ask specifically for references from similar-scope work, not just overall ratings. How Maintenance Records Affect Your Home's Resale Value This angle is genuinely underappreciated. Documented maintenance history isn't just useful for your own reference — it's a demonstrable asset in a home sale.💡 What home inspectors actually say: "Deferred maintenance is the single most common factor that reduces a home's negotiated sale price. Buyers don't just want a list of what you've done — they want receipts."A buyer's inspection that uncovers deferred maintenance leads to price reduction requests, sometimes well beyond the actual repair cost. An organized maintenance binder — service receipts, appliance manuals with marked service dates, inspection reports — communicates responsible ownership in a way that no listing description can. There's also an insurance dimension. Insurers may deny claims for damage they determine resulted from neglect rather than a sudden event. Water damage claims in particular are scrutinized. A maintenance log showing annual water heater inspections and recent caulking work around windows changes the conversation with an adjuster.Frequently Asked Questions About Home Maintenance Tracking What is the best app to keep track of home maintenance? HomeZada and Centriq are the most complete options for most homeowners. HomeZada excels at full home inventory and document storage; Centriq is faster to configure for appliance-specific maintenance. For smart home users who want deeper integration, Home Assistant provides the most capability but requires technical setup. Google Calendar remains the most reliable zero-cost option for homeowners who want simplicity over features. How do I create a home maintenance schedule? Start by inventorying every major system and appliance. Then sort tasks by frequency: monthly (HVAC filter check, smoke detector test), quarterly (gutter inspection, exterior walkthrough), semi-annual (HVAC service, water heater flush), and annual (roof inspection, chimney if applicable). Add these as recurring calendar events and review the full list at the start of each season. What home maintenance tasks do people forget most? The most commonly missed tasks: dryer vent cleaning (annually — a significant fire risk), water heater anode rod inspection, caulking around tubs and exterior windows, garage door spring lubrication, and refrigerator condenser coil cleaning. These tasks share one characteristic: no obvious failure signal until something breaks. How often should you service your HVAC system? Filters should be changed every 1–3 months depending on filter type, household occupants, pets, and local air quality. Professional HVAC servicing — coil cleaning, refrigerant check, system inspection — is recommended annually: ideally in spring before cooling season and in fall before heating season. Is it worth paying for a maintenance app when Google Calendar is free? For most homeowners, no — not initially. Google Calendar handles reminders effectively. The value in paid apps comes from home inventory management, warranty and document storage, and service history logging. If those features matter to you, $6–$9/month is reasonable. If you just need reminders, start free and upgrade only when you've outgrown it.🏠 Most homeowners overlook this: Maintenance records are transferable assets at resale. Keep receipts, service invoices, and a dated maintenance log — organized by system and year. Buyers and their inspectors pay close attention to documented maintenance history, especially for homes over 10 years old.This article is part of our Smart Home Optimization & Maintenance series. For system-specific guidance, see our complete HVAC maintenance guide, seasonal checklist deep-dives, and smart home automation setup resources.
.webp)
Paint Tricks Designers Use to Make Small Rooms Look Bigger (And Why They Actually Work)
Quick Answer: Interior designers make small rooms look bigger by using high light-reflectance-value (LRV) paint colors, matching trim to walls, painting ceilings the same color or slightly lighter than walls, maintaining color continuity between adjacent spaces, and choosing a monochromatic scheme. The goal isn't to pick the "right color" — it's to eliminate visual stopping points that make the eye register a room as small.The room photographs beautifully in the listing. Then you move in. Within a week, it feels like the walls are having a slow, polite conversation about getting closer together. You knew it was small. But this? This is something else. So you do what most people do. You Google "paint colors for small rooms," read six articles that all say the same thing — use light colors, preferably white — and end up standing in front of a paint chip wall for forty minutes, overwhelmed and no clearer than when you started. The problem isn't that light colors are wrong advice. It's that "use light colors" is roughly as useful as telling someone to "eat healthier." It's technically true and practically useless without the specifics. Interior designers don't think about paint the way most homeowners do. They're not asking "which color looks nice?" They're asking "what is this room doing wrong visually, and how do I fix it?" That shift in framing is where most of the real tricks live. This guide walks through exactly what those tricks are — not just the what, but the why behind each one. Because once you understand the mechanics, you can apply them to any room in any home.Why Most Generic Paint Advice for Small Rooms Falls ShortHere's the frustrating reality: a huge number of people follow the "paint it light" advice precisely and still end up with a room that feels cramped. They chose a pale gray. They might even have splurged on a premium brand. And yet the room still reads as small, occasionally even darker than before. Something isn't working, and nobody seems to explain what. Most paint guides for small rooms are written around color names rather than color behavior. They'll tell you that "Repose Gray is a designer favorite" without mentioning that Repose Gray has a light reflectance value of 60 — which means in a north-facing room with a single window, it's not going to do much lifting. The color can be light by name and still underperform by function. There's also the undertone problem that almost nobody addresses. Whites and pale neutrals don't exist in isolation — they carry undertones of pink, green, yellow, blue, or gray that react very differently depending on a room's light source. A "clean white" in the store can read vaguely lavender in your bedroom after dark. That's not a defective paint. That's an undertone you didn't account for. And then there's finish — the factor people consistently skip entirely. Whether a paint has a matte, eggshell, or satin surface changes how it handles light, and in a small room, that difference can be as meaningful as the color choice itself. The purpose of this guide is to give you the actual framework designers use, not a list of recommended color names. Names change. Frameworks don't.Understanding Light Reflectance Value (LRV) — The Tool Designers Actually UseBefore you buy a single sample pot, there's one concept that changes everything about how you select paint for a small room: light reflectance value. Most homeowners pick paint by staring at a chip card and deciding whether they like the color. Designers pick by LRV first, color name second. What Is LRV and Why Does It Matter for Small Rooms? LRV is a measurement from 0 to 100 that tells you how much light a paint color reflects back into a room. Pure black is 0 — it absorbs almost all light. Pure white is 100 — it reflects almost all of it. Everything else sits somewhere in between. For small rooms, the practical guideline is this: aim for an LRV of 70 or above on your walls. For a noticeably bright, open feeling, LRV of 80+ is where the real expansion effect starts. Both Sherwin-Williams and Benjamin Moore publish LRV data for every color in their range — you can find it on their websites or ask at the paint counter. Why does this matter more than just "picking a light color"? Because two colors that both look pale on a chip card can have meaningfully different LRV scores. One might reflect 72% of available light; the other 58%. In a small room with limited natural light, that gap is visible — and it explains why so many "light" rooms still feel dim. High-LRV Colors That Aren't Basic White One of the biggest misconceptions is that high-LRV automatically means white. It doesn't. There are warm creams, soft sage greens, pale blush tones, and gentle greiges that score well on the LRV scale while adding genuine character to a room. Here's a reference table for commonly used designer colors and their published LRV scores:Color Name Brand LRV Score CharacterChantilly Lace Benjamin Moore 92.2 Crisp, cool-clean white — modern spacesExtra White Sherwin-Williams 86 Brightest true white SW offersWhite Dove Benjamin Moore 85.4 Soft warm white — the most versatileAlabaster Sherwin-Williams 82 Creamy warm neutral — cozy without yellowingSwiss Coffee Benjamin Moore 83.8 Warm, slightly cream — pairs with wood floorsRepose Gray Sherwin-Williams 60 Works only in rooms with excellent natural lightAccessible Beige Sherwin-Williams 58 Use with caution — better in larger, lighter spacesDesigner Note: Repose Gray is one of the most popular paint colors in North America. It's also one of the most frequently used in rooms where it doesn't quite work — precisely because people choose it by name recognition rather than LRV. It needs good natural light to perform well. In a dim north-facing room, it can look flat and a little tired.The Undertone Trap: Why Your "Light Color" Is Making the Room Feel Worse This is the part nobody tells you. It's also the reason so many homeowners end up repainting. You chose a light gray. In the store under bright retail lighting it looked clean and contemporary. On the wall of your bedroom at night, it turned vaguely purple. Sometimes pink. Occasionally blue. The color literally seemed to change depending on the time of day — and you weren't imagining it. That's an undertone problem. Every paint color — even whites and pale neutrals — contains undertone pigments that behave differently depending on the dominant light source in the room. When those undertones clash with your lighting, flooring, or furniture, the result ranges from slightly off to genuinely jarring. How to Identify Paint Undertones Before You BuyThe easiest method: hold the paint chip against a sheet of pure white paper. The color shift you see — the slight warmth, coolness, or murkiness — is the undertone revealing itself. A second method: look at the chip alongside other colors in the same range. If you're looking at a pale sage green and you notice it shifting toward yellow compared to the adjacent green, you're seeing its yellow undertone. That undertone will amplify in a south-facing room with warm natural light, and mute in a north-facing room. A third approach — and the most reliable — is testing sample pots on boards in your actual room, under your actual lighting. More on that process in a later section. For now, the rule is: never trust a chip card under store lighting. Undertones by Room Direction (Natural Light) The cardinal direction your room faces is one of the most overlooked factors in paint selection. It fundamentally changes how a color behaves on your walls.Room Direction Light Quality What to Avoid What WorksNorth-facing Cool, bluish light throughout the day Cool-toned grays, blue-based whites, stark whites Warm whites, creamy off-whites, warm greigesSouth-facing Warm, golden light — especially afternoon Very warm yellows or oranges (they amplify) Cooler whites, soft blue-grays, crisp neutralsEast-facing Warm morning light, cooler afternoons Colors with orange undertones in afternoon rooms Warm tones work — but test in afternoon light tooWest-facing Cool mornings, warm evening golden hour Colors that look great at 10am — always test at 5pm Warm to neutral tones generally perform wellA north-facing room painted in Chantilly Lace (cool, crisp white, LRV 92.2) will feel bright and clean. That same room painted in a blue-gray — even a pale one — will feel dim and cold. The light isn't warm enough to counteract the cool undertone.Paint Finish and Sheen — The Factor Almost Everyone Ignores Color gets all the attention. Finish makes or breaks the execution. This is the factor most homeowners skip, and it explains why two rooms painted in the same color can look noticeably different. A matte paint absorbs light; it softens the surface and minimizes imperfections. An eggshell finish has a low, subtle sheen that reflects light gently back into the room. Satin reflects more — enough to make walls feel slightly luminous. Semi-gloss is highly reflective and clinical on walls. For small rooms, eggshell is almost universally the right call on walls. It provides enough reflection to add visual lightness without creating the hard, echoing feel of satin or semi-gloss. It's also cleanable — important in high-traffic spaces. Here's how each finish performs:Finish Sheen Level Light Behavior Best Use in Small Rooms Honest Trade-offFlat/Matte None Absorbs light Ceilings only Difficult to clean; shows scuffsEggshell Very low Subtle reflection Walls — best all-round Shows uneven roller application more than matteSatin Medium Good reflection Trim, woodwork, doors Highlights every wall imperfectionSemi-Gloss High Strong reflection Trim in very small rooms, bathrooms Looks clinical on walls; best avoidedWarning: High-gloss paint in a small room is a trap that sounds appealing in theory. The reflectivity suggests brightness and openness. The reality is clinical, echo-chamber walls that highlight every bump, brush mark, and surface irregularity. Unless your walls are perfectly prepped, eggshell is almost always the better call.One more practical note: if you're going for eggshell, surface preparation matters more than it does with matte. Fill nail holes, sand any rough patches, and wipe walls down before painting. Eggshell's subtle sheen will catch and hold flaws that matte would hide.Before You Paint a Small Room — Checklist Use this before committing to any paint purchase:Identify your visual goal: more perceived height, more width, or overall openness Determine your room's cardinal direction (north, south, east, west facing) Note your artificial lighting type — warm-toned bulbs (2700K–3000K) vs. cool-toned (4000K+) Check the LRV of all shortlisted colors — aim for 70+ on walls Identify undertones and check them against your flooring and fixed furniture Purchase sample pots — not chip cards Test on 12×12 boards, not directly on walls Evaluate samples at three different times of day Decide on a ceiling treatment strategy (same color, slightly lighter, or intentionally dark) Decide on a trim strategy (matching vs. contrasting) Prepare surfaces properly before any paint goes on7 Paint Tricks Interior Designers Use in Small Rooms These aren't ranked by aesthetics — they're ranked by real-world impact. The techniques that consistently move the needle the most are at the top. Read all seven before deciding which to apply, because several of them work best in combination. Trick #1 — Match Your Trim to Your WallsImpact level: Very high. Effort level: Low. This is the single most underused technique in residential painting. Most homeowners default to bright white trim regardless of wall color. It's a habit, not a decision — and in small rooms, it actively works against you. Here's the mechanics: every place where your trim color contrasts with your wall color creates a visual border. Baseboards, door casings, crown molding, window frames — each one becomes a line that frames and defines the room's limited dimensions. In a small square room, those borders turn the space into a visual box. When you paint trim the same color as your walls — or within one step of it on the same color family — those borders dissolve. The eye doesn't stop. It travels through the space instead of bouncing off edges. This works equally well with any color scheme. Light room, dark room, warm, cool — matching trim always removes visual stops. It's one of those tricks that reads clearly in before-and-after photos for a reason. Where it doesn't work as well: In rooms with particularly beautiful architectural millwork — original crown molding, detailed wainscoting — hiding trim in the wall color can flatten the architecture. In those cases, use a very close tone rather than an exact match.Trick #2 — Use Color Continuity Across Adjacent Rooms Impact level: High. Effort level: Medium (requires repainting multiple spaces). This one is most powerful in open-plan layouts, apartments, and homes where rooms share visual lines through doorways. The idea is straightforward: when adjacent spaces share the same color family, the eye perceives the total connected area rather than individual rooms. Think of it as removing the "visual walls" that color contrast creates. If your living room is a warm greige and your hallway beyond is a different neutral, there's an implicit boundary. Paint them the same color and the visual territory expands — the brain reads the connected space as one larger room. This doesn't mean every room needs to be identical. Using the same color with slightly lighter or darker tonal variations across connected rooms still reads as continuous. What breaks the effect is significant contrast — different color families, dramatically different LRV levels, warm vs. cool at the same doorway. Where it doesn't apply: Fully enclosed rooms with narrow doorways don't benefit much from this technique. It's most effective in open-plan spaces and homes where multiple rooms are visible from a single standing position.Trick #3 — Use the Ceiling-Slightly-Lighter Technique Impact level: High. Effort level: Medium. The received wisdom is "always paint the ceiling white." But the reason that advice exists is the principle behind it — a lighter ceiling recedes upward, creating perceived height. White ceiling against a colored wall achieves this, but creates a hard contrast line where wall meets ceiling. The designer refinement is to paint the ceiling the same color as the walls, or mix the wall color with a small percentage of white to create a version that's one step lighter. The ceiling still reads as lighter, the transition is seamless, and the room feels taller without the visual "lid" effect of a stark white ceiling above a colored wall. An exact match — same color on walls and ceiling — works particularly well in rooms where maximizing height is the goal, or in rooms with low ceilings where any contrast line emphasizes the height limitation. Long-term note: If you're painting for eventual resale, very light or white ceilings are still a safer default for broad appeal. The ceiling-match technique is more design-forward and not universal in taste.Trick #4 — Choose a Monochromatic Color Scheme Impact level: High. Effort level: Low to medium. A monochromatic scheme means staying within one color family for your walls, ceiling, trim, and soft furnishings — varying only in tone and saturation. Think multiple shades of the same warm gray, or layering pale sage green from wall to ceiling to cushion covers. Why it works: visual complexity is exhausting in a small room. Every new color is a new piece of information for the brain to process. A monochromatic scheme reduces that load — the eye moves through the room smoothly instead of registering each element as a separate thing. The room feels calmer and, as a result, larger. It also gives you enormous design flexibility. Within one color family, you can have visual texture and depth without the visual fragmentation that multiple colors create in tight spaces. Where people go wrong with this: Treating "monochromatic" as "boring." Layering a stone linen sofa against a pale stone wall against slightly warmer stone trim creates genuine visual richness — it just doesn't create contrast. That's exactly the point.Trick #5 — Use High-LRV Paint Throughout — Walls, Ceiling, and Trim Impact level: High. Effort level: Low. Covered in detail in the LRV section, but worth restating as a technique: the compounding effect of high-LRV paint on all surfaces — not just walls — is meaningfully greater than on walls alone. When your ceiling, trim, and walls all reflect light back into the space, the room creates a kind of ambient brightness that no single surface can produce alone. Each surface bounces light to the others. The room generates its own light circulation rather than relying entirely on windows and fixtures. For small rooms with limited natural light, this is particularly impactful. An LRV 85 on walls with a flat-finish ceiling and contrasting bright white trim doesn't circulate light the same way as LRV 85 on walls, LRV 90 on ceiling, and LRV 85 on trim with an eggshell finish throughout.Trick #6 — Use Vertical Lines or Stripes Strategically Impact level: Medium. Effort level: Medium-high (requires precision). Vertical lines — whether painted stripes, paneling with matching paint, or board-and-batten — direct the eye upward and create perceived ceiling height. In a room where width feels adequate but the ceiling feels low, this is one of the most targeted interventions available. The designer approach is typically subtle: tone-on-tone stripes rather than high-contrast, painted in finishes with slightly different sheen levels (matte base with eggshell stripes, for instance). The lines catch the light differently without reading as loud or retro. High-contrast bold stripes can work, but they're harder to execute well and divide opinion sharply on aesthetics. For most homeowners, a tone-on-tone approach gives the vertical emphasis without the visual risk. Where it doesn't help: Rooms where ceiling height is fine but the floor area feels cramped. Vertical lines address height perception only — they don't expand perceived square footage the way color continuity does.Trick #7 — The Dark Ceiling Counterintuitive TrickImpact level: Medium-high in specific contexts. Effort level: Medium. This one surprises people. Painting a ceiling a significantly darker color than the walls — charcoal, deep navy, forest green, rich terracotta — seems like it should make a room feel more oppressive. In the right circumstances, it does the opposite. Here's what actually happens: a dark ceiling creates the impression of height by making the ceiling visually recede. The eye registers it as further away, not closer. Combined with light walls, the contrast draws attention upward and the ceiling feels higher precisely because it's dark. It also creates something darker, more atmospheric spaces do well — a sense of enclosure that reads as cozy and intentional rather than cramped. A small bedroom with deep blue walls and ceiling-height paneling painted the same deep blue can feel dramatically more spacious than the same room in pale gray, because the color choice signals intentionality.Important caveat: This technique works in rooms where ceiling height is at least adequate (roughly 8 feet or above) and where lighting is properly designed. A low-ceilinged small room with poor lighting and a dark ceiling just looks like a cave. Dark ceilings require deliberate artificial lighting — ideally fixtures that wash light upward.The Accent Wall Question — Do They Actually Work in Small Rooms? The honest answer: in most small square rooms, no. The reasoning is worth understanding because it explains a broader principle. An accent wall introduces color contrast at one surface. That contrast creates a visual stopping point — the eye reaches that wall and registers "different." In a large room, that gives depth and creates a focal point. In a small square room, it typically makes the room feel like a box with a colored front face. The exception — and it's a meaningful one — is long, narrow rooms. A single dark or saturated accent wall on the short end of a narrow room creates genuine depth. It pushes that wall visually further away, which is exactly what you want. The contrast works with the room's proportions rather than against them. Here's how accent walls perform across different small room types:Room Type Accent Wall Result WhySmall square room Usually makes it feel worse Creates a visual box; all walls feel closerLong narrow room (accent on short wall) Works well Creates depth on the challenging dimensionSmall bedroom (on headboard wall) Can work Creates a clear focal point at the bedSmall bedroom (on side wall) Avoid Visually shortens the roomSmall bathroom Proceed with caution Limited wall area amplifies the effect in either directionSmall hallway Almost always avoid Creates visual interruption in a space that benefits from continuityIf you love the idea of visual interest in a small room but want it without the boxing-in effect, the monochromatic scheme approach — layering tones and textures within one color family — achieves personality without contrast-based problems.The Right Way to Test Paint Samples Before CommittingThe sample chip at the paint store is one of the most misleading objects in home improvement. It's tiny. It's evaluated under bright retail fluorescent lighting. It's held against a white background. None of these conditions have anything to do with what that color will look like on your wall, at night, next to your wooden floors, under your warm LED downlights. The consequences of skipping proper testing are real: a full room repainted because the color didn't translate is a $200–$800 mistake, plus your weekend. Sample pots cost $5–$12 each. The math makes itself. Here's how designers actually test paint colors: Step 1: Purchase sample pots of your 3–5 shortlisted colors. Avoid the small stick-on cards some stores offer — they're more convenient but too small to be reliable. Step 2: Apply each color to a 12×12 inch white foam board (available at any craft or office supply store). Use two coats. Do not paint directly on the wall — you need to move the samples around. Step 3: Place the boards at different heights in the room. Hold one near the floor, one at eye level, one near the ceiling. Colors can shift noticeably based on where they sit relative to the room's light sources. Step 4: Evaluate at three distinct times: morning natural light, midday natural light, and evening under artificial lighting. This last one is the step most people skip — and it's often the most revealing. The color you live with most is your evening color. Step 5: Compare boards side-by-side in natural daylight to check for undertone differences. Subtle variations that aren't visible individually become obvious in direct comparison. Step 6: Look at the samples alongside your fixed elements — flooring, furniture, cabinets, anything that isn't changing. A color can be beautiful in isolation and clash with your oak floors in context. For those who want an even better test before committing, peel-and-stick sample services like Samplize produce large, repositionable paint swatches in actual Benjamin Moore and Sherwin-Williams colors. They're slightly more expensive than sample pots but require zero application effort and can be moved repeatedly around the room.Paint Tricks by Room Type — Quick Reference Guide Different small rooms have different challenges. A narrow hallway needs different thinking than a small bedroom. Here's a targeted approach for each:Room Type Primary Challenge Best Strategy Key TrickSmall bedroom Feeling enclosed at night Monochromatic + ceiling match Paint ceiling same color as walls; warm undertone for comfortSmall bathroom Limited surfaces, often no natural light Maximum LRV + reflective surfaces Choose crisp white or pale blue-gray; add mirrors to compound the effectNarrow hallway Visual interruption, low light Full color continuity, walls + ceiling + trim One tone throughout; no feature walls or color breaksSmall living room Feeling separate from adjacent rooms Color continuity with adjacent spaces Match or tonally connect to rooms visible through doorwaysSmall home office Different goal — focus vs. openness Slightly richer tone is acceptable Muted blues, grayed greens work — the room serves a different functionSmall kitchen Hard surfaces, less flexibility Light uppers, consistent LRV on painted surfaces Avoid dark lower cabinets if space is genuinely tightWhich Technique Is Right for Your Room? A Simple Decision Path Answer these questions in order: Is your room very dark with minimal natural light? → Yes: Prioritize LRV 80+ on all surfaces. Consider upgrading your light fixtures before painting — paint can't overcome genuine darkness. → No: LRV 70+ is sufficient as a baseline. Is ceiling height a problem (under 8 feet)? → Yes: Paint ceiling the same color as walls or slightly lighter. Avoid any ceiling-to-wall contrast. Consider vertical lines. → No: Slightly lighter ceiling is sufficient; you have more flexibility. Is the room narrow rather than square? → Yes: An accent wall on the short wall can work. Consider horizontal color banding to add visual width. → No: Avoid accent walls. Monochromatic is safer and more effective. Are adjacent rooms visible from this space? → Yes: Color continuity is your highest-priority technique. → No: Focus techniques on the single room — LRV, trim matching, ceiling treatment.DIY Painting vs. Hiring a Professional — A Realistic Decision Most people who read a guide like this are planning to paint themselves. That's perfectly reasonable for most small rooms. But there's a quality gap between DIY and professional results worth being honest about. Professional painters back-roll to ensure uniform finish distribution. They cut in without tape in most cases, which creates cleaner lines than masking allows. They maintain wet edges that prevent lap marks. And they usually work fast enough that a room is done in a day rather than across a weekend. The DIY result can be excellent. It can also show brush marks near trim, slightly uneven sheen near corners, and lap marks where roller sections overlapped on a drying surface. Most people live with those imperfections without much thought. In a small room where every surface is visible and close, they're slightly more noticeable. Here's what to expect on cost for a standard small room (approximately 150 square feet of wall area):Item DIY Cost Professional CostPremium paint (1–1.5 gallons) $55–$90 $55–$90 (materials)Paint samples (3–5 pots) $25–$45 $25–$45 (your choice)Rollers, brushes, tape, drop cloth $40–$70 Included in quoteLabor Your time (approx. 4–8 hours) $300–$600Touch-up or corrections Your time Typically includedTotal $120–$205 $380–$735When to hire a professional:The room has complex architecture — lots of molding, alcoves, or vaulted ceilings You're using a darker color over a significantly lighter one (requires better primer and more coats) You want a flawless finish that genuinely holds up to scrutiny You're working in a very small space like a bathroom or closet where precision cutting-in is criticalWhen DIY is perfectly fine:A straightforward four-wall room with standard ceiling height You're staying within a similar color family (lighter over lighter) You have basic tool knowledge and aren't rushingMyth vs. Reality — Common Paint Myths for Small Rooms Some paint advice has been repeated so many times it sounds like fact. A few of these are genuinely misleading.Common Myth The Reality"Always paint small rooms white" Any color with LRV 70+ can expand a small room. Dozens of warm neutrals, pale greens, and soft tones outperform basic white in many contexts"Accent walls add depth to small rooms" In most small square rooms, they create a boxing-in effect. The exception is long narrow rooms where the accent goes on the shorter wall"Dark colors always make rooms look smaller" In the right context — adequate ceiling height, deliberate lighting — dark colors can feel more expansive than a poorly chosen pale tone"Ceiling should always be white" Painting the ceiling the same color as walls is a proven height-expansion technique that designers use regularly"Glossy paint makes small rooms look bigger" Gloss finishes on walls highlight surface imperfections and feel clinical. Eggshell is better for light reflection in small rooms"Sample cards show the real color" Sample cards evaluated under retail lighting bear almost no resemblance to how the color looks on your wall in your actual room"More colors add personality to small spaces" More color contrast in a small room creates visual fragmentation — each element competes for attention and the room feels busier, not more interesting5 Paint Mistakes That Make Small Rooms Feel Worse These aren't theoretical — these are the mistakes that show up repeatedly when people share photos of rooms they're unhappy with. 1. Choosing paint under store lighting Retail paint stores are lit with bright, warm, fairly neutral overhead lighting designed to show product attractively. Your bedroom at 9pm has a completely different light quality. A color that looked crisp and clean in the store can read flat, murky, or off-tone in your specific room's artificial lighting. Always test samples in the actual space before committing. 2. Ignoring undertones when there's a conflict with fixed elements Your floors aren't changing. Your kitchen cabinets are staying. If your oak floors have orange undertones and you choose a cool gray with a faint blue cast, that conflict will read on the wall every day. Before you fall in love with a color, hold a sample against your largest fixed element and look for tension between undertones. 3. Painting trim bright white against a colored wall As covered in detail above — contrasting trim creates visual borders that define and box in a small room. It's the most common small-room mistake that's also the easiest to avoid. Same color, or tonally close, on walls and trim. 4. Using high-gloss paint on imperfect walls The thinking makes sense: glossy reflects light, light makes rooms feel bigger. The result is walls that reveal every ding, roller mark, and surface variation. Eggshell achieves meaningful light reflection without the clinical, unforgiving quality of satin or semi-gloss. 5. Painting one feature wall in an already-small square room Covered in the accent wall section, but worth restating as a mistake because it's genuinely common. Most small square rooms benefit from visual continuity, not visual interruption. One saturated or dark wall in a small square room creates a visual closing-in effect that negates whatever decorative gain the feature wall provides.Frequently Asked Questions About Paint Tricks for Small Rooms What color paint makes a small room look bigger? Any color with a light reflectance value (LRV) of 70 or above can make a small room feel more open. The specific color matters less than its LRV score and undertone compatibility with the room's lighting. Warm whites, creamy off-whites, and pale neutrals are consistently effective — but they're not the only options. Should you paint ceilings the same color as walls in a small room? Yes, this is a well-established designer technique. Painting the ceiling the same color — or very slightly lighter — removes the visual "lid" created by a contrasting white ceiling. The room feels taller and more continuous. It's particularly effective in rooms with lower ceilings. Does dark paint make a small room look smaller? Not always. In rooms with adequate ceiling height and deliberate lighting, dark colors can create a sense of expansion by making the walls and ceiling recede rather than advance. Poorly executed in a dim room with low ceilings, dark paint will absolutely shrink the perceived space. Context determines the outcome. What's the best paint finish for a small room? Eggshell on walls is the standard designer recommendation. It provides subtle light reflection, is cleanable, and doesn't highlight surface imperfections the way satin or semi-gloss does. Use flat/matte on ceilings. Use satin or semi-gloss on trim and woodwork. Should trim be lighter or darker than walls in a small room? Neither — match them. Painting trim the same color as walls eliminates the visual borders that make small rooms feel divided and boxed in. Contrasting white trim on a colored wall is one of the most common mistakes in small-room painting. What LRV should paint be for a small room? Aim for LRV 70+ on walls as a baseline. For genuinely bright, airy results, LRV 80+ is preferable. Both Sherwin-Williams and Benjamin Moore publish LRV data on their websites — check before you buy. I painted my small room light gray and it still feels dark and dingy. What went wrong? Almost certainly an undertone issue. Many popular light grays — including some well-known designer favorites — carry blue or purple undertones that read cold and dull in rooms with warm artificial lighting or limited natural light. The fix is usually a warm-undertone neutral: a warm white, greige, or soft beige rather than a cool gray. My landlord won't let me paint. Are there alternatives? Effective ones exist. Peel-and-stick wallpaper in light tones, large mirrors positioned to amplify available light, light-colored soft furnishings (curtains, rugs, slipcovers), and deliberate furniture selection can achieve meaningful visual openness without permanent changes. The mirror strategy in particular can be nearly as impactful as paint in some rooms. Can you use wallpaper in a small room without making it feel smaller? Yes, with the right pattern. Tone-on-tone textures, fine stripes in a color close to the wall, and small-scale geometric patterns all work in small rooms. Large-scale prints, dark backgrounds, and complex florals consistently make small rooms feel more enclosed and visually busy. What's the single easiest paint change to make a small room feel bigger right now? Paint your trim. Use the same color as your walls. This eliminates the visual borders that frame the room's limited dimensions — and it requires no color research, no LRV charts, and no design expertise. Just matching trim to walls removes the most common visual problem in small spaces.Putting It Together — Where to Start If You're Overwhelmed There's a reason this guide is long. Paint selection in small rooms involves more variables than most people expect, and those variables interact. But that doesn't mean you need to optimize all of them at once. If you're not sure where to begin, start with two things: First: Check the LRV of any color you're considering. Both Sherwin-Williams and Benjamin Moore list LRV scores on their websites for every paint they sell. Aim for 70 or above on wall colors. That one filter eliminates most of the colors that won't work before you've spent a dollar on samples. Second: Match your trim to your walls. Whatever color you end up choosing, paint the trim — baseboards, door casings, window frames — the same color or within one tone of it. This single change is the highest-impact, lowest-risk paint trick in this entire guide. From there, add techniques as you're ready: check undertones, test sample pots at multiple times of day, consider your ceiling strategy, think about color continuity with adjacent rooms. Paint is one of the most reversible major decisions in a home. You can repaint. You'll refine your sense of what works with each room you tackle. The goal isn't a perfect outcome the first time — it's a more informed decision each time you pick up a roller.Published guidance is based on industry-standard color science, LRV data from published manufacturer specifications (Benjamin Moore, Sherwin-Williams), and documented interior design practice. LRV scores referenced are published figures accurate as of 2025–2026 and may be updated by manufacturers over time.

Olivia Reed
Hi, I'm Olivia. I've spent nearly a decade obsessed with making homes work smarter, not harder. My mission is to help you optimize your living space with practical, cost-effective tech—focusing on subscription-free security and long-term maintenance solutions.